How To Use Rolling Dates
Overview
The Roll Dates function, used only when saving Enquiries and Campaigns, allows the reports you have built to continue updating as you require them. Save and reuse reports with Rolling Dates to access up-to-date data.
For a report using your own chosen date range, you need to select if you want to roll the dates by turning on the Rolling dates toggle. If you choose to roll the dates, your report will display data from the updated date range each time you open it.
Select device:
Desktop
Step 1: Date range
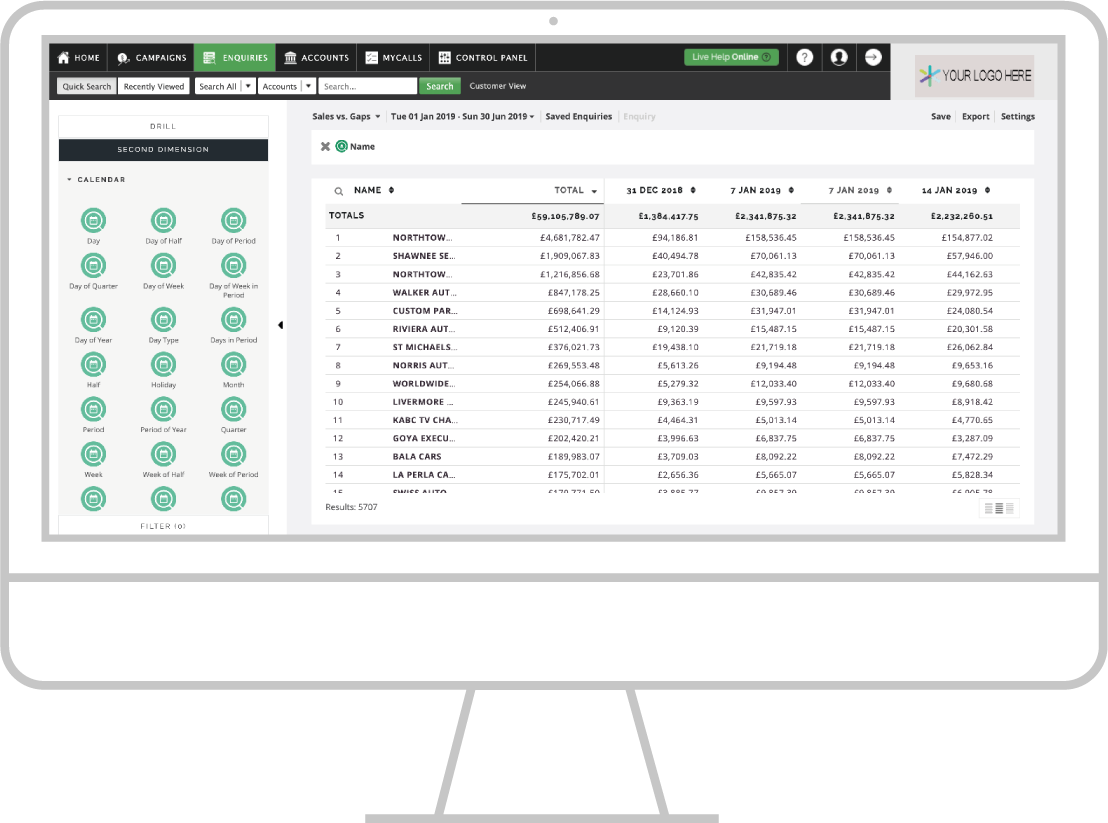
Create an Enquiry with a custom date range.
In this example, we are using January 1st to June 30th.
Step 2: Turn on rolling dates
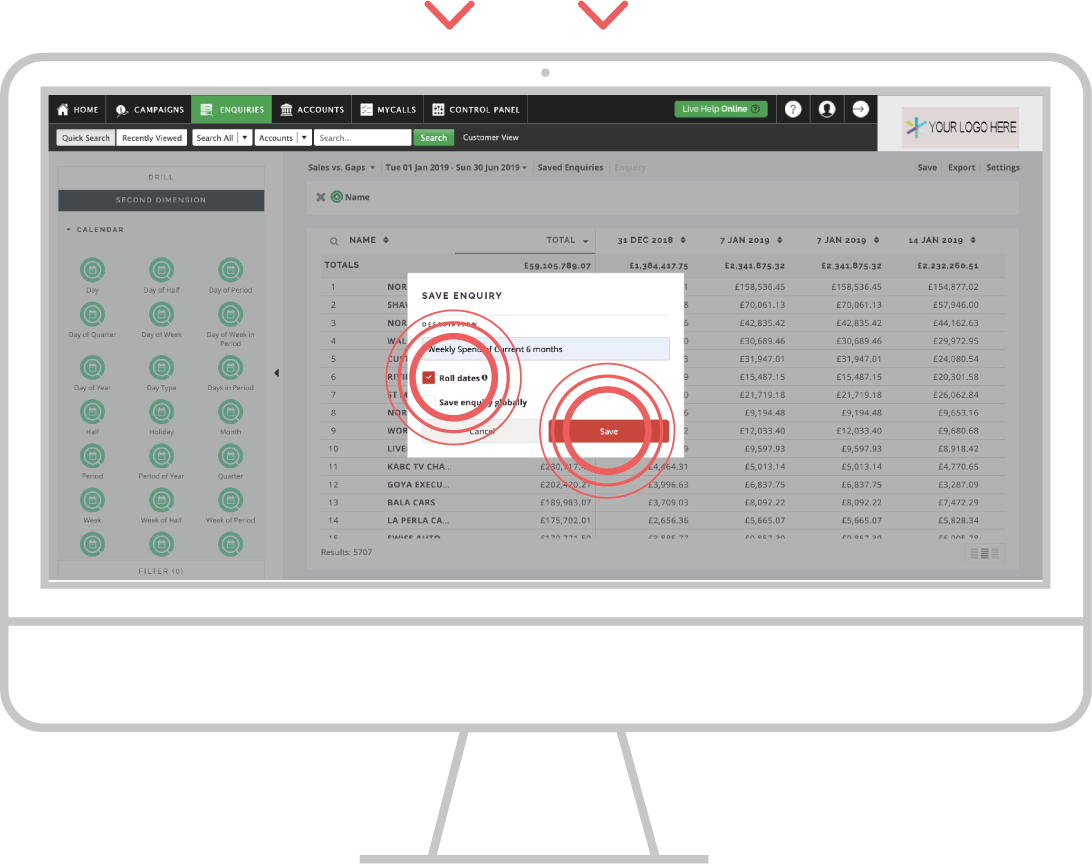
Turn on the Rolling dates toggle and save the report for future use.
Step 3: Reuse report
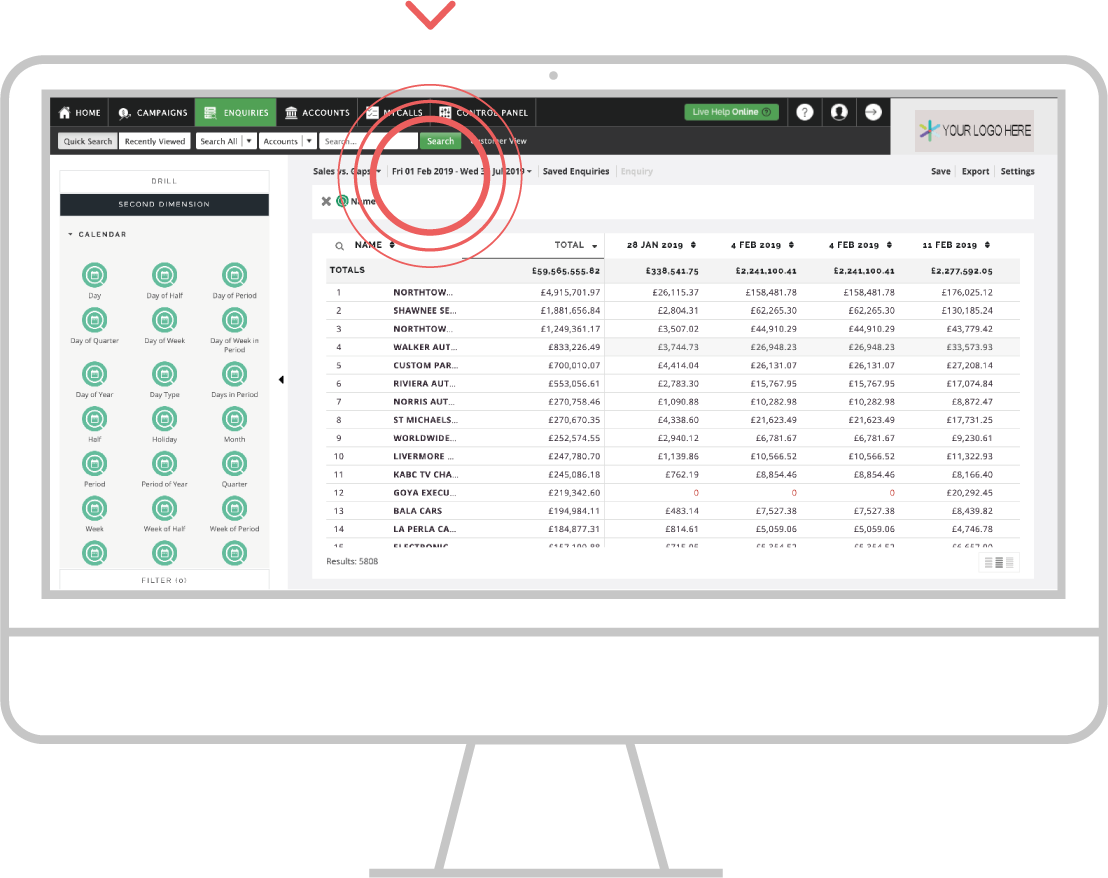
When the report is opened at a later date, such as one month after setup, the report automatically updates to display February 1st to July 31st. The same rolling pattern would occur each time the report is opened.
Apple
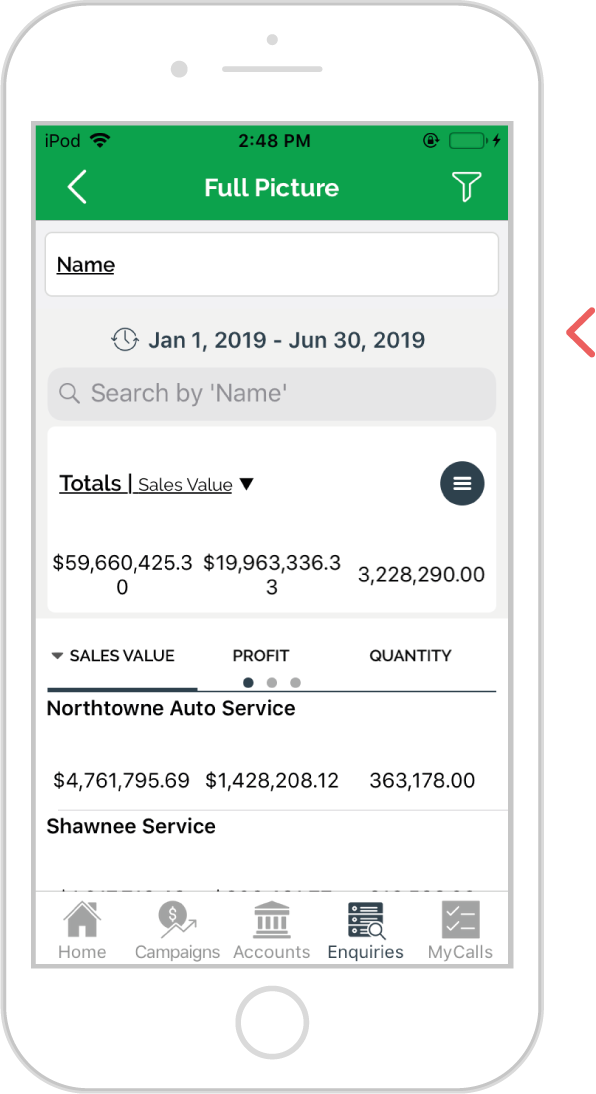
Step 1: Date range
Create an Enquiry with a custom date range. We are using January 1st to June 30th in this example.
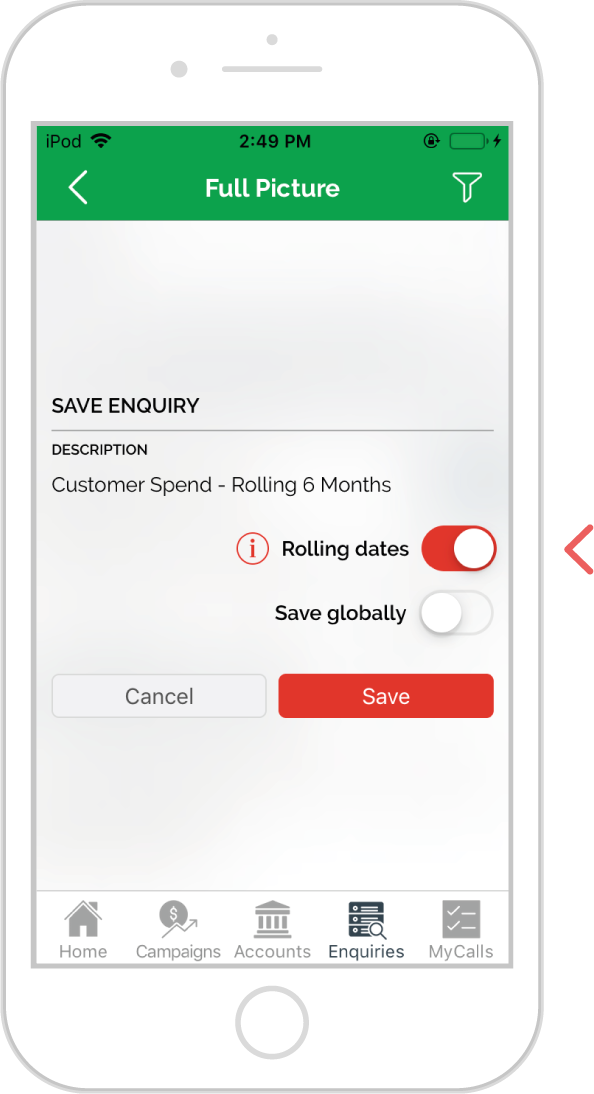
Step 2: Turn on rolling dates
Turn on the Rolling dates toggle and save the report for future use.
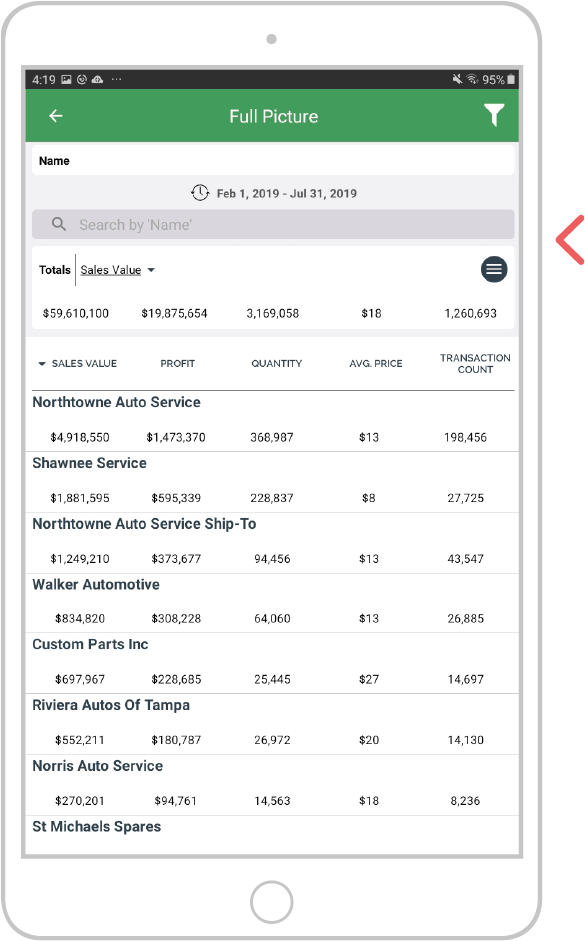
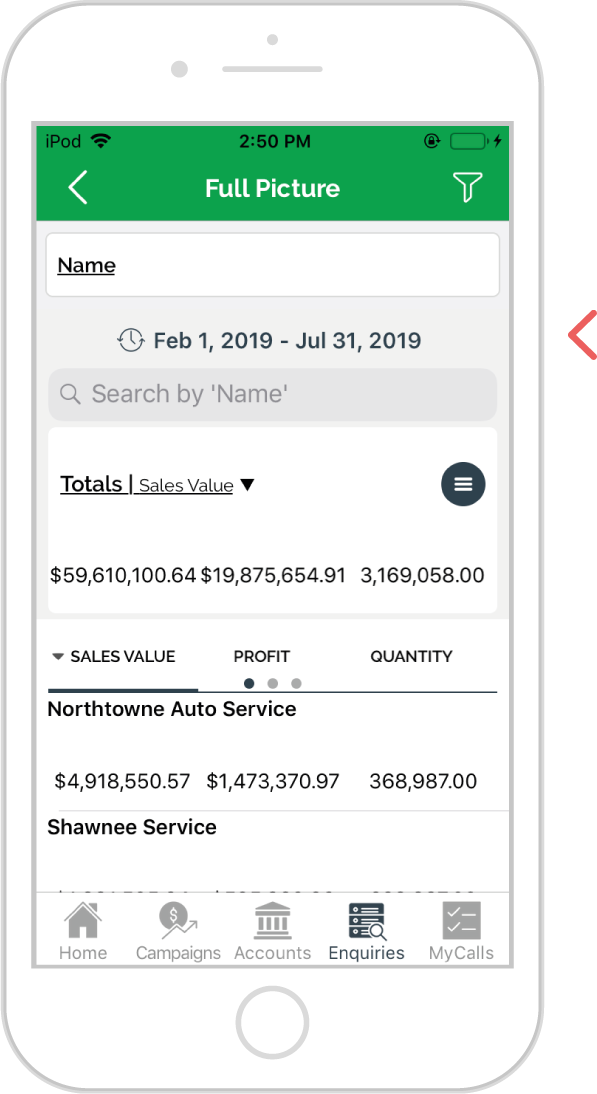
Step 3: Reuse report
When the report is opened at a later date, such as one month after setup, the report automatically updates to display February 1st to July 31st.
The same rolling pattern would occur each time the report is opened.
Android
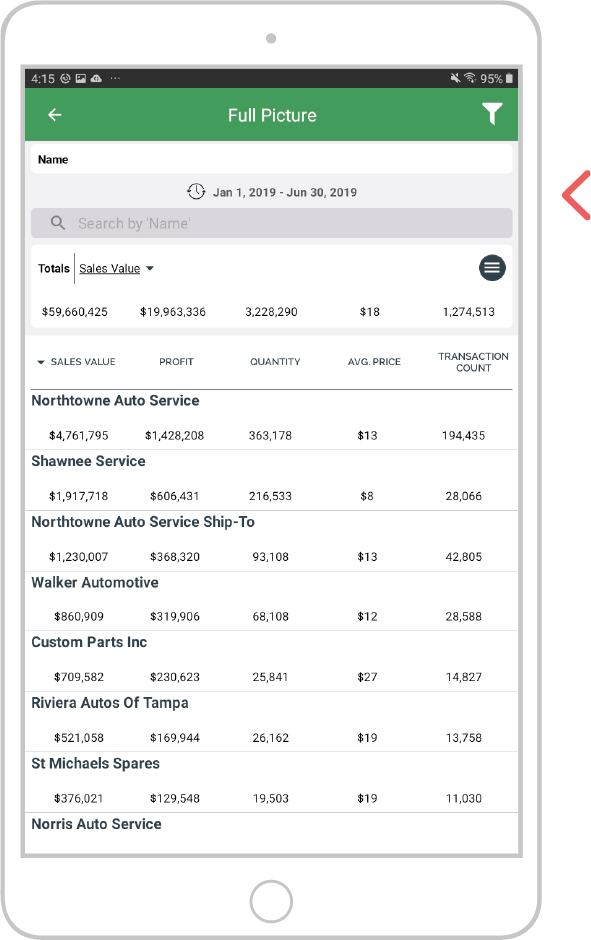
Step 1: Date range
Create an Enquiry with a custom date range. We are using January 1st to June 30th in this example.
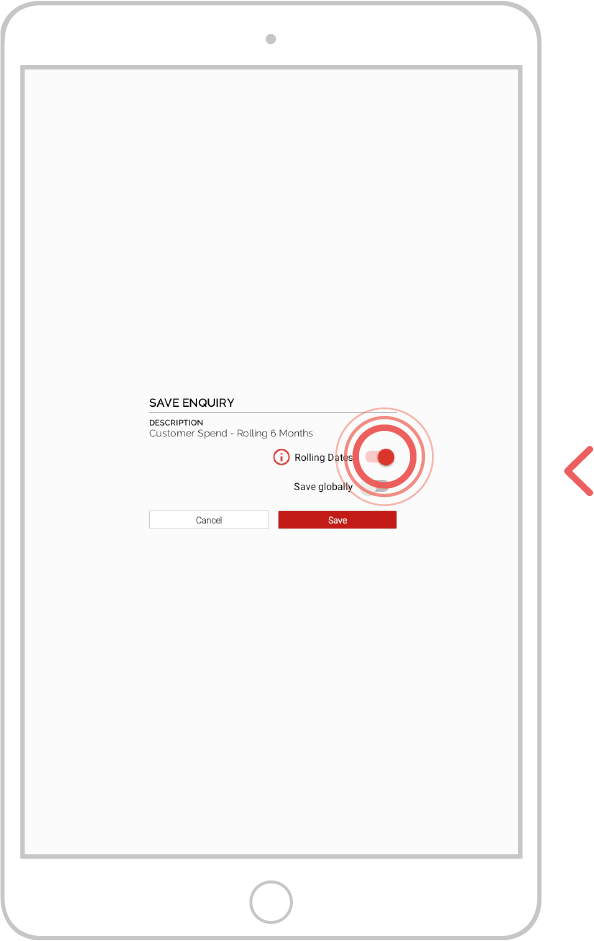
Step 2: Turn on rolling dates
Turn on the Rolling dates toggle and save the report for future use.
Step 3: Reuse report
When the report is opened at a later date, such as one month after setup, the report automatically updates to display February 1st to July 31st. The same rolling pattern would occur each time the report is opened.
