Creating Emails
Overview
This page describes how to create emails with the Email Builder.
Accessing Email Builder
You can access Email Builder by:
- In the navigation bar, click the Emails module.
- Click the Emails submodule.
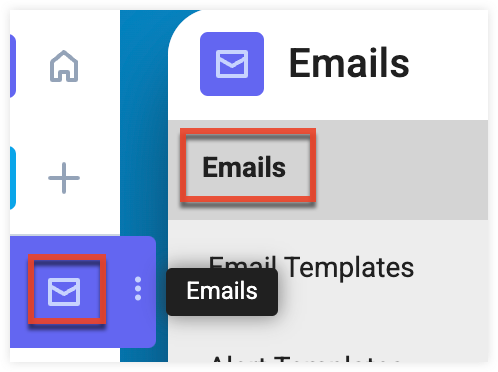
- Click the Create button and select "Email" or access an existing draft email.
Working in the Email Builder
The Email Builder walks you through the process of creating an email, which comprises the following steps:
- Configuring Your Email Options
- Selecting an Email Template
- Building the Email
- Selecting Recipients
- Scheduling Your Email
- Confirming and Sending Your Email
Email Builder Steps
The builder is organized into steps, so you can quickly navigate to and adjust each aspect of your email. The steps are displayed at the bottom of the builder. To navigate between steps, you can click on a specific step or click the Next and Previous buttons. Note: You will not be able to access the next step in the builder until you complete the previous step.
You can click the Save button to save your work at any time.

Email Builder Toolbar
The Email Builder toolbar is displayed at the top of the builder. The toolbar contains dynamic actions and options based on the step you are on.

The following options are available in the builder toolbar, though some options may not be available on every step.
| Icon | Function | Description |
| Desktop View | Displays email as seen on a desktop computer in both design and preview mode. | |
| Mobile View | Displays email as seen on a mobile device in both design and preview mode. | |
| Undo | Revert the last change made. | |
| Redo | Repeat the last change made. | |
| Preview | How email will display on a desktop computer or mobile device. | |
| Send Test Email | Send the email in its current state to yourself and other recipients immediately. | |
| Advanced Testing | Learn how your email will look in various email clients. | |
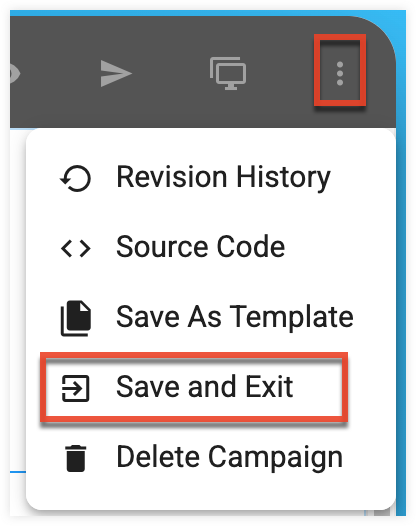
| More Options | Link to functions listed below: | |
| Revision History | Display a panel with history of changes made to the email. A new revision item is made every time you save. | |
| Source Code | Display a window that contains the email's source HTML from which you can copy, but not edit. | |
| Save as Template | Save the current email as a template to be reused for future emails. | |
| Save and Exit | Save the email design in progress and exit Email Builder. | |
| Delete Campaign | Delete the email. You will be prompted to confirm this choice, and if you choose to continue, then the email is permanently deleted. |
Exiting Email Builder
To exit the builder while ensuring your progress is saved, either click the Home module in the navigation bar or click the three-dots menu in the builder toolbar and then select the Save and Exit option. The email is saved in the Draft status and is accessible by navigating to Emails module list view.
Configuring Your Email Options
In the first step of the Email Builder, you define the basic setup information for your email and choose a standard email or an A/B test email type. All fields are required in this step.
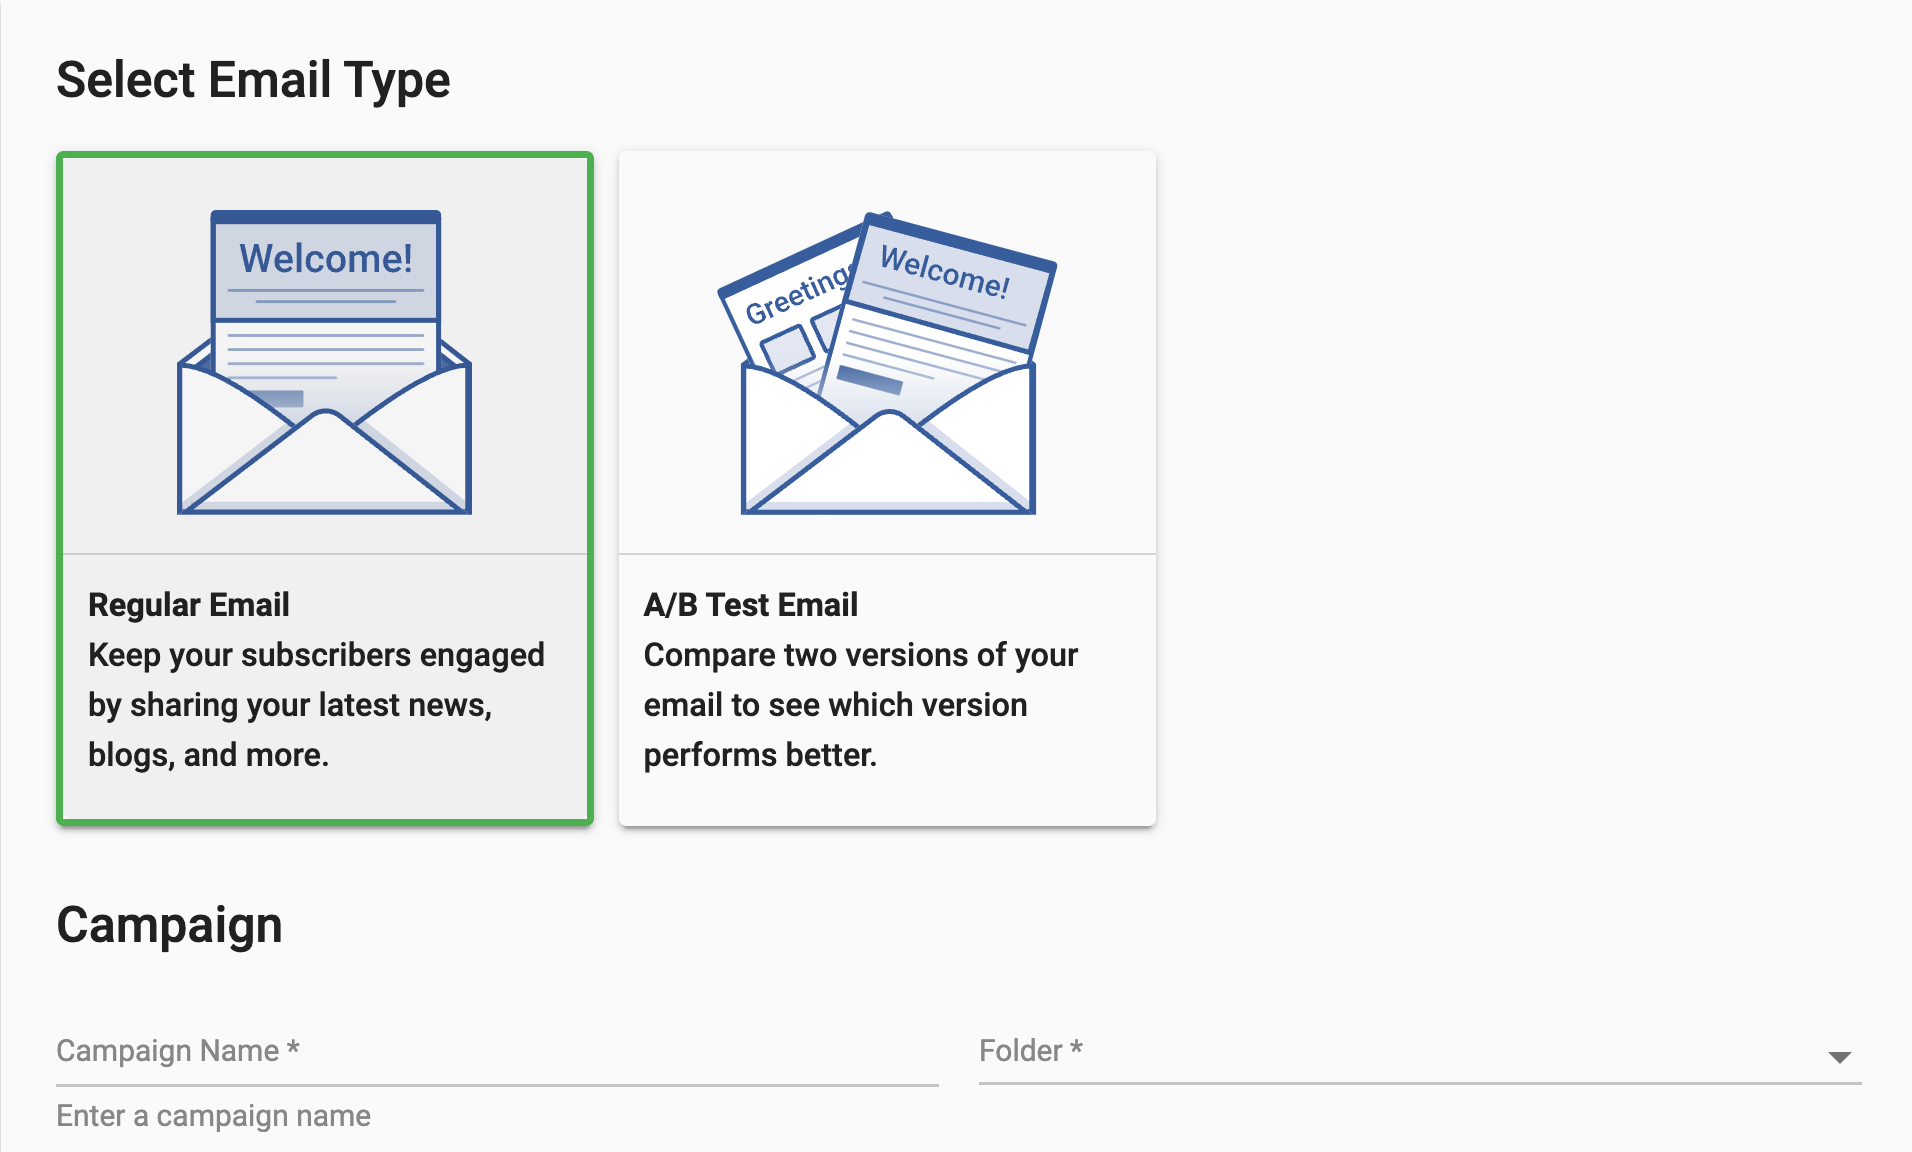
- Campaign Name: This is the internal name used to identify the email in Sugar Market.
- Folder: Where the email is saved. To save the email in a new folder, click the New Folder button, name the folder, and then click the Save button.
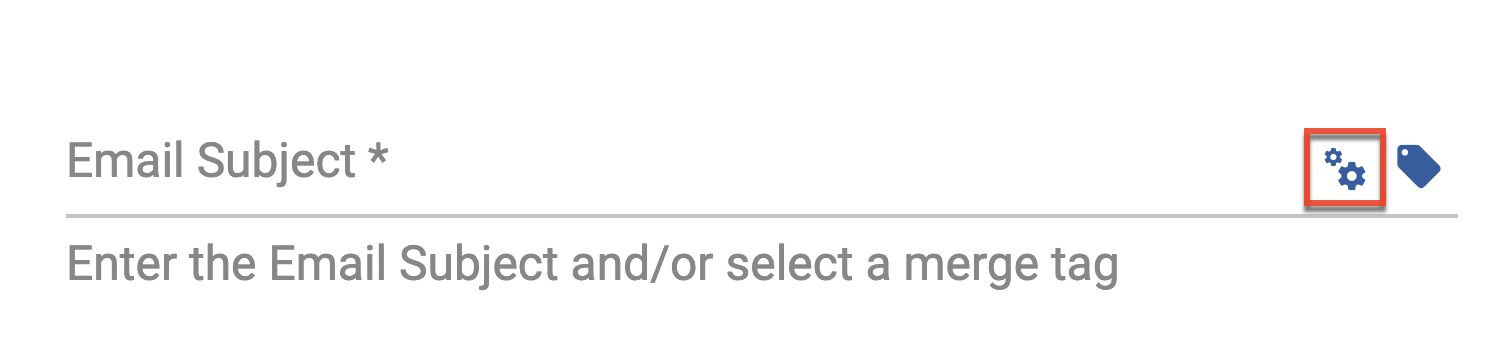
- Email Subject: The description of your email that displays in the email subject line. To use merge tags, click the tag icon where you want it to display in the subject, and then select a field. For example, "++FirstName++, don't miss our new webinar!".
- From Name: Sender display name. Your user name automatically populates this field, but you can overwrite this name and use merge tags.
- Email Preheader: The email preheader text is displayed immediately after the email subject line in a recipient's inbox. If left blank, the email client may pull the first line of your email text, an image's Alt text, or other undesirable elements.
- From Address: Sender email address. Identify the first part of the address on the first line, and then select the appropriate domain from the dropdown list. Click the checkbox to set this address as the default From address for future emails.
- Reply-to Address: Email address to receive messages sent as a reply to your email. Identify the first part of the address on the first line, and then select the appropriate domain from the dropdown list. Click the checkbox to set this address as the default From address for future emails.
- Subscription Options:
- Enable One-Click Unsubscribe: When one-click unsubscribe is enabled, an option to unsubscribe may be displayed next to your email in the recipient's inbox and at the top of the recipient's email when opened. Enabling one-click unsubscribe ensures you comply with bulk sender requirements for major email services like Gmail and Yahoo.
- Select an option for One-Click unsubscribe: Use this field to configure what happens when a recipient clicks the one-click unsubscribe option in their inbox.
- Global One-Click unsubscribe: This option is selected by default and will unsubscribe the recipient from all emails when they click the one-click unsubscribe option.
- Targeted One-Click unsubscribe: This option will unsubscribe the recipent from the preference list selected in the "Search for Preference List to Unsubscribe Contact from" field when they click the one-click unsubscribe option in their inbox.
- Select an option for One-Click unsubscribe: Use this field to configure what happens when a recipient clicks the one-click unsubscribe option in their inbox.
- Include Unsubscribe Link: When the unsubscribe link is included, a link to your Preference page is added to the bottom of the email. Including an unsubscribe link ensures you comply with GDPR regulations. You should only disable this option if your email is transactional or internal.
- Enable One-Click Unsubscribe: When one-click unsubscribe is enabled, an option to unsubscribe may be displayed next to your email in the recipient's inbox and at the top of the recipient's email when opened. Enabling one-click unsubscribe ensures you comply with bulk sender requirements for major email services like Gmail and Yahoo.
- Google Analytics: Set up a link between Google Analytics and your email.
Using Dynamic Email Options
With dynamic email content, you can configure an email's subject, from name, from address and reply-to address to display dynamic values to specific recipient segments. A user must have the Marketing Admin - Dynamic Email Content permission enabled to configure dynamic email options. Dynamic email options are not available when creating and A/B Test email.
Follow these steps to configure dynamic email options:
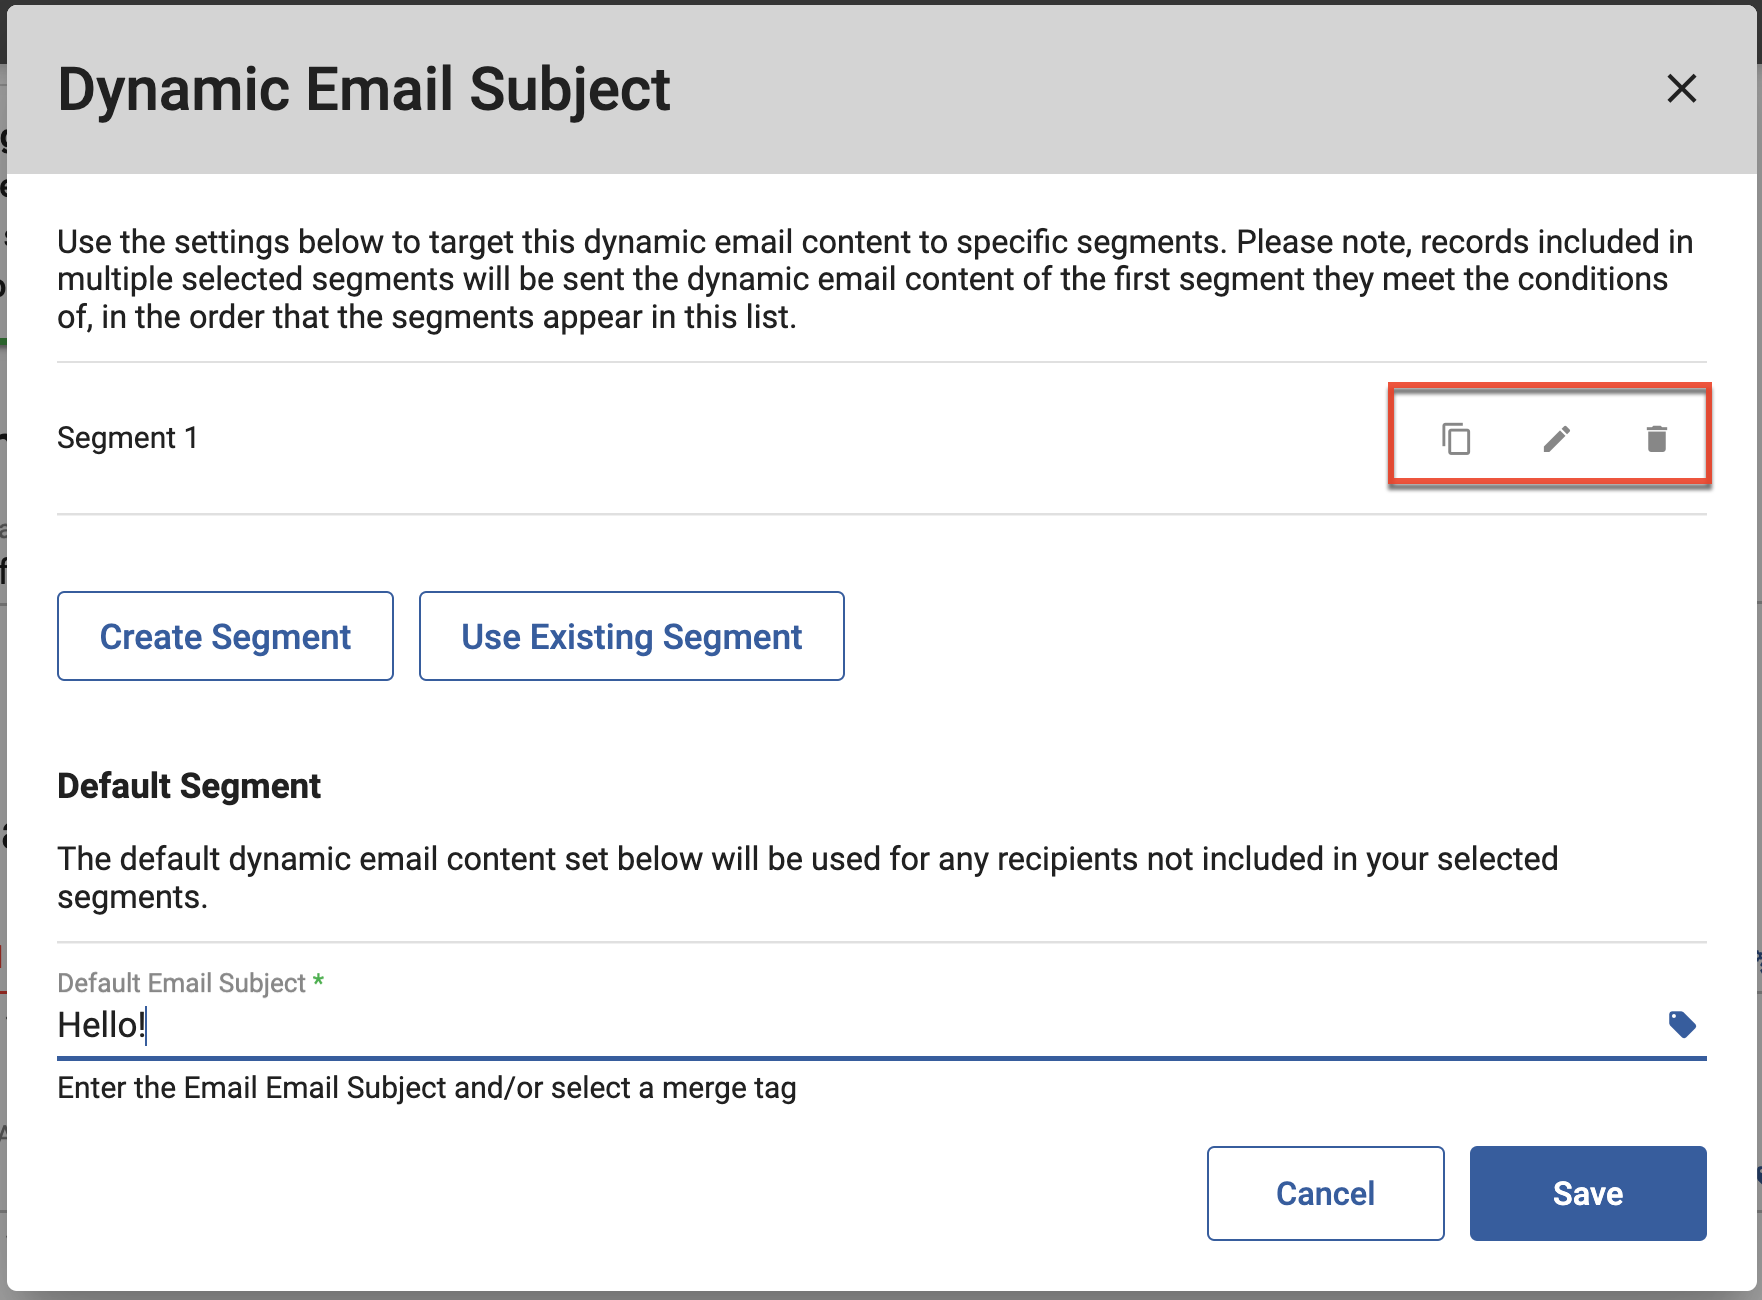
- Click the gear icon in the email option field. In this example, we are configuring a dynamic email subject.
- Click the Create Segment button to create a new segment or click the Use Existing Segment button to choose an existing segment.

- Define your segment using the presented fields. For more information on defining segments in Sugar Market, refer to the Defining Segments section of the Working With Segments page.
Note: Users must have the Marketing Admin - Segment Creation/Editing permission enabled to create and edit segments. - Once your segment is defined, fill in the dynamic value to be displayed for the segment.

- Click the Save button.
- Once the segment is saved, it will appear as a line item in the email option's dynamic content settings. You can change the order of your saved segments by dragging and dropping.
Note: Records included in multiple selected segments will be sent the dynamic email content of the first segment they meet the conditions of, in the order that the segments appear in this list. - Additionally, you can copy, edit, and delete saved segments as needed by clicking the respective icons within each line item.
- Fill in the default dynamic value. This value will be displayed to any recipients not included in your selected segment or segments.
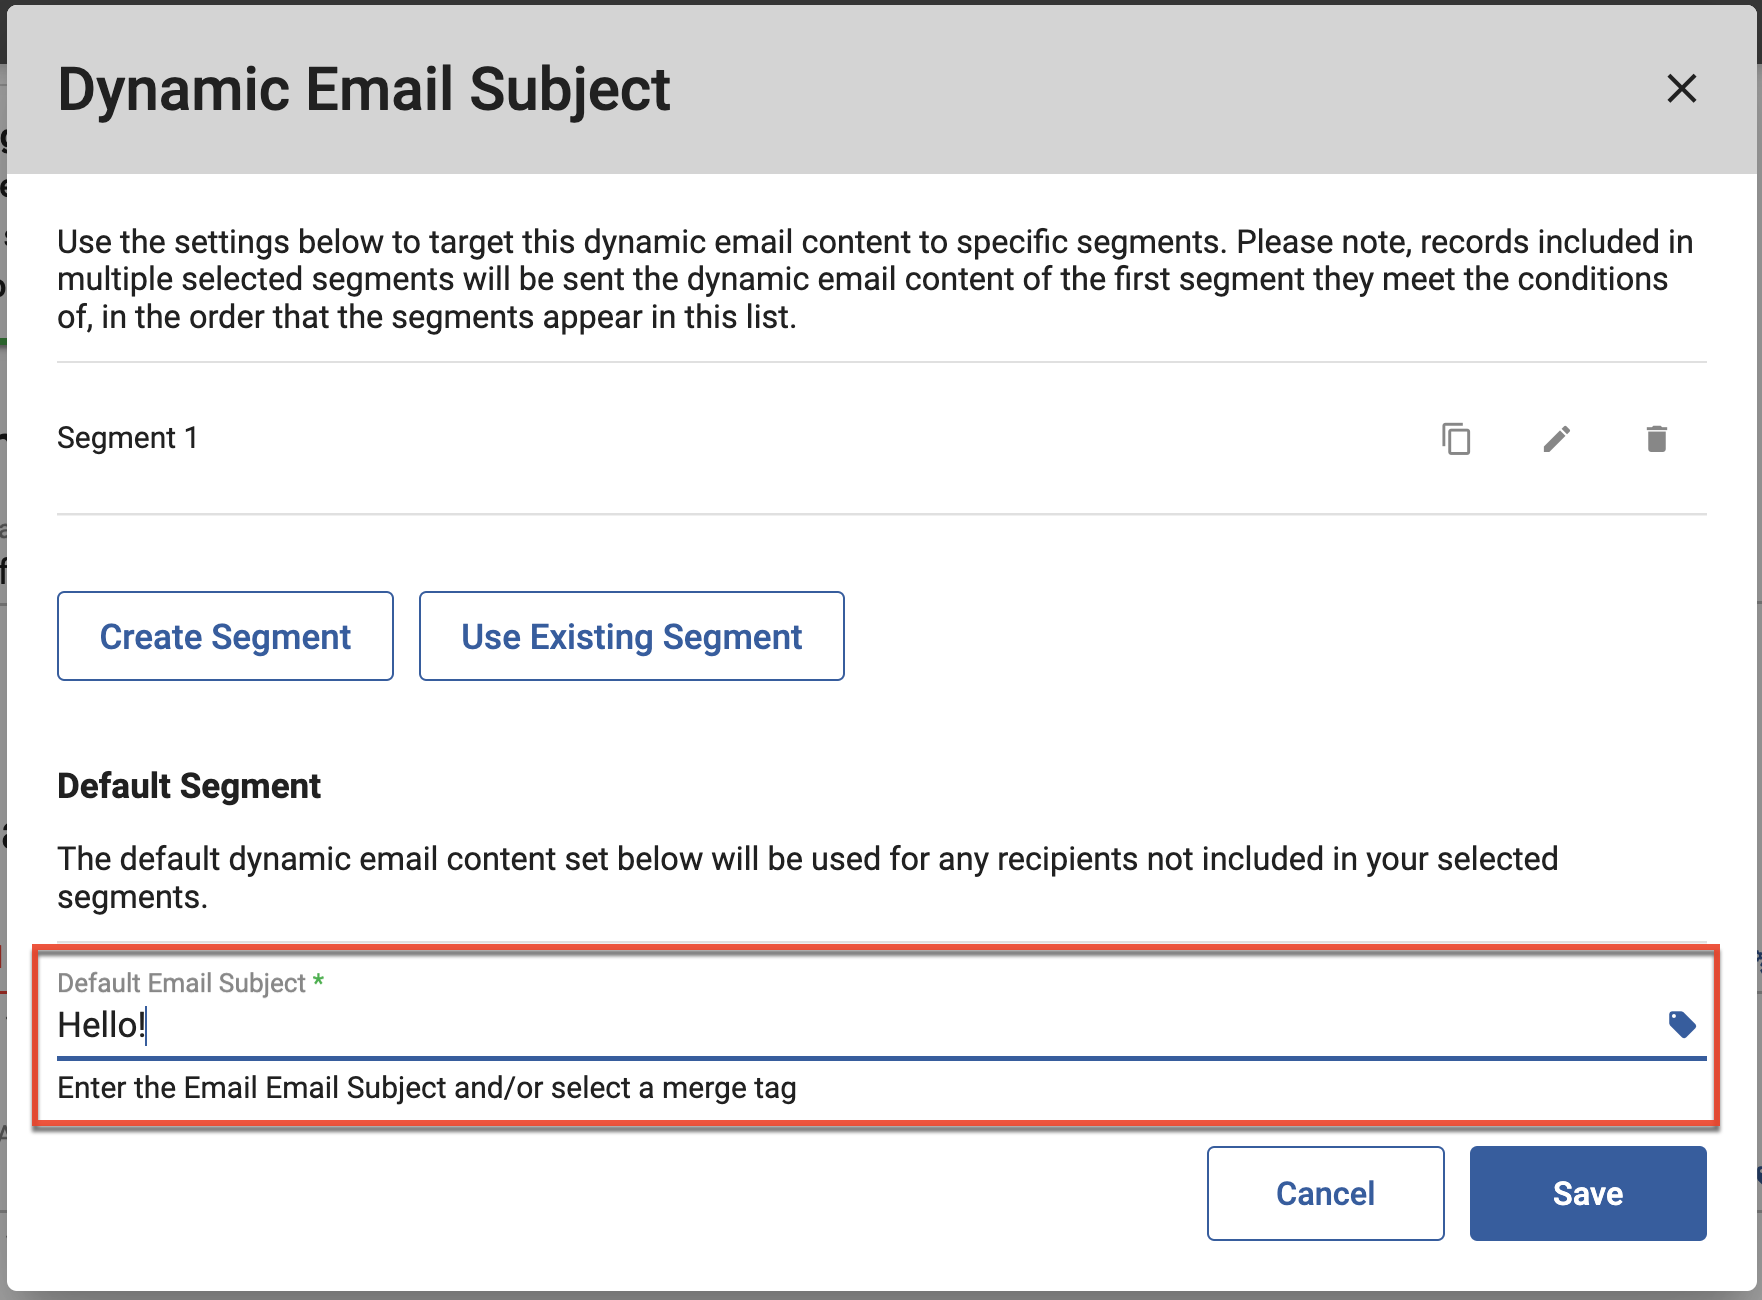
- Click the Save button.
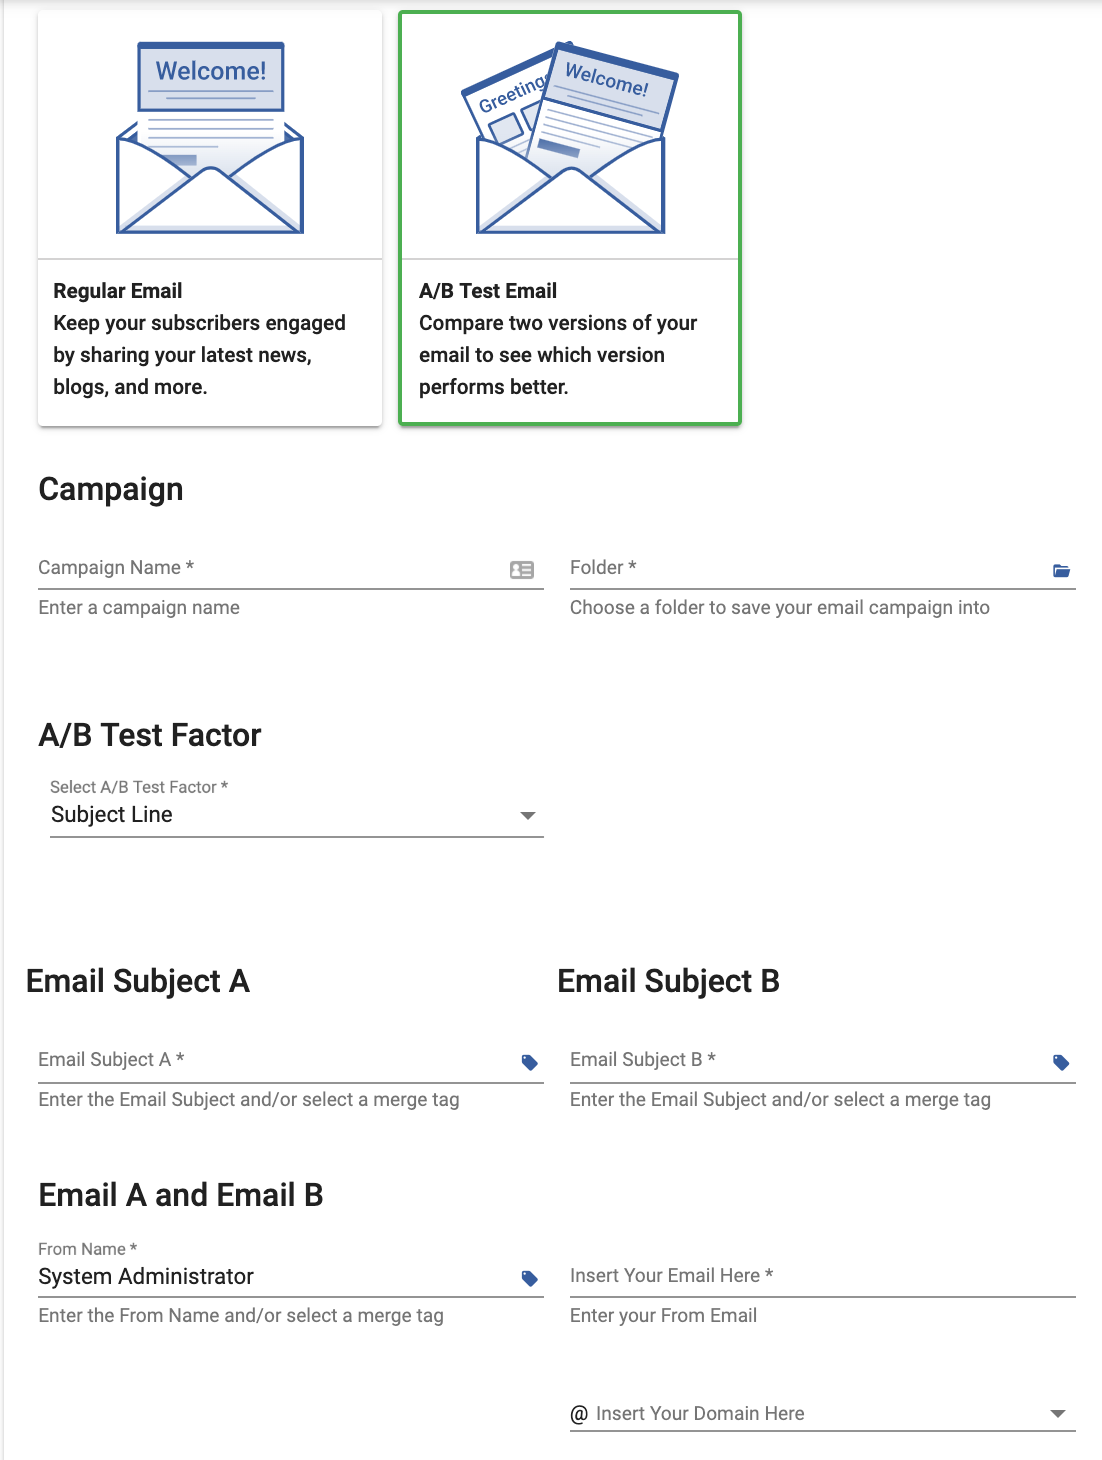
A/B Test Emails
With A/B test emails, you set up two versions of your email to help you determine which version will provide you with the best conversion rate. A standard A/B test sends Email A to 50% of your recipients, sends Email B to the other 50% of your recipients, and the Email Dashboard shows which version is more successful. To customize the way your test recipients are allocated, see the A/B Advanced Test Settings section.
You can test by the following factors with A/B email:
- Subject Line: Consider this option to test your open rate.
- Sender Information: Another option to consider for testing your open rate.
- Email Content: Use this option to test your click-through conversion rate.
- All: Test the Subject Line, Sender Information, and Email Content together. This option is not recommended since it will not provide insight into which factor is working best.
The field display changes to include A and B options when you select the A/B Test Email as your email type, based on the factor you select:
A/B Advanced Test Settings
The Advanced option lets you configure your sample subset and your performance indicator. For example, send your sample email to 20% of your list to check the open rate. This sends Email A to 10% of your list and Email B to another 10%. The version that has the higher open rate (optimized email) is then sent to the remaining portion of your audience. Note the second email send for the optimized email needs to be sent at least 4 hours after the initial email send.
To identify your performance indicator and set the percentage of recipients to receive each mail option:
- Enable the A/B Advanced Test Settings section.
- Select the performance indicator from the dropdown list.
- Drag the slider to the left to increase the percentage of recipients that receive the sample email, or to the right to increase the percentage of recipients that receive the optimized email.
Selecting an Email Template
In the second step of the Email Builder, you determine how you want to what template you want to use to create your email. Choose from the following options:
- Pre-built Templates: Pre-built templates are pre-designed, mobile-friendly email layouts that satisfy the most common email marketing use cases. Consisting of contextual layouts and utilizing the drag-and-drop editor, pre-built templates are the easiest type of email to customize for your content delivery, events, newsletters, and surveys.
- Custom Templates: Custom templates are user-made and may have been based on any of the email types. Templates created with one of the Legacy builders are not available to use in Email Builder.
- Code Templates: Create your email by writing your own code in Sugar Market's built-in HTML/CSS hybrid editor. When using this option, be mindful of any merge tags that need to be included.
- Text Templates: Send your message using only plain-text content without any visual elements or styling. This option is best when you want to add a personal touch to transactional emails with non-marketing content. Text-only email messages are not the same as the text version of your HTML email, which is available on the last step of the Email Builder.
About Pre-built Templates
All multiple-column pre-built templates in Sugar Market are responsive. Responsive design is an approach to web page creation that makes use of flexible layouts, flexible images, and cascading style sheet media queries. The goal of responsive design is to build web pages that detect the visitor's screen size and orientation and change the layout accordingly.
Utilize preview mode to see how your templates respond when viewed on a mobile device. In the example below, notice how the center icons are stacked from left to right when displayed on a smaller screen because these are three separate components in this email design.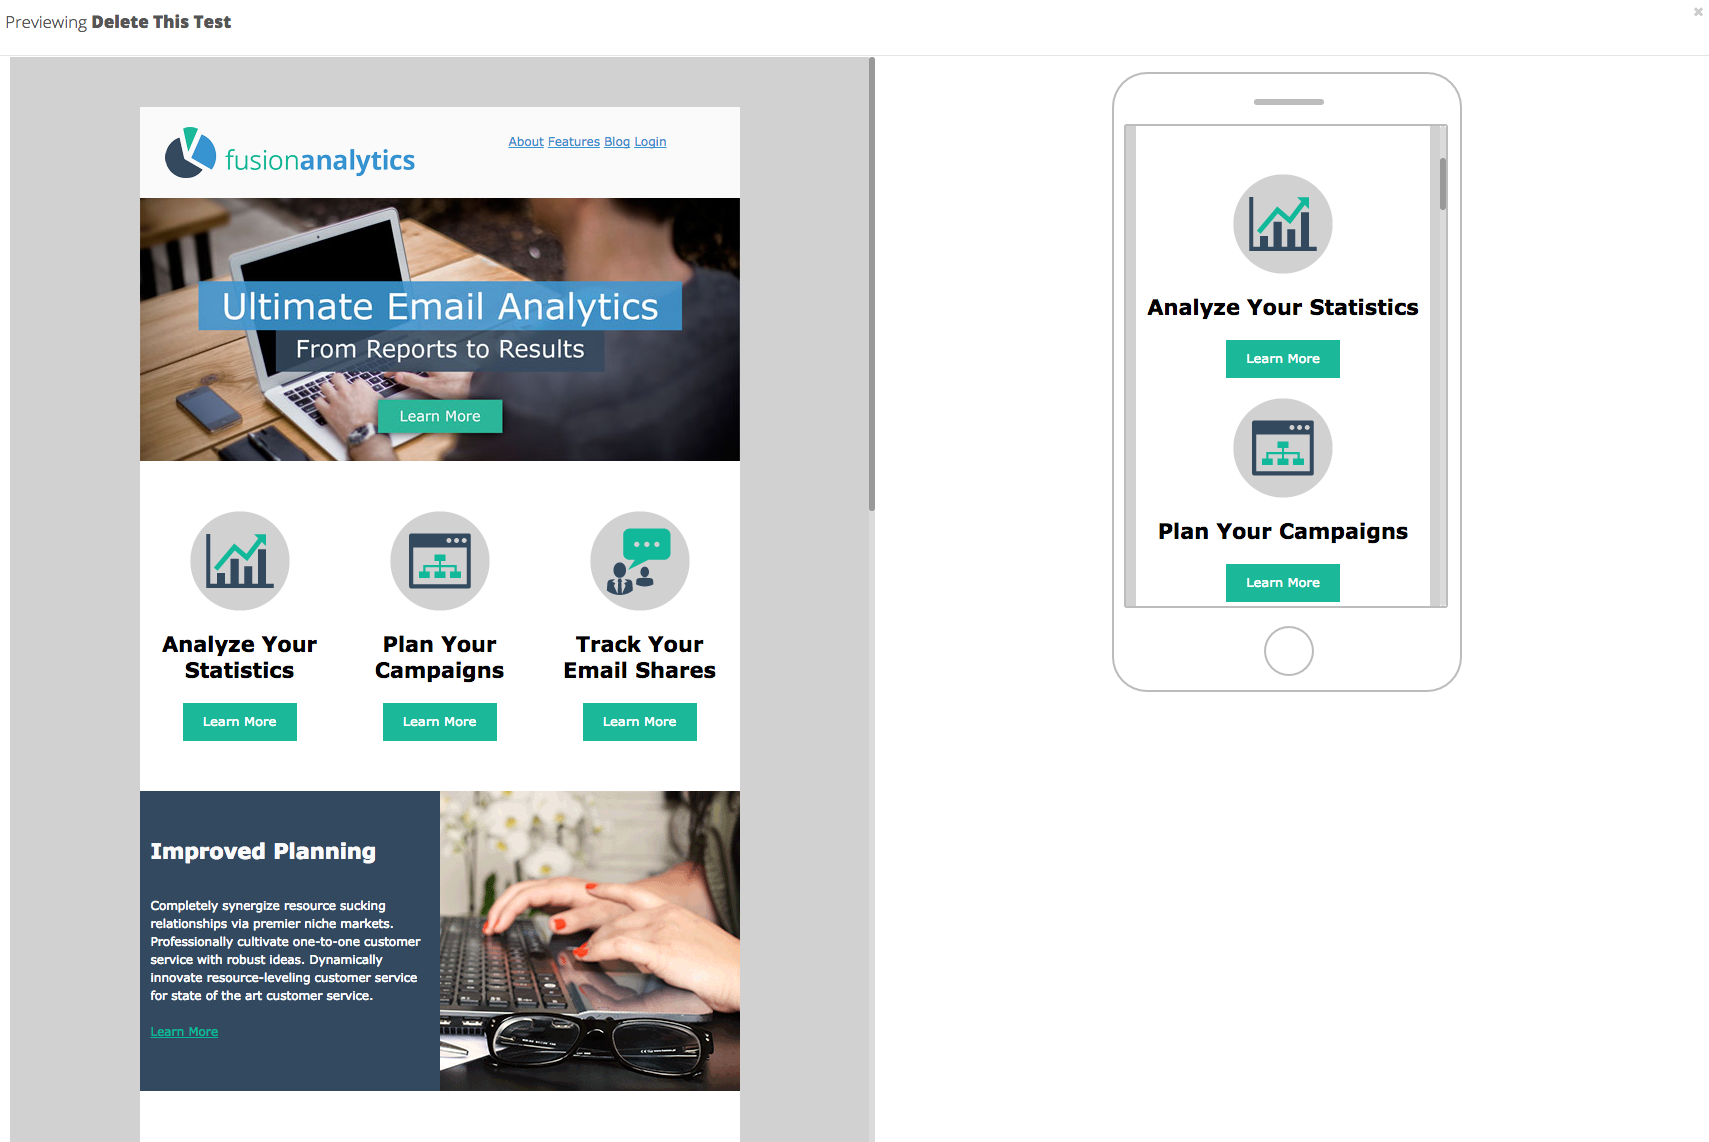
The body section in the example below is not responsive because it uses a table inside of a single text component to create the side-bar. The other sections of the email are responsive.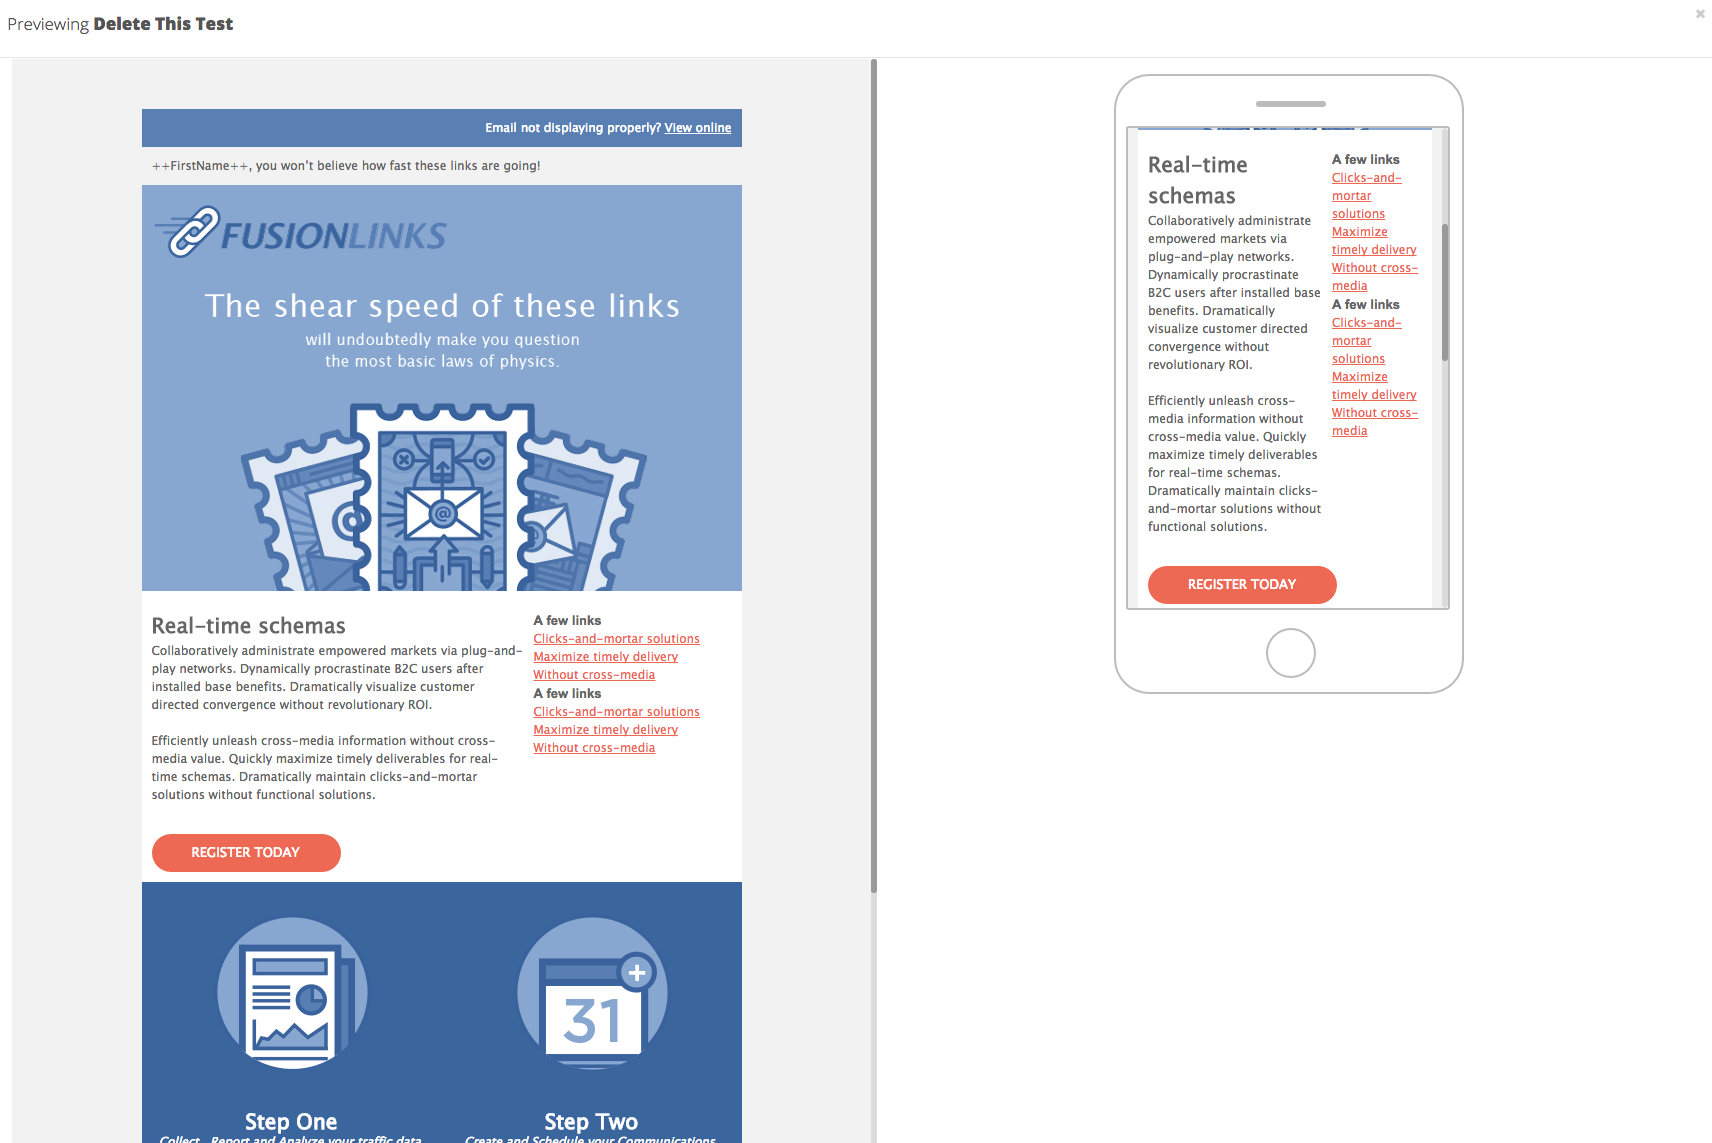
There are two pre-built template types included:
- Basic: Containing all of the components but no styling or text, these templates provide a general layout to follow.
- Advanced: These templates contain several components with the addition of images, colors, and styling included.
Note: There are two single-column email pre-built templates available in Email Builder. These templates do not rearrange in the mobile view because they are already a single column, but they do scale appropriately and are mobile-friendly.
Building the Email
In the third step of the Email Builder, you add and edit your email design and content. Depending on the option you selected in Step 2 of the builder, either a text editor or the drag-and-drop editor displays.
Preview And Test
During this step, you can preview and test your email before you send it to ensure your content looks as you expect on both desktop and mobile devices in all major email clients.
The following are 3 options are available:
|
Icon |
Function |
Description |
| Preview Mode | Launches a modal that displays your email as it would render on desktop and mobile. With this modal, you can preview your dynamic elements and how your email will appear for a specific recipient. Note: Displaying a preview for a specific recipient will override all other preview settings. | |
| Send Test Email | The best way to test your email layout, content, and personalization is to send test emails to yourself and your team. You can send test emails to an unlimited number of recipients and save them as default recipients for future test sends. To send a test email, complete the Send Test Email dialog, separating multiple email addresses with commas, and then click the Send Test Email button. You may want to include the word "Test" in your subject line. If using merge tags, choose the HTML Email with Link Tracking encoding option. Test emails may take up to 10 minutes to be received by your email client. Note: Test emails are processed in the order they are added to the email sending queue and can be delayed by other emails currently in the queue. | |
| Advanced Testing | Advanced Testing renders your email in 27 unique email clients and devices. Read more in the Rendering Emails in Various Clients topic. |
Note: Perfect rendering across all clients and devices is unlikely without some distortion since various clients use different methods to render content. For example, responsive design is not compatible with all email clients.
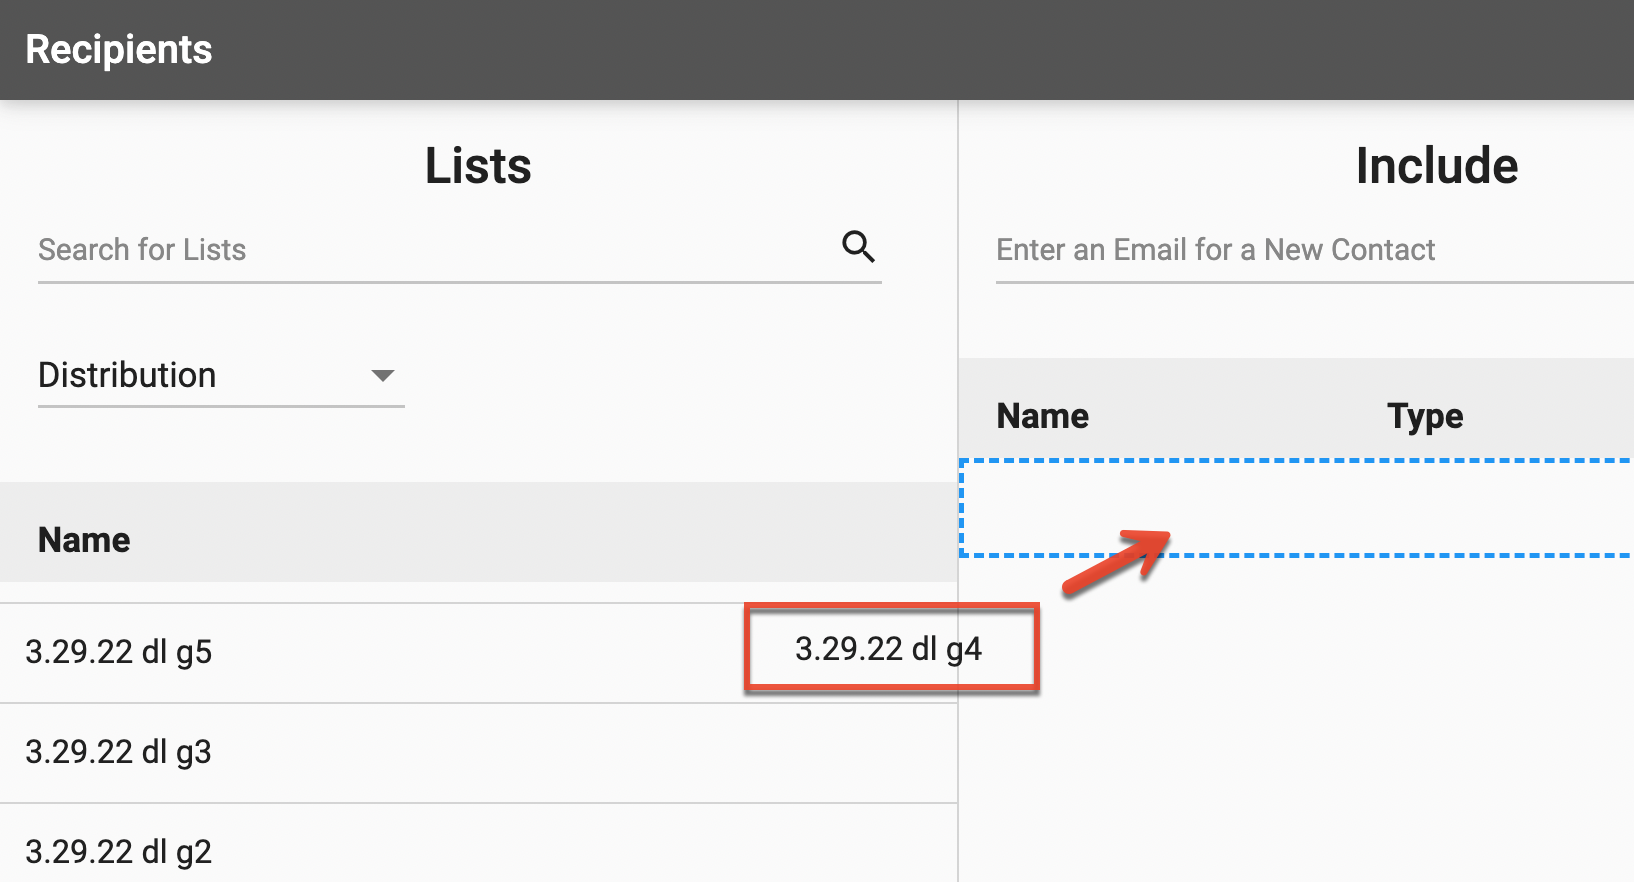
Selecting Recipients
Determine your email recipients in Step 4 of the Email Builder. Quickly filter and search by list type, and then drag and drop the list into the include or exclude sections.
Before adding recipients, it is important to understand and few key behaviors:
- Contacts and leads must have a value for either the AccountID or OwnerID field. If both fields are Null or 0 the recipient will be excluded from the email send.
- If you are using a list that you have recently uploaded, please confirm you have received the email confirming the completion of the upload. If you include or exclude a list that has not finished uploading, then only a partial list will be used in the email.
- Reports used as include or exclude lists in Email Builder must contain the Contact ID and Email columns from the Contacts table.
- While reports based on the Accounts table can potentially be used as include/exclude lists, results are unpredictable since this is unsupported functionality.
Reports used as include or exclude lists in Email Builder must contain the Contact ID and Email columns from the Contacts table. While reports based on the Accounts table can potentially be used as include/exclude lists, results are unpredictable since this is unsupported functionality.
To select recipients:
- Locate the desired list by using the Search field or selecting a list type from the dropdown. You can also create a new distribution or preference list by clicking the + button. Once the list is created it will automatically be added as an included list.
- Drag the list name to the Include or Exclude column.
- If a list has qualifiers (e.g. "registered" vs. "attended" for Events), drag and drop the list name, and then click the three-dot menu to select the qualifier.
- To manually include or exclude individual email addresses, type the address at the top of the Include or Exclude column, and then click the Add button. The individual names are displayed in the lists at the bottom of the page.
Narrowing Lists with Qualifiers
You can use the following qualifiers to refine your list members to include or exclude when using Campaign, Event, and Nurture list types:
Campaign Lists
- Opened But Not Clicked: Contact opened the email but did not click through any embedded links.
- Opened and Clicked: Contact opened the email and clicked through at least one embedded link.
- Did Not Open: Contact did not open email.
- Past Recipients: Contact was a member of the selected email, regardless of their open and click status.
Event Lists
- Registered: Contacts who registered for the event.
- Attended: Contacts who registered for and attended the event.
- Requested Follow-Up: Contacts flagged for follow-up information after the event.
Nurture Lists
- Currently and Previously Enrolled: Contacts that are members of the nurture, or were members of the nurture in the past. To select currently enrolled members that are in the process of flowing through the nurture, use the Active qualifier instead.
- Completed: Contacts that have flowed through and reached the terminating step in the nurture.
- Active: Contacts that are currently flowing through the nurture.
- Removed: Contacts that were removed from the nurture by any method, including manually and by a trigger.
Deduplicating Recipients
All email recipients are automatically deduplicated, ensuring your email is sent only once to each unique email address. Custom reports and distribution lists are deduplicated using the ContactID field, while all other recipients are deduplicated using their email address.
Scheduling Your Email
You can choose to send your email immediately, schedule it to be sent on a specific date and time, or schedule the send in batches.
Sending immediately or scheduling your email send are the best options for smaller lists. If you have a large list and want to distribute a send across a longer time frame, then sending in batches is the ideal choice. Use the Send Email Immediately option with caution since this cannot be undone.
Scheduled Emails
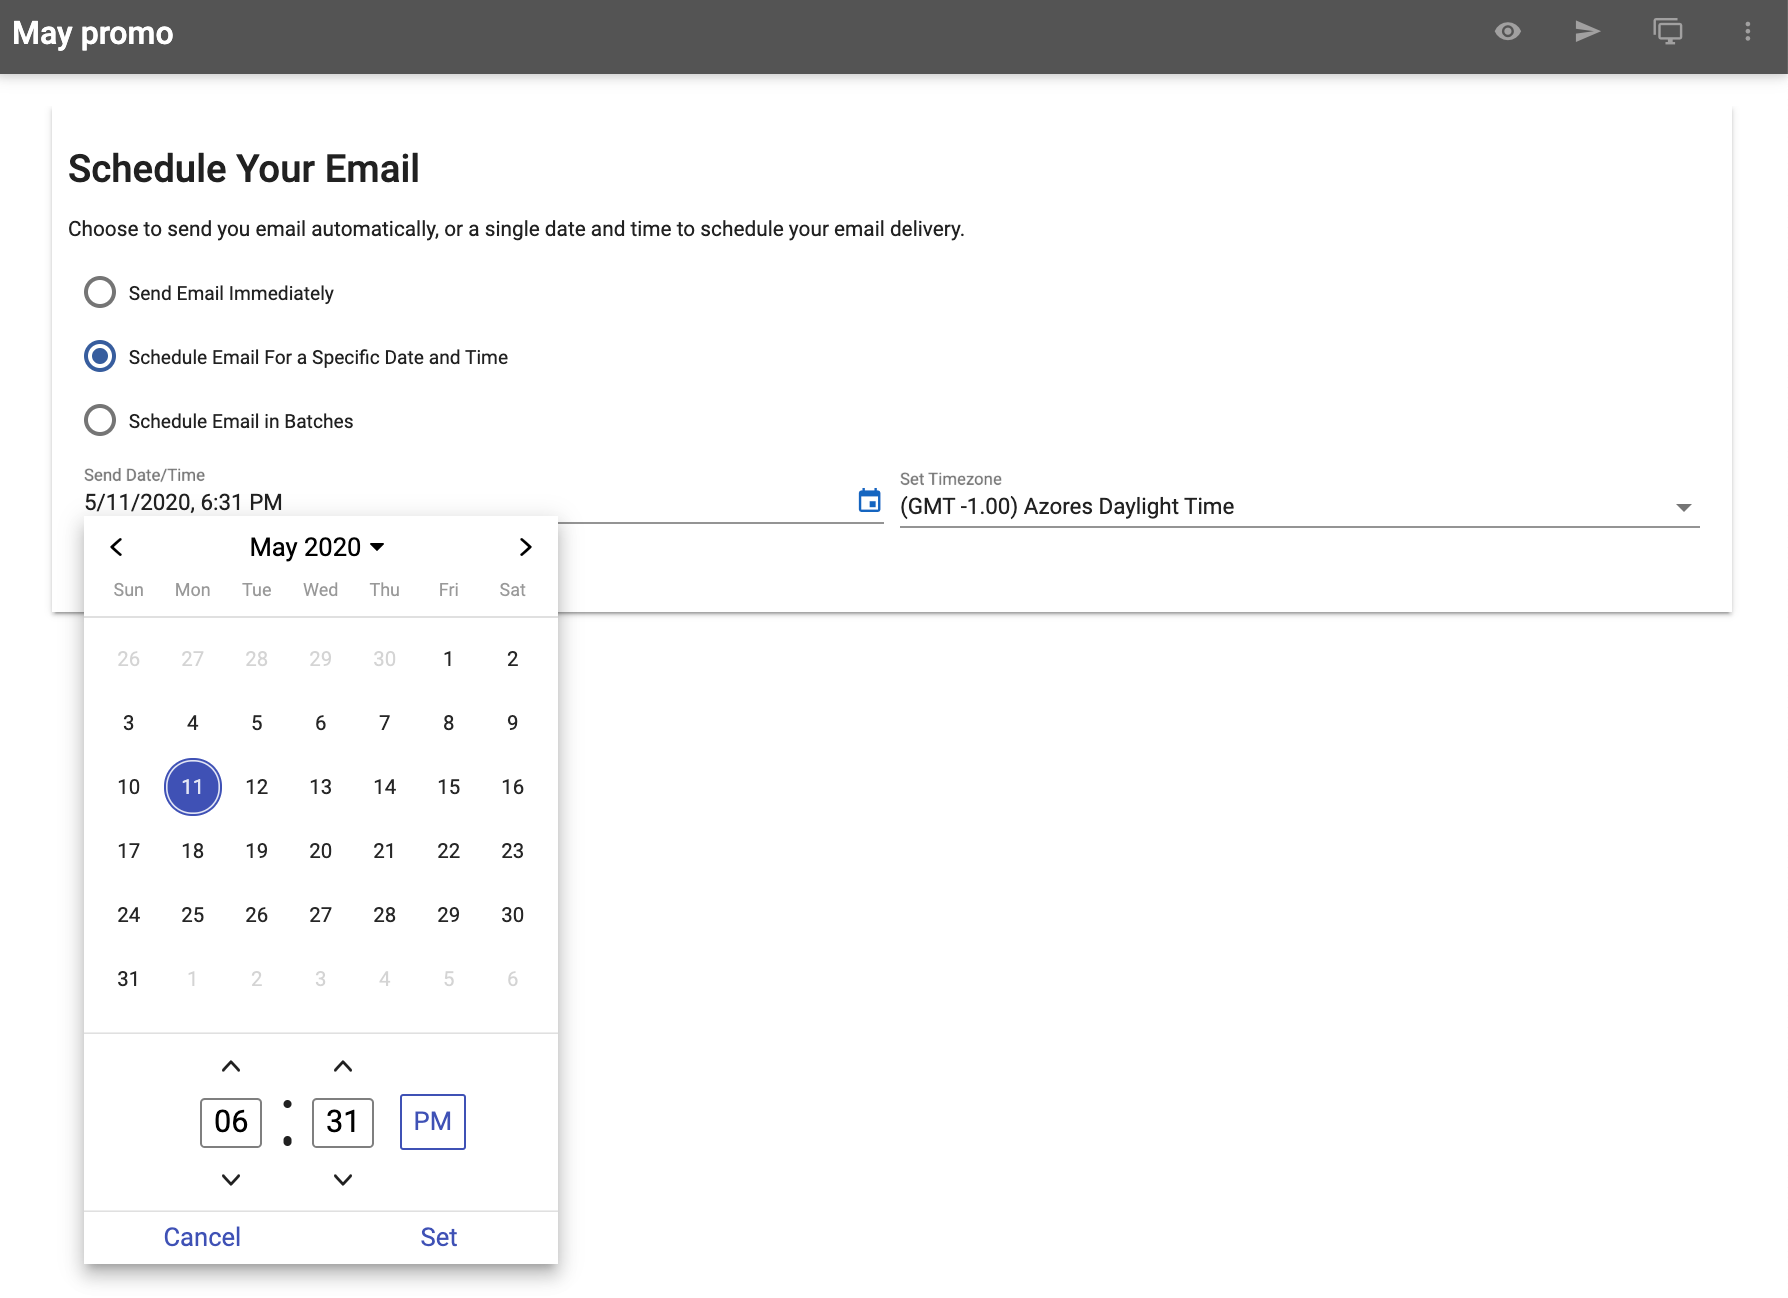
To schedule emails to be sent on a specific date and time:
- Select the second schedule option and then click anywhere in the Send Date/Time field to display the calendar widget.
- Click the desired date on the calendar.
- Use the up and down arrows to change the time or type the numbers directly in each box.
- Click AM or PM, and then click the Set button.
- Select a time zone from the dropdown if you want to identify a time zone other than the default.
Scheduled Emails in Batches
It is good practice to schedule emails with a large number of recipients to be sent in smaller batched groups. When using this option, the list of recipients is divided equally among the number of batches selected, and emails are sent at the scheduled times in the order in which the contacts appear in the Recipients list on Step 4 of the builder.
To schedule emails to be sent in batches:
- Select the third schedule option and then follow the instructions above for Scheduled Emails.
- Click the Add Batch button and repeat for the remaining batches to be sent.
Confirming and Sending Your Email
On the last step of the Email Builder, review the details of your email before sending.
-
Confirming Email Details: The left side of the page displays a summary of the selections you made in each step of the builder. Use the Edit buttons to return to the corresponding builder step to make changes to your email. To edit content, click the pencil icon in the builder toolbar to return to the Build step.
-
Calculating Email Recipients: To determine the number of recipients for your email, click the Calculate Recipients button in the Recipients Review summary section. The number of recipients is calculated based on the currently included and excluded lists and individual email addresses. If you are using a dynamic list such as a report for your include or exclude and you are not sending your email immediately, then your recipient count may change before the email is sent.
- Editing Text Version: A text version of your email is automatically created regardless of the method you chose for building the email. The text version is sent in addition to your fully-styled version and delivered to the customer only if their email client has been set to reject HTML content in favor of text-only content. Some spam filters will also detect and block heavily-styled HTML emails, allowing only the text version to make it through their filter and to the intended recipient.
Follow these steps to review and edit the text version of your email:
1. To review the text version, click the Text Preview icon in the builder toolbar.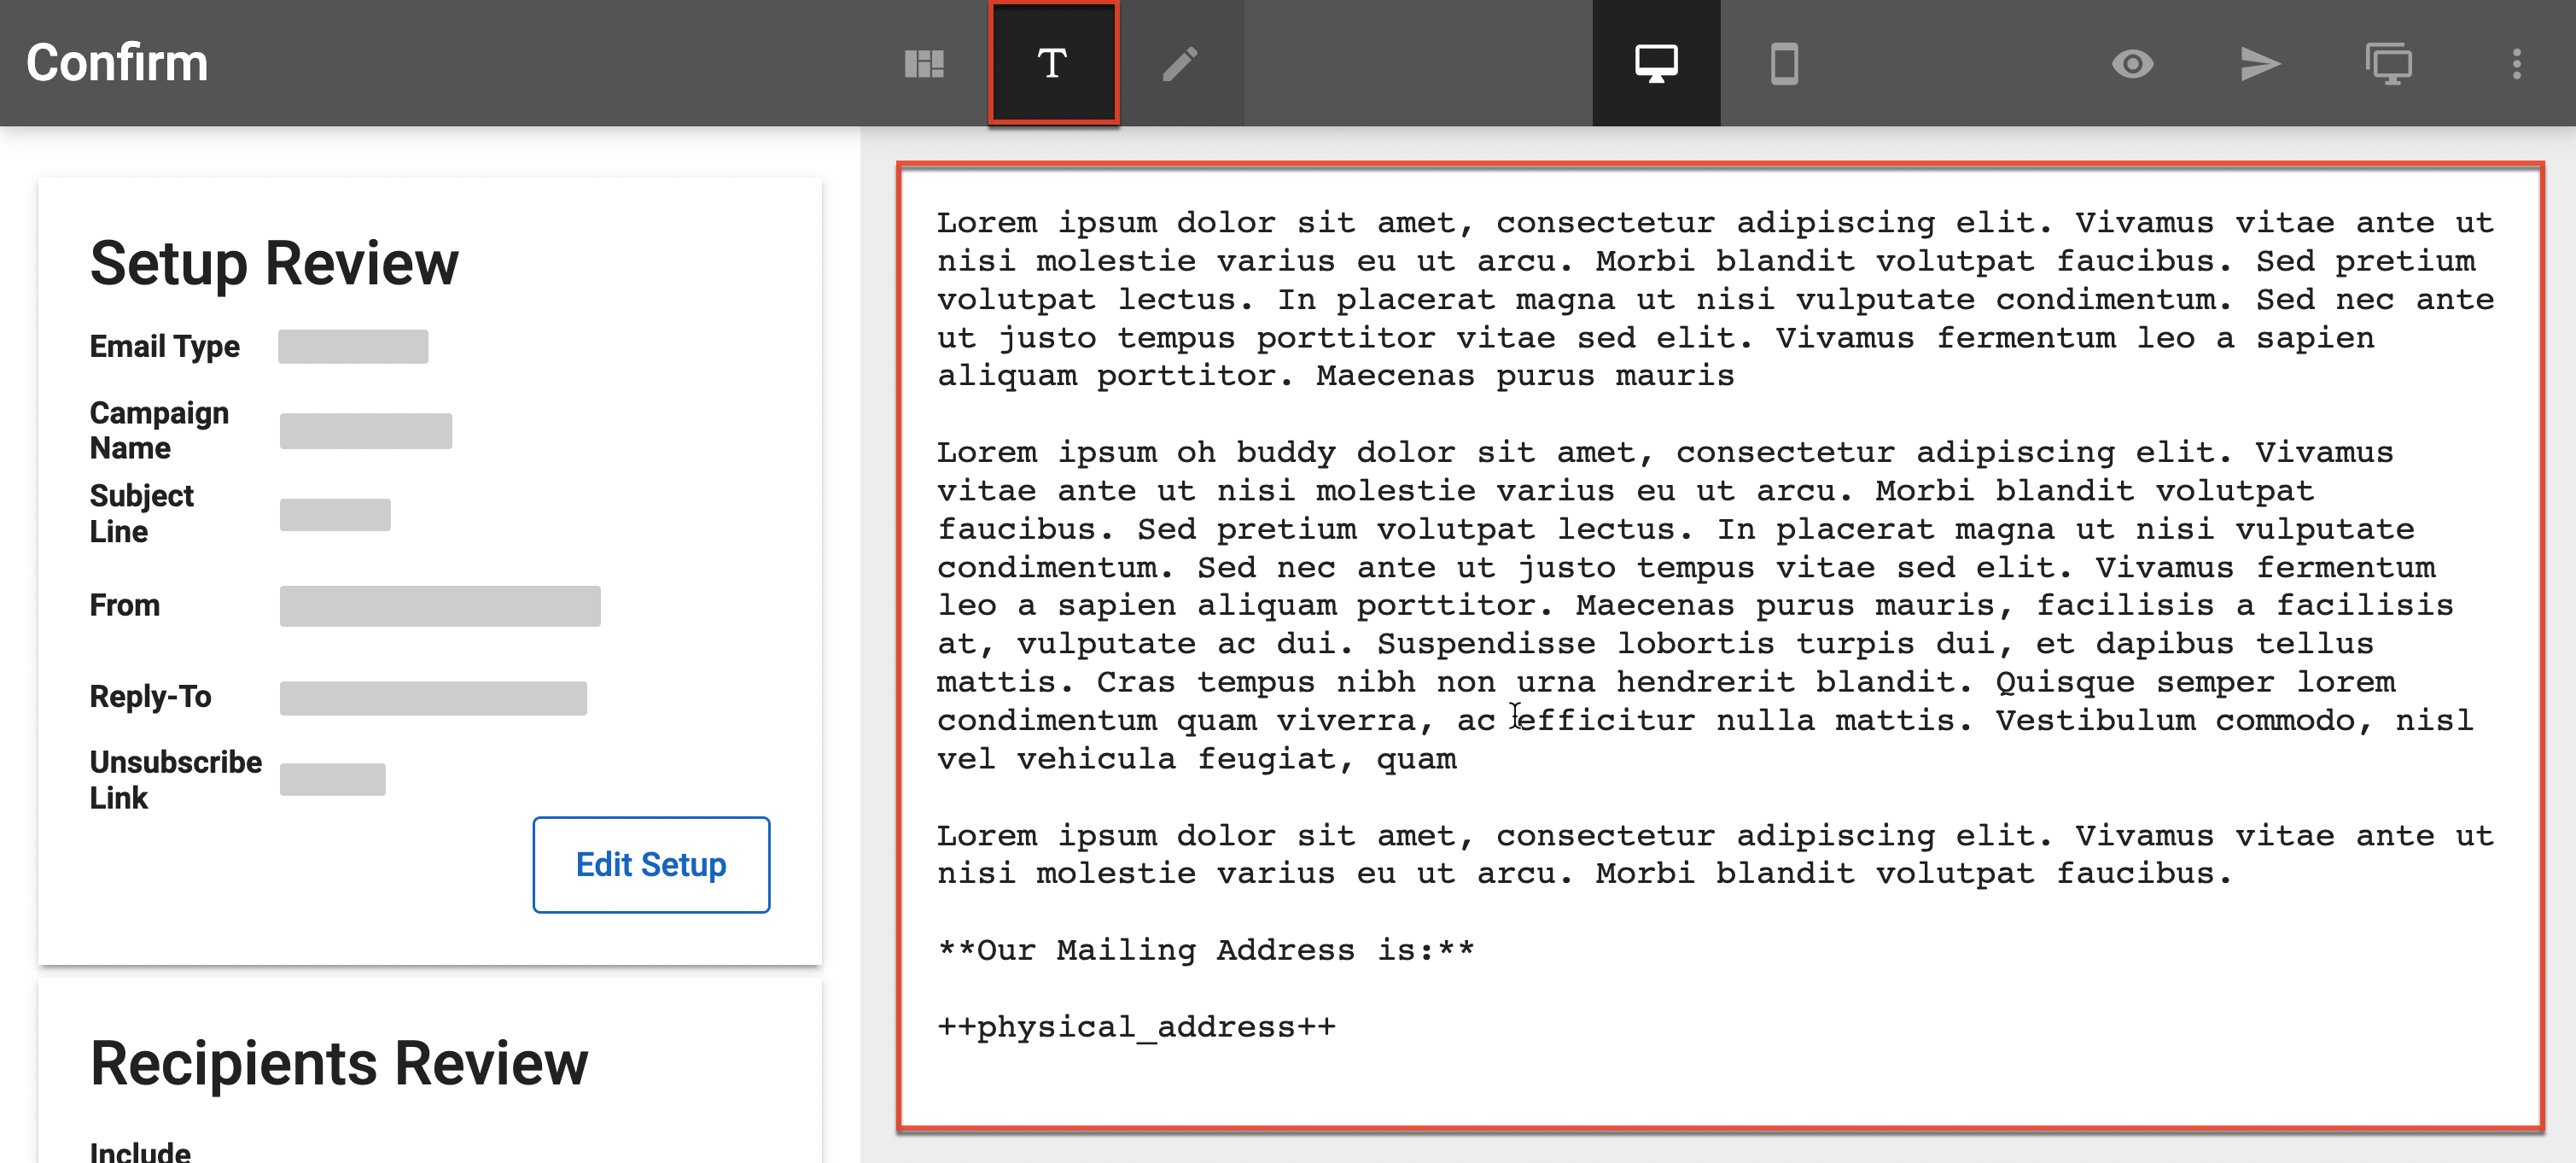
2. To open the text version editor, click the pencil icon in the builder toolbar.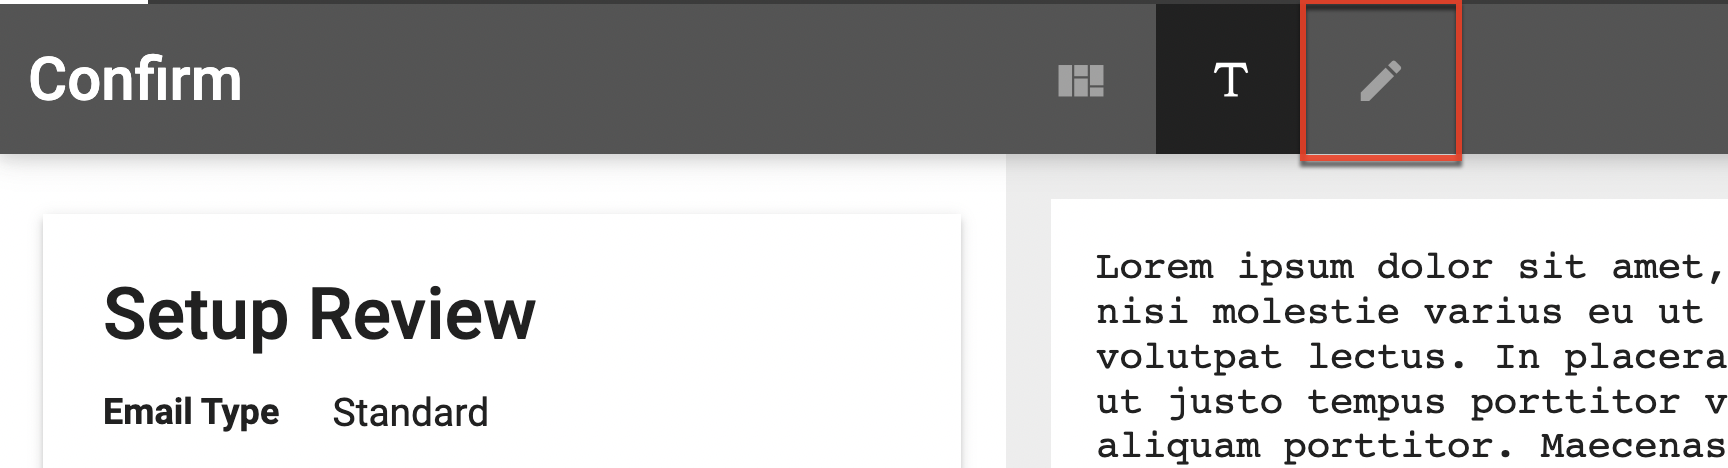
3. Click the pencil icon within the Edit Email Text window to manually edit the text version.
Note: Manually editing the text version will disable the automatic sync of the changes in the email builder to the text version. You can re-enable the sync at any point by clicking the sync icon.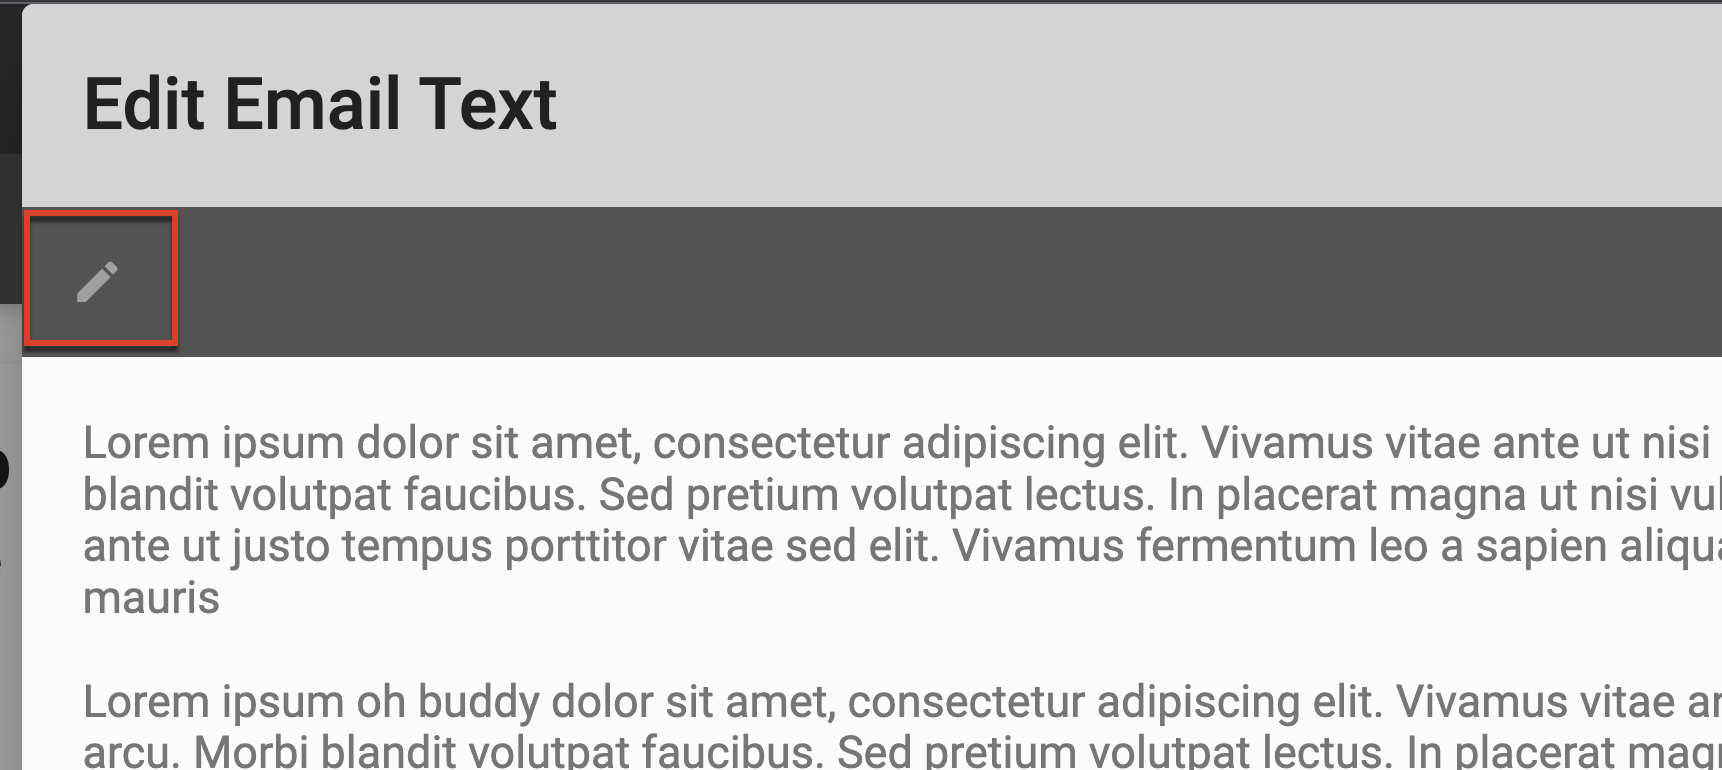
4. To add merge tags, click the tag icon.
5. To regenerate the text version with or without links, click the respective icon.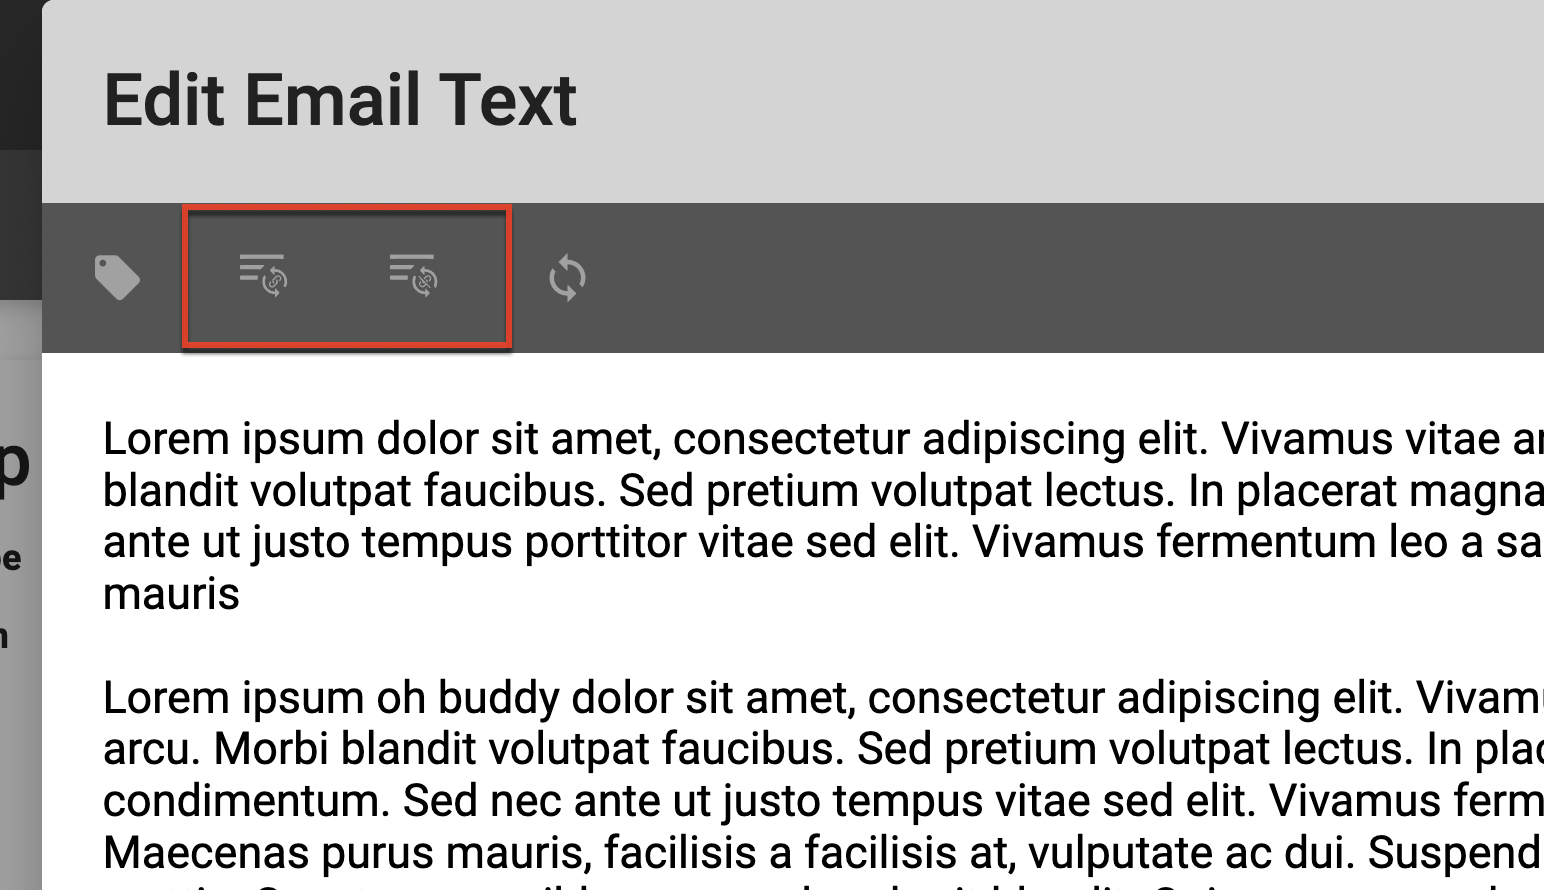
6. Once you have made the needed changes to the text version of your email, click the Save button. - Sending Email: After you have verified that all details are correct and you are ready to send your email, click the Send button at the bottom right. To prevent an unintentional send, you will be prompted to confirm your selection before the email is sent.