Leads and Contacts
Overview
You can create Leads and Contacts directly in Sugar Market or sync them from your external CRM. Please note that Sugar Market does not sync down contacts and leads with blank email addresses.
The Leads and Contacts documentation includes the following topics:
- Accessing Leads and Contacts
- Lead and Contact Actions
- Creating Leads and Contacts
- Managing Lead and Contact Cards
- Creating Tasks and Opportunities
- Updating Leads and Contacts for GDPR Compliance
- Candidates
- Buyer's Journey Overview
- Mass Updating Contacts
- Mass Deleting Contacts
- Importing Contacts
Accessing Leads and Contacts
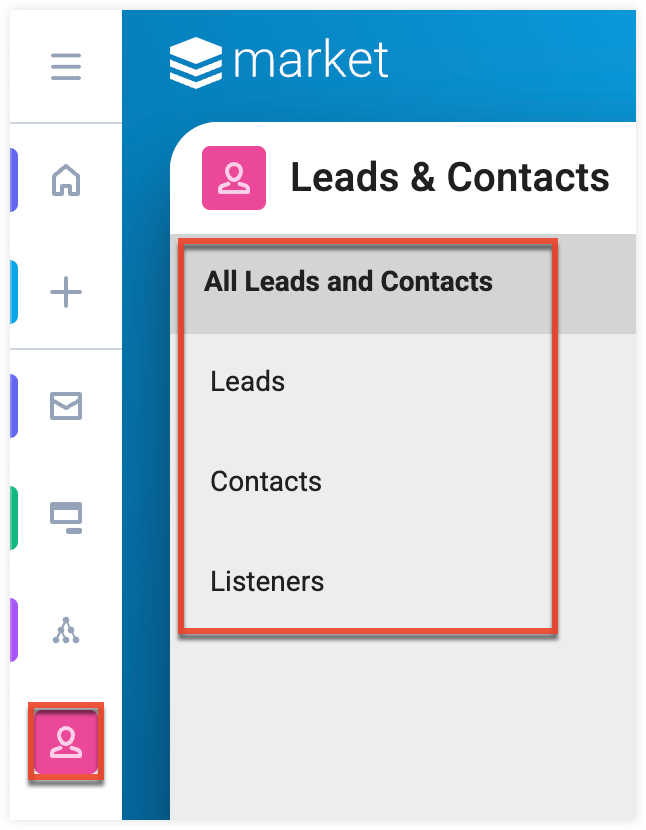
You can access leads and contacts from the navigation bar:
- In the navigation bar, click the Leads and Contacts module.
- Click either the All Leads and Contacts, Leads or Contacts submodule.
Searching for Leads and Contacts
To search for a specific record, type in the search bar and then click the magnifying glass icon or press the enter key. You can search the contact list by first name, last name, email, owner, or account. 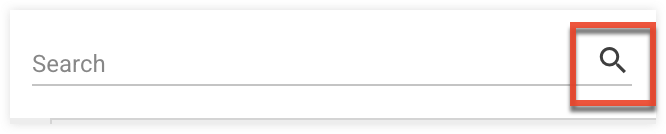
Viewing Leads and Contacts by Scoring Profile
Click the trophy icon in the toolbar to select a scoring profile. After selecting a profile, the score column updates to reflect that profile's scores:

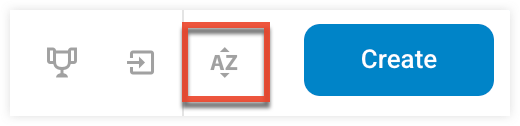
Sorting the Leads and Contacts List
Sort the Leads and Contact list by clicking a column header or by using the sort icon in the toolbar:
Lead and Contact Actions
Select a record or multiple records and click the three-dots menu in the toolbar to see the available actions. Some actions are not available depending on the state of the record or when multiple records are selected.
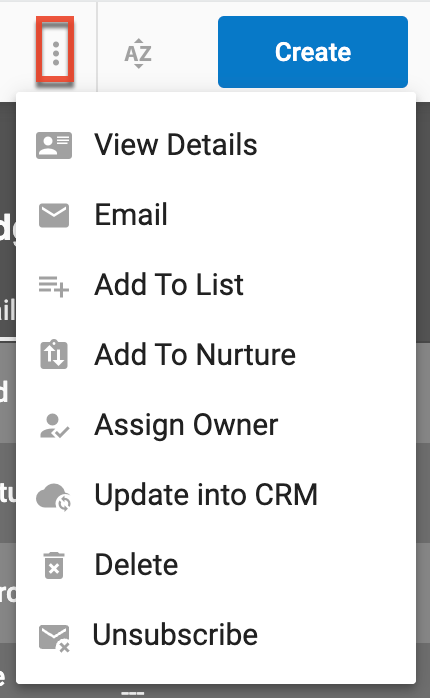
- View Details: Open the lead or contact card. You can also double-click the row to open the card.
- Email: Create and send an email directly to the contact(s).
- Add to List: Add the contact(s) to a distribution list.
- Add to Nurture: Add the contact(s) to a nurture.
- Assign Owner: Reassign the contact(s) to a new owner.
- Push into CRM: Push the contact's data to your external CRM.
- Delete: Delete the contact(s) from Sugar Market.
- Unsubscribe: Unsubscribe the contact from receiving email communications. This action will add the record to Unsubscribe Contacts And Leads.
- Resubscribe: If the contact is not on Unsubscribe Contacts And Leads, this action will resubscribe them by updating the Opt Out Email field to "No". If the contact is on Unsubscribe Contacts And Leads, this action will send the contact a resubscription email containing a link to your preference page.
- Merge: Merge two contact records together. This option is only available when 2 or more records are selected.
Creating Leads and Contacts
To create a new Lead or Contact record:
- Click the Create button in the toolbar.

- Complete the Create Contact fields, setting the Record Type field to either Lead or Contact.
- Click the Create button.
Importing Contacts
You can import contacts through an external file into Sugar Market as a distribution list. Please refer to the Importing Contacts page for more information on importing contacts.
Managing Leads and Contacts
Lead and contact details are contained within the lead and contact record. The top of the record displays summary identification and the lead or contact score. The bottom of the record is grouped into a series of tabs containing further details and activities associated with the record.

The record tabs are described below:
- Journey: Timeline of the contact's activity that you can filter by type and date.
- Details: Lead and contact data as specified by the layout assigned to the current role and record type. Users with the Admin Navigation role have the option to edit data and the layout.
- Lists: The lead or contact's distribution and suppression lists.
- Preference Lists: The lead or contact's preference lists.
- Nurtures: All of the nurtures where the lead or contact is enrolled.
- Scoring Summary: The scoring details for the selected scoring profile.
- Account Contacts: Other contacts that are under the same account.
- Tasks: Tasks associated with the lead or contact.
- Opportunities: The opportunities associated with the lead contact.
Lead and Contact Card Toolbar
The following options are available in the Lead and Contact Card toolbar:
Role: Select a role to view the details layout assigned to that role.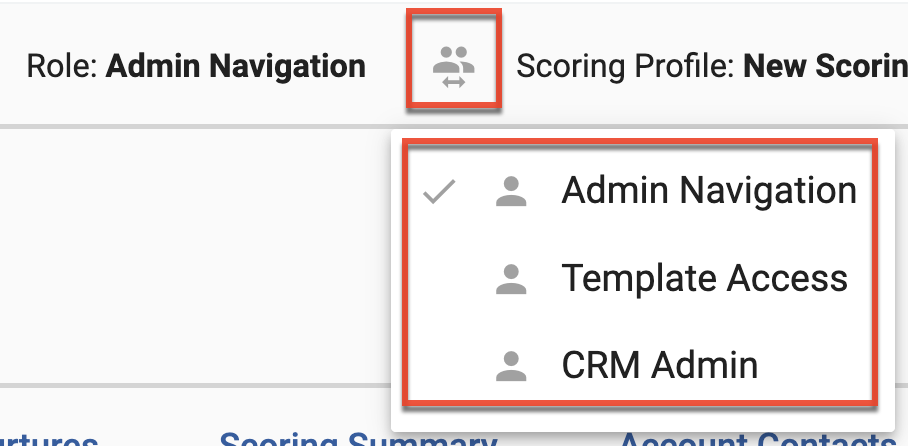
Scoring Profile: Select a scoring profile to update the lead or contact score and the scoring summary tab.

Three-dots menu:
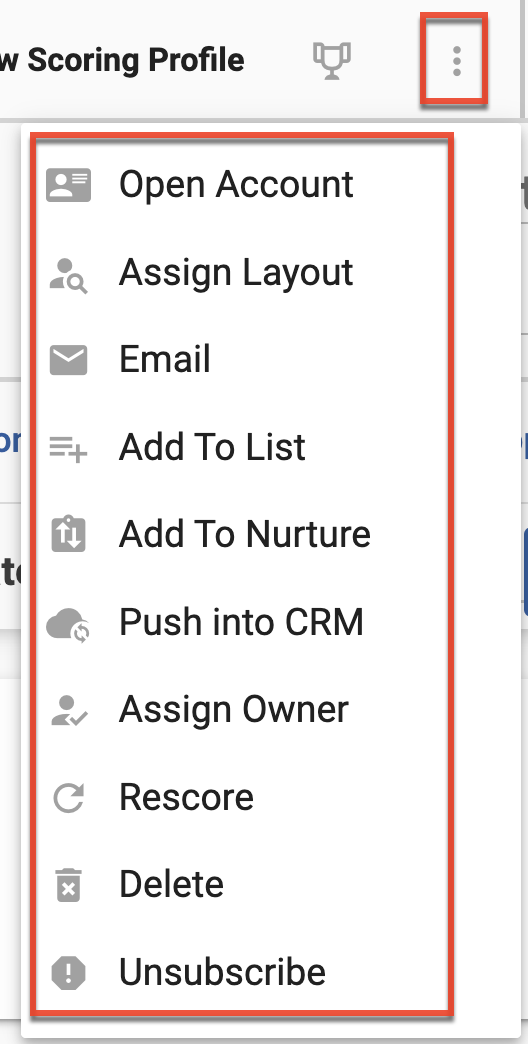
- Open Account: Open the associated account card.
- Assign Layout: Assign a details layout to specific roles and record types. The option is only available to users with the Admin Navigation role.
- Email: Create and send an email directly to the lead or contact.
- Add to List: Add the lead or contact to a distribution list.
- Add To Nurture: Add the lead or contact to a nurture.
- Push into CRM: Push the contact data into your external CRM.
- Assign Owner: Reassign the lead or contact to a new owner.
- Rescore: Rescore the lead or contact to reflect recent activity.
- Delete: Delete the lead or contact from Sugar Market.
- Unsubscribe: Unsubscribe the lead or contact from receiving email communications. This action will add the record to Unsubscribe Contacts And Leads.
- Resubscribe: If the contact is not on Unsubscribe Contacts And Leads, this action will resubscribe them by updating the Opt Out Email field to "No". If the contact is on Unsubscribe Contacts And Leads, this action will send the contact a resubscription email containing a link to your preference page.
Create: Create an associated task or opportunity for the lead or contact.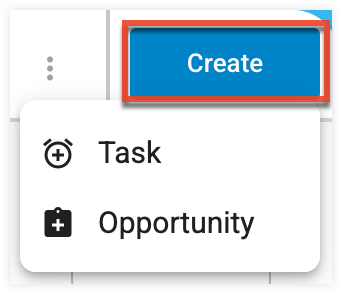
Editing Lead and Contact Records
Users with the Admin Navigation role can edit card field data and layouts within the Details tab.
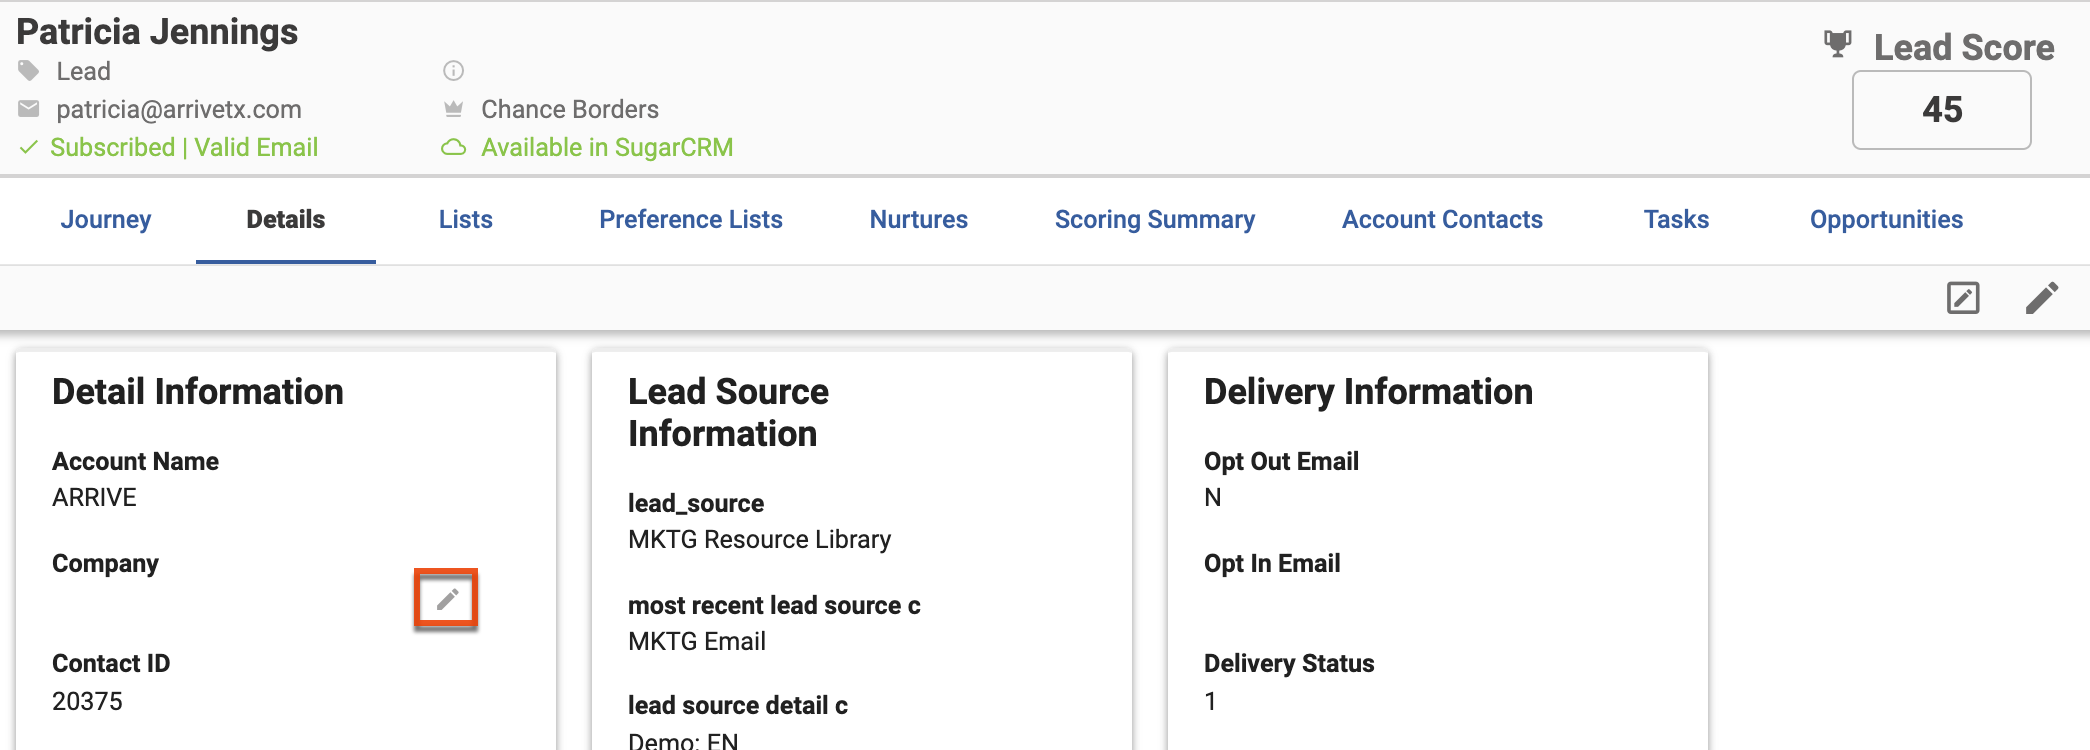
To edit individual fields:
- Click the pencil icon to the right of the field on the Details tab.
- Complete the Edit Field dialog and then click the Save button.
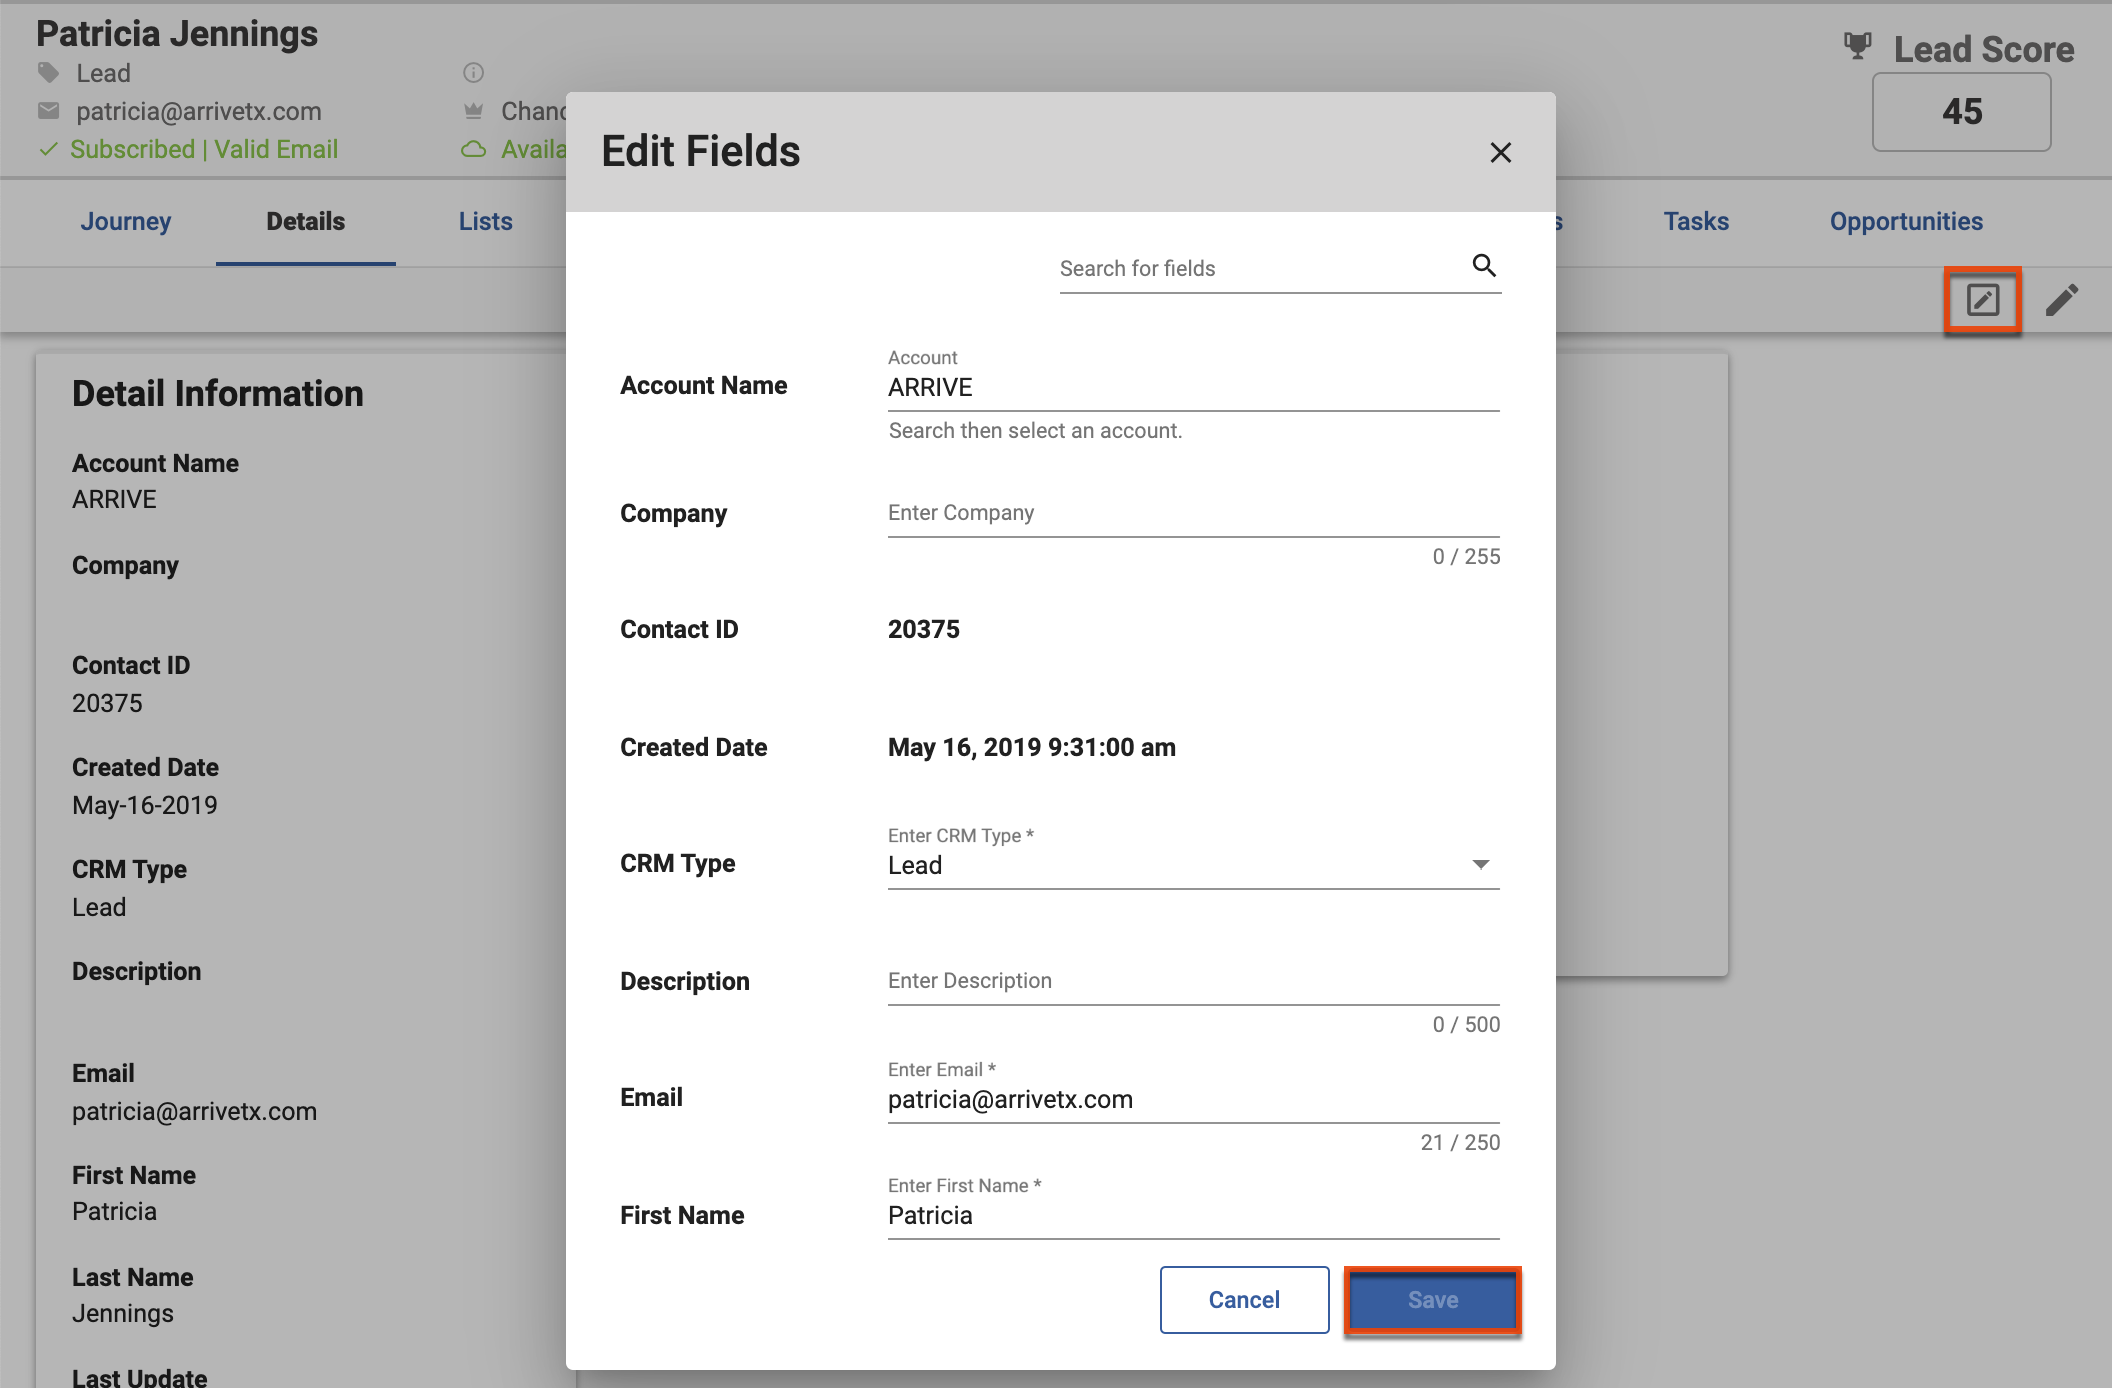
To edit multiple field values:
- Click the Edit Fields icon in the Details toolbar.
- Complete the Edit Fields dialog and then click the Save button.
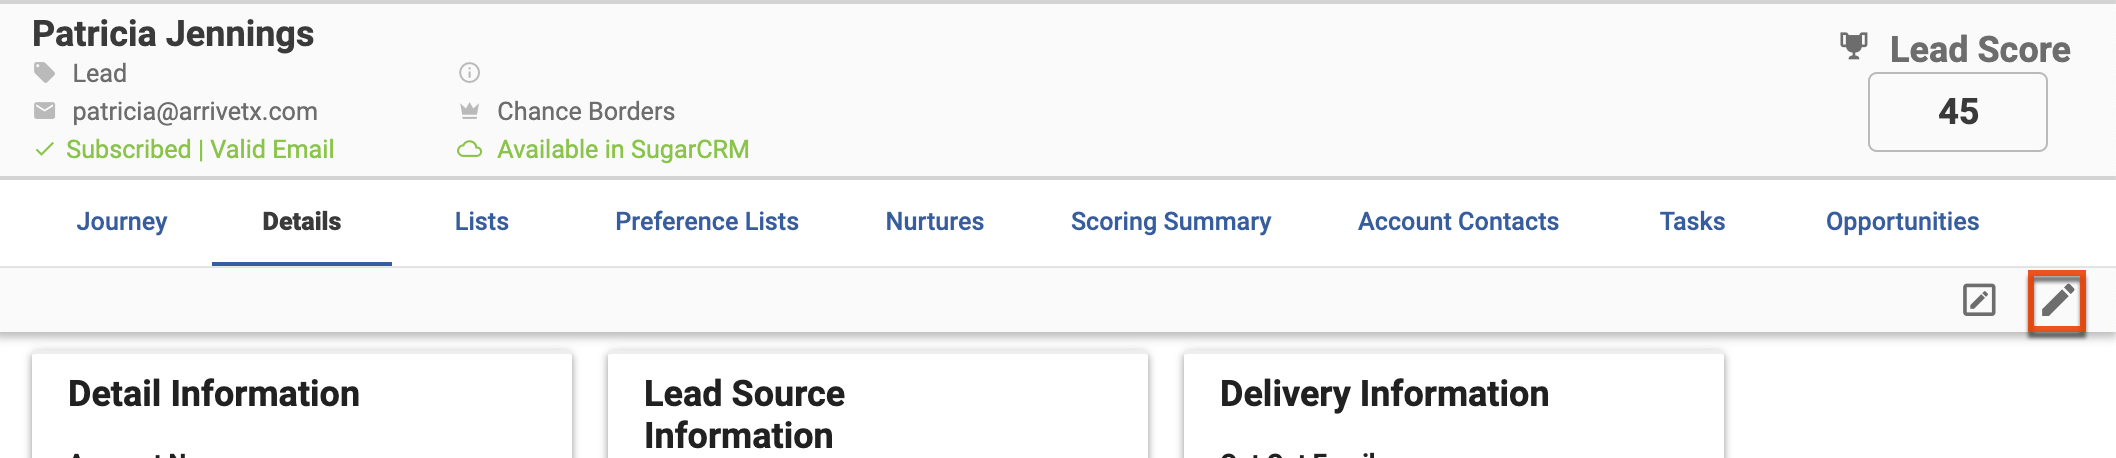
To edit layouts:
- Click the Edit Layout icon in the Details toolbar.
- Drag fields to the desired location, and then click the Save Layout icon in the Details toolbar.
- Complete the Save Layout dialog, and then click the Save button.
Note: You can grant role-based access to your edited layout by selecting the "Save as new layout" option. Refer to the Role-Based Records Layout page for more information.
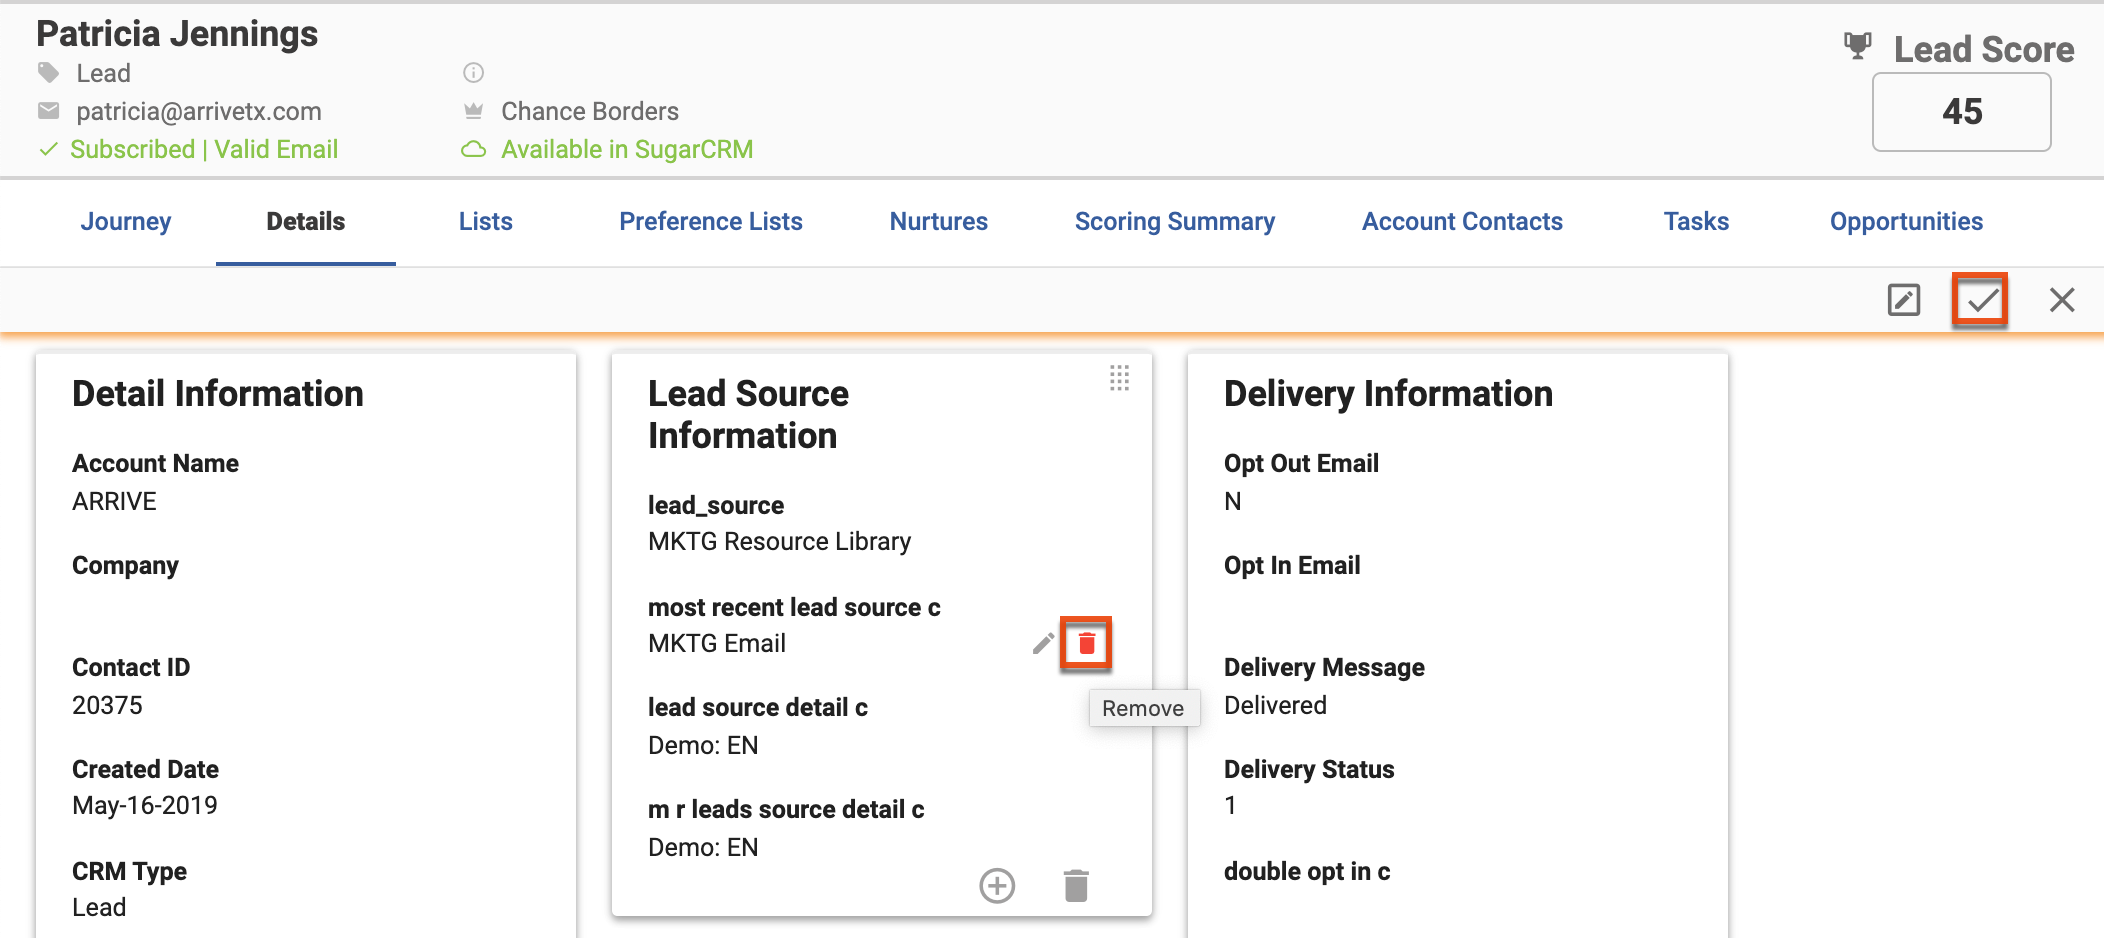
To delete fields:
- Click the Edit Layout icon in the Details toolbar.
- Mouse over the field and then click the Delete icon.
- Click the Remove button to confirm.
- Click the Save Layout icon in the Details toolbar.
Creating Tasks and Opportunities
To assign a task or opportunity to a contact or lead:
- Navigate to the lead or contact card.
- Click the Create button in the toolbar, and then select Task or Opportunity.
- Complete the Create Task or Create Opportunity dialog, and then click the Create button. The new task or opportunity is added to the Tasks or Opportunities tab on the card.
Updating Lead and Contact Records for GDPR Compliance
If your lead and contact records existed before GDPR regulations were enacted, then you may need to take steps to ensure compliance. The following is our recommendation for one way to ensure GDPR compliance, but we advise you to always consult with your legal team in regard to any method you take to ensure it fits with the guidelines required for your business.
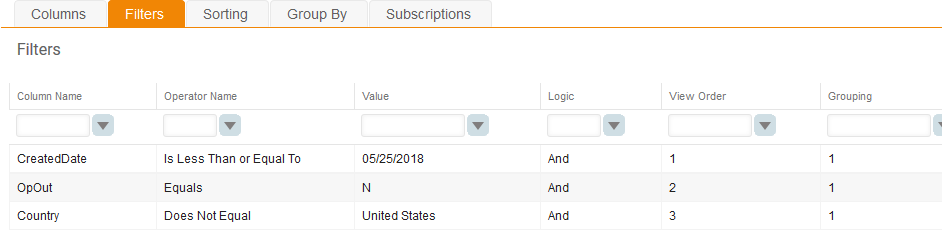
- Create a segmentation with the following filter:
Contacts.CreatedDate less than May 25 2018 AND OpOut = N - Add a filter to target your EU customers (e.g., Country or Region field).
- Create a Page with an embedded Form asking for consent to receive emails.
- Leave the contacts who responded and confirmed consent as OpOut = N.
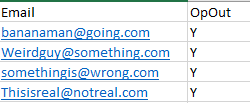
- For contacts who did not respond, export those records with two columns:
Email and OpOut = Y.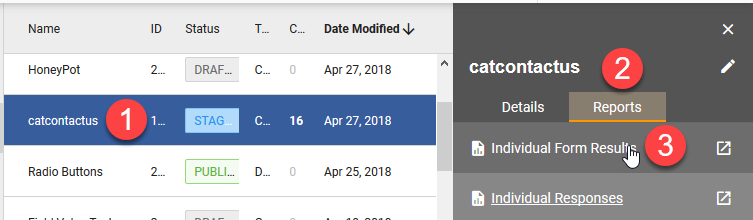
- Import those records.
Your database will now be updated with GDPR compliant records. Alternatively, you may choose to create a custom field to capture this data instead, and then Mass Update Contacts by segmentation to the OpOut field once you have collected the data.
Candidates
You can classify records in Sugar Market as candidates, in addition to leads or contacts. Since candidates are used in some CRMs to represent a person who is seeking a job, this is a useful distinction for staffing and recruiting firms.
Managing Candidates
Candidates are available in the Leads and Contacts section and have their own cards that are identical to lead and contact cards. If you do not see candidates available in your Sugar Market instance, then contact Sugar Support to add the required permissions.
Accessing Candidates Permissions
The following permissions allow you to access the Candidate type:
After being enabled by Sugar Market Support, we recommend you add the above permissions to a role, including the Admin Navigation role.
Buyer's Journey Overview
The Buyer's Journey displays the entire lifecycle of a prospect's marketing activity, from every email click to events attended across time. The Buyer's Journey is available in both Sugar Market and directly in your CRM via an Iframe.
Buyer's Journey in Sugar Market
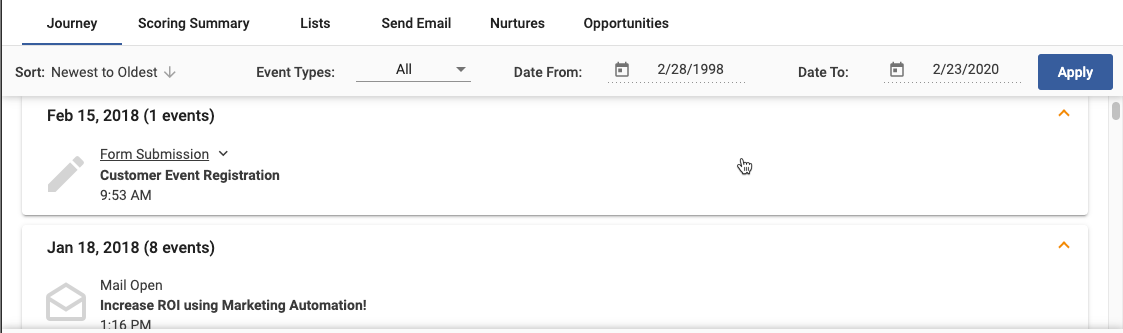
Contained inside the Lead/Contact Card, this chronological journey can quickly reveal the quality and overall interest of the lead or contact so you can take action immediately.

Working in the Buyer's Journey
- Use the sort options at the top of the journey to display the data in your preferred format, and then click the Apply button.
- Click the arrow at the top left of each date card to collapse the card. Click again to expand.
- Click the title of the event to open the relevant page or email in a new page.
Event Types:
- Web Hit: The number of pages hit and the timestamps of the visit duration. The number of pages is clickable and, when expanded, shows the URLs of all pages hit, including timestamps.
- Page Visit: The name of the web page visited. Click the name of the page to navigate to the page.
- Email Sent: The subject line of the email sent. Click the name of the email to view the HTML, including the From, To, and Email Name.
- Email Open: The number of times a contact opened the email and the subject line of the email sent. Click the name of the email to display a pop-up with the email's HTML, the From, To, and the Email Name.
- Email Click: The number of links clicked and the subject line of the email. Click the name of the email to display a pop-up with the email's HTML, the From, To, and the Email Name. The words "Email Clicked" show the specific links clicked by the contact.
- Unsubscribe: The subject line of the opted-out email. Click the name of the email to display a pop-up with the email's HTML, the From, To, and the Email Name.
- Landing Page Completed: The name of the hosted landing page completed. Drill in to display the questions and answers for that form.
- Event Registration: The name of the event for which the contact registered. If there is a registration landing page, drill in to display the questions.
- Event Attended: The name of the event the contact attended.
- Tracked Link Click: The shortened URL that was clicked (previously called Itty Bitty and landing page redirects). Click the URL to redirect to the link's location in another browser tab.
- Social Campaign Click: Users with the Oktopost add-on can see when their lead or contact clicked on a social campaign inside the Buyer's Journey. With easy-to-recognize icons displaying the social channel, campaign, and post the lead/contact clicked, you can better understand other campaign types that may influence the buyer.
Buyer's Journey iframe
The Buyer's Journey iframe allows your CRM users to view and interact directly with the Sugar Market Buyer's journey in your CRM. For more information on the instance and user prerequisites to access the iframe, please refer to the Integration Overview: All CRM Types Guide guide page. For more information on adding the iframe to your CRM, please refer to the guide page specific to your CRM.
To learn more about the iframe in other CRMs, please refer to the guide page specific to your CRM
Accessing the iframe
To access the iframe in SugarCRM, open a lead or contact record view and click the View in Sugar Market button. To learn how to access the iframe in other CRMs, please refer to the guide page specific to your CRM
Using the iframe
CRM users can access the following record tabs via the iframe.
- Journey: Timeline of the contact's activity that you can filter by type and date.
- Lists: The lead or contact's distribution and suppression lists.
- Nurtures: All of the nurtures where the lead or contact is enrolled.
- Scoring Summary: The scoring details for the selected scoring profile.
- Send Email: Email composer to send emails and email templates to the contact or lead.
- Opportunities: The opportunities associated with the lead contact.
Journey Tab
The Buyer's Journey tab displays the entire lifecycle of a prospect marketing activity.
Note: Forms submitted via Oktopost display the following social icon to help distinguish them from standard form submissions, which are identified with the pencil icon:
Scoring Summary Tab
The Scoring Summary displays the actions a particular lead/contact took to get to the score provided in the selected Scoring Profile. Use the Scoring Profile dropdown at the top of the page to switch between scoring profiles and see how people are scoring for other models.

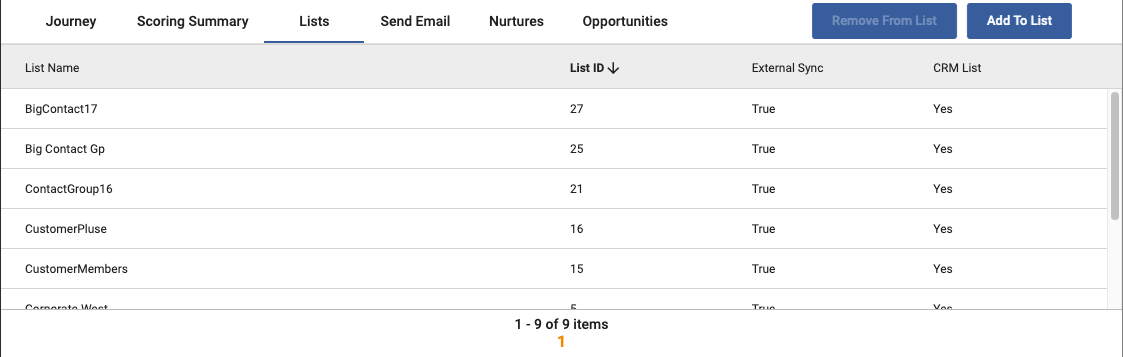
Lists Tab
The Lists tab displays all the distribution lists of which the contact/lead is a member in Sugar Market. If you have permissions, you can add or remove this lead from a Sugar Market-generated distribution list.
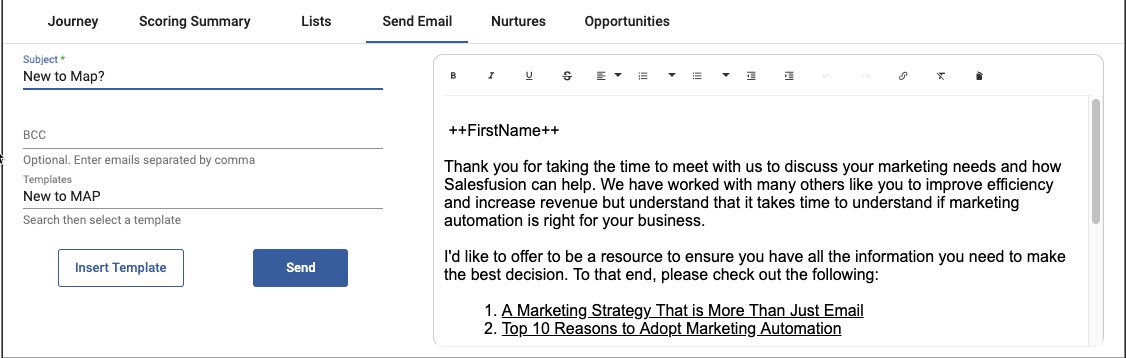
Send Email Tab
Send Email allows you to send a templated one-off email to a particular lead/contact. The email is sent and tracked by Sugar Market and displayed in the Journey as a tracked item. You can create templates in Sugar Market, giving the marketer the ability to allow/disallow certain templates from being sent from the Iframe.
Note: For users to see legacy email templates displayed in the dropdown list, the "Make template available to Sales?" option must be enabled in the template and the user must be assigned to the same role as the user who created the template.
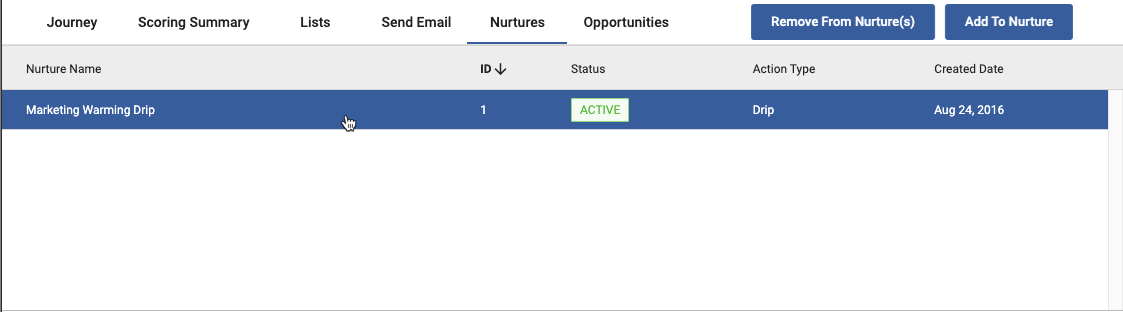
Nurtures Tab
The Nurtures tab displays all active nurtures of which the lead/contact is a recipient. You can also add or remove the lead/contact from a nurture in Sugar Market.
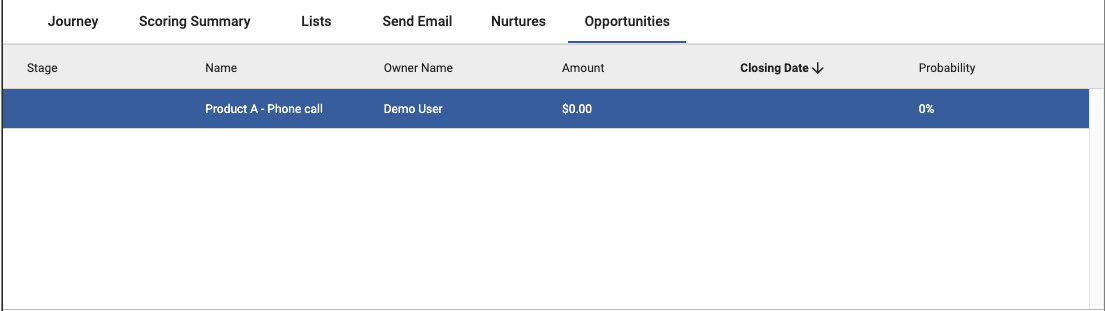
Opportunities Tab
The Opportunities tab displays all opportunities that have been created in Sugar Market through actions such as scoring profiles or nurtures, and all opportunities that have been synced from the CRM related to the Contact.
Mass Updating Contacts
Sugar Market users with the Admin Navigation role can quickly update contact records from Sugar Market's internal CRM using custom reports. This allows you to more easily manage the contact records within your Sugar Market internal CRM. This feature is intended to be used to update your contact records in your Sugar Market database. When Sugar Market is integrated with an external CRM, we always recommend making changes to your contact records in your external CRM and letting those changes sync down to Sugar Market.
Important: Changes made to contact records through "Mass Update Contacts" may get pushed to the contact records in your integrated CRM, depending on sync settings and timing. For example, if your sync settings are set to update contact records in your CRM, you run a "Mass Update Contacts" and a Sugar Market activity prompts the update of those records before the next sync, then the contact records in your CRM will be overwritten with the changes you made to the contact records in Sugar Market.
To mass update contacts:
- From the user menu, click "Admin".
- In the CRM Administrator section, within the Data tab, click "Mass Update Contacts".
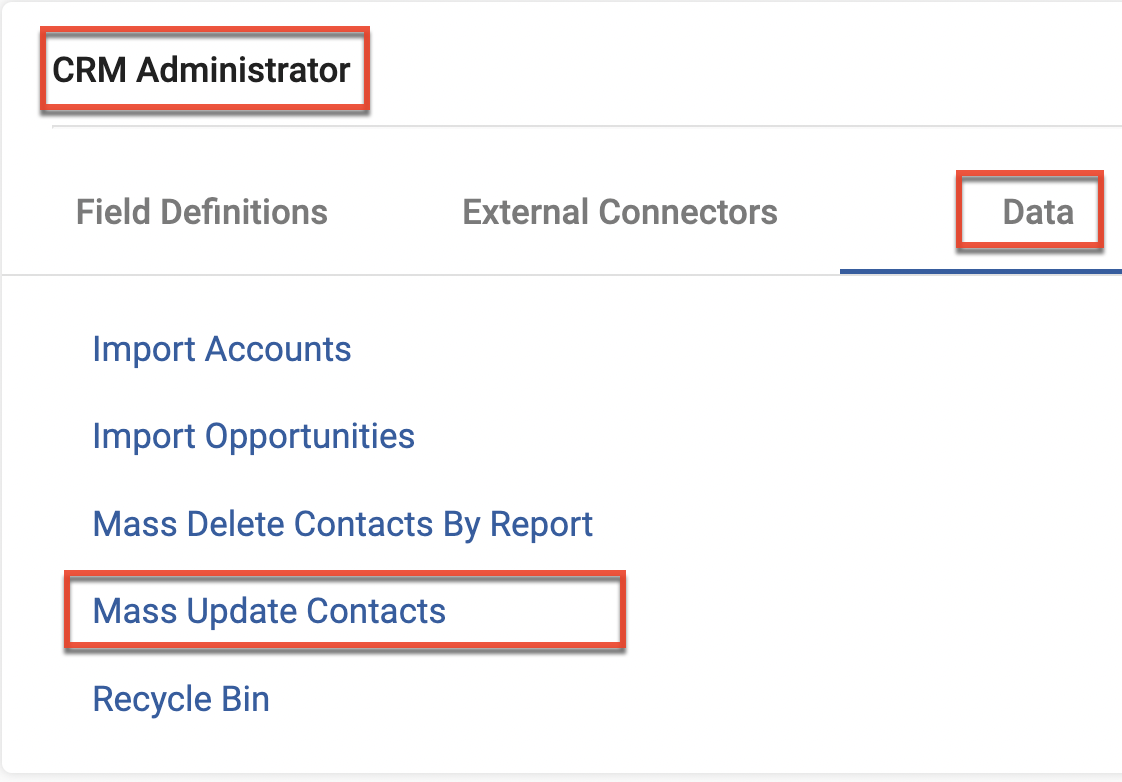
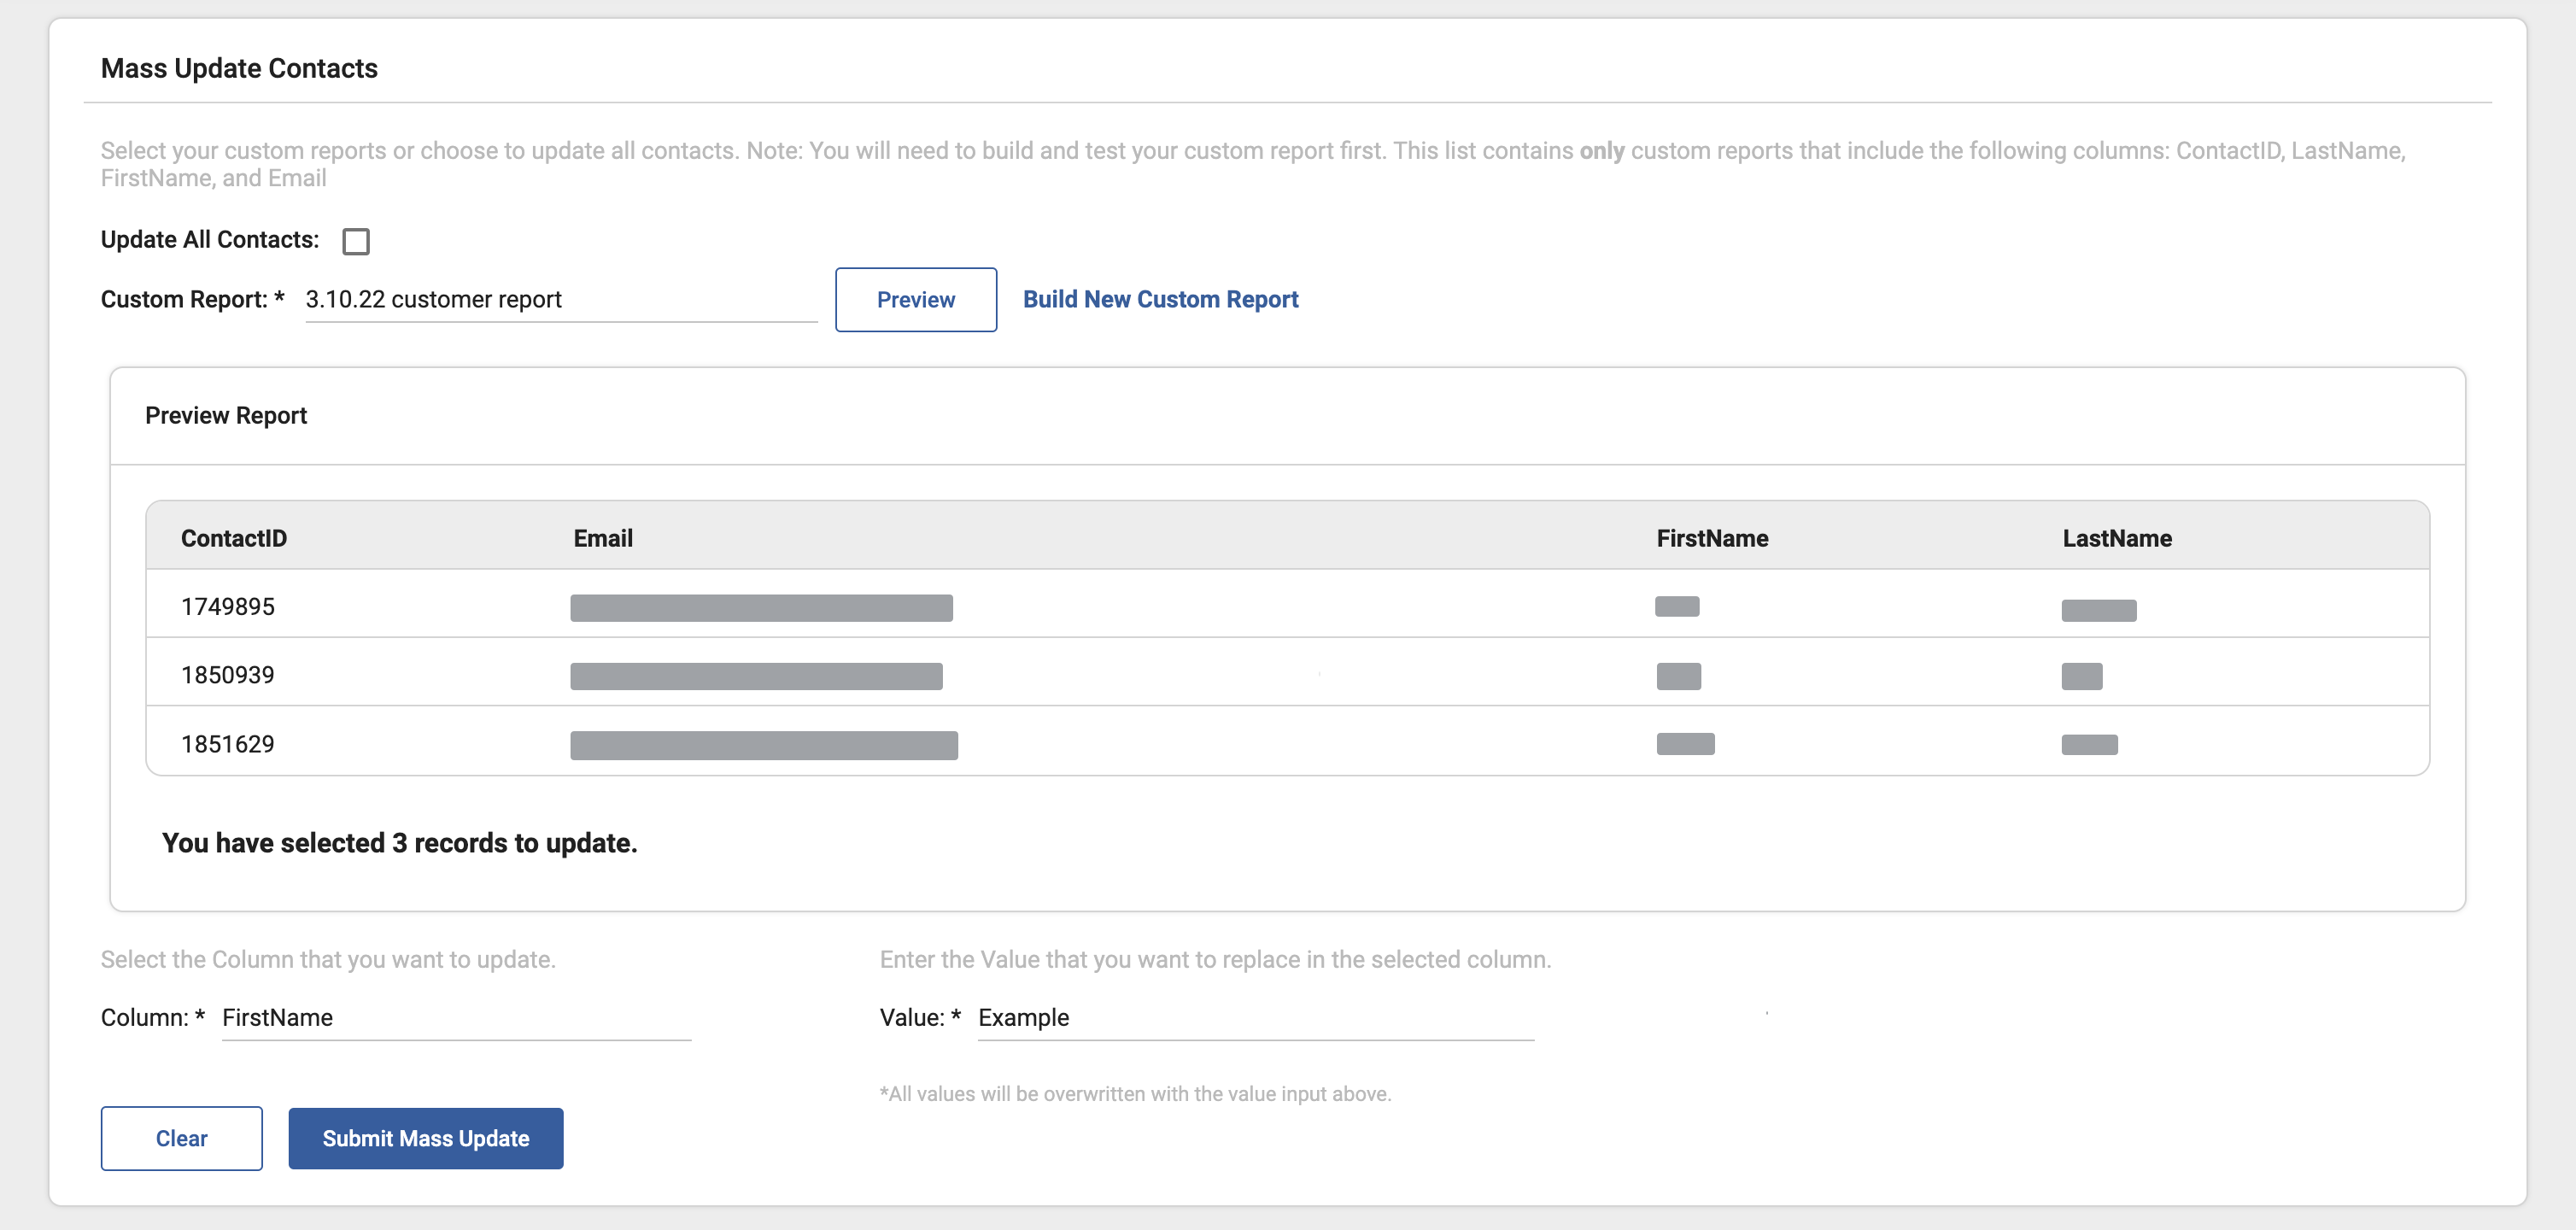
- Check the Update All Contacts checkbox field to update all contacts in your Sugar Market internal CRM. To update only contacts from a specific custom report, select a custom report from the Custom Report dropdown field. Note: You will only be able to select custom reports that include the following columns: ContactID, LastName, FirstName, and Email. If there are no valid custom reports available you can click the Build New Custom Report link to create a new valid custom report.
- Once a custom report has been selected click the Preview button to view a sample of the report and the total number of contacts that will be updated. This step will be skipped if you chose to update all of your contacts.
- After review, select the column you wish to update using the Column dropdown field.
- Enter the updated value for the selected column in the Value field.
- Click the Submit Mass Update button to update the selected column with the updated value for the selected contacts. You will receive an email notification when the update is complete
Mass Deleting Contacts
Similar to mass updating contacts, Sugar Market users with the Admin Navigation role can quickly delete contact records from Sugar Market's internal CRM using custom reports. This feature is intended to be used for deleting unwanted contact records from your Sugar Market database only. If your Sugar Market instance is integrated with an external CRM, the contacts can potentially be re-created, depending on your CRM integration sync settings. Deleting contact records from Sugar Market will not delete records from your integrated CRM.
Note: Mass Updating Contacts uses custom reports. We recommend you confirm the custom report you will use works as expected before proceeding with a mass update.
When you mass delete contacts, the following occurs:
- Contact records are deleted from Sugar Market's internal CRM and cannot be recovered.
- Contact records are removed from distribution lists, reports, and nurtures.
- Deleted contact records may still appear in email, nurture, and landing page statistics.
Warning: Deleting data from your Sugar Market account includes inherent risks, including the possibility of creating duplicate leads in your external CRM and potential loss of important contact history necessary for accurate lead scores and customer journeys. Please consult with Support before deleting any data.
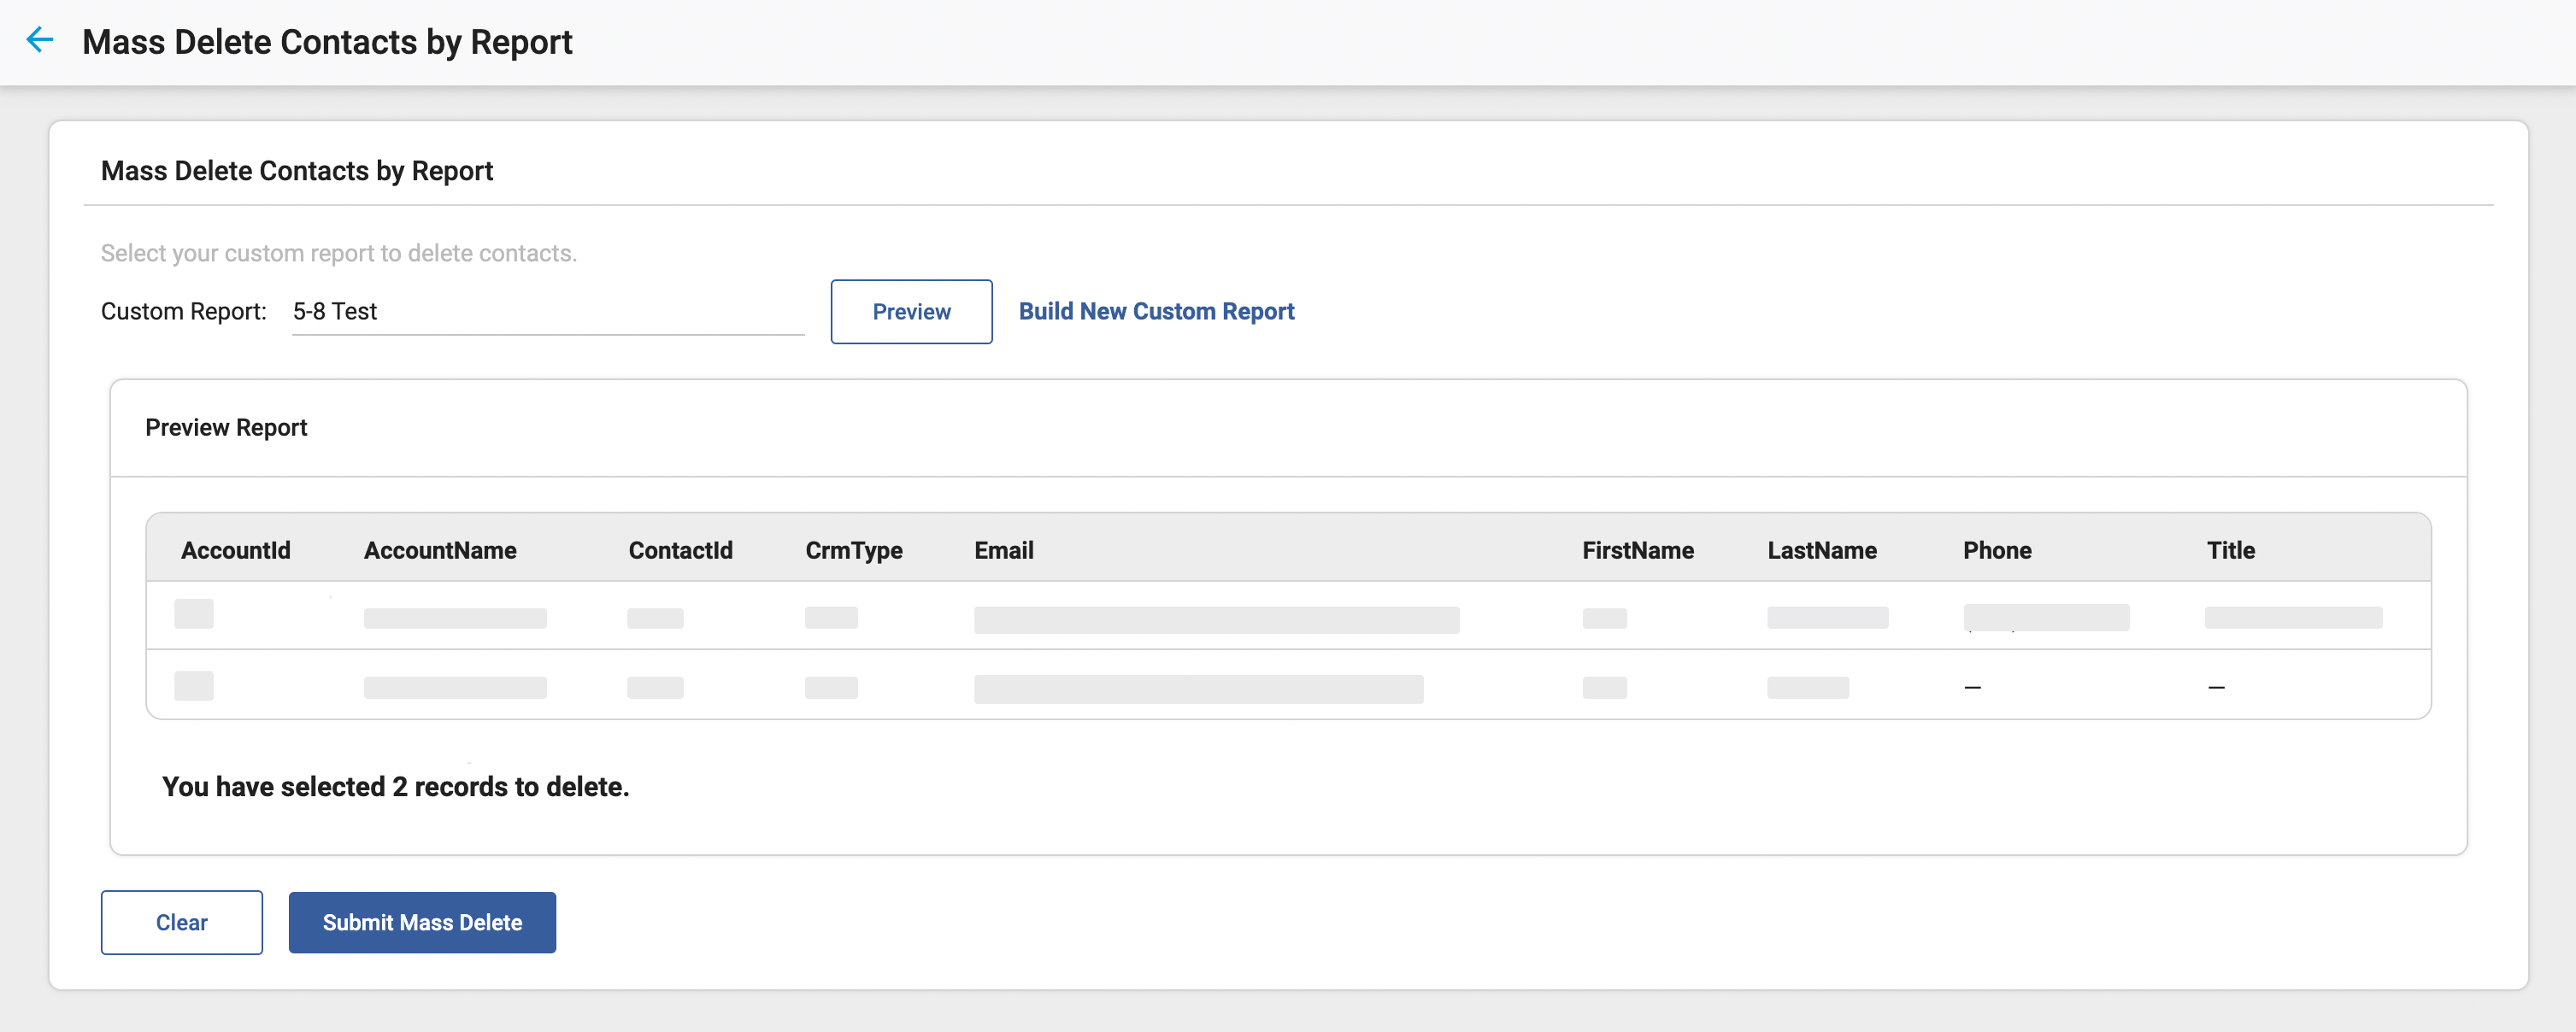
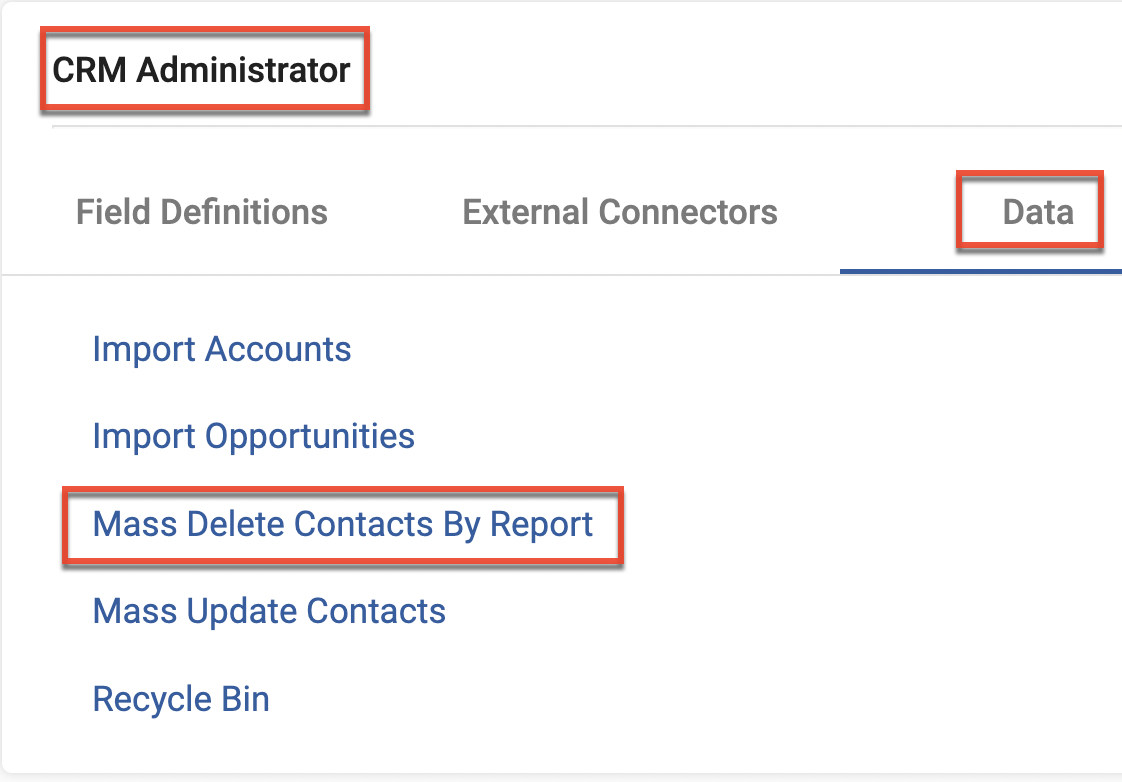
Follow these steps to mass delete contacts:
- From the user menu, click "Admin".
- In the CRM Administrator section, within the Data tab, click "Mass Delete Contacts By Report".
- Select an existing custom report from the dropdown list. You can also click the Build New Report link to create a new custom report.
Note: Reports used for mass deletion must include a "Contacts.ContactId" or "ContactId" column. Column display names are not case-sensitive. - Click the Preview button to view a preview of the custom report selected and the total number of contacts that will be deleted.
- Click the Submit Mass Delete button to delete the contacts included in the selected custom report.