Nurture Builder 1.0
Overview
This page explains how to create automated Trigger Nurture campaigns and how to schedule a controlled Drip Nurture campaign in Sugar Market's legacy nurture builder. Please refer to the Sugar Market User Guide for information on the latest nurture builder.
Content Types
Content forms the foundation of your lead nurture programs. Below is a list of suggestions for content worth including in your nurture campaigns: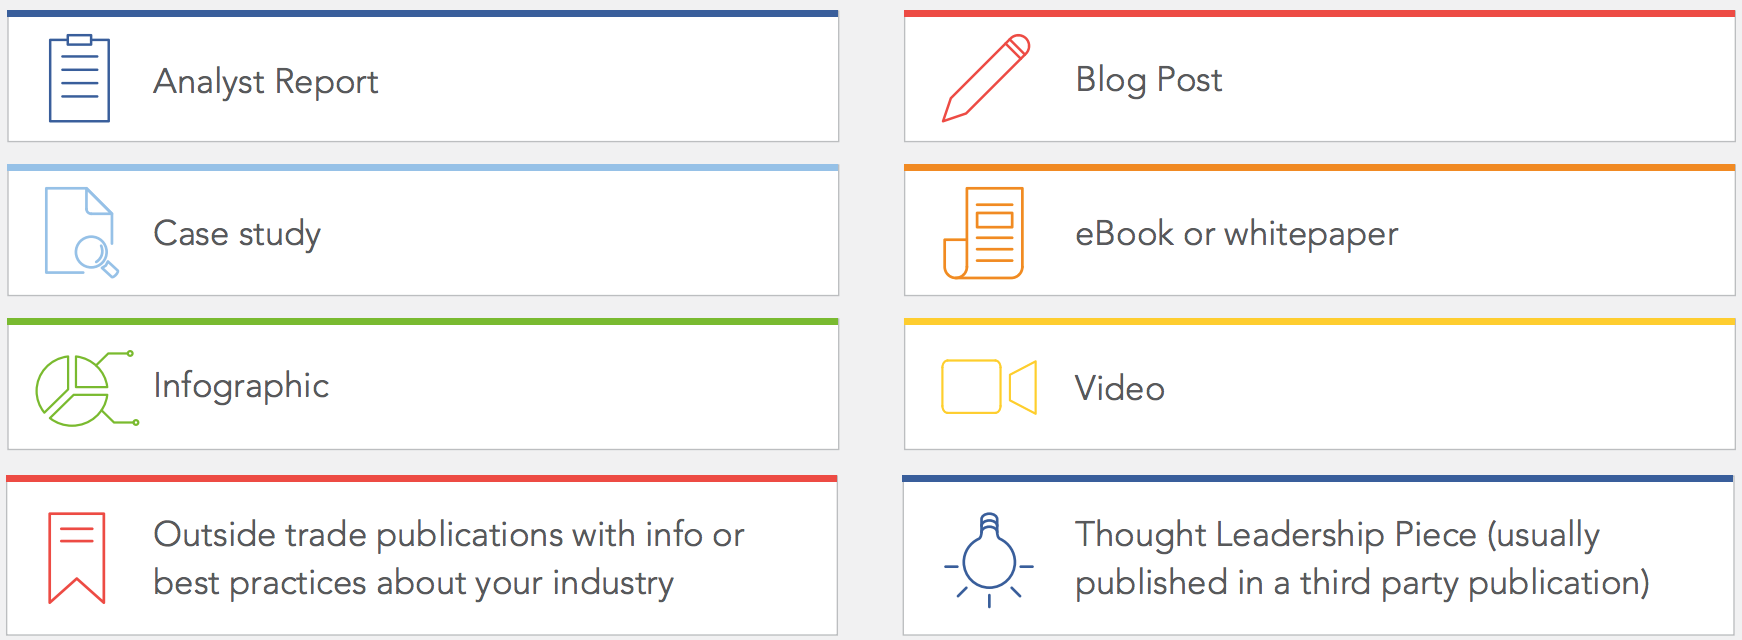
Drip Nurture vs. Trigger Nurture
Within the Nurture module, Sugar Market offers two different types of nurtures: Drip Nurtures and Trigger Nurtures.
While both types of nurture support similar functionality and the same list of actions, there are two questions you should ask yourself when deciding whether or not to create a Drip vs Trigger nurture:
- Who are your nurture members?
- What is the first step in your nurture flow?
Drip nurtures require you start with a list of recipients, a scheduled email send date and time.
The trigger nurture is the most flexible type. If you wish to start your nurture with any step other than send an email or if you are dynamically adding members to your nurture through a form complete, lead scoring or event listener, then you should select trigger nurture for your type.
In addition to the powerful conditional steps which allow you to segment and target your communication, nurture contains the following action steps:
- Alert - Notify Contact Owner
- Alert - Notify Role/Group
- CRM Action - Add Opportunity
- CRM Action - Add Task
- CRM Action - Push to External CRM
- CRM Action - Update Contact/Lead via Template
- Marketing Action - Add to Another Nurture
- Marketing Action - Add to Distribution List
- Marketing Action - Remove from Distribution List
Creating a Drip Nurture
The following example will walk through how to build a drip nurture campaign that starts with a recipient list and a scheduled email send.
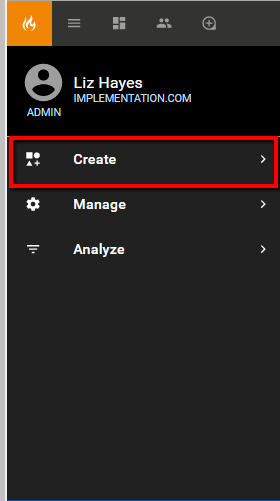
- Navigate to Create > Campaign > Nurture.
- Set up the basic details for your nurture:
- Enter the name of the nurture campaign.
- Select 'Drip campaign' for our example.
- Select a template to start the campaign.
- Establish the date and time the campaign will be sent.
- Choose a folder for organization.
- Enter a description and click 'Next'.
- Establish Date and Time Rules according to your preferences
- For our example, choose to suppress emails on the weekends.
- Keep in mind that the nurture throttle checks all campaigns (blast, drip, trigger, nurture) and holds the next nurture email until the contact/lead is x minutes/hours/days clear of the most recent email.
- Click 'Next.'
- Add your recipient lists and click 'Next'.
- Add any lists you would like to be excluded and click 'Next'.
- Review the confirmation screen to ensure all information is accurate and click 'Finish'.
Setting Up a Drip Nurture Flow
- Right click on the 'Send Email with Email Builder' to view the menu of options.
- Select 'Edit Step' to update campaign details such as the name, subject, from and reply-to options. You should also review and modify the email content, making sure there are links to your website and valuable content. Once your email is correct, click 'Save & Return' to go back to your Nurture.
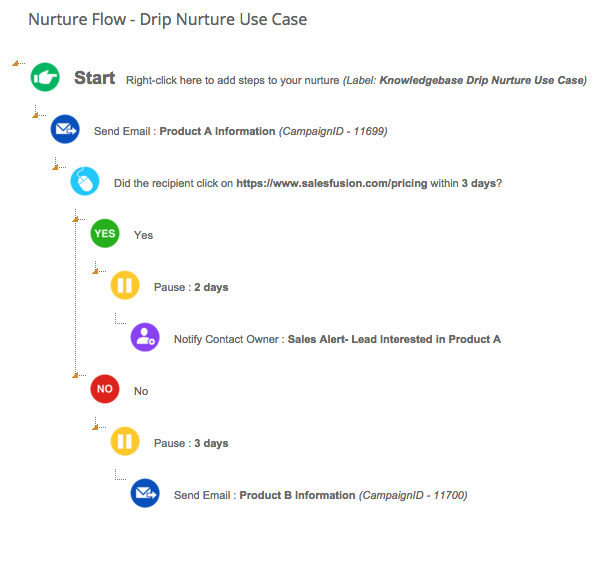
- Now break out the nurture to 2 branches: Those who click on the email and those who do not.
- Right-click the email you just modified and select 'Did Recipient Click a Particular Link in Email'. Select your link and enter 3 for the number of days you want to give the recipient to click the email before the system checks for the click.
- Right click on the yes branch and add a 'Pause' of 2 days.
- Establish the action you would like to take when they do click the email by right clicking 'Yes' and selecting 'Add Pause'. Enter a pause of 2 days and then continue to build out this branch. To do so, right click on the pause and then add the action 'Add Alert: Notify Contact Owner'.
- Establish the action you would like to take when they do not click the email, by right clicking 'No' and selecting 'Add Pause'. Enter a pause of 3 days and then follow the pause with the action 'Send Email'.
- Continue the steps above referring to the Adding Steps section to build out a nurture campaign to keep customers engaged and take action when they show buying signals.
Creating a Trigger Nurture
In this example, you will build a nurture for re-marketing lost opportunities. In your nurture flow, you will "drip" out a sequence of emails. Even though the flow will resemble targeted drip marketing, you will select trigger for your nurture type. This is because you will use an action (event listener) to put leads into the nurture and you will begin with a pause rather than an email at a set date and time. The benefit of using a trigger nurture is that you can set it up and the system will automatically add and nurture the leads that meet your specified criteria.
Step 1: Set up Your Nurture
Click 'New' to create a new Nurture.
- Navigate to Create > Campaign > Nurture.
- Set up the basic details for your nurture:
- Enter the name of the nurture campaign.
- Select Trigger as your type for our example.
- Choose a folder for organization.
- Enter a description and click 'Next'.
- Establish Date and Time Rules according to your preferences
- Depending upon your industry and practices, you may wish to suppress emails on the weekends and suppress emails outside of business hours.
- Click 'Next'.
- Add any lists you would like to be excluded and click 'Next'. For example, you may wish to exclude a list of competitors, current customers etc.
- Review the confirmation screen to ensure all information is accurate and click 'Finish'.
Create a Trigger Nurture Flow
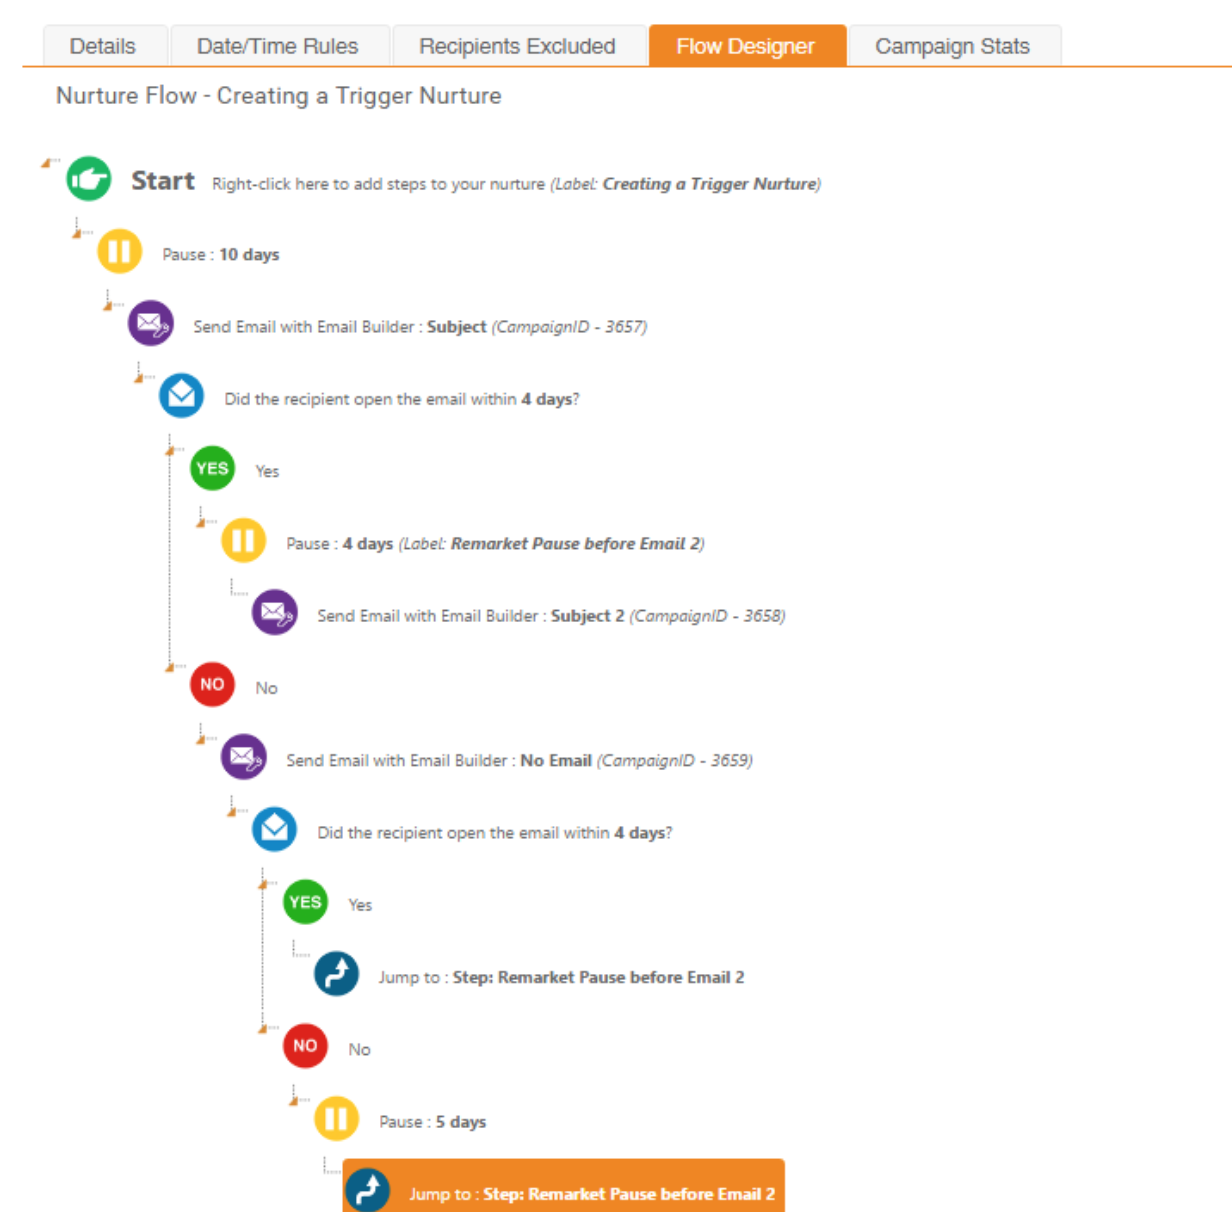
In this example, your first step will be a pause. This is to prevent your leads from getting an email the moment the opportunity is lost and the lead is marked for remarketing.
- Right click on the 'Start' to view the menu of options and select 'Add Pause'. This will prompt you to enter a pause length. Remember leads will enter this nurture as soon as they are marked "remarket" on their contact/lead card. You will use a pause to keep them from immediately getting an email. In our example, set the pause to 10 days.
- Right click on the pause and select 'Send Email' as your next step. Select your email template and click save. You will then right click on the 'Send Email' step and select 'Edit Step'. You will edit your subject, from/reply and email body to contain the desired content.
- Now break the email into two branches: Those who opened the email and those who did not.
- Right click on the 'Send Email' step and add a 'Did recipient open the email'. You will then specify to check after 4 days.
- On the 'No' branch, you will send a subject swap email. You can right click on your first 'Send Email' step and select copy branch. Move down to the 'No' branch, right click and select 'Paste Branch' this will paste your email along with the 'Did the recipient open the email' step.
- On the 'Yes' branch, you will pause an additional 2-6 days, add a jump label to this step and then send a second email. To do this right click to add 'Pause' step and set your number of days. Then right click on your 'Pause' step again and add a jump label called "Remarket Pause before Email 2". Finally, you can right click on the 'Pause' step and select 'Send Email'.
- Now that you have set up the 'Yes' and 'No' branch for your first email, we will return our subject swap recipients back to the main flow so that you can continue to nurture them.
- Under 'Did recipient open email within x days - Yes' step underneath your subject swap. Right click on this step and select 'Jump to another step'. You will select your Remarket Nurture and the 'Remarket Pause before Email 2' step that you just created and save. This will return your leads who open the subject swap email back to the pause before the second email. This will set them back on the main communication path.
- You then should decide what is the best step for everyone who did not open Email 1 or the subject swap for Email 1. At this point, you may want to pause for a greater length of time and then put them back in the flow to receive Email 2 or stop campaigning. In this example, an additional 5-day pause was added for recipients who did not open the first email or the subject swap; however, in a remarket nurture you may wish to pause for a month or longer after a couple of emails with no engagement.
Continue to add appropriate pauses and email campaigns as desired. In a remarket situation make sure you are thinking about the timing of your emails. For example, if most of your competitors utilize 1-year contracts you will want to time your communication with that information in mind.
Step 3: Test Your Nurture
Testing your nurture is an important part of reviewing your content and timing before activating.
Step 4: Activate the Nurture
Once you have made the necessary adjustments to your nurture campaign, you will then click 'Save and Stay' and then 'Activate.' After you click Activate you will be prompted with the 'Activate Nurture Design' pop up window. Click 'Proceed' to make your nurture active. Remember because this is a trigger nurture, it will not immediately send to anyone until we set up the action that qualifies leads/contacts for our nurture. In this example, you will navigate to Create > Lead/Contact Listener to establish the criteria that will determine who should enter your nurture in the future.
Step 5: Setup Your Action (Event Listener)
- From the right hand User Menu, select 'Account Configuration'.
- Go to 'Change Tracking' and select the contact table. In the left hand box, identify your lead status or contact field where you identify leads/contacts for "remarket". Select that field and use the single arrow to move it to the right hand box. Then select the 'Track Changes' button. This will enable Sugar Market to constantly listen to this field for any changes.
- Select Lead/Contact Listener from the Create menu.
- Name the listener 'Remarket Nurture', select 'On Update' for event type, select 'Contacts' for monitored, enter a description and click create.
- In the Event Listener page, under Event Listener Conditional Values click the 'Add' button. For your event select drop down select 'Changes To' then select the contact field that contains your Lead Status remarket value and enter the value 'Remarket'. In our example the field or column is the Status field and the value we are looking for is remarket; however, when building out your own nurture make sure you identify the appropriate field and value for your organization.
- Under Event Activities click the 'Add' button. Select 'Add To Nurture' as your action and then select the name of your remarket nurture. If you are unable to find your nurture as an option, you likely need to first activate your nurture.
- Ensure that your listener is set to active and save and return. This will begin feeding leads/contacts into your nurture whose status field is changed to remarket.
*Note: Your event listener must be active for contacts/leads who meet the criteria to be added to your nurture. This listener will not add all contacts whose status is currently equal to remarket. If you need to add existing "remarket" leads/contacts into your nurture you can create a report and add recipients to your nurture from the action drop down in the nurture grid.
Adding Leads/Contacts To Trigger Nurtures
How can a lead/contact get added to a Trigger Nurture?
As we know, a trigger nurture does not require an email campaign as a first step. Contacts/Leads are added to a trigger nurture based on specific actions:
Landing Page
Using Next Page Logic within a Landing Page, you are able to add a contact to a trigger nurture. While editing your Landing Page, from the 'Page Designer' select the 'Next Page Logic' tab. Click 'New' in the upper right-hand corner. Under the 'Actions' section, select 'Add' in the upper right hand corner. From the dropdown of actions, you will see 'Add to nurture'. It will then prompt you to select the name of the nurture and which step you would like to add the contact to.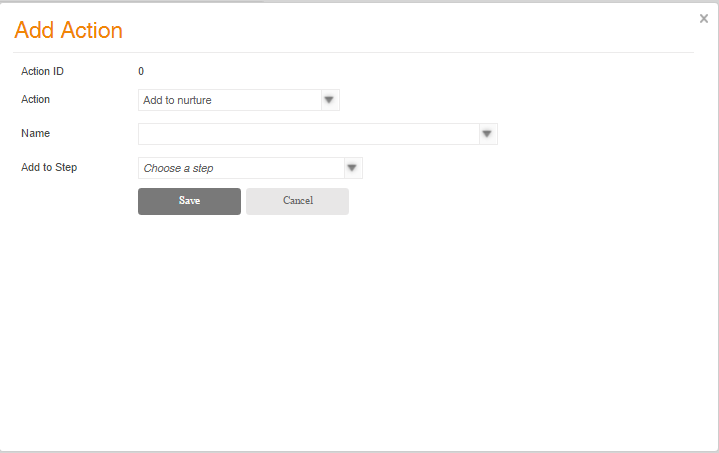
Event Listener
Open your Listener and under 'Event Activities' click 'Add' in the upper right hand corner. From the dropdown of actions, you will see 'Add to nurture'. It will then prompt you to select the name of the nurture and which step you would like to add the contact to.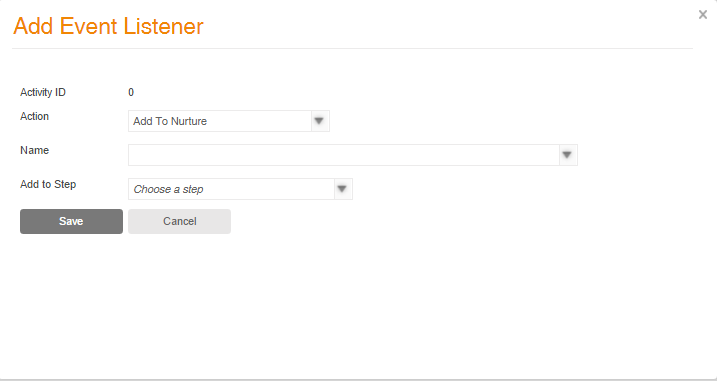
Scoring
Within any Scoring Profile, under the 'Lead Stage Thresholds' section, click 'New' in the upper righthand corner. Select 'Add' next to 'Profile Scoring Actions'. From the dropdown of actions, you will see 'Add to nurture'. It will then prompt you to select the name of the nurture and which step you would like to add the contact to.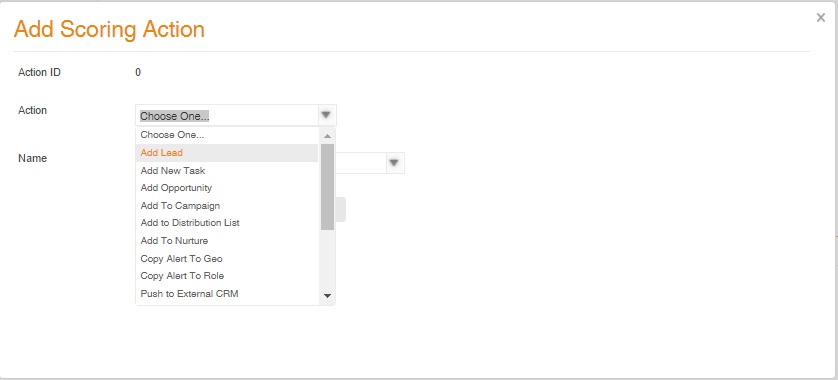
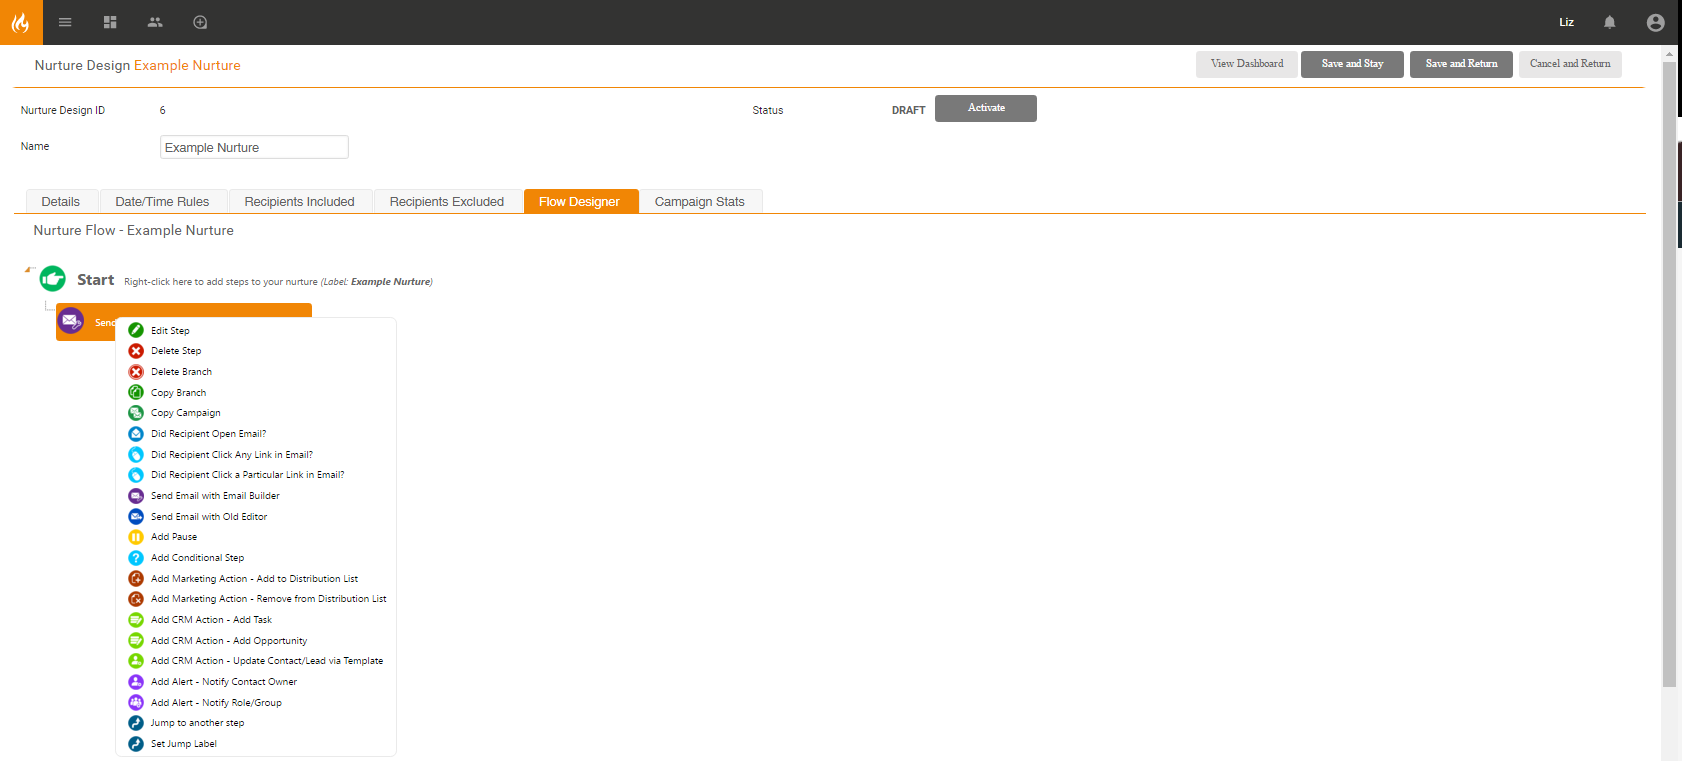
Adding Steps
Beside each step is an indicator as to which type of step each is and whether or not a specific step will occur immediately or over a given time period. Steps may be timed or instant, and instant steps may be conditional. Both timed and instant steps can optionally be set as "jump" steps, which enables them to be accessible by other steps even if they are not in the flow.
Timed Steps
A timed step specifies that a timer is related to the step in some manner. Records will often sit in these steps for specified amounts of time by the user unless other criteria are met. Once the criteria of the step are met, the record will move forward immediately.
- Did Recipient Open Email Within : This option will evaluate whether or not a record opened an email within a given time frame. For example, if set to three days, it will check the open status of the records within this step for those three days. At the end of the three day period, all records that have still not opened the email will move into the corresponding "No" branch. If a record opens the email at any point during the three day evaluation period, the record would move into the corresponding "Yes" branch immediately.
- Did Recipient Click Any Link in Email : This option will evaluate whether or not a record clicked any link in an email within a given time frame. For example, if set to three days, it will check the clicked status of the records within this step for those three days. At the end of the three day period all records that have still not clicked any link within the email will move into the corresponding "No" branch. If a record clicks any link within the email at any point during the three day evaluation period, the record would move into the corresponding "Yes" branch immediately.
- Did Recipient Click a Particular Link in Email : This option will evaluate whether or not a record clicked a specific link in an email within a given time frame. For example, if set to three days, it will check the clicked status of the particular link for the records within this step for those three days. At the end of the three day period, all records that have still not clicked the specific link within the email will move into the corresponding "No" branch. If a record clicks the specific link within the email at any point during the three day evaluation period, the record would move into the corresponding "Yes" branch immediately.
- Add Pause : This step adds a pause in between other steps. You can specify any duration of time here and choose from time increments in minutes or hours. A record will simply wait in a pause step with no action occurring until the specified amount of time expires. If a nurture is deactivated a pause step will continue to count, however, the record will not move past the pause step until the nurture is reactivated.
- Add Task : This step allows you to select a pre-created task template and push the task to your CRM.. This step is dependent on Sugar Market pushing data to your CRM; this action may take some time to appear with your CRM. The Sugar Market sync runs every 20 to 25 minutes and you should see your data within that time frame.
- Add Opportunity : This step allows you to select a pre-created opportunity and push it to your CRM. As this step is dependent on Sugar Market pushing data to your CRM this action may take some time to appear with your CRM. The Sugar Market sync runs every 20 to 25 minutes and you should see your data within that time frame.
- Update Contact/Lead via Template : This step allows you to select a pre-created contact/lead template and push it to your CRM. You can create a new lead/contact template by navigating to Create > Template > Alert/Update/CRM > New. As this step is dependent on Sugar Market pushing data to your CRM this action may take some time to appear with your CRM. The Sugar Market sync runs every 20 to 25 minutes and you should see your data within that time frame.
Instant Steps
An instant step is a step that occurs immediately upon the record's entrance into that step. Records will not stay in an instant step for any lengthy period of time and will generally move to the following step immediately. An example of an instant step is "Send Email with Email Builder"
- Send Email with Email Builder : This step allows the creation of emails within a nurture using the Email Builder tool, which features the drag and drop component system.
- Send Email with Old Editor : This step allows for the creation of emails within a nurture using the Old Editor. This tool allows for more granular creation using HTML and CSS elements and is no longer recommended for use unless necessary.
- Add Is On List Step : This step will evaluate whether or not the record exists within a specified distribution list. If the record is on the list, they will continue to the corresponding "Yes" branch. If the record does not exist, they will continue on to the corresponding "No" branch. There is no delay or pause in this evaluation. Records will move through this step immediately unless prefaced by a pause. Refer to the Is on List Types and Is on List Examples sections below for more information.
- Add to Distribution List : This Step will add the records to an existing Distribution list once the records reach this point in the nurture.
- Remove from Distribution List : This step can remove records from an existing Distribution list once the record reaches this point in the nurture.
- Notify Contact Owner : This step will send an alert to the user in Sugar Market which owns the record.
- Notify Role/Group : This step allows you to send an alert to a specific role and notify multiple owners. You can select from a pre-created alert template.
Is On List Types
The following list types are available in the Is on List step:
- Segmentations
- Distribution Lists
- Report Builder
- Subscriber Lists
- Past Campaigns
- Campaign Responses (Opened But Not Clicked)
- Campaign Responses (Opened and Clicked)
- Campaign Responses (Did Not Open)
- Landing Page Responses (Started)
- Landing Page Responses (Completed)
- Events (Registered)
- Events (Attended)
- Events (Requested Follow-Up)
- Nurtures (Recipient Has Ever Been Enrolled in Nurture)
- Nurtures (Recipient Completed the Nurture)
- Nurtures (Recipient Currently Active in Nurture)
- Nurtures ( Recipient Removed from Nurture)
Is On List Examples
Evaluating Events
If you select 'Events (Attended)', the nurture will check to see a recipient's attendance status for that particular session within Event Management. This works for Sugar Market hosted webinars, as well as third-party webinars and live events, like trade shows, where a list is imported into the session after the fact.
If the recipient did not register for the session and thereby did not attend, they will be routed down the 'No' path.
Evaluating Landing Page Starts
If the primary call to action of your nurture is for your recipients to convert on a landing page, it is often beneficial to treat those who visited your landing page and did not convert differently than those who have not yet visited the page. This can be done by select 'Landing Page (Starts)' and routing each recipient down the appropriate path.
Note: 'Landing Page (Starts)' will not work on external forms.
Conditional Instant Steps
All conditional steps are instant steps. This step is for the general assessment of contact values/activity and has multiple options detailed as follows:
- Email Delivered : This evaluation determines whether or not records have received a specific campaign. You can choose from any campaign in or outside of the nurture. This step does occur immediately and if evaluating a campaign that has been sent from within the nurture it is advised to place a pause prior in order to allow for Sugar Market and the recipient server to have time to communicate.
- Email Opened : This evaluation determines whether or not records opened a specific campaign. You can select a campaign in our outside of the nurture. When a record passes through this step, the actions occur immediately and, if evaluating a campaign sent from within the nurture, it is advised to place a pause prior in order to allow for Sugar Market and recipient server to have time to communicate.
- Email Clicked : This evaluation determines whether or not records have clicked ANY link within a specified email. You can select a campaign in our outside of the nurture. This step does occur immediately and if evaluating a campaign sent from within the nurture it is advised to place a pause prior in order to allow for Sugar Market and recipient server to have time to communicate.
- Evaluate Contact Field Value : This step will evaluate a specified contact level field that equal the specified value entered. Some examples of this may include: scoring fields, country, region, or email. You can select any standard or custom field for evaluation and input an expected value (EX: FirstName = Tony). Once a record hit this step within a nurture the field will be analyzed for the expected value. If the value matches, the record would then move into the corresponding "Yes" branch immediately, otherwise it will move the "No" branch immediately.
- Evaluate Account Field Value : This step will evaluate any Account level field. Some examples of this may include AccountName, Billing Country or AccountScore. You can select any standard or custom field for evaluation and input and expected value (EX: AccountName = Sugar Market). Once a record hit this step within a nurture the field will be analyzed for the expected value. If the value matches, the record would then move into the corresponding "Yes" branch immediately, otherwise it will move the "No" branch immediately.
- Evaluate Opportunity Field Value : This step will evaluate any Opportunity level field. Some examples of this may include OpportunityName, CloseDate or Amount . You can select any standard or custom field for evaluation and input and expected value (EX: OpportunityName = SF Proposal). Once a record hits this step within a nurture the field will be analyzed for the expected value. If the value matches, the record would then move into the corresponding "Yes" branch immediately, otherwise it will move the "No" branch immediately.
- Landing Page Completion : This step will evaluate if a specific record has completed a landing page. You can select any active landing pages for evaluation. A common use case for this step is to send a landing page link within an email and evaluate whether or not the recipient completed the landing page. As this step evaluates immediately, you would need to place a pause between the email send and the Landing page completion step in order to allow recipients time to complete the landing page.
- Landing Page Question Answer : This step will evaluate a specific field answer on a landing page. You can select from any active landing pages and choose any field from the specific landing page. Once you have selected a field you can choose an operator and input the desired value. As this step evaluates immediately, you would need to place a pause between the email send and the Landing page completion step in order to allow recipients time to complete the landing page.
- Check if ever been in another nurture : This step will evaluate all records that flow through it to check if they have already participated in another specific nurture or all nurtures. Select "Any Nurture" to evaluate all nurtures.
- Web Page Hits : This step evaluates a cookied record's web activity on a specified webpage. You enter the exact URL of the webpage you would like to evaluate on. You can then select a number of hits(each new visit being a hit) and records below that amount will travel into the corresponding "No" step, while records above will move into the "Yes" step. You may also set a date filter to only analyze records with web activity within certain date ranges or a past number of days. It is important to note, that web tracking code must be placed onto the desired website in order for this step to work.
- Web Activity Sessions : This step will evaluate the number of web activity sessions a record has. You can specify a number of hits (visits) and records below that amount will travel into the corresponding "No" step, while records above will move into the "Yes" step. You may also set a date filter to only analyze records with web activity within certain date ranges or a past number of days. It is important to note, that web tracking code must be placed onto the desired website in order for this step to work.
Conditional Step Operators
For a number of the conditional steps, you can select the following operators:
- Equals : This is a direct comparison of values. If the value stored in the database does not directly match the specified value, the record would move the corresponding "No" step of the evaluator.
- Does not Equal : This is a direct comparison of the values. If the value stored in the database does not directly match the specified value, the record would move to the corresponding "Yes" step of the evaluator.
- Starts With : This operator will look at the first few characters specified of a database field value. For example, FirstName "Starts With" "Stephan". This operator can be used with numbers as well as letters and would detect all records whose first name start with the specified characters i.e. Stephanie.
- Contained in : This operator allows the user to specify several possible values. It will then look at the database value and compare against all specified values. If the value in the database matches any of the specified values, the record will then move on the corresponding "Yes" step of the evaluator. It is important to note that for text-based fields the values would need to be wrapped in quotes and separated by a comma like so:
'test@testemail.com','test@testemail2.com','test@testemail3.com'. Numbers only need to be separated by a comma and do not require single quote wrapping. - Not Contained in : This operator allows the user to specify several possible values. It will then look at the database value and compare against all specified values. If the value in the database matches any of the specified values, the record will then move on the corresponding "No" step of the evaluator. If the value in the database does not match any of the specified values, it will move into the corresponding "Yes" step. It is important to note that for text-based fields, the values would need to be wrapped in quotes and separated by a comma like so:
'test@testemail.com','test@testemail2.com','test@testemail3.com'. Numbers only need to be separated by a comma and do not require single quote wrapping. - Contains : This operator will compare a specified value with database values to see if any part of the specified value matches the database value. An example of this would be specifying the value "CA" and if the database value is the word "California" you would receive a match.
Note: The input for these comparisons is not case-sensitive.
Jump Steps
Setting a step as a jump label will indicate that the "Jump to another step" action has access to the designated step. Any step that has a jump label set on it will show up as an option when adding the "Jump to another step" action.
- Jump to another Step : This option allows records to move to another designated step that has been set as a Jump Label. You can select from any labeled steps from within any nurture system-wide. You cannot direct a jump step to point to a previous step in the same nurture.
Activating the Nurture
Once you have made the necessary adjustments to your nurture campaign, you will then click 'Save and Stay' and then 'Activate.' After you click Activate you will be prompted with the 'Activate Nurture Design' pop up window and click 'Proceed'.
Editing Nurtures
You can make edits to a nurture but you must first deactivate it. There are limitations on edits and deletions that can be made. For example, if an action has a recipient that has been processed, then that step cannot be deleted. Once a recipient has passed through a step, the only steps that can be edited are email campaign content (HTML/Body, Subject Line, From etc) and pause lengths.
Including and Excluding Nurture Recipients
How can I designate which contacts or leads should be in my nurture? There are many different ways to include/exclude records. You can use lists, campaign, landing page, event and nurture activity as well as listeners and scoring profiles.
There are multiple ways to include and exclude contacts and leads within the nurture module. Here is a list of your options:
- Reports
- Segmentations
- Distribution Lists
- Past campaign recipients and responses (opened, clicked)
- Landing page completions and responses
- Event registration and attendance
- Past Nurture recipients
- Landing Page Forms using next page logic*
- Event Listeners*
- Lead Scoring Profile actions*
* These are action items typically used for adding recipients to a trigger nurture. For example, you may want to add all warm leads to a nurture. This would be set up in the Lead Scoring Profile under the Threshold section.
Adding Recipients After Activating a Nurture Campaign
Can I add additional recipients to my nurture after I have saved and activated?
A: Yes. Select Marketing and then Nurture from the left hand navigation which will bring you to the nurture grid. From here, you can use the actions drop down arrow next to any active nurture to add recipients, a report, segmentation or distribution list. You can also add an individual record from their lead/contact card using the actions drop down arrow and selecting add to nurture.
Automatically Adding Recipients to Nurture Campaigns
Q: If I have a report or segmentation used as an include list, when additional records meet the report or segmentation criteria are they automatically added to my nurture? When records no longer meet the criteria are they removed?
A: Yes, you build your drip nurture to automatically add new additions to these lists by using the Auto Refresh function. Auto Refresh will automatically check new updates to Reports, Distribution Lists, or Segmentations at hourly, daily, or weekly intervals.
Auto Refresh aims to improve your workflow and overall efficiency by giving you the option to auto-add new recipients to a nurture as new emails get added to your include lists. This feature replaces the need to re-add include lists to a nurture.
On the "Recipients Included" step (step 3) of creating a new drip nurture, you have the option to check an Auto Refresh box and select a time interval. The checkbox will only be enabled if you select either a Report, Distribution List, or Segmentation.
You have three time intervals to select from. This interval tells the nurture how often to check an individual list for any new records. Each auto refresh list can be set to a specific Auto Refresh cycle.
- Every hour
- Every day
- Every week
This means that new records will be added either every hour, every day, or every week, depending on the interval you've chosen for that specific list. The auto-refresh cycle starts at the time of your first activation and it does not queue up records that are added and then removed from the list before the next auto-refresh time.
Reports and Segmentations are dynamic by nature. Records fall in and out of these lists as their details are evaluated against the report or segmentation criteria or as you update the criteria itself. The Auto Refresh feature for include lists on nurture utilizes the dynamic nature of these lists and automatically adds new emails to the nurture.
Note: Records that are removed from the lists do not get removed from the nurture. This feature is only to add new records to the nurture.
Example:
If you activate a nurture at 12:10 pm and select a 1-hour cycle, the nurture will check for new records again at 1:10 pm, 2:10 pm, 3:10 pm, and so forth. If a record is added to a list at 12:30 pm but then removed at 12:50 pm, it will not be added to the nurture on the next cycle, which is at 1:10 pm.
Note that records will not be added to the nurture while it is inactive. Upon activating the nurture again, the nurture will evaluate when the last time your auto-refresh lists were checked for new records. If the time in between the last refresh and the time of activation is less than the auto refresh interval you have chosen, then new records will not be added to the nurture until the next auto-refresh date.
Example:
I set my auto-refresh interval for 1 week and activate my nurture. I've deactivated and activated my nurture multiple times in the next 6 days. During those 6 days, I've also updated my segmentation and reports that are being used in the nurture and increased the number of records to be added to the nurture. The nurture will not add these new records until it has reached its 1-week cycle, which would be on the 7th day.
In addition, you can dynamically add records to a trigger nurture using event listeners. Event Listeners are found within the Lead Analyzer module and allow you to set your criteria and the appropriate actions for someone who meets that criteria such as add to nurture.
Deactivating Nurture Campaigns
Q: When I deactivate my nurture, what happens with my pauses?
A: When you deactivate your nurture, your pauses will continue to run. For example, if you have a 3-day pause and a 1-day pause and you deactivate your campaign for one day. When you reactivate your nurture one day later, your recipients who were in the 1-day pause will move to the next step. Your recipients who were in the 3-day pause will still have 2 days left before moving to the next step.
Q: When I deactivate my nurture and add a new step to the end, what happens to my records who reached the end prior to the addition of the new step?
A: This is dependent on the type of action you choose for your next step. There are 8 actions which will cause records who had previously reached the end to continue to your additional step(s). They are:
- Add Pause
- Add Marketing Action - Add to Distribution List
- Add Marketing Action - Remove from Distribution List
- Add CRM Action - Add Task
- Add CRM Action - Add Opportunity
- Add CRM Action - Update Contact/Lead via Template
- Add Alert - Notify Contact Owner
- Add Alert - Notify Role/Group
If you select any action not listed above, the records who previously reached the end will not continue through to your additional step(s). If you want these records to continue to a different action to the end of the nurture (e.g. Send Email with Email Builder), add a 15 minute Pause at the end of the nurture followed by your new Send Email action.
Removing Recipients From Active Nurture Campaigns
Q: After I have activated my nurture, how can I stop someone from getting emails?
A: You can add the record to the exclude list and click save. The nurture will review the exclude list at every send email step and will not send to anyone who has been excluded moving forward. You can also select "Remove from Nurture" from the nurture tab within that records lead/contact card.
Testing Nurture Campaigns
Q: Can I test my nurture prior to campaigning to leads and contacts?
A: Yes. You can create a copy of your nurture for testing purposes. This will keep your statistics clean and allow you to shorten the timing on your testing version.
Testing out a nurture campaign prior to activating with leads and contacts is always recommended. By sending yourself through a nurture first you are able to review your content, campaign timing and confirm that your steps reflect your intended actions. The easiest way to test your nurture is to make a copy prior to activating. In addition to allowing you to speed up your test, using a copy to test will keep your statistics clean. Here are the steps for testing:
- Create your nurture campaign setting up all of your emails, actions, and steps.
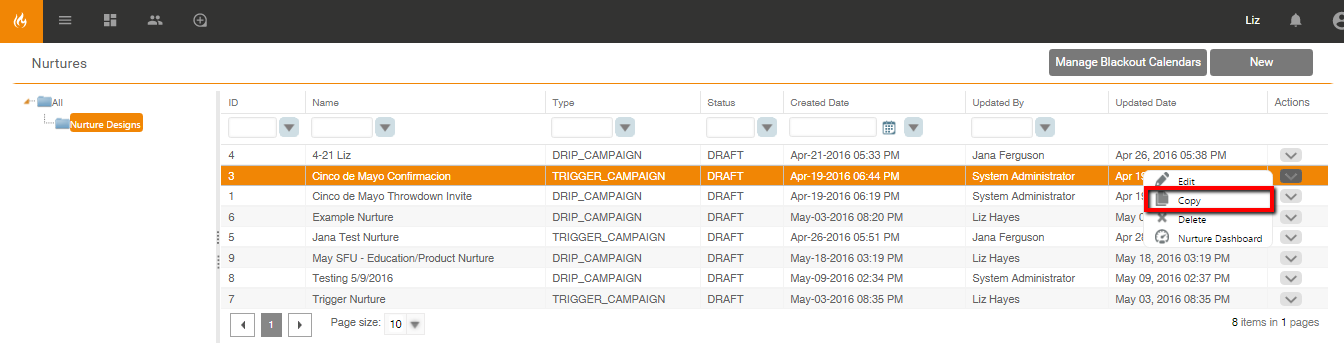
- Prior to activating your nurture, click save and return to go back to the nurture library. Using the actions arrow to the far right of your nurture, select copy.
- Give your nurture copy a name (e.g. Nurture Name [Test Copy]).
- Review your include and exclude lists ensuring that this information was not copied over from your original nurture. Go into your flow and shorten your pauses for testing. For example, you may wish to shorten a 1-week pause down to a single day and a 1-day pause down to 1 hour for testing purposes. This will allow you to get through testing more quickly but still allow you to follow the cadence of your campaign efforts. Once your timeline has been shortened, save and activate your nurture.
- For a drip nurture you will add yourself using the action arrow in the nurture grid. For a trigger nurture, it is recommended that you try to complete the same process you have set up for your leads/contacts. For example, if a record is sent the nurture after completing a form, you should complete the form with your email address and verify that you entered the nurture. If you are using the event listener or scoring profiles to enter leads/contacts into a nurture, you should modify the lead/contact associated to your email address to meet the criteria set in your event listener or lead scoring profile.
- Once the test nurture begins, check the timing of your emails and actions and carefully review the content for all of your emails.
Reconciling Queued Records From A "Deleted Nurture Step"
In the event that you delete a step in a nurture that has records already "queued" to flow through the step, the system will warn you about the deletion and allow you to either mark those records as completed or move them to a new step.
Example: You have a "Pause" step followed by a "Send Email" step. There are currently 4 records in the "Pause" step and are queued to enter the "Send Email" step when the pause time is over.
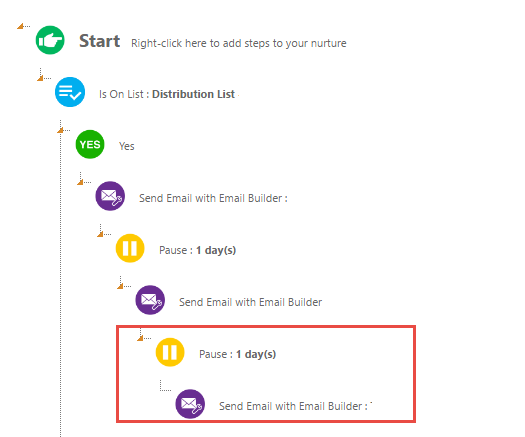
You decide you want to delete the "Send Email" step. In this scenario, you will be prompted the warning message below
When you proceed, the nurture flow will show where your records are still remaining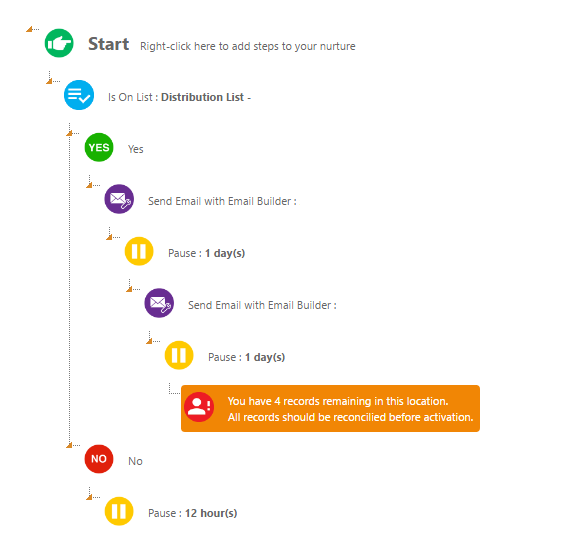
Upon reactivating the campaign, you will receive a pop up asking you to choose to reconcile the records by either "Marking them as Complete" or "Jump Them to a step".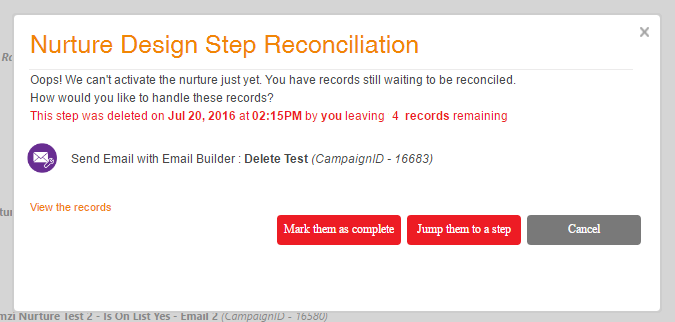
When you mark the records as complete, the records will no longer move through the flow of the nurture and will be considered complete at the prior step of the deleted.
When you select the option to jump them to a step, you will be prompted with the option to select which nurture and which step exactly in that nurture you want to jump them to. Only steps that have "Jump Labels" set up will appear in the steps drop down to select from.
Alerting Users of Nurture Activity
You can send alerts to the salesperson or owner of a record when the contact/lead hits a step or takes a specific action. You will first create your alert by navigating to Create > Template > Alert/Update/CRM and then add the "Alert- Notify Contact Owner or Notify Role/Group" underneath the desired step in your nurture.
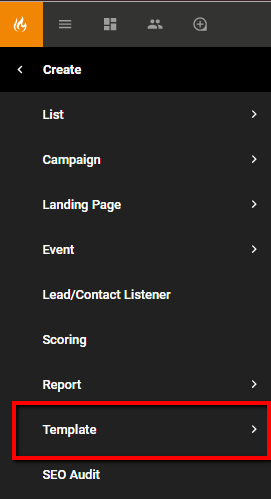
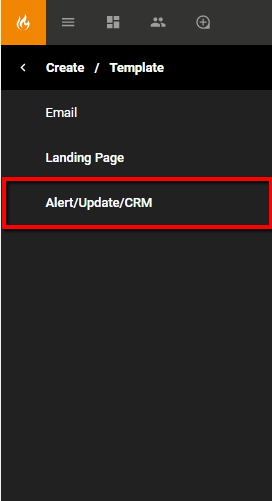
- Navigate to Create > Template > Alert/Update/CRM.
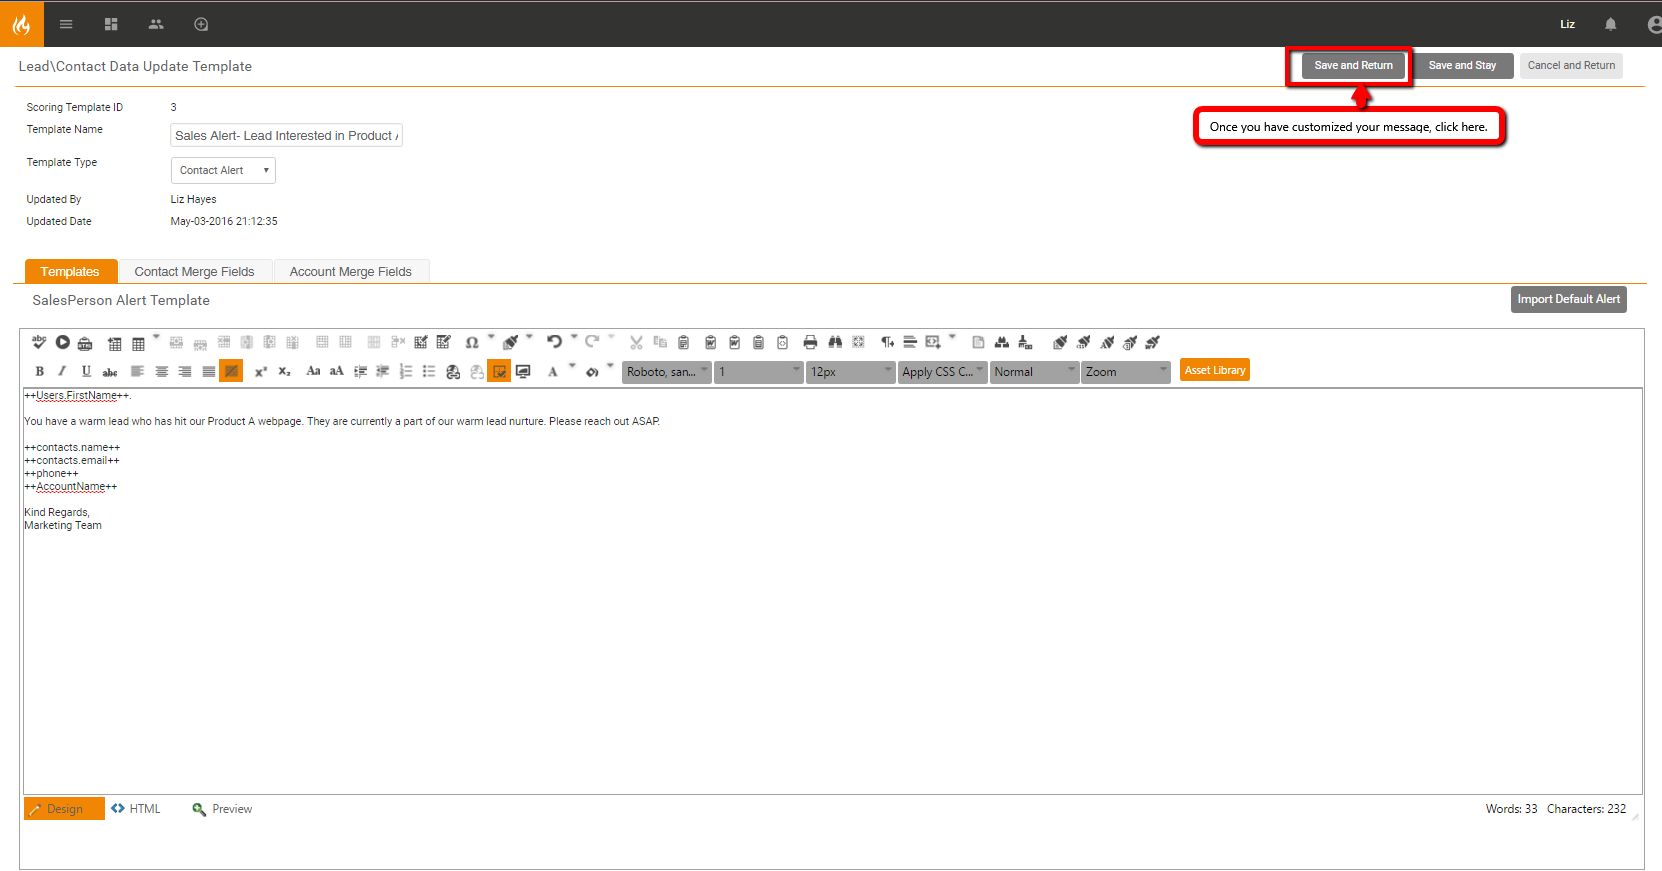
- Create a new scoring template by selecting a template type and name. For example:
- Template Type: 'Contact Alert'.
- Template Name: 'Sales Alert- Lead Interested in Product A'.
- Customize the email message that will be sent to the contact owner and then save and return.
- Once your alert has been created and saved, you can deploy the alert within a nurture flow or when a record hits a specific lead score threshold.