Email Administration
Overview
Sugar comes with many different email-related capabilities, many of which require an administrator to set up or configure. Email administration covers the system email settings, campaign email settings, email archiving, inbound email, and managing the email queue.
Email Accounts
Outgoing Email Accounts
There are three types of outgoing email accounts used in Sugar:
- System Email Account: The administrator sets up the system email account by configuring the System Email Settings. Sugar uses this account to send campaigns and email notifications such as password reset emails, record assignment notifications, and workflow alerts.
- Default User Email Account: A default email account is automatically created by Sugar for each user in Sugar. The default user account will use the primary email address stored in the user's profile. To use their default email accounts for sending email through Sugar, users must edit their profile and select "Sugar Email Client" as their outgoing email client. For more information on how users configure their user accounts, refer to the Emails documentation in the Application Guide.
Note: The users' default email accounts may be affected by the "Allow users to use this account for outgoing email" option in Admin > System Email Settings. If the administrator has enabled the option, users will not be able to configure their default email account and must instead utilize the system email account or create a new user email account. Users will see the system email account in the Outgoing Email Accounts list view with an asterisk to indicate that it is a system account. - User Email Accounts: User email accounts can be created by all users and can consist of the user's personal email accounts (e.g., jane@example.com) as well as any shared email accounts. Shared email accounts allow a group of users to send outbound email messages using the same email account (e.g., support@example.com). If you have existing group email accounts that should be available to select when composing emails, it is recommended that you create a shared email account via Emails > Email Settings, making sure that it is assigned to the specific team(s) who can use the account to send emails. For more information on creating outgoing email accounts, refer to the Emails documentation in the Application Guide.
Note: The "Allow users to configure email accounts" option must be enabled in order for users to see the Create button to create new outgoing email accounts when they navigate to Emails > Email Settings.
Incoming Email Accounts
There are two types of incoming email accounts used in Sugar:
- Group Mail Accounts: Group inbound email accounts allow multiple users, such as team members, to view emails from an external mail account. When emails are addressed to your organization but not to any particular user, you can route them to a Group mail account such as support@example.com or sales@example.com. Users can subsequently distribute emails in the Group mail account to other team members. Emails received to a Group mail account will have no assigned user unless "Create Case from Email" has been enabled for the account.
Note: Group Mail Accounts will only import unread messages from the mail server. - Bounce Handling Mail Accounts: Bounce handling email accounts are configured to store campaign emails that are returned to the server, or "bounced" back to you due to incorrect email addresses or incompatible server settings on the receiving end. You can create a bounce handling inbox separately for each campaign, or you can create one that is common to all campaigns. The system tags every bounced campaign email with a unique identifier that enables you to identify the campaign.
System Email Settings
The System Email Settings section allows Sugar administrators to configure the system's outbound email settings as well as additional email and security options. Make any necessary changes in the sections below and click "Save" to commit the changes. 
Outgoing Mail Configuration
This section applies to the system email settings. For help setting up the email accounts for individual users, please refer to the Emails documentation in the Application Guide.
The Outgoing Mail Configuration section contains details for sending email notifications, scheduled reports, workflow alerts, etc. Enter appropriate values for the following fields, keeping in mind that all required fields are marked with a red asterisk and must be completed prior to saving: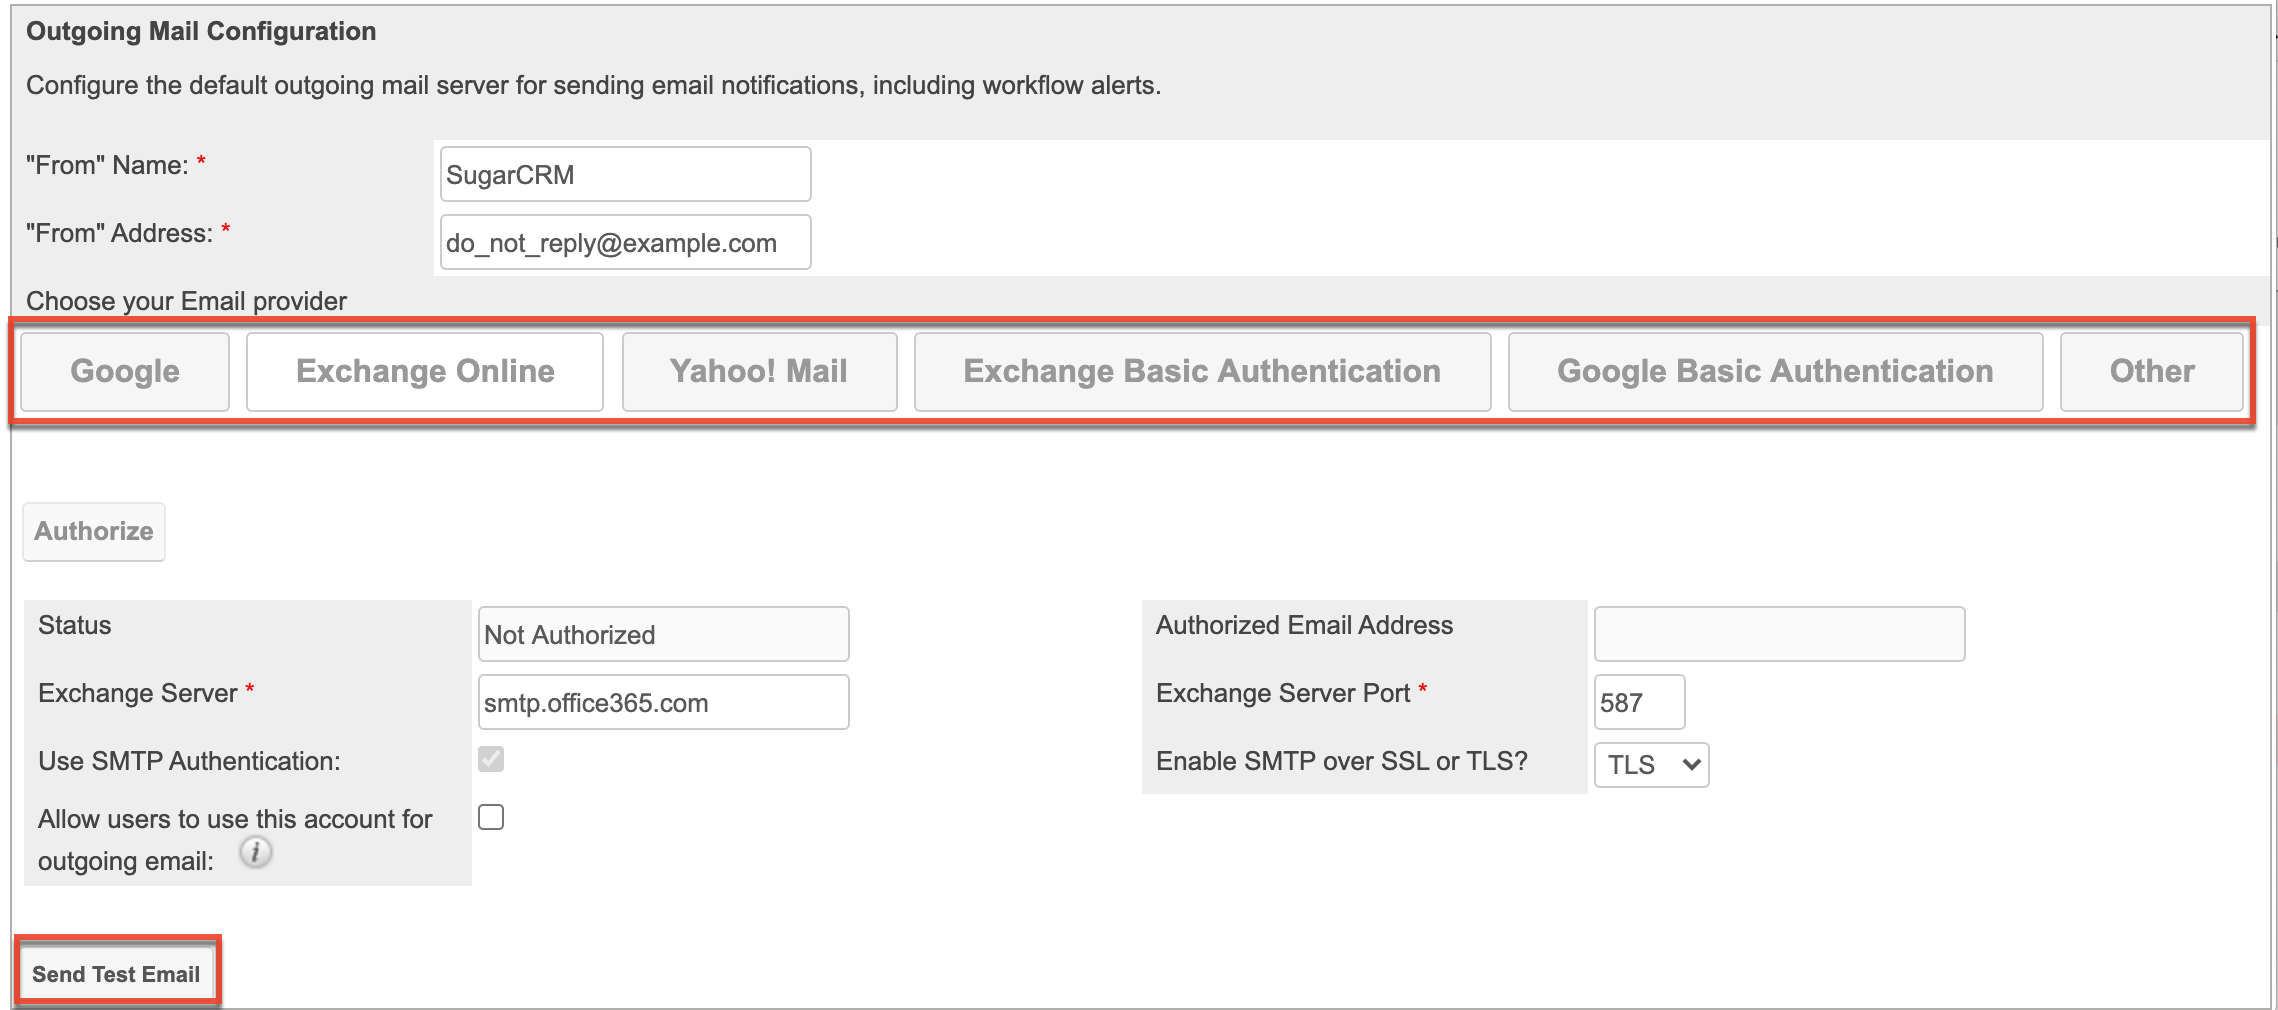
- "From" Name: The name the outgoing email will come from; for example, the name of your organization. Defaults to "SugarCRM".
- "From" Address: The email address the outgoing email will come from. Defaults to "do_not_reply@example.com".
- If specifying a different address than the email address associated with the account you are authenticating, the email server being utilized may need to be configured to allow the email account to send email as the entered From Address.
- For more information on configuring "Send As" permissions with Gmail, refer to Gmail's Help documentation.
- For Exchange Online, enter only the authorized email address, as it cannot send emails using a different email address unless the organization's Exchange admin has configured the account to allow this.
- Choose your Email provider: Click on the tile that corresponds with your mail provider (e.g., Google, Exchange Online) to populate provider-specific values. Refer to the table below this list for details about the fields shown for each provider.
- Allow users to use this account for outgoing email: Check this box if you would like users to be able to send emails using the same outbound mail account. If the option is not selected, users will still be able to use the outbound mail server to send emails by entering their personal mail account information in their user preferences. For more information on setting up the email settings in user preferences, please refer to the Email Settings section of the Getting Started documentation.
Once the appropriate mail server information is entered, you can send a test email to make sure it is configured properly. Click "Send Test Email", enter your email address, and send the test. If you do not receive the test email, re-enter the account information including the password to ensure it is all correct.
| Email Provider | Fields | Description |
| Authorize | Click this button to authorize the Google mail account to be the system email account. The Google connector must be configured via Admin > Connectors before you can authorize and set up the mail account. Note: A "This app isn't verified" warning may appear after selecting your Gmail account to authorize. You can click the Advanced link then click the "Go to..." link at the bottom of the window to proceed and grant permission for the connection to occur. For more information on this warning, refer to the Unverified apps article on the Google Cloud Platform Console Help page. |
|
| Status | The status will display "Authorized" once the mail account is authorized. | |
| Authorized Email Address | The email address of the authorized Google mail account. | |
| SMTP Mail Server | The web address of the external email server Sugar will connect to. | |
| SMTP Port | The communication port number used for connecting to the mail server. | |
| Use SMTP Authentication | This option is automatically enabled to require server authentication for the account. Most email servers require authentication for security purposes. By default, authentication is required for Google. | |
| Enable SMTP over SSL or TLS | Select the appropriate option from the dropdown to use Secure Socket Layer, Transport Layer Security, or no encryption when connecting to the mail server. | |
| Exchange Online | Authorize | Click this button to authorize the Microsoft Exchange mail account to be the system email account. The Microsoft connector must be configured via Admin > Connectors before you can authorize and set up the mail account. |
| Status | The status will display "Authorized" once the mail account is authorized. | |
| Authorized Email Address | The email address of the authorized Microsoft Exchange mail account. | |
| Exchange Server | The web address of the external email server Sugar will connect to. | |
| Exchange Server Port | The communication port number used for connecting to the mail server. | |
| Use SMTP Authentication | This option is automatically enabled to require server authentication for the account. Most email servers require authentication for security purposes. By default, authentication is required for Exchange. | |
| Enable SMTP over SSL or TLS | Select the appropriate option from the dropdown to use Secure Socket Layer, Transport Layer Security, or no encryption when connecting to the mail server. | |
| Yahoo! Mail | Yahoo! Mail ID | Enter the email address or user name to connect to the SMTP server. |
| Yahoo! Mail Password | Enter the password associated with the entered email address or user name. | |
| Exchange Basic Authentication | Exchange Server | The web address of the external email server Sugar will connect to. |
| Exchange Server Port | The communication port number used for connecting to the mail server. | |
| Use SMTP Authentication | Check this box to require server authentication for the account. Most email servers require authentication for security purposes. By default, authentication is required for Exchange. If left unchecked, the SMTP server must accept anonymous connections, which is not recommended. | |
| Enable SMTP over SSL or TLS | Select the appropriate option from the dropdown to use Secure Socket Layer, Transport Layer Security, or no encryption when connecting to the mail server. | |
| Exchange Username | Enter the user name to connect to the SMTP server. | |
| Exchange Password | Enter the password associated with the entered user name. | |
| Google Basic Authentication | SMTP Mail Server | The web address of the external email server Sugar will connect to. |
| SMTP Port | The communication port number used for connecting to the mail server. | |
| Use SMTP Authentication | Check this box to require server authentication for the account. Most email servers require authentication for security purposes. By default, authentication is required for Google. If left unchecked, the SMTP server must accept anonymous connections, which is not recommended. | |
| Enable SMTP over SSL or TLS | Select the appropriate option from the dropdown to use Secure Socket Layer, Transport Layer Security, or no encryption when connecting to the mail server. | |
| Gmail Email Address | Enter the email address to connect to the SMTP server. | |
| Gmail Password | Enter the password associated with the entered email address. | |
| Other | SMTP Mail Server | The web address of the external email server Sugar will connect to. |
| SMTP Port | The communication port number used for connecting to the mail server. | |
| Use SMTP Authentication | Check this box to require server authentication for the account. Most email servers require authentication for security purposes. By default, authentication is required for email providers such as Outlook. If left unchecked, the SMTP server must accept anonymous connections, which is not recommended. | |
| Enable SMTP over SSL or TLS | Select the appropriate option from the dropdown to use Secure Socket Layer, Transport Layer Security, or no encryption when connecting to the mail server. | |
| Username | Enter the user name to connect to the SMTP server. | |
| Password | Enter the password associated with the entered user name. |
Email Options
The Email Options section provides some global options for email configuration. Check the box next to the desired options:
Note: Logged-in users must log out and back in for changes to the following settings to take effect.
- Assignment Notifications: When enabled (default), Sugar will send email notifications to users automatically when records are assigned to them. When assigning a record to yourself, you will not receive a notification of the assignment.
Note: To receive notifications, users must also have "Notify on Assignment" checked in their user profile. - Send notification from assigning user's e-mail address: Enable this option to have Sugar send notifications from the email address and name of the user who is assigning a record to another user. This option is disabled by default.
Note: The SMTP server being used must allow sending from a different email address than the authenticated account and the email account may need to be configured to allow the Send As permission. For more information, please refer to the following articles: - Allow users to configure email accounts: Determines whether users can create new outgoing email accounts. When enabled (default), users will see a Create button when they navigate to Emails > Email Settings.
- Opt-out new email addresses by default: Enable this option to mark new email addresses added to Sugar records as opted-out by default. Email addresses that are marked as opted-out cannot receive campaign emails from Sugar. Please note that changing this setting will not affect email addresses already existing in Sugar. For more information on opted-out email addresses, please refer to the Emails documentation in the Application Guide.
Email Security Settings
The Email Security Settings section allows Sugar administrators to decide which HTML tags are allowed to be displayed in Sugar. The selected tags will not be allowed for viewing within Sugar. There are two options to mass set the tag selection:
- Select Outlook default minimum security settings: Select this option to automatically select every tag that Outlook also restricts. This will not strip the style tag which is used by default in Outlook. This option is selected by default.
- Toggle All Options: Select this option to either select all tags or deselect all tags.
After selecting one of those options you can individually select or deselect additional tags to restrict or allow the tags, respectively. 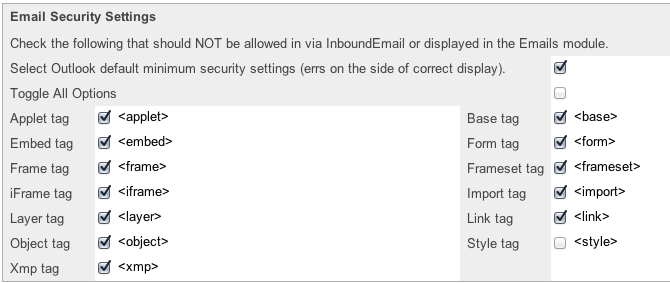
Related Contacts Emails
The Related Contacts Emails section allows administrators to enable or disable related contact's emails from appearing in the Emails subpanel and History dashlet for certain modules (Cases, Accounts, Opportunities). In order to have emails from related contacts appear in the Emails subpanel, simply mark the checkbox to the right of the module name (e.g., Opportunities). To disable related contact's emails from appearing in the Emails subpanel, uncheck the box for the specific module as necessary. Click "Save" to preserve the change.
Campaign Email Settings
The Campaign Email Settings section allows Sugar administrators to configure some backend settings for sending campaign emails. Select the appropriate values for the following fields:
- Number of emails sent per batch: When the "Run Nightly Mass Email Campaigns" scheduler runs, it will send out the specified number of emails for a single run. The default is set to 500. Some email servers have one or more of the following restrictions for a specific timeframe (e.g., hour, day, etc.): the number of unique recipients, how many times the same email can be sent to individual recipients, and the most common, how many emails can be delivered. This setting helps control the outgoing email to conform to these restrictions. For example, if your scheduler is set to run every hour, the number of emails to send per batch is set to 500, and you have 1600 emails to send out, starting at 2:00 AM the last batch of emails will be sent at 5:00 AM. Please check with your email provider to determine the proper level.
- Location of campaign tracking files: Campaign tracking files log responses from campaign targets. If you are running Sugar on an external network, select "Default" to accept the default location. However, if your Sugar instance is behind a firewall, then choose "User Defined" and specify the path to your external web server in the field below. The external web server must have the ability to connect to your Sugar instance behind the firewall. Ensure that you create a file named index.php to handle requests for three different types of entry points: campaign_trackerv2, removeme, and image, and place the index.php file in the path to your external web server. This index.php file must make the appropriate calls to the index.php file located in the root of your Sugar instance in order to properly record the activities in Sugar. For more information on how to set up a custom campaign tracker page, please refer to the Using a Custom Page For Campaign Trackers section of the Advanced Config Options documentation in the Administration Guide.
- Keep copies of campaign messages: Set this option to "Yes" to keep a copy of every email sent during a campaign. If "No" is selected, the template is saved and one copy of the email is stored in the Emails module. The email record will have an empty To field but the recipients will be visible in the email's related records subpanels. The default is set to "No".
Note: Storing every email sent does take up space in the database and can reduce performance. We recommend setting this value to "No".

Make any necessary changes and click "Save" to commit the changes.
Email Queue
The Email Queue option in Admin is where Sugar administrators can monitor and perform actions on queued email. When sending a campaign, the emails are not sent immediately but are instead queued to be sent. Each queued email has a "Send On" date and time set by the campaign they are sent from. The scheduler "Run Nightly Mass Email Campaigns" takes the queued emails that are ready to be sent based on this date and time and sends them in batches. If an email fails to send from the queue for any reason it will be flagged as a send attempt and, by default, Sugar will not attempt to send that email for another 24 hours. Once Sugar reaches six failed attempts to send an email it will be deleted from the queue. In order to send a failed email sooner than the default 24 hours, you can perform a mass update to reset the In Process field. For more troubleshooting information, refer to the Troubleshooting Campaigns Failing to Send From Email Queue article. This section will cover how to use the email queue as well as the various actions and options available from within the email queue.
Viewing via List View
The email queue list view displays all queued email records meeting the current search criteria. To access the list view, simply click the Email Queue link on the Admin page. List view shows key email fields including links to the Campaign, Recipient, and Marketing Message records. For more information on viewing queued email via list view, please refer to the Email Queue List View section.
Searching Queued Email
The email queue list view includes a Basic and Advanced Search to help you locate records easily and effectively in a module-specific manner. Once the search is performed, the relevant results will be displayed in the Email Queue list view below. Please note that Sugar automatically appends the wildcard character (%) to the end of your search phrase. This allows the system to retrieve all records that start with the keyword entered in the search. If you would like to broaden the search, you can use the wildcard at the beginning of your text as well (e.g., %services). This will pull up any record that has the word "services" in the name, regardless of how it starts or ends.
For more information on using the various search methods as well as how wildcards are used in the different methods, please refer to the Search documentation.
Basic Search
Basic search offers a few, commonly used fields for a simplified search experience. From the Basic Search panel, you can click "Advanced Search" to access additional search functionality as needed.
The buttons and checkboxes available in Basic Search panel have the following functions:
- Search: Click the Search button or press your Return/Enter key to perform the search.
- Clear: Click the Clear button to clear all criteria from the searchable fields.

Once the search is complete, the relevant results will populate in the list view below the search panel. To see all queued email records to which you have access, simply click "Clear" and then "Search" to perform a blank search with no filters.
Advanced Search
Advanced Search offers a more in-depth search experience than Basic Search including additional fields, layout options, and saved search capability. From the Advanced search panel, you can click "Basic Search" for simplified searching.
The buttons, checkboxes, and dropdowns available in Advanced Search have the following functions:
- Search: Click the Search button or press your Return/Enter key to perform the search.
- Clear: Click the Clear button to clear all criteria from the searchable fields.
- Layout Options: Use the expandable Layout Options section to configure your list view. For more information, please refer to the Layout Options section of the Search documentation.
- Saved Searches: Save, recall, update, and delete searches that you use often. For more information, please refer to the Saved Search section of the Search documentation.

When you run a search, Sugar will return records matching all (as opposed to any) of the fields for which you have given a value. For example, if you enter a campaign name to search and a recipient name, Sugar will only return queued email records with matching both fields. Once the search completes, the relevant results will populate in the list view below the search panel. To see all queued email records to which you have access, simply click "Clear" and then "Search" to perform a blank search with no filters.
Email Queue List View
The Email Queue list view displays all queued email records meeting the current search criteria and to which your user has access. You can view the basic details of each email within the field columns.
You have the option to change what fields are displayed in list view by configuring your layout options in the Advanced Search. For more information on configuring your list view, please refer to the Layout Options section of the Search documentation.
Pagination
List view displays the current search results broken into pages that you can scroll through rather than displaying potentially thousands of rows at once. To the right just below the search panel, you can see which records of the total results set are currently being displayed. The two single-arrow Next and Previous buttons can be used to scroll through the records page-by-page. The two double-arrow First Page and Last Page buttons allow you to skip to the beginning or the end of your current results.
By default, Sugar displays 20 records per list view page, but administrators can change the number of records displayed via Admin > System Settings. For more information on changing the number of displayed records, please refer to the System documentation in the Administration Guide.
Checkbox Selection
You can perform several actions on queued email records directly from the list view by first selecting the desired records. To select individual queued email records on the Email Queue list view, mark the checkbox on the left of each row. To select or deselect multiple queued email records on the list view, use the options in the checkbox dropdown menu:
- Select This Page: Selects all records shown on the current page of results.
- Select All: Selects all records in the current search results across all pages of results.
- Deselect All: Deselects all records that are currently selected.

Actions Menu
The Actions menu to the right of the checkbox dropdown allows you to perform various actions on the currently selected records. 
The options in the Actions menu allow you to perform the following operations:
| Menu Item | Description |
| Delete | Delete one or more queued emails at a time. |
| Mass Update | Mass update one or more queued emails at a time. |
Column Sorting
List view provides the ability to sort all of the current search results by a field column in either ascending or descending order. To sort by a field or switch the sort direction, click the column header noting that the fields which allow sorting will have a pair of arrows. The list view may be sorted by only one column at a time. You can also set a default order-by column using the layout options in Advanced Search. For more information on setting a default column sort, please refer to the Layout Options section of the Search documentation. 
Deleting Queued Email
If a queued email is invalid or should no longer be sent, it may be deleted from the list view. The list view allows for mass deleting multiple records at once. Deleting queued emails will not delete the campaign or target, but will remove the instance of this email so it will not be sent.
Mass Deleting via List View
Use the following steps to delete one or more queued email records via the list view:
- Navigate to the Email Queue list view by clicking the Email Queue link on the Admin page.
- Use the Basic or Advanced Search to find the queued email records you wish to delete.
- Select the desired records individually or using the checkbox dropdown's options.
- Choose "Delete" from the Actions menu.
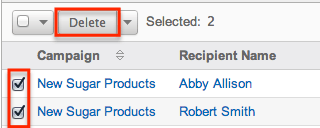
- A pop-up message will display asking for confirmation. Click "Ok" to proceed.
Due to PHP memory limitations on the server, there may be occasions when the application times out while deleting a large number of queued email records. If you encounter an error when performing this action, we recommend selecting the records in smaller batches.
Mass Updating Queued Email
Mass Updating allows users to make the same change to multiple queued email records at once from the Email Queue list view. Currently, only fields with the data type of date, datetime, dropdown, multiselect, and radio may be altered during a mass update. Due to the PHP memory limitations on the server, there may be occasions when the application times out while mass updating a large number of queued email records. If you encounter an error when performing this action, we recommend selecting the records in smaller batches.
Use the following steps to mass update queued email records from the list view:
- Navigate to the Email Queue list view by clicking the Email Queue link on the Admin page.
- Use the list view's Basic or Advanced Search to find the queued email you wish to modify.
- Select the desired records individually or using the checkbox dropdown's options.
- Choose "Mass Update" from the Actions menu.

- Scroll to the Mass Update panel and set values for the fields you wish to alter.
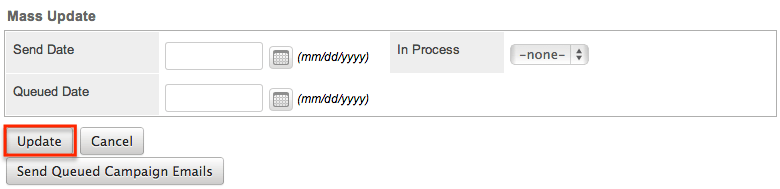
Note: After an email has failed to send, setting In Process to "No" will flag the email to attempt to send again. Otherwise, the email will not attempt to be sent again until 24 hours have passed. Optionally set the Send Date to configure when the email should be attempted again. - Click "Update" to save the changes to all of the currently selected queued email records.
Sending Queued Email
Email in the queue will be automatically be sent out in batches by the "Run Nightly Mass Email Campaigns" scheduler. For more information on setting up and configuring scheduler, please refer to the Schedulers documentation in the Administration Guide. Alternatively, you can manually send a batch of emails in the queue. The amount of queued email that will be sent is equal to the "Number of emails sent per batch" value specified in the Campaign Email Settings.
Use the following steps to manually send a batch of queued emails from the list view:
- Navigate to the Email Queue list view by clicking the Email Queue link on the Admin page.
- Choose "Send Queued Campaign Emails" from below the list view.

- Sugar will then send a batch of queued email whose Send On date and time is equal to now or in the past.
Note: If an email fails to send it will not be tried again for 24 hours.
Selecting specific records and searching for specific records will not determine which queued emails will be sent. This process will send a batch of emails that are queued to be sent in order by the Send On field. For more information on setting the batch amount, please refer to the Campaign Email Settings section.
Note: If your batch size is set high and you have a lot of queued email, this process can take a while to run through a single batch.
Creating via Duplication
You can also create a new group mail or bounce handling account by duplicating an existing inbound email account record. The copy option is useful if the inbound email account you are creating has similar information to an existing inbound email account.
Use the following steps to create an inbound email account by duplicating an existing record:
- Navigate to an inbound email account record's detail view.
- Click "Copy".
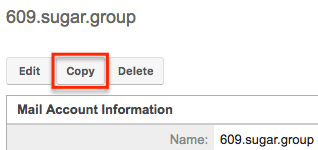
- The displayed edit view is pre-populated with the original account's values. Update the necessary fields, then click "Save".

Email Archiving
The Sugar Email Archiving service allows users to easily archive email to Sugar records simply by sending the email to a special email address. The email archiving service monitors the email address and imports the email into your instance of Sugar and links related records without the use of a plug-in or other syncing process.
This section explains how the administrator can enable the Sugar Email Archiving service. For complete steps to use Sugar Email Archiving once it is enabled, please refer to the Emails documentation in the Application Guide.
Enabling Email Archiving
Before you can use Sugar Email Archiving, you need to enable the service for your instance. Email Archiving can be enabled for multiple instances per license key, but each instance must be registered independently and receive its own, unique email address. If you clone an instance that has Email Archiving enabled, the clone will show as having Email Archiving enabled, but must have the service disabled and re-enabled in order to receive its own email address and start using the service. For further troubleshooting information, refer to the Troubleshooting the Sugar Email Archiving Service article.
Use the following steps to enable email archiving via the Administration page:
- In the Email section of the administration page, Select "Email Archiving".
- Read the Email Archiving feature description, Master Subscription Agreement, and privacy policy.
- Select the checkbox to agree to the terms and click "Enable Email Archiving".

Note: Your instance needs to be reachable over the internet from SugarCRM's Email Archiving server. For more information, refer to the Troubleshooting Sugar Email Archiving (SNIP) Activation article. - The next screen displays the unique email address assigned to your instance for Email Archiving. Forward emails to this email address to automatically archive the messages to Sugar.
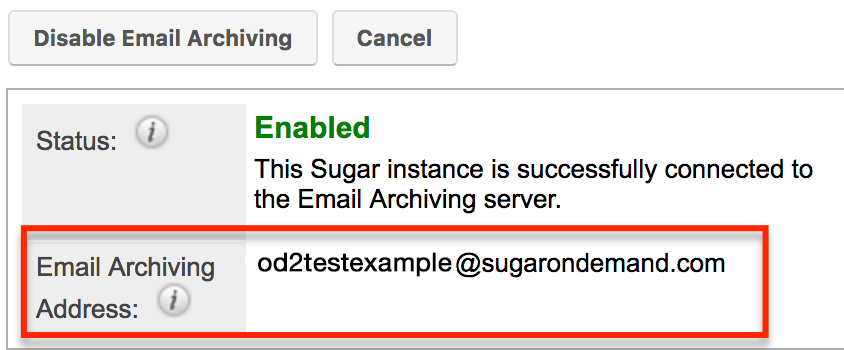
To begin using the email archiving service, please refer to the Emails documentation in the Application Guide. To turn off this feature, navigate to Admin > Email Archiving and click "Disable Email Archiving".
Note: If you disable and then re-enable Email Archiving, you will be assigned an archiving email address that is different than the one you were using before.
Inbound Email
Inbound Email allows external email to be pulled into Sugar. Inbound accounts can be configured as either group email accounts or bounce email accounts. Group inbound accounts can be configured to create case records in Sugar or send automatic replies to imported email. Prior to Sugar 7.10.x, you could enable the "Allow users to send emails using the "From" Name and Address as the reply-to address" option to allow users on teams who had access to the group email account to be able to select the "From" name and email address associated with the group email account when composing emails in Sugar. As of Sugar 9.0.x, you can instead create shared email accounts directly via Emails > Email Settings which allows groups of users belonging to the assigned team(s) to send outbound email messages using the same email account (e.g., support@example.com). For more information on creating shared email accounts, please refer to the Emails documentation. The following sections will cover how to use the Inbound Email module as well as the various actions and options available from within the module.
Note: The Check Inbound Mailboxes scheduler must be configured and running in order to retrieve inbound email messages in Sugar. For more information on setting up and configuring the inbound email scheduler, please refer to the Schedulers documentation.
Inbound Email Fields
The Inbound Email module contains a number of stock fields that come out-of-the-box with Sugar in order to configure inbound email accounts. The below definitions are the meanings for the available fields.
| Field | Description |
| Assign To Teams | The Sugar team(s) assigned to the email record. Note: Users will only be able to see emails in group accounts as allowed by their team memberships. |
| Auto-Reply Template | Select an existing template or click "Create" to create a new one to send an automated response notifying email senders that you received their email. Note: If both Auto-Reply and Case Reply templates are selected, Sugar will respond to the sender with the Case Reply template only. |
| Create Case from Email | Select this option to create cases automatically from inbound emails. Only available for Group Accounts and defaults to not checked. For more information on creating cases via email, the distribution method, and case auto-reply, please refer to the Creating Cases From Email section. |
| Distribution Method | Only available if Create Case from Email is checked for a Group Account and allows you to select Round-Robin, Least-Busy, or None for assigning the new cases. |
| Email Provider | Select the email provider for the inbound email account. Note: The "Google Mail" and "Exchange Online" options allow you to connect your Sugar instance to these email services via OAuth2. The "Other" option covers all other email account configurations (e.g., Yahoo) that are supported in Sugar. |
| From Address | Enter the email address ( e.g., serviceinfo@example.com) that will appear as the "From" email address for automatic responses to imported email. Defaults to the email address from your user profile. |
| From Name | Enter the name (e.g., Service Info) that will appear as the "From" name for automatic responses to imported email. Defaults to your first and last name from your user profile. |
| Import Emails Automatically | Select this option to create email records automatically in Sugar for all incoming emails. Only available for Group Accounts and defaults to checked. |
| Leave Messages On Server | Select this option if you do not want to remove emails from the server when they are opened in Sugar. This will allow the messages to remain visible and appear unread in other email clients. Only available for Group Accounts and defaults to Yes. |
| Mail Server Address | The web address of the external email server from which emails will be imported in Sugar. |
| Mail Server Port | The communication port number used for connecting to the mail server. |
| Mail Server Protocol | The mail protocol used to communicate with the mail server. IMAP is the default selection and provides the best functionality with Sugar. |
| Monitored Folders | The folders in your external account that Sugar will monitor. Inbox is selected by default. To select one or more folders to monitor click "Select" and then pick the folders in your external account for Sugar to monitor. |
| Name | The name or designation of the account. |
| New Case Auto-Reply Template | Only available if Create Case from Email is checked for a Group Account and allows you to select or create an automated response template notifying email senders that a case has been created to resolve their issue. For more information on creating cases via email, the distribution method, and case auto-reply, please refer to the Creating Cases From Email section. |
| No Auto-Reply to this Domain | Enter a domain name or multiple domains separated by commas to exclude from receiving auto-reply emails. It is common to specify your organization's domain to prevent auto-replies from being sent to your organization's members. |
| Number of Auto-responses | Set the maximum number of auto-responses to be sent to a unique email address during a period of 24 hours. |
| Password | Enter the password associated with the email address or username. |
| Reply-to Address | Enter the email address that will receive any replies to the auto-reply template. If left blank, replies will be sent to the From Address. |
| Reply-to Name | Enter the name that will be used to receive any replies to the auto-reply template. If left blank, replies will be sent to the From Name. |
| Sent Folder | Select a folder from your external account to store any email being sent from that account through Sugar. |
| Status | The current status of the account (i.e., Active, Inactive). |
| Trash Folder | Select a folder from your external account to be designated as the trash folder. Sugar will place deleted emails into this folder on your external account. |
| Use SSL | Check this box to force the connection and communication between Sugar and the mail server to use a secure socket layer of encryption. |
| Username | Enter the email address or username used to connect to the SMTP server. |
Inbound Email Module Tab
Click the Inbound Email module tab in the navigation bar, shown after selecting Inbound Email in the Admin page, to access the Inbound Email list view. You may also click the three-dots menu in the Inbound Email module tab to display the Actions and Recently Viewed menus. The Actions menu allows you to perform important operations within the module. The Recently Viewed menu displays the list of inbound email accounts you most recently viewed.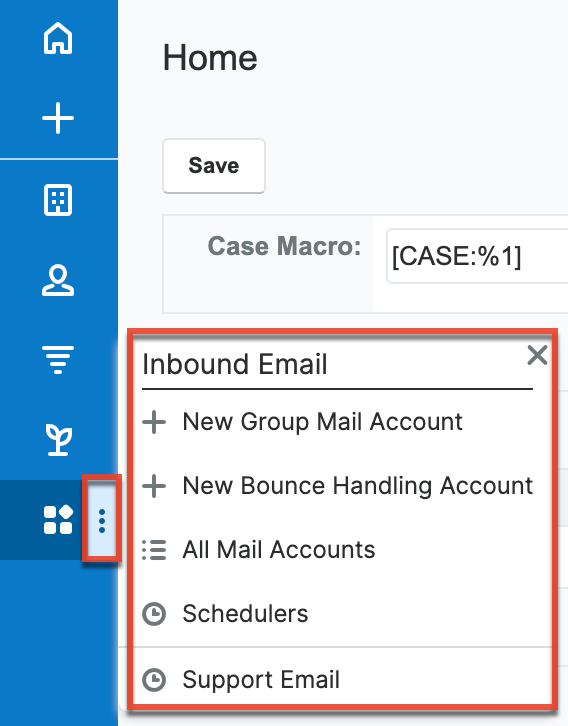
The Actions menu allows you to perform the following operations:
| Menu Item | Description |
| New Group Mail Account | Opens the edit view layout to create a new Group Mail Account. |
| New Bounce Handling Account | Opens the edit view layout to create a new Bounce Handling Account. |
| All Mail Accounts | Opens the list view layout to display all inbound mail accounts. |
| Schedulers | Opens the list view layout to search and display schedulers. |
Creating Inbound Email Accounts
There are various methods for creating inbound email accounts in Sugar. The full edit view layout opens when creating the inbound account directly from the Inbound Email menu and includes all of the relevant fields for your organization's accounts.
Creating Group Mail Accounts
One of the most common methods of Group Mail Account creation is via the New Group Mail Account option in the Inbound Email module tab (visible when you navigate to Admin > Inbound Email). This opens up the edit view layout which allows you to enter all the relevant information for the group mail account. Please note that Group Mail Accounts will only import unread messages from the mail server.
Use the following steps to create a group mail account via the Inbound Email module:
- Navigate to Admin > Inbound Email.
- Click the three-dots menu in the Inbound Email module tab and select "New Group Mail Account".
- Enter appropriate values for the fields in the edit view layout.
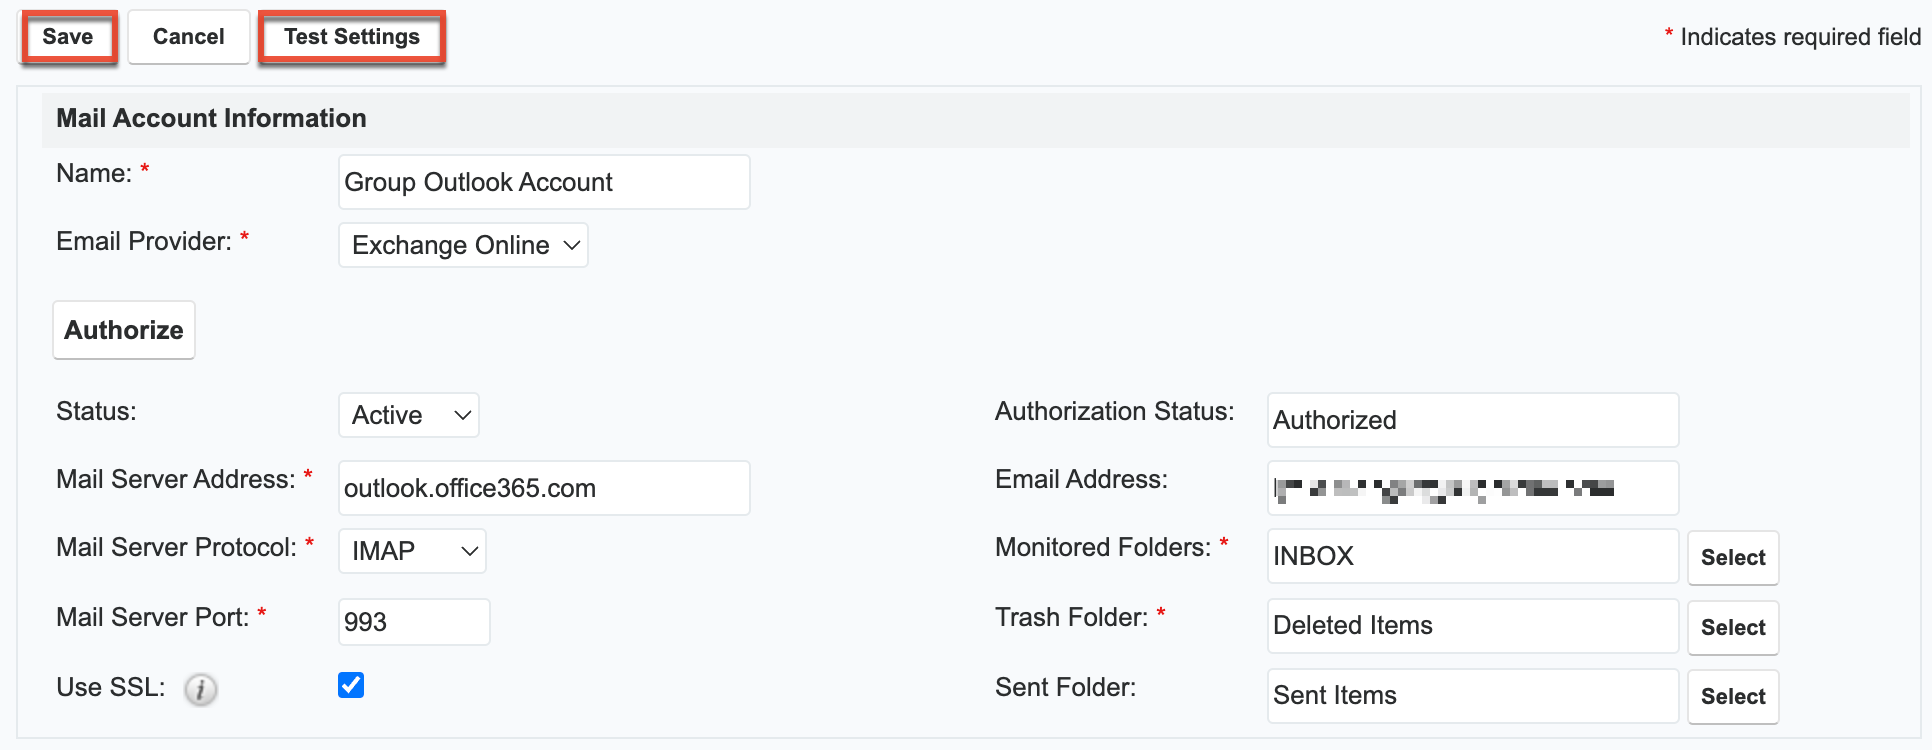
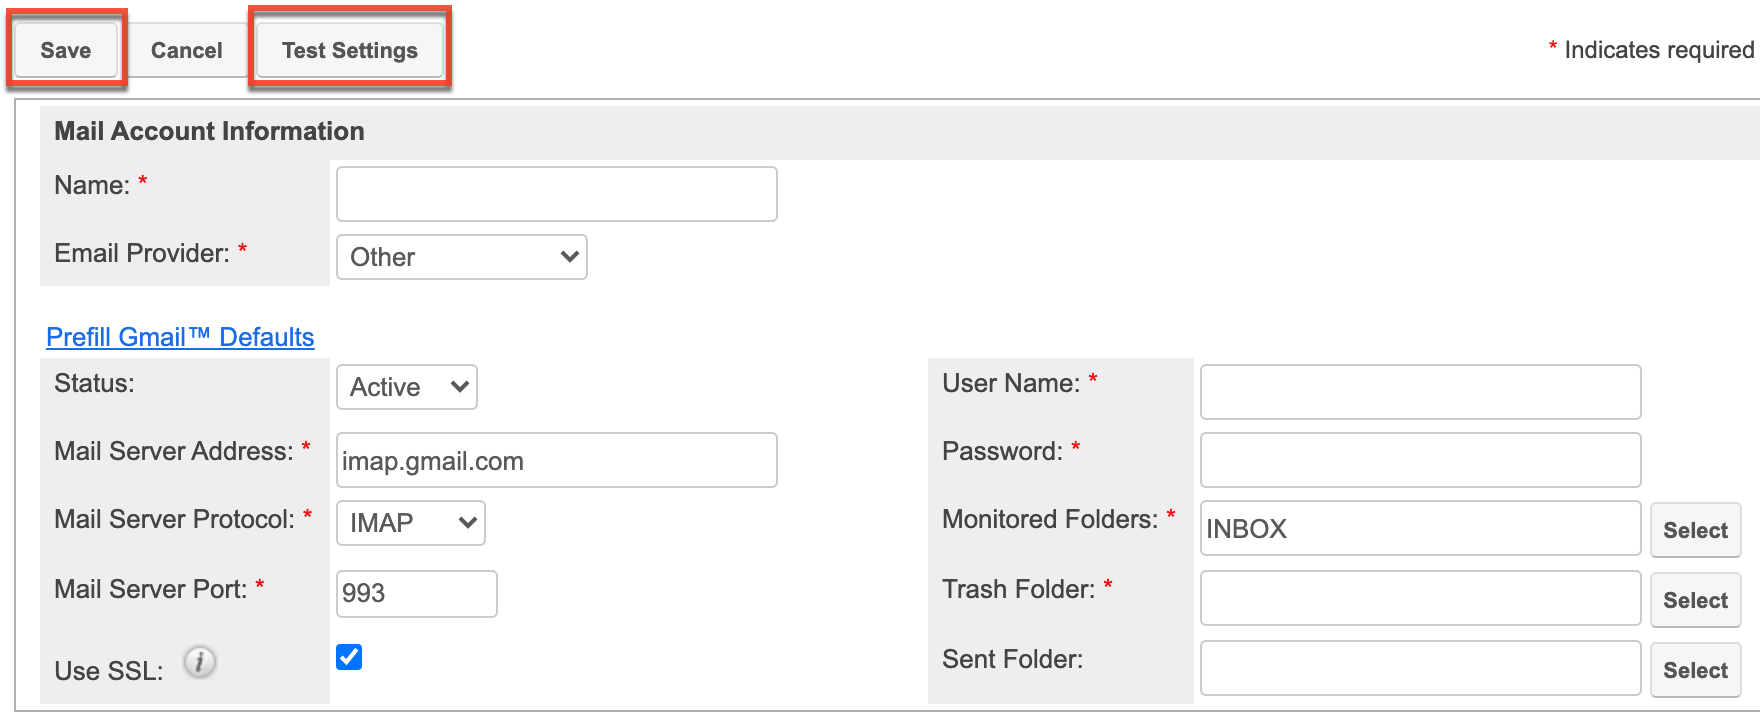
Note: If your mail account is using Gmail, click "Prefill Gmail™ Defaults" to populate many fields with defaults to connect to Gmail. - Once the necessary information is entered, click "Save". Optionally, click "Test Settings" to verify your entries.
Creating Bounce Handling Accounts
One of the most common methods of Bounce Handling Account creation is via the New Bounce Handling Account option in the Inbound Email module tab. This opens up the edit view layout which allows you to enter in all the relevant information for the bounce handling mail account.
Use the following steps to create a bounce handling account via the Inbound Email module:
- Navigate to Admin > Inbound Email.
- Click the three-dots menu in the Inbound Email module tab and select "New Bounce Handling Account".
- Enter appropriate values for the fields in the edit view layout.
Note: If your mail account is using Gmail, click "Prefill Gmail™ Defaults" to populate many fields with defaults to connect to Gmail. - Once the necessary information is entered, click "Save". Optionally, click "Test Settings" to verify your entries.
Note: You can also set up a bounce handling account from the Campaigns module. For more information, refer to the Campaigns documentation.
Viewing Inbound Email Accounts
There are various options available for viewing inbound account records in Sugar including via Inbound Email list view, detail view, and Last Viewed menu.
Viewing via List View
The Inbound Email list view displays all inbound account records. To access the list view, simply click the Inbound Email module tab in the navigation bar. While list view shows key inbound account fields, you can click the account's name to open the record in detail view. For more information on viewing inbound accounts via list view, please refer to the Inbound Email List View section.
Viewing via Detail View
The Inbound Email detail view displays thorough inbound account information including all fields. The detail view can be reached by clicking an account record's link from anywhere in the application including from the Inbound Email list view. For more information on viewing inbound accounts via detail view, please refer to the Inbound Email Detail View section.
Viewing via Recently Viewed
As you work, Sugar will keep track of which inbound accounts you have recently viewed. Click the three-dots menu in the Inbound Email module tab to see a list of the 3 records you most recently viewed in the module. Clicking the record's name within the list will open the record in detail view. 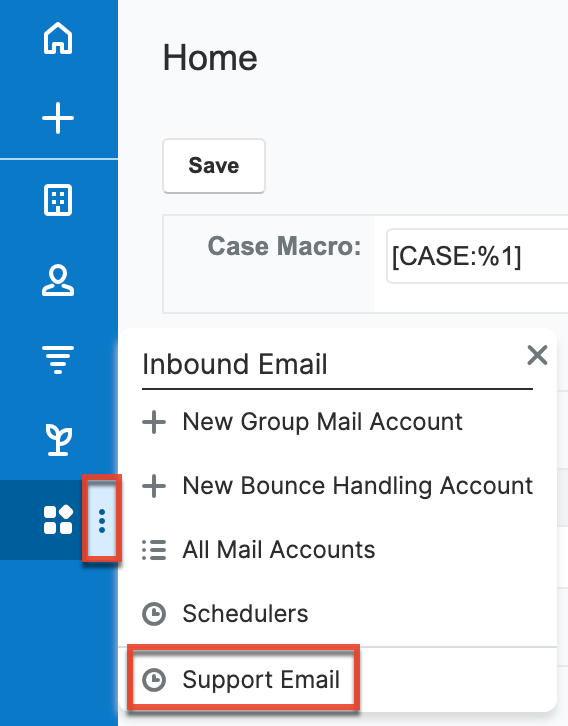
Inbound Email List View
The Inbound Email list view displays all inbound account records meeting the current search criteria and to which your user has access. You can view the basic details of each account within the field columns.
Modifying the Case Macro
The Case Macro field determines what distinct string Sugar will use to match emails to the Cases module. The case macro string can be added anywhere within the email subject and does not need to be at the beginning for it to match. The Case Macro is on the Inbound Email list view and displays the current case macro string. By default, this string is set to [CASE:%1]. To customize it, you can change CASE to a different word, but you must preserve the rest of the string; for example, [TICKET NUMBER:%1].
Note that the macro is case-sensitive and also takes spaces into consideration. As a result, capitalization and spacing must match the case macro to ensure that the email is related to the case. For example, using the default case macro of "[CASE:%1]", incoming emails must have no space before the case number and the text must use the same capitalization in order to be related to the existing case. That is, an email with the subject "[CASE:1234]" will automatically be related to case number 1234 while an email with the subject "[CASE: 1234]" or "[Case:1234]" will not.
Click "Save" to preserve your changes.
Pagination
List view displays the current results broken into pages that you can scroll through rather than displaying potentially thousands of rows at once. To the right just below the case macro you can see which records of the total results set are currently being displayed. The two single-arrow Next and Previous buttons can be used to scroll through the records page-by-page. The two double-arrow First Page and Last Page buttons allow you to skip to the beginning or the end of your current results.
By default, Sugar displays 20 records per list view page, but administrators can change the number of records displayed via Admin > System Settings. For more information on changing the number of displayed records, please refer to the System documentation in the Administration Guide.
Checkbox Selection
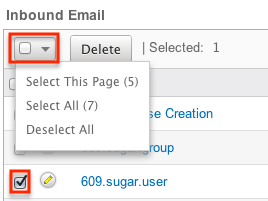
You can perform several actions on inbound account records directly from the list view by first selecting the desired records. To select individual inbound account records on the Inbound Email list view, mark the checkbox on the left of each row. To select or deselect multiple inbound account records on the list view, use the options in the checkbox dropdown menu:
- Select This Page: Selects all records shown on the current page of inbound account results.
- Select All: Selects all records across all pages of inbound account results.
- Deselect All: Deselects all records that are currently selected.
Actions Menu
The Actions menu to the right of the checkbox dropdown typically allows you to perform various actions on the currently selected records. 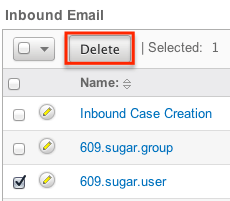
The only action available from the Inbound Email list view is the following operation:
| Menu Item | Description |
| Delete | Delete one or more inbound accounts at a time. |
Column Sorting
List view provides the ability to sort all of the current results by a field column in either ascending or descending order. To sort by a field or switch the sort direction, click the column header noting that the fields which allow sorting will have a pair of arrows. The list view may be sorted by only one column at a time. 
Inbound Email Detail View
The Inbound Email detail view displays thorough inbound account information including all inbound account fields which are grouped by default into the Mail Account Information and Advanced Setup panels. The detail view can be reached by clicking an inbound account record's link from anywhere in the application including from the Inbound Email list view.
Action Buttons
The Action Buttons on the top left of each inbound account's detail view allow you to perform various actions on the current record. 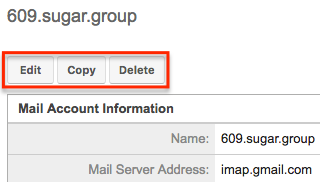
The action buttons allow you to perform the following operations:
| Menu Item | Description |
| Edit | Edit this inbound account. |
| Copy | Duplicate this inbound email account. |
| Delete | Delete this inbound account. |
Editing Inbound Email Accounts
Inbound accounts may be edited at any time to update or add information to the record. You can make changes to existing inbound account records via the Inbound Email edit view. Edit view is available within the Inbound Email module and includes all of the Inbound Email fields you should need.
Editing via Detail View
You can edit inbound accounts via the detail view by clicking the Edit button on the upper left of the page. Once the edit view layout is open, update the necessary fields, then click "Save" to preserve your changes. 
Editing via List View
You can edit inbound accounts via the list view by clicking the Pencil icon to the left of each inbound account's name. Once the edit view layout is open, update the necessary fields, then click "Save" to preserve your changes. 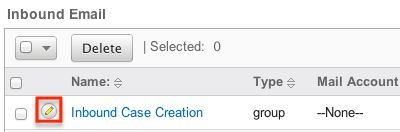
Deleting Inbound Email Accounts
If an inbound account record is invalid or should no longer appear in your organization's Sugar instance, it may be deleted from either the Inbound Email detail view or list view. Deleting via the detail view allows you to delete a single record while the list view allows for mass deleting multiple records at once. Deleting inbound account records will not delete the email imported from this account.
Deleting via Detail View
Use the following steps to delete an inbound account record via the detail view:
- Navigate to an inbound email account record's detail view.
- Click "Delete".
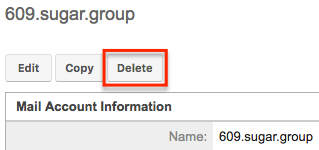
- A pop-up message will display asking for confirmation. Click "Ok" to proceed.
Mass Deleting via List View
Use the following steps to delete one or more inbound email account records via the list view:
- Navigate to the Inbound Email list view by clicking the Inbound Email module tab.
- Select the desired inbound email account records individually or by using the checkbox dropdown's options.
- Click "Delete".
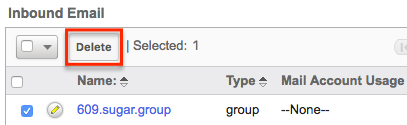
- A pop-up message will display asking for confirmation. Click "Ok" to proceed.
Due to PHP memory limitations on the server, there may be occasions when the application times out while deleting a large number of inbound account records. If you encounter an error when performing this action, we recommend selecting the records in smaller batches.
Creating Cases From Email
To create a case via email, simply send an email to a group inbound email account that has the case creation option selected. The subject and description of the case are populated with the subject and body of the email respectively. The new case is assigned to the team defined in the inbound email account record and the case can be assigned to a specific user in that team based on two rules:
- Round-Robin: Sugar assigns cases evenly among all users within the team.
- Least-Busy: Sugar assigns cases to the least busy user within the team. Least busy is defined by the person with the least number of unread emails assigned to them.
- None: Sugar does not initially assign cases and instead leaves the assigned user blank, allowing the admin to use other automation (e.g., SugarBPM) to handle assignments. Please see the SugarBPM documentation for further information.
Note: Case assignment is distributed to all members of the specified team, but excludes any inherited members of the team due to the "Reports To" structure. For more information on teams and the Reports To structure, please refer to the Team Management and User Management documentation in the Administration Guide.
Cases created from email are automatically related to contact and account records that match the email address in the From field of the email. If a case auto-reply template is specified, the sender of the email will receive an email based on the template selected. The response contains the system-generated case number formatted according to the case macro as a subject line. The body of the email displays below the template text. The case auto-reply also ignores the "No Auto-Reply to this Domain" setting.
Note: If both the Auto-Reply and Case Auto-Reply templates are selected, Sugar will respond to the sender with the Case Auto-Reply template only.