Mobile Layouts
Overview
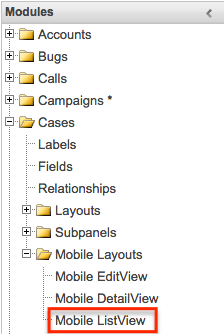
Mobile layouts are used to represent the views in the SugarCRM mobile app. The mobile layouts section in Studio allows administrators to add fields and configure the various mobile layouts. To access the mobile layouts section in Studio, expand "Mobile Layouts" from the Modules panel under the desired module. The available mobile layouts for the selected module will appear under "Mobile Layouts". 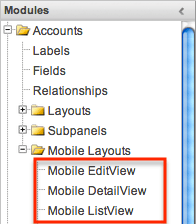
For all other layout types, please refer to the Layouts page.
Mobile Layout Types
There are various mobile layouts in Sugar to represent the different areas of the SugarCRM mobile application. Please note that not all layouts are available in every module and the different mobile applications will use the information defined here differently.
The following mobile layouts are available in Sugar:
- Edit View: Edit view layout is used to modify or create records in the specified module.
- Detail View: Detail view layout is used to view the current data for a record within the specified module. Certain fields are translated to the mobile app as buttons instead of data. For example, instead of seeing the phone number, there is a phone icon to be able to call the number on the record.
- List View: List view layout is used to view multiple records within the specified module. The first eleven fields in the Default column will be displayed in the mobile app by default unless the user has customized their view.
Mobile Layout Options
Administrators have the ability to configure the various mobile layouts available via Studio.
The following options are available when configuring mobile layouts in Studio:
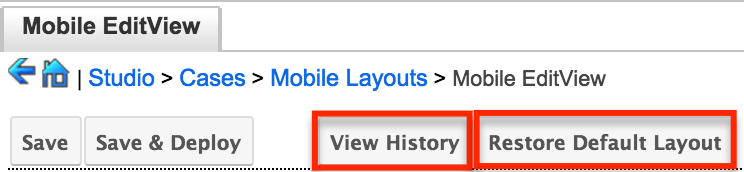
- View History: Sugar keeps a history of the changes made to each layout. You can preview and restore historical layouts via "View History". For more information on viewing the history of layouts, please refer to the Viewing Layout History documentation.
- Restore Default Layout: Restores the mobile layout back to the default out-of-the-box layout. For more information on how to restore the default layout, please refer to the Restoring Default Layouts documentation.
- Role: Record views may be configured to display differently based on the viewing user's role. For more information, please refer to the Creating Role-Based Record View Layouts documentation.
Editing Mobile Layouts
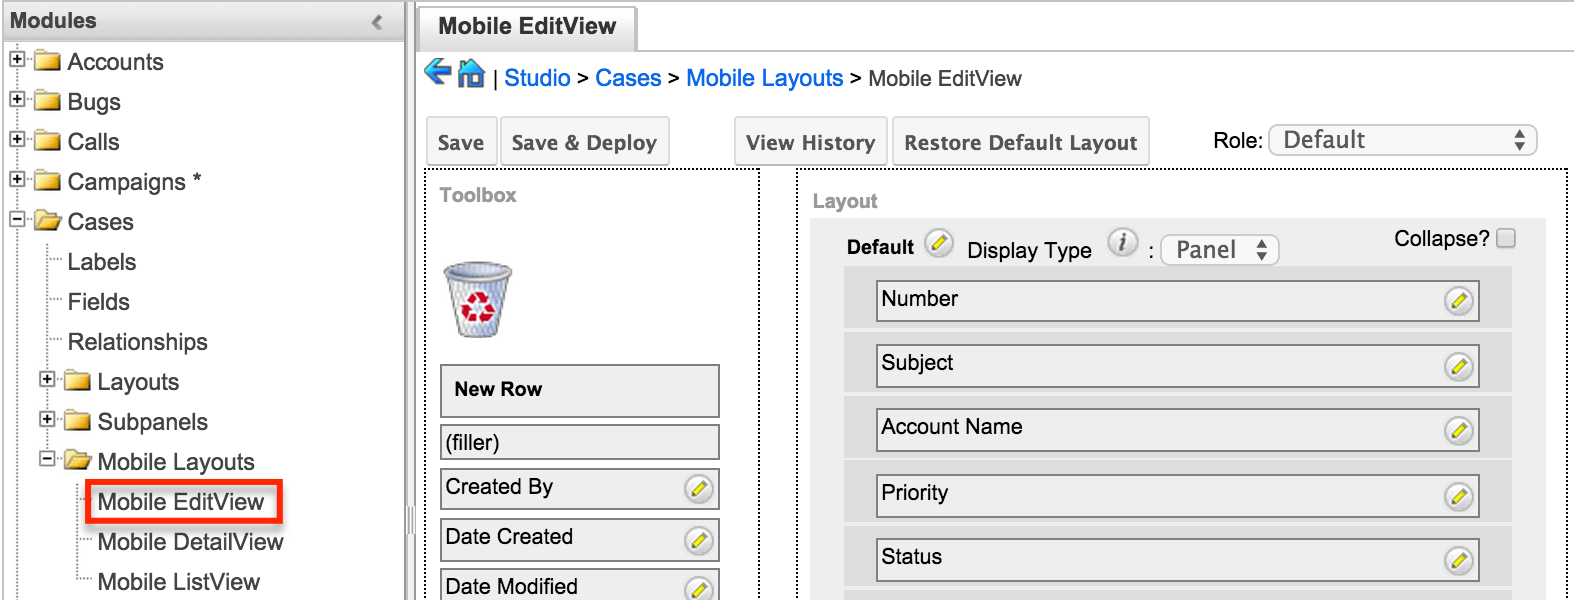
You can add, remove, hide, and reorder the fields for the available layouts in "Mobile Layouts" by selecting the specific layout under the Modules panel to edit. Please note that the method for modifying Mobile EditView and DetailView layouts are similar. The Mobile ListView layout has columns where you can designate fields users can and cannot see.
Mobile EditView and DetailView can both be configured to display customized layouts based on the viewing user's role. The availability and organization of fields may be altered to provide only the relevant fields for each user's role according to your business practices. For more information about configuring role-based layouts, please refer to the Creating Role-Based Record View Layouts documentation.
The following steps cover editing the Mobile EditView layout for the Cases module as an example:
- Expand "Mobile Layouts" from the Modules panel under the Cases module and select "Mobile EditView". The Mobile EditView layout will display in the main panel to the right.
- To add a field to the Mobile EditView layout, drag the field from the list of fields in the Toolbox to the desired "(filler)" location on the layout.
- You can also drag a field to a location on the layout that already has a field in place. The newly added field and the existing field on the layout will swap places.

- To remove a field from the layout, drag and drop the field from the layout to the trash bin in the Toolbox to remove the field from the layout. You may remove an entire row in the layout using the same method.
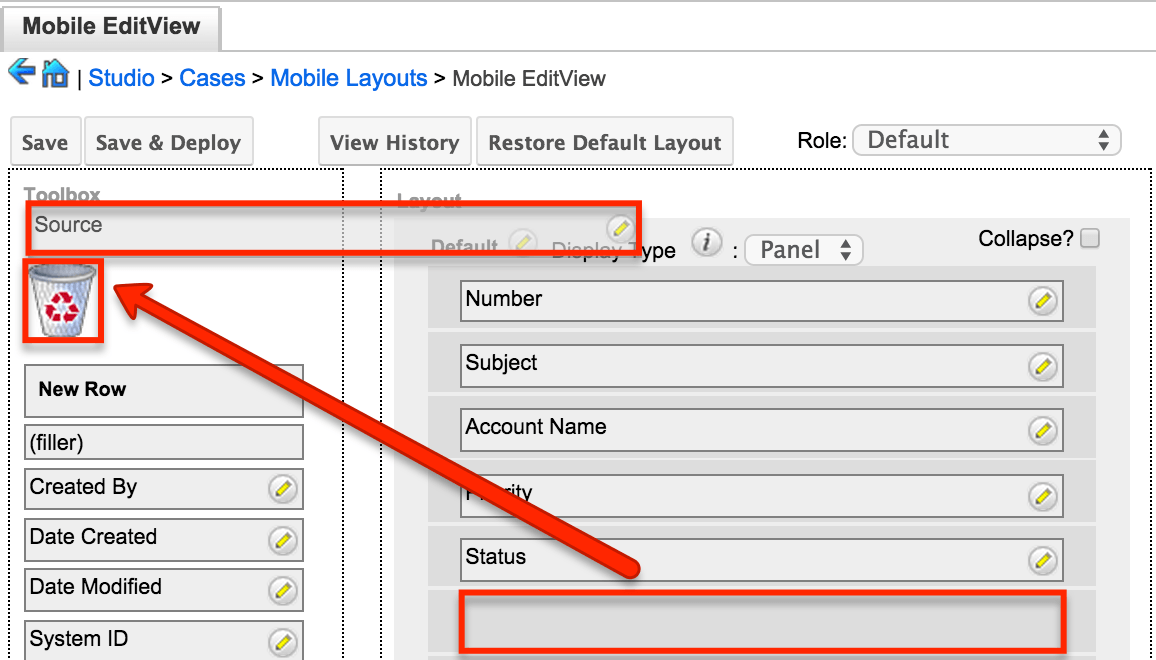
- To add a new row, drag the "New Row" item in the Toolbox to the layout to allow additional fields or blank spaces to be added.
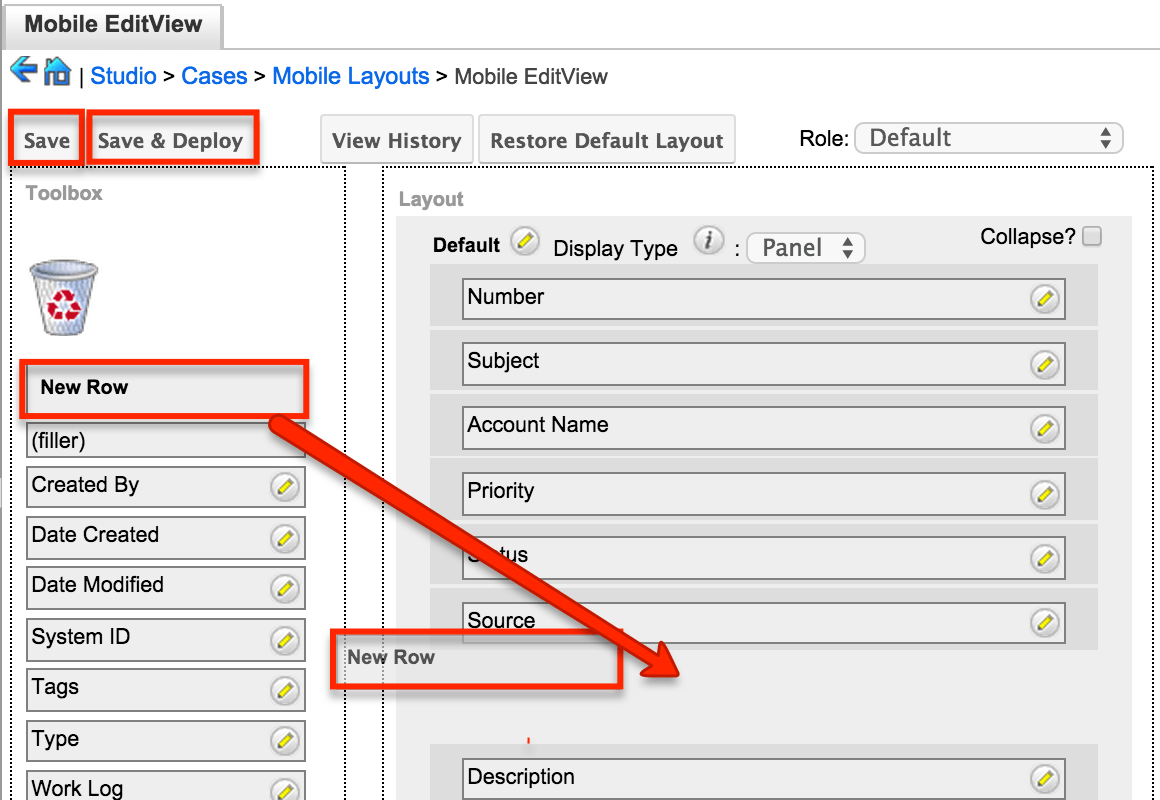
- Once the layout is finalized, click "Save" to preserve your changes or "Save & Deploy" to preserve your changes and deploy them instantly.
Unlike the Mobile EditView layout, the Mobile ListView layout has columns where you can designate fields users can and cannot see. When configuring the Mobile ListView layout, you will see three columns (Default, Available, Hidden) where fields can be dragged and dropped accordingly.
- Default: This column contains fields that are displayed in the list view; the first eleven fields are shown by default unless a user has customized their list view for the module using the List View Builder in the mobile app. See the SugarCRM Mobile App User Guide for more details on List View Builder.
- Available: Available fields are fields that will not show by default in the layout, but if the layout can be personalized, users can add these fields to their view of the layout. Not all list type layouts have an available fields section.
- Hidden: This column contains fields that will not be displayed or available to be added to the list view by users.
The following steps cover editing the Mobile ListView layout as an example:
- Expand "Layouts" from the Modules panel under the Cases module and select "Mobile ListView".
- To add a field to the Mobile ListView layout, drag and drop the fields from the Hidden column to the Default column. The top eight fields will be displayed on the Cases list view if the user has not customized their list view at all using the List View Builder in the mobile app. See the SugarCRM Mobile App User Guide for more details on List View Builder.
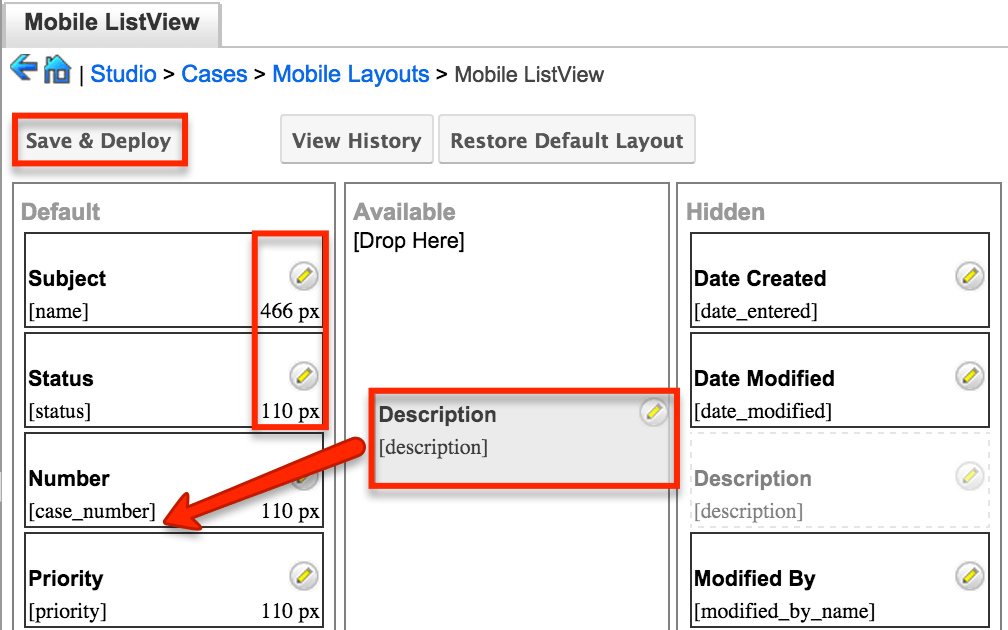
- Click the Pencil icon to modify the label of the field as well as the width size the field will take up in the list view. Please note that the modified label will display in all ListView layouts.
- Click "Save & Deploy" to preserve your changes and deploy immediately.