SugarCRM Mobile App User Guide
Overview
The SugarCRM mobile app enables access to your SugarCloud or on-site Sugar instance from your mobile device so you can interact with your data, manage daily activities, initiate phone calls, send SMS and emails, map record addresses, generate documents, and more while away from your computer. The app may also be used on tablets running a compatible version of Android or iOS and will automatically adapt to tablet-sized screens. It can also be used in split-screen mode on tablets to view the SugarCRM mobile app next to another app.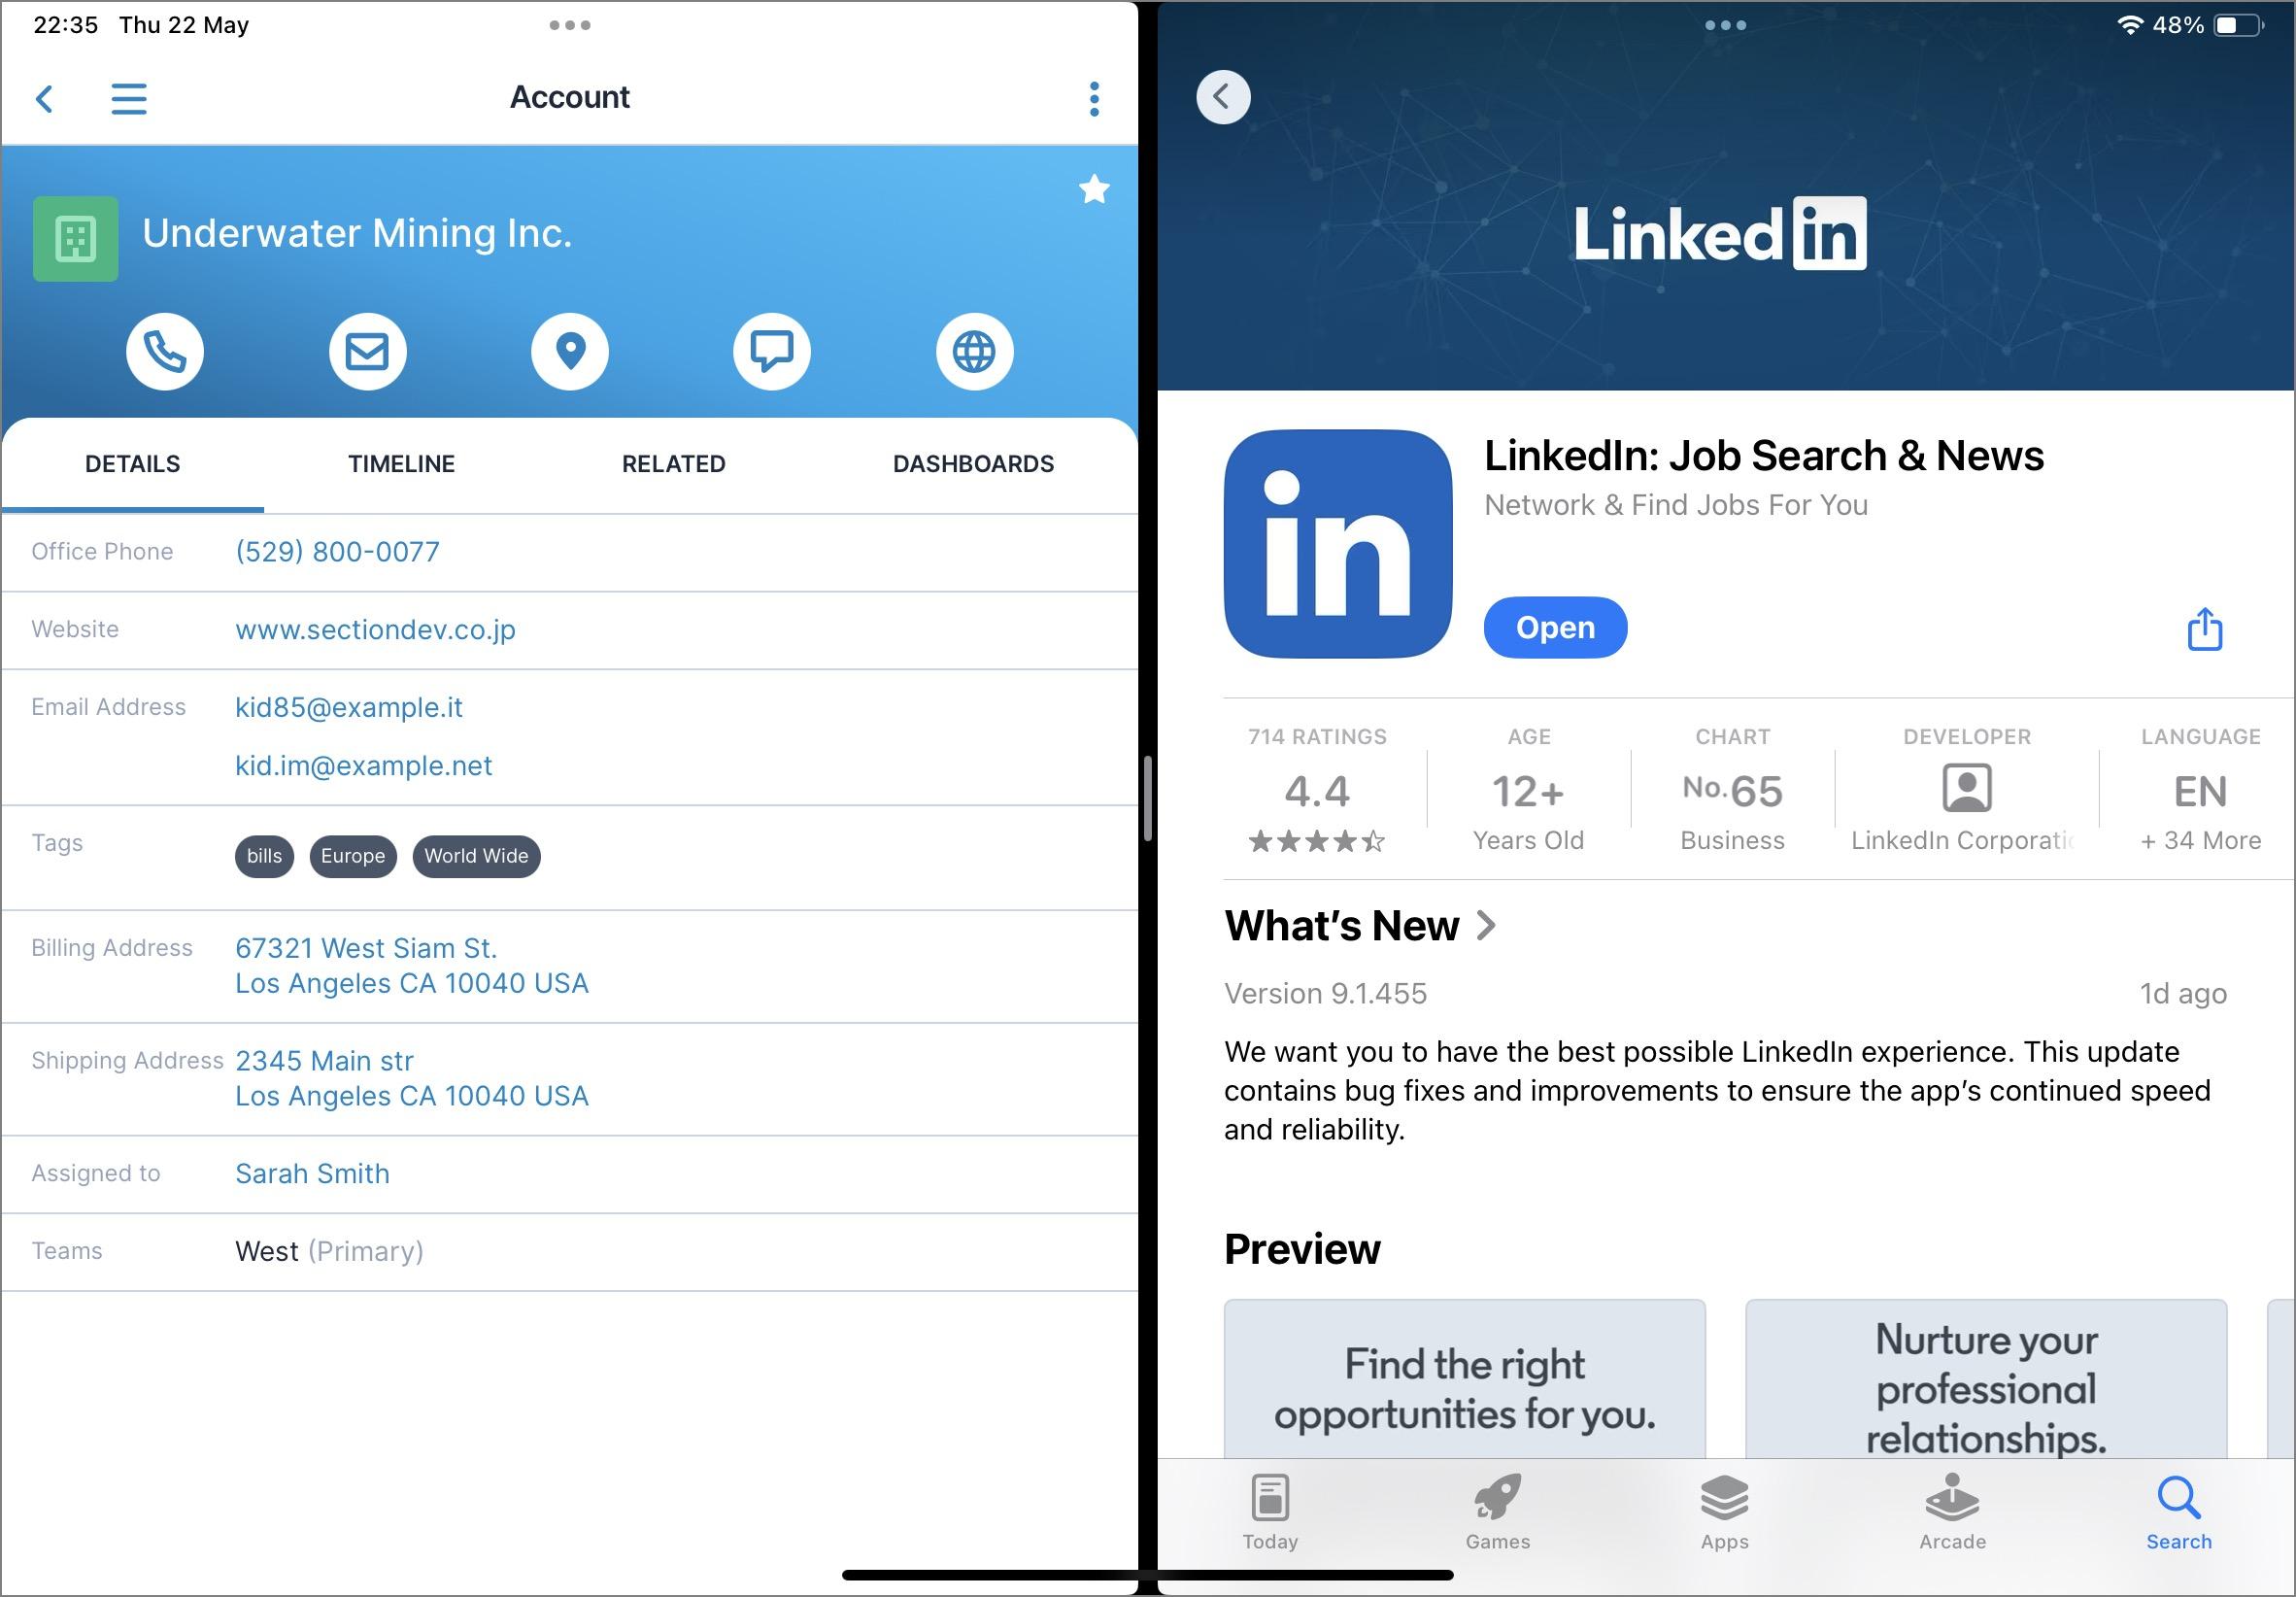
For more information on supported platforms, please refer to the Mobile Supported Platforms page.
Note that the SugarCRM mobile app is not available to users with a Sugar Sell Essentials license type. Please see the License Types Matrix in the Administration Guide for more details.
Installing
SugarCRM's mobile app is available for download from the Apple app store and the Google Play store. Use the following steps to download and run the application on your device:
- Search for "SugarCRM" in the app store. If searching from an iPad, choose the "iPhone Apps" tab in the Apple app store.
- Select the "SugarCRM" app.
- Tap "Install" to install the application.
Note that the mobile app cannot be used on a jailbroken or rooted device. If you install it on a jailbroken or rooted device, an error message will appear when you try to open the app, preventing you from accessing the application. In addition, the SugarCRM mobile app and an app built using Sugar's mobile SDK cannot be installed on the same device.
Logging In
To log in to your Sugar instance using the mobile app, you will need the following pieces of information:
- Username: The username you use to access your Sugar instance in a desktop browser.
- Password: The password you use to access your Sugar instance in a desktop browser.
- Sugar Instance or single sign-on URL: The URL of your Sugar instance. Please note that the HTTP protocol is not supported.
Note: "https://" can be included or left off without effect, but be careful to only include "www." if this is included when accessing your instance from a desktop browser.
The sections below outline the steps to log in based on the authentication type used by your Sugar instance. If you are unsure if your instance uses SugarIdentity, you can easily check by navigating to the edit view of your profile in the desktop application. If your instance uses SugarIdentity, a popup will appear stating that you must contact your administrator to make changes to read-only fields. Otherwise, the popup will not appear. If you are still unsure, you can also contact your administrator to confirm which authentication type your instance uses.
Standard Login
Both SugarIdentity and non-SugarIdentity instances can use the standard login process if an admin has not configured single sign-on (SSO). Use the following steps to log in to your instance via standard login:
- Once the app is installed, tap the SugarCRM cube icon to run the application. If you are using iOS, you will be prompted by the iOS operating system to allow push notifications. If you wish to take advantage of push notifications from the app for Comment Log mentions and record assignments, be sure to allow this in the pop-up that appears.
- Enter your Sugar instance URL. "https://" will be added to the beginning of the URL if it is not already included. Then, tap "Continue" to proceed to the SugarIdentity login screen. Alternatively, if you wish to log in using your Sugar credentials directly, tap the link below the Continue button.
Note: If you have previously used the app on your mobile device, you must tap the gear icon in the top right corner to modify these settings.
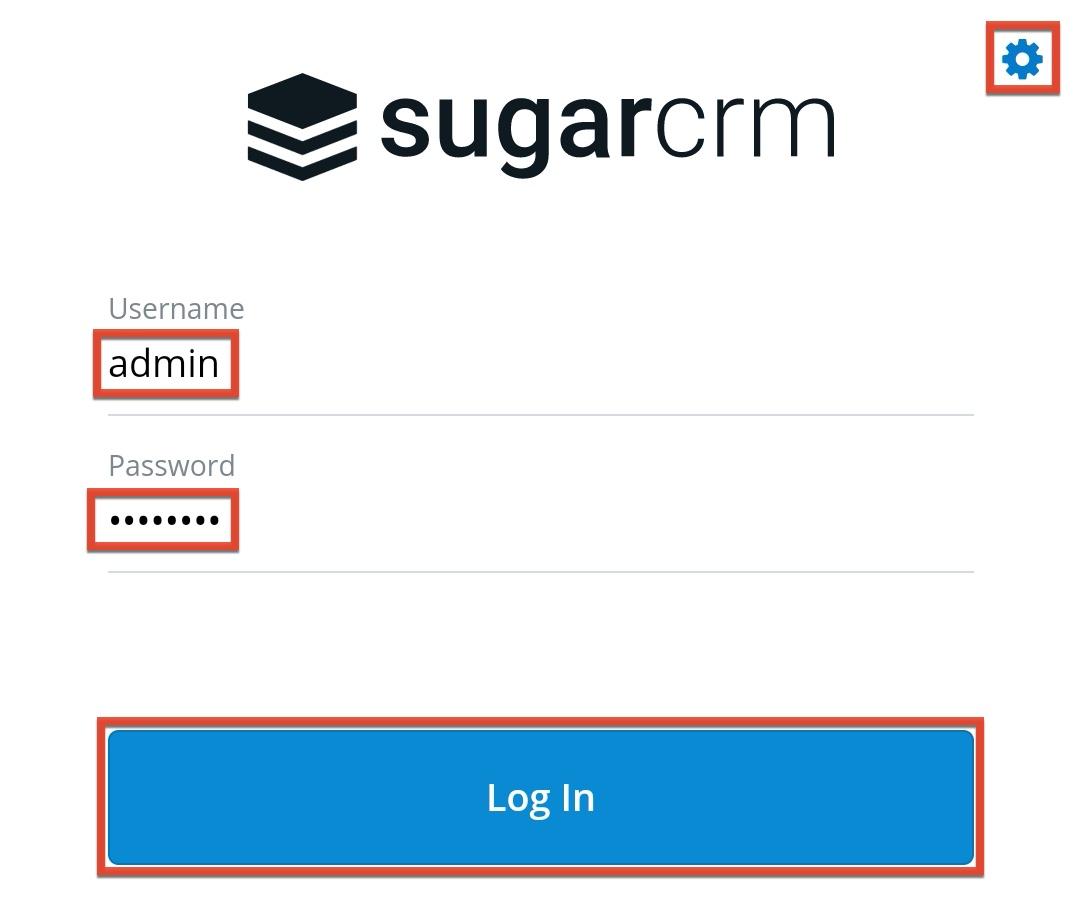
- Enter your username and password then tap "Log In".
- For instances that do not use SugarIdentity
- For instances that use SugarIdentity
- For instances that do not use SugarIdentity
- For iOS devices with Touch ID, tap "Enable" on the Enable Touch ID screen to allow logging in to the app with your fingerprint.
Note: Touch ID cannot be used for instances that use SugarIdentity.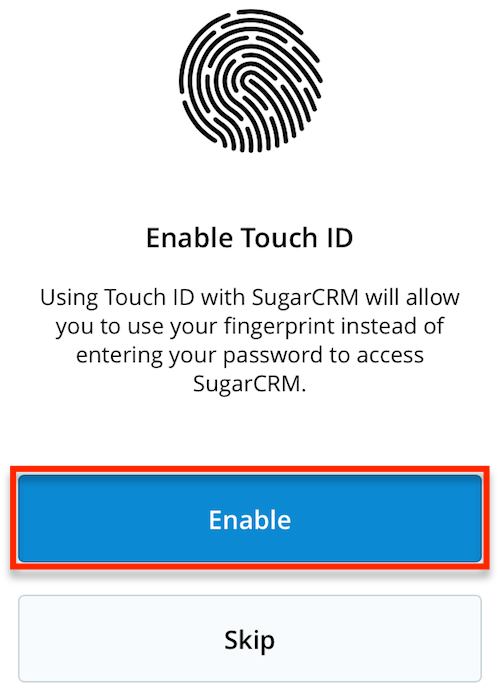
- For iOS devices with Face ID, tap "Enable" on the Enable Face ID screen to allow logging in to the app using Face ID.
Note: Face ID cannot be used for instances that use SugarIdentity.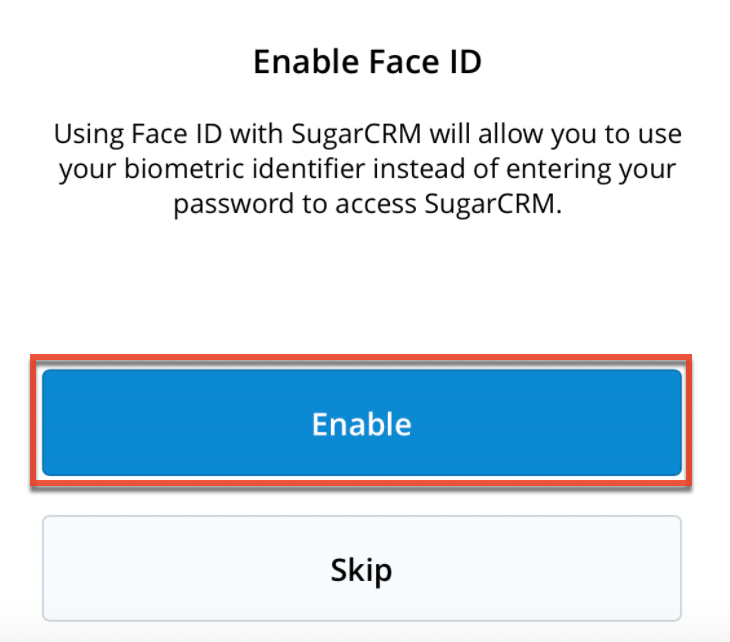
- For instances that use SugarIdentity, a user consent screen will appear requesting access to certain Sugar data (e.g., your Sugar profile). Tap "Allow access" to continue to the app.
The first time you log in and navigate through the app, a brief tour will appear to help familiarize you with the application.
Logging in With SugarIdentity Using Multi-Factor Authentication
SugarIdentity supports multi-factor authentication, which provides an added layer of security for Sugar to prevent unauthorized users from gaining access to your account. When multi-factor authentication is enabled for your Sugar instance, you will need to use an authenticator app (e.g., Authy, Google Authenticator, Microsoft Authenticator) on a mobile device when logging in to your Sugar account via the standard mobile login.
Use the following steps to log in to your instance using SugarIdentity with multi-factor authentication:
- Follow steps 1-3 in the Standard Login section above.
- If this is your first time logging in after multi-factor authentication has been enabled for Sugar, a QR code will appear on the screen. Scan the QR code using your mobile authenticator app (e.g., Authy), then tap "Continue". If you cannot scan the QR code using a mobile device, skip to step 3.
Note: If you have already paired an authenticator app with Sugar, then skip to step 4.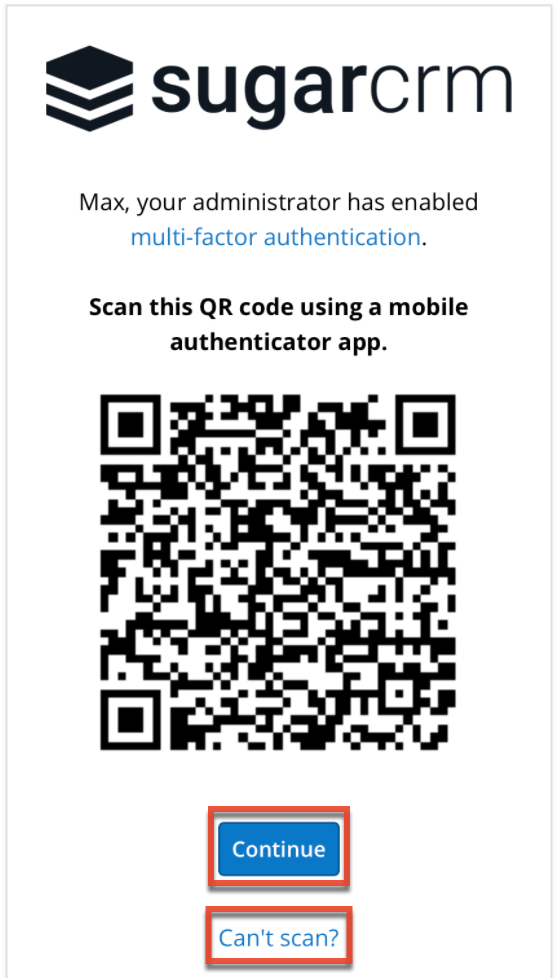
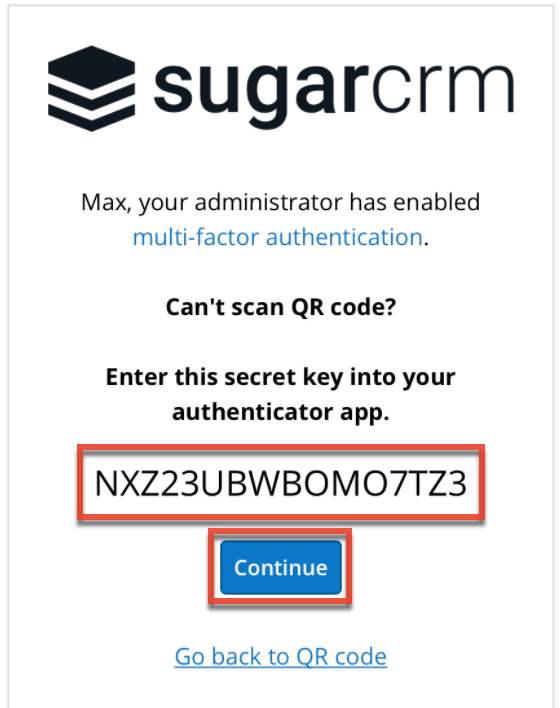
- If you cannot scan the QR code on step 2 using a mobile device, tap the "Can't scan?" link and enter the secret key that appears on the screen into your authenticator app. Tap "Continue".
- On the next screen, enter the 6-digit code generated from your authenticator app, then tap "Log In".
Note: Once your authenticator app is paired with Sugar, for future logins, you will just be required to enter a new 6-digit code on this screen after entering your Sugar login credentials.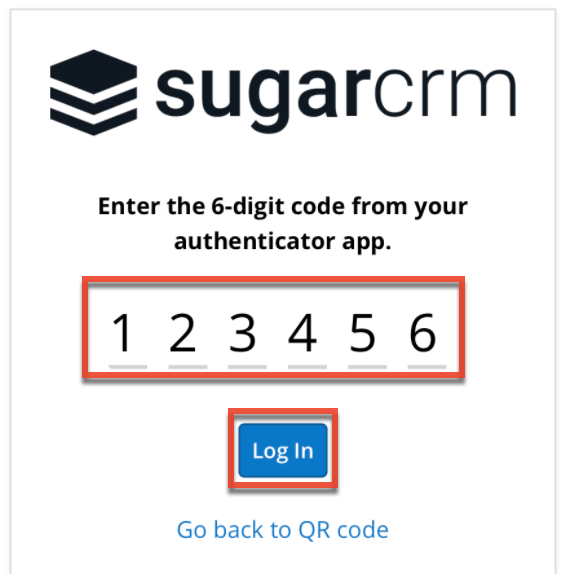
- A user consent screen will appear requesting access to certain Sugar data (e.g., your Sugar profile). Tap "Allow access" to continue to the app.
The first time you log in and navigate through the app, a brief tour will appear to help familiarize you with the application.
Legacy Single Sign-On Authentication
Use the following steps to log in to your instance using SAML without SugarIdentity:
- Once the app is installed, tap the SugarCRM cube icon to run the application.
- Enter your Sugar instance URL. "https://" will be added to the beginning of the URL if it is not already included.
Note: If you have previously used the app on your mobile device, you must tap the gear icon in the top right corner to access these settings. - Tap "Continue". The application will redirect you to your single sign-on login page. Enter the SAML login credentials. Alternatively, if you wish to log in using your Sugar credentials directly, tap the link below the Continue button.
The first time you log in and navigate through the app, a brief tour will appear to help familiarize you with the application.
Note: Only instances that are configured to use SAML authentication can log in through legacy single sign-on in the mobile app.
Single Sign-On Authentication With SugarIdentity
Use the following steps to log in to your instance using single sign-on (SSO) with SugarIdentity:
- Once the app is installed, tap the SugarCRM cube icon to run the application.
- Enter your Sugar instance URL. "https://" will be added to the beginning of the URL if it is not already included.
Note: If you have previously used the app on your mobile device, you must tap the gear icon in the top right corner to access these settings. - Tap "Continue". The application will redirect you to your SugarIdentity login page. Enter the SugarIdentity login credentials. Alternatively, if you wish to log in using your Sugar credentials directly, tap the link below the Continue button.
- After logging in, a consent screen will appear requesting access to certain Sugar data (e.g. your Sugar profile). Tap "Allow access" to continue to the app.
The first time you log in and navigate through the app, a brief tour will appear to help familiarize you with the application.
Note: Only instances that are configured to use SugarIdentity authentication can log in through SugarIdentity in the mobile app. In addition, the iOS Face ID and Touch ID features cannot be used with SugarIdentity.
Offline Records
If your Sugar instance is enabled for offline use, the Offline Records screen will appear upon first logging in to the app. While a small number of records are automatically cached to your device for offline use, you have the option to bulk download your assigned, favorited, and followed records. Click "Download" to initiate the download which will continue in the background while you use the app. Alternatively, click "Not right now" if you do not wish to make these records available for offline use. Check the "Use cellular data" box to have the download continue using cellular data when a wifi connection is not available.
You can initiate the bulk download at any time from the Offline Settings option in the main menu. For more information, refer to the Offline section of this documentation. 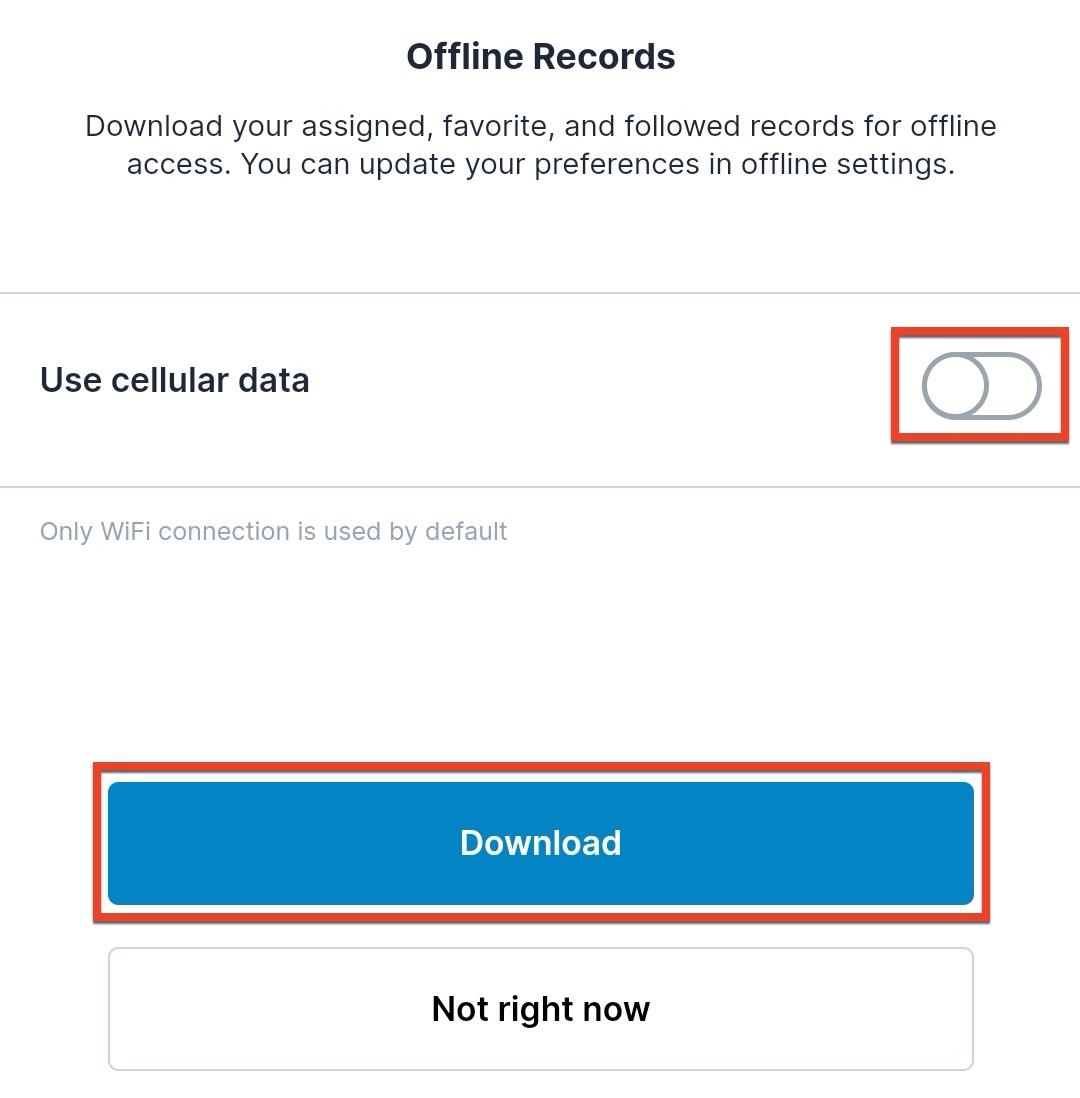
Main Menu
The main menu can be accessed from any page by tapping the three-bar icon at the top left. Tap the icon again to close the menu. The menu will open from the left and allow you to work with your user profile, access Sugar modules, dashboards, and the calendar, view information about the application, configure the application, access the desktop version of Sugar, and log out.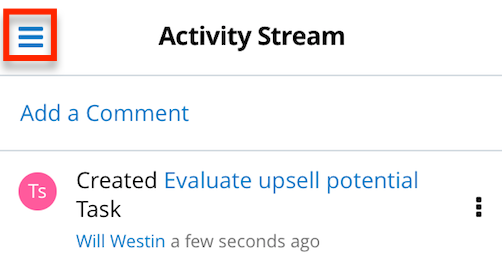
Profile
Your user profile by tapping your name or the user icon at the top of the main menu. To make changes to any fields, edit them using the instructions in the Editing Records section of this documentation, then tap "Save" to preserve your changes. 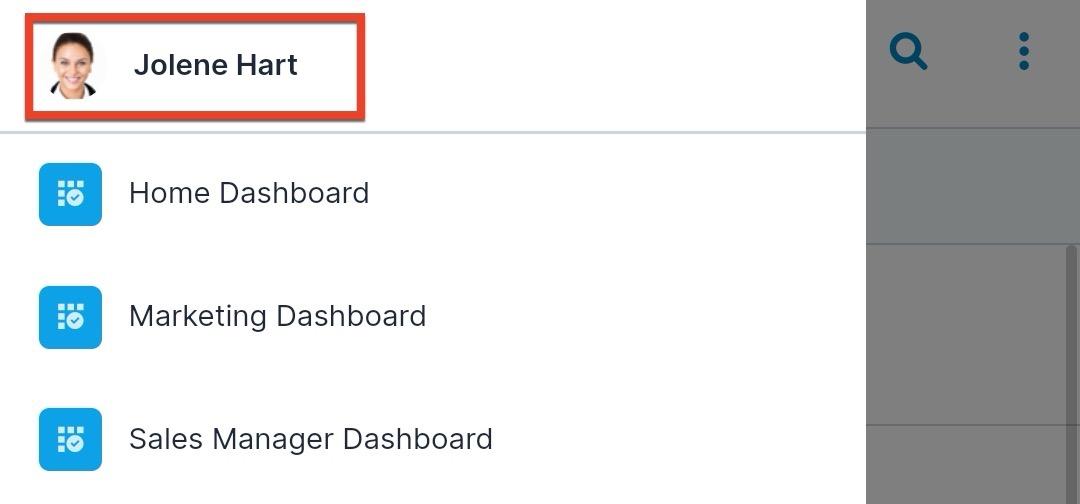
Note: Fields that are unavailable for editing are greyed out.
Dashboards
Beneath the calendar, the main menu displays each of the dashboards you have access to and have marked as a favorite in your Sugar instance, as long as they contain at least one dashlet that is available in the mobile app. To switch between your dashboards, tap the main menu icon and select the desired dashboard. Dashboards and dashlets must be created and edited in the desktop version of Sugar, but note that not all dashlets are available in the mobile app and some may not appear. Only dashlets supported by the moble app will be visible in the app. After making a change to your dashboards in the desktop version, close and reopen the app to see the changes.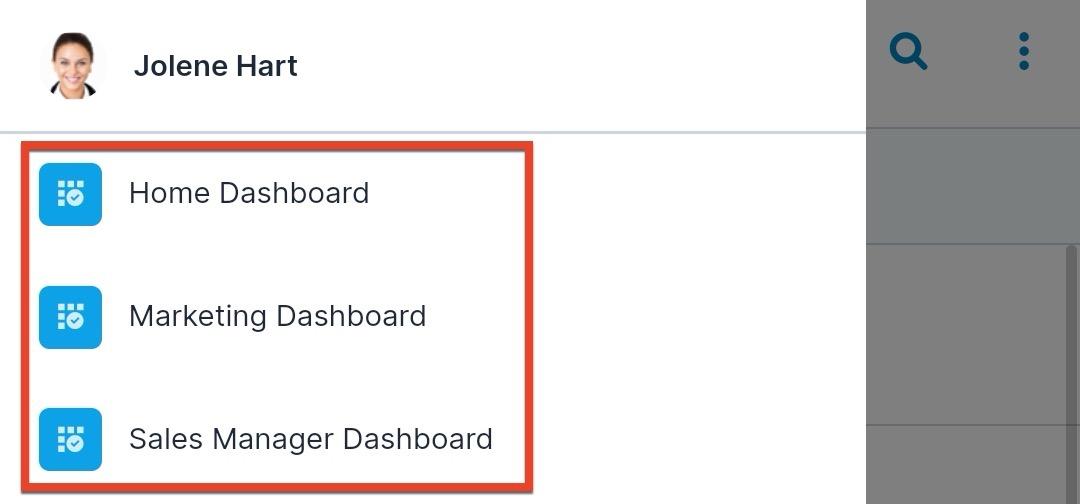
From the dashboard view, tap any dashlet's icon to view the individual dashlet.
From any dashlet, you can tap the Dashboard icon to return to the tiled view of all of your available dashlets. For dashlets that display records in a list view, swipe from right to left on a record's row to open the Actions menu.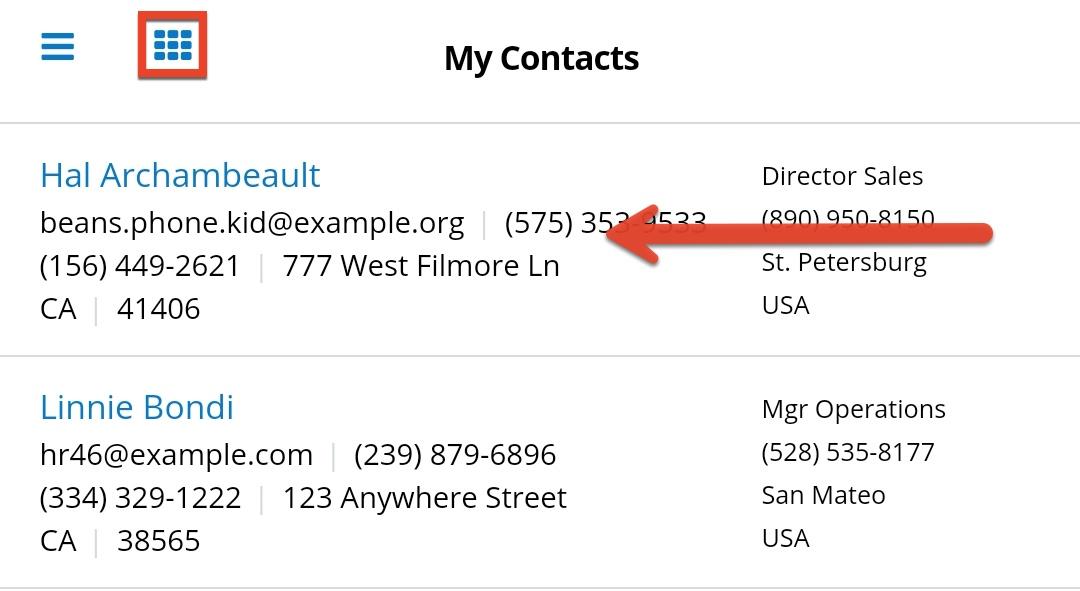
Note: When using a tablet, tapping on the name of a record in a dashlet will open the record in detail view to the right of the dashlet.
At the bottom of any dashlet, there is a navigation bar with colored dots representing which of your dashlets you are currently viewing. You can move forward or backward through your dashlets by tapping the forward and back arrows or by swiping left or right within this bar.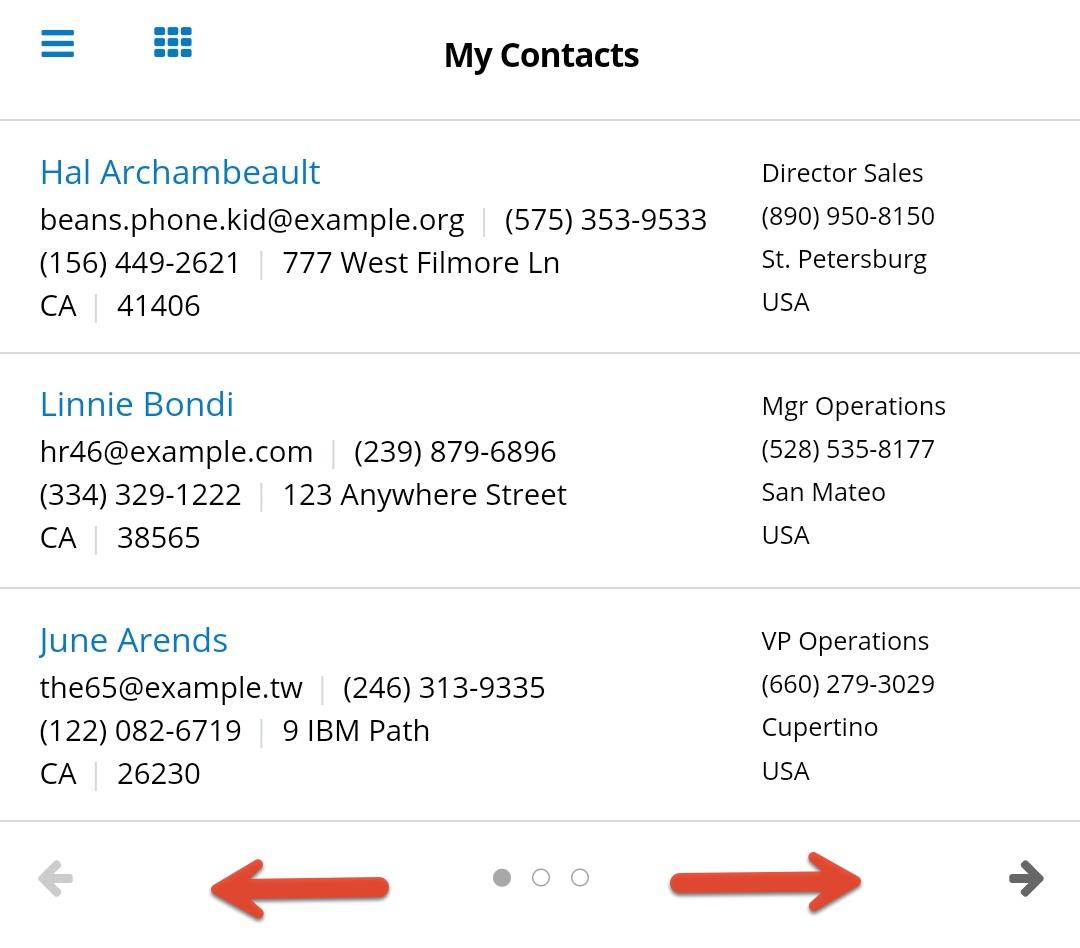
For information about configuring and using dashlets, please refer to the Dashboards and Dashlets documentation.
Note: Dashlets that list records (e.g., list view dashlets and chart dashlets) will not load any new data while your device is offline. Only data that has previously been loaded in the dashlet will be displayed until the application reconnects to your Sugar instance.
Note: A user must log in to the desktop version of Sugar at least once before any dashboards will appear in the mobile app.
Calendar
SugarCRM's mobile calendar is available in the main menu under your dashboards. It has two different layouts for seeing your schedule based on the calendars you have configured in the desktop application. You can configure any number of calendars in the desktop app based on different modules, but for some older, unsupported versions of Sugar, you can only configure calls, meetings, and tasks. You must have access to at least one of the configured calendars' modules to see the mobile calendar.
In addition, you can add calendars of events belonging to other users or teams to your calendar view in the mobile app so that you can view an overlay of various schedules in one place. See the Calendar Settings section for details on adding new user and team calendars.
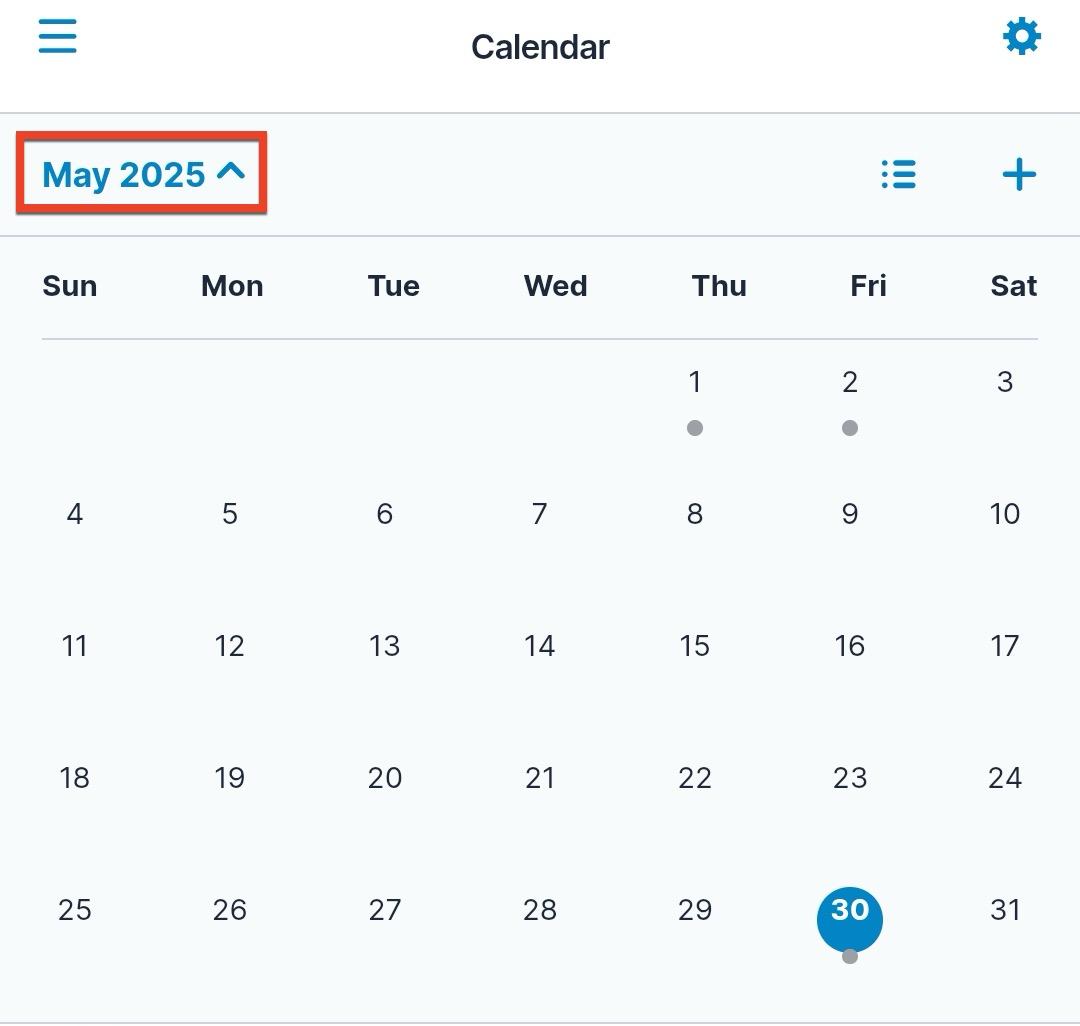
The default view when you open the calendar is agenda view, which shows a summary of all your activities. Tap the calendar icon at the top to switch to day view, where you can see an hourly view of a single day with the activities displayed within their time slots.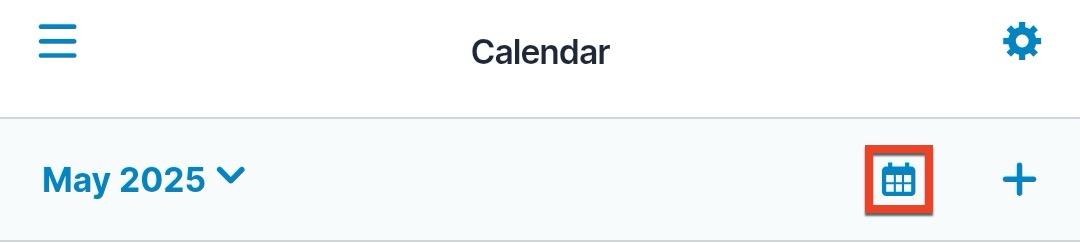
When you enter day view, the calendar icon becomes a list icon and tapping it brings you back to agenda view.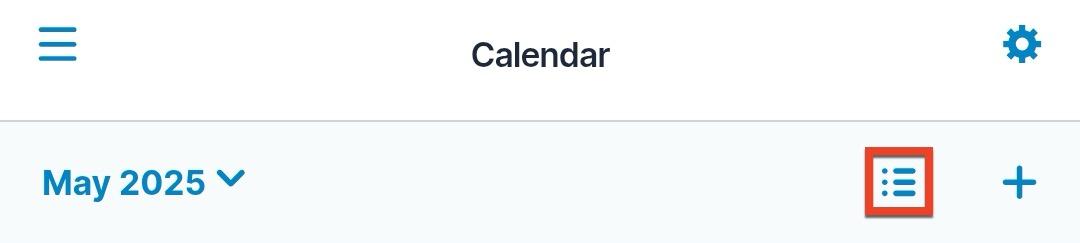
In either view, the top bar offers the same abilities: choosing a different date to view, switching between views, and creating a new event. The following elements are available:
- Month navigator: Displayed as the month and year (e.g., May 2025) that you are currently viewing, tapping this button expands and collapses the month view of the current month. In this view, you can swipe up and down to scroll through the months and tap a day to open it in the calendar. Days with at least one scheduled event have a grey dot below them.
- View switcher: Displayed as either a calendar icon or a list icon, depending on your current view, tapping this icon switches between agenda view and day view. If you have selected a specific day other than today in either view, switching between views keeps that day in focus. In agenda view, the day at the top of the screen is considered the selected date, but you can also tap on a date in the month navigator to select it.
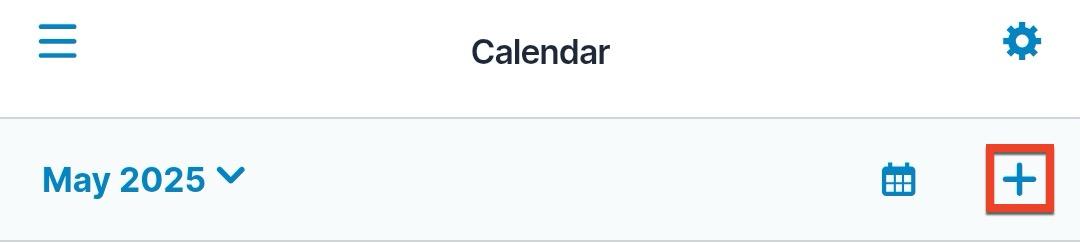
- Create: Displayed as a plus icon, tapping this icon allows you to create a new record based on the types of calendars you have configured in the desktop app. Once you select the type of event to create, its edit view is opened. After you save, you are returned to the calendar.
The bottom bar contains the following two abilities regardless of which view you are in: navigating back to today's date and refreshing the calendar. The following elements are available:
- Today navigator: Displayed as a Today link, tapping this button opens the current date in whichever view you have open (i.e., agenda view or day view).

- Refresh: Displayed as an icon with two circular arrows, tapping this icon refreshes the current view so any changes to the events are visible.

Agenda View
Agenda view, accessible via the list icon in the top bar if not already open, shows all future events as color-coded cards in a list by date. Every date has a heading with the events, if any, displayed in chronological order beneath the heading. Each event shows its subject, description, start time, and duration and is displayed as a color-coded card according to the type of activity (e.g., call). Tap any event to open its detail view.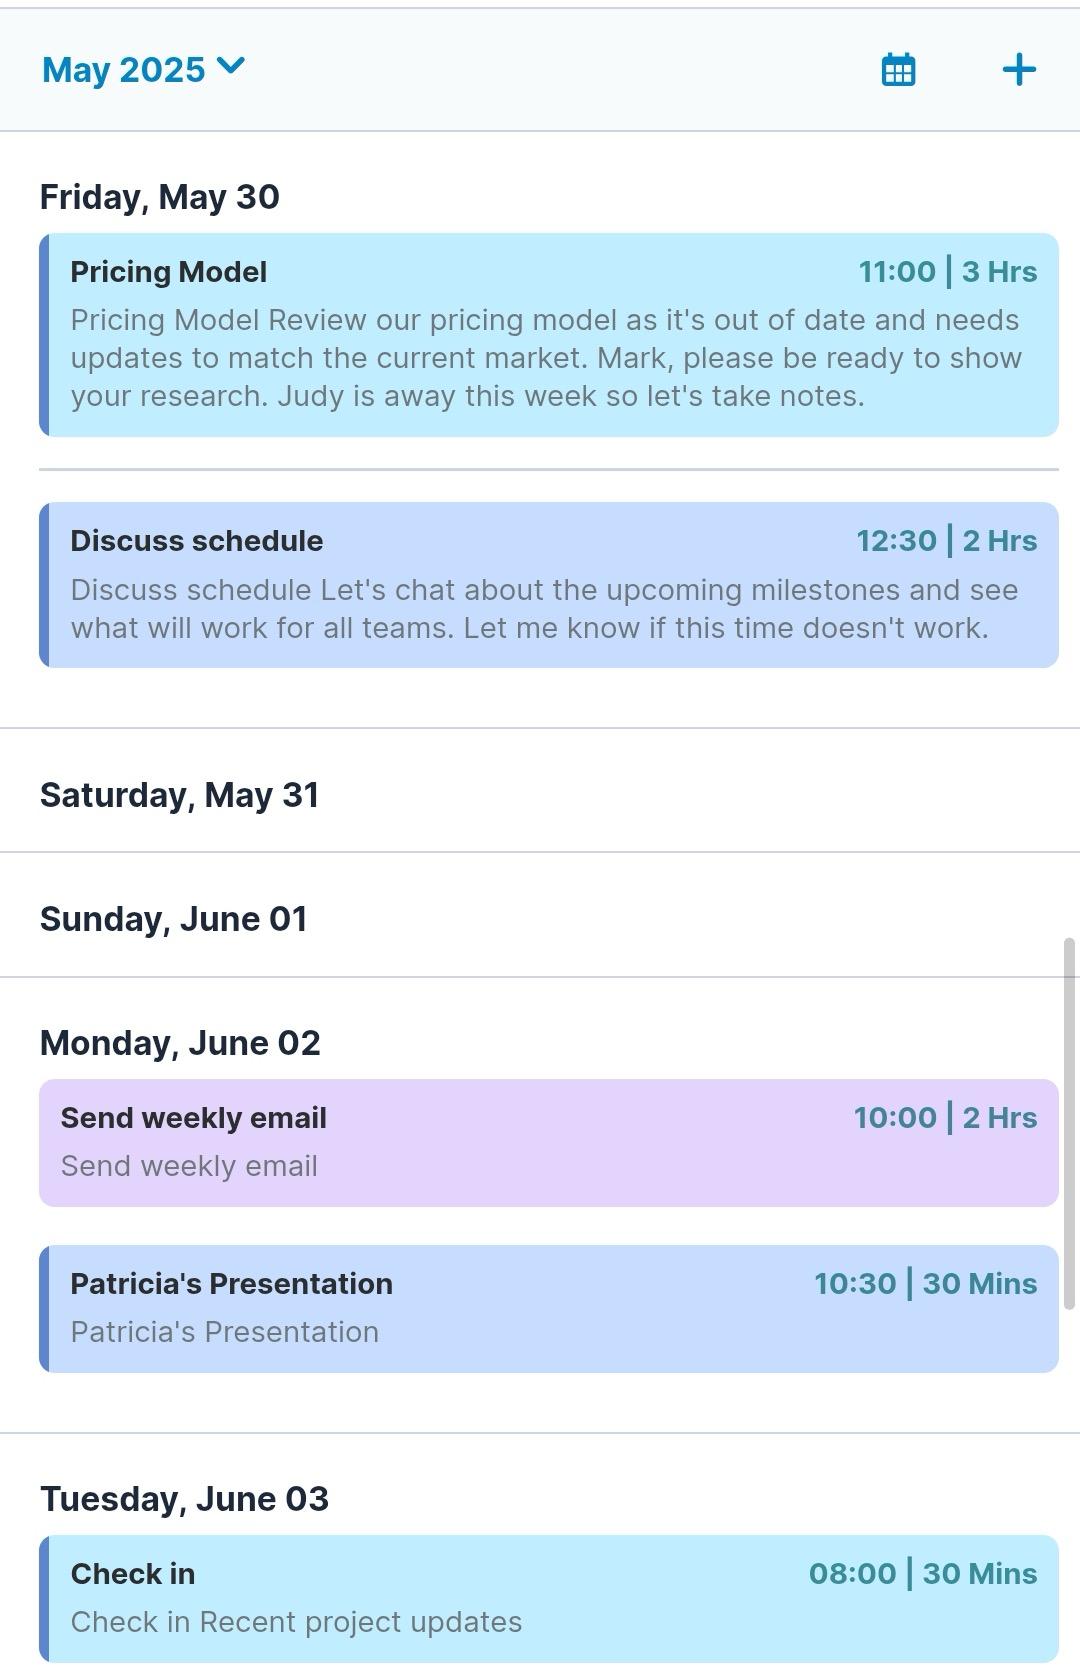
Day View
Day view, displayed by default when you first open the calendar after logging in, is an hourly view of a single day with all events displayed within their time slots; a blue, horizontal line is displayed at the current time in the view. Each event shows its subject, description, start time, and duration and is displayed as a color-coded card according to the activity type (e.g., call). If an event lasts 24 hours or longer, it is displayed as an all-day event at the top of the view on every day for which it spans the entire day. Tap any event to open its detail view and scroll up and down within the day to see different hours of the day.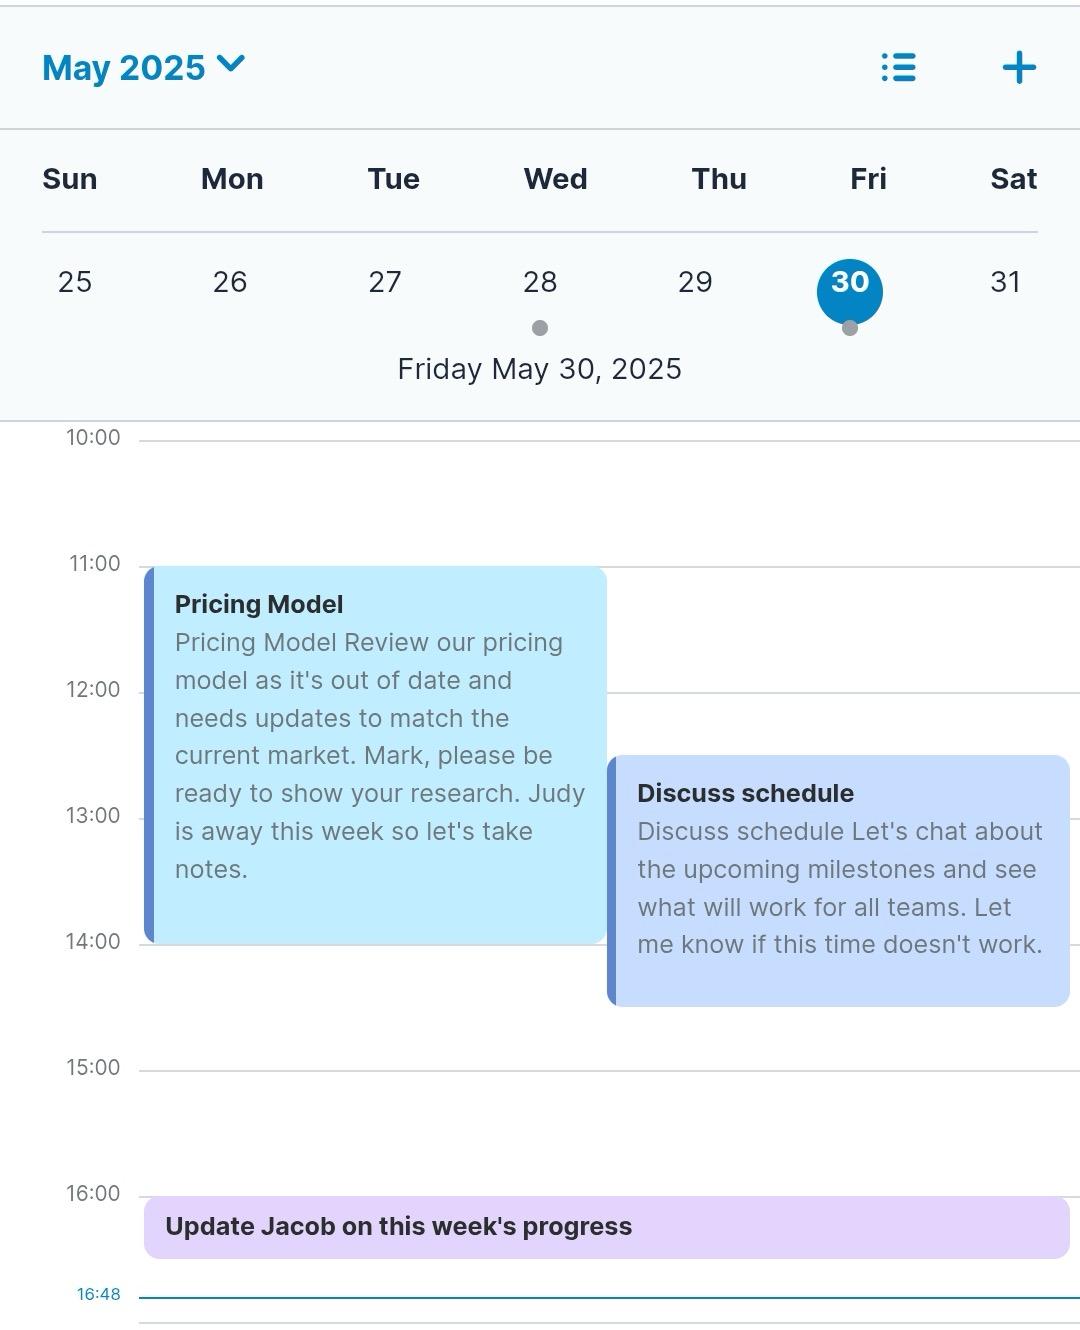
At the top of the view is an overview of the week, starting with the first day of the week, as configured in the calendar settings. The currently-selected date is displayed in a solid blue circle and today's date, if not selected, is displayed in blue text. Swipe left and right to scroll through the weeks and tap a specific date to open it in day view.
Calendar Settings
Clicking the gear icon in the top right corner of the calendar opens the Calendar Settings screen.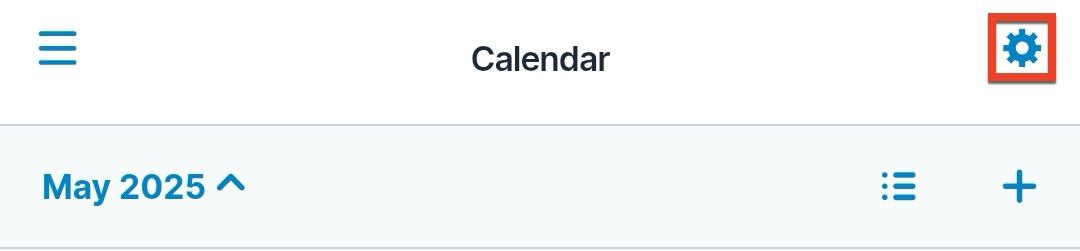
The first setting on this page allows you to select on which day of the week (e.g., Sunday) the calendar's week should start: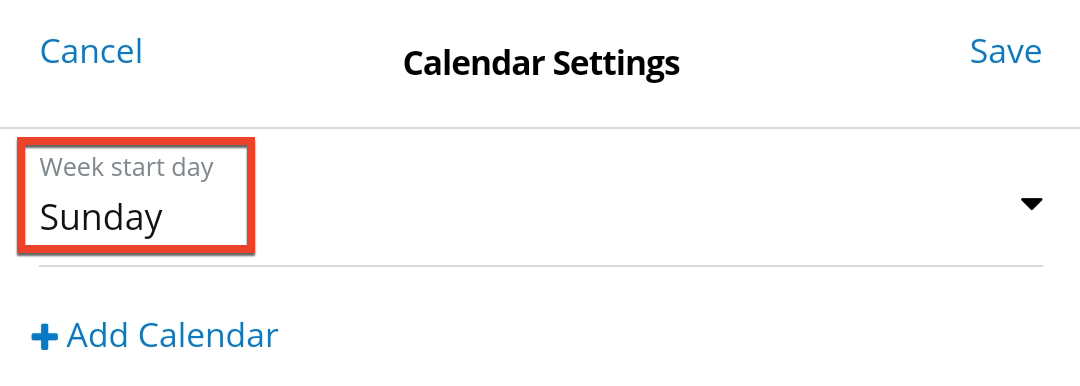
Below this, you can enable and disable each of your own calendars for display and add or remove other users' and teams' calendars that you wish to see in your mobile calendar. The tabbed view contains two tabs listing your own calendars in the first tab and any shared calendars you have added in the second tab.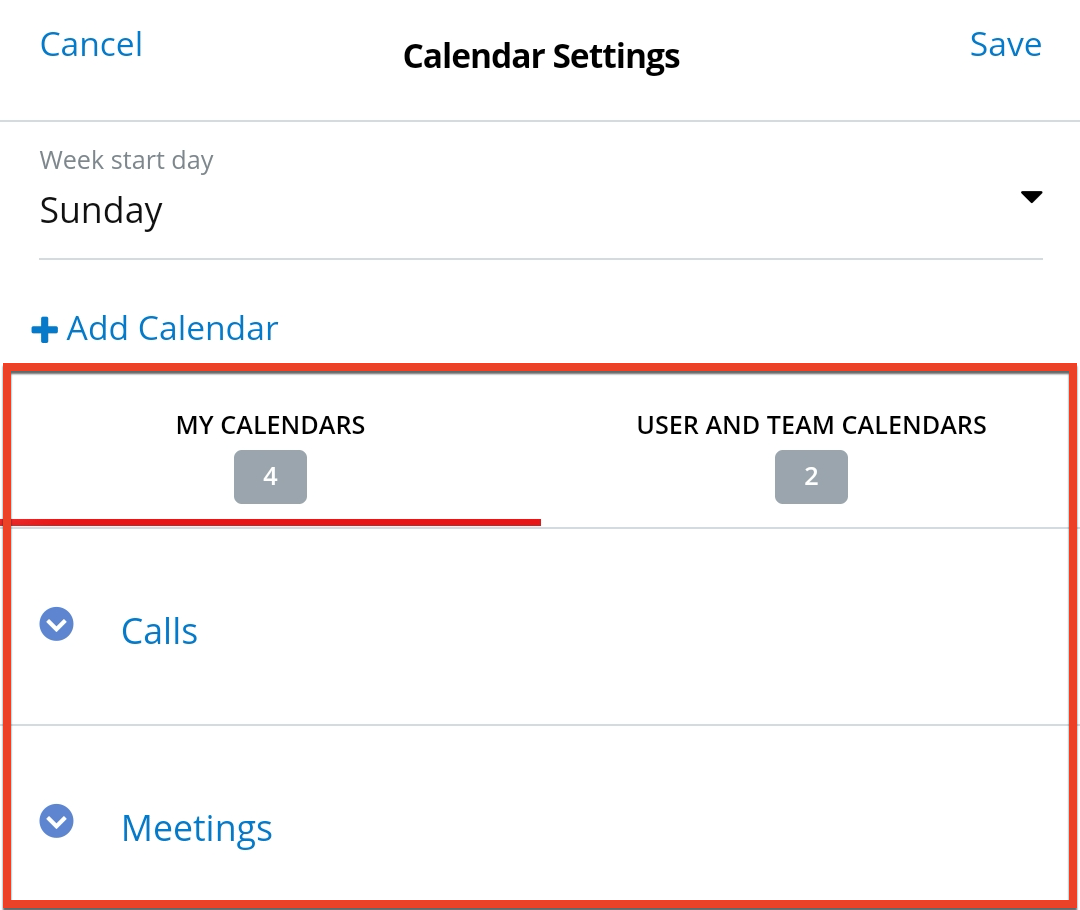
The My Calendars tab lists all calendars you have configured in the desktop application. Tap any calendar in the list to enable or disable it for display in the mobile calendar, but note that you cannot add or remove any calendars from the mobile app. These can only be configured in the desktop app. For more information on configuring calendars in the desktop app, refer to the Calendar documentation in the Application Guide.
The User and Team Calendars tab lists all calendars of records belonging to other people that you have added via the mobile app. Use the Add Calendar button to add a new shared calendar, tap any existing shared calendar to enable or disable it for display in the app, and tap the X next to any calendar to remove it from the app. Note that the list of shared calendars in the mobile app is configured separately from the list in the desktop app; you must add a calendar in each application to see it there.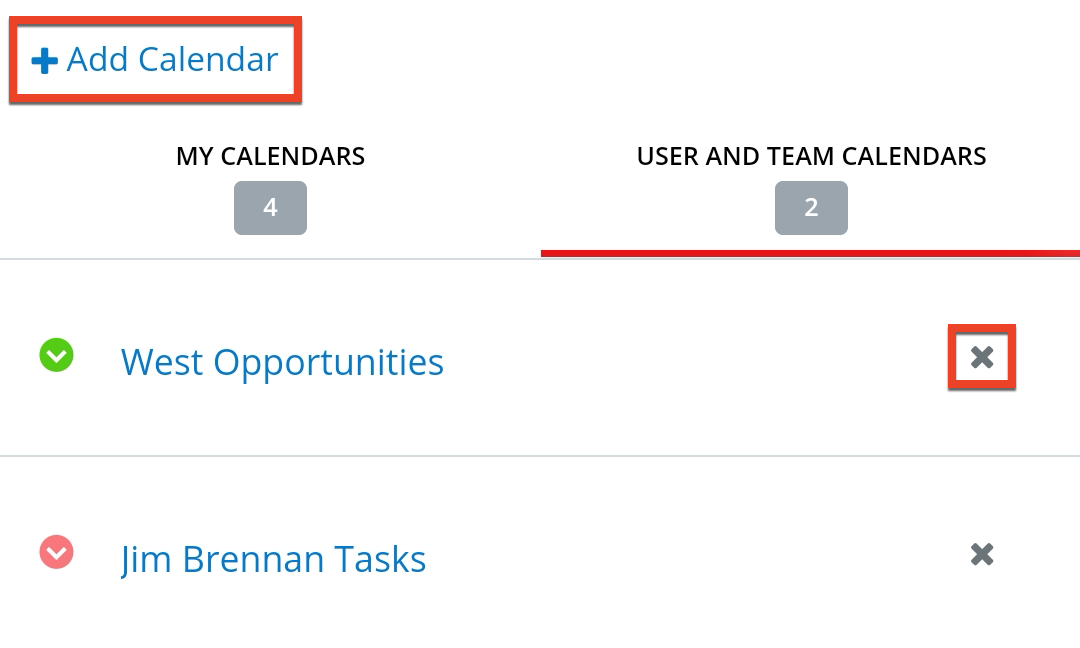
Once you have made your changes to your calendar settings, be sure to tap "Save" in the top right corner to save the changes.
Adding Calendars
Tapping "Add Calendar" allows you to add new shared calendars to your mobile view. Once you are on the Add Calendar screen, tap "Search and Select Calendar" at the top to choose a calendar you have configured in the desktop application as the basis for this shared calendar. Once you have selected one, tap a user or team from the displayed list; this indicates that you want to see the records specified by the selected calendar belonging to the user or team you have chosen. Use the filter above the list to narrow it down to only users or only teams and use the magnifying glass icon across the top to search for something specific.
When you are happy with your selection, tap "Done" to add the calendar. Calendars that you add will appear under the User and Team Calendars tab and, when enabled, their events will be visible in your mobile calendar alongside your own events.
Global Search
When logging in to SugarCRM's mobile app, your Global Search page will be displayed first unless a different option is selected in your Start Screen option. You can navigate to the Global Search page from anywhere within the application by tapping the three-bar icon to access the main menu then choosing "Global Search". By default, the Global Search page will show a list of your recently viewed records from all available modules. The list will be empty if there are no recently viewed records to display.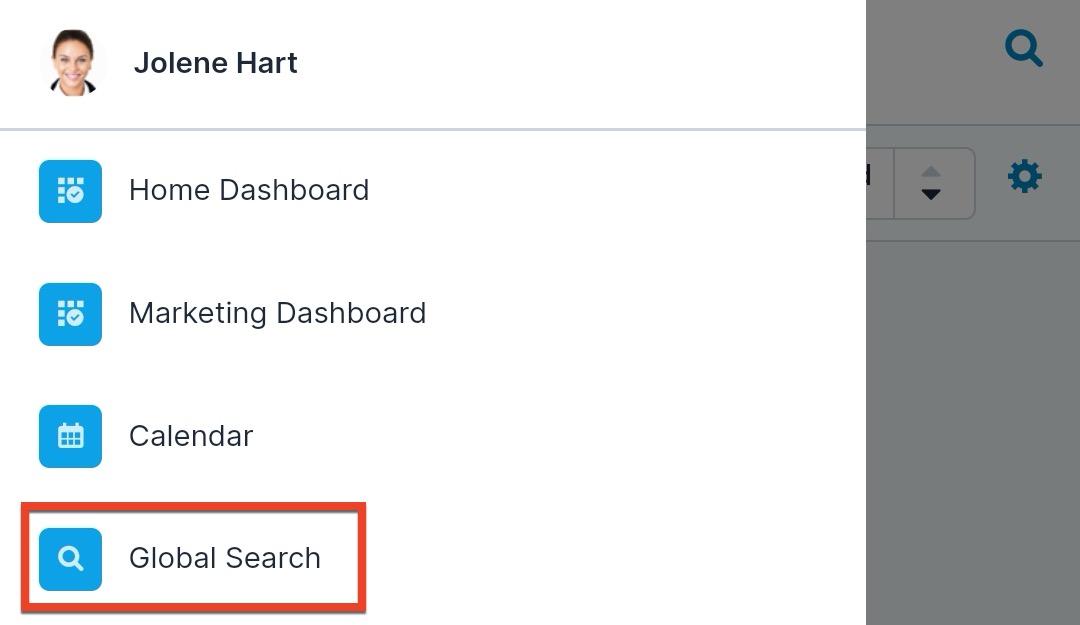
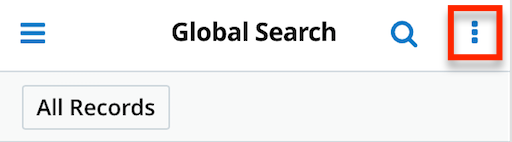
The app allows you to search across all modules at once from the Global Search page. You can use the out-of-the-box filter options (i.e., All Records, My Favorites, My Records, and Recently Viewed) or build your own Global Search filter by tapping "Build Filter". You can also tap the magnifying glass icon to expand the search box and begin typing your search criteria. 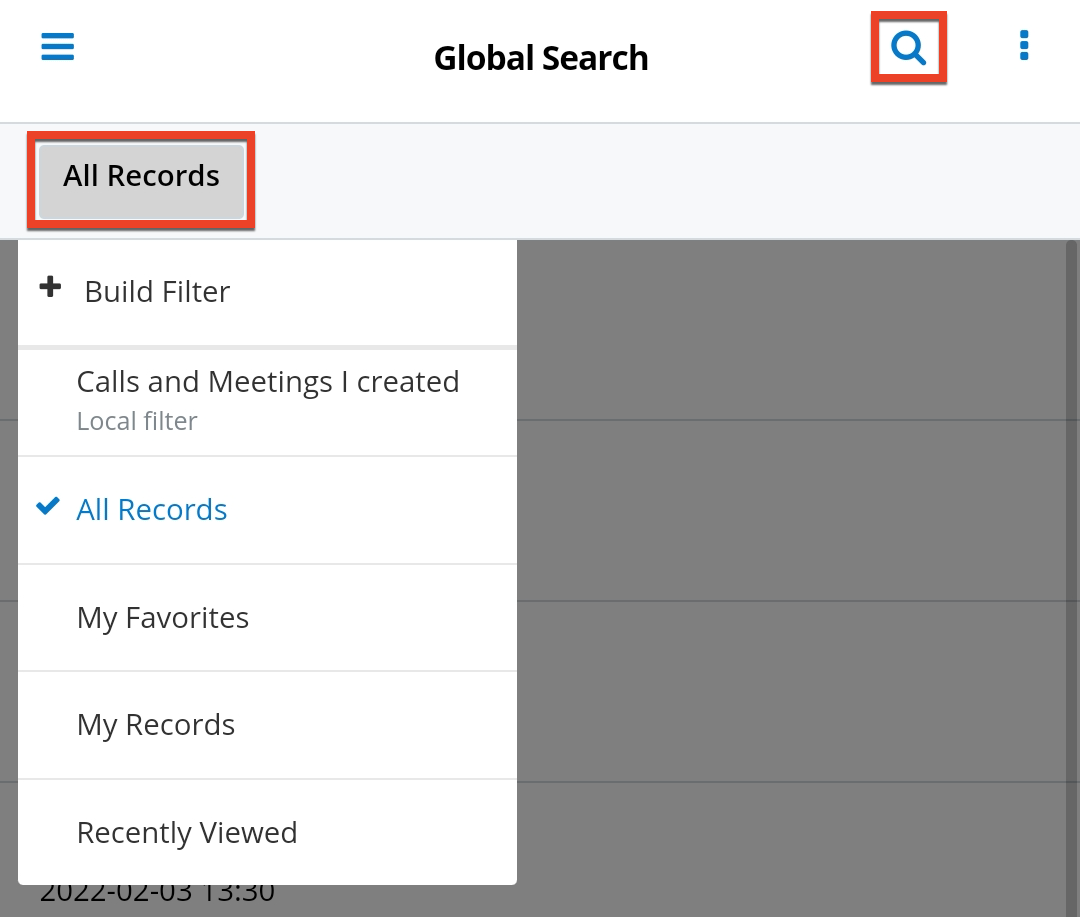
When the search bar is expanded after tapping the magnifying glass, you can continue to filter the list by tapping the filter button and selecting the desired search filter (e.g., All Records). The records list will automatically update to show records that match your search criteria and/or the selected filter. Tap the "x" within the search bar to clear your search. 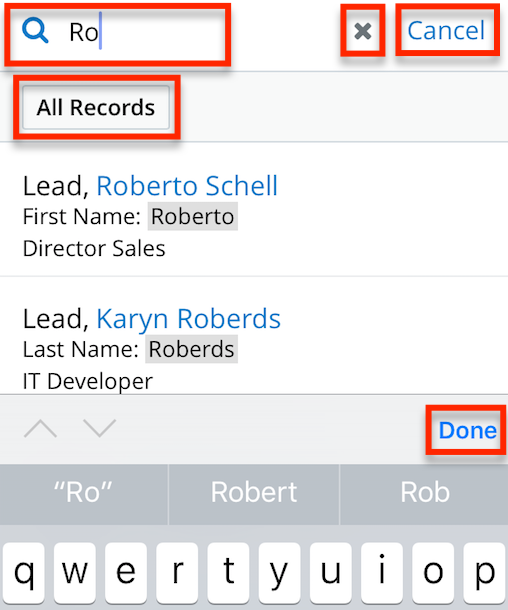
Records with any matching field that has been enabled for full-text search are returned. Beneath each returned record's name is the field within that record that matched your search term. Please note that if changes are made to your instance's full-text search configuration, users must log out and back in to the mobile app in order for the matched field to be displayed as expected. For more information on configuring full-text search, refer to the System documentation.
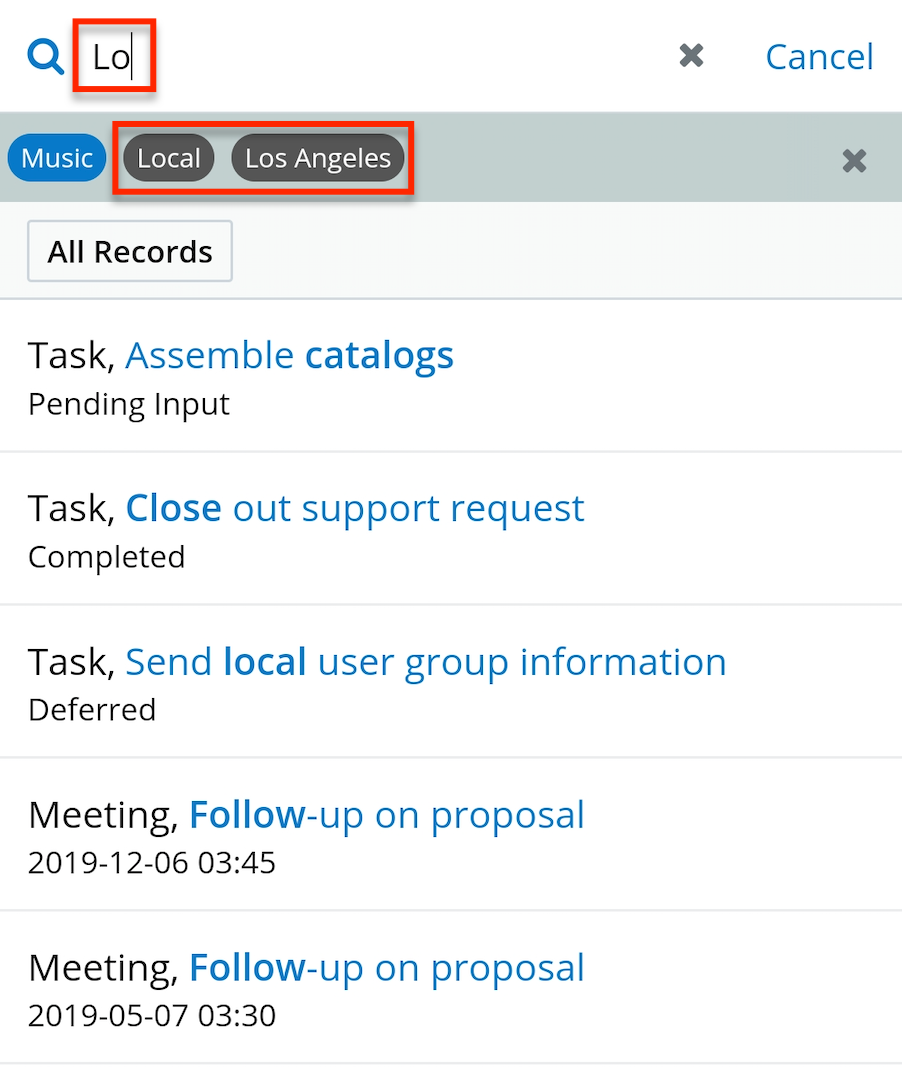
If you enter text that matches one or more Tag records, the matching tags appear under the search bar as tappable grey pills. Tap a tag's pill to filter your search by that tag; this will cause the pill to change to blue. To remove the tag from your search filter, tap it again to deselect it. If you wish to filter by multiple tags or a combination of tags and text, simply tap a tag to select it. Then, enter new search criteria in the search box to find more tags or filter the results by your desired text.
For information on editing tags and adding them to a record in the mobile app, see the Editing Tags section of this page. For more details on how tags work in Sugar, refer to the Tags documentation in the Application Guide.
For more details on how global search works, see the Global Search documentation in the Application Guide.
Global Search Filters
Custom filters can be created on the Global Search page to help filter the results to specific modules or criteria, which can be used in conjunction with search text entered in the search bar. To create your own filter, tap the filter button and select "Build Filter". This opens the Build Filter screen where you can create a filter using the following fields:
- Save filter: Enable this checkbox to save the filter for future use in the mobile app on your device. Saved custom filters will show "Local filter" below them in the list of filters.
- Filter name: Enter a name for the filter if you do not want to use the default name provided by the app.
- Module Selector: Select one or more modules to filter the search results by. Records in any of the selected modules will be returned by the filter.
- Select Additional Parameters: Select one or more of the following parameters to further filter the search results: Modified by Me, My Favorites, Assigned to Me, and Created by Me.
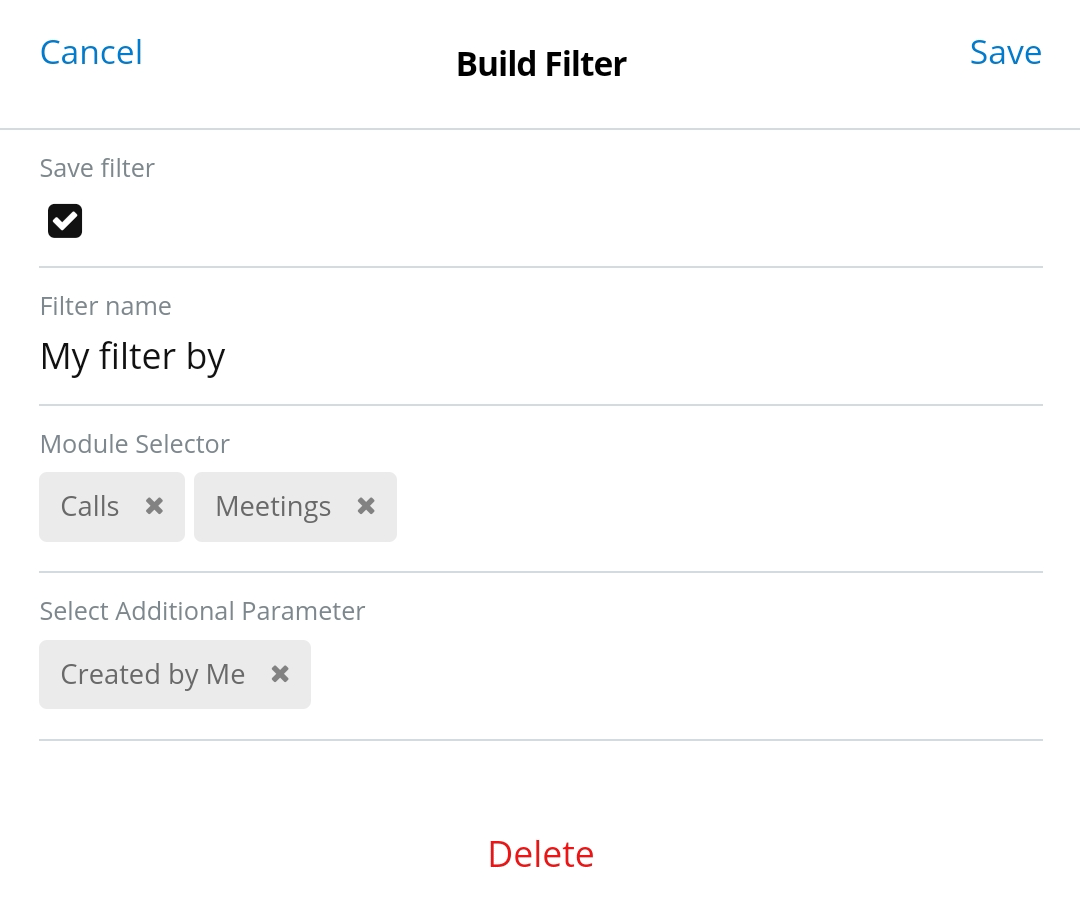
Once your filter is configured, tap the button in the top right corner to apply it - either "Apply" or "Save" depending on if you chose to save the filter or not. This will return you to the Global Search page where you can see that your new filter is applied. The pencil icon will also be available so you can edit it further or open the Edit Filter page to delete it. Note that if you did not save the filter, it will automatically disappear when you choose a different filter from the list.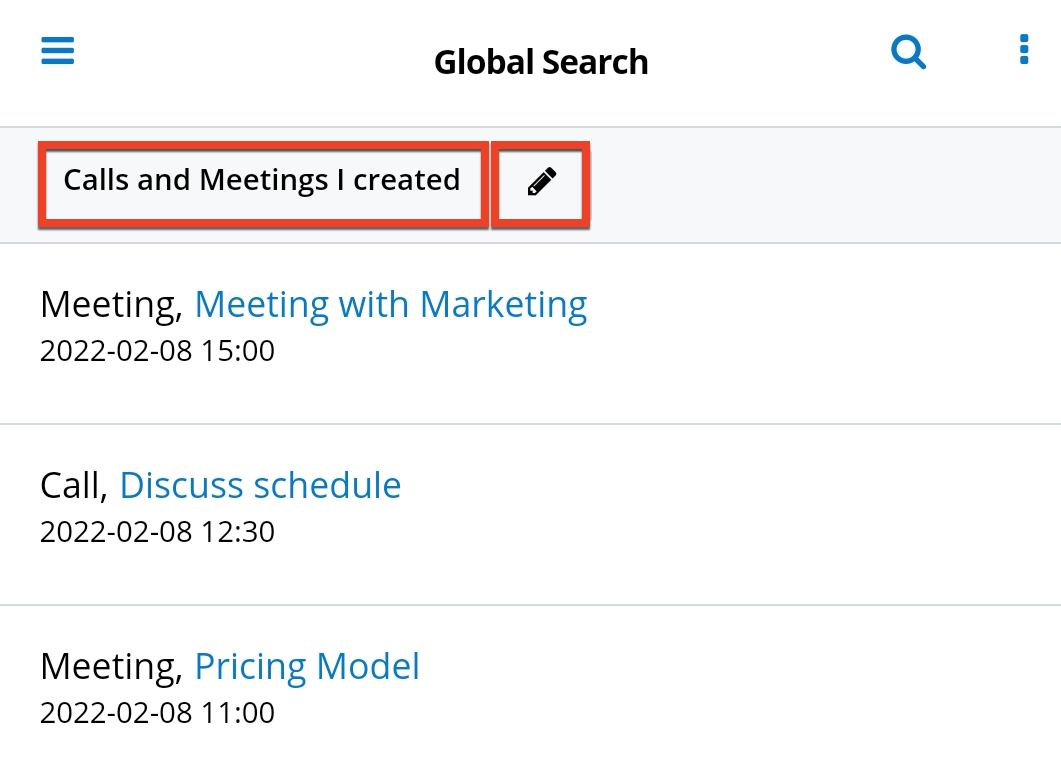
Actions Menu
From the Global Search page, you can access a menu of actions to be performed on a single record by swiping the grip icon of any record's row to the left. 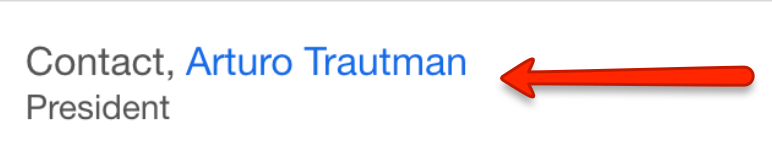
Doing so will open a context-sensitive menu of actions available for this record, meaning that the options available will differ according to the type of record and the fields it has populated. For a full list of available actions and a description of each, refer to the Record Actions section of this documentation.
Quick Create
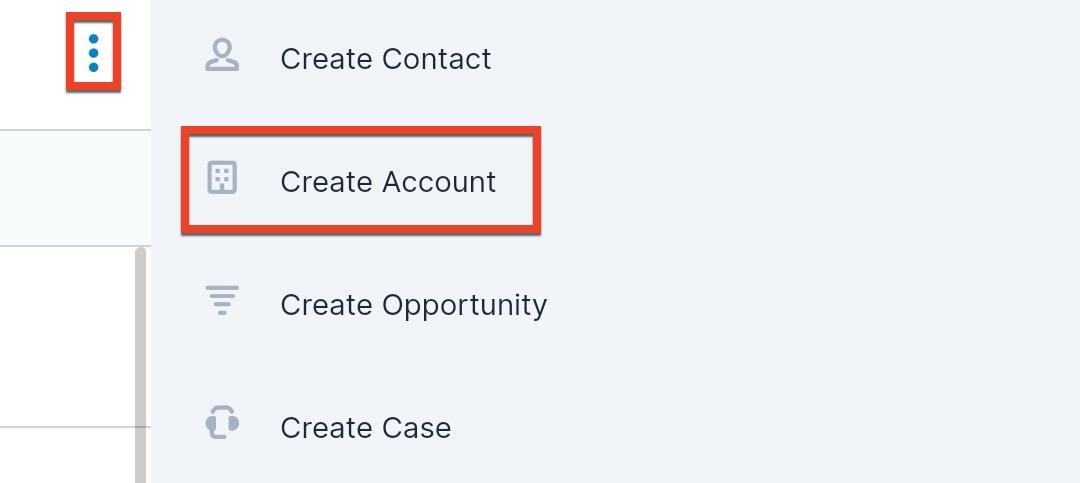
The Quick Create button appears as a verticle ellipsis on the top of the Global Search page's header bar. From the Global Search page, the Quick Create menu will allow you to create a new record of any type which you have access to create in the mobile app.
The following steps will cover creating a new Account from the Global Search page quick create as an example:
- Navigate to the Global Search page by tapping "Global Search" within the main menu.
- Tap the verticle ellipsis Quick Create button at the top right of the page.
- Choose "Create Account".
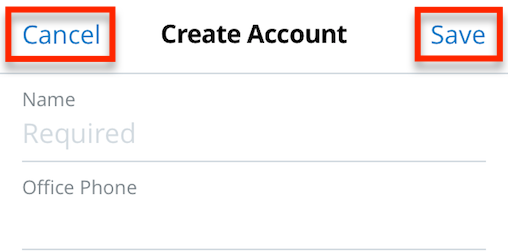
- Fill in all desired fields using the instructions in the Editing Records section of this documentation.
Note: Fields that are required will show "Required" in grey to the right of the field name. - When all desired fields are populated, tap "Save" to create the new account record. Tapping "Cancel" will return you to the Global Search page without creating a new record.
Please note that your ability to create records in Sugar may be restricted by a role. For more information on roles, please refer to the Role Management documentation. Check with your system administrator if you do not see the Create options.
Note: Report, employee, and knowledge base records may not be created from the mobile app.
Activity Stream
The Activity Stream option in the main menu displays recent activity in records you follow across all Sugar modules. If you wish to see the Activity Stream page when first logging in to the mobile app, you can select it as your Start Screen option. 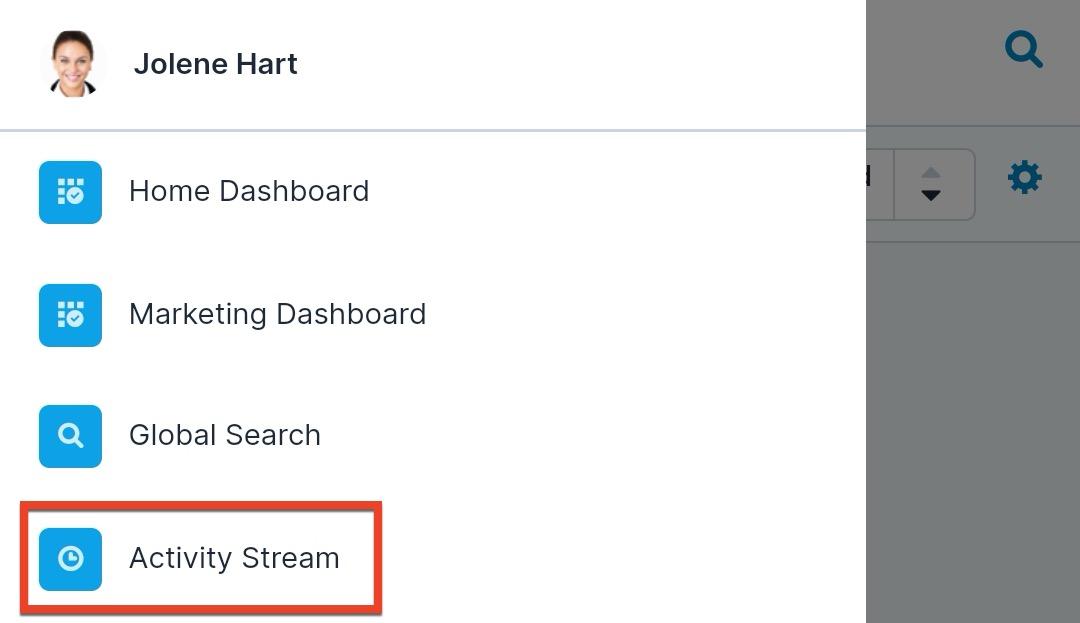
Note: Activity streams may be disabled in your Sugar instance. For more information, refer to the System page of the Administration Guide.
Users can create posts by tapping "Add a Comment" at the top of the Activity Stream page. To leave a comment on a specific post, simply swipe from right to left on a post then select "Comment". In addition, you can mention specific users or records by typing @ followed by the user's name or # followed by the record's name in the post or comment. Users or records included in posts can be tapped to open them in detail view. For more information, please refer to the Activity Streams documentation. 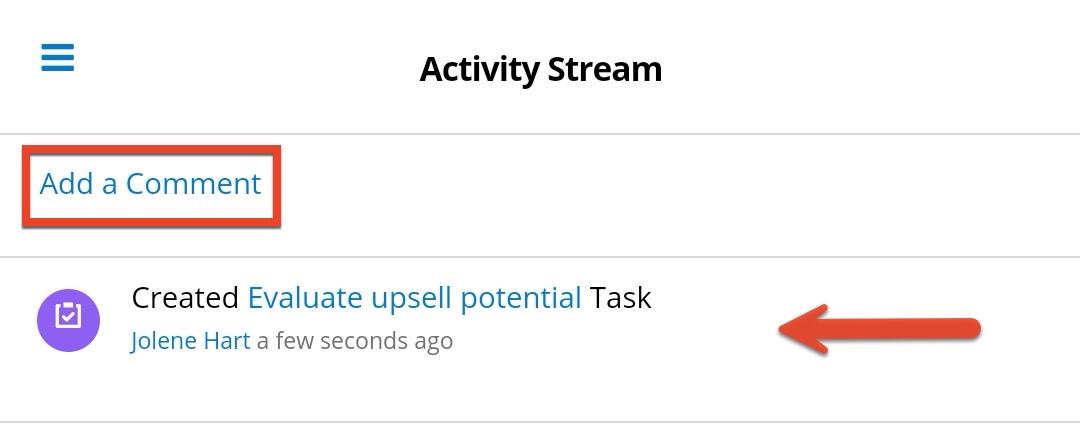
Document Merges
If you are connected to a Sugar instance with access to Doc Merge, you can generate documents based on record data from the mobile app. See the Merging Records With a Document Template section of this page for more details on using Doc Merge in the mobile app.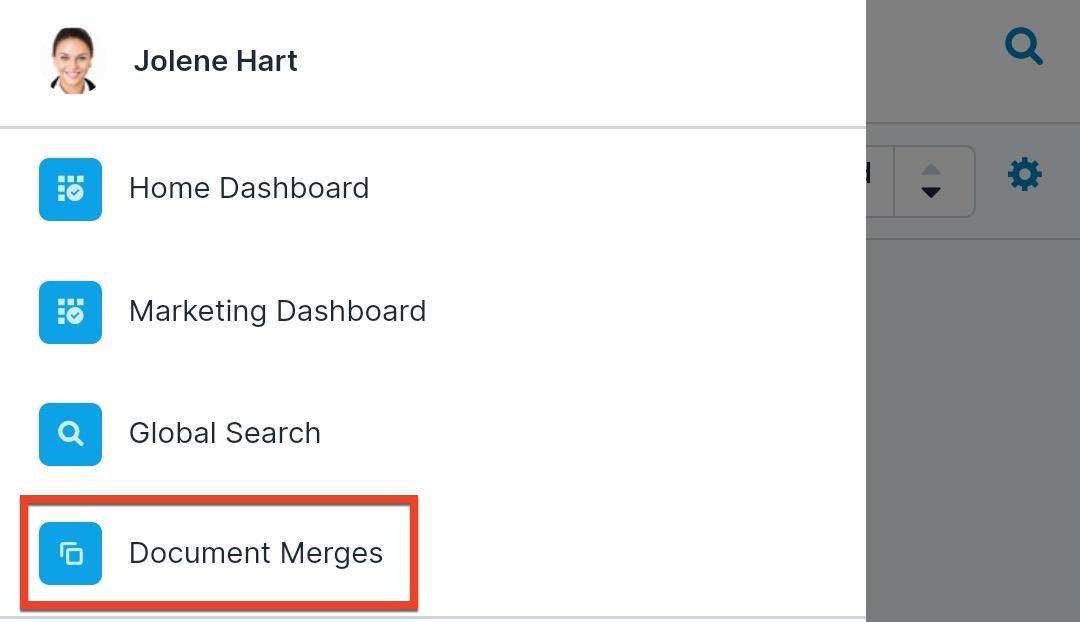
Sugar Modules
Below your user profile, dashboards, calendar, global search, and activity stream is a list of Sugar modules that you can access using the mobile app. Tapping one of the Sugar module names will open its list view. You can also press and hold any module to drag it to a new location within the list. This way, you can organize the module list so that your most-used modules are at the top.
The following modules may be made available for use in the app by your administrator via Admin > Mobile. For more information on controlling which modules are available in the mobile app, please refer to the System documentation. Note that certain modules are only available if connected to a Sugar instance on a specific minimum version.
- Accounts
- Calls
- Cases (for Sugar Sell, Serve, and Enterprise)
- Contacts
- Contracts
- Documents
- Document Templates
- Emails
- Employees
- Escalations (for Sugar Sell and Serve)
- Knowledge Base
- Leads (for Sugar Sell and Enterprise)
- Meetings
- Messages
- Notes
- Opportunities (for Sugar Sell and Enterprise)
- Processes
- Purchases (for Sugar Sell and Serve)
- Purchased Line Items (for Sugar Sell and Serve)
- Quoted Line Items (for Sugar Sell and Enterprise)
- Quotes (for Sugar Sell and Enterprise)
- Reports
- Revenue Line Items (for Sugar Sell and Enterprise)
- Smart Guides
- Smart Guide Stages
- Tasks
- Any Custom Module
Note: The Employees, Reports, and Knowledge Base modules are read-only for all users when accessing them from the mobile app. The Quotes module may be read-only when using some older, unsupported versions of Sugar.
Please note that your ability to access the above modules may be restricted by a role. For more information on roles, please refer to the Role Management documentation. Check with your system administrator if you cannot access the above modules.
About
The About page shows the following information in addition to providing the privacy policy and terms and conditions.
- App Version: The version of your mobile application
- Server Version: The version of the Sugar instance that the application is accessing
- Server URL: The URL of the Sugar instance that the application is accessing
- Support: A link to the Support site containing all SugarCRM product documentation
- SugarCRM Mobile App Release Notes: A link to the release notes for the version of the app that you are using
- SugarCRM Mobile App User Guide: A link to the mobile app user guide
Settings
The settings page includes the following configurations:
- Language
- Font Size
- Appearance
- Email Client
- Maps and Navigation Provider
- Start Screen
- Enable Offline Capabilities
- Touch ID (iOS only)
- Enhanced Security Mode
- Advanced Logging
Language
The Settings page allows you to configure what language your mobile application will use.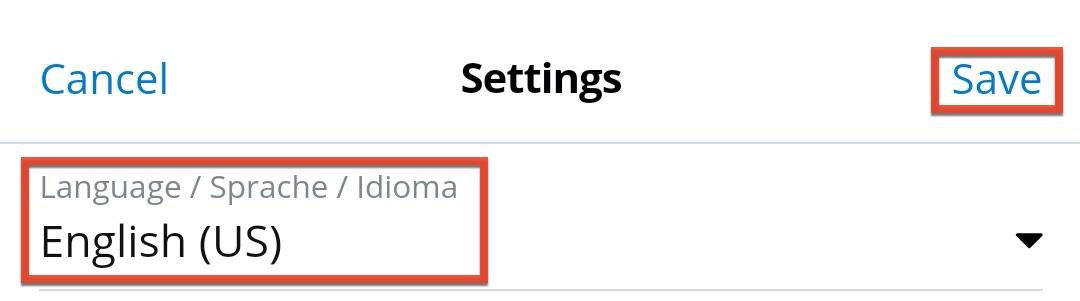
While English is the default language, the stock Sugar languages are available for use:
- Arabic
- Czech
- Bulgarian
- Chinese
- Danish
- Dutch
- English-UK
- Estonian
- French
- German
- Hebrew
- Hungarian
- Italian
- Japanese
- Lithuanian
- Norwegian
- Polish
- Portuguese
- Romanian
- Russian
- Spanish
- Swedish
- Turkish
Font Size
Users can alter the font size for the entire app, based on their personal preference. Tap the Font Size line and choose the desired option. Once the font size has been adjusted, click "Save" in the main Settings window to finalize the change. 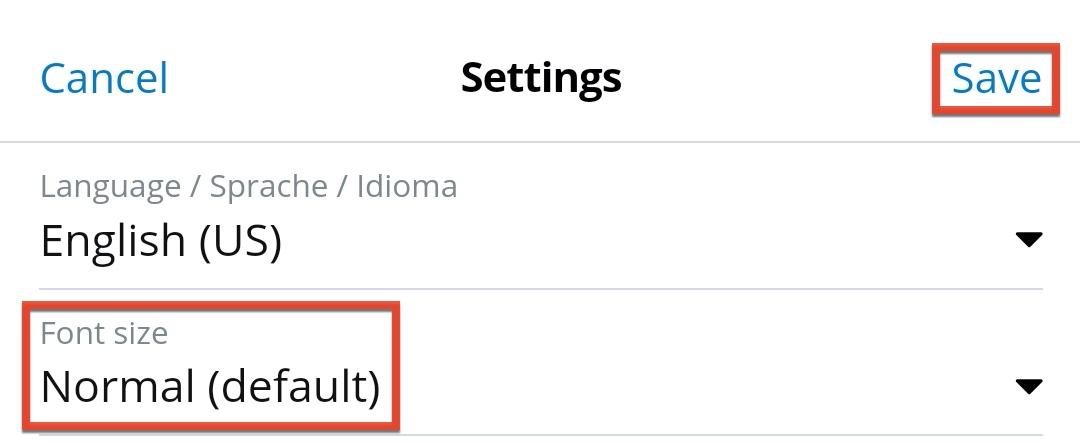
Appearance
Users can choose the color scheme of the entire app using the Appearance setting. The following options are available: "Light", "Dark", and "Use system setting". Selecting "Light" displays the app in its default white-based theme. Selecting "Dark" turns on dark mode in the app, and selecting "Use system setting" changes the app to match your device's system setting. That is, if your device is using dark mode, the app will too. When you make a selection, the Settings screen is immediately updated to use the selected theme so you can preview what it will look like, but note that you must still tap "Save" to have the change take effect across the app.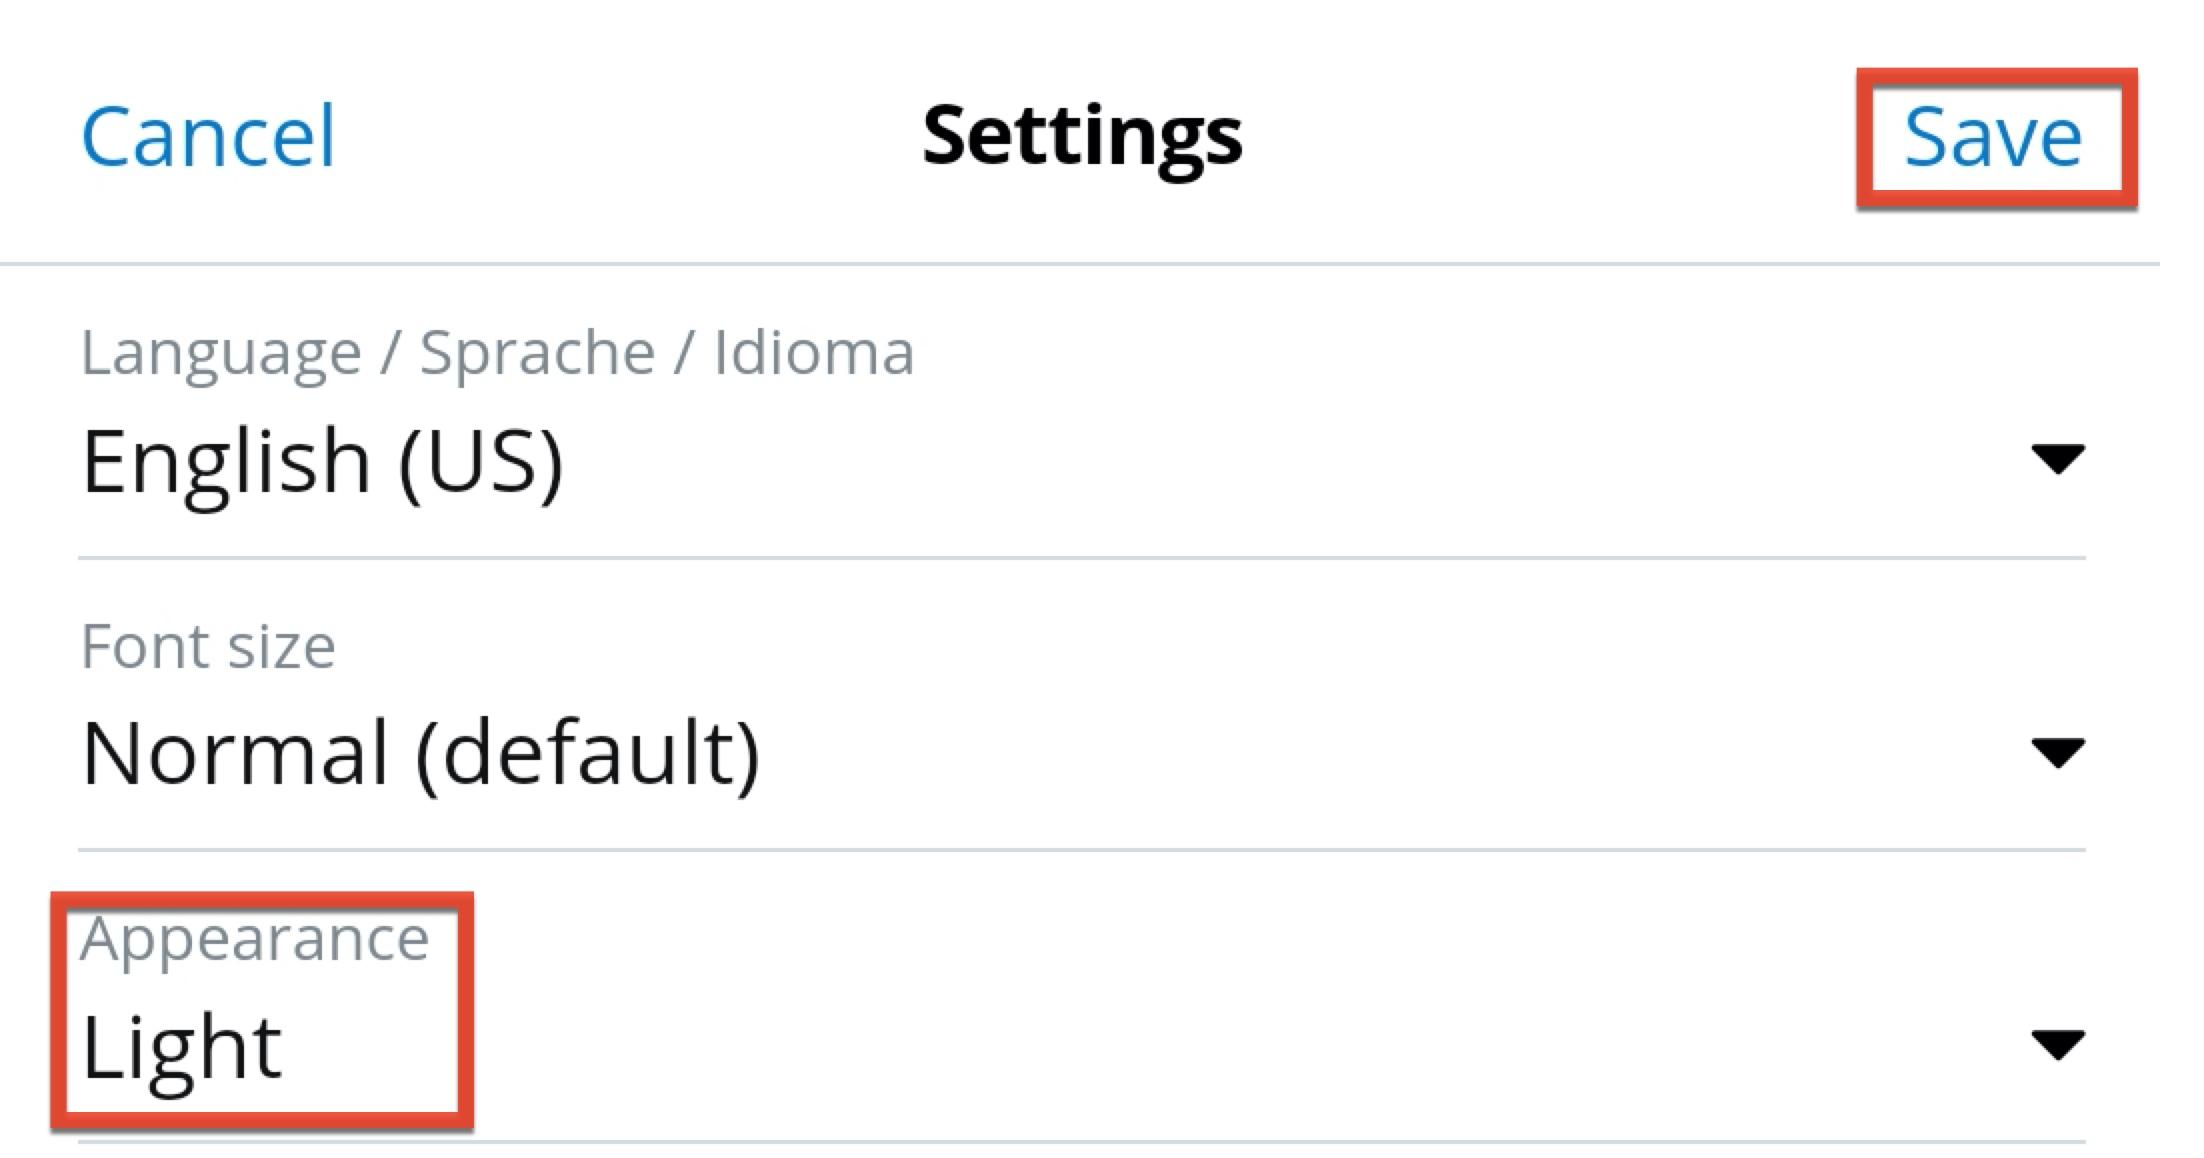
Email Client
Users can choose if they wish to use the built-in Sugar Emails module to compose emails in the app or use the default email application on their device. The options include "Sugar Email Client" and "External Email Client".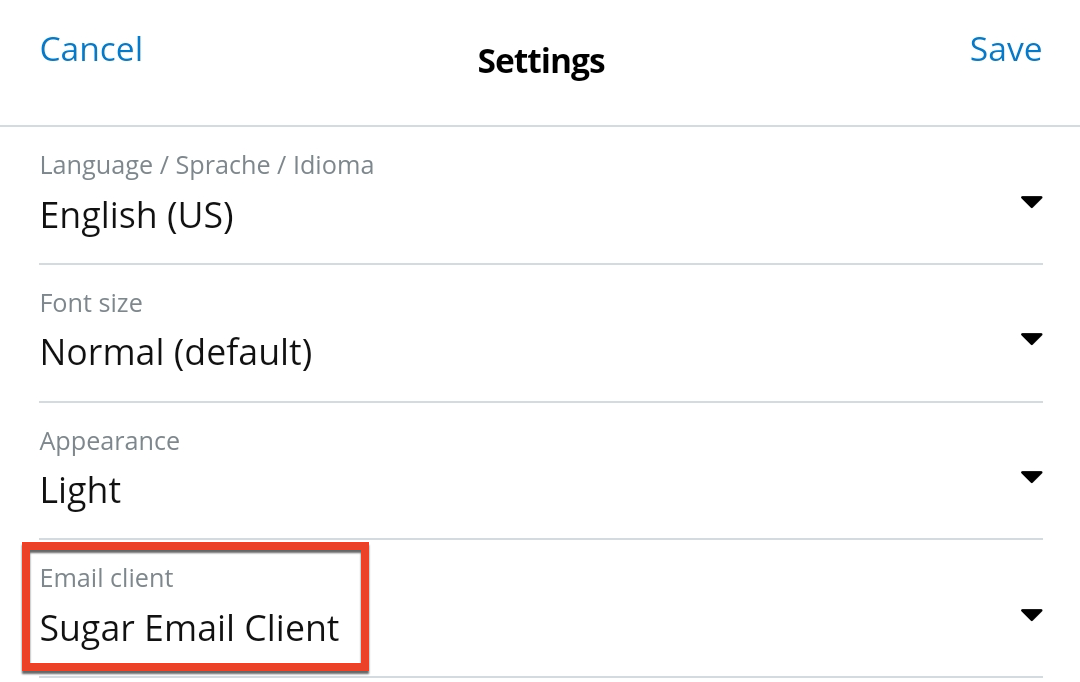
Maps and Navigation Provider
If your Sugar instance has Sugar Maps and you have the Sugar Maps license assigned to your user, this setting allows you to choose if you wish to use Sugar Maps when mapping records or one of the mapping applications installed on your device. The options include "Sugar Maps" along with any mapping apps recognized by the SugarCRM mobile app (i.e., Apple Maps, Google Maps, Waze, Baidu Maps, Amap). Note that if your Sugar instance does not have Sugar Maps, this setting will not be available and you will always use your default mapping application. If you do not select your preference here, you will be prompted via a pop-up when trying to use a mapping feature in the app to select your preference at that time. When you do, you can choose to use that selection just once, or save it in the Maps & Navigation Provider setting for future use.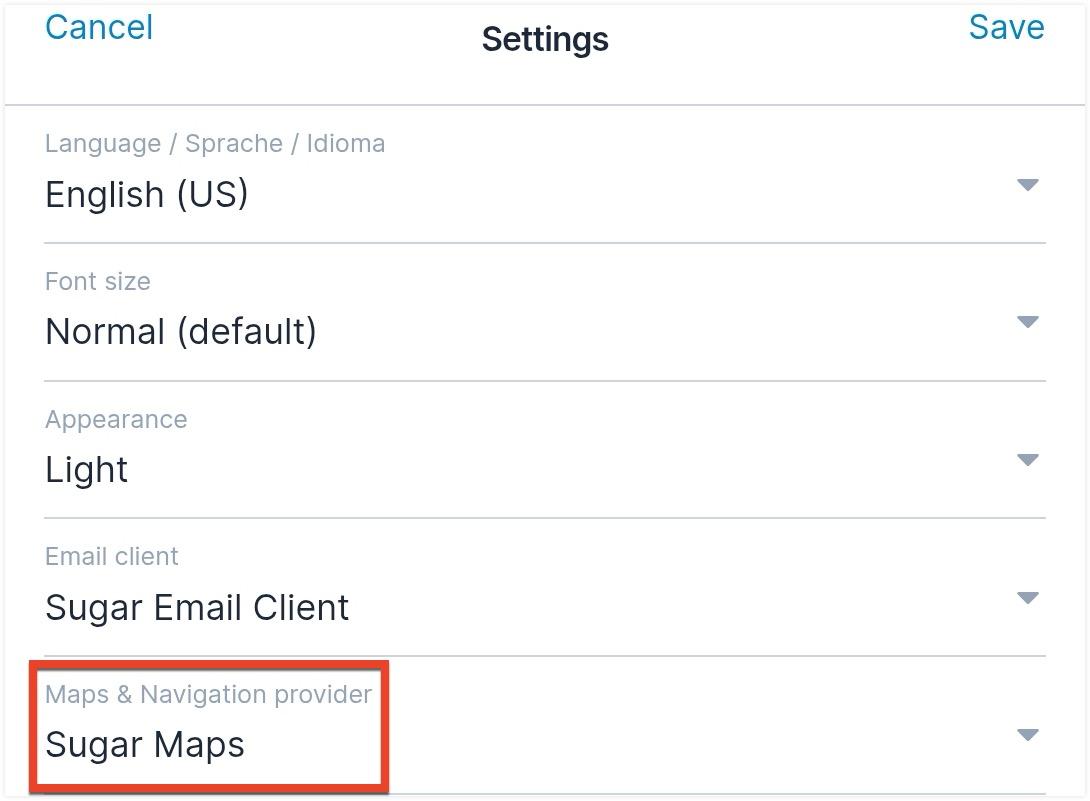
Start Screen
Users can specify what screen they want to appear upon first logging in to the app. 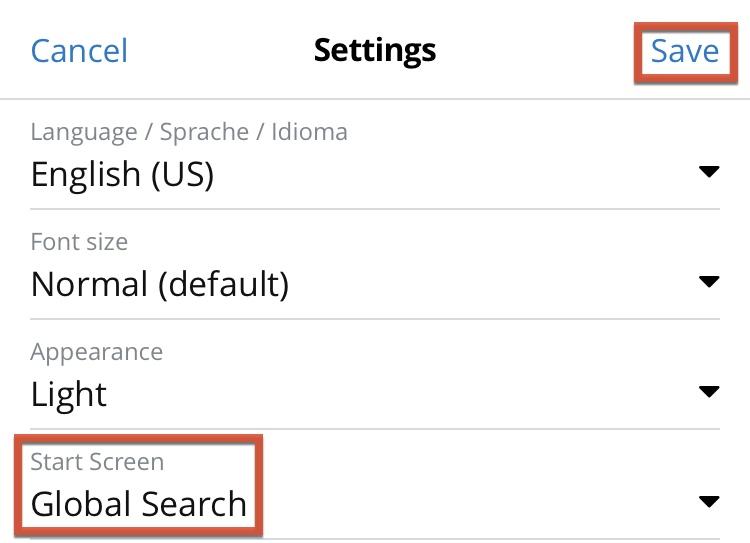
The following options are available:
- Activity Stream: Displays the user's main activity stream
- Calendar: Displays the mobile calendar
- Global Search: Provides a search across all records available as well as displaying a list of recently viewed records
- Specific Dashboard: Displays the dashboard of the user's choice
Note: When "Specific Dashboard" is selected from the Start Screen dropdown, users have the option to select all dashlets or a single dashlet from the specified dashboard to use as their Start Screen. - Specific Module: Displays the list view of a single module of the user's choice
Enable Offline Capabilities
The Settings page has a toggle to enable or disable offline capabilities. Select the "Enable offline capabilities" checkbox and click the Save button to activate.
Note: In order for the "Enable offline capabilities" option to appear, an administrator must first enable the option on your Sugar instance. For more information on enabling offline capabilities for an instance, please refer to the System documentation.
When enabled, your mobile device will cache records for offline viewing as well as buffer changes you make to records while offline to be synced upon reconnecting. This includes the addition and removal of attachments. Viewing a record in any list view, detail view, or edit view will cause it to be automatically cached in your local database, although attachments are not cached. Additionally, users will have the opportunity to preemptively download their assigned, favorited, and followed records from the Offline Settings menu. Data will sync between the mobile app and the Sugar database when the application is open and actively in use. If you navigate away from the application, synchronization will be suspended until you return to the mobile app.
To disable the service, unselect the "Enable offline capabilities" checkbox and click the Save button. Doing so will delete your device's local copies of any Sugar records and forget any changes that were made to records on the device but have not yet synced to the instance.
Touch ID
Users that are using an iOS device can specify if they want to be able to log in to the mobile app using their fingerprint. Enabling Touch ID will require tapping your Sugar password.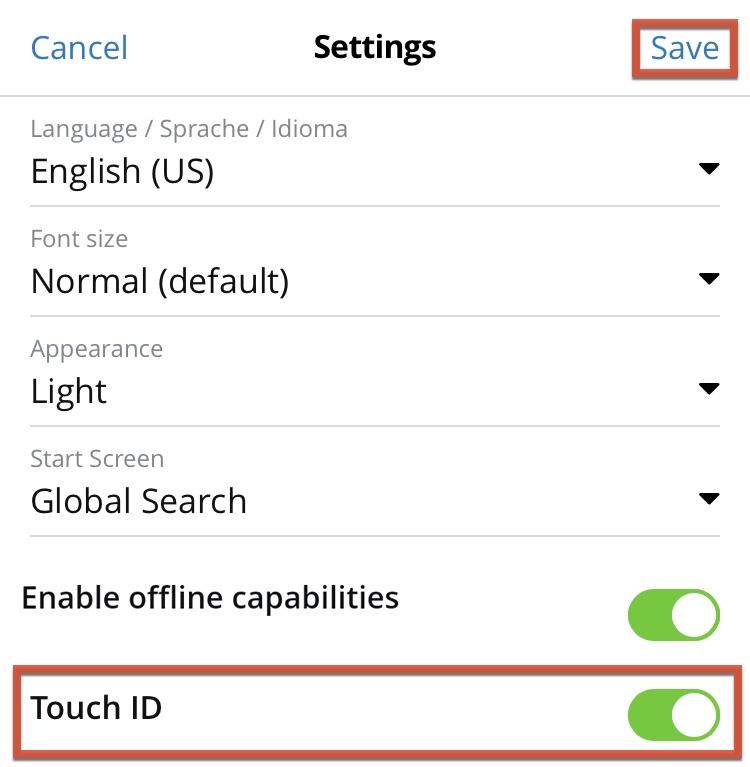
Enhanced Security Mode
The Setting page has a toggle to enable or disable Enhanced Security Mode, which behaves slightly differently on iOS versus Android devices.
On both iOS and Android devices, enabling this setting turns on the following security feature for the mobile app: when the mobile app is in the background on your device, the contents of the app are hidden and cannot be previewed in the list of open apps. This way, it is not possible to see any potentially sensitive data while scrolling through the list of apps.
On Android devices, this setting enables the following additional security feature: it is not possible to take a screenshot of any part of the app.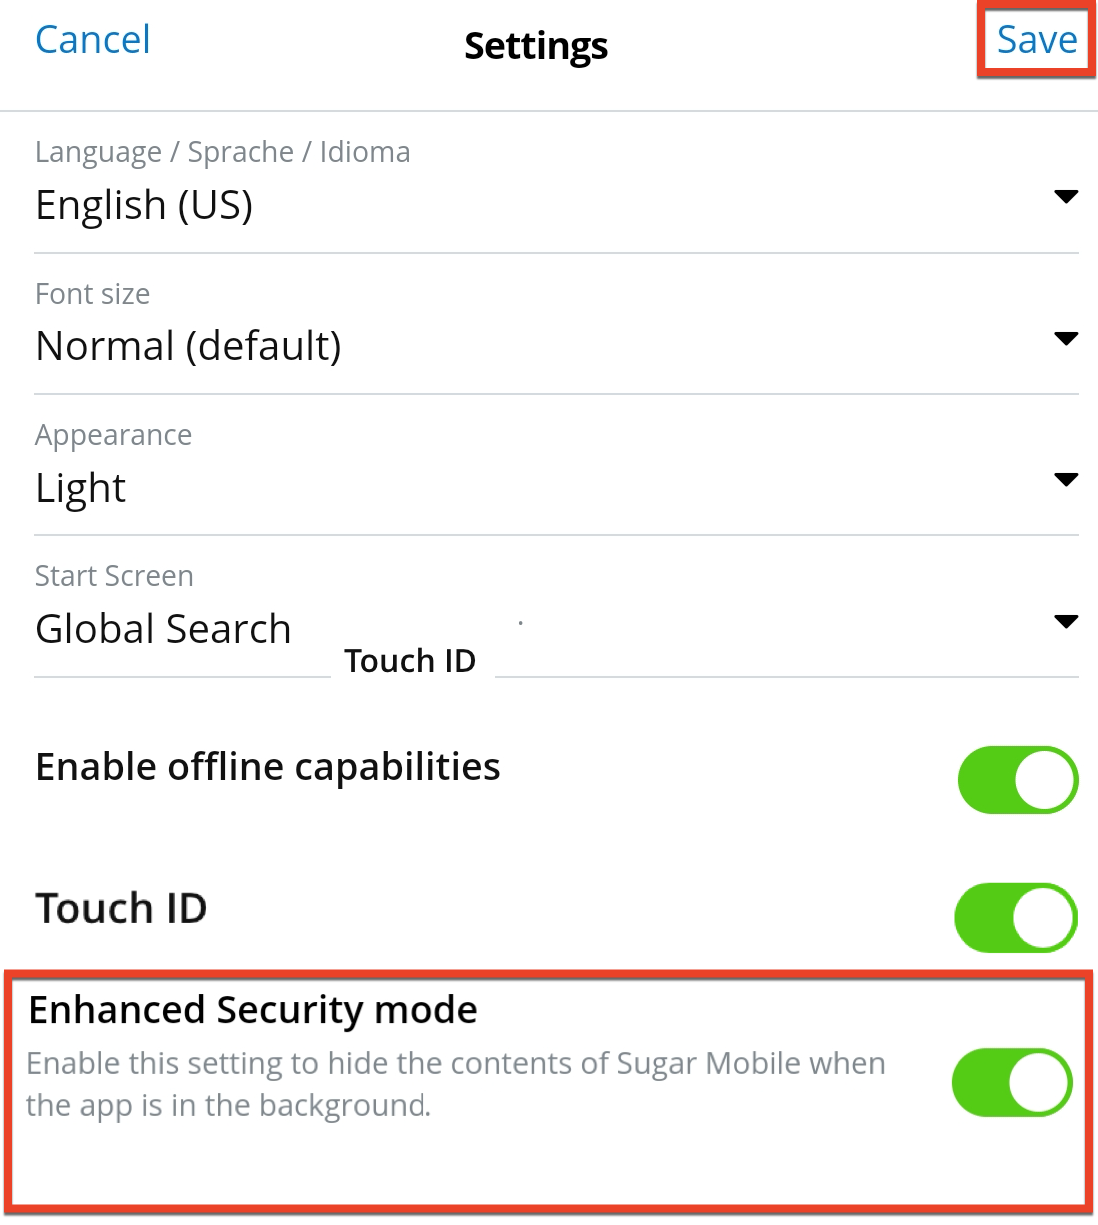
Advanced Logging
If you are experiencing problems with the mobile app, you can enable advanced logging to start tracking more details about your use of the app. It is recommended to enable advanced logging and then perform the actions you are having trouble with in the app to log details about the activity. After this, contact Sugar's Support team and they will guide you through sharing the log file with them to enable them to resolve your issue more quickly.
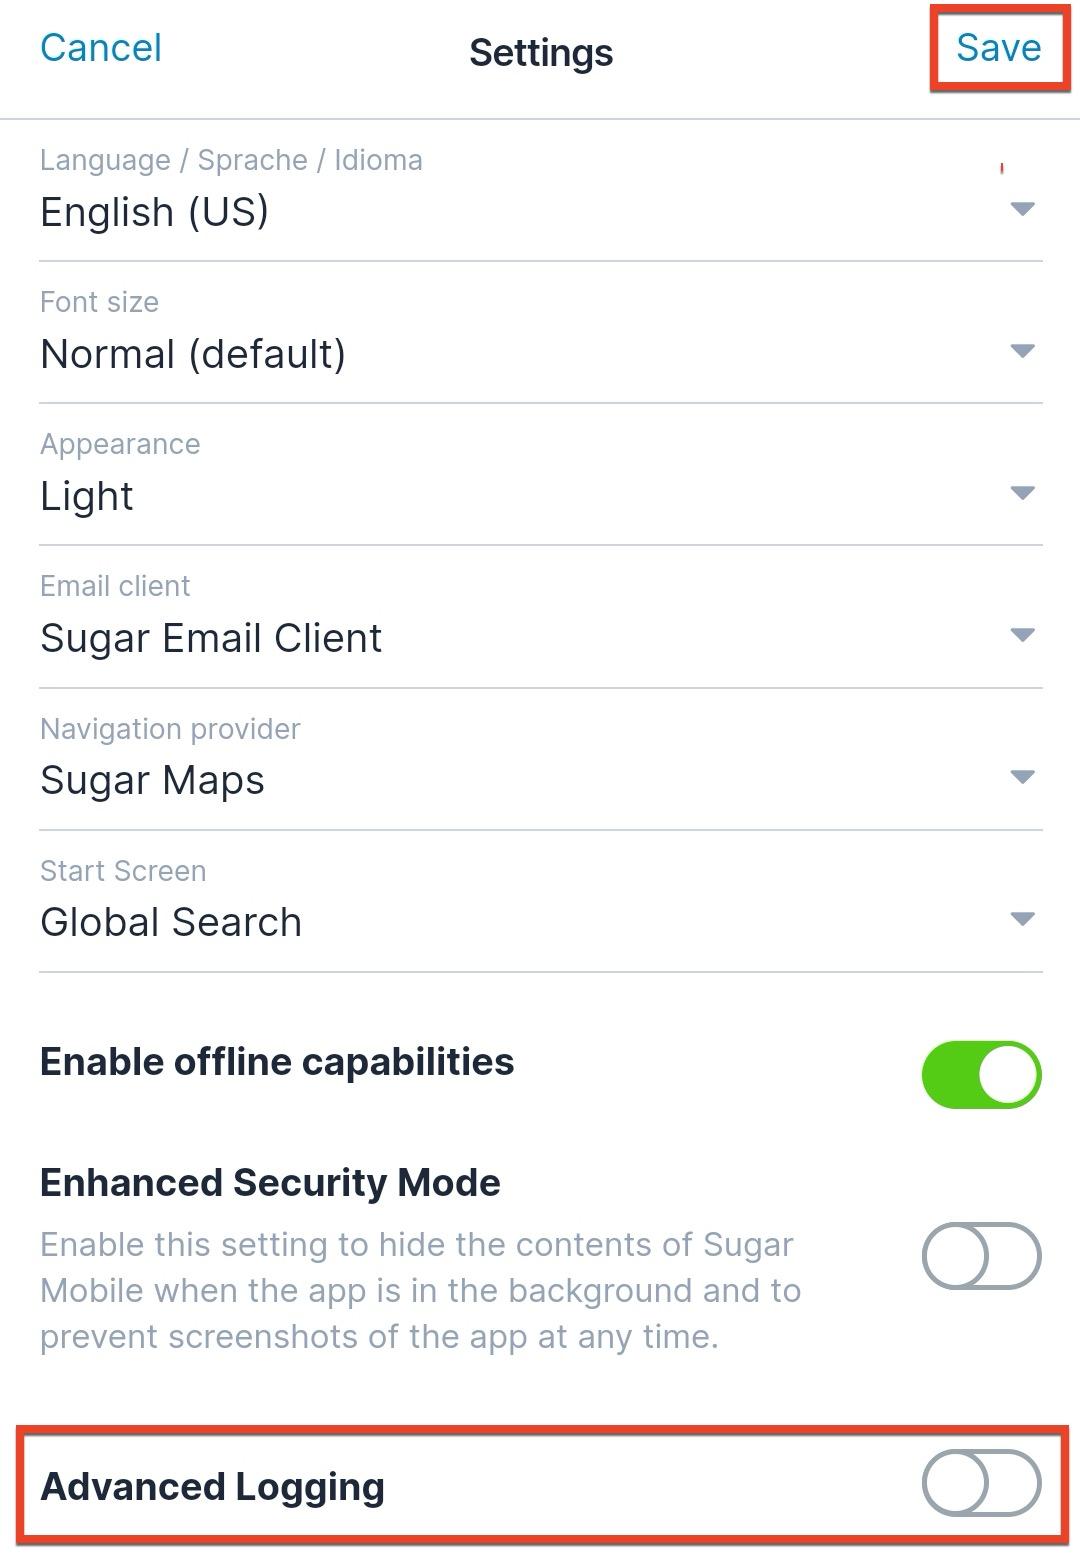
Note that while you have advanced logging enabled, the log file that is generated and stored on your device will grow more quickly and take up more space. Therefore, it is not recommended to leave advanced logging on at all times, only when you need to troubleshoot unexpected behavior. Once you are done troubleshooting, it is recommended to turn off advanced logging again.
Notification Settings
If you are connected to an eligible Sugar instance, the mobile app can send push notifications to your device when certain events take place. Enable each setting if you wish to receive those notifications on your current device. If you log in to the app on multiple devices, you will also receive the notifications on those devices.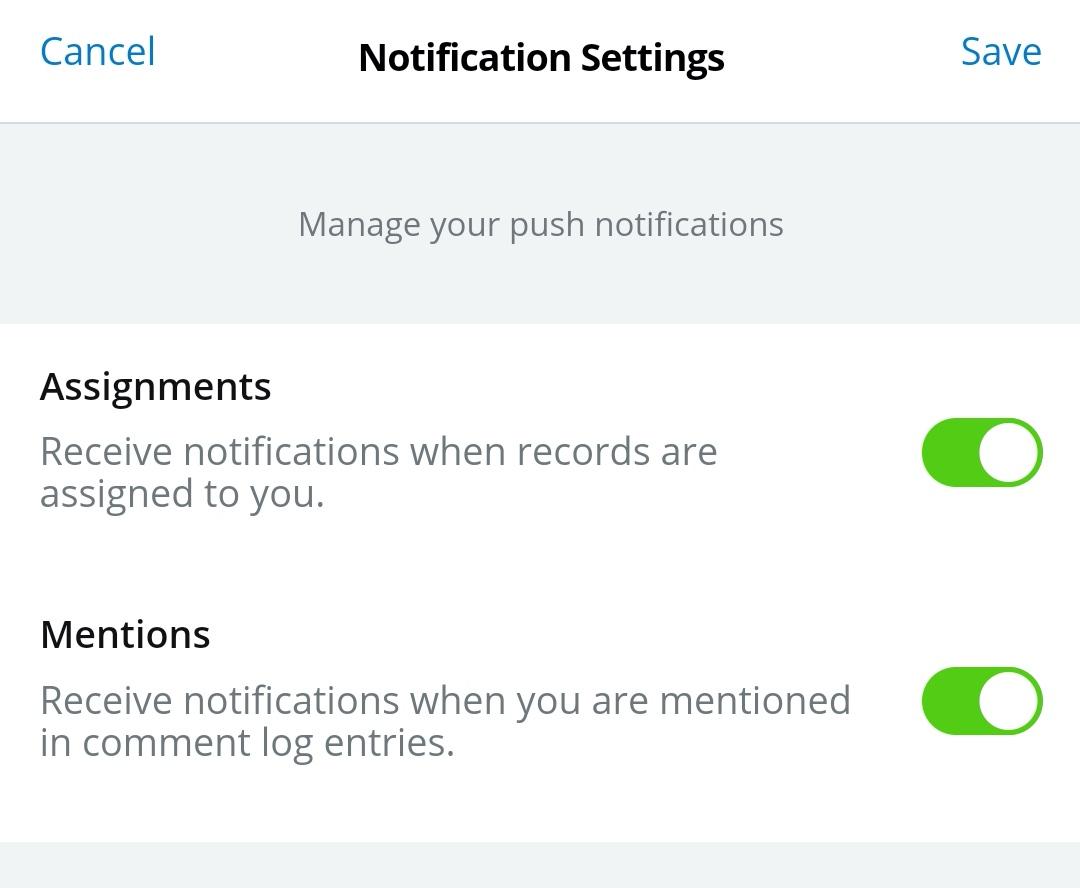
To stop receiving push notifications for one or more categories of events, simply disable the field in Notification Settings in the app. If you turn off notifications in the app on one mobile device, the notifications will stop on all devices.
You can turn on push notifications for the following types of events in Sugar:
- Assignments: Receive a push notification whenever a record is assigned to you.
- Mentions: Receive a push notification whenever someone mentions you in a comment log entry.
Tapping a notification opens the relevant record in the app. If you are not logged in at the time, the login screen is opened instead and the relevant record will be opened after logging in.
Eligible Sugar Instances
You must be connected to a Sugar instance that meets the following conditions in order to access the Notification Settings screen and receive push notifications from the mobile app. The instance must be:
- On Sugar Sell, Serve, or Enterprise
- Hosted in Sugar's cloud environment in one of the following regions:
- ap-southeast-1: Asia Pacific (Singapore)
- ap-southeast-2: Asia Pacific (Sydney)
- ca-central-1: Canada (Central)
- eu-central-1: Europe (Frankfurt)
- eu-west-2: Europe (London)
- us-west-2: US West (Oregon)
- SugarIdentity-enabled
Offline
When the SugarCRM mobile app is offline enabled, the Main Menu includes an Offline Settings option that includes an offline status indicator, Always Offline mode, a transaction log, and an Offline Records screen with download settings and offline record counts.
Note that Sugar Logic calculations that use a related record will not be calculated correctly while your device is offline. When your device goes back online, the affected field will be recalculated using related record values as they exist at the time of reconnecting to the server. The correct value will then be stored in the server's database and synced back to your device.
In addition, dashlets that list records (e.g., list view dashlets and chart dashlets) will not load any new data while the app is offline. Only data that has previously been loaded in the dashlet will be displayed until the application reconnects to your Sugar instance.
Lastly, emails with an implicit relationship will not appear in the related record while the app is offline.
Offline Status Indicator
To the left of the Offline Settings menu item is an offline status indicator. Tapping to enter the Offline Settings menu reveals more details about the current status. When the indicator is amber or red, it will also appear overlayed on the Main Menu button in the app's header. 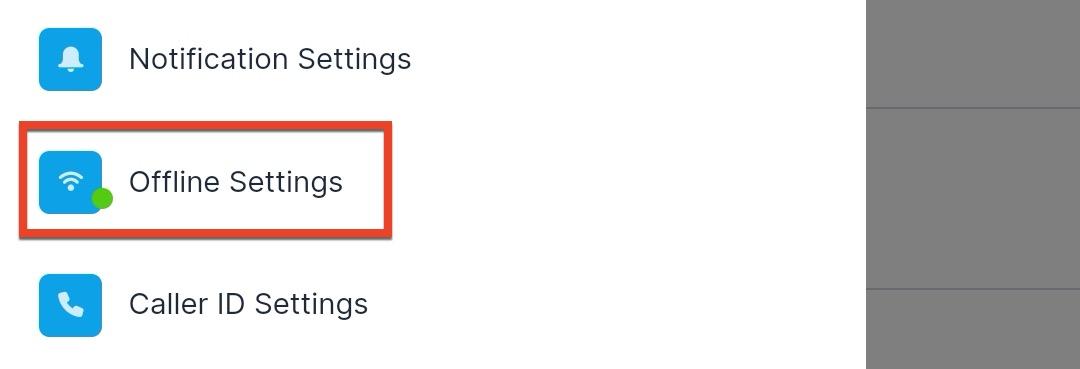
There are three statuses, each represented by a different color:
- Green: The device is online and all records are synced. This dot will appear on the Offline Settings option in the Main Menu but not in the app's header.
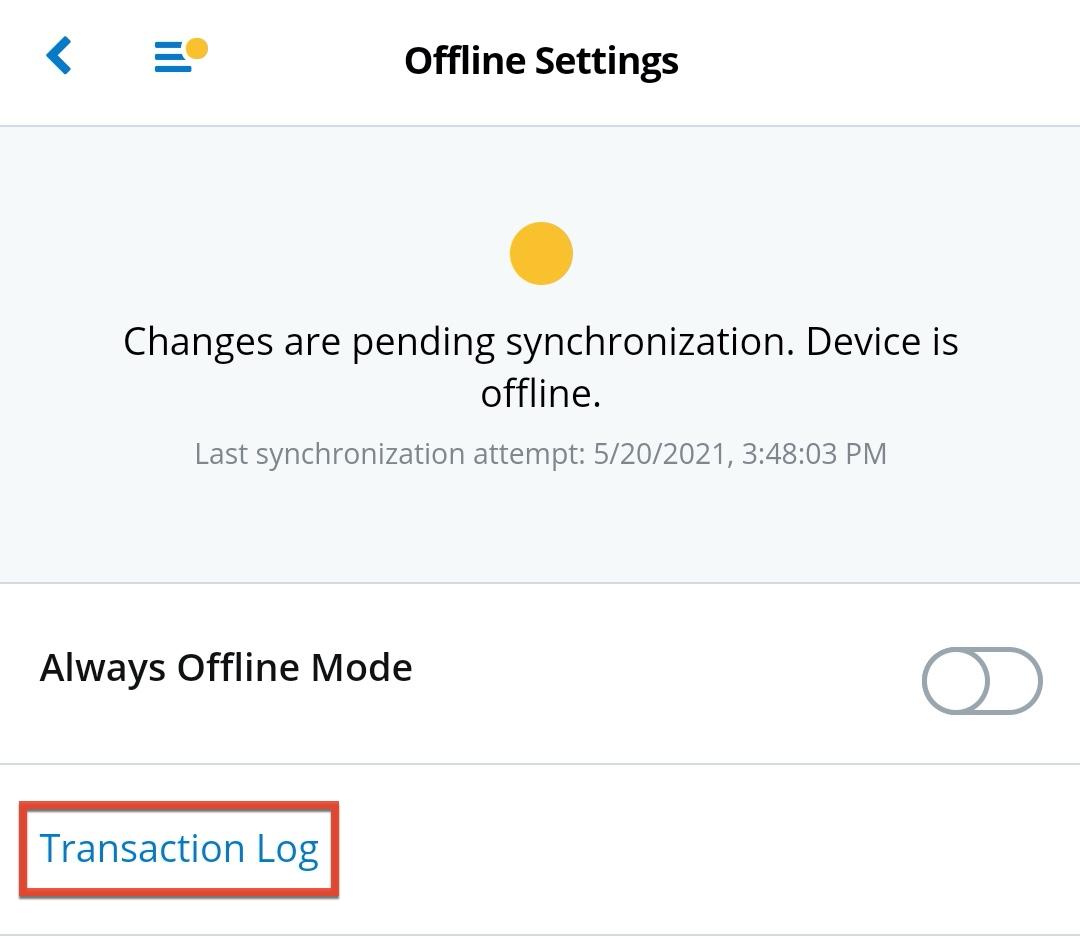
- Amber: The device is offline, either because the user enabled Always Offline mode or due to no available connection, or the device is online but has pending changes in the transaction log which have not yet been synced. This last scenario can occur when the connection is very slow. The transaction log may contain errors, but they are not blocking the sync and will be retried when a connection is available. An amber dot will also appear overlayed on the Main Menu button in the app's header.
- Red: There are pending changes in the transaction log that failed to sync because of some unrecoverable error. Critical error codes include 403, 405, 422, and 500. The failed transaction(s) will be retried, but these errors are unlikely to be resolved without user intervention. A red dot will also appear overlayed on the Main Menu button in the app's header.
Always Offline Mode
The Always Offline Mode setting can be enabled to force the app to stay offline, regardless of the availability of a network connection. This can be used when you know you will have an unreliable connection for a while, such as when entering a remote area with poor cellular service. When going in and out of service, the app normally tries to sync with your Sugar instance and only queues pending actions in the transaction log if unable to connect to the instance to complete the action. However, for large actions that may take a long time (e.g., uploading large files) or when working with an extremely unstable network, it is possible that the transaction will not sync as expected. To avoid this, enable "Always Offline Mode" before entering the area of unreliable service. The app will queue every action you take in the transaction log and will not attempt to sync anything with the server until you disable the Always Offline Mode setting. This way, you can have more confidence that all transactions will succeed by waiting to sync until your connection is reliable.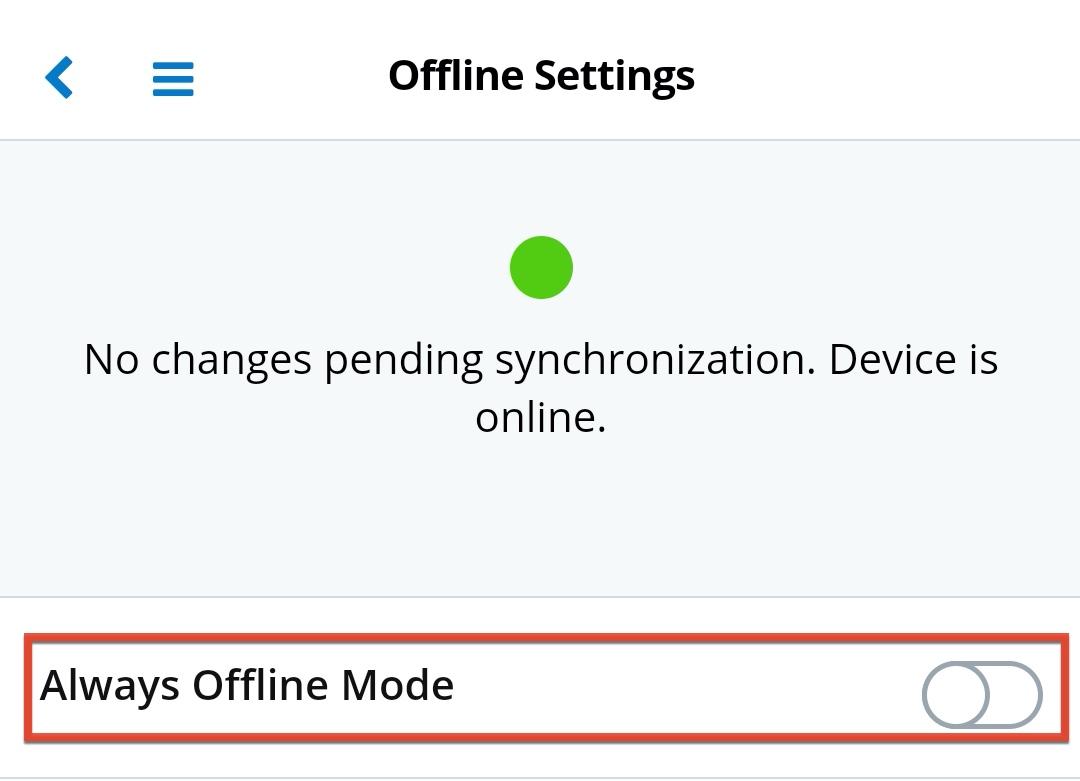
If you enter Always Offline mode and leave it on for more than a day, the mobile app will prompt you each morning to confirm if you want to continue in Always Offline mode or if you want to disable it and sync to the server again. This is to ensure that you only queue up actions to be synced for the minimum time necessary, since working while offline always poses some risk of becoming out of sync with your Sugar instance.
Transaction Log
The Transaction Log contains a list of pending and failed transactions between the mobile app and the instance. The pending changes have a white background and should be pushed to the instance without incident once a connection is re-established and the application is open and in use. Changes that cannot be pushed to the instance due to some problem or error will be listed with a yellow background. The offline status indicator will also appear in red to notify the user that such an issue has been encountered and requires attention. These changes require user intervention to clear.
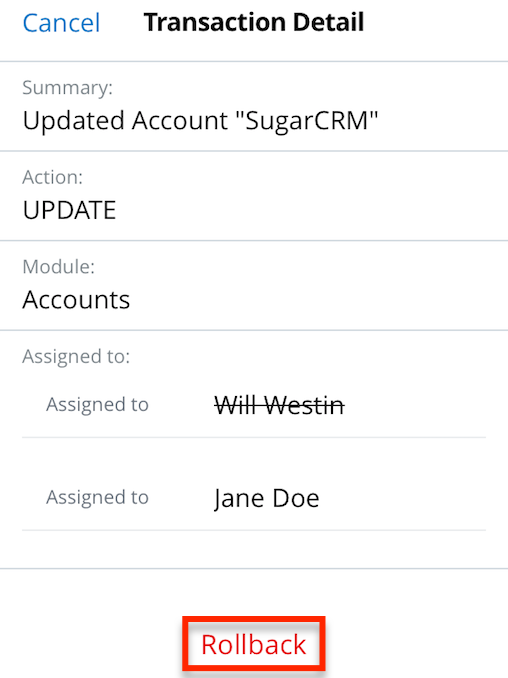
You can view the details of any change by tapping its name. If a change has failed to take place, you will be presented with the Rollback option at the bottom. Use this option to revert the change on your local database and prevent it from being pushed to the instance upon reconnection. This removes the failed transaction from the log. If a change encountered a conflict with server configuration changes made by the admin in your Sugar instance and it is not possible to roll back your change, you will be presented with the Delete option. Use this option to clear the transaction from the Transaction Log. If a configuration change occurred but did not conflict with your change, your change will succeed after syncing with the Sugar instance.
Use the following steps to clear a change that is encountering an error:
- Tap "Offline Settings" from the Main Menu. In order to see this, the SugarCRM mobile app must be enabled for offline use.
- Tap "Transaction Log".
- To view the details of a failed change, tap the change's row.
- Scroll down and tap "Rollback" in order to revert this change on your device and prevent the change from being made on the instance. You can tap "Cancel" to exit the log without removing the affected change.
Offline Records
The Offline Records page displays counts of downloaded records as well as allowing you to configure and initiate a bulk download of records for offline use. Tap "Records" from the Offline Settings menu to access these options. 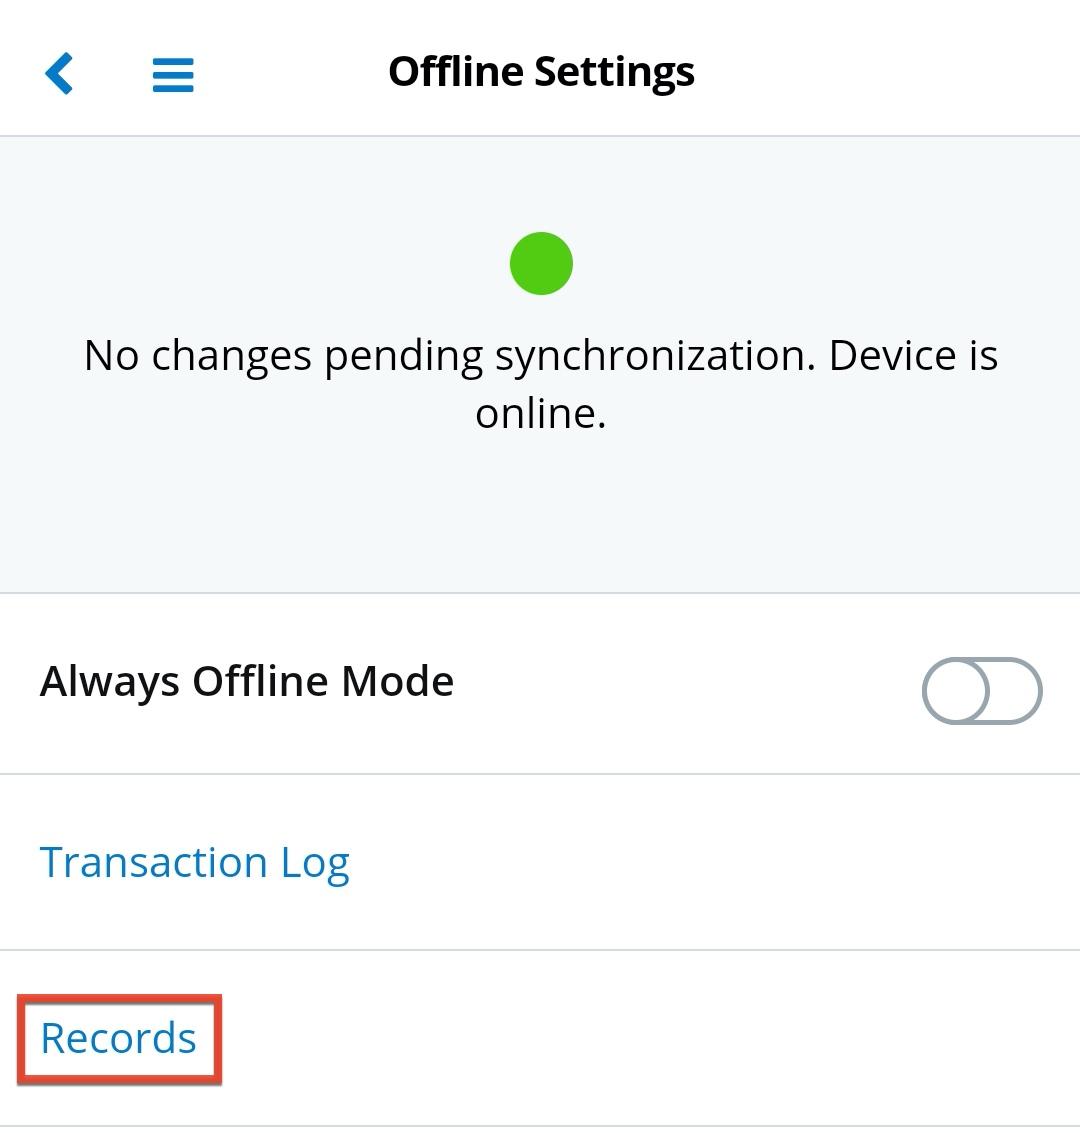
Downloading Records
While online, the SugarCRM mobile app checks for updates to your cached records or new records that meet the criteria to be cached every 3 minutes. This includes your assigned, favorited, and followed records. It also allows you to proactively download eligible records in addition to automatically downloading records you access in the app. The Download Settings section displays the last time a bulk download was performed. Tap the "Download" button to initiate the process.
Note: Records related to your assigned, favorited, and followed records will not automatically be downloaded unless they, too, fall into one of these categories. 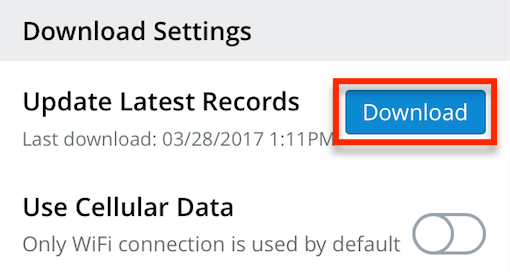
The download will automatically pause when you exit the app and resume when you begin using the app again. You can also manually pause or resume the download by tapping "Pause" or "Resume".
Note: Upon first login after enabling offline capabilities, you will be presented with the option to download your records. You may also choose to initiate the download at any time from the Offline Settings menu.
Use Cellular Data
By default, the app will only perform the bulk download using a Wi-Fi connection. Enable the Use Cellular Data toggle if you want to bulk download records even when no Wi-Fi connection is available. 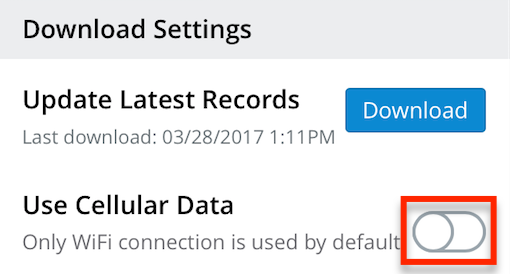
Record Counts
As you use the application, any records displayed in a list view, detail view, or edit view will automatically be stored in your local database while offline capabilities are enabled. Your device will download up to 3000 accounts, 3000 contacts, 3000 teams, 3000 employees, 3000 product catalog records, and 1000 records belonging to other modules. If you download more than the maximum number of records, the app will purge unused or less important records down to 90% of the maximum the next time you open the app.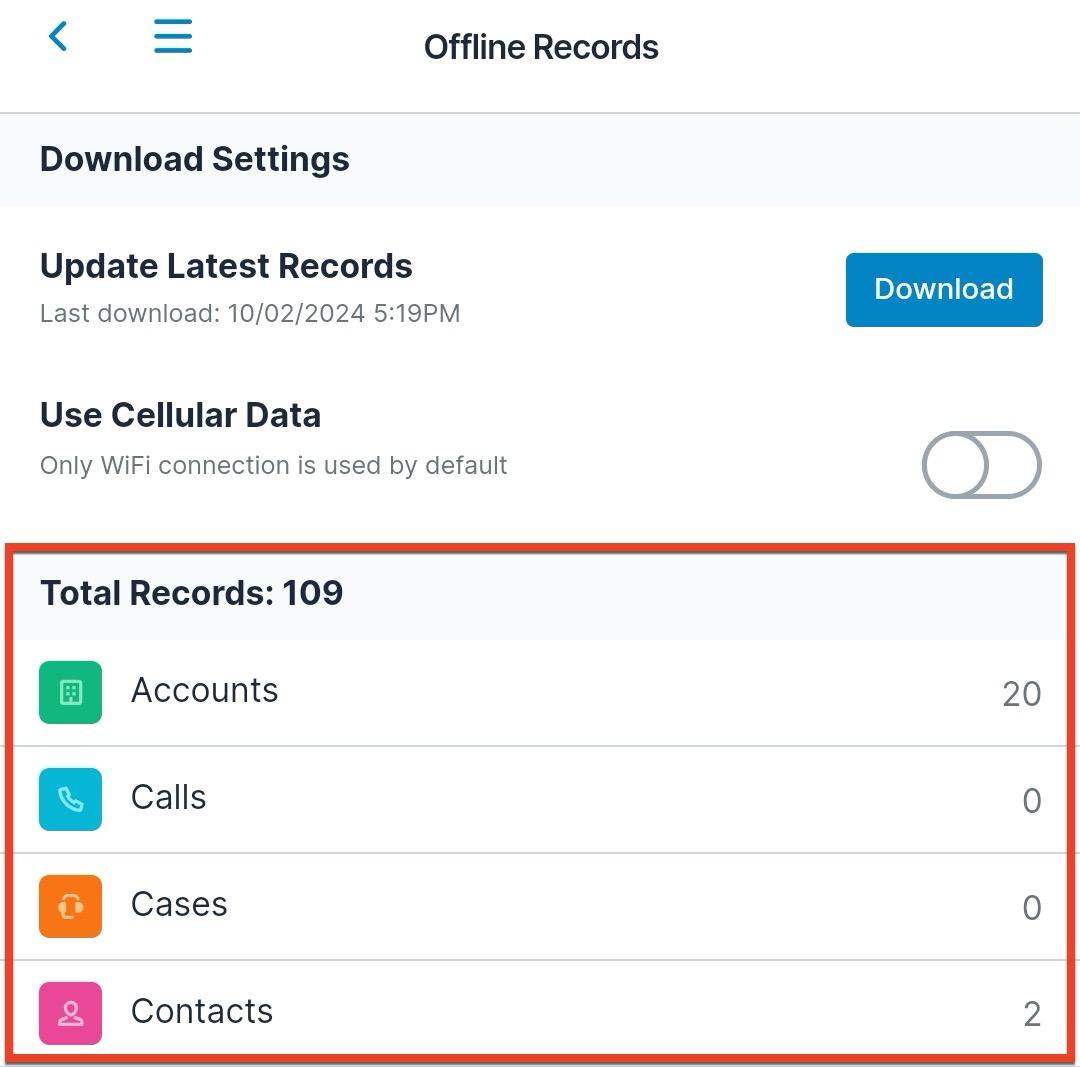
Caller ID Settings
If you wish to use caller ID provided by the SugarCRM mobile app, you must first enable phone permissions for the app on your device. Once set up, a contact or lead name will appear on incoming calls if the phone number matches one of your synced contacts or leads in the Sugar database, differentiating important business calls from unsolicited calls. The steps to set up this feature are different for each device operating system; see the below instructions for Android and iOS to set up caller ID.
Once caller ID is enabled, contacts and leads in your Sugar instance will automatically start syncing to your device, as long as you have the necessary field-level permissions to the phone number fields. After the initial sync, the mobile app will resync with your Sugar instance every five minutes whenever the app is open. This way, you will have caller ID data for the most recently created or updated contacts and leads.
If at any time you wish to force the sync to take place sooner, simply tap the Sync Record Data button that appears on the Caller ID Settings screen after the feature has been enabled. In the pop-up that appears, you can choose to either resync all records, which completely refreshes the device's caller ID database, or only check for record updates, which syncs only records that are new or updated since the last sync took place.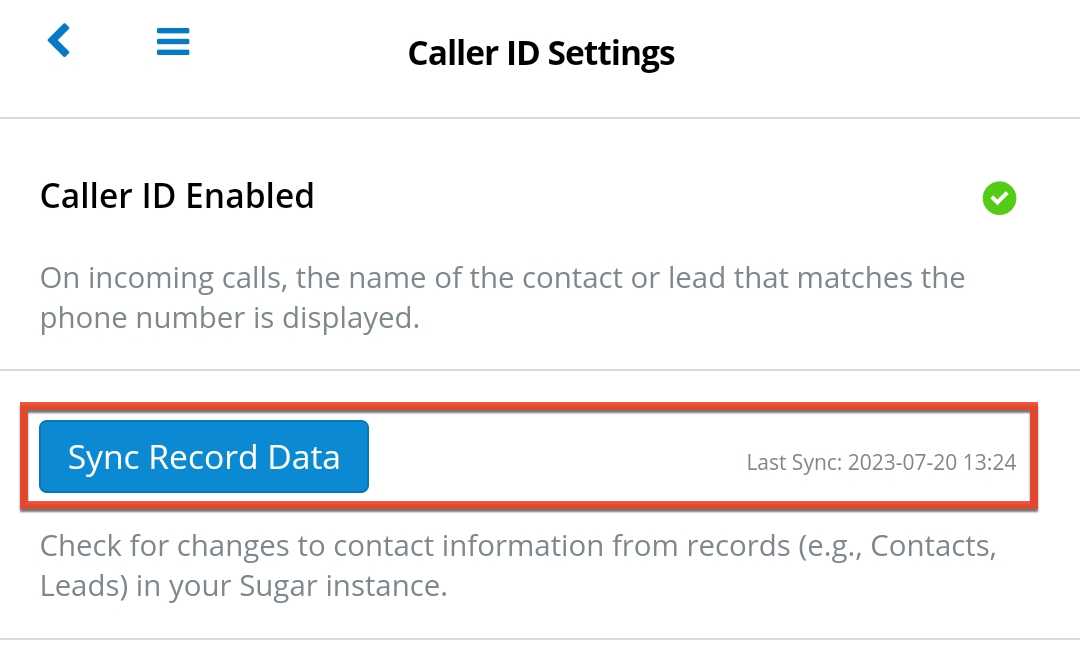
The sync should take a few moments to complete, and once it is done, the last sync date will be updated. The app can store up to 10,000 contacts and 10,000 leads for use by the caller ID capability and chooses the 10,000 most recently modified records when the system contains more than this number of contacts or leads.
Note: If you do not have access to the Contacts or Leads module, caller ID cannot be used and the Caller ID Settings screen is hidden from the navigation menu. If you do have access to the modules but lack the field-level permissions for the relevant phone number fields, the Caller ID Settings screen is available but the sync will never take place.
Enabling Caller ID on Android
The first time a user logs in, they will be prompted to enable the appropriate permissions to use caller ID, but they also have the option to skip this initial step and enable the permissions at a later time from the Caller ID Settings screen in the mobile app. To enable caller ID on an Android device, follow these steps:
- Open the Caller ID Settings screen from the main menu of the SugarCRM mobile app.
- Follow the instructions provided on the screen to open the app permissions in the Android settings, or use the Go to Settings link to navigate directly to the page.
- Enable phone permissions for the SugarCRM app.
- Next, follow the instructions provided in the Caller ID Settings screen to set the default caller ID and spam app to the SugarCRM app.
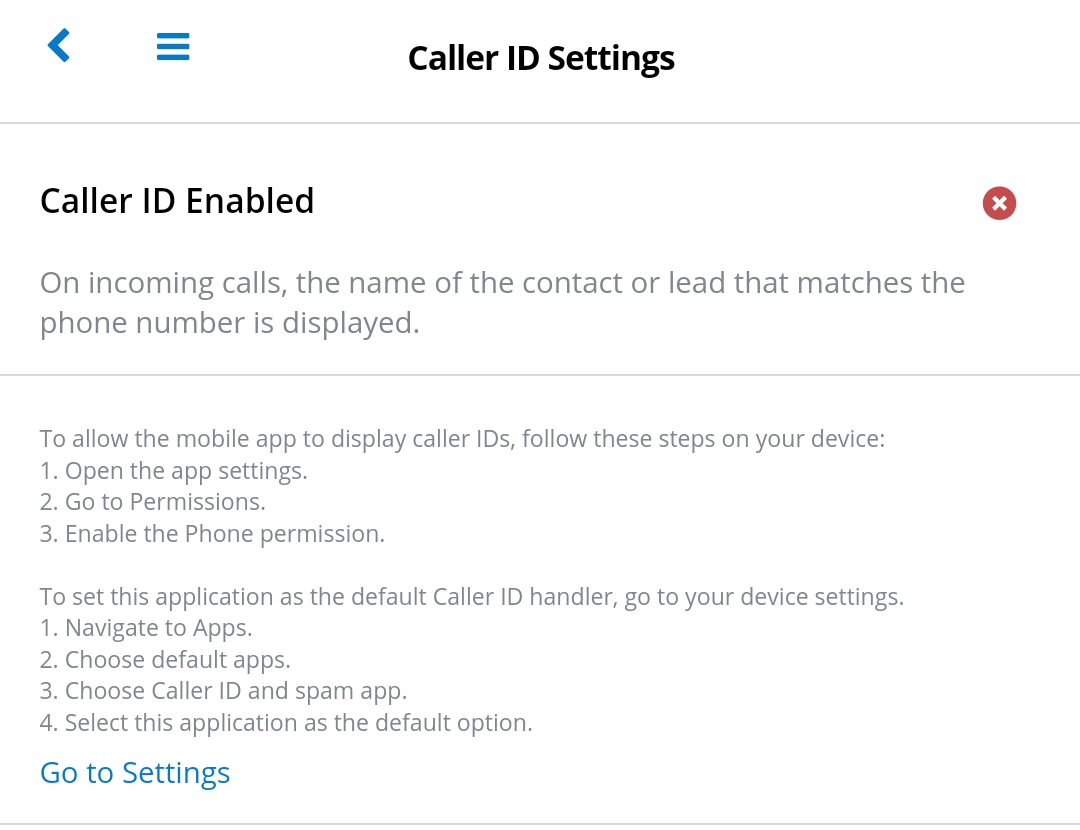
After completing the above steps, caller ID should now be enabled for your device, and the red 'x' will be replaced with a green checkmark.
Enabling Caller ID on iOS
The first time a user logs in, they will be prompted to enable the appropriate permissions to use caller ID, but they also have the option to skip this initial step and enable the permissions at a later time from the Caller ID Settings screen in the mobile app. To enable caller ID on an iOS device, follow these steps:
- Open the Caller ID Settings screen from the main menu of the SugarCRM mobile app.
- Follow the instructions provided on the screen to find the appropriate iOS settings or use the Go to Settings link, which opens the settings for you.
- Enable the SugarCRM app for call blocking and identification.
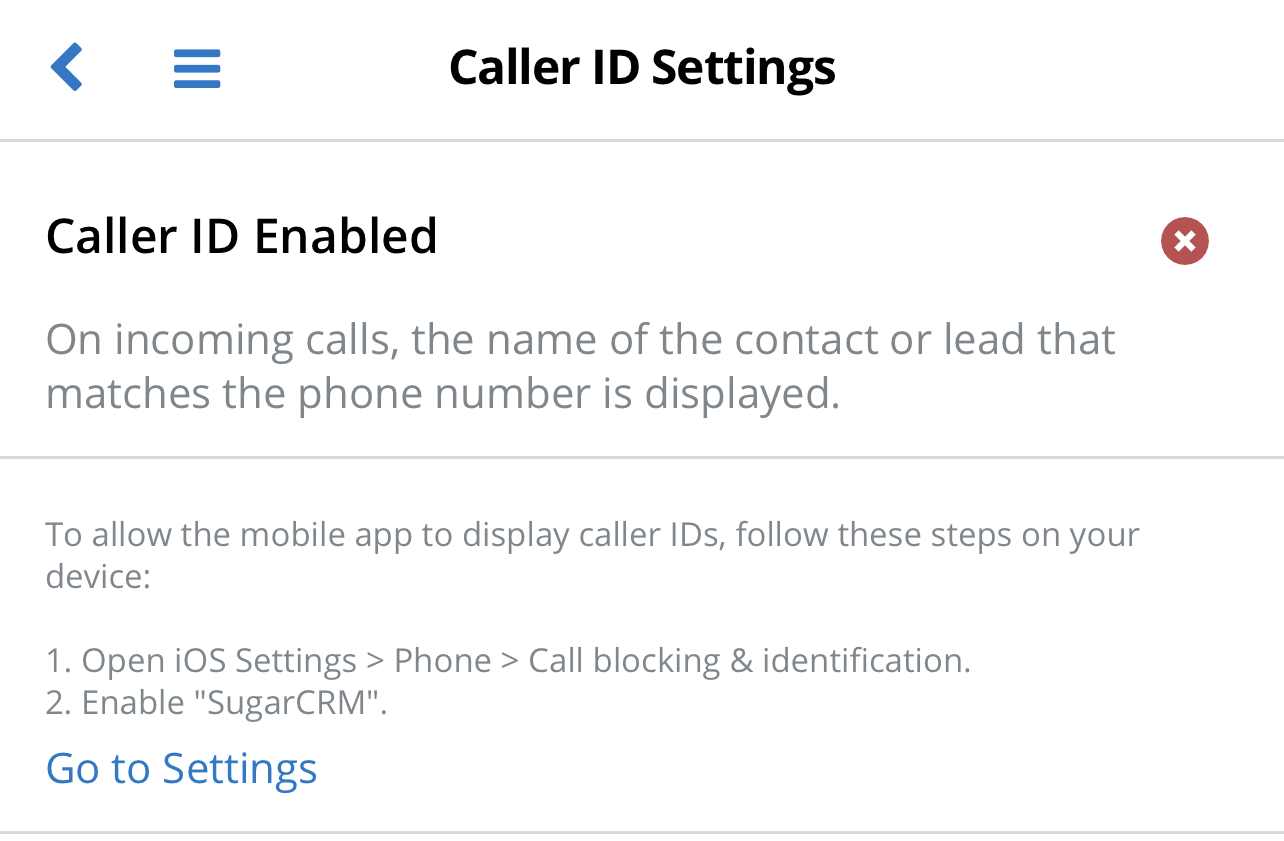
After completing the above steps, caller ID should now be enabled for your device, and the red 'x' will be replaced with a green checkmark.
Desktop Version
The Desktop Version option will switch applications on your phone to open your browser and navigate to your Sugar instance's login screen. This can be useful when you desire to access a module or perform an action in Sugar that is not supported in the mobile application.
Log Out
Tapping "Log Out" from the main menu will return to the SugarCRM Login screen where you can access the same instance from a different user or access a different installation of Sugar.
List View
The SugarCRM mobile app's list view lists records within a specific module as well as providing tools for searching, creating, and working with those records. As you scroll through the results, the app loads more records at the bottom of the list so you can continue scrolling. List views can be accessed from the main menu by tapping any module name. For example, tapping "Accounts" will open the Accounts list view. From a list view, you can return to the main menu by tapping the three-bar icon.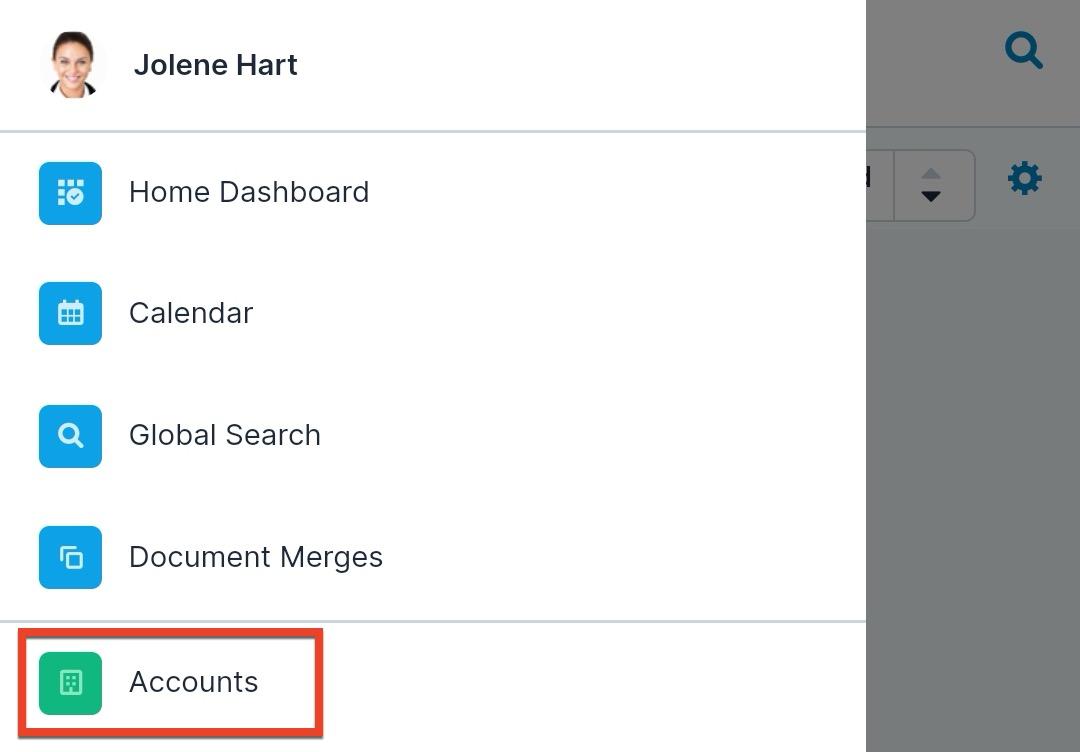
Using Studio from the desktop Sugar application, administrators can configure a default layout for each list view and the additional fields that are available for users to add to their views. For more information on configuring this default mobile layout, refer to the Studio documentation.
Users can update the default layout of their list views to design a list view that is most helpful to them for each module. See the List View Builder section below for details on how to do this.
Quick Create
The Quick Create button allows you to create a new record in the current module and appears at the top right corner of most modules' list views.
The following steps cover creating a new account from the Accounts list view quick create as an example:
- Navigate to the Accounts list view by tapping "Accounts" within the main menu.
- Tap the "+" quick create button at the top right of the page.

- Fill in all desired fields using instructions in the Editing Records section as needed.
Note: Fields that are required will show "Required" in grey. - Tap "Save" to create the new account record. Tapping "Cancel" will return you to the Accounts list view without creating a new record.
Please note that your ability to create records in Sugar may be restricted by a role. For more information on roles, please refer to the Role Management documentation. Check with your system administrator if you do not see the Create options.
Note: Report, employee, and knowledge base records may not be created from the mobile app, so these modules do not include a Quick Create button.
Search
You can search within a module from the top of each module's list view to see the list of matching results in the layout you have configured. Tap the magnifying glass icon in the header to expand the search box and begin typing the name of a record you wish to access.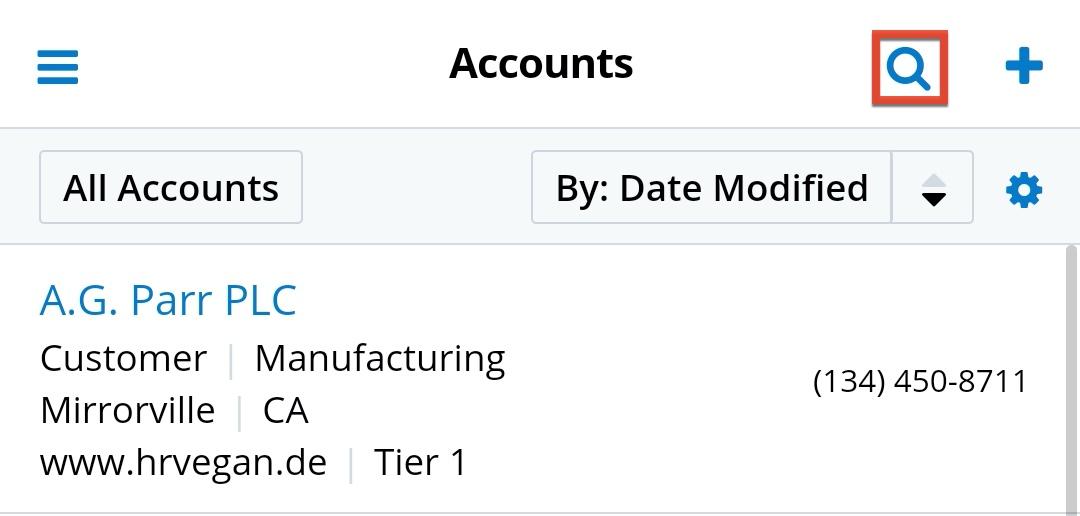
When the search bar is expanded, you can also filter the list of records by tapping the filter button and selecting the desired search filter (e.g., All Accounts, My Favorites). By default, the search filter is set to show all records. The record list automatically shows records with names starting with the characters you have typed and/or matching the selected filter. Tapping "x" clears your search term while tapping "Cancel" closes the search to show the previous list of records.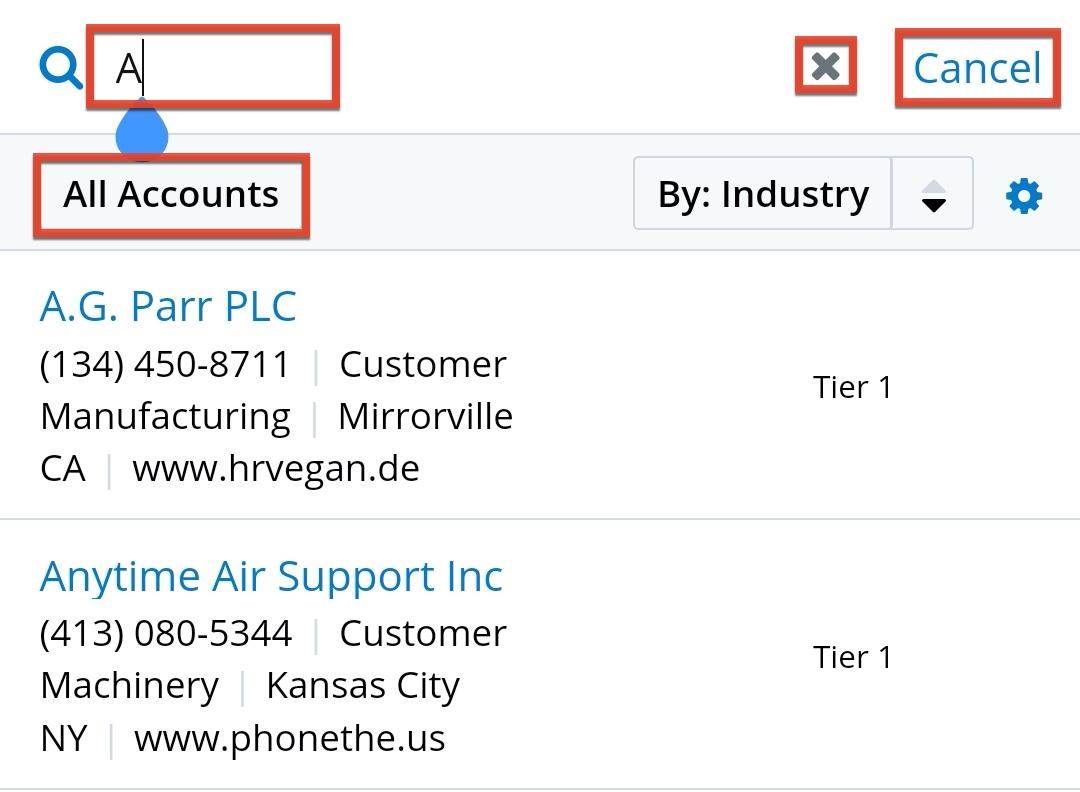
Wildcards can be used to search for criteria without including the entire word in the search. The wildcard character % matches any number of characters, including zero. Note that the wildcard character (%) is implicitly appended to the end of your search phrase.
Filters
In addition to searching for record names, you can filter the records in a list view in the same way you can in your desktop Sugar application. By default, the filter is set to show all records. Tap the Filter button to select the desired search filter or create a new one. 
To create a new filter with customized criteria, follow these steps in any module's list view:
- Open the Filter menu by tapping the name of the currently applied filter, then select "Build Filter".
- First, enable the Save Filter checkbox if you wish to preserve this filter for use in the future. If this is a temporary, one-time-use filter, you can leave this checkbox disabled; this will cause the filter to automatically disappear the next time you switch to a different filter.
- If you are saving the filter, provide a name for the filter.
- Then, if you are saving the filter to your device and you wish to make this filter available to you in the desktop application too, enable "Save to Desktop App". Otherwise, leave it disabled to only save the filter locally in the mobile app. Or, if you are not saving the filter, you can ignore this field.
Note: "Save to Desktop App" performs a one-way save and does not subsequently keep the filter in the mobile app in sync with the filter in the desktop app.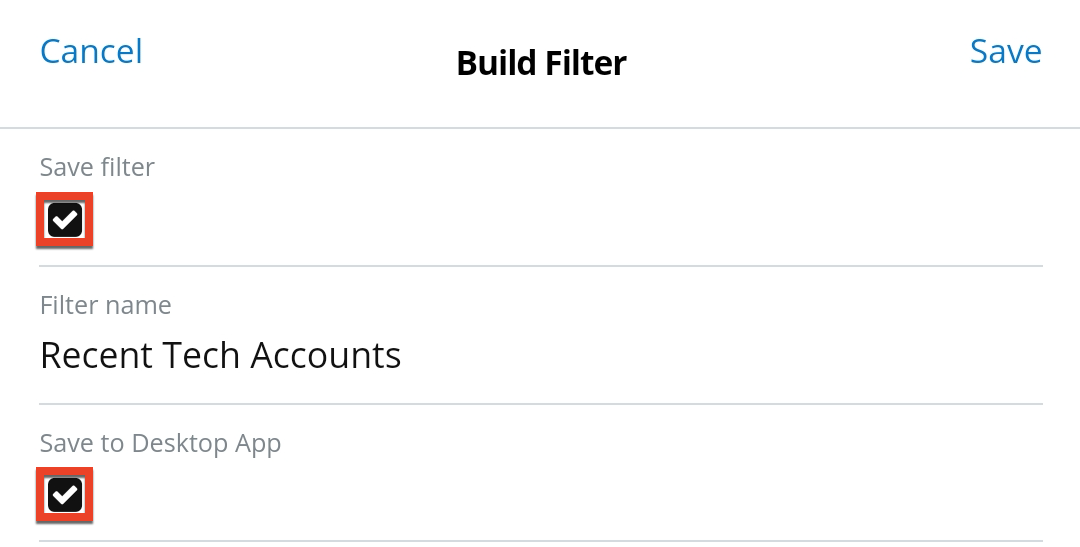
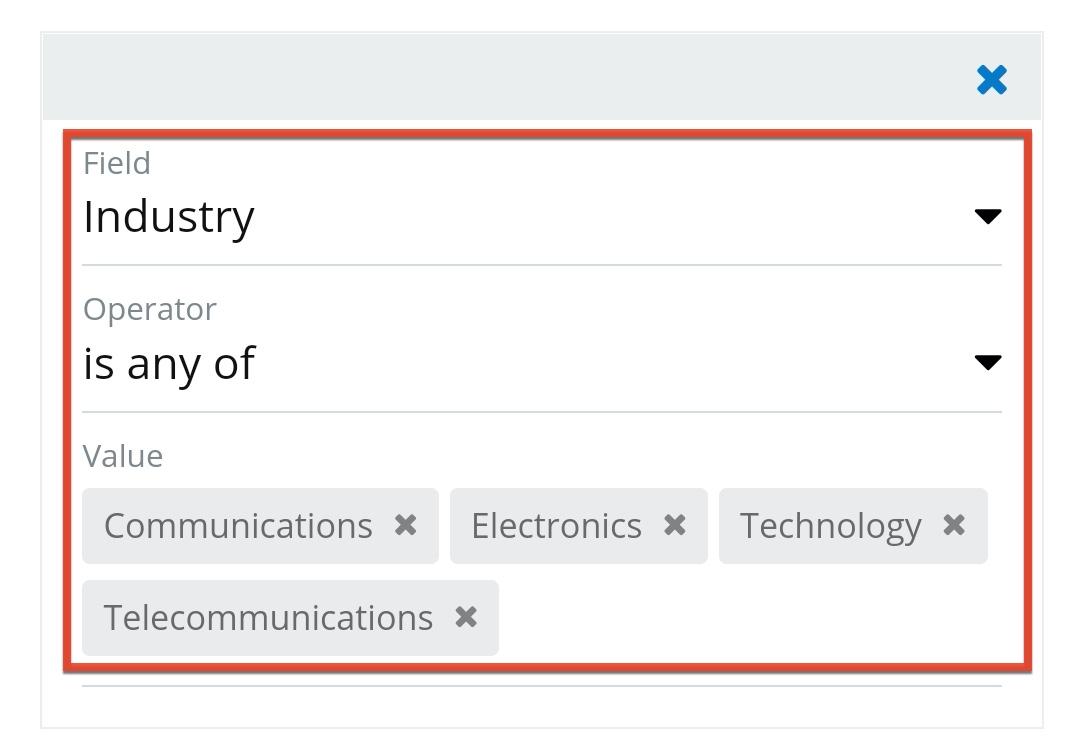
- In the empty criteria box, select a field to filter by.
- Doing so displays the Operator field. Here, choose from the operators (e.g. "is any of") available for the type of field you selected.
- In the Value field that appears, choose the value(s) for the field that you want to filter the results by. For example, you may wish to filter accounts by a subset of industries.
- To add another filter criteria, tap the Add Criteria button at the bottom and repeat steps 4-6 for each subsequent criteria. Once complete, the filter may look similar to this:
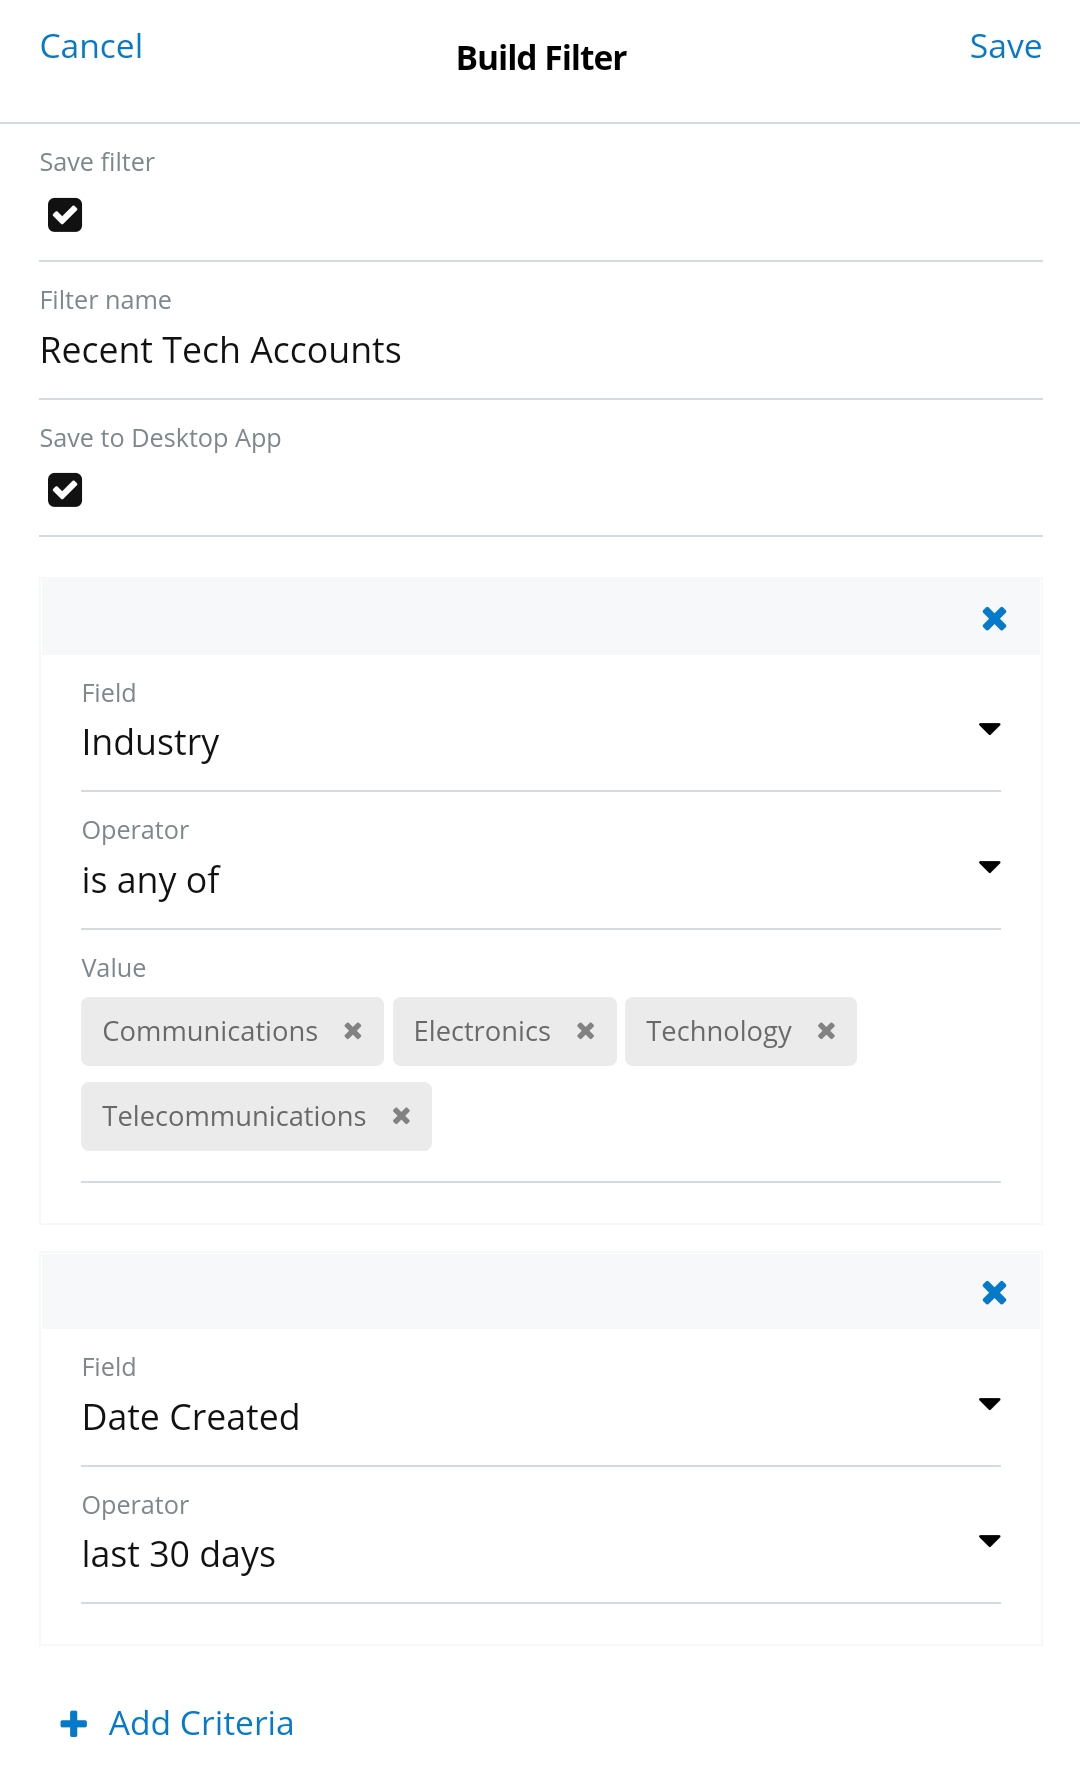
- Tap "Save" in the top right corner to preserve the new filter.
After saving, the filter is now applied to the list view.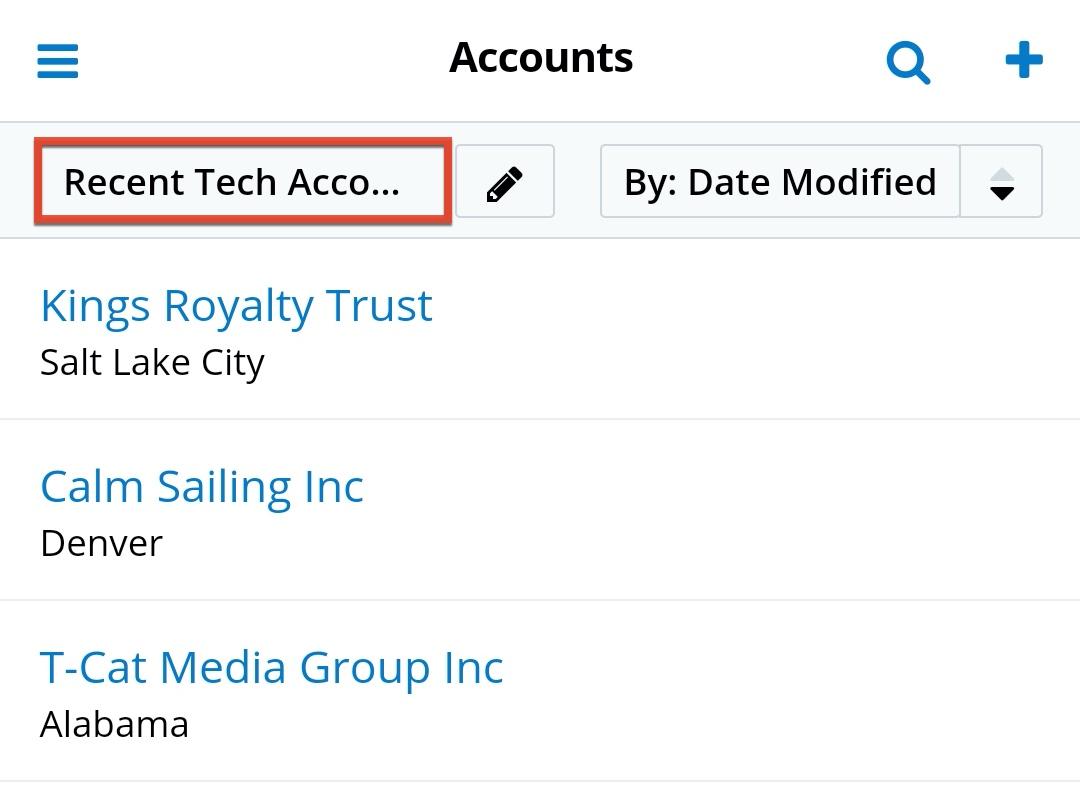
To edit an existing custom filter, tap the pencil icon next to the filter name when it is applied to open the Edit Filter screen.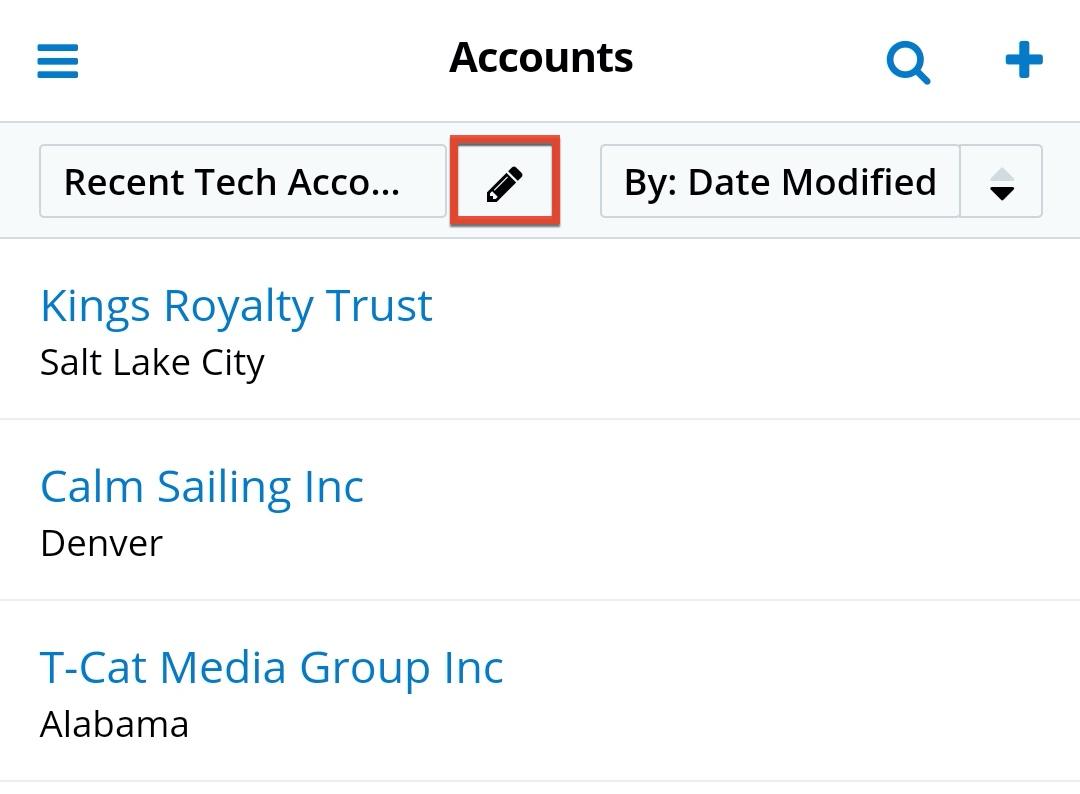
Here, you can change the name and criteria of the filter or delete it. If the filter has not yet been saved to your device or to the desktop Sugar application, you can also do so by enabling "Save filter" and "Save to Desktop App". However, if the filter has been saved to your Sugar instance, you cannot undo this change.
Once a filter has been selected in a list view, the search will be preserved when you navigate away from the page. Returning to the list view will automatically display the results of your last filter.
The following filter options are available in list views:
| Filter Name | Used With Search | Description |
| All Records | Yes | Returns all records to which you have access Note: By default, the module list view is set to "All <Module Name>". |
| My <Module Name> My Records |
Yes | Returns only records assigned to you |
| My Favorites | Yes | Returns only records you have marked as favorites |
| Recently Viewed | No | Returns only records you have viewed within the last 7 days |
| Recently Created | No | Returns only records you created in the module within the last 7 days |
| My Scheduled <Module Name> | No | Returns only scheduled calls or meetings assigned to the user Note: This filter option is only available for the Calls and Meetings modules. |
| My Sent | No | Returns only email records where you are the sender Note: This filter option is only available for the Emails module. |
| My Received | No | Returns only email records that were sent to you Note: This filter option is only available for the Emails module. |
| My Drafts | No | Returns only email records assigned to you that have a status of "Draft" Note: This filter option is only available for the Emails module. |
| With Charts | No | Returns only report records that have a chart Note: This filter option is only available for the Reports module. |
| Custom Filters | No | Returns all records in the module that meet the specified criteria |
Please note that you will only be able to see records as allowed by your team membership, user access type, and assigned roles. For more information on teams and roles, please refer to the Team Management and Role Management documentation.
Sorting
Module list views and lists of related records provide the ability to sort the current search or filter results by a specified field in either ascending or descending order. To sort, tap the sort button and select the desired field in the dropdown. To toggle sorting in ascending or descending order, tap the arrow icon to the right of the sort button. If you sort by a field that is not currently displayed in your configured list view layout, it is added to the bottom of each record.
Note: Multiselect-type fields and Teams fields are not available to be used with sorting. 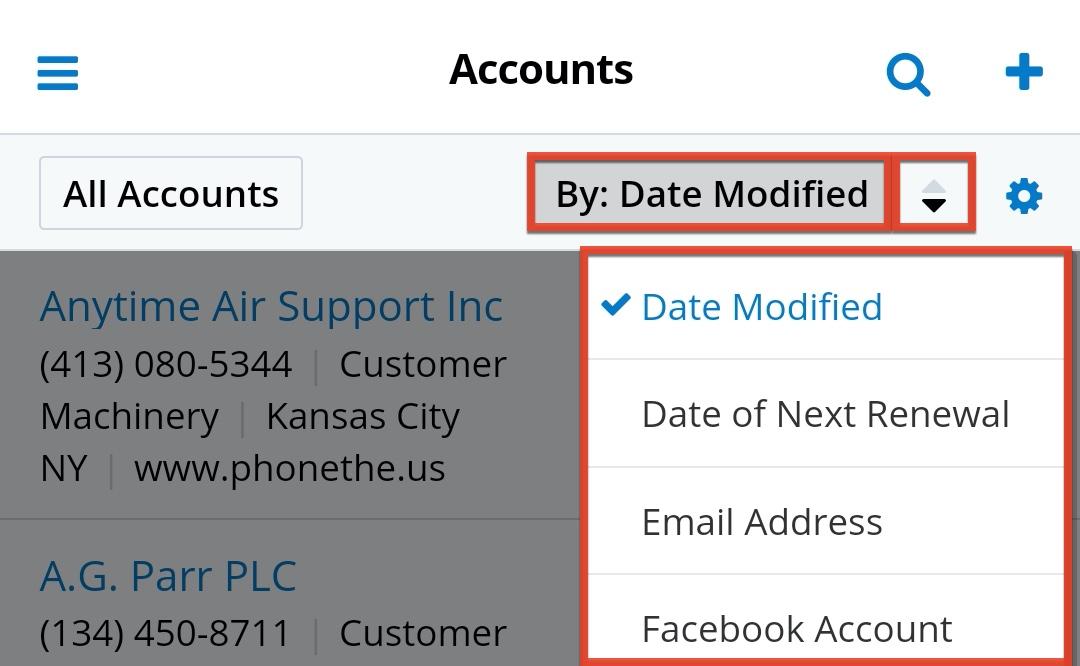
Actions Menu
Swipe left on a record's row in list view to open a context-sensitive menu of actions available for this record. The options which appear will differ based on the type of record and the fields it has populated. For a full list of available actions and a description of each, refer to the Record Actions section below. 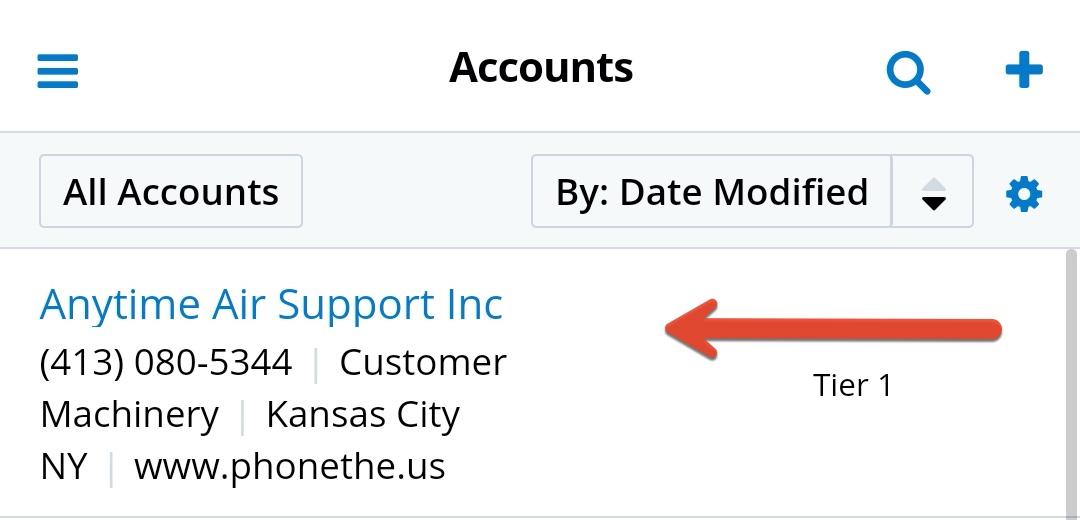
If there are more than three available actions, tap "More" to access the remaining actions. 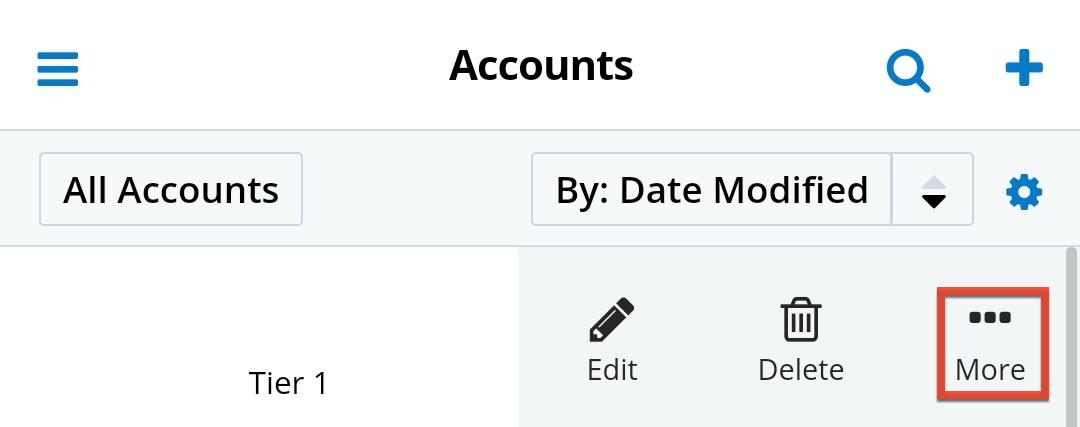
Multiple Selection
Press and hold a record in any list view to initiate multiple-selection mode. After a moment, a checkbox will appear next to every record, indicating whether or not it has been selected. The record you chose will be selected and you can tap other records to add them to your selection. A message across the top of the screen will show how many records you currently have selected (e.g., "3 Items Selected") and a three-dots menu will appear in the top right corner to allow you to perform mass actions on your chosen records.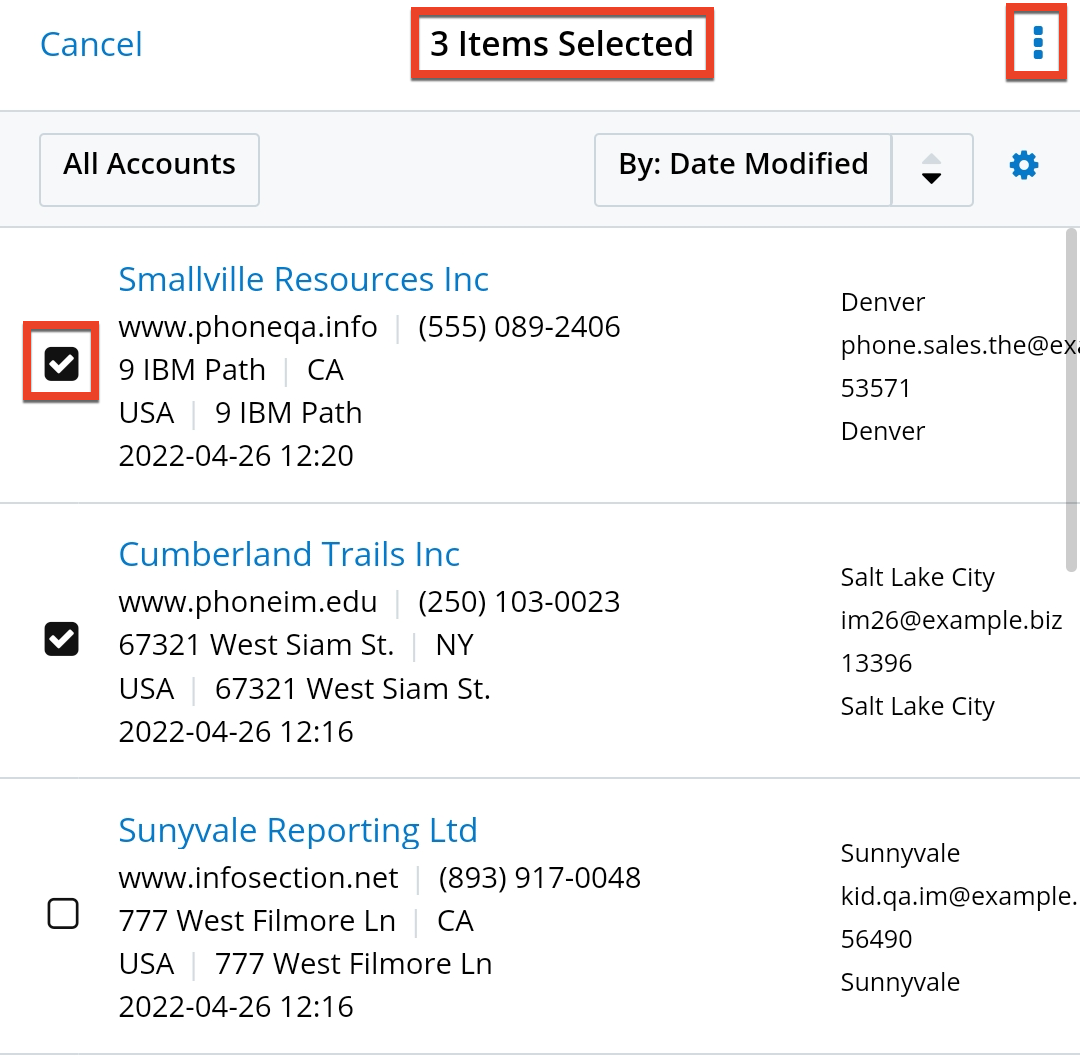
Scroll down the list to continue adding more records while maintaining your existing selections. If you wish to select all records, tap the three-dots menu in the top right corner and choose "Select all". This opens a pop-up asking if you would like to select just the records that are currently loaded or all records in the full result set, up to a maximum of 1000.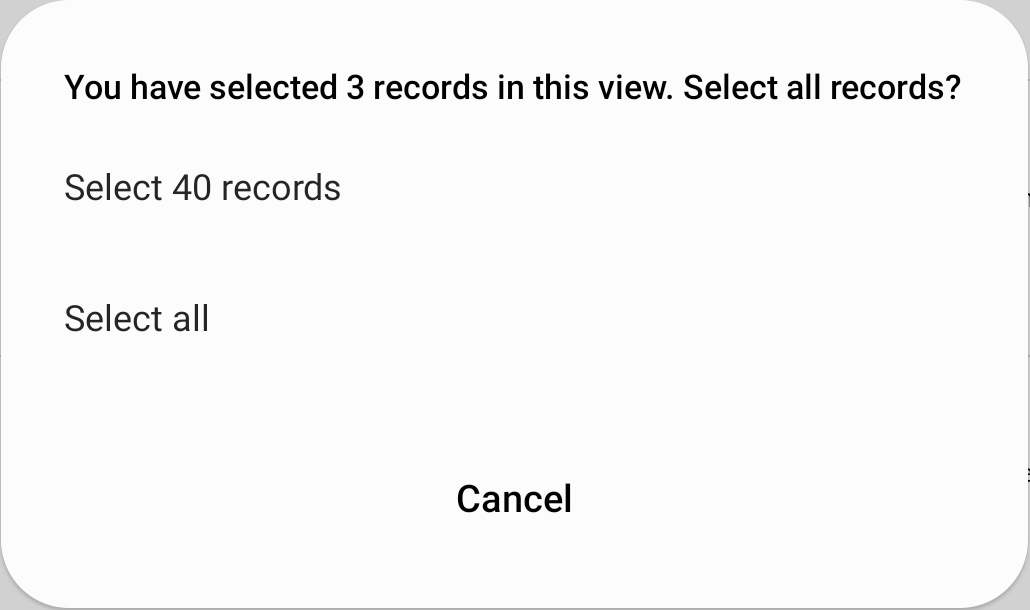
Once you have finalized your list of selections, use the mass actions in the three-dots menu in the top right corner to perform an action on the records. Or, to clear your selections, tap "Cancel" or use the Back button on your mobile device.
Mass Actions Menu
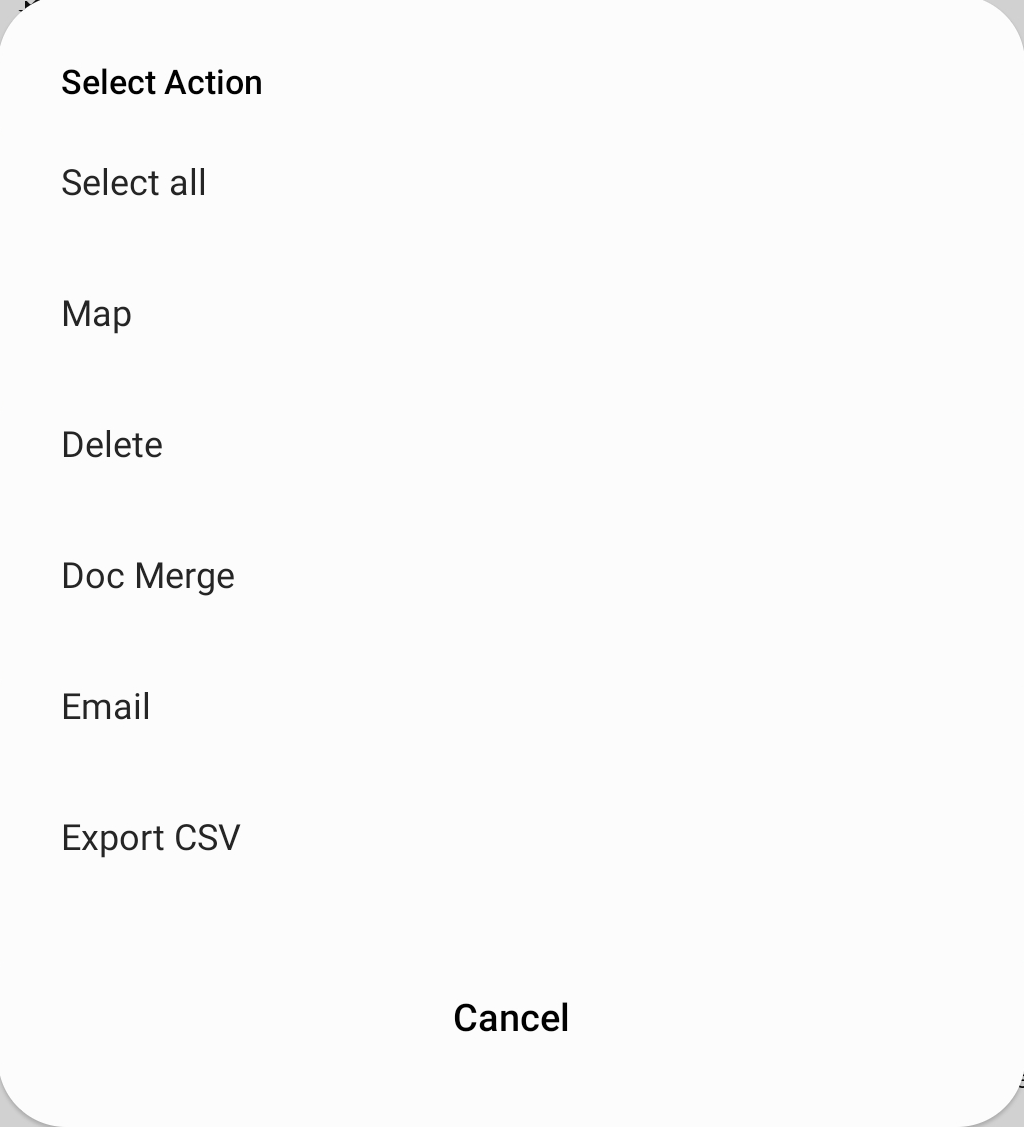
The following actions are available in the three-dots menu in the top right corner of list view when you are in multiple-selection mode:
- Map: View multiple records on a map within Sugar Maps, if your instance has Sugar Maps.
- Directions: Create a route between multiple records on a map using the maps and navigation provider specified in Settings, if your instance has Sugar Maps.
- Directions from current location: Create a route on a map from your device's current location to multiple records using the maps and navigation provider specified in Settings, if your instance has Sugar Maps.
- Delete: Delete the selected records.
- Doc Merge: Merge multiple records into one document, for example, a set of mailing labels based on contact records in Sugar, if your instance has Doc Merge.
- Email: For records with an email address (e.g., contacts, leads), start composing an email to all selected recipients.
- Export CSV: Export the selected records to a CSV file that can be opened in a spreadsheet application.
Note that each action is only available if it applies to the module you are viewing and you have the necessary role access for that action.
List View Builder
The List View Builder screen allows you to fully design the layout of the list view for each module so that you can choose the fields that are displayed and how they are organized. This layout also applies to List View dashlets. To access List View Builder, tap the gear icon on the right side of any list view: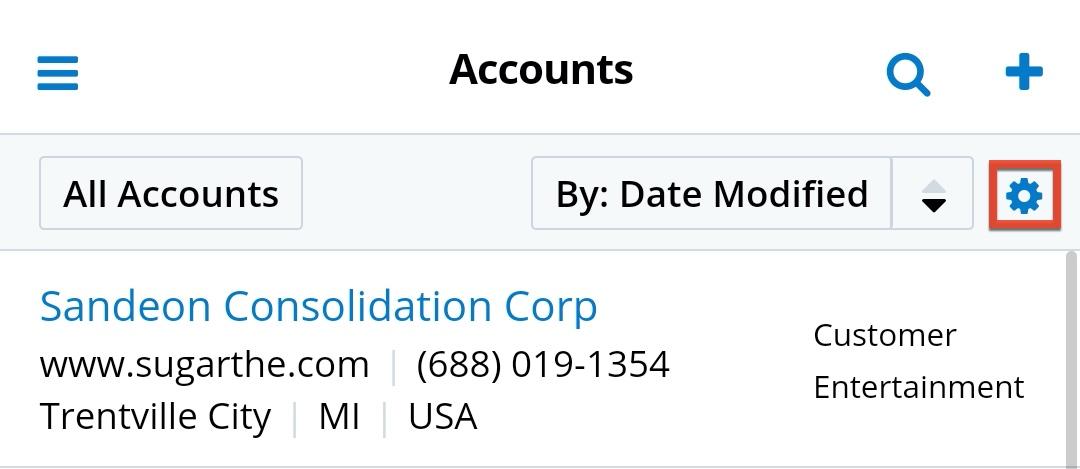
Once open, the screen has three main components: the List View Builder section, the Available Fields section, and the Restore Defaults link: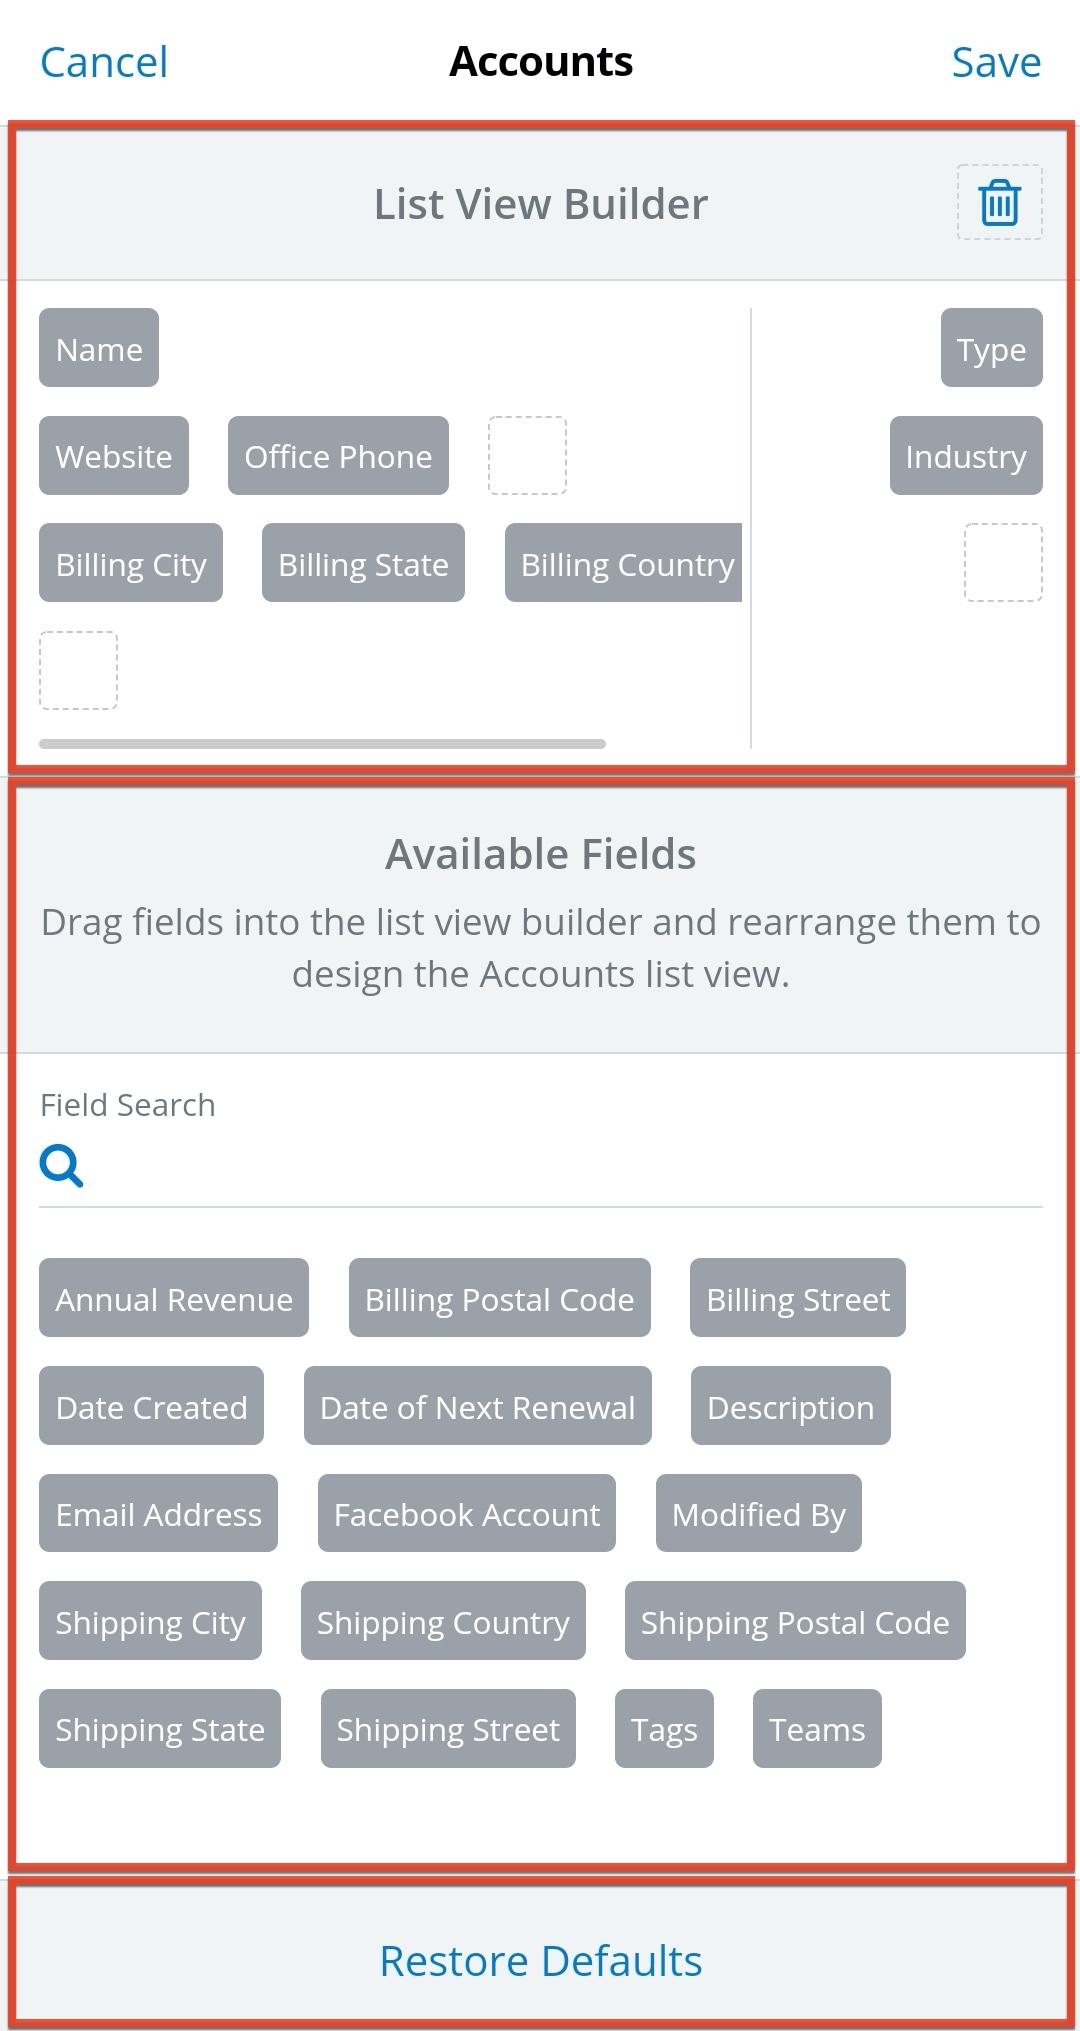
On top, the List View Builder section shows an outline of what the list view will look like with the current configuration. On the left side of the view, you can add up to four rows and each row can hold up to six fields. On the right side, you can also add up to four rows but each row holds only one field. Each individual field is represented by a draggable pill; empty placeholders, where fields can be dropped, are represented by a dotted-line box.
Press and hold fields to drag and drop them within List View Builder or up from the Available Fields section and drop them onto a placeholder to put them there or onto an existing field to swap the two. Placeholders expand when you hold a selected field over them to indicate that you have targeted that location. To remove a field from the layout, drag it to the trash can icon in the top right corner.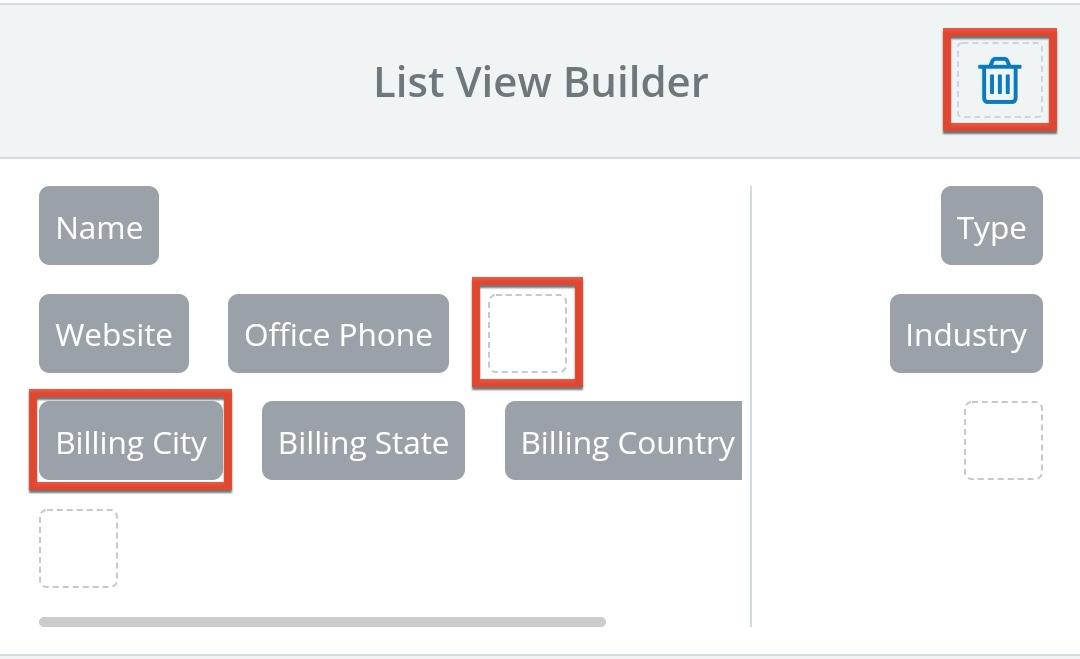
The Available Fields section contains all fields that can be added to the view that are not already placed, as configured by your administrator in Studio. Use the Field Search bar to filter the list of available fields by name then drag the desired field onto a placeholder in the layout. If there is a horizontal scrollbar in the List View Builder section, simply hold a dragged field over the far side of the section to scroll in that direction before dropping the field.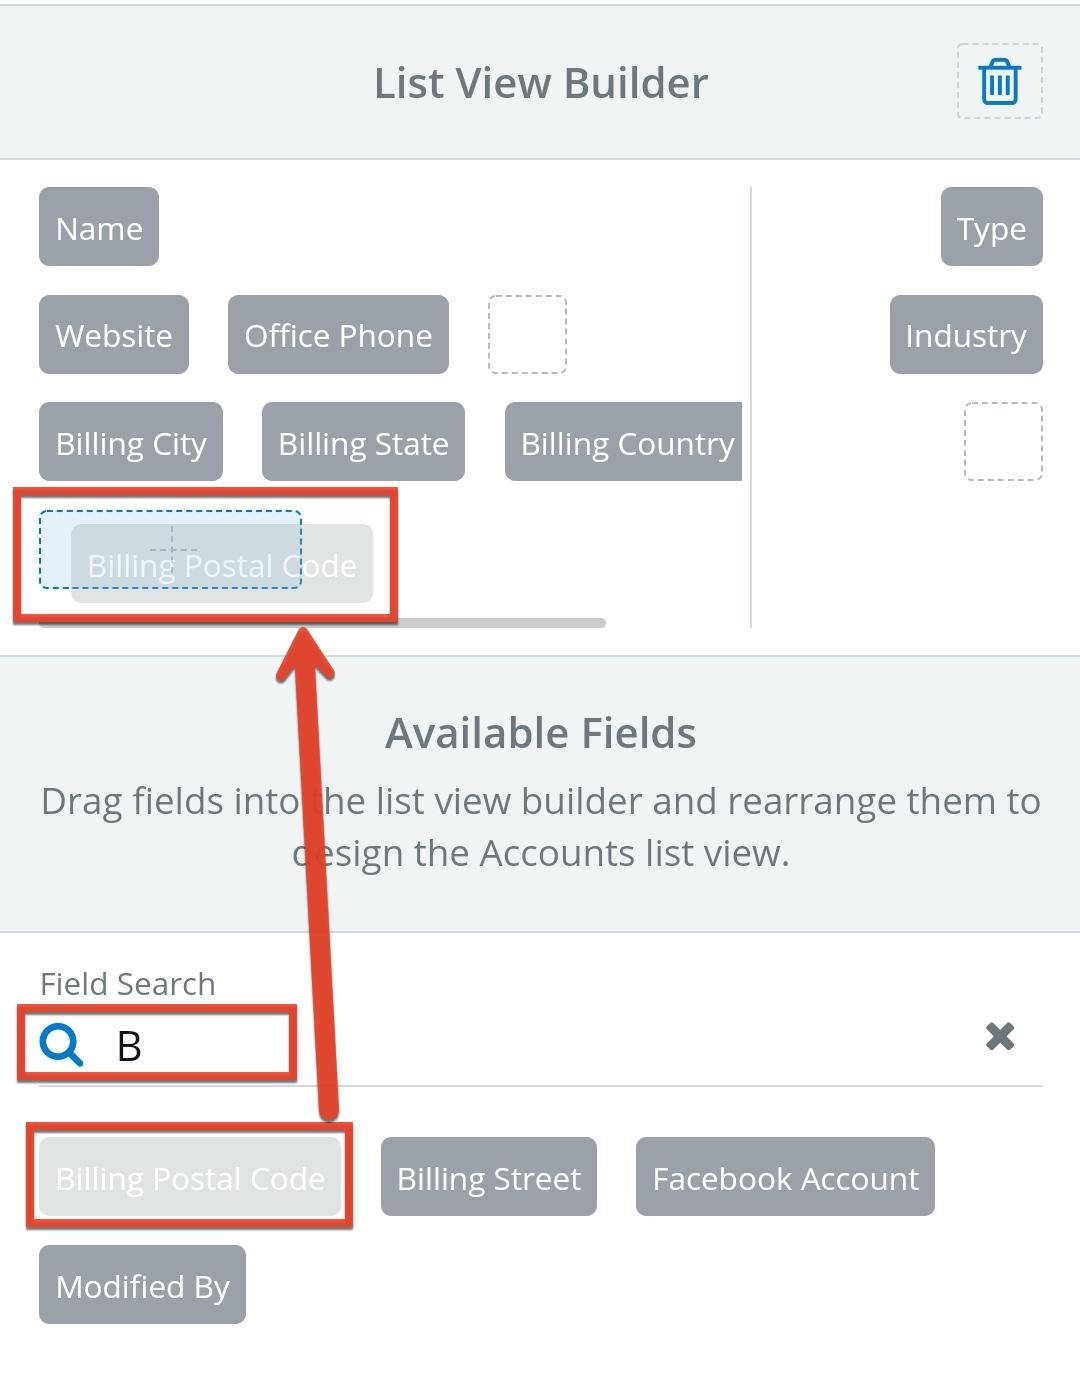
When you have organized the layout how you would like, tap "Save" in the top right corner of the screen to preserve your changes and see how they look once applied. Note that the list view for a module will look the same everywhere, whether you access it from the main menu or via the related records on another module (e.g., viewing the list of calls related to an account). Layout changes made in any location are applied everywhere you can view that module's list view.
At the bottom of the screen, you can use the Restore Defaults link to return the layout to the default state, as configured by an administrator in Studio. To save the default layout, be sure to tap "Save" afterward.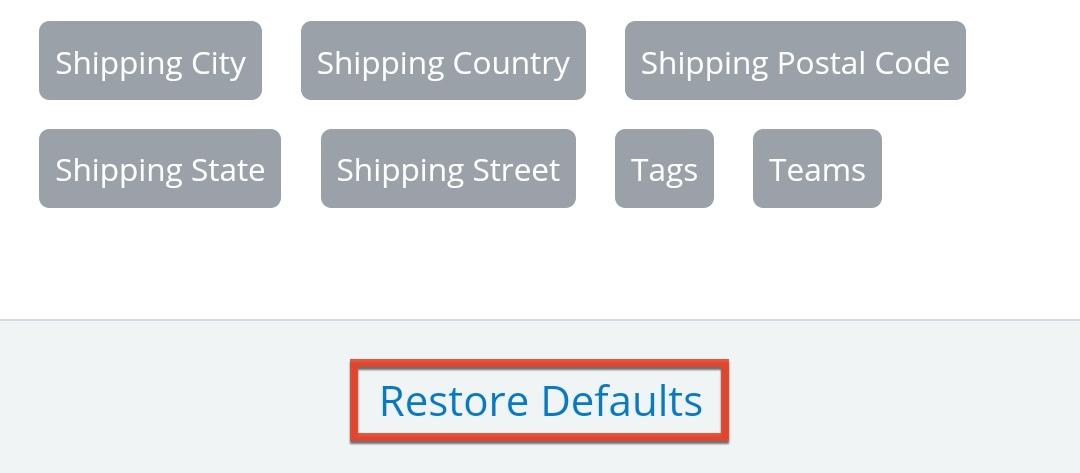
For more information on how admins can configure the default list view layout for each module and the list of fields that are available for users to add, see the Studio documentation in the Administration Guide.
Detail View
The SugarCRM mobile app's detail view shows the details, related records, dashboards, and activity stream of one specific record as well as providing the ability to edit and perform other actions on the record. Detail views can be accessed from many places in the application by tapping any record's hyperlinked name. For example, tapping a row on the Accounts list view or on the Global Search page will open the record in detail view. 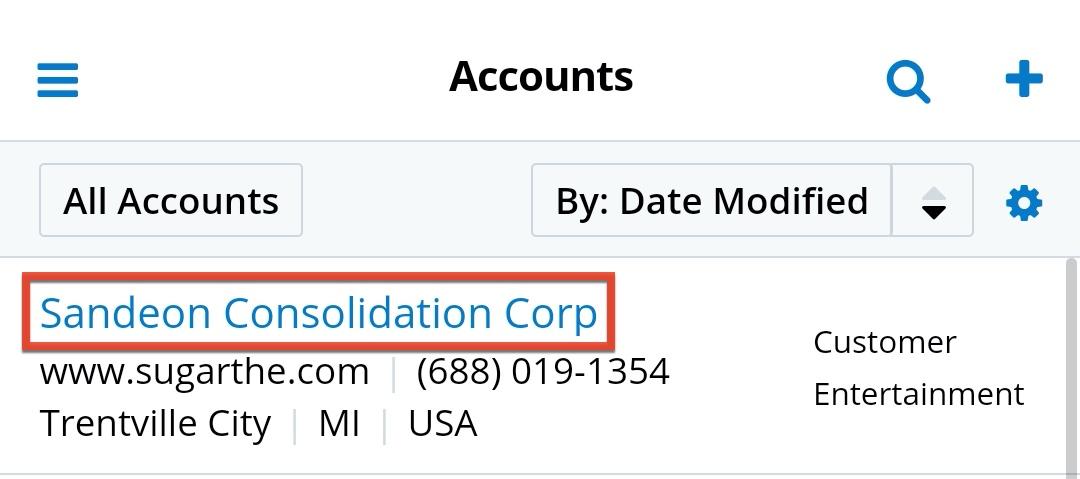
The following elements are available on detail view pages: 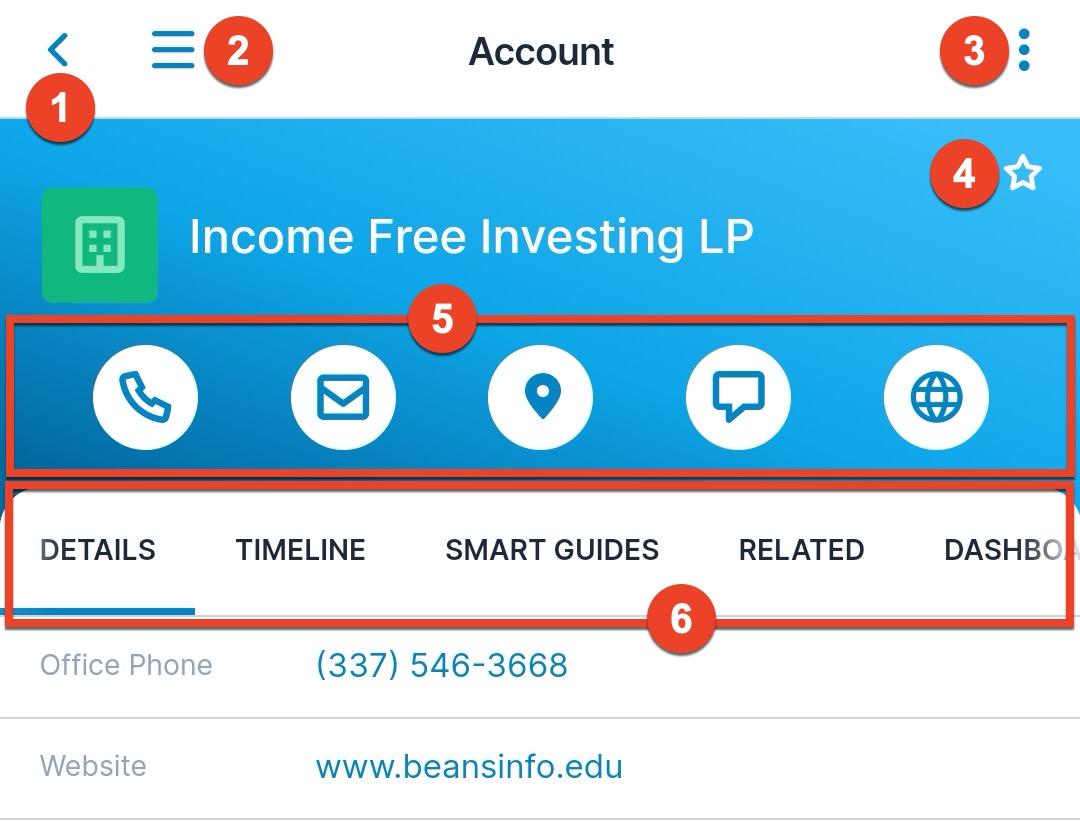
- Previous Page: Tap the arrow on the top left to return to the page you last viewed.
- Main Menu: Tap the three-bar icon on the top left to access the main menu.
- More Actions Menu: The following actions are available by tapping the vertical ellipsis icon on the top right:
- Edit: Modify the values of this record.
- Copy: Make a new record with the same field values as this record.
- Link Existing Record: Relate an existing record to this record.
- Create Related Record: Create a new record and relate it to this record.
- Share: Send a link to this record using the sharing options available on your device.
- Convert: On lead records only, initiate the lead conversion process.
- Create Opportunity from Quote: On quote records only, automatically create an opportunity record based on the quote's values.
- Download Quote PDF: On quote records only, download a PDF version of the quote using the PDF template specified in the menu item name.
- Email Quote PDF: On quote records only, start drafting an email with the quote PDF attached.
- Escalate: On accounts, cases, and opportunities, create an escalation record related to this record.
- Doc Merge: If you have access to the Doc Merge functionality, merge this record with a document template to generate a PDF or DOCX file.
- Geocode: If you have access to the Sugar Maps functionality, manually geocode this record.
- Resend: On DocuSign envelope records only, immediately resend the envelope to the recipients.
- Fetch envelope: On DocuSign envelope records only, fetch the updated envelope from DocuSign.
- Fetch completed document: On DocuSign envelope records only, download the signed document and automatically relate it to the target record.
- Delete: On DocuSign envelope records only, delete the record.
- Favorites Designation: Tap the Star icon to toggle whether a record is marked as a favorite for your user. A solid white star indicates it is a favorite. For more information, refer to the Favoriting Records section below.
- Record Actions: The context-sensitive menu of actions will differ based on the type of record and the fields it has populated. For a full list of available actions and a description of each, refer to the Record Actions section below.
- Record Tabs: The tabs below the Record Actions menu provide the following information and functionality. Each is described in greater detail in the following sections.
- Details: Tap the Details tab to view the record's field values.
- Timeline: Tap the Timeline tab to view a chronological history of activities and events related to this record.
- Smart Guides: If your Sugar license type has access to Sugar Automate and an admin has configured it for the current module, tap the Smart Guides tab to interact with smart guides that are in progress for the current record.
- Related: Tap the Related tab to view, edit, and create records related to the current record.
- Dashboards: The Dashboards tab displays the dashboards you configured to appear on this module's record view.
- Activity Stream: The Activity Stream tab displays recent activity on this record and allows you to add comments or posts.
Details Tab
The Details tab shows the record's fields. Field values shown in blue can be tapped to open the related record or take an action such as calling a phone number or mapping an address. You can also press and hold an address field to copy the address to your clipboard for pasting elsewhere, such as in an email or text message.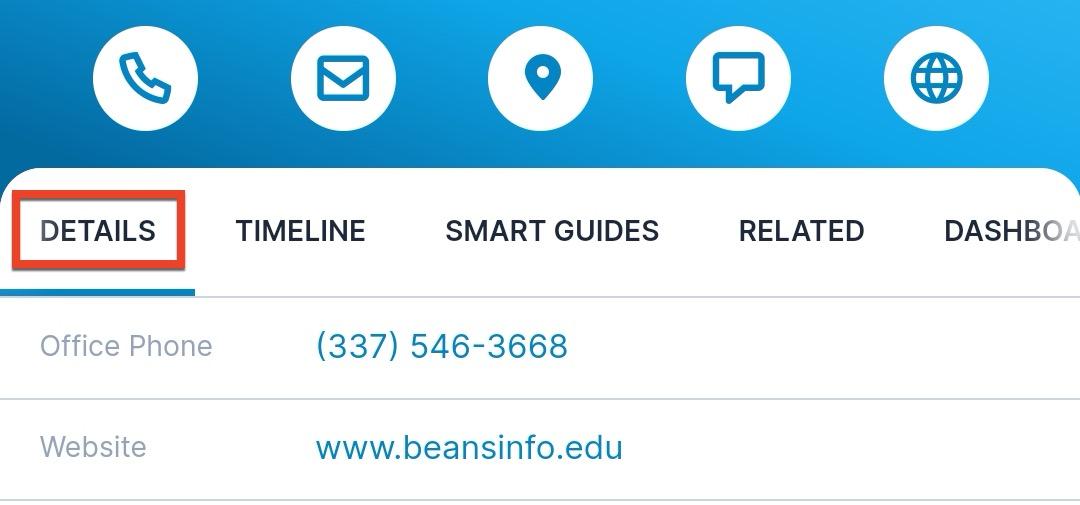
In addition, if the Tags field is displayed, you can tap an individual tag to open Global Search filtered by the tag to see all records with that tag.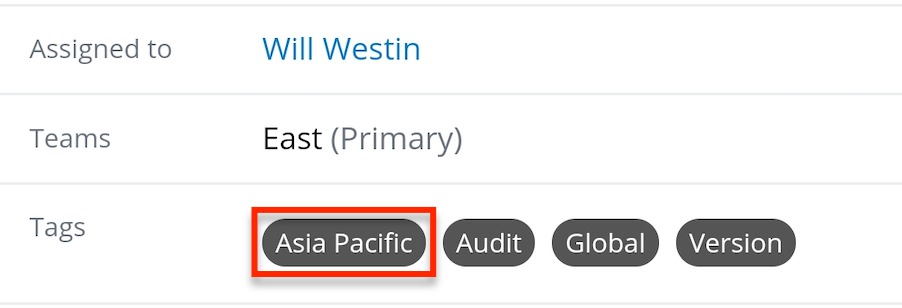
If connected to a Sugar Sell, Serve, or Enterprise instance, admins can also configure and add certain Action Buttons to detail and edit view. These buttons are displayed within the list of fields and tapping them will perform specific, pre-configured actions as set up by your admin.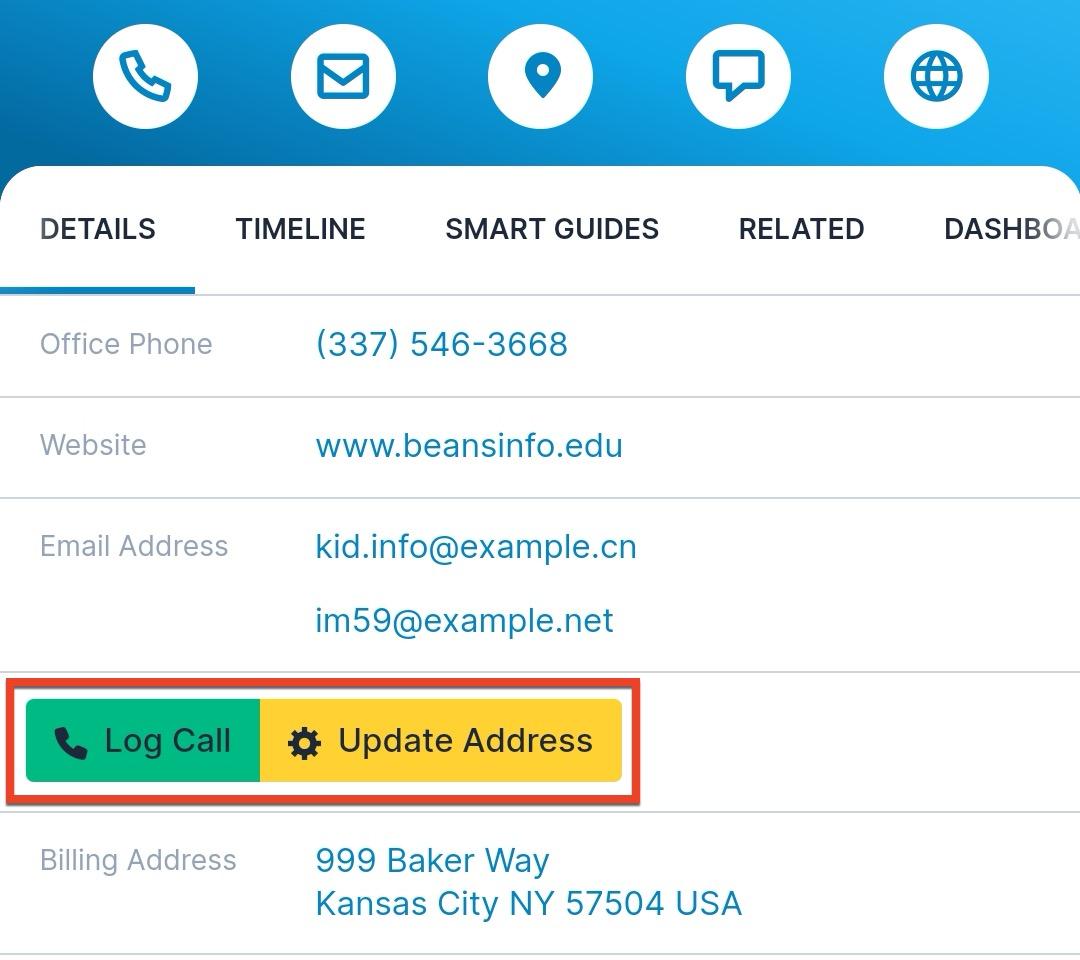
The following types of Action Buttons can be used in the mobile app:
- Assign Record
- Compose Email
- Create Record
- Doc Merge
- Open URL
- Update Record
If other types of buttons are displayed in the app, they will be disabled and cannot be used. Also, note that buttons configured to appear in the record header will not be displayed in the mobile app; they must be displayed within a detail view or edit view layout to be accessed via the app. See the Action Buttons documentation in the Administration Guide for more details on Action Buttons and the different types.
Note: Administrators have the ability to configure which fields appear here using Studio from the desktop Sugar application. In addition, if an admin has configured the view to change based on the value selected in a dropdown field, you could see a different layout for different records. For more information on configuring the Mobile DetailView layout or dropdown-conditional views, refer to the Mobile Layouts section and the Creating Dropdown-Field-Based Record View Layouts section in the Studio documentation.
Timeline Tab
When connected to Sugar versions 14.0 and higher, the Timeline tab shows a chronological history of activities and events related to the current record and allows searching and filtering to find what you need. The desktop equivalent of this timeline is the Timeline dashlet, but in the mobile app, it is displayed as a tab within the detail view instead of as a dashlet. The tab is composed of two areas: the top bar containing the filter and search options and the remainder of the screen containing the list of activity cards in descending order.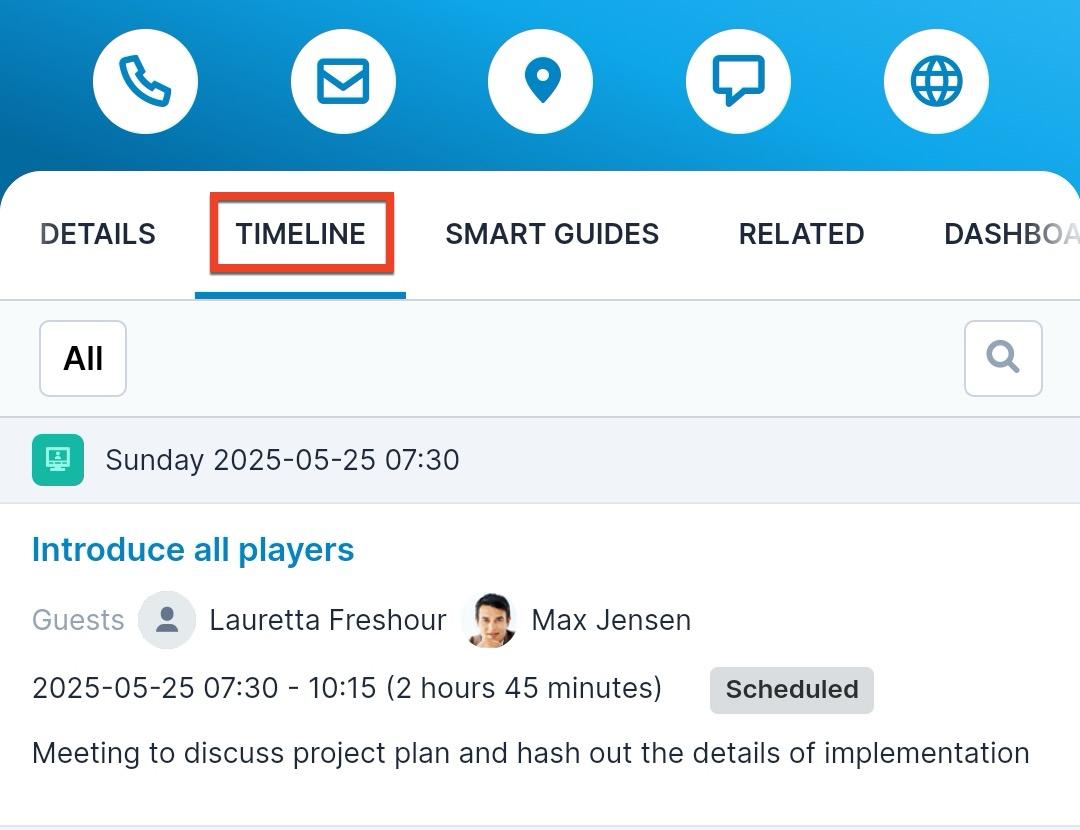
Tap the Filter button in the top left corner to access the filter options. You can filter by a specific activity card type to view only activities of that type (e.g., meetings). You can also use the Updates filter option (e.g., "Account Updates" when viewing an account's timeline) to view a timeline of changes to the record, which shows updates to specific fields. See the Sugar Dashlets page in the Application Guide for a complete list of the fields included in the timeline when updated.
Use the magnifying glass icon in the top right corner to search for specific keywords in the timeline. Note that this search functions the same as the list view search, which means that it only searches the title or subject of the record and only finds matches for the beginning of the text. Use the percent sign (%) as a wildcard at the beginning of the search to search for text within any part of the title or subject.
The content of the timeline displays an activity card for each activity (e.g., meeting, email) in descending order. The information displayed on the card varies between modules but typically includes the date and time of the event (e.g., the meeting start time) in the bar at the top of the card, followed by the title or subject, which can be tapped to open the record. To understand which datetime field is used for each card type in the chronological sort order, see the Sugar Dashlets page in the Application Guide.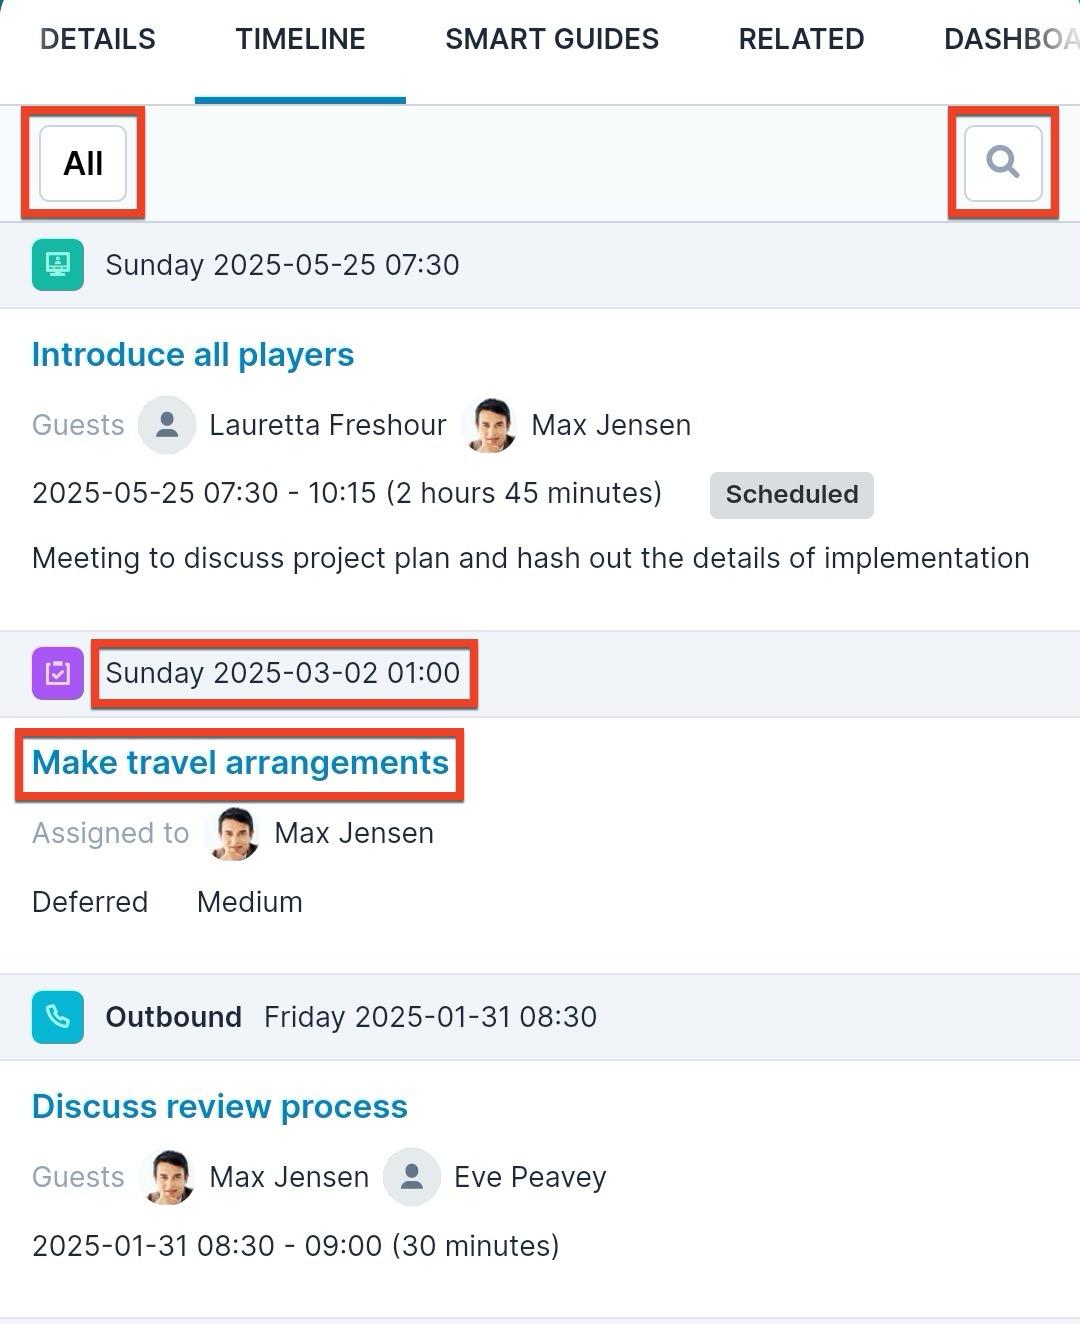
Swipe up and down to scroll through the timeline and pull down from the top and hold briefly to refresh the list. More cards will load automatically as you scroll. Swipe from right to left on any activity card to access the Actions menu. From here, use the Unlink option on most cards to unlink the related record from the record you are viewing. On email cards, you can use the Actions menu to forward, reply, or reply-all on the email.
Note: The timeline in the mobile app does not display cards for Sugar Market activities.
Smart Guides Tab
If you use and have access to Sugar Automate in Sugar versions 13.0 and higher, the Smart Guides tab shows all smart guides associated with the current record for any module where an admin has enabled Sugar Automate. This includes in progress, completed, canceled, and archived smart guides. Use the filter in the top left corner to show only active or archived guides. To refresh the list, you can swipe down on the screen. Tap the Plus button in the top right corner to start a new guide for the current record; you will be presented with a list of smart guide templates for the current module to choose from.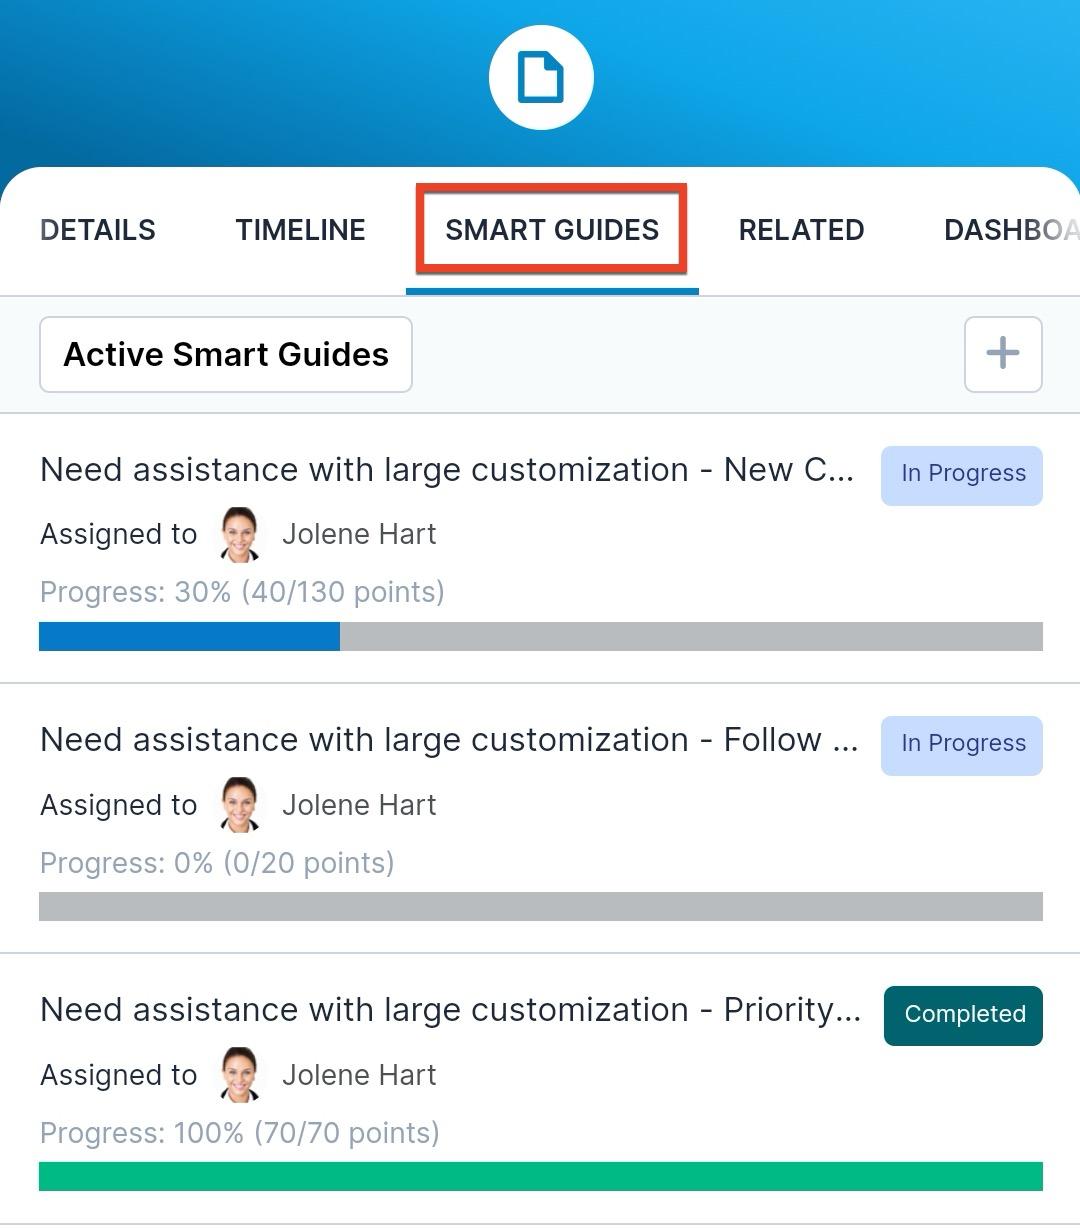
Tap any smart guide to open it, where you can view and interact with its stages and all of the activities in each stage. From this tab, you can also add a stage, cancel the guide, or delete it by swiping from right to left to open the Actions menu on a specific guide. Note that deleting a smart guide also deletes all activity records (i.e., tasks, meetings, and calls) within the smart guide. If the guide is complete, you will have the option to archive it in this menu, and if it is already archived, you will have the option to unarchive it.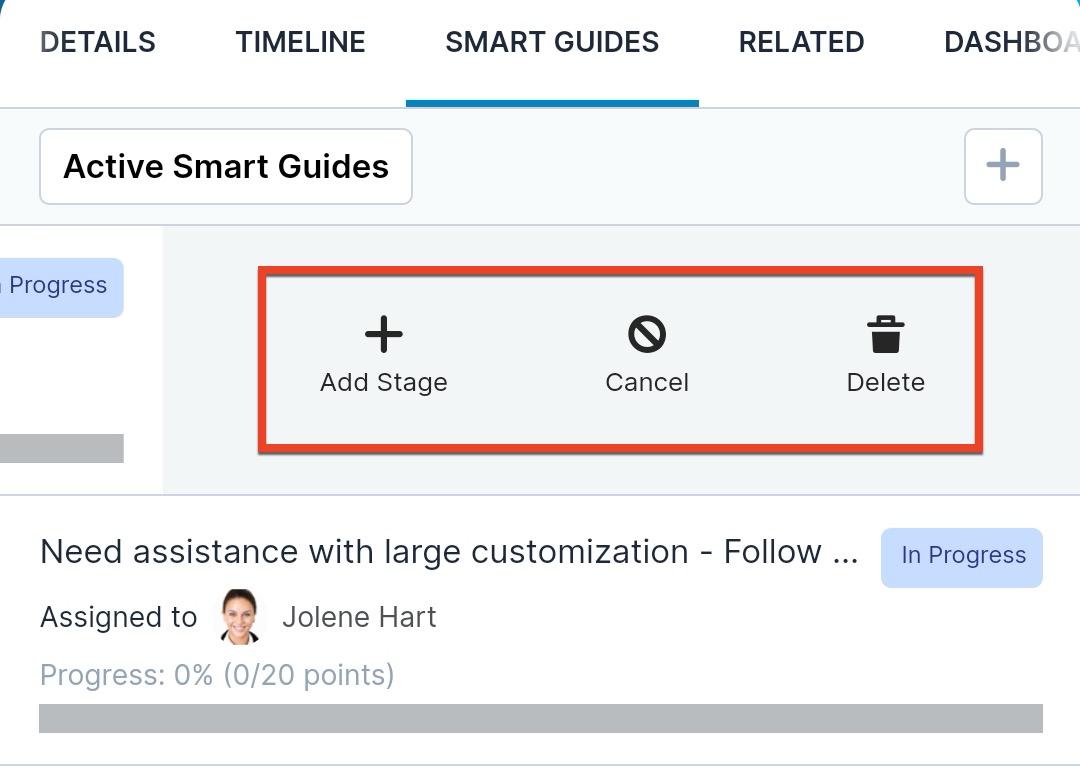
Note that an admin must enable the Smart Guides and Smart Guide Stages modules for the mobile app before users can work work with smart guides from their mobile device. See the Working With Smart Guides section of this page for more information on interacting with smart guides.
Related Tab
The Related tab displays subpanel lists of records that are related to the record you are viewing. Each related module is displayed with the count of related records within that module. Tap the module name to see a list of its individual related records or tap the plus icon to add a related record of that module type. You can also press and hold any module to drag it to a new location within the list. This way, you can organize the subpanels so that your most-used modules are at the top.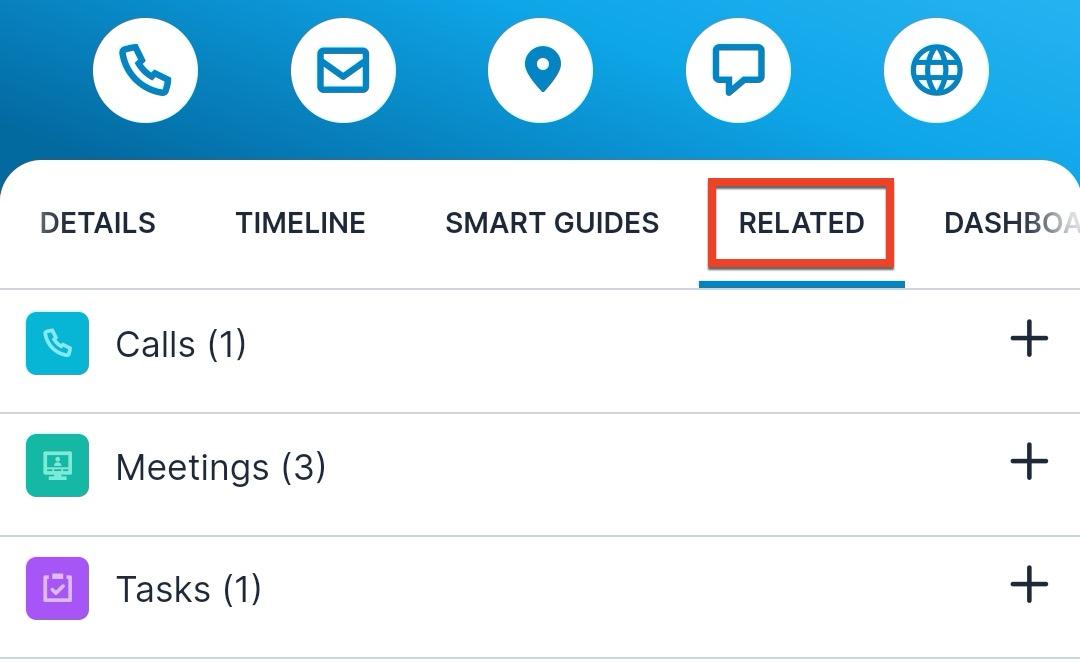
Note that if a particular module does not have any subpanels to display, the Related tab will not be shown.
Once a list of related records is opened, the following options are available: 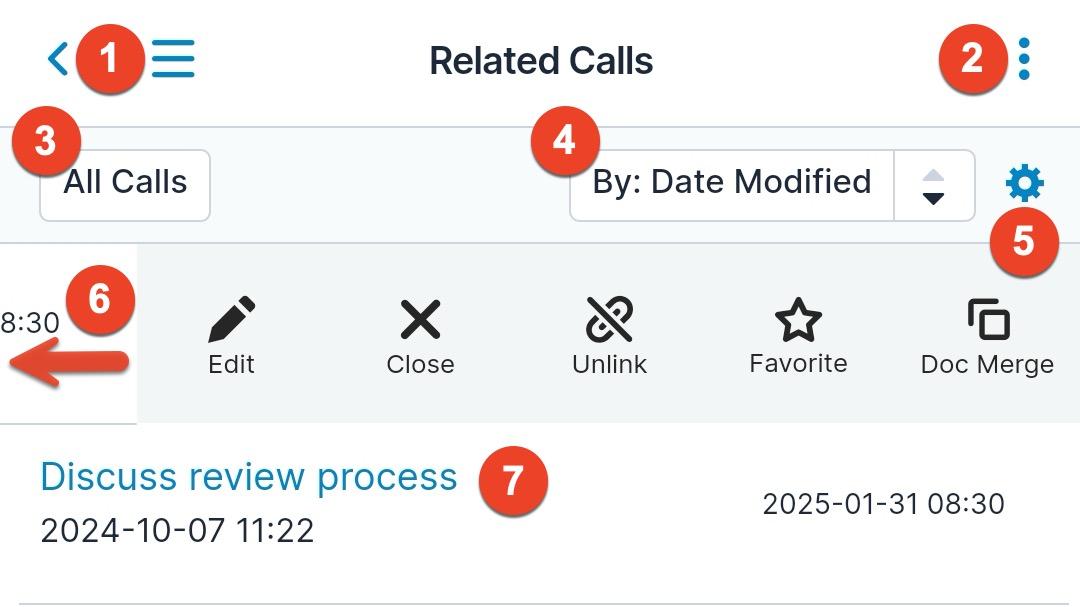
- Previous Page: Tap the arrow on the top left to return to the detail view.
- Three-Dots Menu: Tap the three-dots icon at the top right to create a new related record or link an existing record. Once complete, the new record will automatically be related to the original record.
- Filter: Tap the Filter button to restrict which related records are displayed. For more information, refer to the Filters section.
- Sort: Select a field by which to sort the related records or tap the arrow icon to toggle between sorting in ascending or descending order.
- List View Builder: Tap the gear icon to access List View Builder and configure the layout of the related list of records.
- Actions Menu: Swipe left on a row to display a context-sensitive menu of actions you can take on the record. For more information, refer to the Record Actions section. The "Unlink" action is unique to lists of related records. Tapping it removes the relationship between the two records without deleting either record. To close the menu without taking any action, swipe right on the record's row.
- Record Details: Tap a record's row to open it in detail view.
Dashboards Tab
The Dashboards tab contains the dashlets you have configured to appear on the module's record view via the desktop Sugar application. Tap the Dashboards tab to see the list of dashlets and then tap the dashlet's icon to open it. If you have more than one dashboard configured for this module's record view, you can select which to view from the dropdown list. 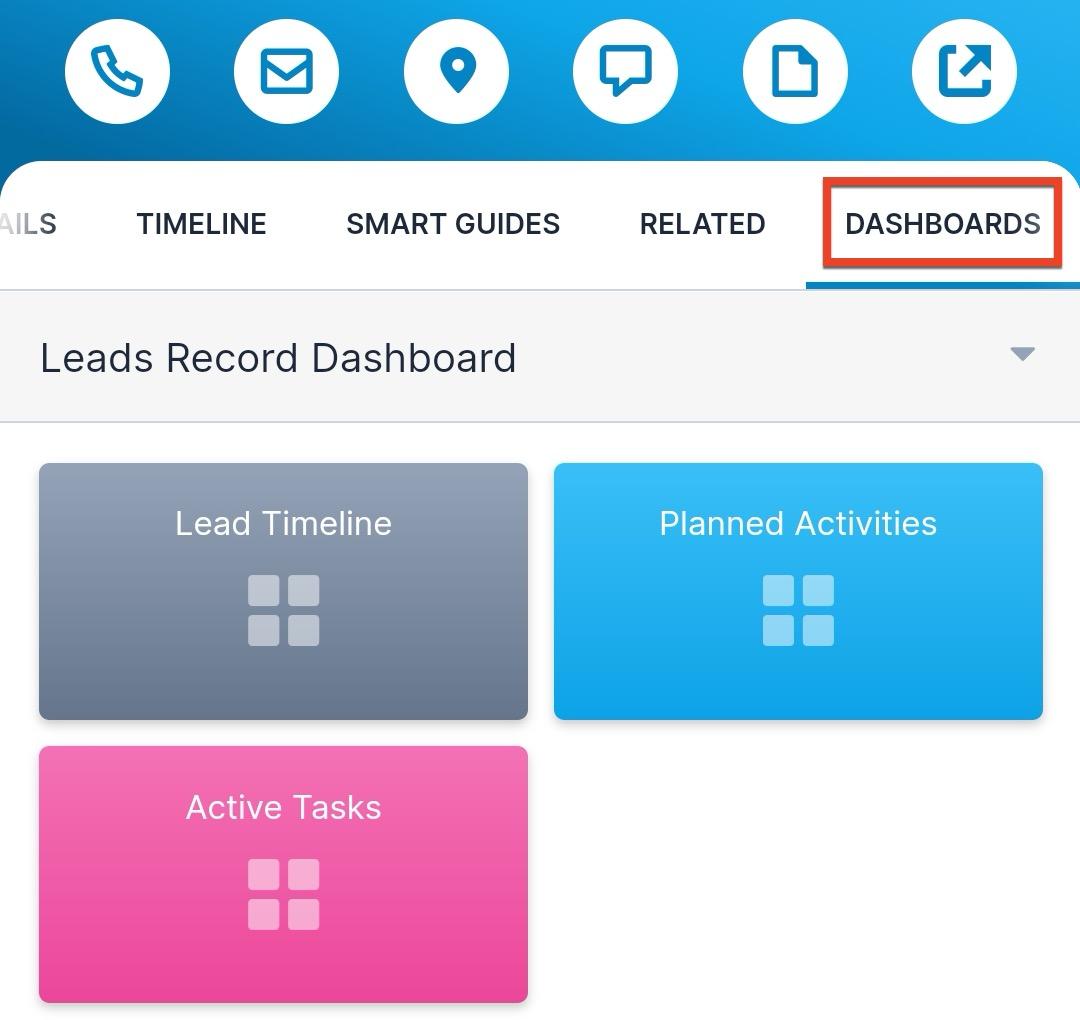
Refer to the Dashboards section above for more information on working with dashboards in the mobile app. For information about configuring and using dashlets in desktop Sugar, please refer to the Dashboards and Dashlets documentation.
Activity Stream Tab
The Activity Stream tab displays recent activity on the record you are currently viewing. These posts will also appear on your main activity stream if you have marked the record as a favorite. Create posts by tapping "Add a Comment". To leave a comment on a specific post, swipe from right to left on the post then select "Comment" in the Actions menu. In addition, you can mention specific users or records by typing @ followed by the user's name or # followed by the record's name in the post or comment. Users or records included in posts can be tapped to open them in detail view. For more information, please refer to the Activity Streams documentation. 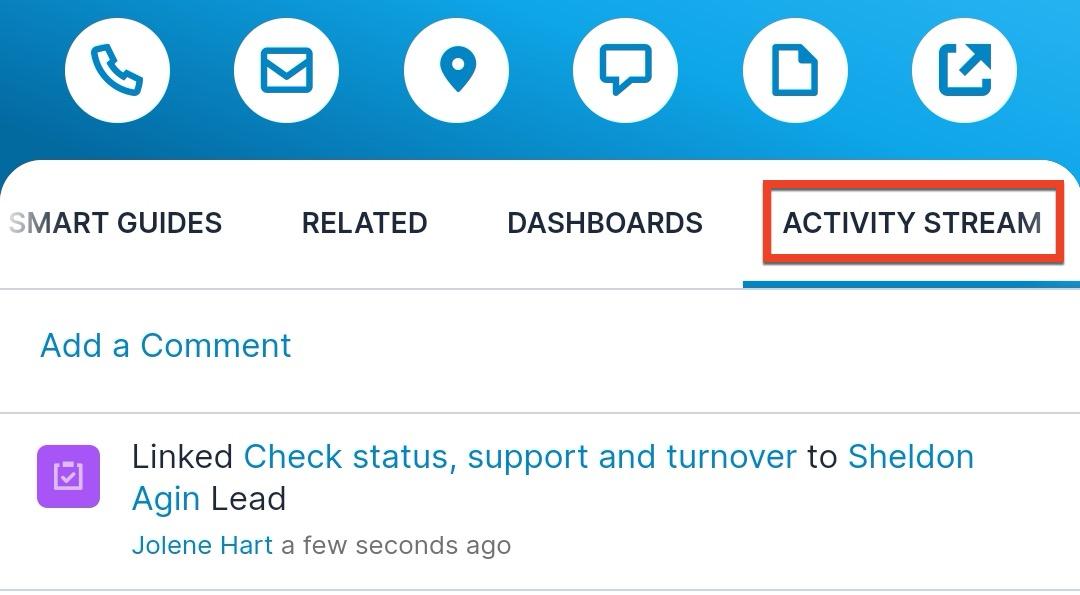
Record Actions
The SugarCRM mobile app offers context-sensitive menus for performing operations on individual records. These menus are available on record views, list views, lists of related records, dashlets displaying a list of records, and the Global Search page. A subset of the following operations will be available in a record's Actions menus, depending on the record's type and populated fields:
| Menu Item | Description |
| Edit | Opens the record for editing |
| Favorite/Unfavorite | Favorites / Unfavorites the record |
| Delete | Deletes the record from your Sugar instance |
| Call | For records with a phone number, calls the number from your phone |
| SMS | For records with a phone number, sends a text message from your phone |
| For records with an email address, sends an email from the mobile app | |
| Web | For records with a website, opens the website in your phone's browser |
| Map | For records with an address, lets you map the address If you have Sugar Maps, this will map the address within the mobile app using Sugar Maps, or if you do not have Sugar Maps or have selected a different default mapping application, it will open the address in that application. |
| File | For records with attached images or files, opens the list of files available to be opened If there is only one attached file, the file is opened immediately. |
| Attachments | For records (e.g., emails) with file attachments, downloads and opens the file for viewing |
| Unlink | In a list of related records, deletes the relationship between the two records |
| Close | For calls, meetings, and tasks in a non-closed status, changes the Status field to "Completed" |
Accessing Actions Menus From Lists
On a list view, list of related records, global search, and dashlets that display lists of records (e.g. list view dashlets), swipe right to left on a row to reveal its Actions menu. If more than three actions are available for a record, tap "More" to access the additional options. 
Note: The action items that appear in the actions menu are dependent on the relevant field being added to the Mobile List View layout in Admin > Studio as well as the field being populated in the record. See the Studio documentation for details on updating mobile layouts.
Accessing Actions Menus From Detail View
On a record's detail view, the Actions menu will appear in a ribbon above the record's tabs. Scroll the menu horizontally to access all options. 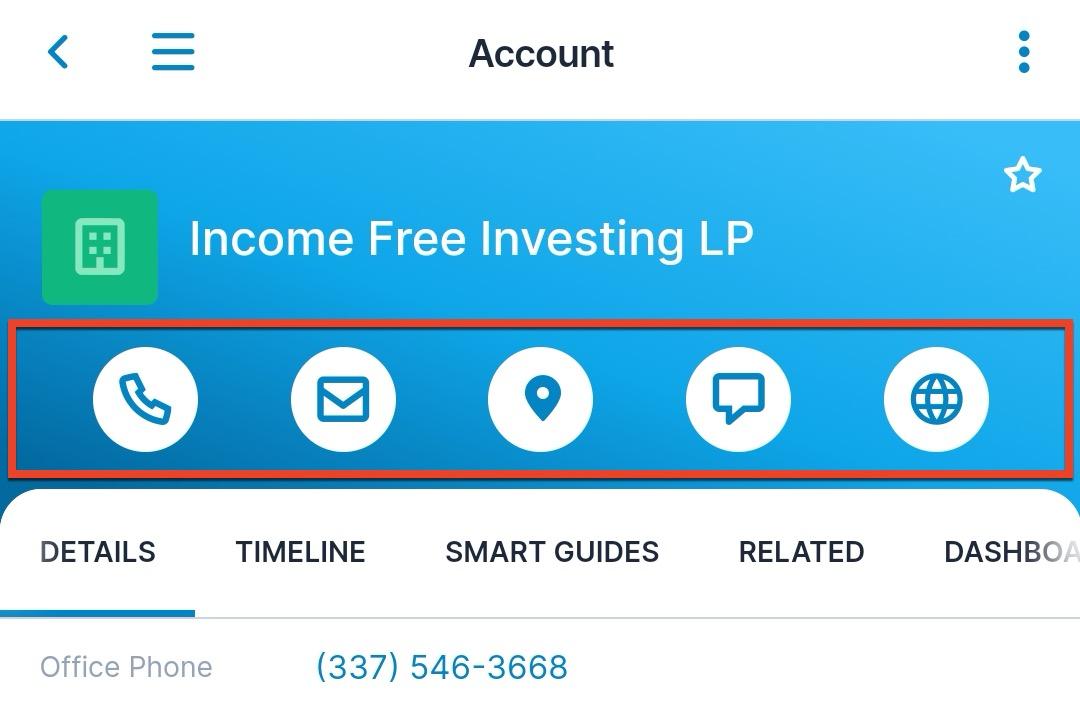
Related Records
Relationships between records allow you to connect relevant records together. While related records can be created and viewed from the detail view of a record, relationships can also be created via a record's detail view using the More Actions menu and the related records listing.
Please note that your ability to create and edit records in Sugar may be restricted by a role. For more information on roles, please refer to the Role Management documentation. Check with your system administrator if you do not see the desired options.
Creating Related Records
Users can create new records that are automatically related to an existing after save. As an example, the following steps use the Plus icon on the Related tab to create a new call related to the account you are viewing:
- From the account's detail view, tap the Related tab.
- Tap the plus icon on the Call module's row.
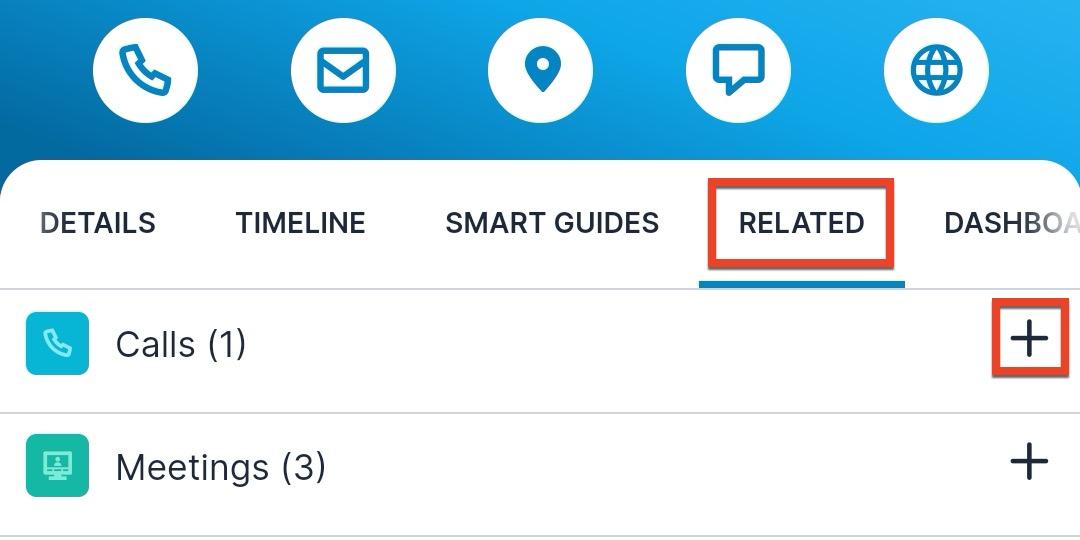
- Populate the desired fields and tap "Save".
The following methods also allow you to create new records related to the record you are currently viewing or editing:
- Tap the More Actions menu's vertical ellipsis on the top right of a detail view and choose"Create Related Record".
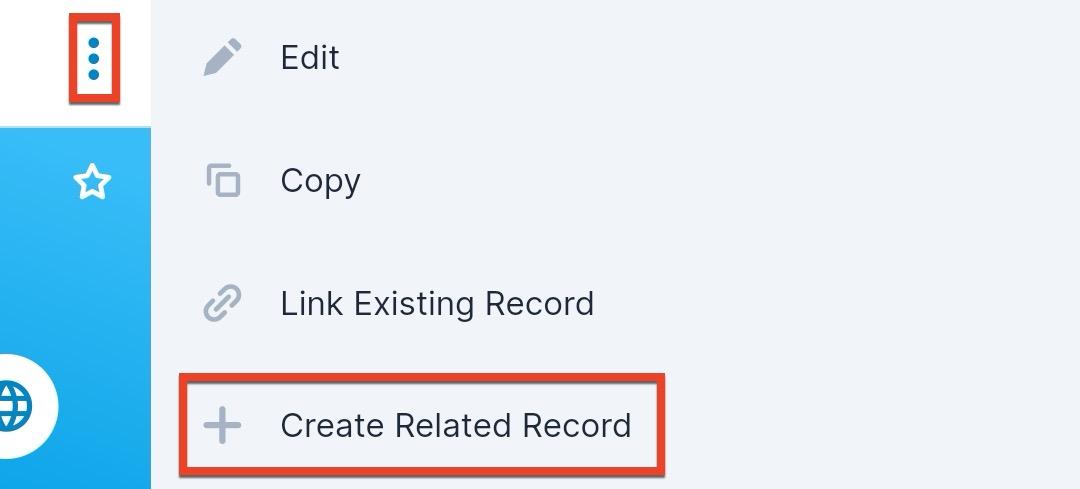
- From the Related tab on a detail view, tap the desired module name (e.g., Calls), then tap the three-dot menu on the top right of the list of related records to access the Create Related Call menu option.
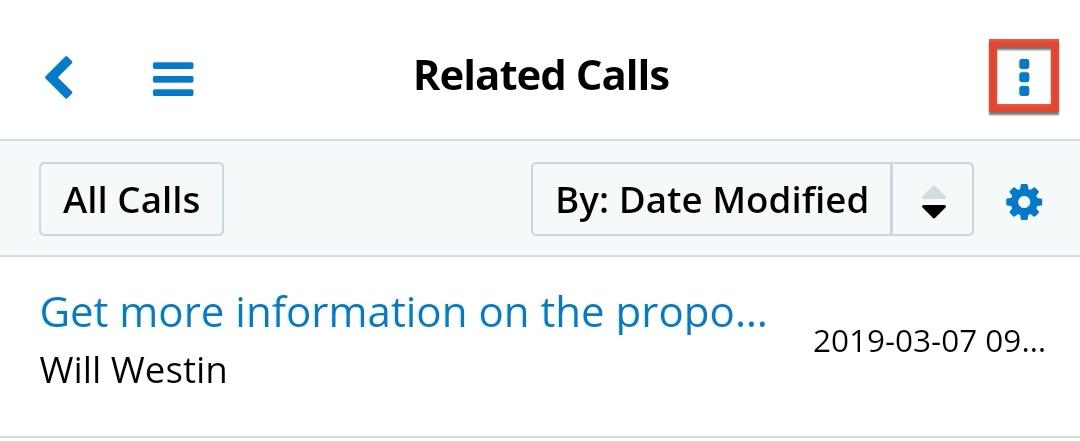
- When editing relate fields (e.g., "Account Name") or flex relate fields, tap the plus icon to the right of the magnifying glass icon.
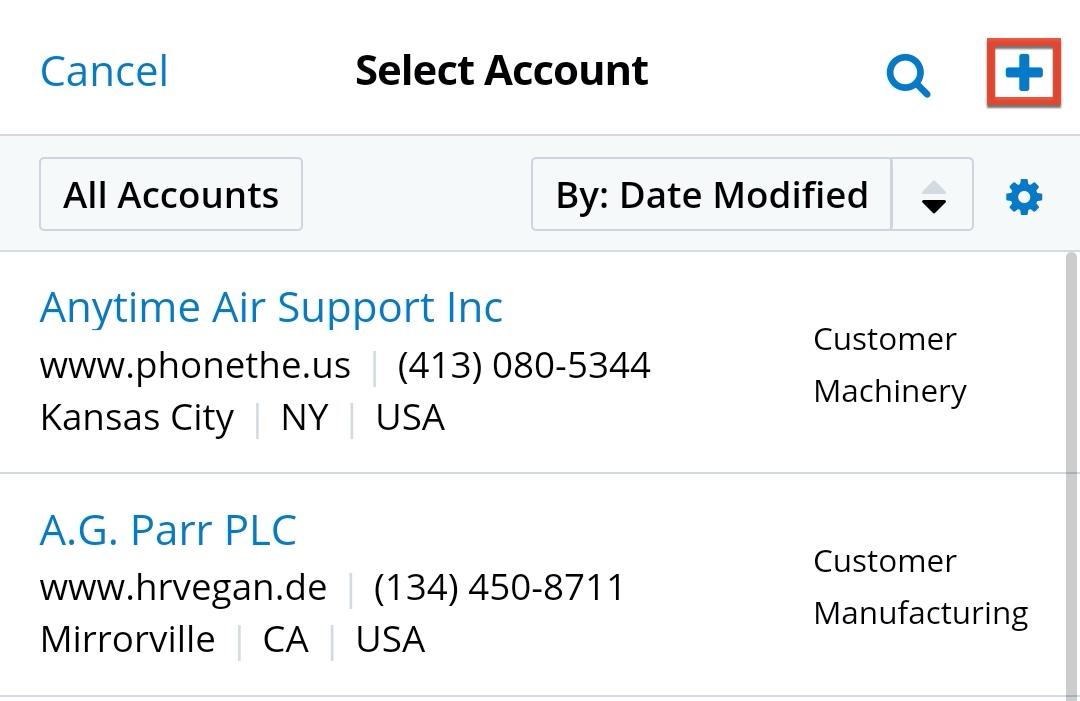
Note: Report, employee, and knowledge base records may not be created or duplicated from the mobile app.
Linking Existing Records
Users can create a relationship between two existing records from the detail view of one of the records. As an example, the following steps use the detail view's More Actions menu to link an existing contact to the account record you are currently viewing:
- From the account's detail view, tap the vertical ellipsis at top right to access the More Actions menu.
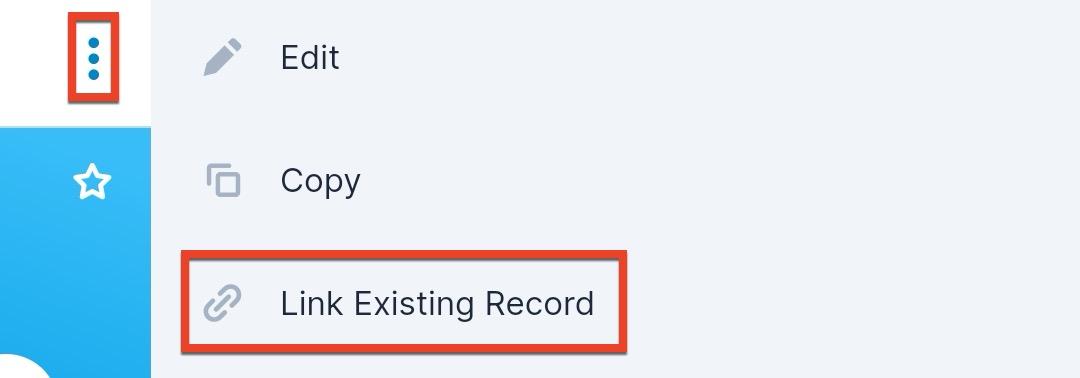
- Select "Link Existing Record" from the menu.
- On the "Choose Link Type" page which appears, select the Contacts module. The modules shown are all those which have a many-sided relationship to the original record's module.
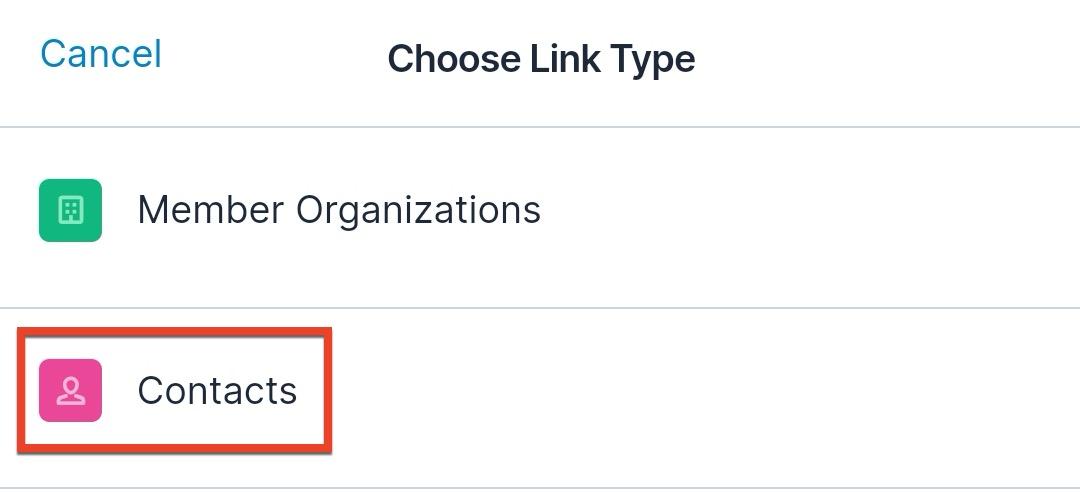
- You can use the filter and sort options or tap the magnifying glass icon to search in order to locate the records you wish to link to the original record. Select one or more records' checkboxes and tap "Done" to form the link.
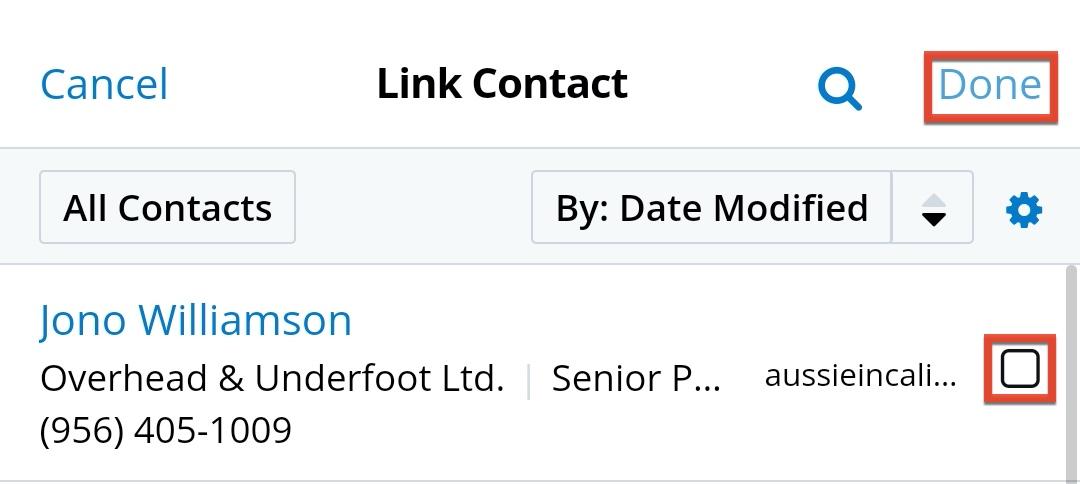
You can also link existing records from the Records tab on a detail view by tapping the desired module, then tapping the More Actions menu's vertical ellipsis at the top right and selecting "Link Existing Record".
Editing Related Records
You can edit a related record directly from another record's detail view. As an example, the following steps demonstrate editing a call record from its related account detail view:
- Tap the Related tab on the account's detail view then tap the Calls module.
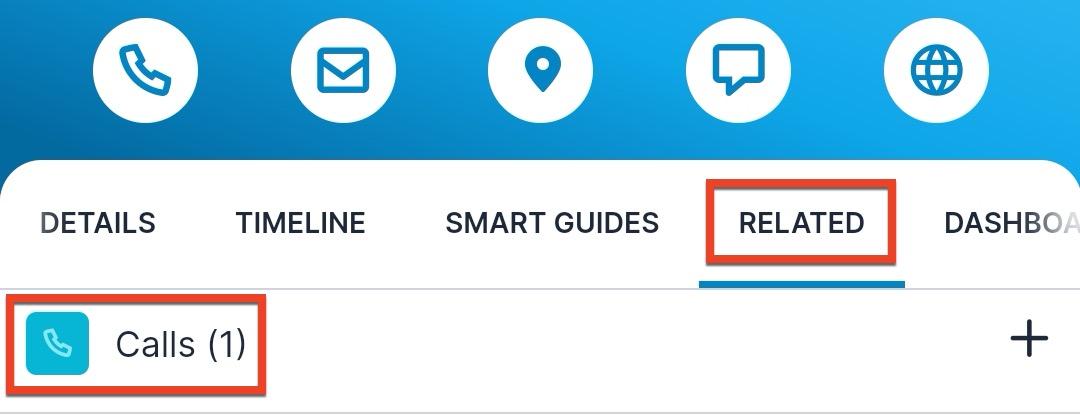
- Locate the desired record in the list of related records and swipe to the left on the record's row to access the Actions menu.
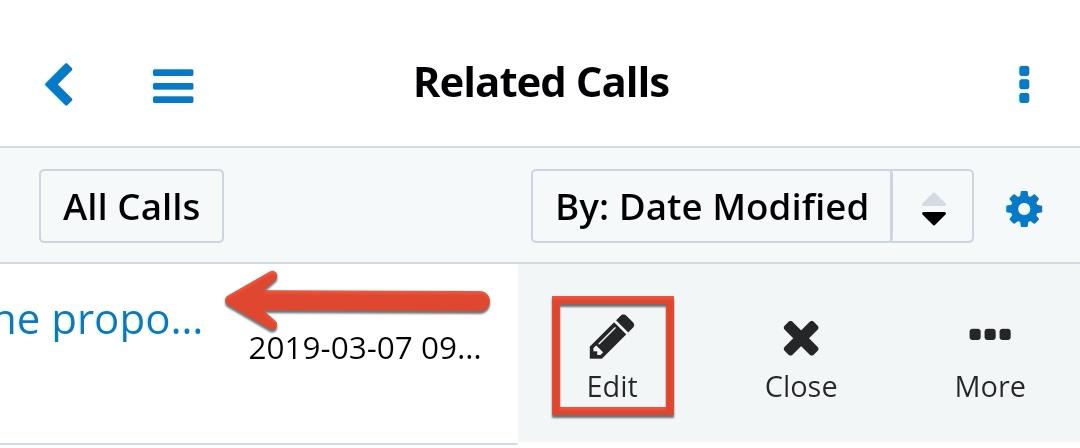
- Tap "Edit" and make changes as desired using instructions in the Editing Records section, then tap "Save" to preserve your changes.
Note: Quote records may not be editable when using some older, unsupported versions of Sugar.
Unlinking Related Records
If a relationship should no longer exist between two records, the records may be unlinked. Deleting the relationship will not delete either record. As an example, the following steps demonstrate deleting a relationship between an account and a call from the account's detail view:
- Tap the Related tab on the account's detail view then tap the Calls module.
- Locate the desired record in the list of related records and swipe to the left on the record's row to access the Actions menu.
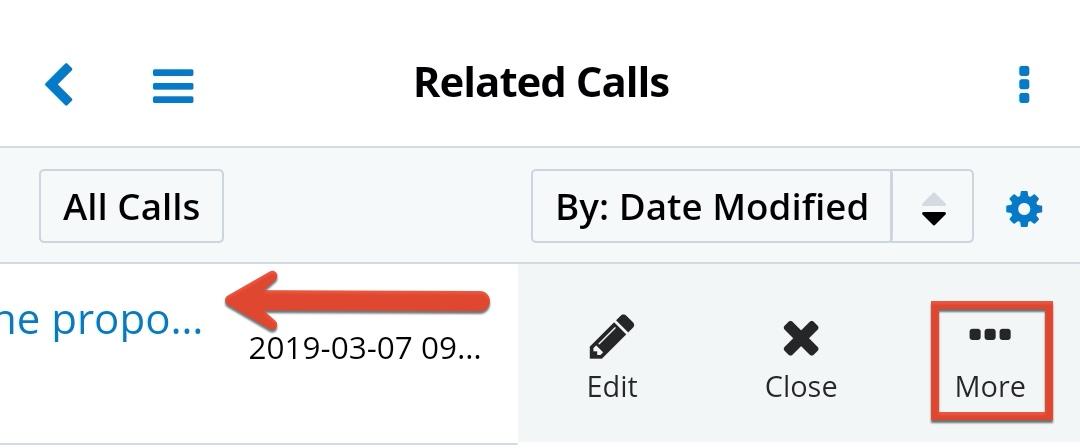
- Choose "Unlink" from the list of options. If there are more than three actions available, tap "More" to access the additional options.
Creating Records
New records may be created in the mobile app from several different locations. You can create new records from the Global Search page, from a module's list view, or from an existing record's detail view by duplication or creating a related record.
Please note that your ability to create records in Sugar may be restricted by a role. For more information on roles, please refer to the Role Management documentation. Check with your system administrator if you do not see the Create options.
Note: Report, employee, and knowledge base records may not be created or duplicated from the mobile app.
Creating via Duplication
Creating a new record by duplication will copy the original record's field values but not any of its relationships. As an example, the following steps demonstrate creating a contact by duplicating an existing contact:
- Navigate to a contact's detail view.
- Tap the vertical ellipsis icon on the top right then select "Copy" from the More Actions menu.
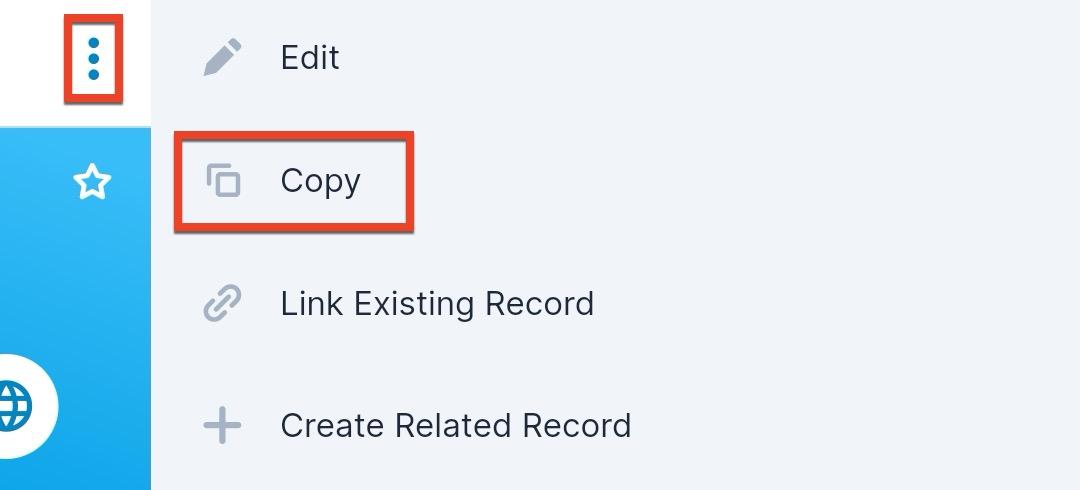
- The displayed edit view is pre-populated with the original record's values. Update the necessary fields, then tap "Save".
Editing Records
Records may be edited from the mobile app by navigating to the detail view, tapping the vertical ellipsis icon on the top right, and selecting "Edit". This will open the record in edit view where values can be viewed and modified. If desired, you can use your device's voice-to-text capability to enter text into field values quickly. All required fields will indicate "Required" in the field and must be completed prior to saving. Once you have made the desired modifications to a record's fields, tap "Save" to preserve the changes. You can tap "Cancel" at any time to return to the previous page without editing the record.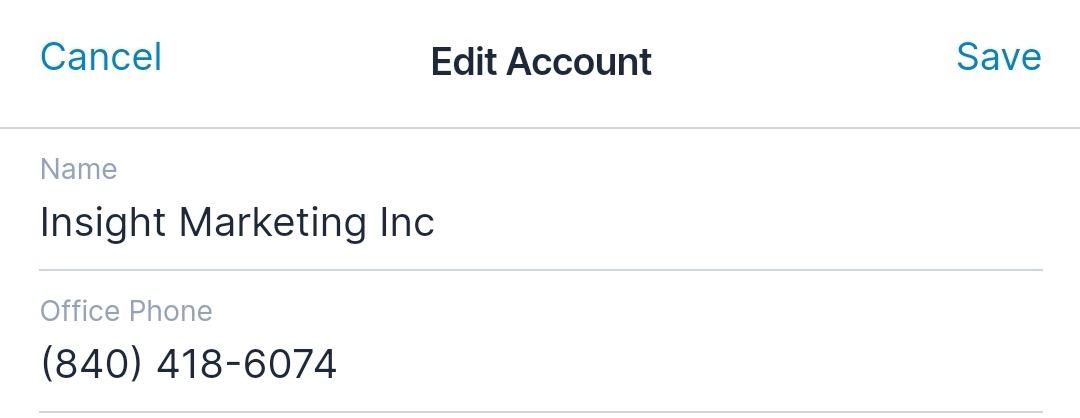
Administrators have the ability to configure which fields appear here using Studio from the desktop Sugar application. In addition, if an admin has configured the view to change based on the value selected in a dropdown field, you could see a different layout for different records and the layout could change when you update a dropdown field. For more information on configuring the Mobile EditView layout or dropdown-conditional views, refer to the Mobile Layouts section and the Creating Dropdown-Field-Based Record View Layouts section in the Studio documentation.
Please note that your ability to edit records in Sugar may be restricted by a role. For more information on roles, please refer to the Role Management documentation. Check with your system administrator if you do not have the ability to edit records.
Note: Report, employee, and knowledge base records may not be edited in the mobile app. Quote records may not be editable when using some older, unsupported versions of Sugar.
Note: Calculated or dependent fields which use a related function do not work when offline. Once users enter online mode, the calculated or dependent fields will show the correct value.
Editing Email Addresses
Email address fields can store one or more email addresses for a single record. You can also designate whether they are the primary email address for a record, are opted-out, or are invalid.
Use the following steps to edit an email address field:
- Tap "Add email" to add a new email address to the record.
- To edit an existing email address, tap on the specific email address and make the necessary changes. Tapping the "x" will clear the email address.

- Tap the vertical ellipsis icon to the right of the email address to set it as the primary email address for the record, mark it as opted-out, mark it as invalid, or remove it.
Editing Multiselect Fields
Multiselect fields provide a list of values where one or more values can be selected at a time.
Use the following steps to edit a multiselect field:
- Tap the multiselect field.
- Mark the checkboxes of the items you wish to select. If you wish to have no items selected, choose the blank option.
- Tap "Done" to preserve your new values. Tapping "Cancel" will return you to the edit view page without altering the field's value.
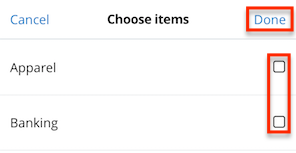
- To remove an item from the multiselect field, tap the "x" icon located to the right of the item tag.
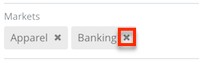
Editing Radio Fields
Radio fields provide a list of values where only one value can be selected at a time.
To edit a radio field, tap the field and select the desired value. 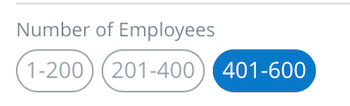
Editing Relate & Relationship Fields
Relate fields allow you to create a one-way link from your original record to another record in Sugar. Relationships allowing only one link from your original record to another module are edited the same way.
The following steps cover editing the Account Name field as an example:
- Tap the "x" icon to the right of the record's name to clear the value first or you can simply tap the field to select or create a record.
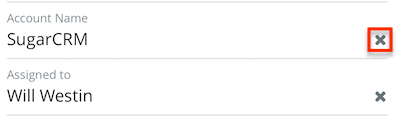
- You can use the filter and sort options or tap the magnifying glass icon to search in order to locate and select an account you wish to relate to the current record.
- If you wish to create a new related record, simply tap the Plus icon to the right of the magnifying glass icon. Populate the desired fields then tap "Save".
Note: Your ability to create records in Sugar may be restricted by a role. For more information on roles, please refer to the Role Management documentation. Check with your system administrator if you do not see the Create options.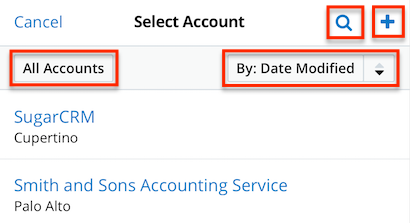
Note: If any view includes a relate field to a disabled module, the view will display "No Access" in the mobile app.
Editing Flex Relate Fields
Flex relate fields allow you to select the desired module first then a record from that module to relate it to the current record.
The following steps cover editing the Related To field in the Calls module as an example:
- Tap the Related To field in the edit view.
- Select the module (e.g., Account) you wish to relate to on the Choose Parent Type page.
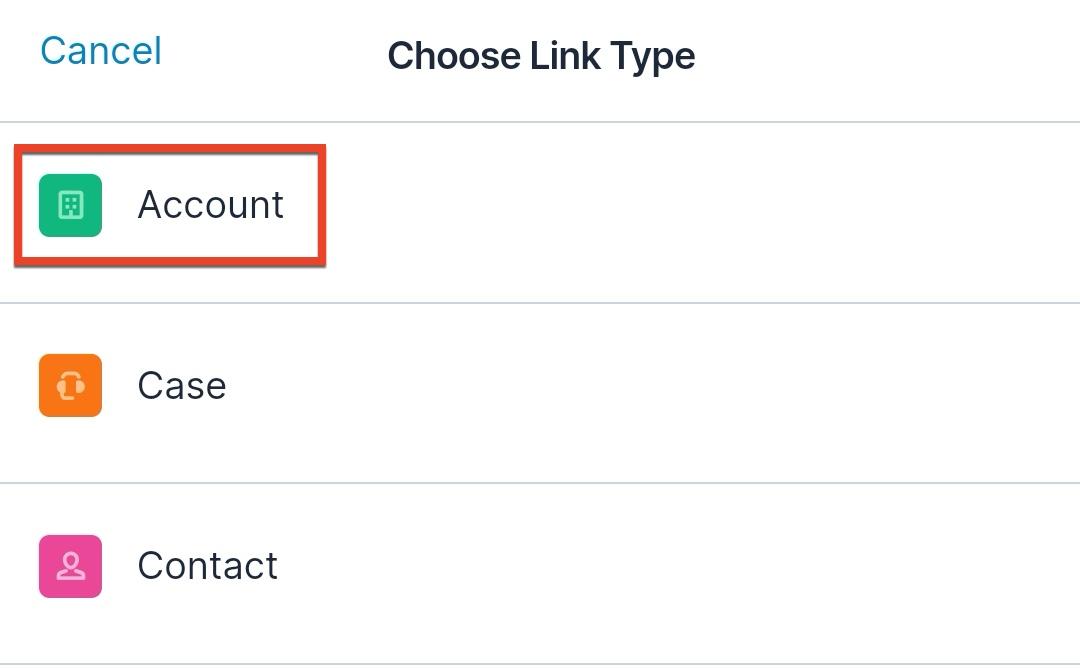
- You can use the filter and sort options or tap the magnifying glass icon to search in order to locate and select a record you wish to relate to the current record.
- If you wish to create a new related record, simply tap the plus icon to the right of the magnifying glass icon. Populate the desired fields then tap "Save".
Note: Your ability to create records in Sugar may be restricted by a role. For more information on roles, please refer to the Role Management documentation. Check with your system administrator if you do not see the Create options.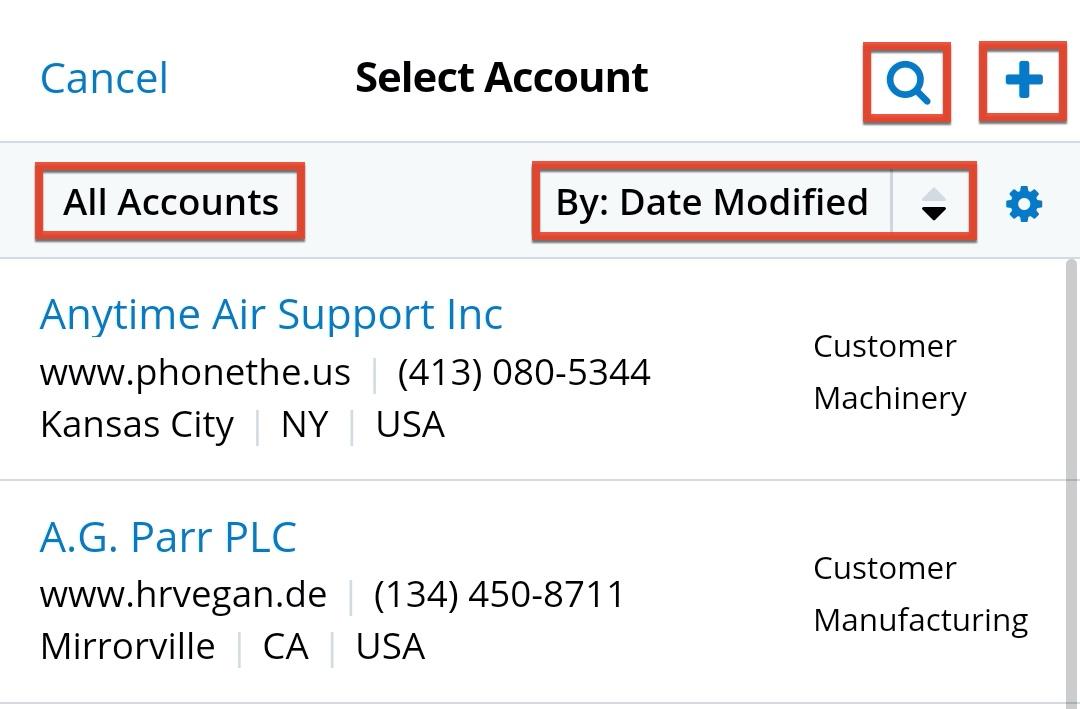
Editing Teams
The team field specifies which team of users have access to view the record.
Use the following steps to edit a record's assigned teams:
- To assign a team to the record, simply tap the Teams field.
- Use the Select Teams page to search for and mark the checkboxes of teams you wish to assign to the record.
- Tap "Done" to add the chosen team(s) to your record.
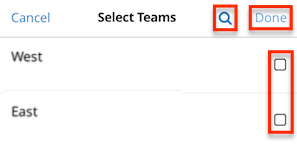
- To remove any unwanted teams, simply tap the "x" icon to the far right of the team name.
- To designate a team as the record's primary team, tap the star icon.
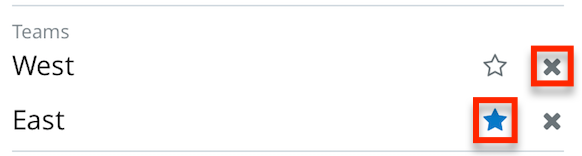
Editing Tags
The Tags field lists all tags that have been applied to the record, and you can tap an individual tag to open Global Search filtered by the tag to see all records with that tag. Refer to the Tags documentation in the Application guide for more information on how tags work in Sugar.
Use the following steps to edit a record's tags:
- To add a new tag, tap "Add tag" under the Tags field in edit view. Start typing the name of an existing tag and select it when it appears in the list of options, or select the "New tag" option to create a new tag with the name you have entered.
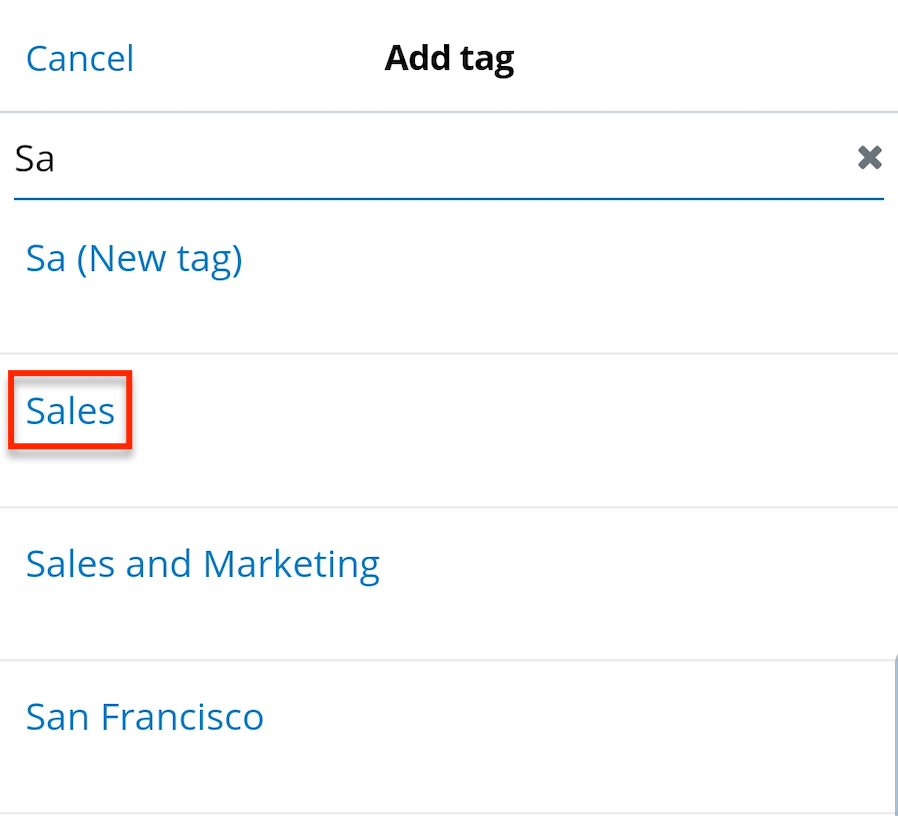
- To remove a tag, simply tap the "x" icon next to it in edit view:
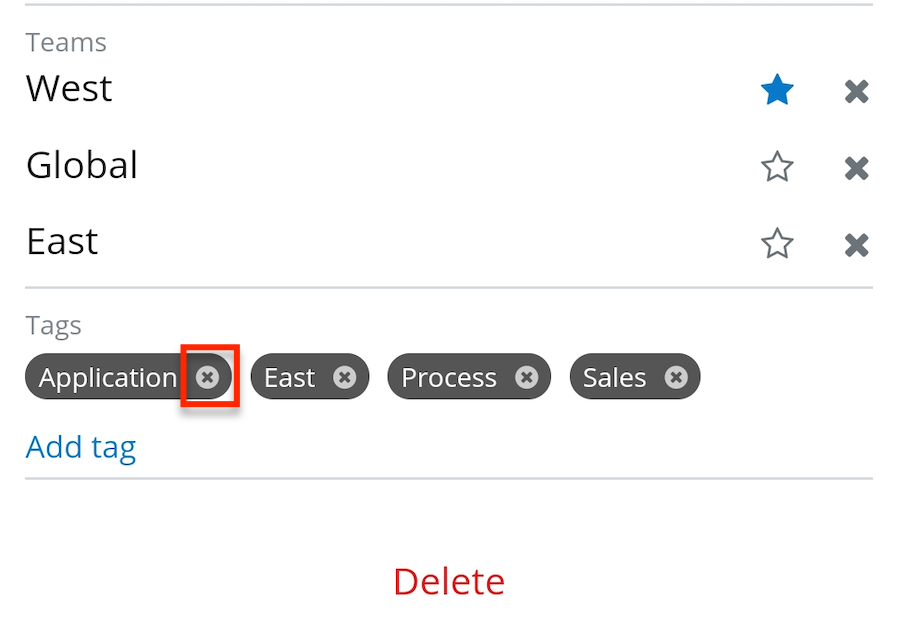
- Once you have finished updating the record's tags, press "Save" to preserve your changes.
Editing Image Fields
It is possible to edit the image-type field of any module in the mobile app as long as the image field is present on the module's edit view. For information on modifying mobile layouts, please refer to the Studio documentation.
The following steps cover editing a lead's image-type field via edit view as an example:
- Navigate to a lead's edit view and tap the existing image or the placeholder image icon.
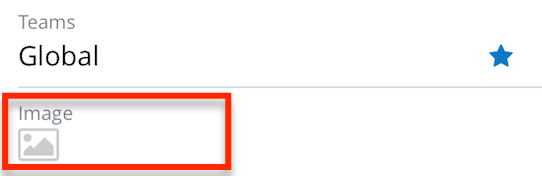
- Tap the appropriate option to either take a new picture using your device's camera or select a photo from your device's photo album.
- Once you have selected an image, tap the File Size link to open the Image Quality screen if you wish to change the size at which the file is saved. To preserve the original quality of the image, choose "Original"; if the file is large, you may wish to choose a smaller size to reduce upload time by reducing the image quality. An estimated file size for each size option is shown at the bottom.
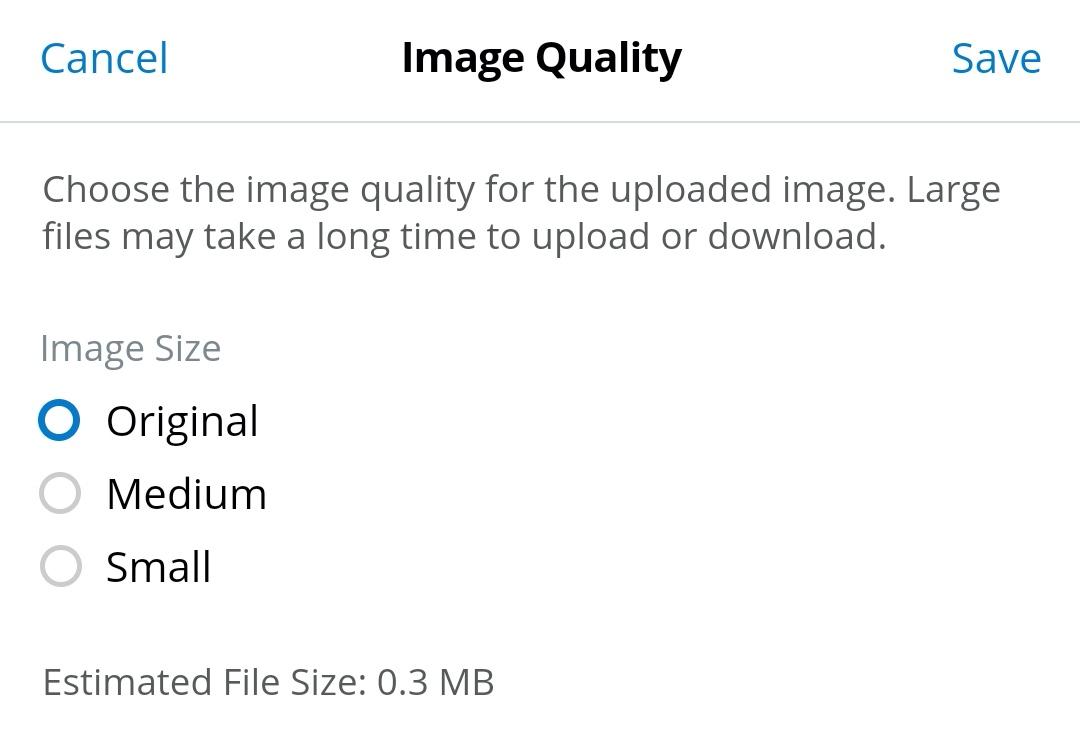
- To remove an image, simply tap the "x" icon on the far right.
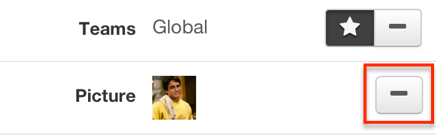
- Tap "Save" to preserve your changes. Note that on detail view, the image will be accessible using the File icon.
Editing Contact Avatars
If an admin has added the Avatar field to the Contacts detail view in the mobile app, the image can be edited directly via the mobile detail view instead of only from edit view. See the Mobile Layouts page in the Administration Guide for details on how an admin can edit mobile layouts.
Use the following steps to edit a contact record's Avatar field via detail view:
- Navigate to a contact's detail view and tap the existing image or the placeholder image icon.
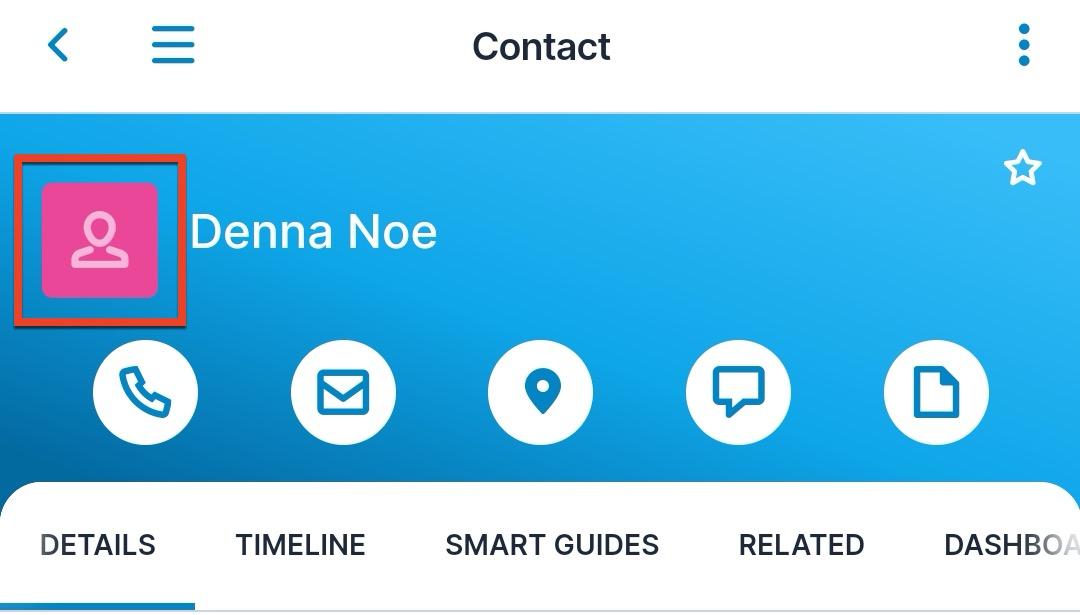
- Tap the appropriate option to either take a new picture using your device's camera or select a photo from your device's photo album.
Adding Comment Log Entries
The Comment Log field allows users to add messages, comments, or other text to a log appearing on the detail view of a record.
To add an entry, tap "Add a Comment" to open a new screen where you can add text, mention users, and reference records. For more information on tagging users and records in this way, refer to the User Interface documentation. To add your comment, tap "Done" and then "Yes" in the confirmation dialog that appears. This appends the message to the log with a link to the user that added the entry and the date and time the entry was created. Once saved, entries cannot be edited or removed.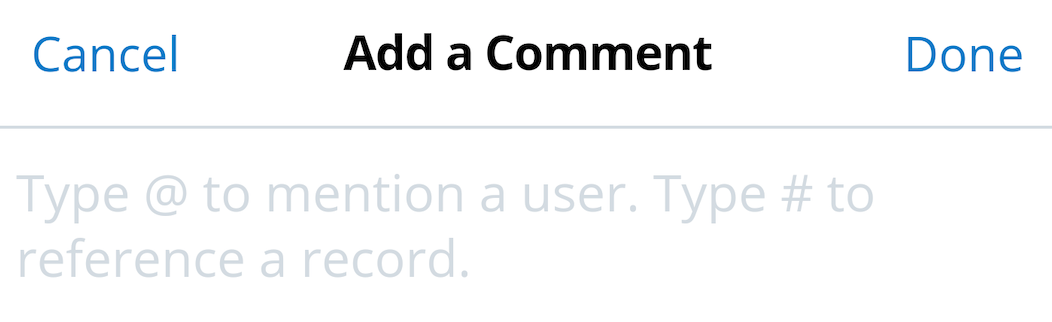
Comment Log entries can be sorted by timestamp using the arrow next to the field; this sort order is remembered per record the next time the record is opened. Note that if you add a new entry when the Comment Log is sorted with the oldest on top, the new entry is still added at the top. The new entry will be placed in the correct order the next time the record is opened. Entries longer than 150 characters are truncated on detail view, but tapping "Show entire comment" opens the full text.
The Comment Log field is displayed on the detail view of the Cases module by default and can also be added to most other modules in Studio.
Deleting Records
Records can be deleted from your Sugar instance using the Delete option in the Actions menu, Mass Actions menu, or at the bottom of edit view. Deleting a record will not delete its related records and will only remove the relationship, so you may wish to also delete any related records to avoid orphaned records.
Please note that your ability to delete records in Sugar may be restricted by a role. For more information on roles, please refer to the Role Management documentation. Check with your system administrator if you do not see the Delete options.
Deleting via Record Lists
Individual records can be deleted from the Global Search page or list view by selecting the "Delete" action from the row's Actions menu as described in the Accessing Actions Menus From Lists section above. 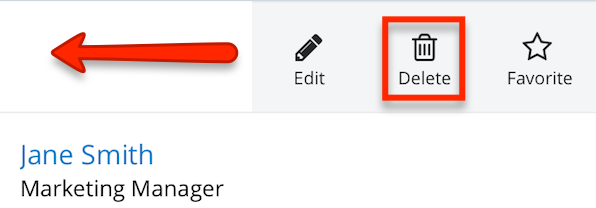
You can also delete many records at once from a list view by selecting multiple records and using the Mass Actions menu to delete them.
Records may not be deleted from a list of related records, but their relationship can be removed from this screen using the Unlink option. If you wish to delete a related record rather than just unlink it, you must first tap the related record's name to open its detail view, then follow the instructions in the Deleting via Edit View section below.
Deleting via Edit View
Use the following steps to delete a record from its edit view:
- Navigate to a record's detail view, tap the vertical ellipsis icon on the top right, then select "Edit" from the More Actions menu.
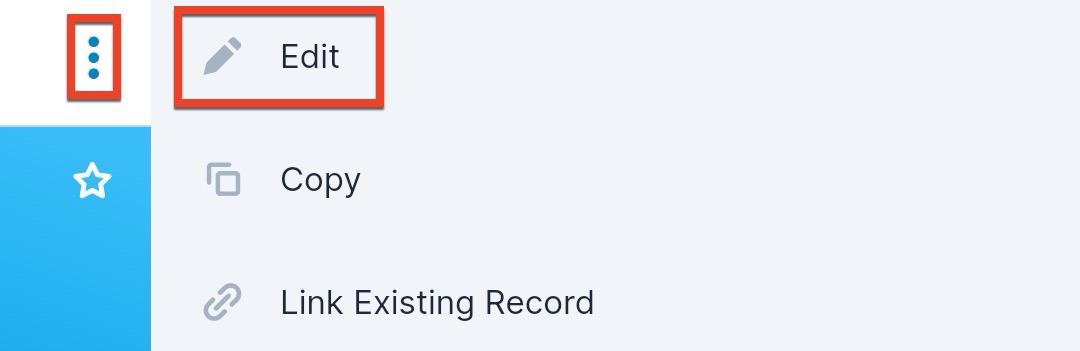
- Scroll to the bottom of the edit view and tap "Delete".

- A pop-up message will display asking for confirmation. Tap "Yes" to proceed.
Working With Calls and Meetings
Certain aspects of call and meeting records have additional functionality that allows you to create recurring events without having to do so manually, add invitees from different modules (e.g., contacts, leads) efficiently, close events quickly, and log calls. See the sections below for details on how to work with calls and meetings in the mobile app.
Creating Recurring Calls and Meetings
When you need a call or meeting that takes place at a regular interval, you can create a recurring event from within the mobile app, which creates a record for each recurrence automatically. The following steps cover creating a recurring meeting as an example:
- Create a new meeting record and populate the basic, required fields such as "Subject".
- In the Repeat field, tap "Configure" to open the Repeat screen, where you can configure the details of the recurrence.
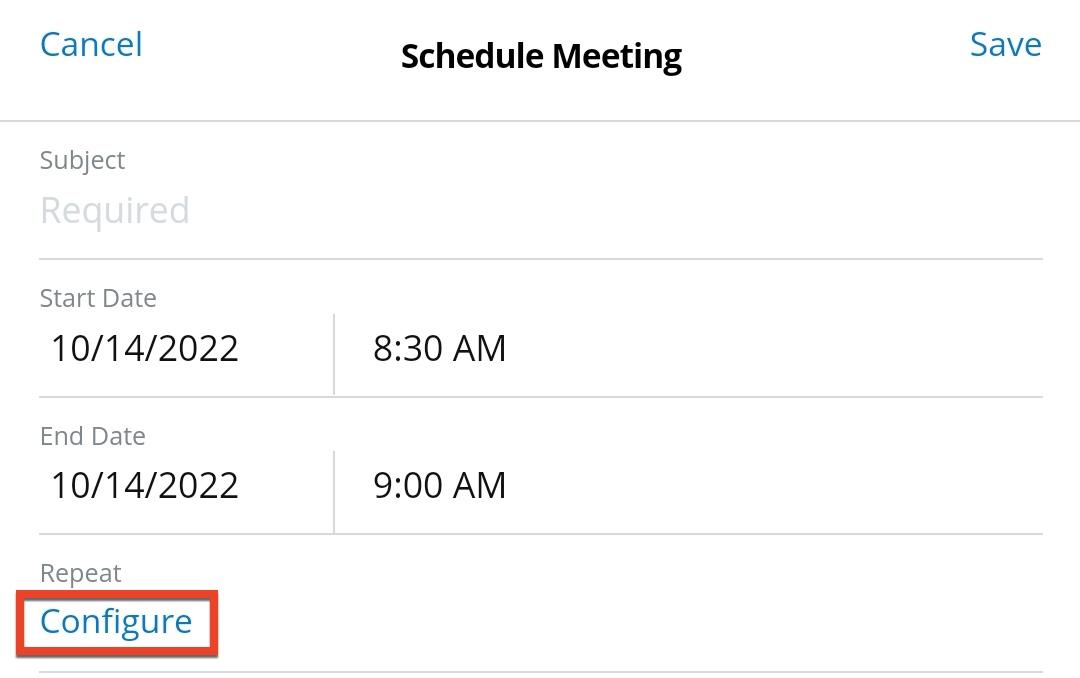
- Choose a repeat type (e.g., "Weekly"). This will cause more fields to appear below based on your selection.
- In this example of creating a weekly meeting, the Repeat on Days of Week field appears; select the desired days of the week.
- In the Repeat field, choose the method of defining the end of the series. In this example, we will use "Occurrences".
- In the Repeat Occurrences field, specify the number of times the recurrence should take place.

- Tap "Done" in the top right corner and then save the meeting.
A new meeting record for each recurrence of the event should now exist in the Meetings module. When deleting a recurring meeting or call from list view, you will be presented with the additional option to delete all recurrences instead. This will delete every event in the series. Likewise, you can also edit all events in a series at once instead of one at a time; simply use the Edit All Recurrences option in the three-dots menu from the detail view of one of the events.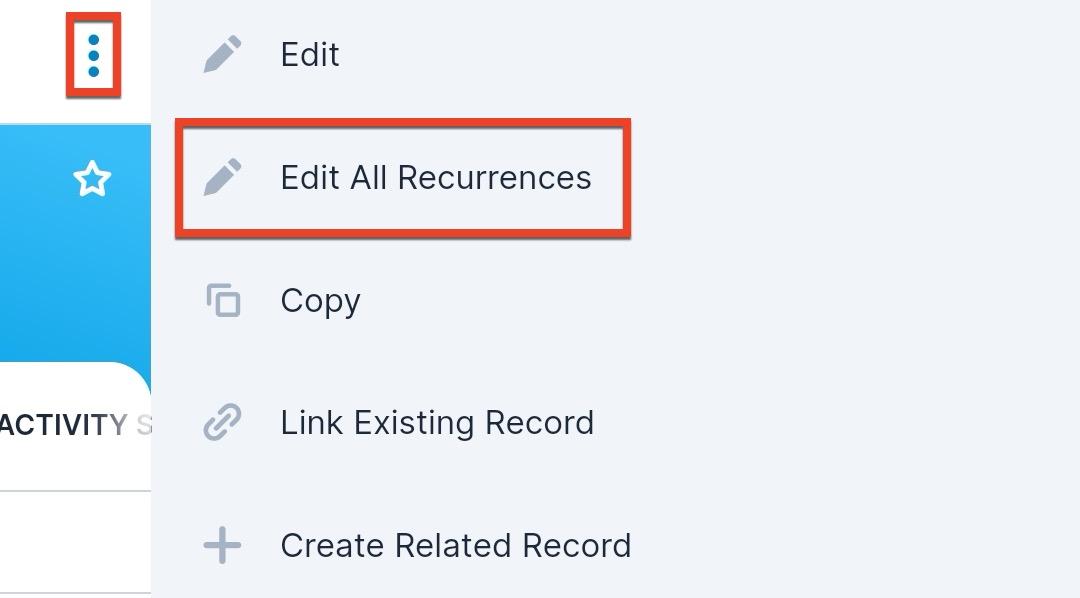
For more information on recurring meetings and calls, refer to the Meetings and Calls documentation in the Application Guide.
Inviting Call and Meeting Attendees
Contacts, leads, accounts, and other Sugar users can be added to calls and meetings as attendees. You will have the option to email attendees an invitation when saving the call or meeting. For more information about attendees, please refer to the Calls or Meetings documentation.
Adding Attendees During Creation
When a call or meeting is initially being created, a Guests field is available where you can add invitees. The following steps cover adding a contact to a new call as an example:
- Create a new call record and populate the desired fields.
- Scroll to the bottom of the page and tap the Guests field.
- On the Choose Link Type page, select the Contacts module.
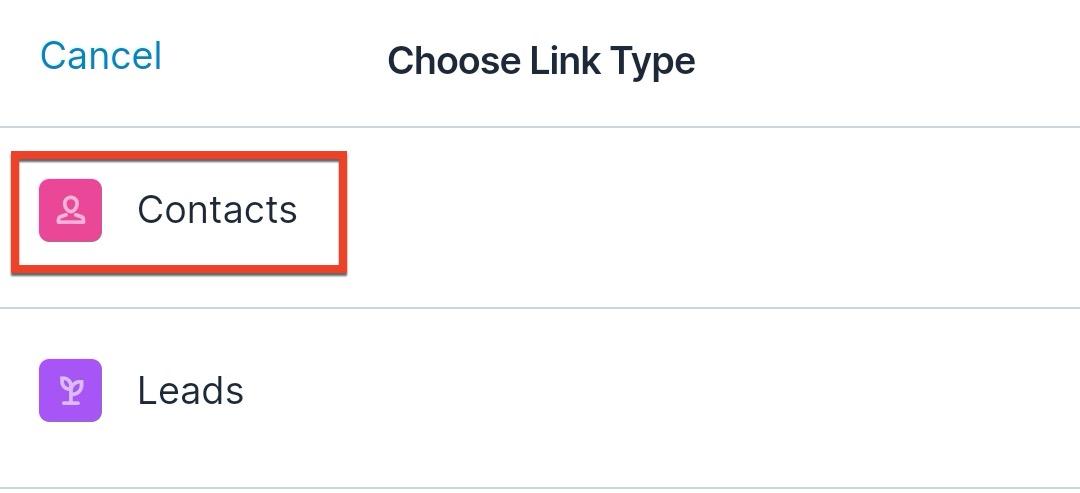
- You can use filter, sort, or search in order to locate the contact records you wish to add as attendees for the call. Select one or more records' checkboxes and tap "Done" to add the attendees.
- To have an email invitation sent to the attendees upon save, tap the "Send invite" checkbox. To remove an unwanted attendee, tap the x icon to the right of the attendee's name.
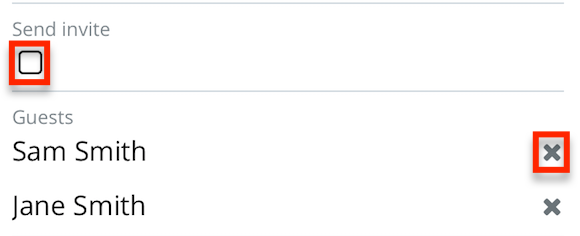
- Tap "Save" to finish creating the call.
Adding Attendees to Existing Records
Once a new call or meeting has been saved, the Guests field is no longer available to edit. For these existing records, you may remove attendees or add additional attendees via the Related tab. The following steps cover adding a contact as an attendee to an existing call as an example:
- From the call's detail view, tap the vertical ellipsis at the top right and select "Link Existing Record" from the More Actions menu.
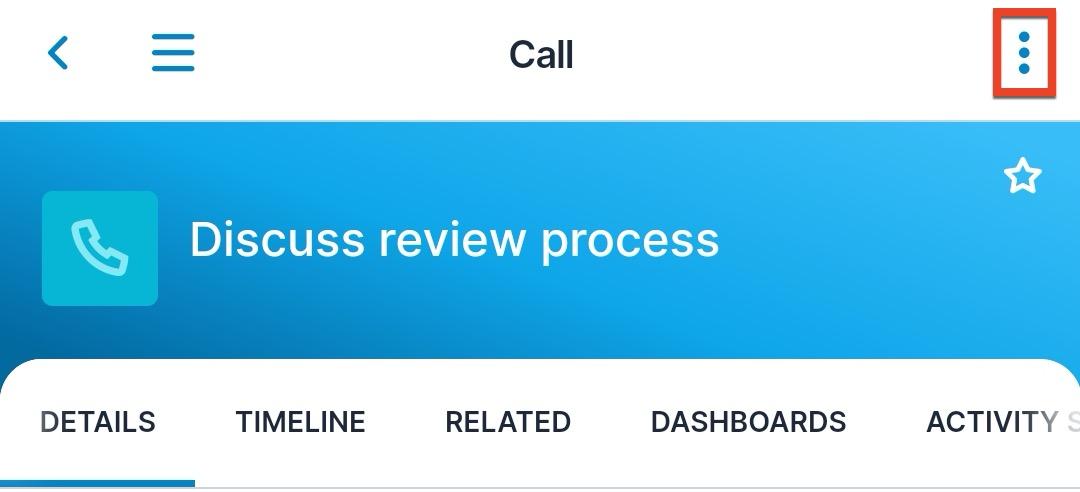
- On the Choose Link Type page, select the Contacts module.
- You can use filter, sort, or search in order to locate the contact records you wish to add as attendees for the call. Select one or more records' checkboxes and tap "Done" to add the attendees.
Closing Calls, Meetings, and Tasks
Users can easily change the status of calls, meetings, and tasks to "Completed" without having to directly edit the Status field. The activity records can be closed when editing the record or from the Actions menu when viewing a list of records.
Note: Only records in a non-closed status will allow the following closing options.
The following steps cover closing a task from Tasks edit view as an example:
- Navigate to the task's detail view, tap the vertical ellipsis icon on the top right, then select "Edit".
- Tap the down arrow to the right of "Save" then select "Close task and save".

From a list of records such as Global Search, list view, dashlets, or lists of related records, you can select the "Close" action from the row's Actions menu as described in the Accessing Actions Menus From Lists section above.
Logging Calls
When you initiate a call from the SugarCRM mobile app by tapping a phone number field or the Call icon across the top of a record's detail view, you have the option to log the call in Sugar when are you done. After the call ends and you return to the SugarCRM app, a pop-up appears asking if you wish to log the call. If you choose "Yes", the Create Related Call screen appears with several fields pre-populated, including the relationship to the record you called (e.g., a contact), the start and end date and time, direction, and status. This allows you to keep a history of calls with the specific person or organization easily, with minimal manual entry.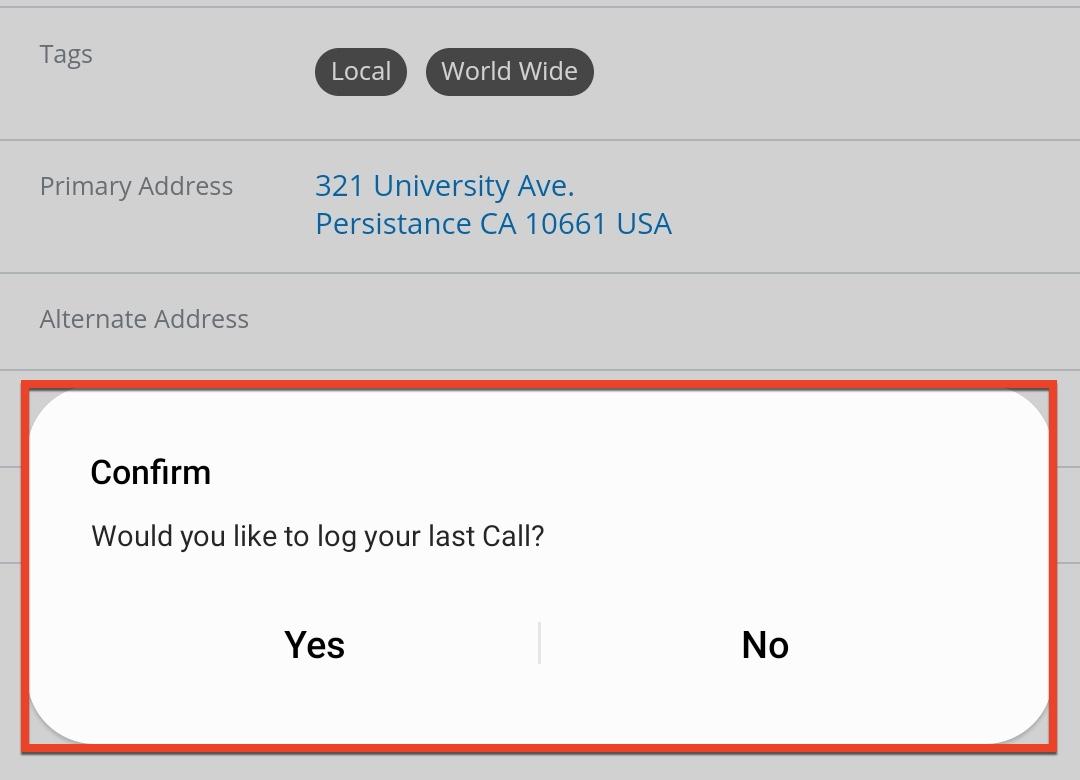
Composing Emails
You can compose and send emails directly in the SugarCRM mobile app so that the emails are archived in your Sugar instance and related to all relevant records. For example, you may want a history of your email communications with a contact to be displayed in the Emails subpanel for that contact; sending the email via the SugarCRM mobile app instead of an external application will do this automatically. You also have the option to manually archive an email in Sugar by navigating to the Emails module and accessing the Archive Email option in the three-dots menu in the top right corner: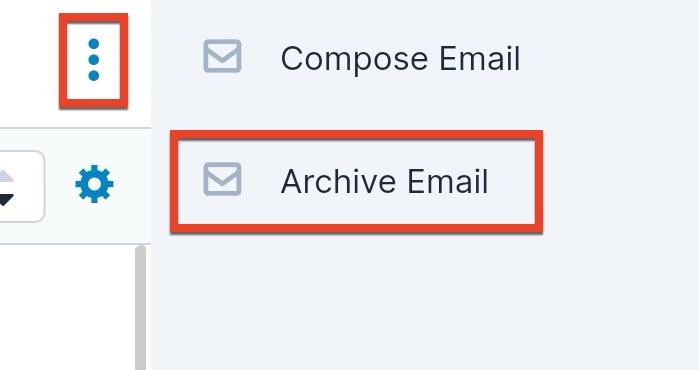
Additionally, you can compose an email from this menu as well as from several other places throughout the app. For a list of the places where you can start composing an email, see the Emailing Records section of this page.
The fields available when composing and viewing emails in the mobile app are the same as when working with emails in the desktop application; refer to the list of Email fields in the Application Guide for a summary of these fields. In addition, for a complete overview of how emails work in Sugar, including topics such as sending, receiving, and archiving emails, see the full Emails page in the Application Guide.
Once the Compose Email screen is open in the app, use the fields shown to prepare the email. To draft the body of the email, simply tap the Email Message field to open the WYSIWYG text editor, where you can write your email and apply basic formatting. Tap "Save" on this screen to return to the Compose Email screen where you can continue by choosing recipients and using templates or signatures. Refer to the below sections for details on these steps:
In addition to the above, you can also add attachments to an email in the same way you add attachments to other records in the app (e.g., notes). See the Uploading Record Files section of this page for more details on how to do this.
When you are ready to send the email, tap "Send" in the top right corner. If you wish to save the email as a draft instead, tap "Cancel" in the top left corner. This will cause a pop-up to appear asking if you would like to save the email as a draft or discard it. If you choose to save as a draft, you can then return to it later to continue editing.
Note: Email composing and sending is not available when your device is offline.
Working With Recipient Fields
There are three recipient fields you can use: "To", "Cc", and "Bcc". The Cc and Bcc fields are not displayed by default but can be opened by tapping the CC and BCC buttons on the right-hand side: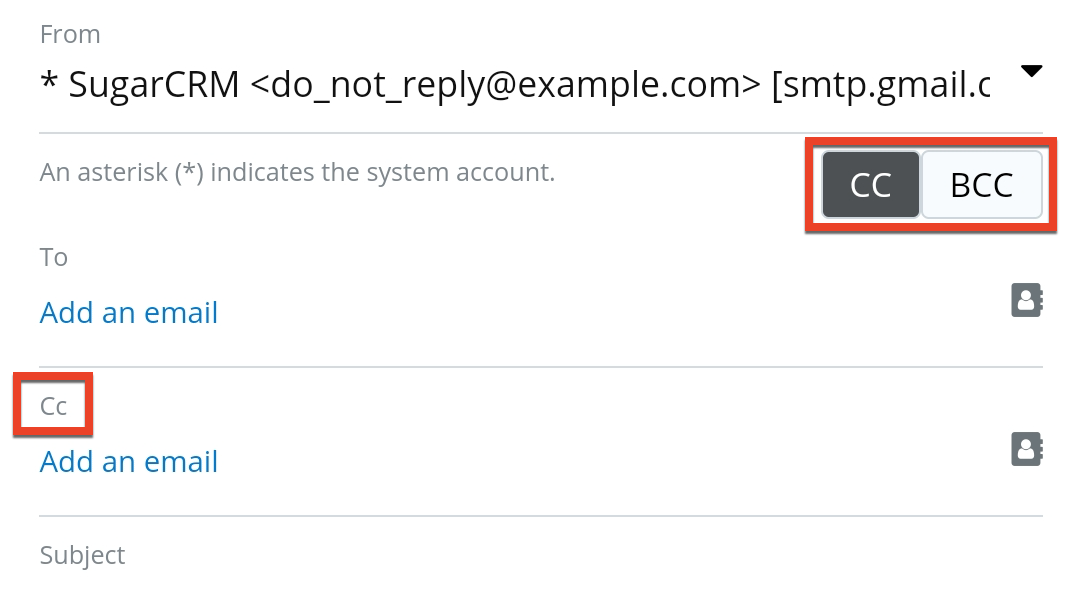
Tap the button again to hide the field. Note that if you hide the field after adding recipients, the recipients remain in the field and will still receive the email unless you manually remove them.
You can add recipients to all three fields using one of two methods: either use the address book or start typing using freehand entry. If you use freehand entry, the app will suggest matching recipients for you to select or you can enter the complete email address yourself. Once a recipient is added, you can remove it by tapping the "x" within the recipient's pill when the specific field (e.g., "To") is active: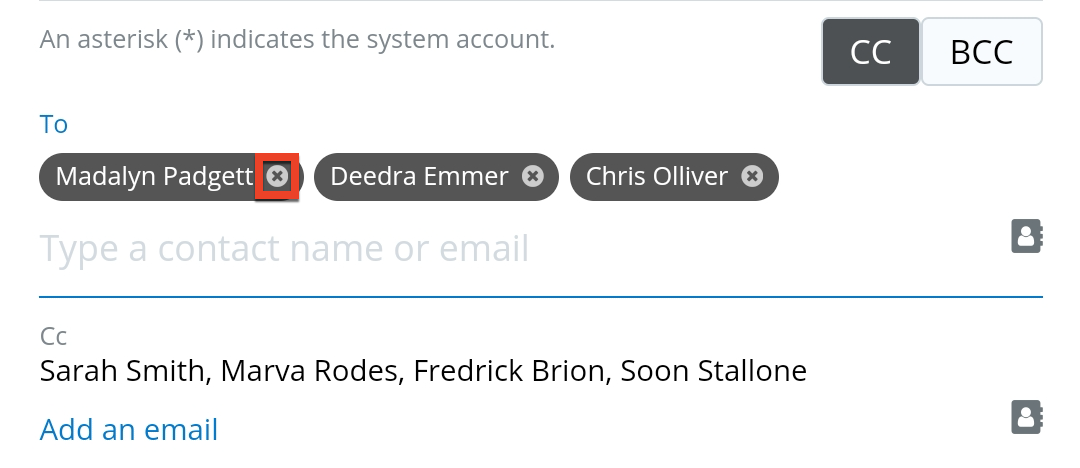
If the field is not active, the recipients are displayed as text instead. Simply tap anywhere in the field to activate it for editing.
Using the Address Book
To add someone to one of the recipient fields using the address book, tap the Address Book icon next to that particular field:
Once open, the address book provides you with a list of users, contacts, leads, and accounts with at least one valid email address. The record's module (e.g., contact) is indicated by the color-coded icon next to the record. Tap the magnifying glass at the top of the screen to search for specific recipients and use the filter dropdown on the left to narrow the matching results down to a particular module.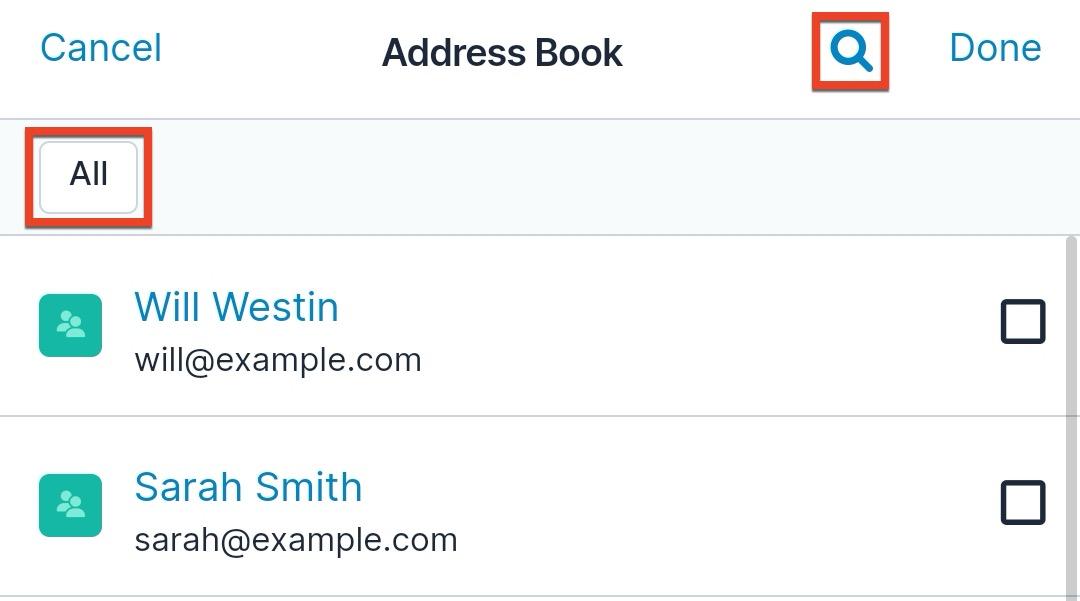
After you have filtered the list as needed, tap each result you wish to add. Once you have made your selections, tap "Done" in the top right corner to add the selections to the email's recipients list.
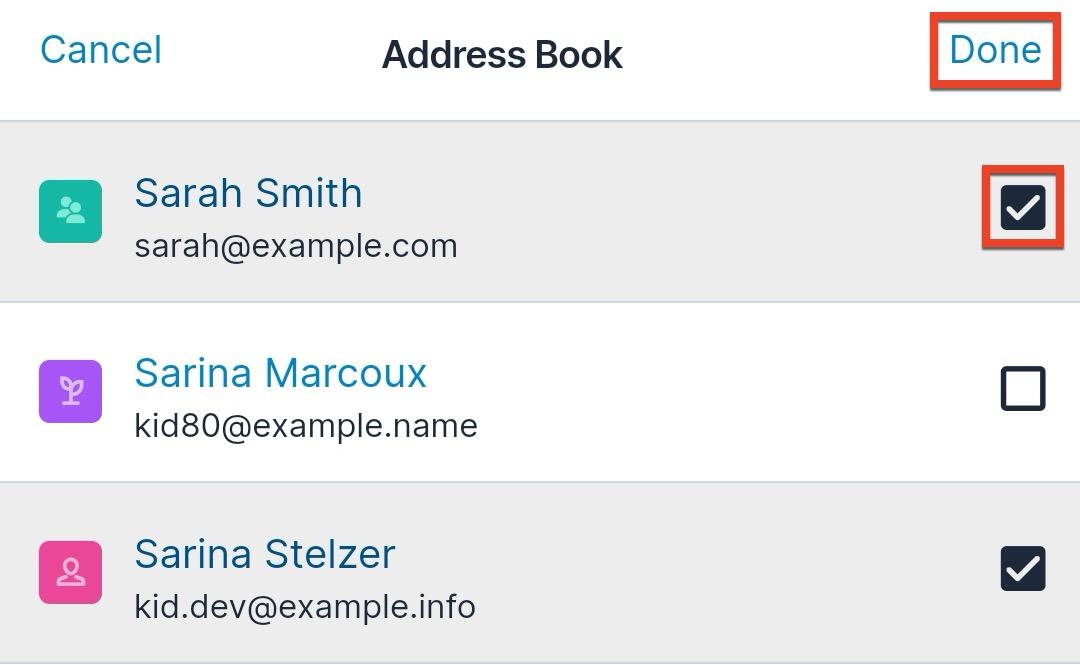
Freehand Address Entry
In addition to using the address book, you can also add a recipient by typing their name or email address in the recipient field. Tap the field to make it active, which displays the keyboard. Start typing the name or email address of the recipient you wish to add; as you type, a list of matches will appear, allowing you to select one. The record's module (e.g., contact) is indicated by the color-coded icon next to the record. Alternatively, you can simply type the entire email address yourself if it is not an email address that is currently in your Sugar database.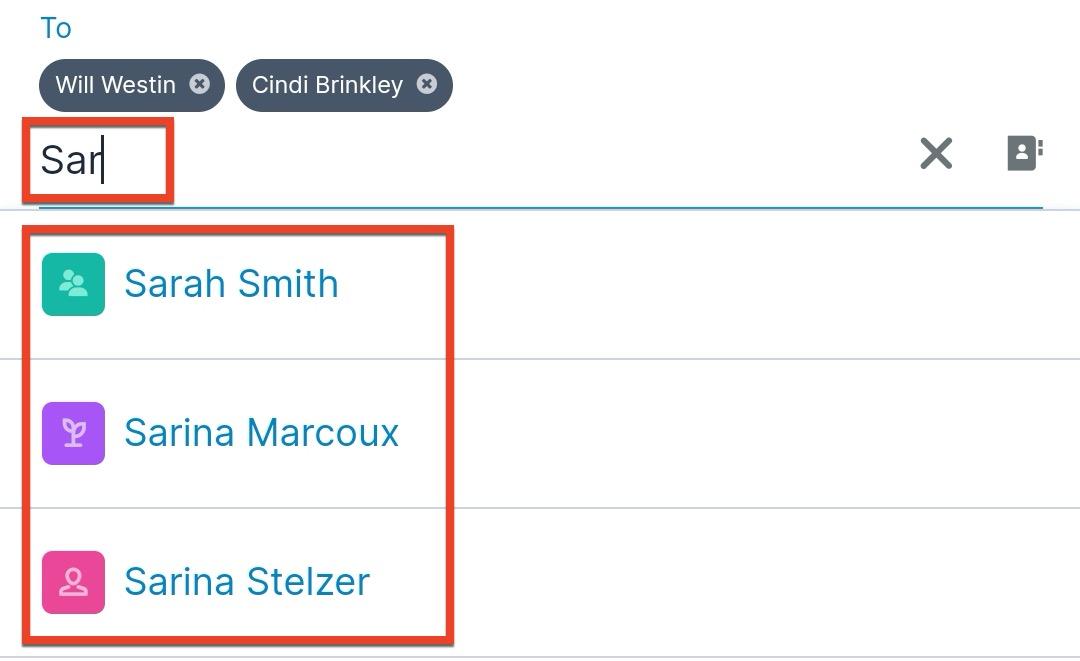
Adding Email Attachments
You can attach one or more files to an email from either your local device or from a Sugar document record. Simply tap the paperclip icon: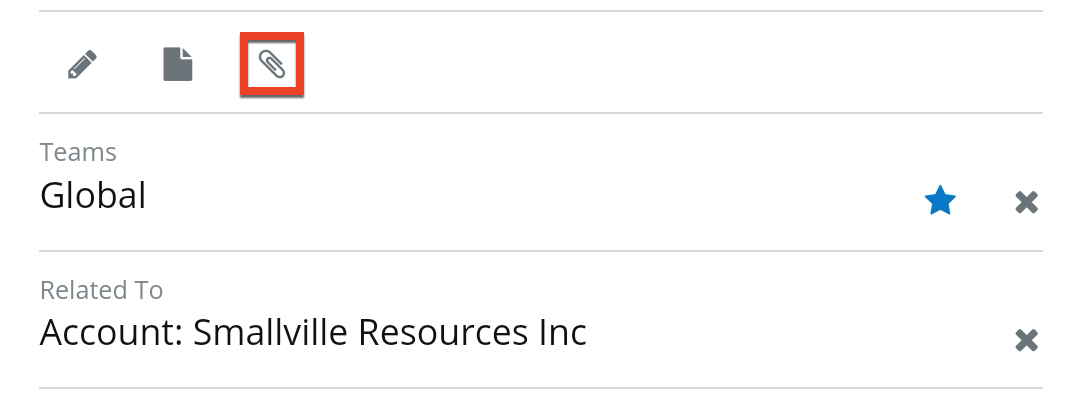
This opens a pop-up menu where you can choose where to select the file from. Note that selecting a document record does not create a relationship between the email and the document. This takes the file in the document and attaches that file to the email.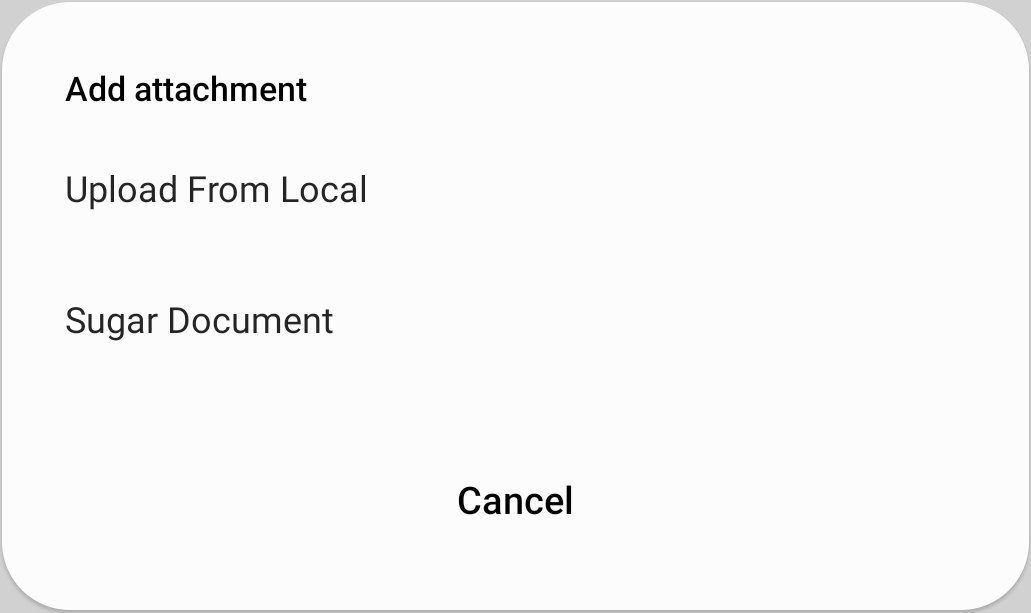
Once your selected file(s) are uploaded, they are shown in the Attachments field and can also be removed from the email by tapping the "x" icon next to them. See the Uploading Record Files section for more information on working with attachments in the mobile app.
Using an Email Template
Email templates can be used to save time and reduce errors when drafting emails in the SugarCRM mobile app, although the templates can only be created or edited in the desktop application. To use a template, tap the Template icon and select one from the list of templates that are available to you.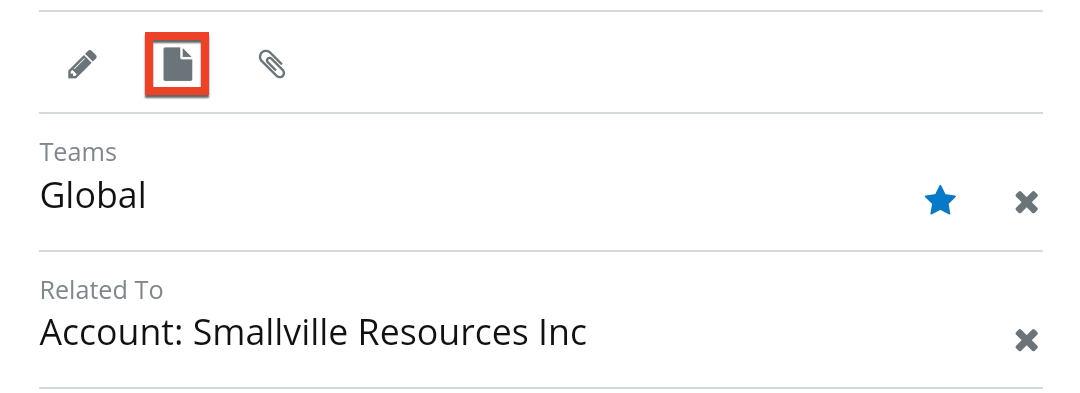
Note that if the body or subject of your email contains any data before you select a template, the body and subject will be removed and replaced with the template data. Similarly, if the message contains an attachment, the attachment will be removed and replaced with any attachments that the template may contain. Refer to the Emails page in the Application Guide for best practices when working with email templates and details on creating and editing templates in the desktop app.
Once an email template has been inserted in the email editor, users are free to edit the subject and email body, add or remove attachments, and insert a signature on the message.
Using an Email Signature
Email signatures can be added to emails in the SugarCRM mobile app to standardize the messages you send, although they can only be created or edited in the desktop application. If you have a default signature configured in your Sugar instance, this signature will automatically be applied when drafting new emails. See the Emails page in the Application Guide for more information on creating signatures and choosing a default via the desktop app.
To manually select a signature to use, tap the Signature icon and select one from the list of signatures that are available to you. Once selected, the signature's text will be inserted into the email body.
If you do this while you already have a signature applied, it will be replaced with your new selection. If you wish to completely remove a signature from your message, you must edit the email body and manually delete the text.
Viewing Reports
The Report dashlet can be added to dashboards in the SugarCRM mobile app so you can view and manipulate report data from your mobile device. All report types are supported in the mobile app, but only the Rows and Columns, Summation, and Summation With Details report types support data tables. Matrix reports only display a chart and allow viewing and editing their run-time filters. The dashlet must be present on a given dashboard in the desktop application for it to appear in the mobile dashboard. Note that if you add a dashlet or make a change to it from the desktop app, you must log out of the mobile app and log back in to see the update. See the Dashboards section of this page for more information on working with dashboards in the app.
There are three main views that can be available in the Report dashlet. See the below sections for details on each of these views:
Chart View
When accessing a report with a chart, the Chart icon across the top opens the Chart view of the report. Tap any value within the graph to open that subset of data in a list view for further review and sorting. It can be helpful to rotate your device to landscape mode when viewing charts to see the data more easily. If you wish to review all of the report's data rather than just the results in a certain subset, tap the Data Table icon, next to the Chart icon, to access the Data Table view.
Data Table View
All supported report types (i.e., Rows and Columns, Summation, and Summation With Details) contain a data table of the report results, which can be accessed using the Data Table icon across the top. This view shows the report results in table form, although the exact form depends on the type of report. See the Reports page in the Application Guide for details on the different report types and how to work with their datasets.
Tap column names (e.g., Account Name) to sort the table by that column and swipe from side to side to view the complete set of results if there are more columns displayed than can fit on the screen. Also, note that you can change which columns are displayed and in what order using the data table settings accessed via the gear icon in the top right corner.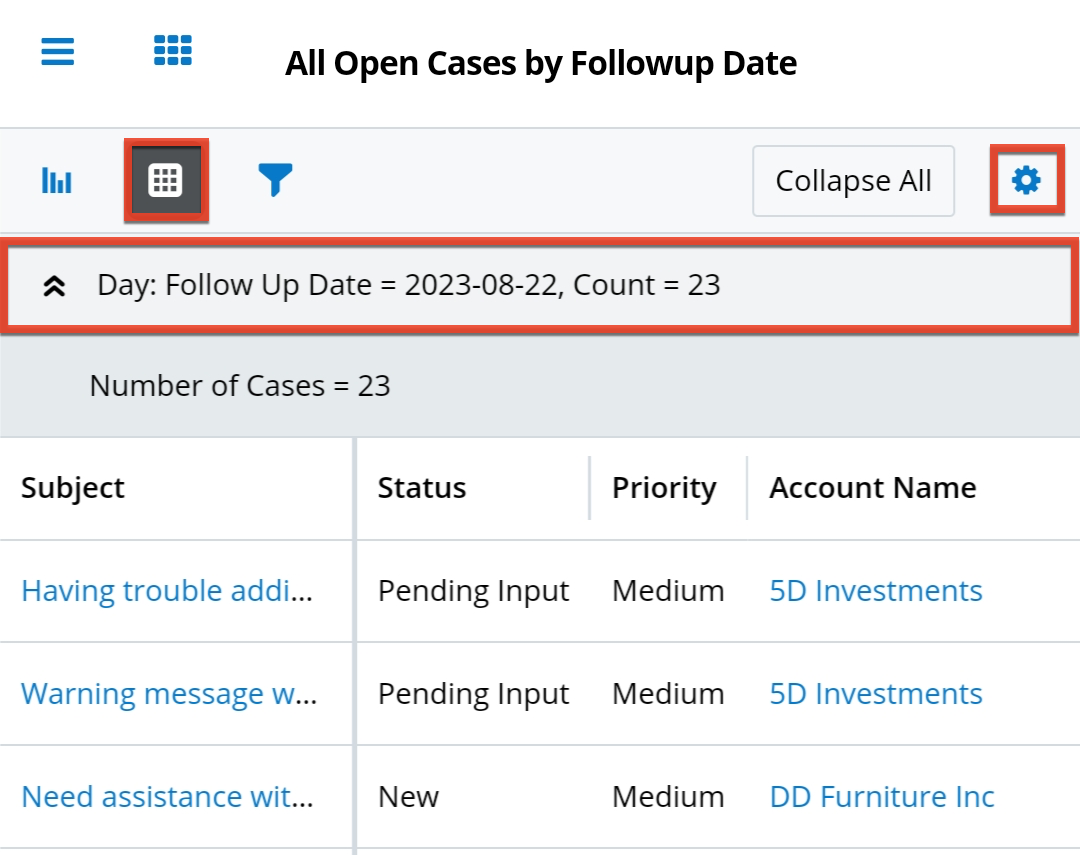
If viewing a Summation With Details report, tap the header of any group of results to collapse or expand that section. In addition, you can use the Collapse All button at the top to collapse them all at once, and likewise, expand them all at once afterwards. In a Rows and Columns or Summation report, tap "More..." at the bottom to load more results if more are available, and at the bottom of any data table, tap the Refresh icon in the corner to refresh the report results.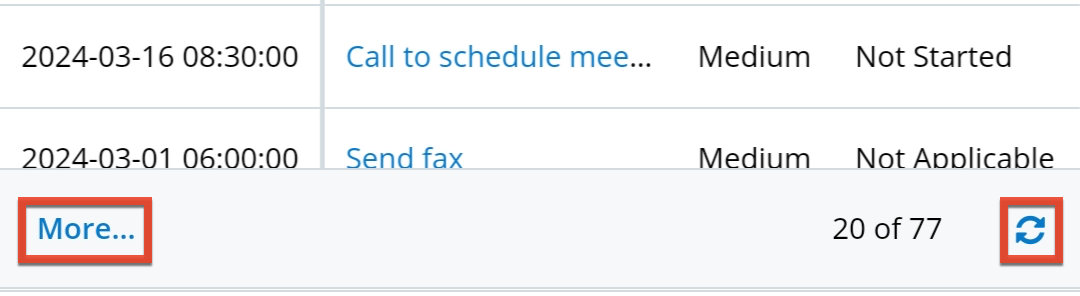
Data Table Settings
When you tap the gear icon available in the Data Table view, the Display Columns screen opens. Here, you can configure how the columns are displayed in the table for this particular Report dashlet. The first setting, "Freeze First Column", pins the first column of the table in place so that it remains in view when you scroll horizontally. This is helpful when viewing a table with more columns than can fit on the screen so that you can always keep one identifying piece of information in context for each row.
In the Column View Options section, you can enable and disable each column for display in the table using the toggle next to it. In addition, you can reorder the columns by pressing and holding the three-lines icon on the left of each column name and dragging it to your desired position in the list.
If you would like to return the data table to its original state (i.e., sorting, filtering, displayed columns, and column order), tap the Reset to Dashlet Defaults option at the bottom.
Run-Time Filter View
Note: If connecting to some older, unsupported versions of Sugar, the run-time filters are read-only and cannot be edited.
If the report you are viewing has run-time filters, these are available by tapping the Filter icon across the top.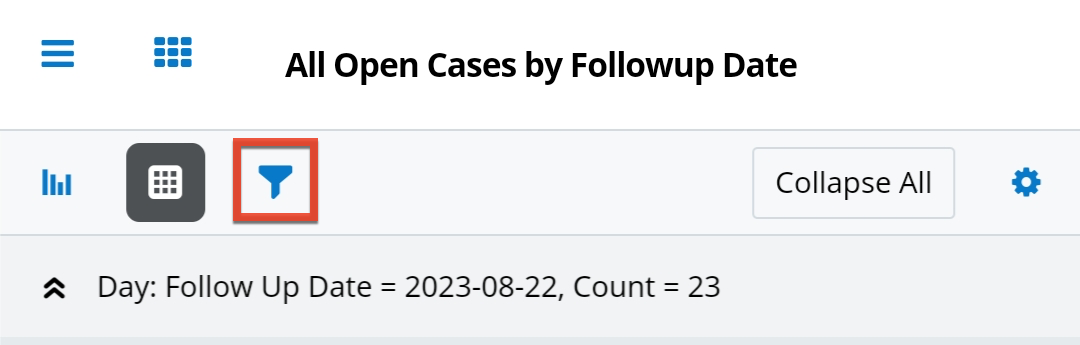
The run-time filters available to be updated are those configured on the report via the desktop application. Make any changes to the filters desired and tap "Apply" to apply the filters to the result set and return to the previous view. If you have changed the filters, you can tap "Reset To Default Filters" to restore the filters to their default values.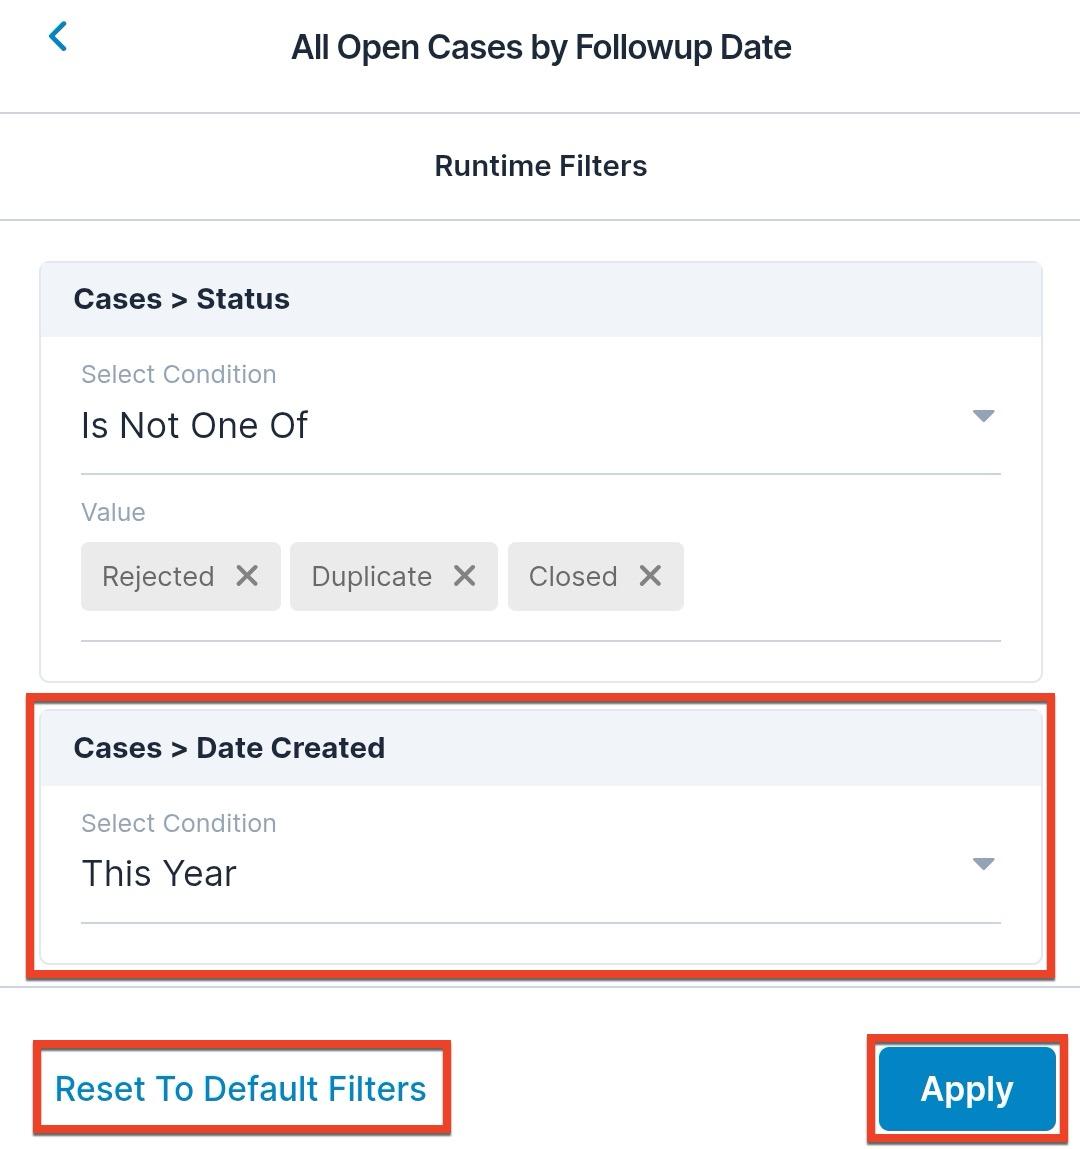
Converting Leads
When a lead is qualified as a sales opportunity according to your organization's practices (e.g., after an evaluation/qualification process or upon entering into business with the individual), you can convert the lead via the Leads detail view or list view. To initiate the conversion process, simply tap the Convert icon in the detail view's Record Actions menu or select the Convert action from the list view row's Actions menu. When the lead is converted, a new contact record is created in your Sugar instance with a relationship to the original lead record. In addition, the lead conversion process gives you the option to create an account and opportunity record. Please note that lead conversion is not available when there is no internet connection on your mobile device.
Administrators have the ability to mark modules as required for conversion, add additional modules to the lead conversion process, and remove modules from the lead conversion process by configuring the Convert Lead layout via Admin > Studio on the desktop Sugar application. For more information on configuring the Convert Lead layout, please refer to the Studio documentation. Note that only the following modules are supported for lead conversion in the mobile application:
- Contacts
- Accounts
- Opportunities (for Sugar Sell and Enterprise)
- Tasks
- Cases
- Notes
- Revenue Line Items (for Sugar Sell and Enterprise)
- Custom modules (enabled for the mobile app)
Note: Users assigned a role in Sugar restricting access or edit permission for a supported module (e.g., Opportunities) will not see the particular module step during the lead conversion process.
If any unsupported modules are added to the Convert Lead layout and marked as required, the lead conversion feature becomes disabled in the mobile app and the Convert icon will not appear in the Record Actions menu.
Use the following steps to convert a lead via the Leads detail view:
- Locate an unconverted lead record and open its detail view.
- Tap the Convert icon in the Record Actions menu to initiate the lead conversion process. Or, from the Leads list view, simply select the Convert action from the row's Actions menu as described in the Accessing Actions Menus From Lists section.
From Leads detail view: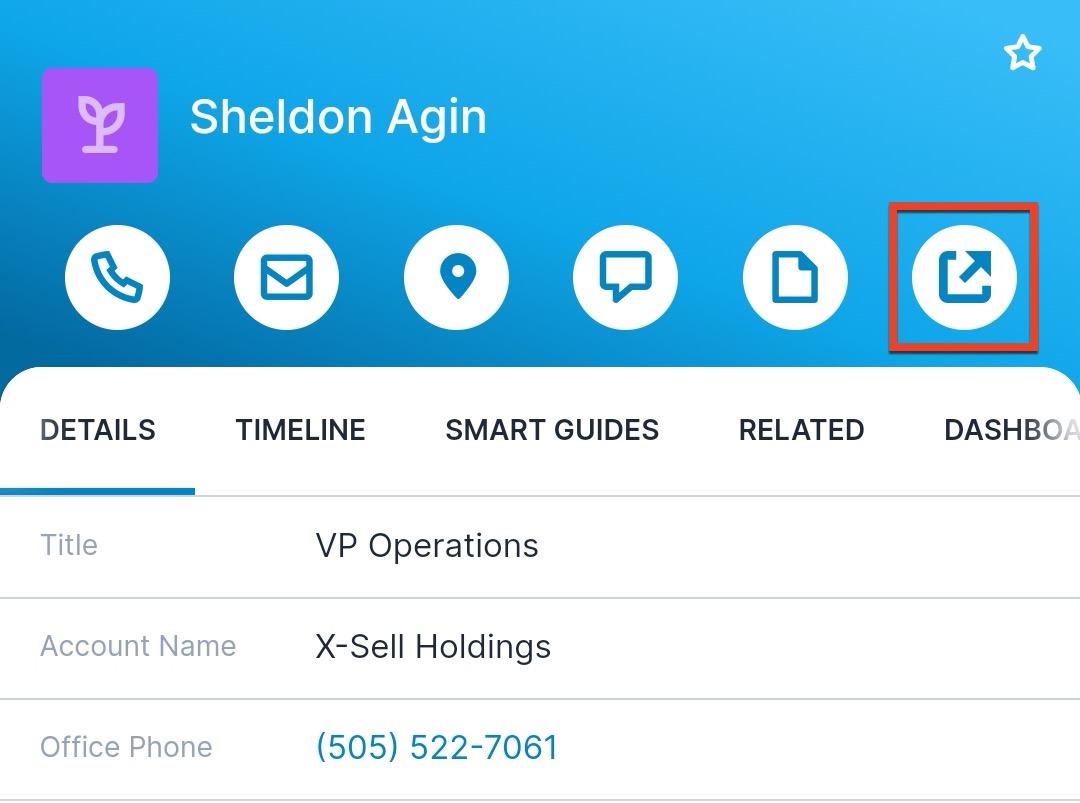
From Leads list view: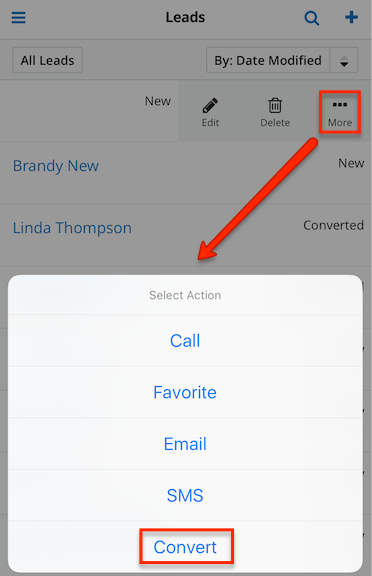
- The system will automatically perform a duplicate check to see if any existing records are found in the modules. The duplicate records, if any, will be displayed on the screen for the particular module (e.g., Contact) during the lead conversion process. You can click the Show More link to view additional record details. If you wish to relate an existing record to the lead, simply tap the radio button to the left of the record's details.
- If you wish to perform a list view search for other existing contact records to relate to the lead, simply tap the Search Existing Contacts link.

- To create a new record, tap the Create Contact link instead and the displayed edit view will be pre-populated with the lead's values. Update any necessary fields then tap "Save" to relate the new record to the lead. The created contact will automatically be selected and the record details will be displayed on the previous Contact step.
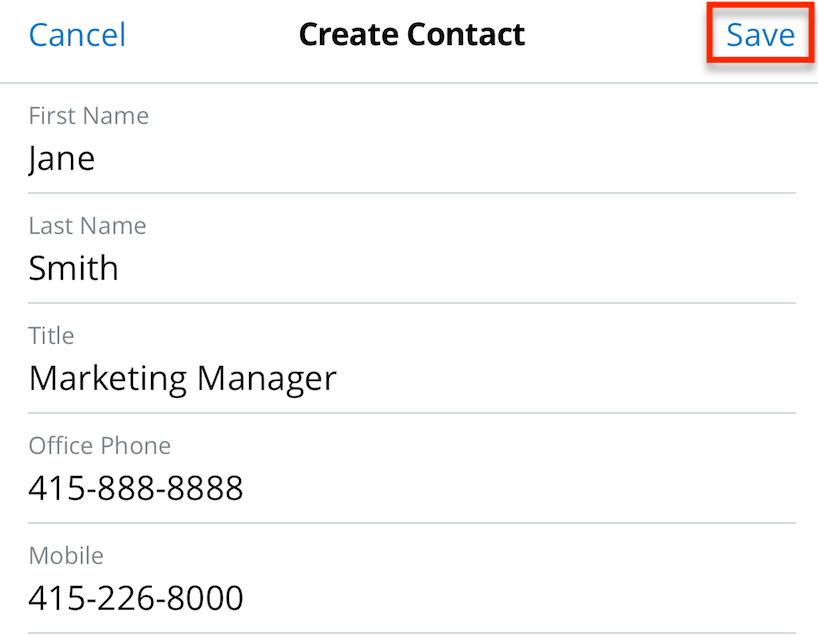
- Tap the Account button to proceed to the Account step of the lead conversion process.
Note: As each step of the lead conversion is completed, the progress bar on the upper right of the screen will advance.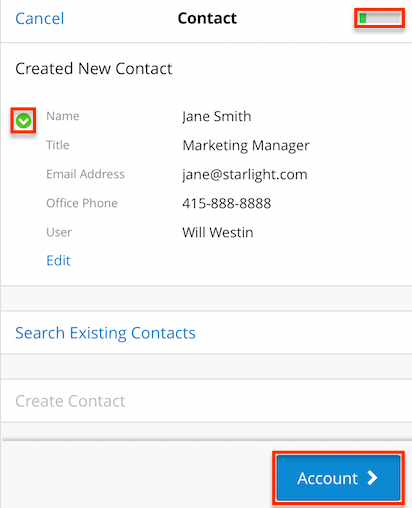
- If the lead record's Account Name field is populated and there are no duplicate account records found, the new record will be automatically created and selected on the Account step. Tap "Edit" to update any fields for the record. If you wish to relate an existing account instead, simply tap the Search Existing Accounts link. Tap the Opportunity button to proceed to the Opportunity step. If you wish to navigate back to the previous step, tap the Contact link.
Note: If the lead record's Account Name field is not populated, the Account step will be displayed, giving users the option to associate an existing account or create a new account record instead.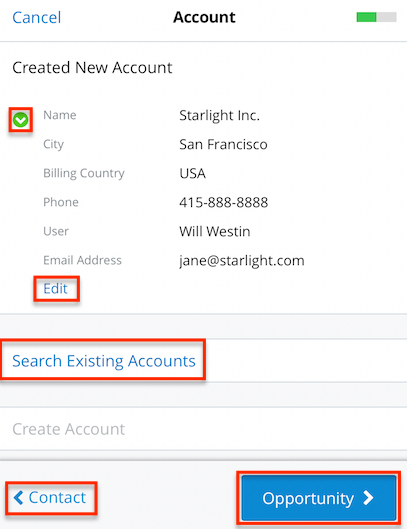
- New or existing opportunity records can be related to the lead by tapping the "Search Existing Opportunities" or "Create Opportunity" link. Depending on how the admin has configured the lead conversion settings in Sugar, it may be optional or required to include a revenue line item with a newly created opportunity. If the Opportunities step indicates that it is optional, then an opportunity record is not required to convert the lead. If any other supported modules are added to the Convert Lead layout in Studio, you will continue the lead conversion process by tapping the <Module Name> button (e.g., Task) to relate a new or existing record to the lead as necessary.
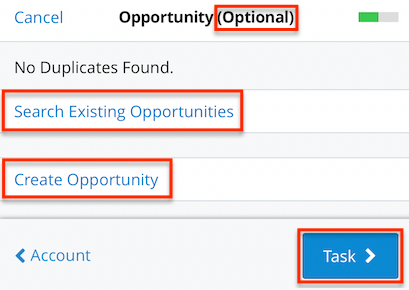
- Once all of the necessary steps have been completed, tap the Convert button to convert the lead.
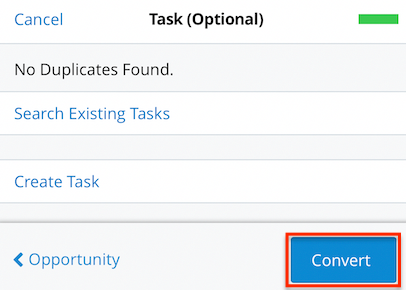
Once the lead conversion process completes, you will return to the lead's detail view, and the Status field will now display "Converted". Links to any contact, account, or opportunity records you created during conversion are added to the bottom of detail view. In addition, the Convert icon will no longer be displayed in the Record Actions menu. Please note that the Status field becomes read-only upon conversion and cannot be manually changed for the lead.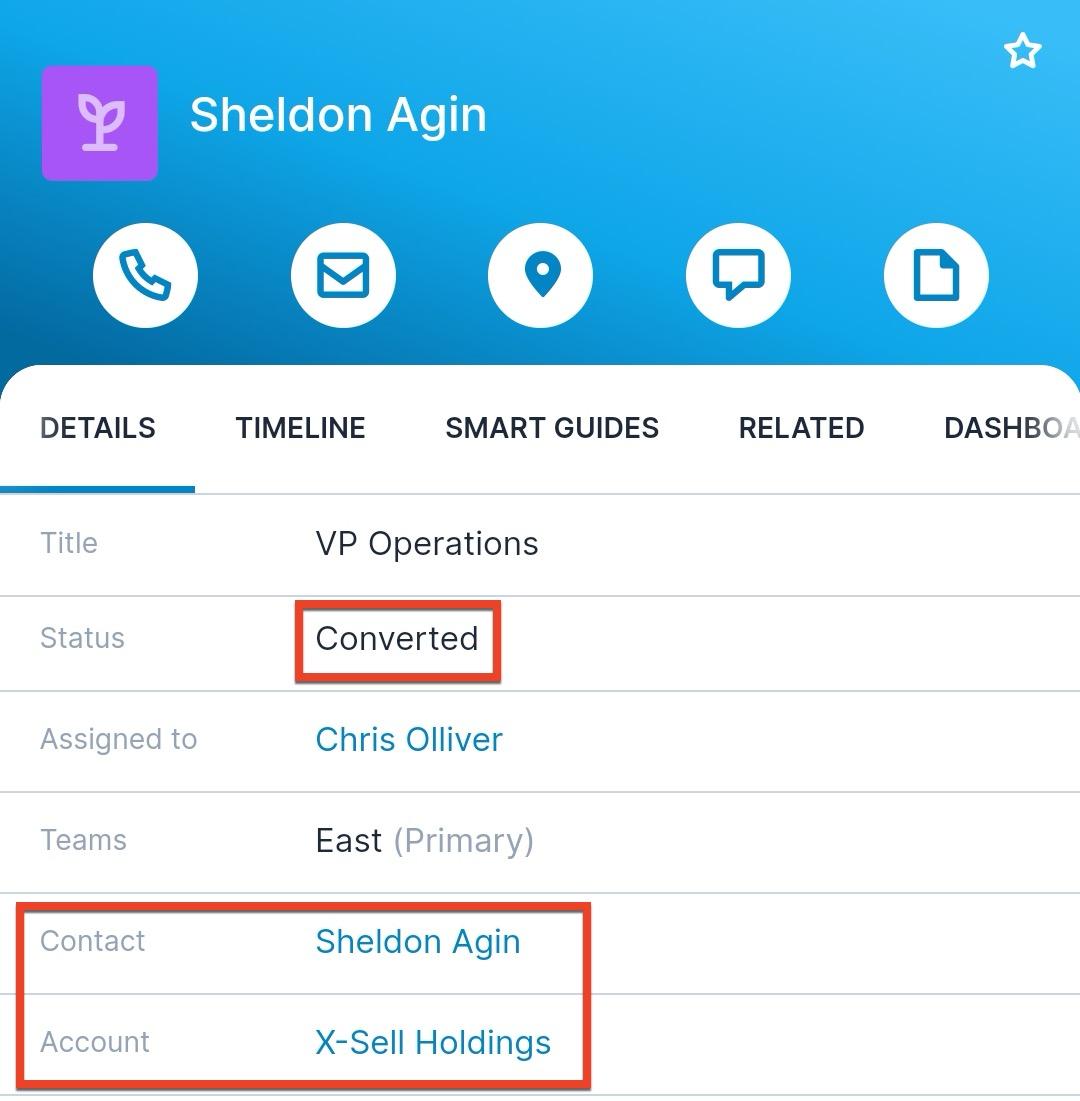
Building Quotes
Quotes may be created and modified from within the SugarCRM mobile app. This includes building quotes by creating groups, comments, and quoted line items which are based on items from the product catalog. Groups are optional but can be used to organize similar products or services. For example, a quote for software might have a group labeled "Services" to contain the quoted line items for implementation and extended support. For more information about working with quotes, please refer to the Quotes documentation.
When creating or editing a quote record, tap the Quoted Line Items tab to access its worksheet where you can add and manipulate line items, comments, and groups. Tap the Details tab to view and modify the quote's fields (e.g., Valid Until and Quote Stage).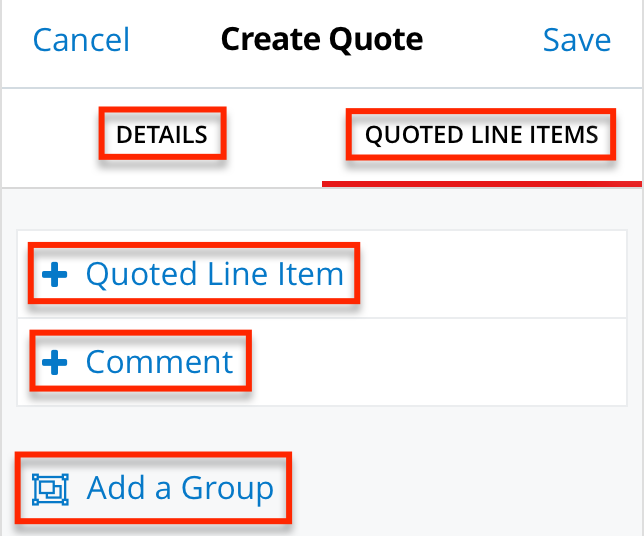
Note: The Quotes and Quoted Line Items modules may need to be made available in the mobile app by your administrator via Admin > Mobile. For more information on controlling which modules are available in the mobile app, please refer to the System documentation. If an admin makes changes to the worksheet and the changes do not appear in the SugarCRM mobile app, they will need to navigate to Admin > Quotes Configuration > Save to re-save any configuration options. More information can be found in the Quotes Configuration documentation in the Administration Guide.
Once the quote is complete, you can easily create an opportunity from the quote using the Create Opportunity from Quote option in the More Actions menu in the top right corner. See the Quotes page in the Application Guide for details on how this works.
Working With Groups
The quoted line items and comments for a quote may optionally be organized into groups to bundle similar products or services together. For more information on quoted line item groups, please refer to the Quotes documentation.
To insert a group, tap "Add a Group" then tap the blank space beneath "Group Name" to type the group's name. You can then add line items and comments to the group by tapping "+ Quoted Line Item" and "+ Comment" buttons at the bottom of the group. Each group will display a Group Total value which sums all line item totals within the group.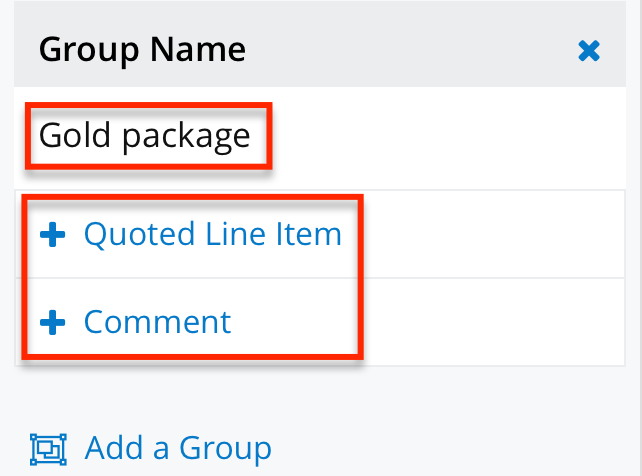
You can delete a group by tapping the "x" in the group's header. Doing so will move all comments and line items to the ungrouped portion of the quote.
Working With Quoted Line Items
Quoted line items can be added independently or within groups. To add a line item to a group, you must first create the group, then use the "+ Quoted Line Item" button at the bottom of the desired group. Tapping the "+ Quoted Line Item" at the top of the quote will create an ungrouped line item.
After adding the quoted line item, select an item from the product catalog by tapping the Product field then complete and adjust any other desired fields. The line item, group, and quote totals will update as you work.
If you have "Show Preferred Currency" enabled in your profile in Sugar, quoted line items are displayed in the app in your preferred currency, with the quoted line item's currency displayed next to each value. Please note that this is not the same as how the Quotes module works in the desktop application. See the Quotes documentation for more details.
Note: The ability to create custom quoted line items is not supported in the mobile app. Ad-hoc line items can be created from the desktop application.
You can delete a quoted line item by tapping the "x" in the line item's header. This can also be done through the menu next to each line item when viewing the quote.
Working With Comments
Comments can be added independently or within groups. To add a comment to a group, you must first create the group, then use the "+ Comment" button at the bottom of the desired group. Tapping the "+ Comment" at the top of the quote will create an ungrouped comment.
After adding the comment, tap the blank space below the Comment header, type your desired text, and tap "Done" at the top of the screen.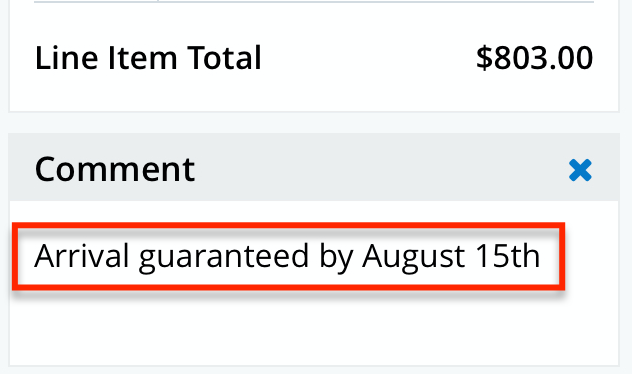
You can delete a comment by tapping the "x" in the comment's header. This can also be done through the menu next to each comment when viewing the quote.
Totals and Shipping
As you work to build the quote, various fields will automatically calculate to show updated values. Totals encompassing the entire quote appear at the top of the worksheet along with a Shipping field which is user provided. In edit view, these totals are displayed at the bottom of the worksheet.
If you have "Show Preferred Currency" enabled in your profile in Sugar, the values are displayed in the app in your preferred currency, with the quote's currency displayed next to each value. Note that in the desktop application, only the quote's currency is used. See the Quotes documentation for more details.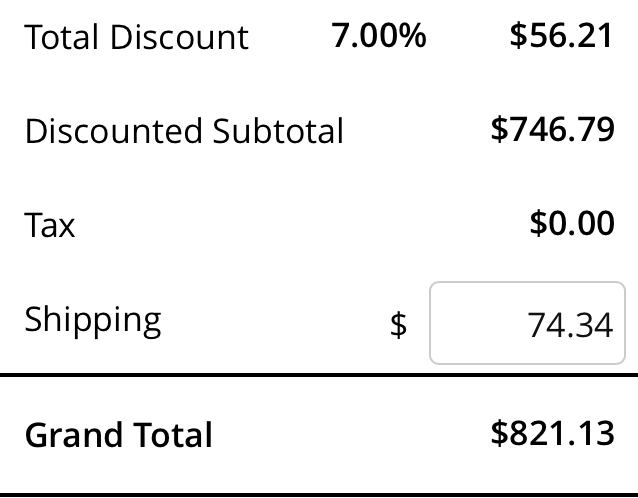
- Line Item Total: The calculated total for an individual quoted line item.
- Group Total: The calculated sum of a group's line item totals.
- Total Discount: The calculated sum of all discounts appearing on any of the quote's line items.
- Discounted Subtotal: The calculated total of all line items, including their discounts.
- Tax: The calculated total tax amount based on the quote's tax rate being applied to line item totals. Please note that an admin needs to add the Tax Rate field to the Quotes module's Mobile EditView via Admin > Studio in order to set a quote's tax rate via the app. For more information, refer to the Studio documentation.
- Shipping: A user-provided cost for shipping the quoted items.
- Grand Total: The calculated sum of all line items plus any taxes and shipping costs within a quote.
An administrator can configure which fields are displayed in the worksheet totals via Quotes Configuration in Sugar; this configuration applies to both the Sugar desktop application and the mobile app. Refer to the Quotes documentation for more details.
Note: At this time, the ability to view and modify the quote's currency is not supported in the mobile app. A quote's currency can be viewed and changed from the desktop application.
Accessing Quote PDFs
Quotes can be downloaded or emailed as PDFs using the PDF templates created by your system administrator. To download or email a quote PDF, open the More Actions menu via the three-dots icon in the top right corner when viewing a quote record. The menu contains a download option and an email option for each PDF template associated with the Quotes module: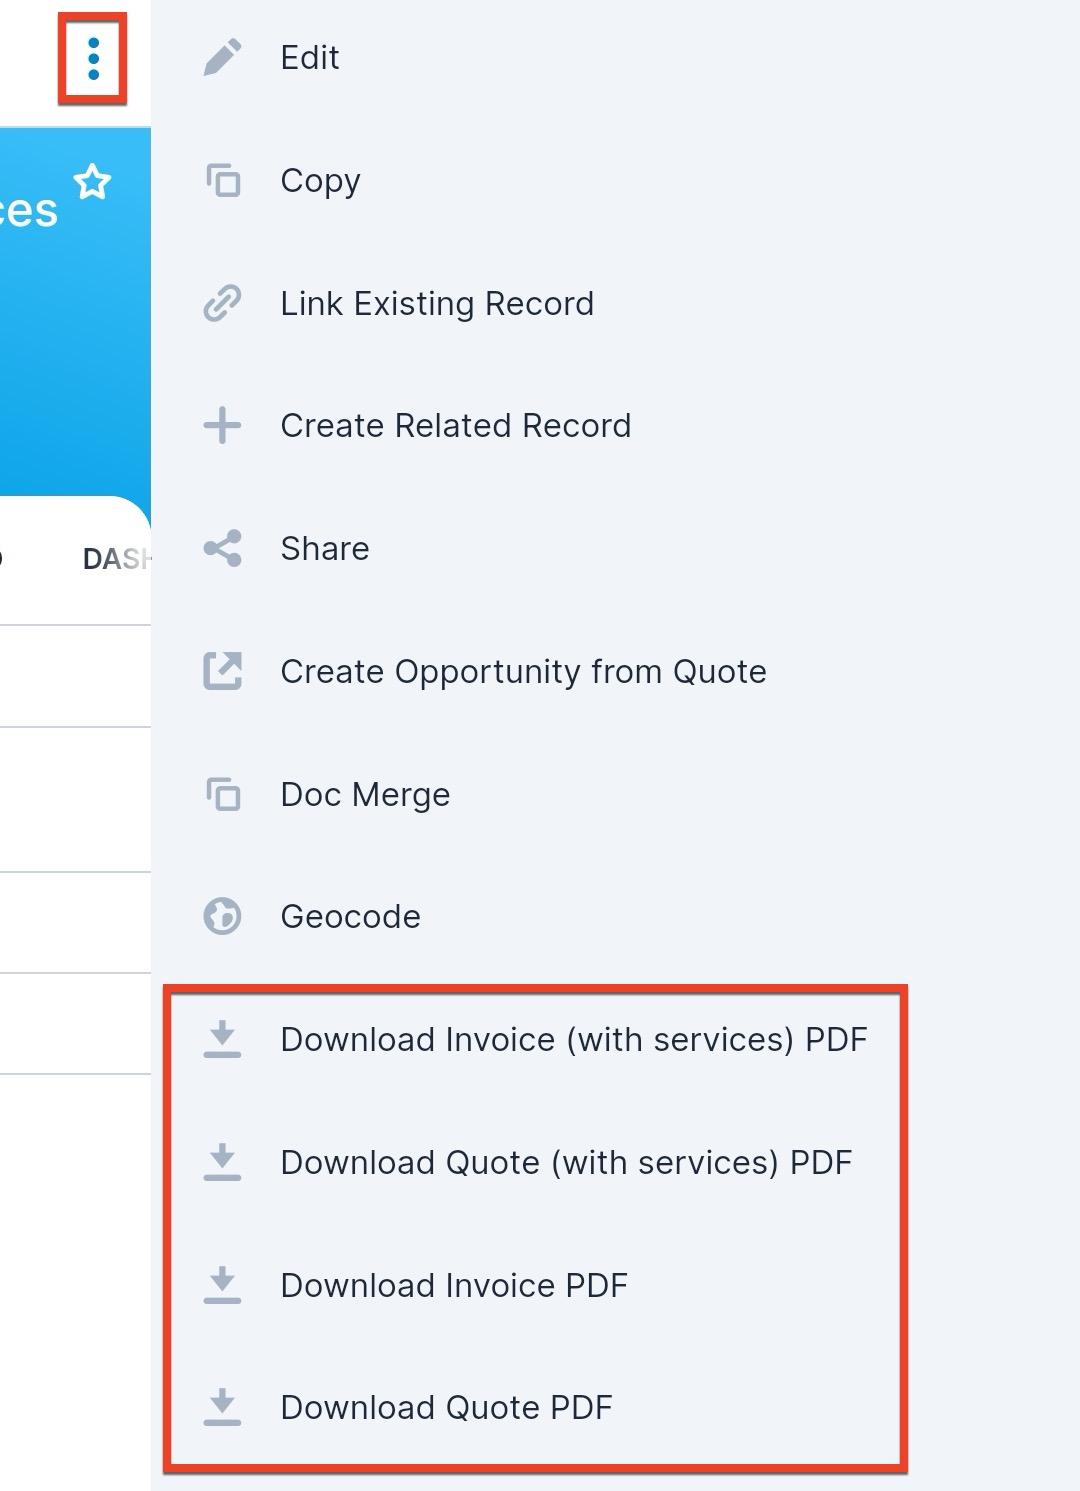
Tapping the Download button opens the PDF in the default PDF application on your device. From there, you can save the file to your device or share it with others using your device's email application. Note that downloading quote PDFs does not work on device web browsers.
Tapping the Email button opens the Compose Email screen within the app with the PDF attached to the email and the account's email address populated as the recipient. Note that the Email button is only available if your settings are set to use the Sugar email client.
If an administrator adds or removes a template, you will need to log out and in to see the changes in the mobile app.
Cascading Opportunity Values
If you are using opportunities with revenue line items, it is possible to cascade values on an opportunity down to its revenue line items. When editing the opportunity, you will see a checkbox below certain fields called "Update Open Revenue Line Items". Enable this checkbox to make the field above it available for editing. When you save the opportunity, the value you entered will also be applied to any eligible revenue line items.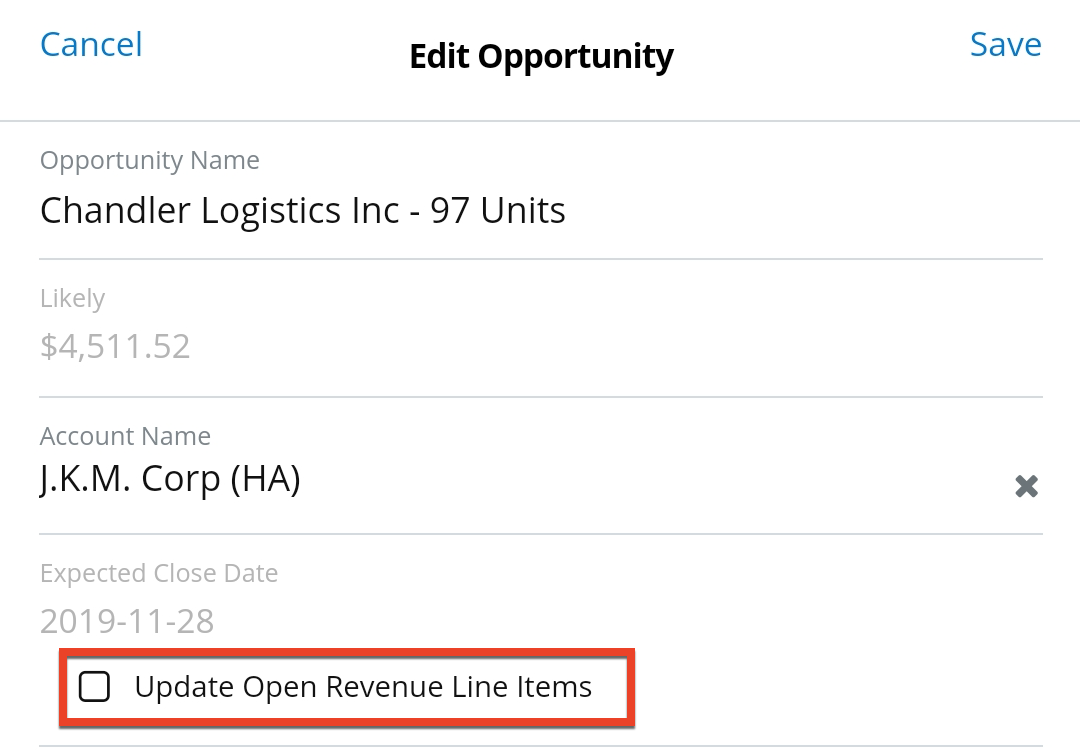
The fields that can be cascaded in this way are:
- Expected Close Date
- Forecast
- Sales Stage
- Service Duration
- Service Start Date
To learn more about opportunity cascading, see the Opportunities documentation in the Application Guide.
Executing SugarBPM Processes
The SugarCRM mobile app allows users to approve, reject, and route SugarBPM processes, including self-service processes, from their mobile device. To view all running processes that are either assigned to you or available to be claimed, view the Processes dashlet in the mobile app. Note that the dashlet must first be added to one of the dashboards in your Sugar instance. For more information on adding dashlets to a dashboard, refer to the Dashboards and Dashlets documentation in the Application Guide.
You can also use the Processes module to access processes that are assigned to you, but self-service processes can only be viewed from the Processes dashlet.
To execute a process, use the following steps:
- Open the Processes dashlet. Using the Current and Overdue filters in combination with the My Processes and Self Service Processes tabs, tap the process that you would like to execute:
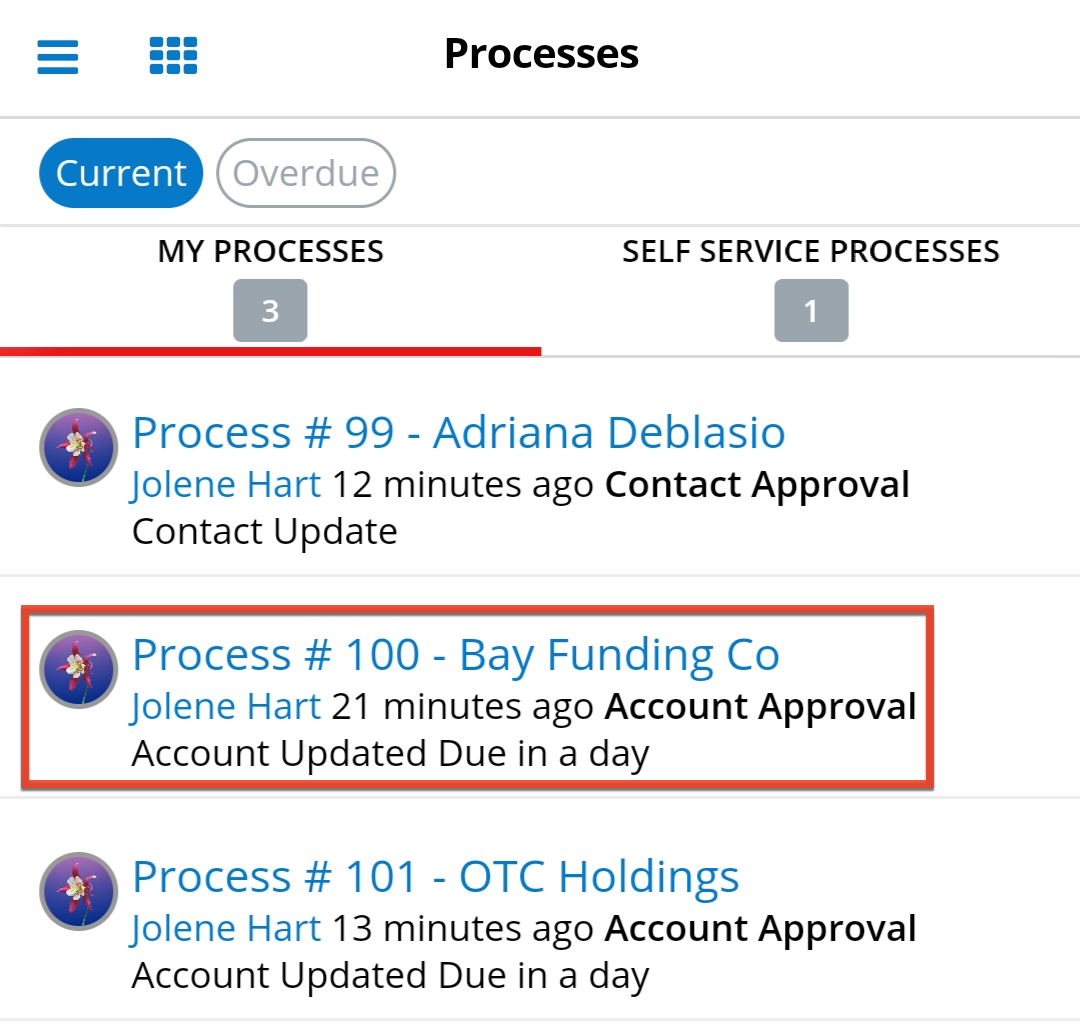
- After tapping a process, the target record's detail view is displayed with a pop-up asking how you would like to complete the process. Depending on if the process is an approval or routed process, tap the appropriate button in the pop-up to proceed:
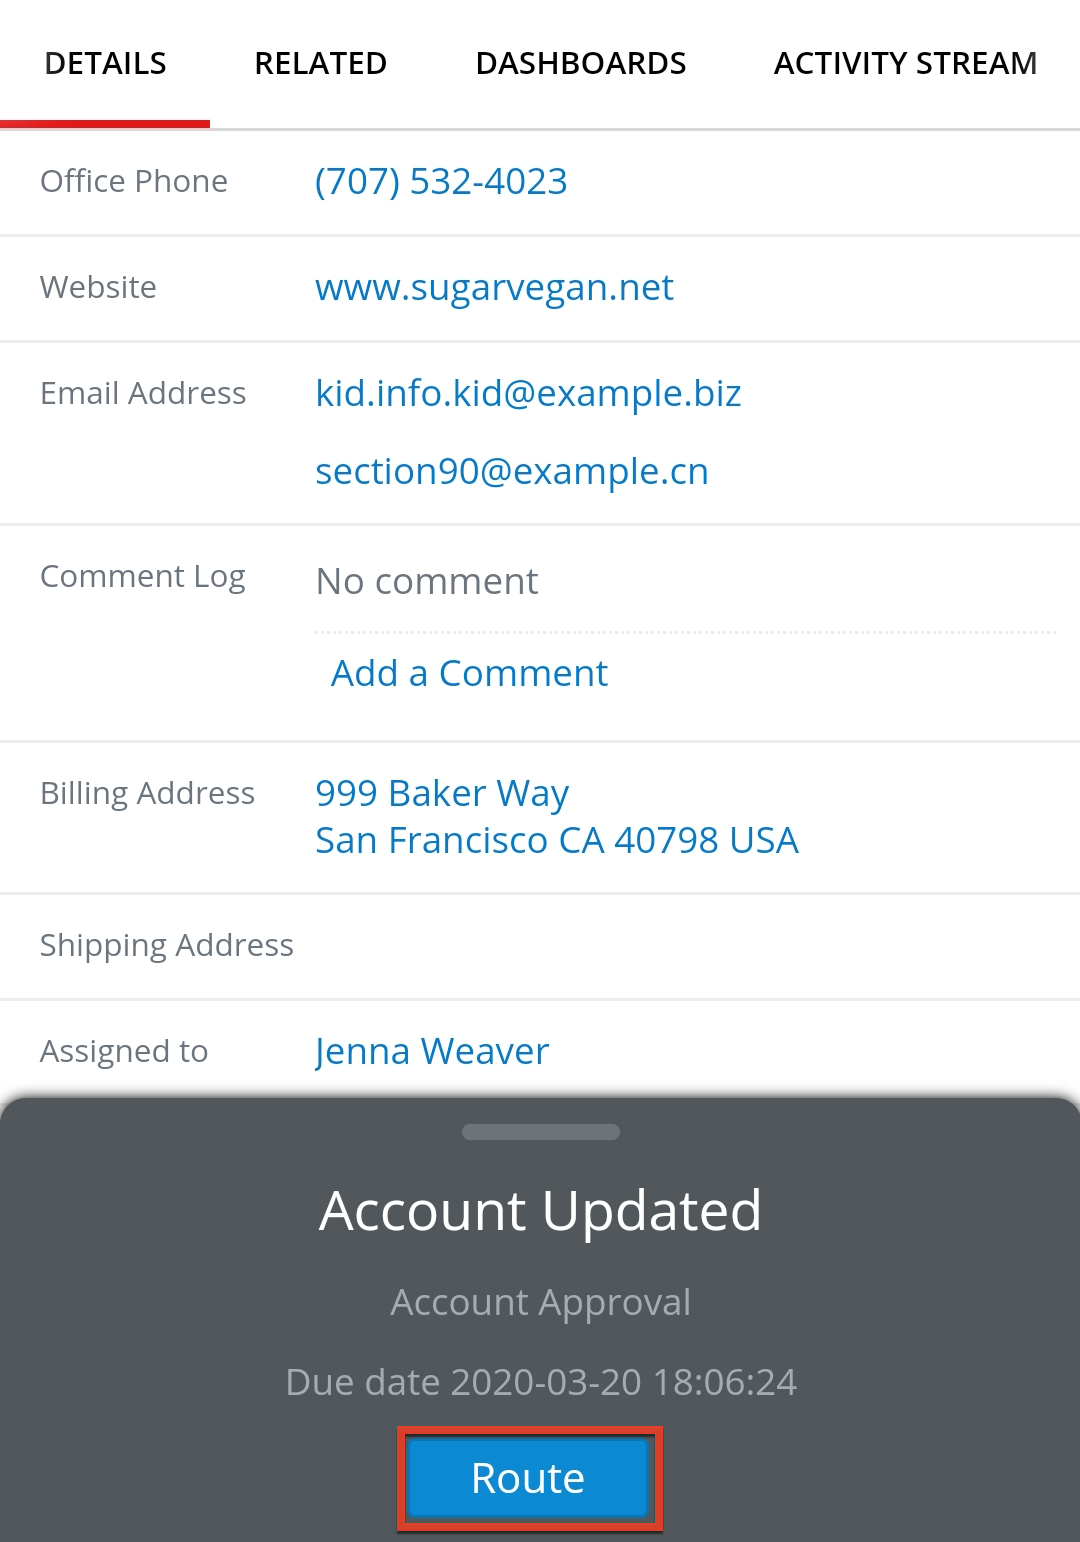
- If the record is missing values for any fields that are required by the process, edit view is opened. Fill in all required fields and proceed by tapping the Route or Approve button in the top right corner:
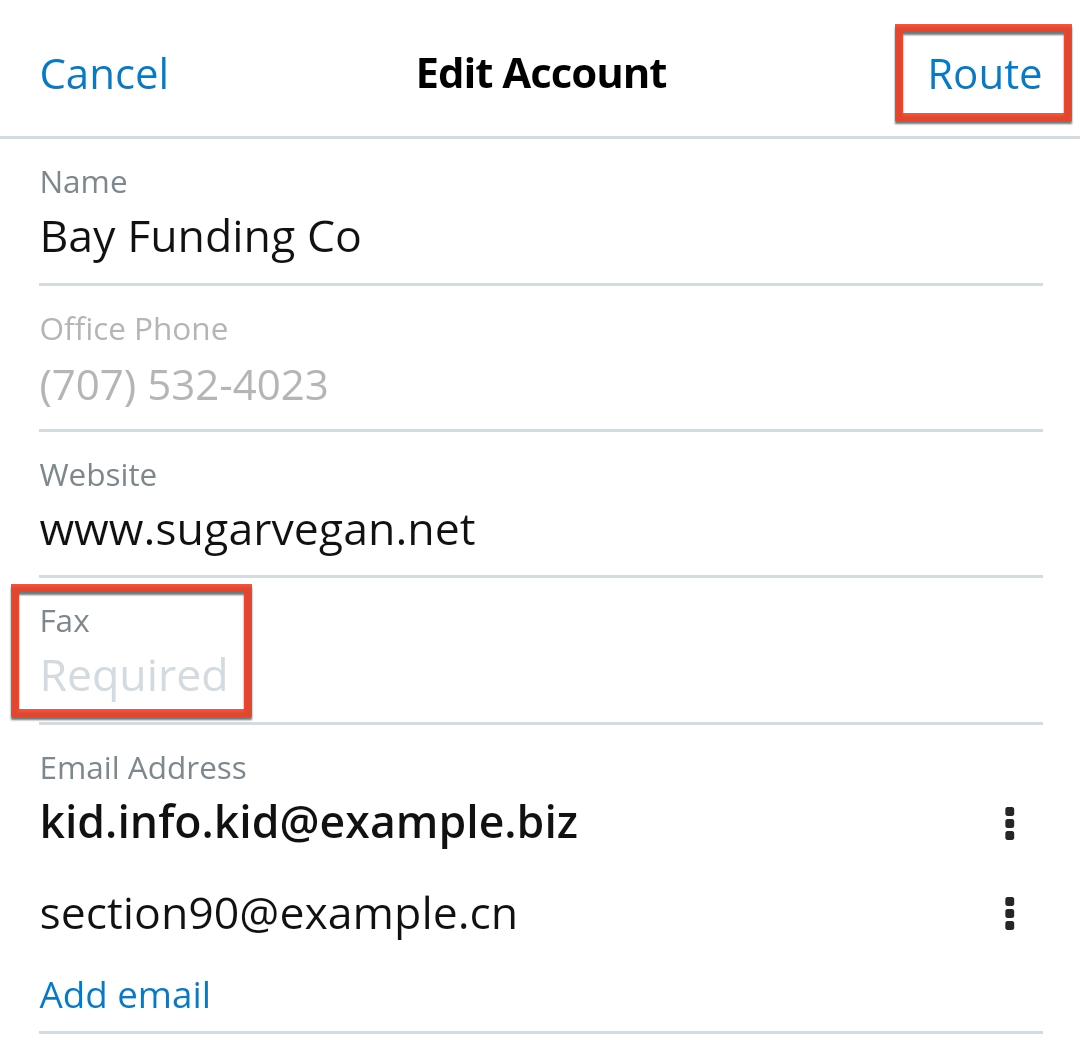
Once the process has been executed, the Processes dashlet is displayed again.
For more details on SugarBPM processes, refer to the Processes documentation in the Application Guide.
Escalating Records
In Sugar Sell, Serve, and Enterprise, it is possible to escalate records in the following modules in the mobile app: accounts, cases, and opportunities. This can be done via the More Actions menu in the top right corner of a record's detail view and selecting "Escalate" or by adding a new escalation via the Escalations subpanel in the Related tab. If a record has at least one open escalation, a banner is displayed across its detail view indicating that the record is escalated. If an admin has configured it, the Escalated field can also be added to your list view layouts so you can see which records are currently escalated from list view.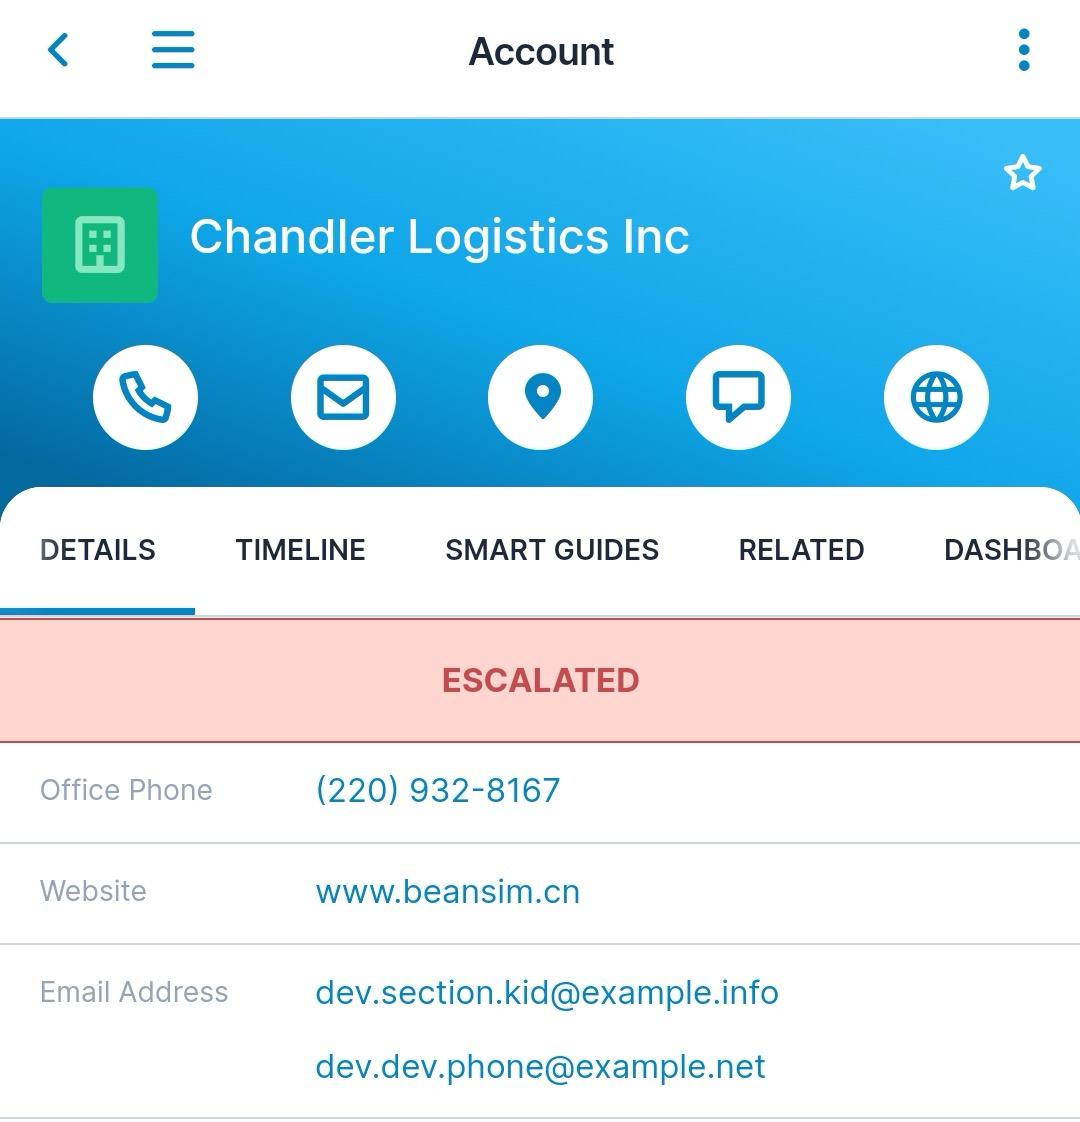
Note that since the Bugs module is not available in the mobile app, you can view a bug escalation but cannot see any details on the bug itself. For more information on escalations, see the Escalations page in the Application Guide.
Merging Records With a Document Template
If you are connected to a Sugar instance with access to Doc Merge, you can generate documents based on record data from the mobile app. From the More Actions menu on any record, select "Doc Merge" and then choose "Doc Merge to PDF" to generate a PDF file or "Doc Merge" to generate a DOCX file.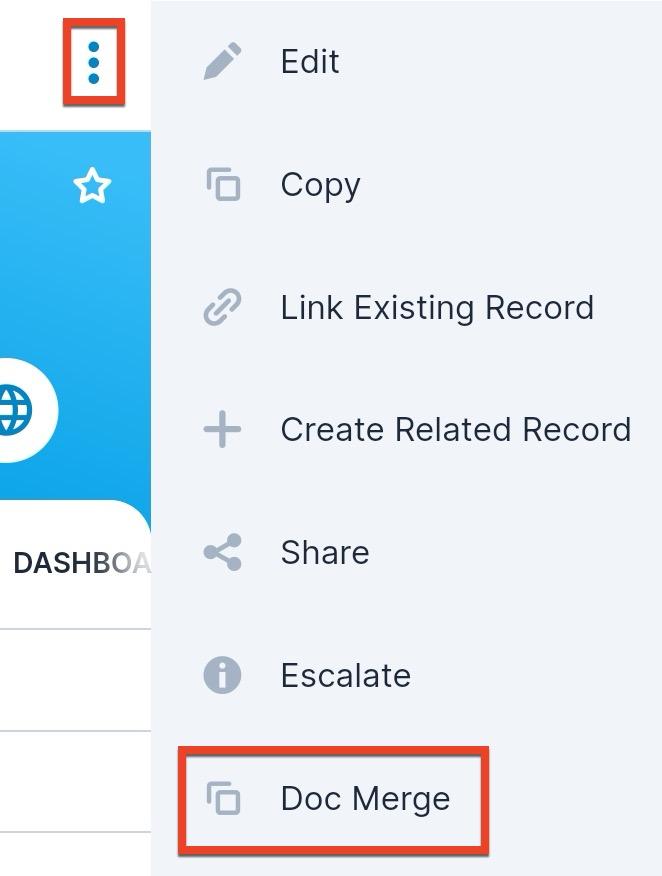
You can also merge multiple records into one document (e.g., a set of mailing labels) by selecting several records in list view and using the Mass Actions menu to initiate the document merge. To do this, you must ensure that the document template you use is designed for a multiple-record merge. See the Doc Merge documentation in the Application Guide for more details.
After initiating a single- or multiple-document merge and selecting a file type in the pop-up that appears, a list of document templates to which you have access is displayed. Tap the template you wish to use to initiate the merge process.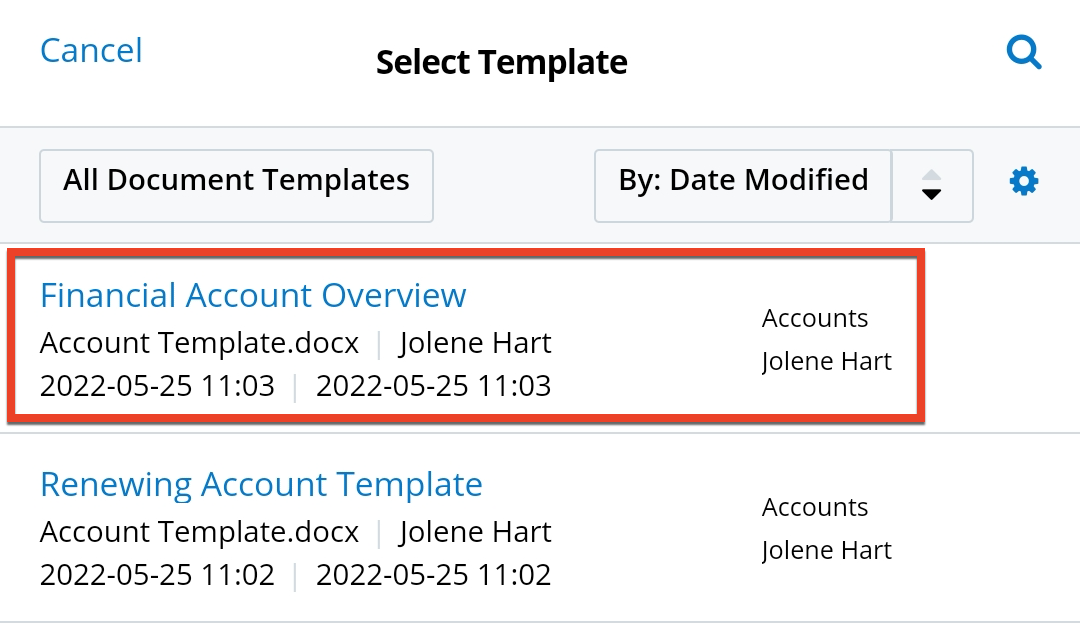
After starting the merge, you will be navigated to the Document Merges screen to see the status of your merge. Here, you can also see the status of all past merges you have performed in the desktop application or the mobile app. If a merge fails due to an error, tap the merge in the list to view the error message. The Document Merges screen does not refresh automatically, so swipe down on the screen to refresh the list to see when your merge is complete.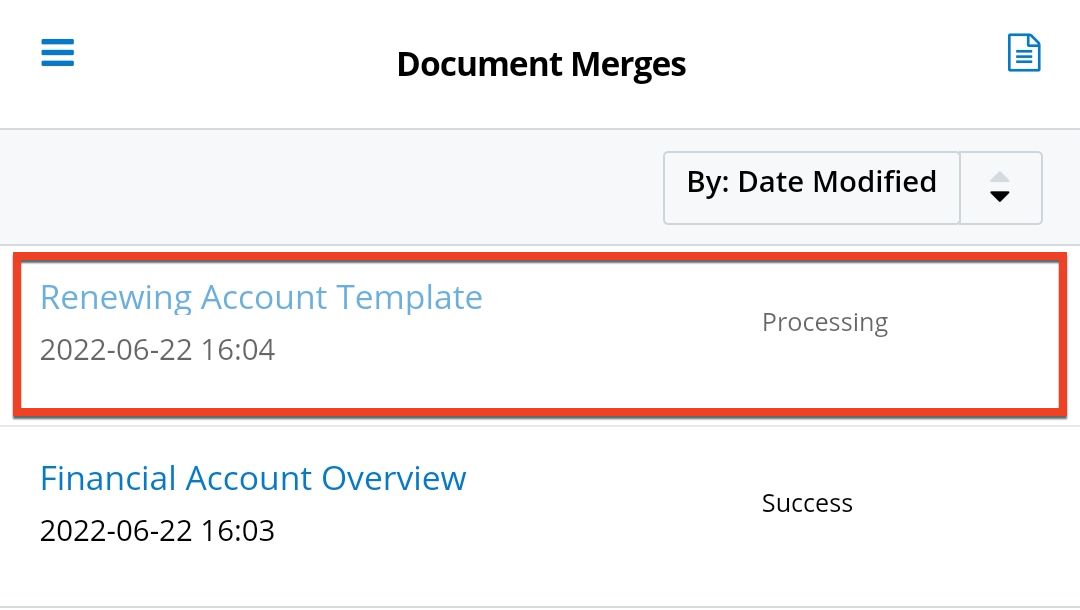
If you do not wish to wait for the merge, you can return to the Document Merges screen at any time from the main menu of the app: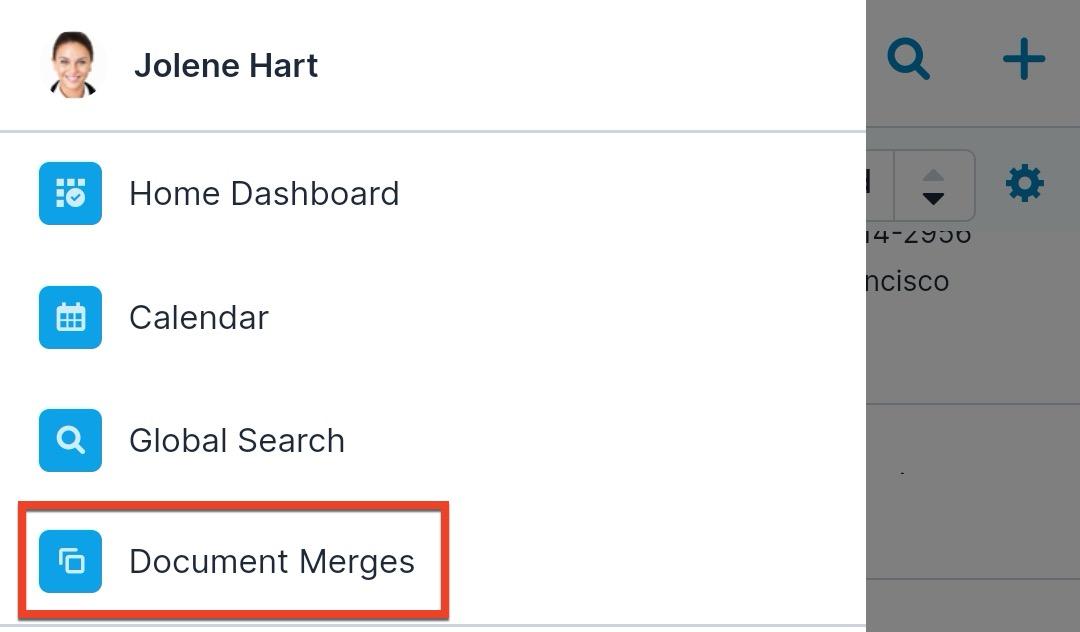
To view the list of document templates available to you, you can either open the Document Templates module from the main menu if it is displayed there or from within the Document Merges screen using the icon in the top right corner: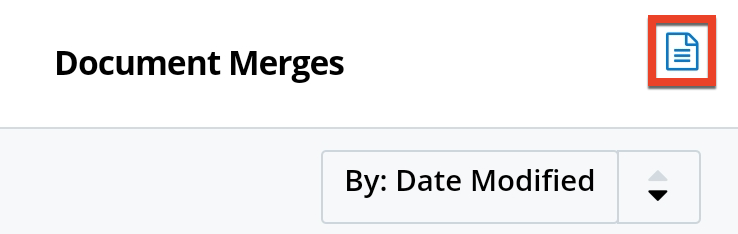
Working With Your Cloud Drive
If you use Dropbox, Google Drive, Microsoft OneDrive, or Microsoft SharePoint to manage files, you can access these files using Cloud Drive within the SugarCRM mobile app. There are two main places where you can interact with drive files: the Cloud Drive dashlet, which can be added to a Home dashboard or a detail view dashboard, and the Actions menu on document records, which allows you to upload document files to your drive. To use a cloud drive, you must first connect the account in your user profile in the desktop app and add the Cloud Drive dashlet to dashboards. Your admin also must configure the connector for the specific type of drive. See the prerequisites in the Cloud Drive documentation for details on how to get ready to start using it.
Note: Microsoft SharePoint is organized into sites with document libraries that contain folders and files. In this documentation, we refer to sites, document libraries, and folders collectively as "folders" to simplify talking about SharePoint in conjunction with Dropbox, Google Drive, and OneDrive, which only use folders and files. Refer to the Microsoft documentation for more information on SharePoint structure.
The Cloud Drive dashlet presents the structure of your drive's folders and files and gives you options to create and navigate folders, manage files, and turn a file into a Sugar document. See the below sections for details on these actions. For more information on setting up and using Cloud Drive in the desktop application, see the Cloud Drive page in the Application Guide.
Working With Files
There are several ways you can interact with files in your drive. First, you can upload files from your device to your drive using the Upload icon, but note that in SharePoint, you can only upload to a document library or folder. To open a file that is already in your drive, simply tap it; this will attempt to open the file using the account you are currently logged in to on your mobile device. If that account does not have permission to access the file, you will be prompted to request permission. To perform actions on a file, swipe from right to left on the specific file.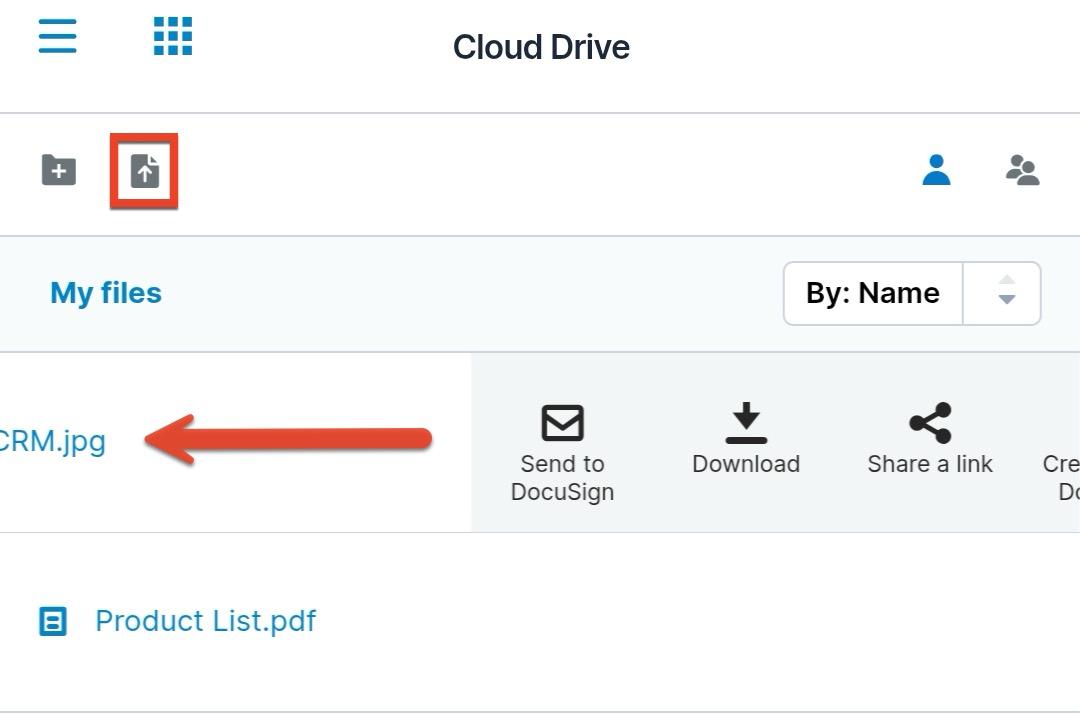
The Actions menu that opens provides the following options:
- Send to DocuSign: If your Sugar instance is connected to DocuSign, send this file in your drive to DocuSign for signature.
- Download: Download a copy of the file. This opens a menu to let you choose if you wish to simply view the file on your device or to share it via another app.
- Share a link: Choose an application on your device (e.g., a messaging app) in which to share a link to this drive file or folder. The name of the file and its link will be automatically populated in the message. Note that the recipient will only be able to access the file if they have the appropriate permissions in the drive. Sharing a link does not change any permissions.
- Create Sugar Document: Create a document record in Sugar with the file attached to the document. If done from a record's detail view dashboard, the document will be related to that record if possible. The record is created immediately and can be found in the Documents module or via the current record's subpanels. Note that you must have access to the Documents module in order to see this option.
- Delete: Delete the file or folder from your drive. Note that you can only delete files in your own drive, not shared files.
You can also add files on document records from the mobile app to your drive using the Sync To Google Drive/OneDrive/Dropbox option. This option is available in the Actions menu in the Documents subpanel on any record related to the Documents module as long as the Cloud Drive dashlet is present on that module's detail view dashboard.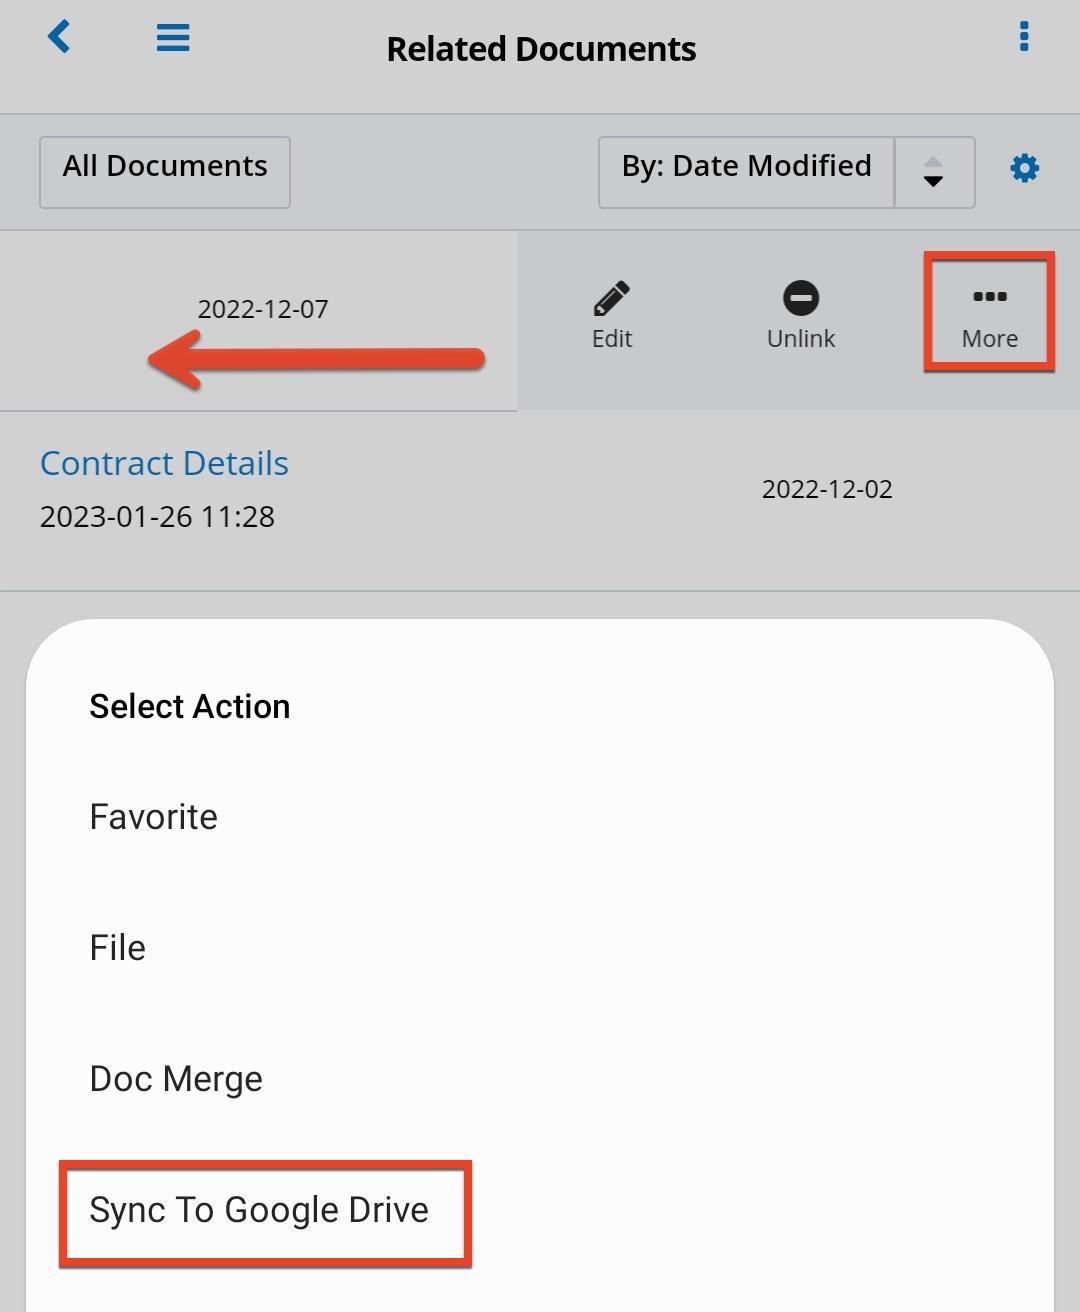
If you want to sync the files from all of the related documents, use the Sync All To Google Drive/OneDrive/Dropbox option in the three-dots menu in the top right corner instead.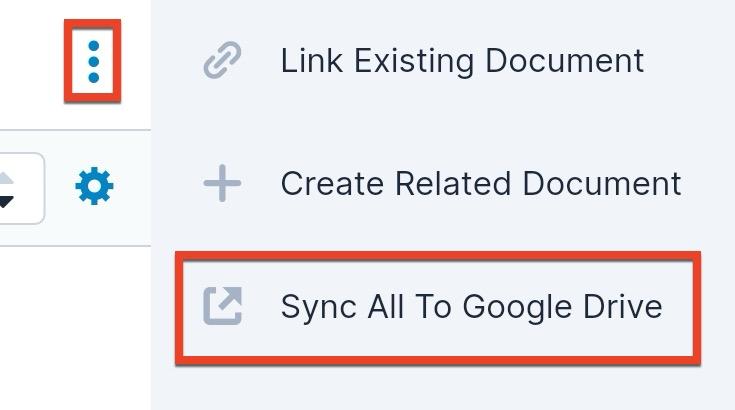
Working With Folders
You can navigate the structure of folders in your drive using the path links above the drive files. The current folder and the folder above it, if there is one, are shown. Tap the parent folder to go up a level and view that folder's contents. Or, if there are more folders inside the one you are viewing, tap a folder to open it and continue navigating through the tree. To create a new folder, tap the New Folder icon in the top left but note that for SharePoint, folders can be created only within a document library or another folder. Lastly, for Dropbox and Google Drive, you can also toggle between viewing your own files and files that are shared with you; simply use the two people icons in the top right to switch between the two views.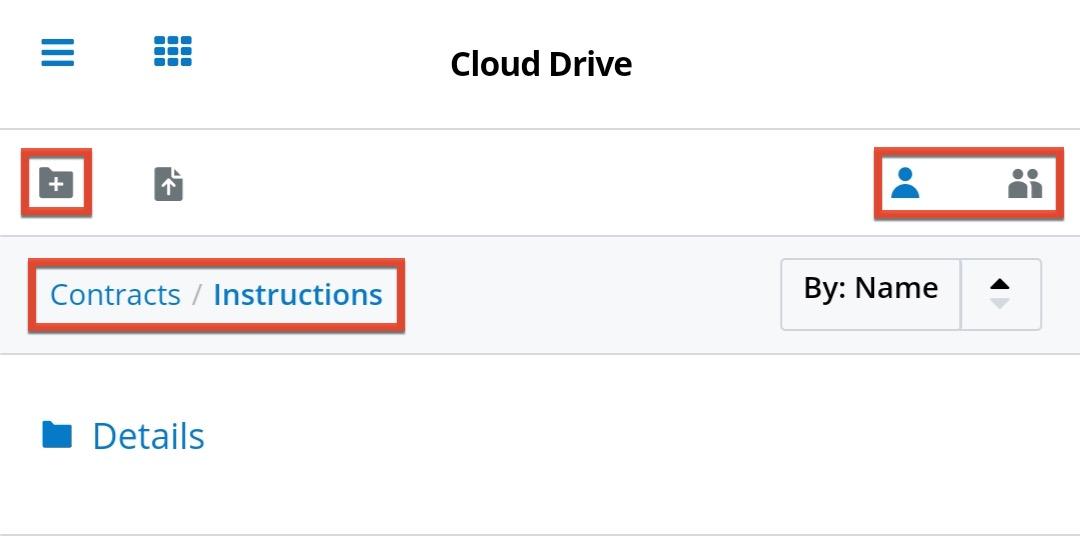
Swipe from right to left on a specific folder to access the Actions menu, which contains options to share a link to the folder with an app on your device and to delete the folder. Note that in SharePoint, you cannot delete sites or document libraries.
Sending Documents to DocuSign
If you are set up to use DocuSign in your Sugar instance, you can also create envelopes with documents and manage envelopes from the mobile app. Before you can use DocuSign in either the desktop or mobile application, an admin must first configure the connector and you must then connect your DocuSign account to your Sugar user profile. See the DocuSign Integration page in the Application Guide for details on using DocuSign in the desktop app and refer to the following two help articles for steps to configure Sugar and your user profile to connect to DocuSign:
The sections below are grouped to follow a typical flow to send an envelope containing a document. This flow is as follows:
For details on the DocuSign dashlet or DocuSign Envelopes module themselves, see the DocuSign Dashlet section and DocuSign Envelopes section below.
Creating an Envelope
You can create an envelope with a document in the Documents module in one of three ways. Firstly, you can open the Documents subpanel on any record with a relationship to the Documents module and swipe from right to left on a related document to access the Actions menu. In most cases, you will then need to tap the three-dots More menu to see the Send to DocuSign action.
The second way to create an envelope is via the Cloud Drive dashlet. Swipe from right to left on a file in your drive, tap "Send to DocuSign", and provide a name for the envelope.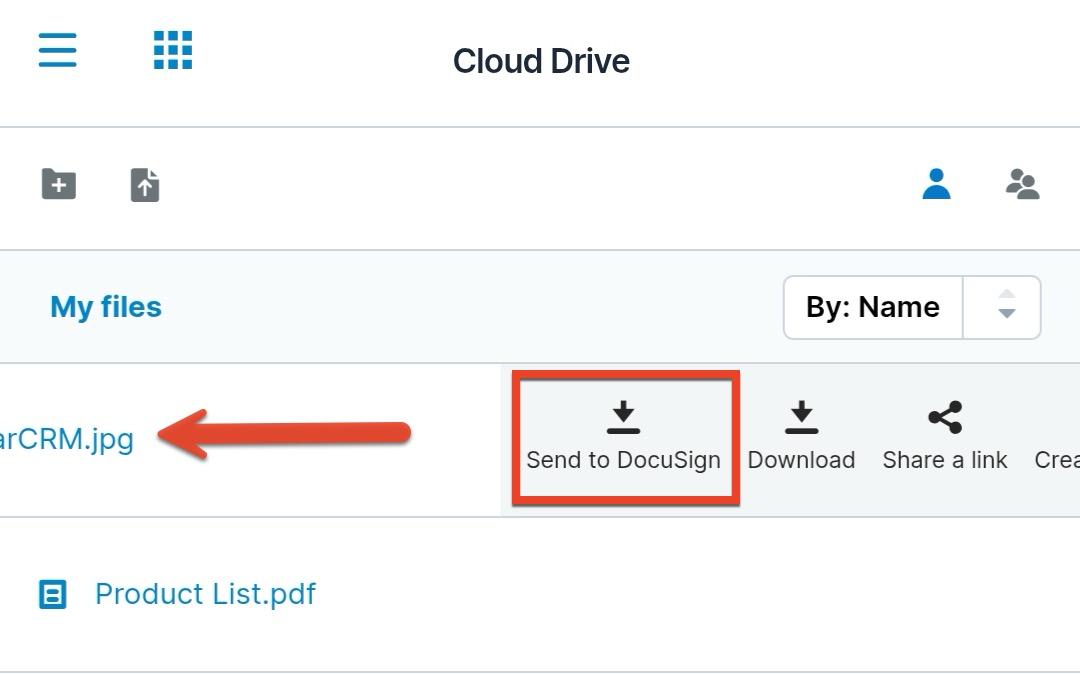
Whether using the Documents subpanel or the Cloud Drive dashlet to send a specific file to DocuSign, the subsequent process is the same. If recipient selection has been enabled by an admin and you are in the context of a target record, tapping this action opens the recipient selection screen. Otherwise, it navigates you directly to DocuSign, where you can select recipients within DocuSign before proceeding with sending the envelope.
If you are sending a file from the Cloud Drive dashlet, a document record will be created for the file and, if in the context of a target record (e.g., an account), it will be related to that target record. Once the signature is complete, the signed file will also be placed in a document record in Sugar and uploaded to the cloud drive with "- Completed" appended to the end of the filename. This way, both the unsigned and signed copies of the file are located in both Sugar and the integrated drive (e.g., OneDrive).
Note that you can only send a single document at a time when sending via the Documents subpanel or the Cloud Drive dashlet.
The third way to create an envelope is via the DocuSign dashlet on a specific module's detail view. When in the context of a detail view (i.e., not when on a Home dashboard), the dashlet has a Plus icon in the top right.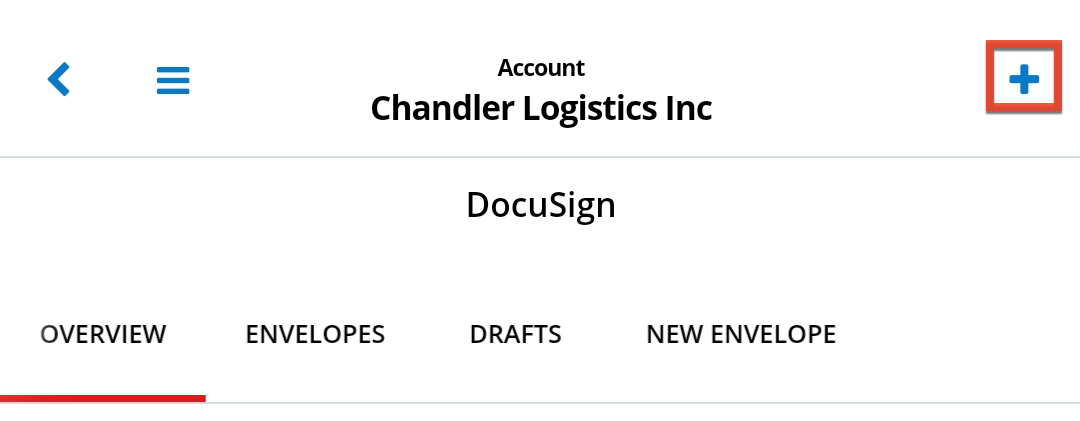
Tap this icon to open the New Envelope view. Note that the icon is not visible if you do not have DocuSign configured in your user profile.
From here, use the magnifying glass icon to select one or more documents to add to the envelope. You can remove a selected document by swiping from right to left and tapping "Exclude" to remove it from the envelope. Then, if recipient selection has been enabled by an admin, use the paper airplane icon to select recipients and proceed to DocuSign. Otherwise, tapping this icon will navigate you immediately to DocuSign, where you can also select recipients. If you wish to restart and select different documents, tap "Clear" to remove the chosen documents. You can also tap "Cancel" to stop the envelope creation process.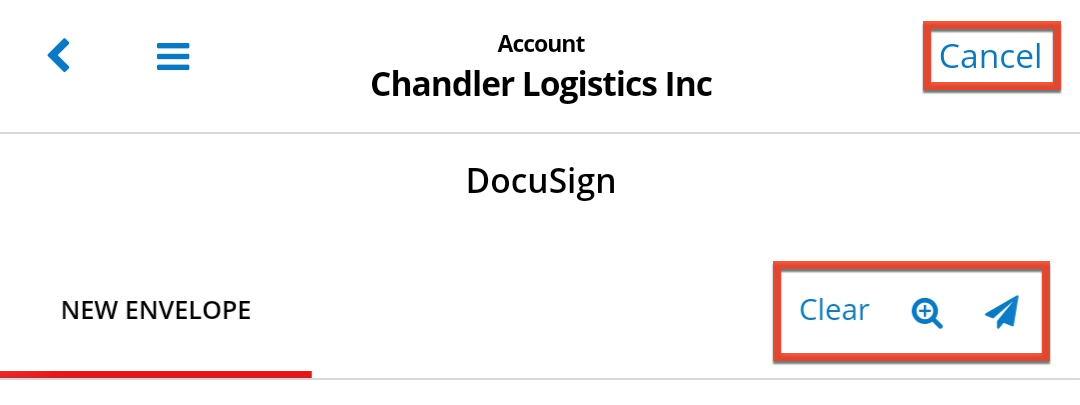
You will be taken directly to the DocuSign app after adding documents to the envelope and selecting recipients, if applicable. If you do not have the app, you will be taken to the DocuSign website instead. See the DocuSign page in the Administration Guide for details on the admin setting to enable or disable recipient selection in Sugar.
Complete the document preparation and sending process within DocuSign before returning to the SugarCRM mobile app to check on the envelope status of ongoing DocuSign envelopes.
Selecting Recipients
If recipient selection has been enabled in your Sugar instance by an admin and you are creating an envelope from the context of a target Sugar record, you can select related records (e.g., contacts) as recipients for the envelope. After creating an envelope and selecting the document(s) to include in the envelope, the "Select signer recipient" screen opens. It contains a multi-selection list of the target record and its related accounts and contacts so you can select all parties that should sign or view the document.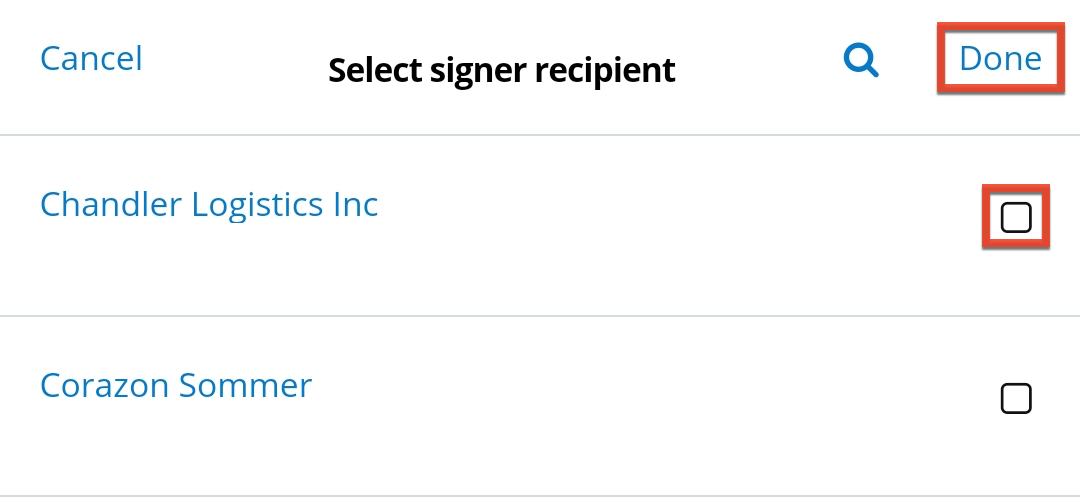
Note that you do not have to select a recipient from Sugar. You can proceed without selecting any and choose the recipients within DocuSign instead. Tap "Done" in the top right corner once you have completed your selections. Doing so will open the DocuSign app if you have it, or the DocuSign website if you do not.
Complete the document preparation and sending process within DocuSign before returning to the SugarCRM mobile app to check on the envelope status of ongoing DocuSign envelopes.
Viewing Envelope Status
Use the DocuSign dashlet to easily monitor the state of in-progress and completed envelopes. The dashlet has several views that include a chart showing the state of all envelopes to which you have access, a list of envelopes that you can filter by status or by a custom filter, and a list of draft envelopes. If the dashlet is placed on a Home dashboard, it will show all of your envelopes across all records. If placed on a detail view dashboard (e.g., in the Accounts module), it will only show envelopes for that specific record. Review the status of envelopes or tap them to see more details and understand where the document is in the process.
Downloading Completed Documents
In the DocuSign dashlet, you can use the "Fetch completed document" action on a DocuSign envelope record to create a document record related to the target (e.g., the account from which you created the envelope). The signed file will be attached to this document, which can then be found in the Documents subpanel of the target record. Now, you can download the file attachment from the document record for viewing or saving to your device.
DocuSign Dashlet
The DocuSign dashlet allows you to create an envelope, including selecting recipients if this has been enabled by an admin, view the status of the envelope, and download completed documents. It includes several views split into tabs:
- Overview: View a chart showing the status (e.g., created, sent) of all envelopes to which you have access. You can tap a chart segment to open the Envelopes tab filtered down to the envelopes with your selected status, or you can press and hold a segment to view its count and percentage.
- Envelopes: View a list of envelopes, which you can filter by status or by a custom filter. For example, you can filter the list to only show envelopes in a specific status. Swipe from right to left on an envelope to access the Download action. Only the user that created the envelope may download it from the dashlet, but other users with appropriate role access can download it from the DocuSign Envelopes module directly.
- Drafts: View a list of all draft envelopes (i.e., those that have not yet been sent). In the Drafts tab, swipe from right to left to open the Actions menu and tap the Open Draft option to open the draft within DocuSign. Note that only users with DocuSign configured in their profile can see the Drafts tab.
- New Envelope: Start creating a new envelope. This tab and the Plus icon in the top right corner are only displayed if you are viewing the dashlet within a record's detail view dashboard. It is not possible to create a new envelope outside the context of a specific target record (e.g., account). Note that only users with DocuSign configured in their profile can see the New Envelope tab.
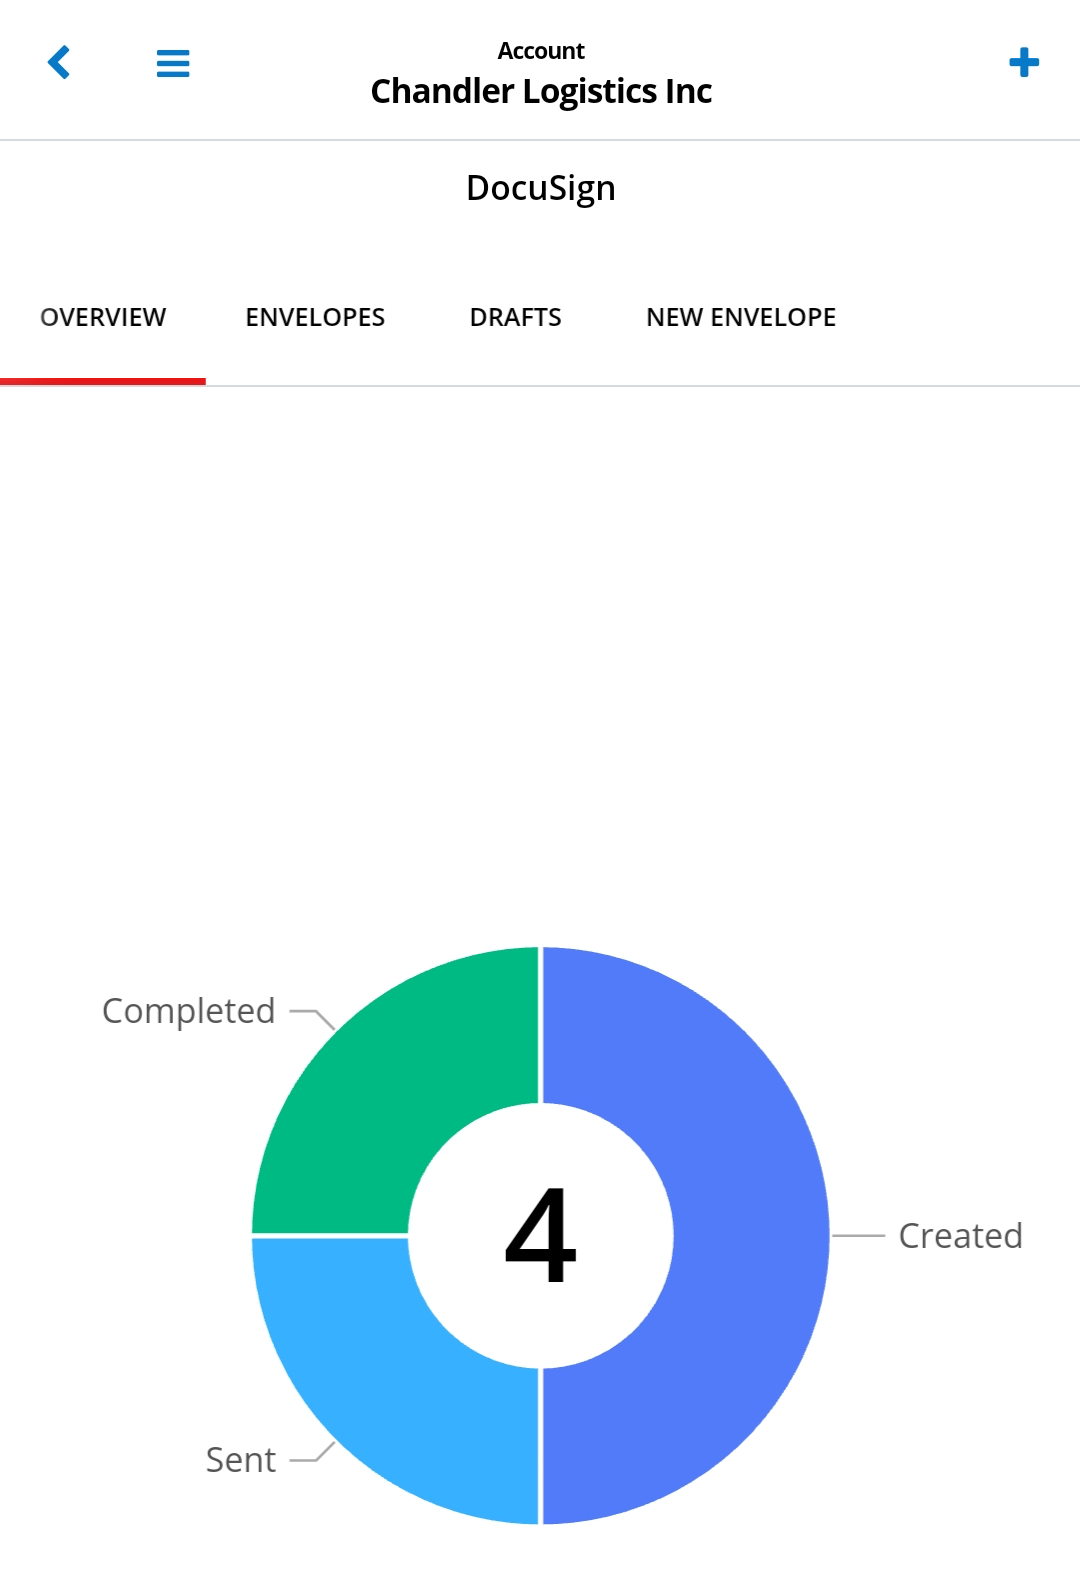
The DocuSign dashlet can be placed on a Home dashboard or a record's detail view dashboard. If the dashlet is placed on a Home dashboard, it will show all envelopes across all records. If placed on a detail view dashboard (e.g., in the Accounts module), it will only show envelopes for that specific record.
DocuSign Envelopes
In the DocuSign dashlet or directly within the DocuSign Envelopes module, tap any envelope to open the DocuSign envelope record. This record includes details such as its status, parent (i.e., target) record, the date it was last audited against the DocuSign system, and the Sugar document containing the signed file, if all requested actions have been completed in DocuSign. There are several actions you can perform to resend, fetch, share, or delete an envelope. These actions are available in the three-dots menu at the top right of the envelope record's detail view.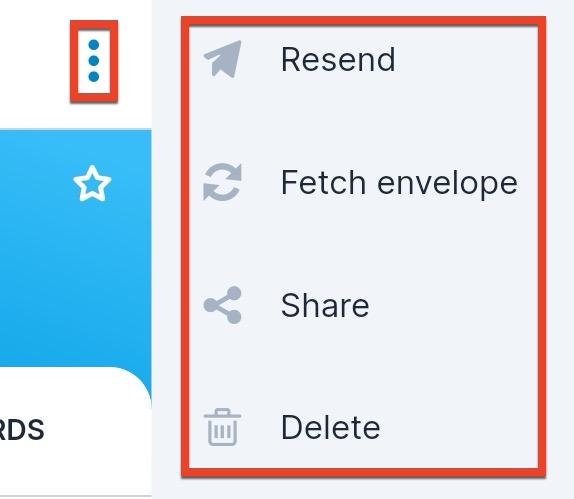
The following actions are available:
- Resend: Immediately resend the envelope to the recipients, which includes sending them an email. This action is only available for envelopes with a status of "Sent".
- Fetch envelope: Fetch the updated envelope from DocuSign. If there have been changes on the DocuSign side that are not yet represented in Sugar, this will pull the latest data from DocuSign, update the "Last audit" field timestamp, and add an entry to the comment log with the status of the envelope. This action is only available for envelopes that have not been completed.
- Fetch completed document: For completed envelopes only, download the signed document and automatically relate it to the target record (e.g., the account from which you created the envelope). A document record will be created with the signed file attached, and you can find it in the Documents subpanel of the target record. The file and document will have " - Completed" appended to the end of the name so you can identify it as the signed document.
- Share: Share this DocuSign envelope record via another mobile app (e.g., email).
- Delete: Delete this DocuSign envelope record. Note that this only deletes the record within Sugar; it does not have any impact on the envelope or signing process taking place in DocuSign. You must delete the process in DocuSign as well to fully end the envelope-sending process.
Note that if you do not have DocuSign configured in your user profile, you will not be able to resend, fetch an envelope, or fetch a completed document.
Working With Smart Guides
If you have access to and use Sugar Automate in Sugar versions 13.0 and higher, you can work with smart guides via the mobile app to advance a record through a pre-configured set of steps. You can see all guides for a given record and start new ones on the Smart Guides tab when viewing the record. Alternatively, you can also use the Smart Guides and Smart Guide Stages module list views to access all of the guides and stages that are available to you.
When you view a smart guide by tapping it in the Smart Guides tab, it opens the guide in a full view that shows one stage at a time, where you can swipe the stage name header, swipe the bar across the bottom or tap the arrows to switch between the different stages. By default, it opens to the earliest stage that is not yet complete. In the top right corner, use the three-dots menu to perform actions on the smart guide; you can edit, copy, share, merge with a document template, cancel, or delete the guide, or add a stage to it. Swipe down on the screen to refresh the guide.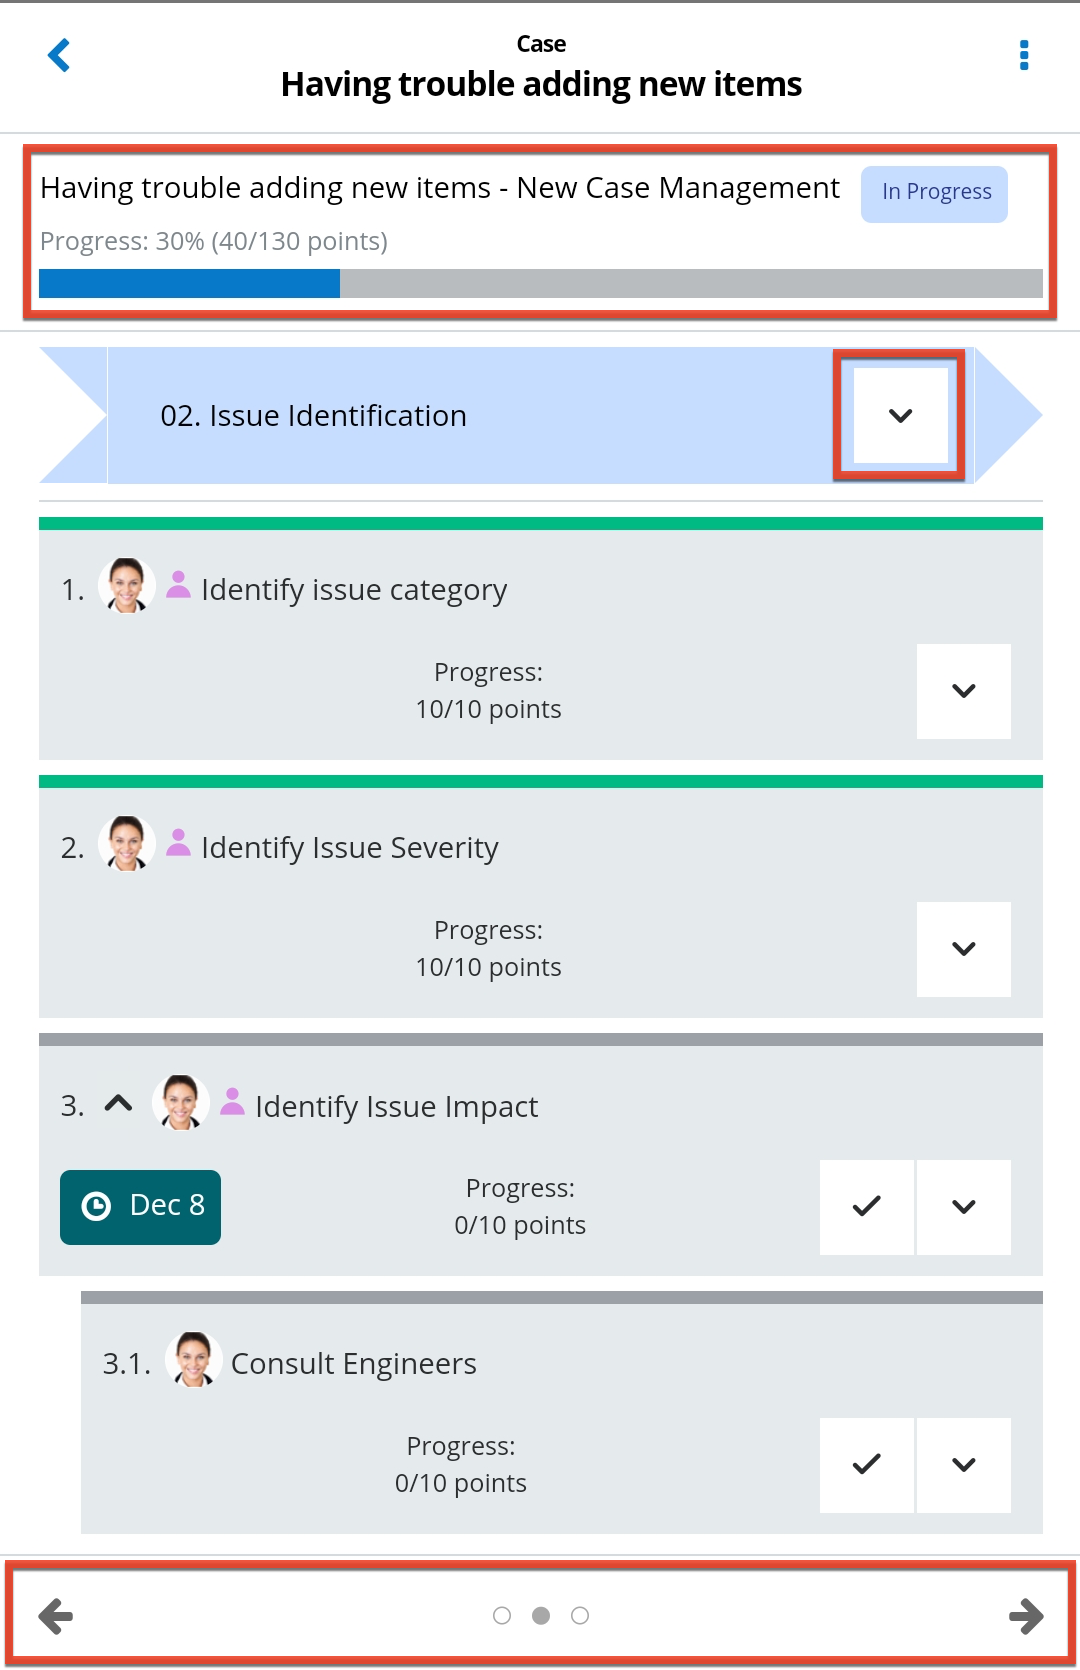
At the top of the screen, the smart guide's status and progress bar are displayed. Below that, the current stage's name is shown in a color-coded bar according to the state of the stage. Use the down-arrow menu to perform actions within the stage, including editing or deleting the stage and adding or linking activities to it. Note that deleting a stage also deletes all the activity records (i.e., tasks, meetings, and calls) within it.
Below the title of the stage, all the activities in the stage are displayed with an icon indicating the activity type (e.g., call, internal task) next to the name. The status of each activity is represented by the color of the bar across the top of it. For example, in-progress activities have a blue bar. If an activity has a due date, it is displayed in a color-coded badge in the bottom-left corner. If an activity can be completed immediately, a checkmark button is displayed, which can be tapped to mark the activity as done. If an activity cannot be completed until a previous activity is done, it is considered blocked and will display a blocked icon next to the name; the checkmark button will not be available until the dependency is fulfilled. In addition, note that if the activity has sub-activities, which are displayed slightly indented below it, completing the parent will also complete all children.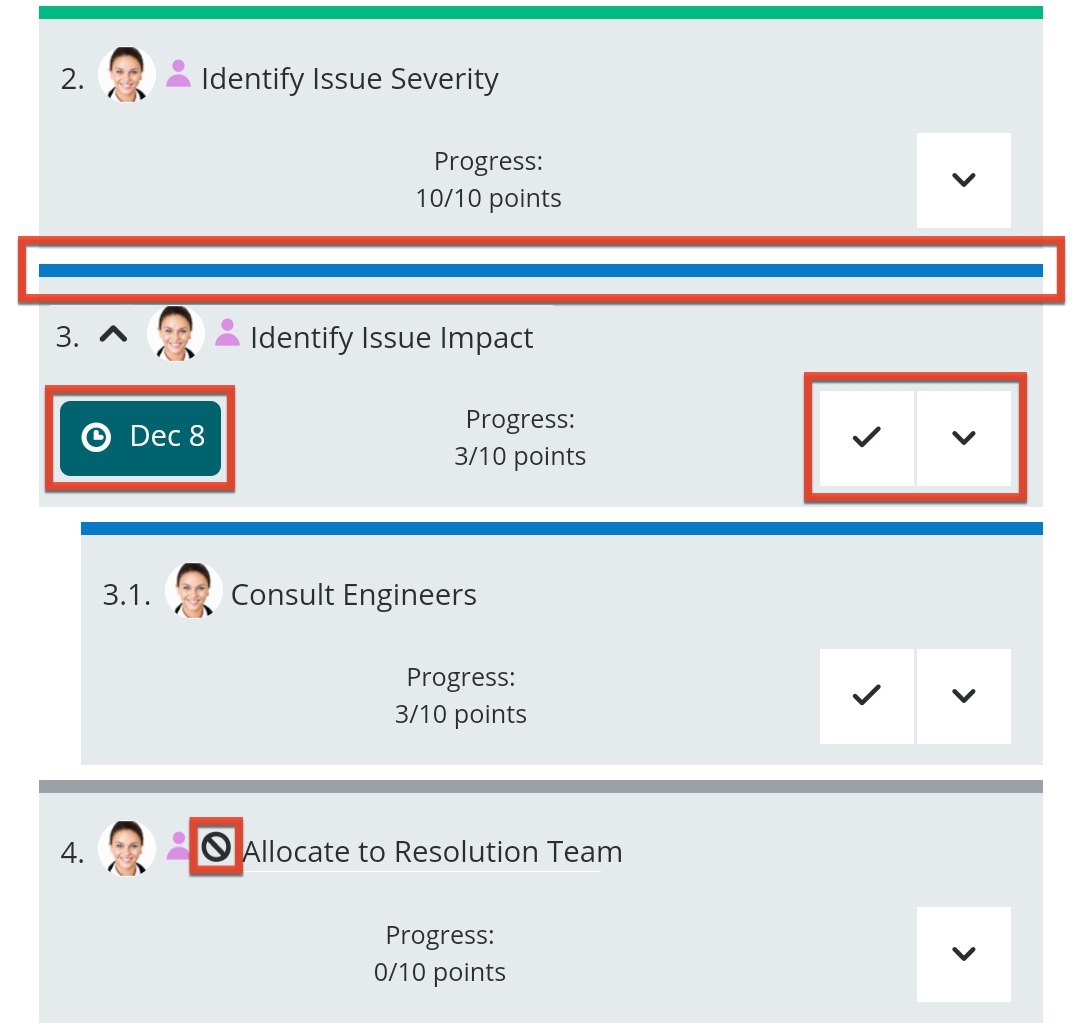
On any activity, tap the down-arrow button to start, edit, delete, copy the activity, assign it to yourself, or mark it as Not Applicable. Note that deleting an activity from a smart guide also deletes its activity record (i.e., task, meeting, or call) in Sugar. From this menu, you can also add a sub-activity (i.e., a child task, meeting, or call) to the parent. If an admin has configured an activity to have a related Sugar action (e.g., create a new case) or an external link to a web page, its button is displayed next to the other buttons on the activity.
Aside from a record's detail view, you can also interact with smart guides and the records associated with them in a few other places. Firstly, you can find all smart guides and smart guide stages to which you have access in their respective modules. Secondly, there are several Smart Guides list view filters available on the Calls, Meetings, and Tasks modules. See the Sugar Automate page in the Application Guide for details on these filters.
Note that if you wish to copy a stage as a starting point for creating a new stage, this can only be done from the Smart Guide Stages module, using the Copy option in the detail view three-dots menu.
Favoriting Records
Users have the option to designate favorite records so that they can be located in lists of records using the My Favorites filter as well as having their updates appear in the main menu's activity stream. For more information about favorites, refer to the User Interface documentation.
When viewing a record's detail view, you can tap the star icon on the top right. A solid white star indicates it is a favorite. Tap the star again toggle the favorites designation off. 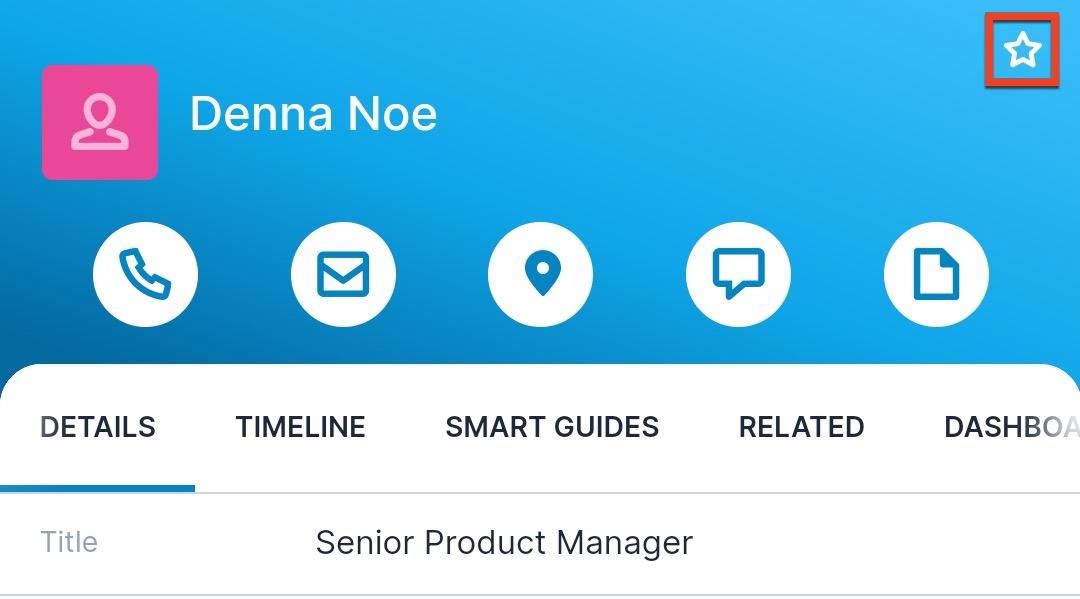
From a list of records such as Global Search, list view, dashlets, or lists of related records, you can select the "Favorite" and "Unfavorite" actions from the row's Actions menu as described in the Accessing Actions Menus From Lists section above.
Calling Records
If a record has a populated phone number field, you can tap the Call icon in the Actions menu in detail view. Please note that the Call icon will be grayed out if the record's phone number field is not populated. Additionally, you can tap the phone number itself on the Details tab. Your device's phone application will appear where you can make the call.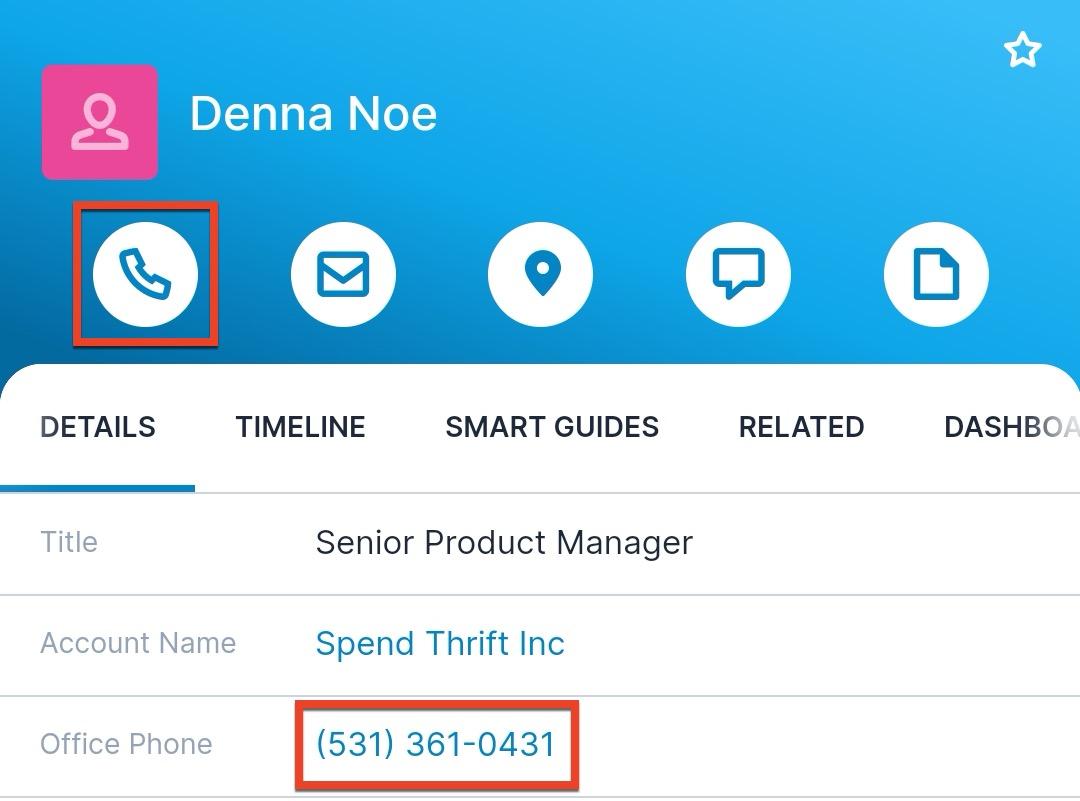
From a list of records such as Global Search, list view, dashlets, or lists of related records, you can select the "Call" action from the row's Actions menu as described in the Accessing Actions Menus From Lists section above.
After you complete the call and return to the SugarCRM mobile app, you will be asked if you want to log the call. If you do, the newly created call will automatically be related to the record from which the call originated. An exception to this is calling a contact that has a related account; in this case, the account will be populated in the Related To field instead. However, you can change the value of the field before saving if you prefer to relate it to something else, such as the relevant opportunity.
Note: If the phone number field and Call action do not appear for a module, check with your Sugar administrator. For more information on editing mobile layouts, please refer to the Studio documentation.
Caller ID
If you have enabled the SugarCRM mobile app for caller ID on your device, you will be informed when an incoming call matches a contact or lead record in your Sugar database. The incoming call displays the name of the matching record to ensure that you do not miss an important business call that could otherwise be taken for spam. Phone numbers in any field of type "Phone" will be matched against, including custom fields, and most common phone number formats are accepted as long as a country code is included. If a phone number does not have a country code, the app will attempt to identify the country code using the following approach:
- If the contact or lead has a country written in one of Sugar's supported languages populated in an address field, the app will add that country's code to the beginning of the phone number. Address fields are searched in the following order: Primary Address, Alternate Address, then any other address field that includes a country.
- Otherwise, if the app cannot find a country on the record itself, it will use the country where the device is currently located to identify the country code to add to the phone number.
The above approach may still not succeed in all scenarios, especially if a country requires an additional region code to be included in conjunction with the country code. This technique also relies on the country taken from the record being spelled in a standard way so that it can be matched to a country code. Lastly, it is possible that the record or device's country is not the country where the record's phone number is from, meaning that a match will not be possible. Therefore, for the best results, storing phone numbers in Sugar in their full international format will give the best results when using caller ID.
If a phone number matches more than one record, only one name will be displayed. Note that if a phone number matches a contact in your device's address book, the SugarCRM caller ID will not be displayed.
On Android devices, the matching record name is displayed in a pop-up that can be dragged around the screen or closed using the 'x' button in the top right corner: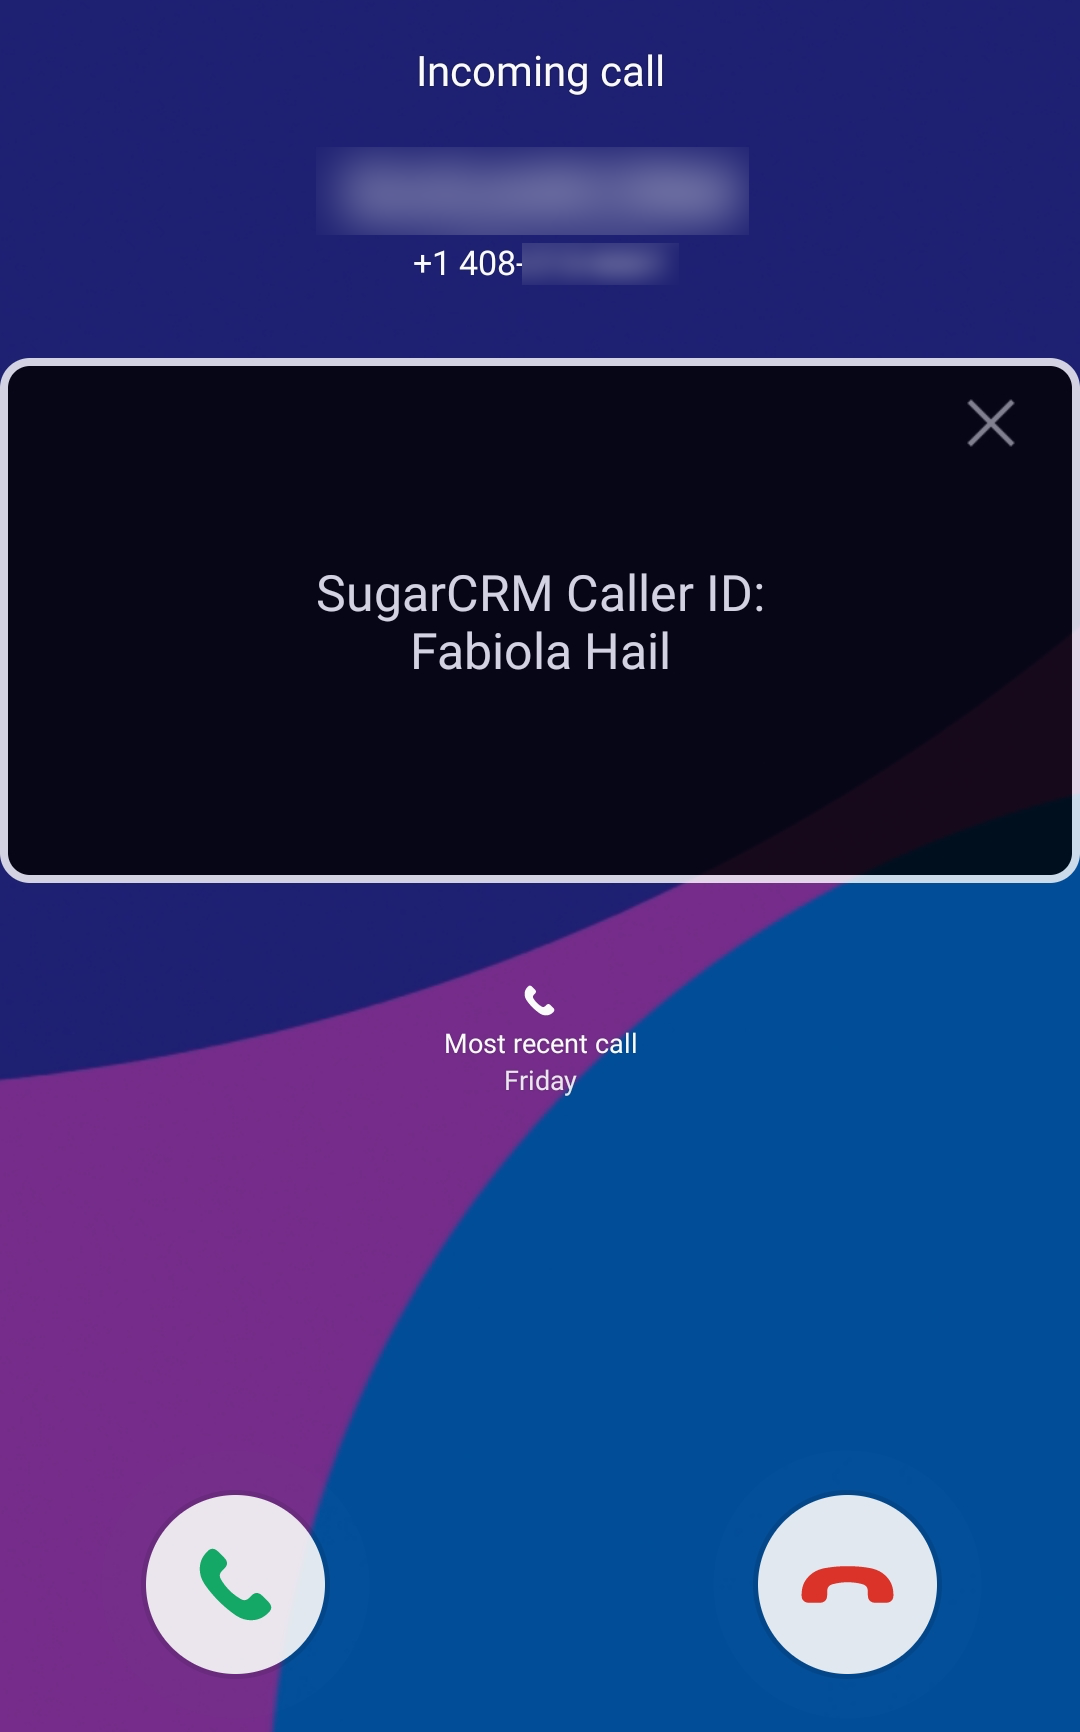
On iOS devices, the matching record name is displayed below the calling number. It is also available in the call history after the call has taken place.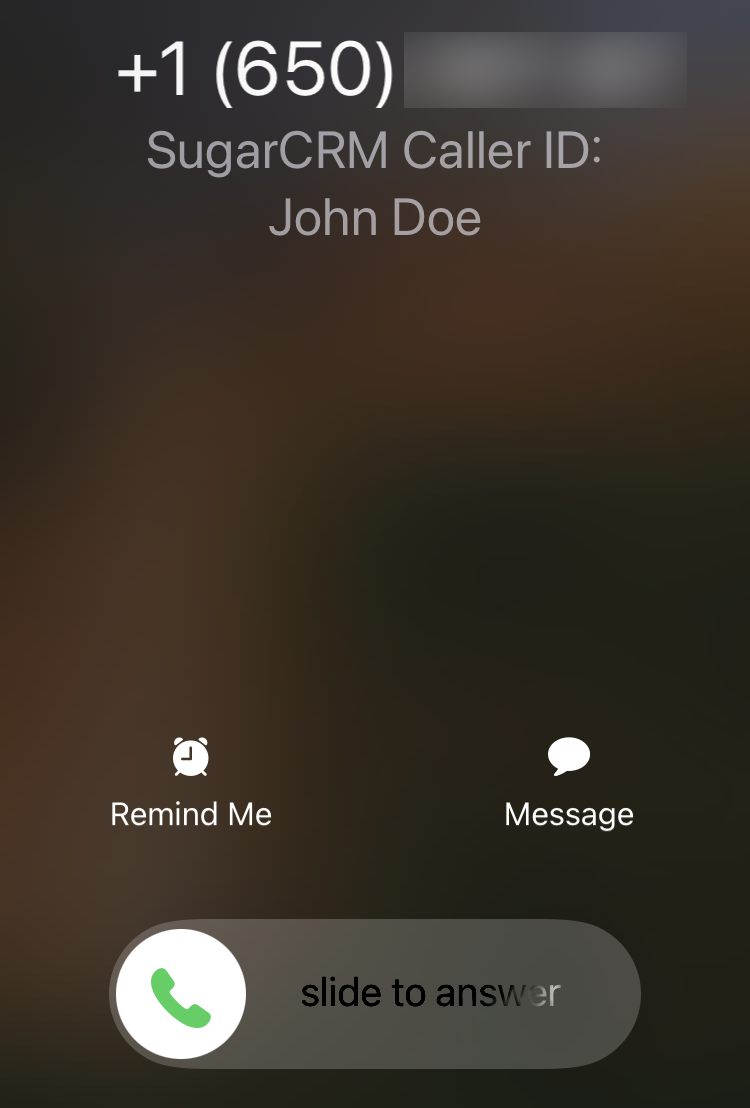
As new contacts and leads are added to your Sugar instance or existing ones are updated, be sure to return to the Caller ID Settings screen to resync your device if you wish for those records to be identified as a match by the caller ID feature. Note that only the 10,000 most recently modified contacts and the 10,000 most recently modified leads are stored in your device when you perform the sync.
Text Messaging Records
If a record has a populated phone number field, you can tap the SMS option in the record's Actions menu to compose a text message to the phone number. When viewing a record's detail view, you can tap the SMS icon in the Actions menu. Please note that the SMS icon will be grayed out if the record's phone number field is not populated. Additionally, you can tap the phone number on the Details tab. Your device's messaging application will appear where you can complete and send the text.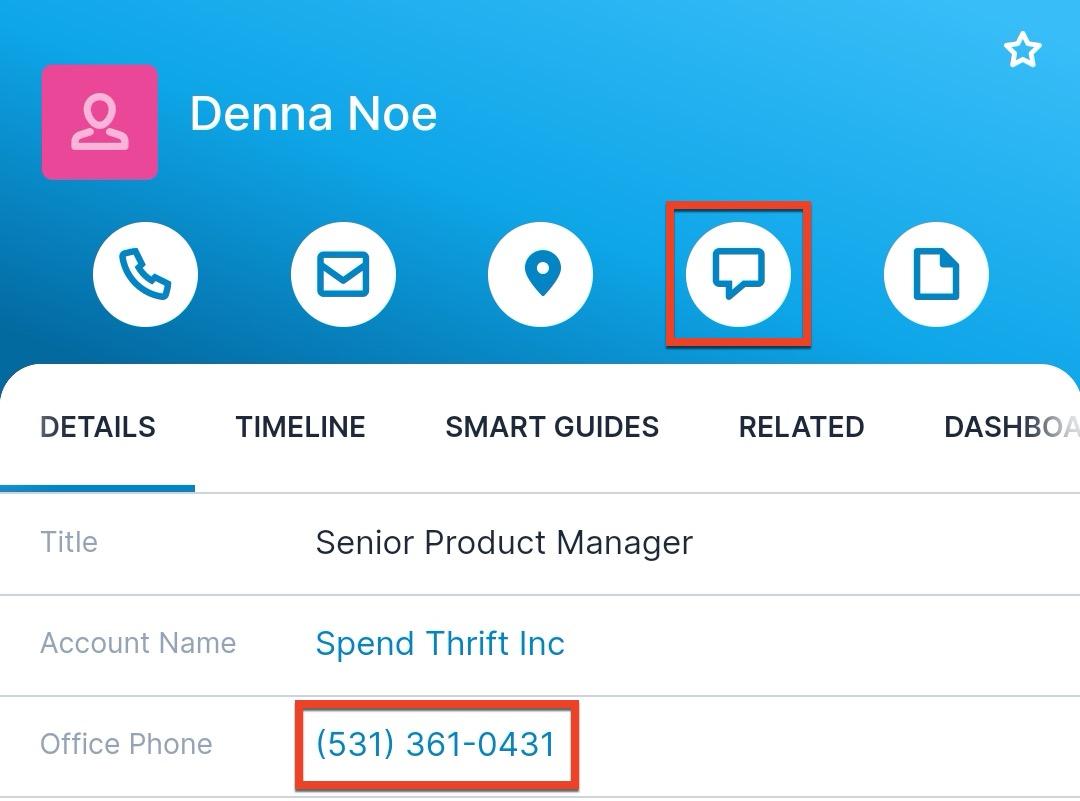
From a list of records such as Global Search, list view, dashlets, or lists of related records, you can select the "SMS" action from the row's Actions menu as described in the Accessing Actions Menus From Lists section above.
Note: If the phone number field and SMS action do not appear for a module, check with your Sugar administrator. For more information on editing mobile layouts, please refer to the Studio documentation.
Emailing Records
There are a few possible ways to start writing an email in the SugarCRM mobile app:
- From Global Search or the Emails module, tap the three-dots menu in the top right corner and select "Compose Email".
- On the detail view of a record with an email address, tap the Email icon in the Record Actions section.
- Tap an email address field directly on the Details tab of any detail view.
- On a list of records with email addresses (e.g., in list view, Global Search, dashlets, or subpanels), swipe to the left to reveal the Actions menu and choose the Email option.
- From list view for a module with an email address, select several records and use the Mass Actions menu to compose an email to all of the selected recipients.
- If your admin has configured an Action Button that allows you to compose an email on a record's detail view, tap that button.
If you have your preferred email client set to "Sugar Email Client" in your user profile in the desktop application, the mobile app will always open the Compose Email screen when you use one of the methods above. If you have the setting set to "External Email Client", the mobile app will open the default email app on your device instead.
If you wish to reply to or forward an existing email, you can do so using the Record Actions section of an email record's detail view: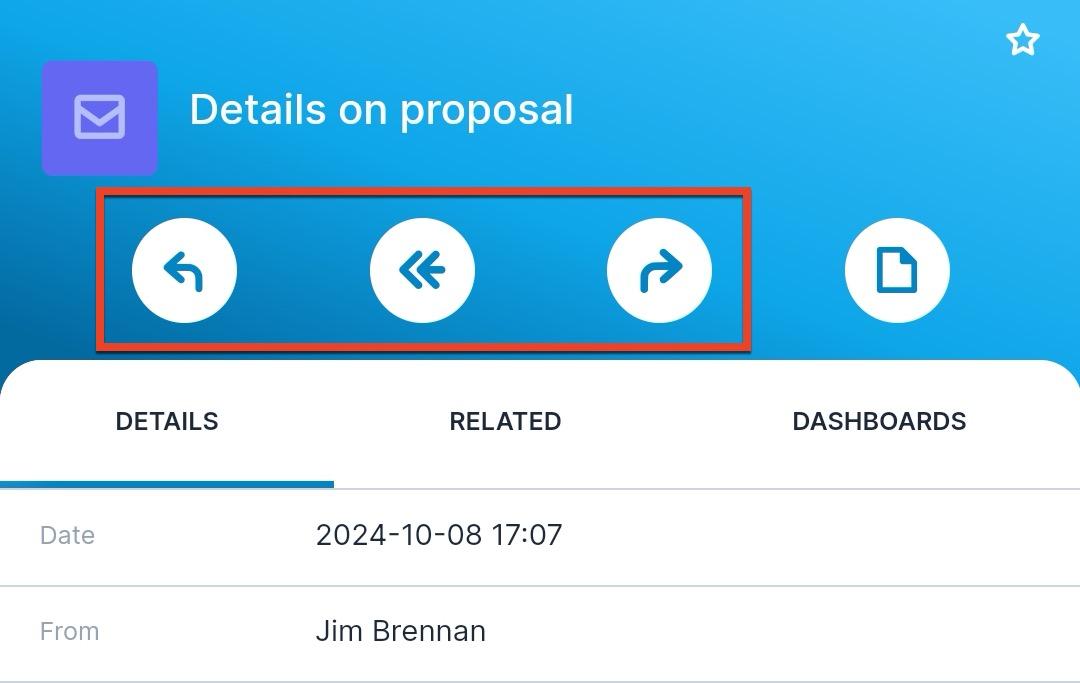
When you start writing an email using one of the above methods, the Compose Email screen will open with the recipient's email address and the specific record you are emailing, if any, populated in the Related To field on the email. If you are replying to or forwarding an email, the full email thread will be displayed in the email body when you tap to start editing it. See the Composing Emails section for details on working in this screen and how to draft and send emails in the mobile app.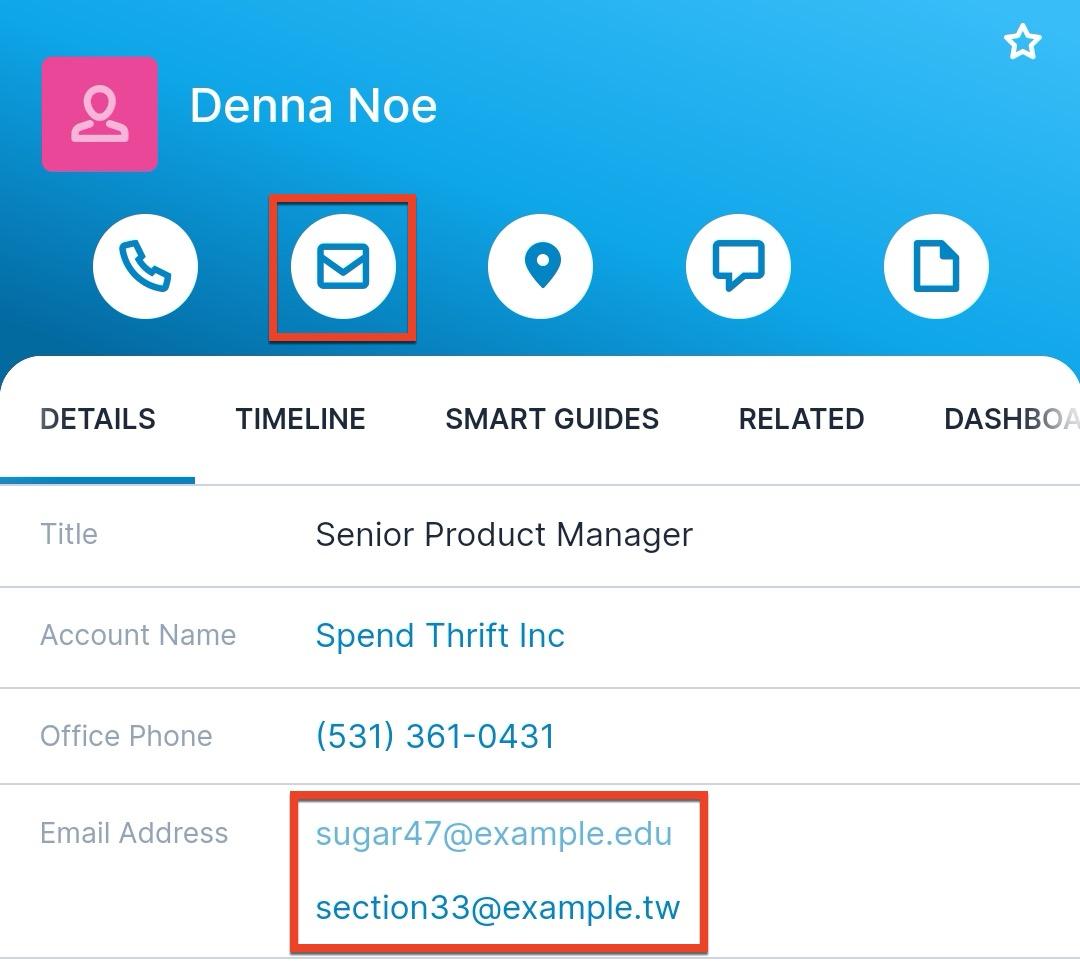
If the email field and Email action do not appear for a module, check with your Sugar administrator. For more information on editing mobile layouts, please refer to the Studio documentation.
Note: Email composing and sending is not available when your device is offline.
Mapping Records
Sugar records with an address can be mapped, allowing you to view them on a map and receive step-by-step directions to navigate to the address from your current location. You can also create routes between multiple records or from your current location to multiple records in a multi-stop trip. If you are using Sugar Maps, all of these actions are performed directly within the SugarCRM mobile app. If you are using an external mapping application, the SugarCRM mobile app opens that app instead. See the following sections to understand how to work with maps depending on which configuration you are using:
If you have access to Sugar Maps, you can choose which mapping option you wish to use (i.e., Sugar Maps or an external app) in the Settings menu. If your instance is not configured to use Sugar Maps, this setting will not be displayed and you will always use your default mapping application.
There are several places within the app from which you can map a record:
- From a list of records such as Global Search, list view, dashlets, or lists of related records, you can select the Map action from the row's Actions menu as described in the Accessing Actions Menus From Lists section.
- From a record's detail view, you can use the Map icon to map the record, as described in the Accessing Actions Menus From Detail View section.
- From list views, you can use multiple selection to select several records you wish to view on a map and choose the "Map", "Directions", or "Directions from current location" option in the Mass Actions Menu. Note that the "Map" action only supports multiple selection if you are using Sugar Maps and not an external app to display them.
- Fom the Maps subpanel, you can use the "Map" option via a record's Actions menu to view a nearby record on a map or the "Map", "Directions", or "Directions from current location" options in the Mass Actions Menu on multiple selection to work with many at once.
Note: If the address fields and Map action do not appear for a module, check with your Sugar administrator. For more information on editing mobile layouts, please refer to the Studio documentation.
Sugar Maps
If your instance has Sugar Maps and it is set as your preferred maps and navigation provider in the Settings menu, you can access its full suite of mapping capabilities within the mobile app, which includes the following:
- Navigating to a Record: Receive step-by-step directions from your current location to a given Sugar record
- Viewing Records on a Map: View one or more records on a map
- Finding Nearby Records: See other records within a specified radius of your current location, a record you are viewing, or a provided zip or postal code
- Routing Between Records: View directions from one record to another or between many records in a multi-stop trip
- Geocoding Records: Manually geocode records that have not yet been geocoded for use in Sugar Maps
Navigating to a Record
You can receive step-by-step directions from your current location to a Sugar record by using the Map action from the Record Actions menu on list view, subpanel, or detail view. When you tap the action, the map is displayed: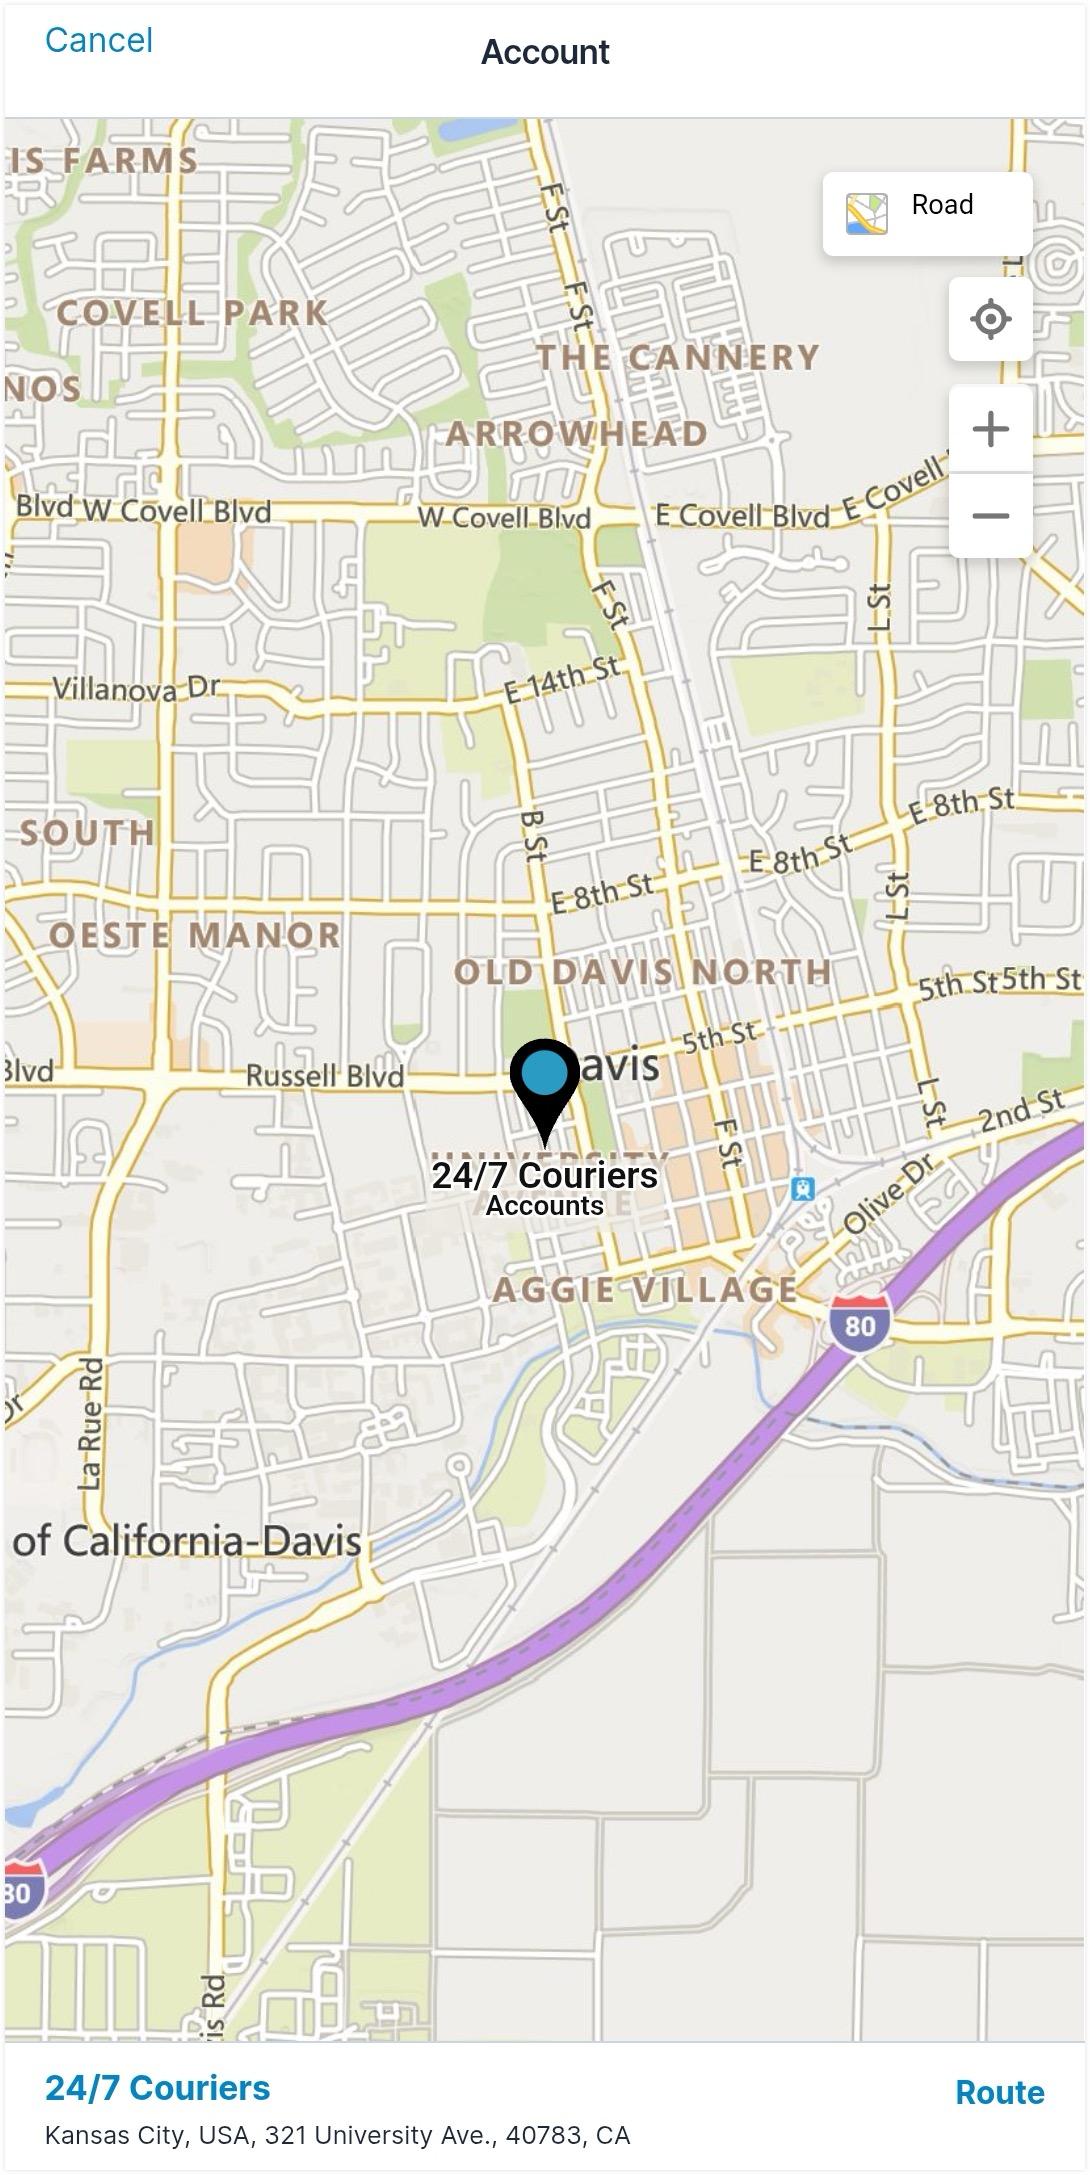
Use the buttons in the top right corner to explore the map by changing the type of map view, focusing the map on your own location, and zooming in and out. You can also drag the view around to explore further and use a pinching motion to zoom in and out. To return to the record's detail view, tap "Cancel" or the record's name at the bottom.
When you are ready to navigate to this record, tap "Route" in the bottom right corner. This opens a panel at the bottom with the step-by-step directions to navigate from your location to the record: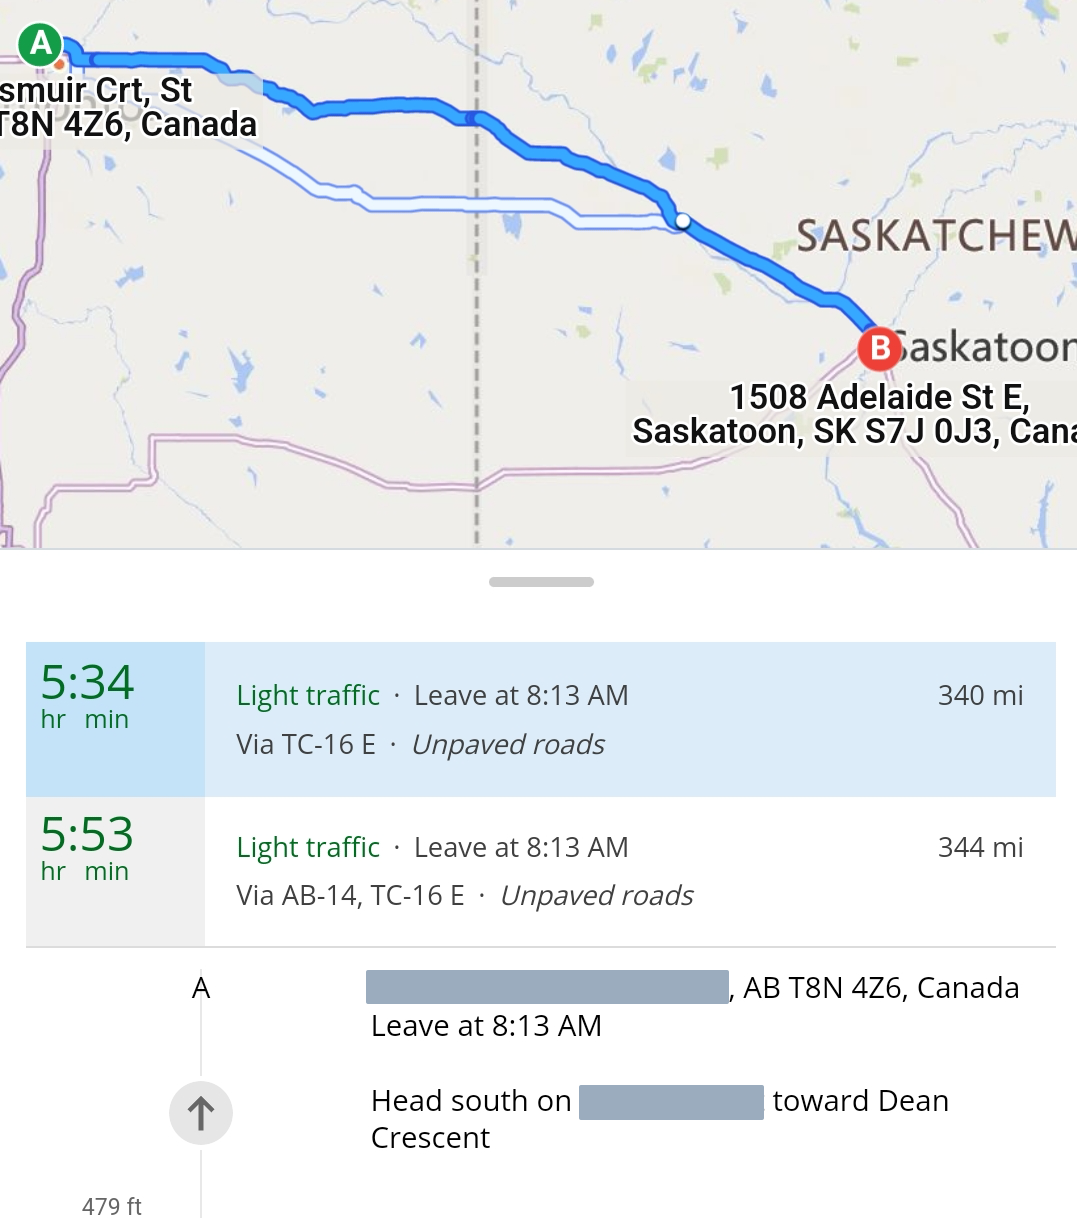
Another alternative to navigating to a specific record is to use the multiple selection options that also apply to single records as described in the Routing Between Records section.
Viewing Records on a Map
In addition to viewing a single record on a map using record actions as described above, you can also view multiple records on a map at the same time. To do this, open list view, a subpanel, or the Maps subpanel, and press and hold a record to initiate multiple selection and select all of the records you wish to view on a map together. Once you have chosen the records, use the Map action from the Mass Actions menu (i.e., three-dots menu) in the top right corner to load a map showing pins for each of the selected records. You can tap a record on the map to create a route from your current location to that individual record, but if you want to create a route between multiple records, you will need to initiate that using one of the other actions to route between records rather than starting with the Map action, which is only for viewing.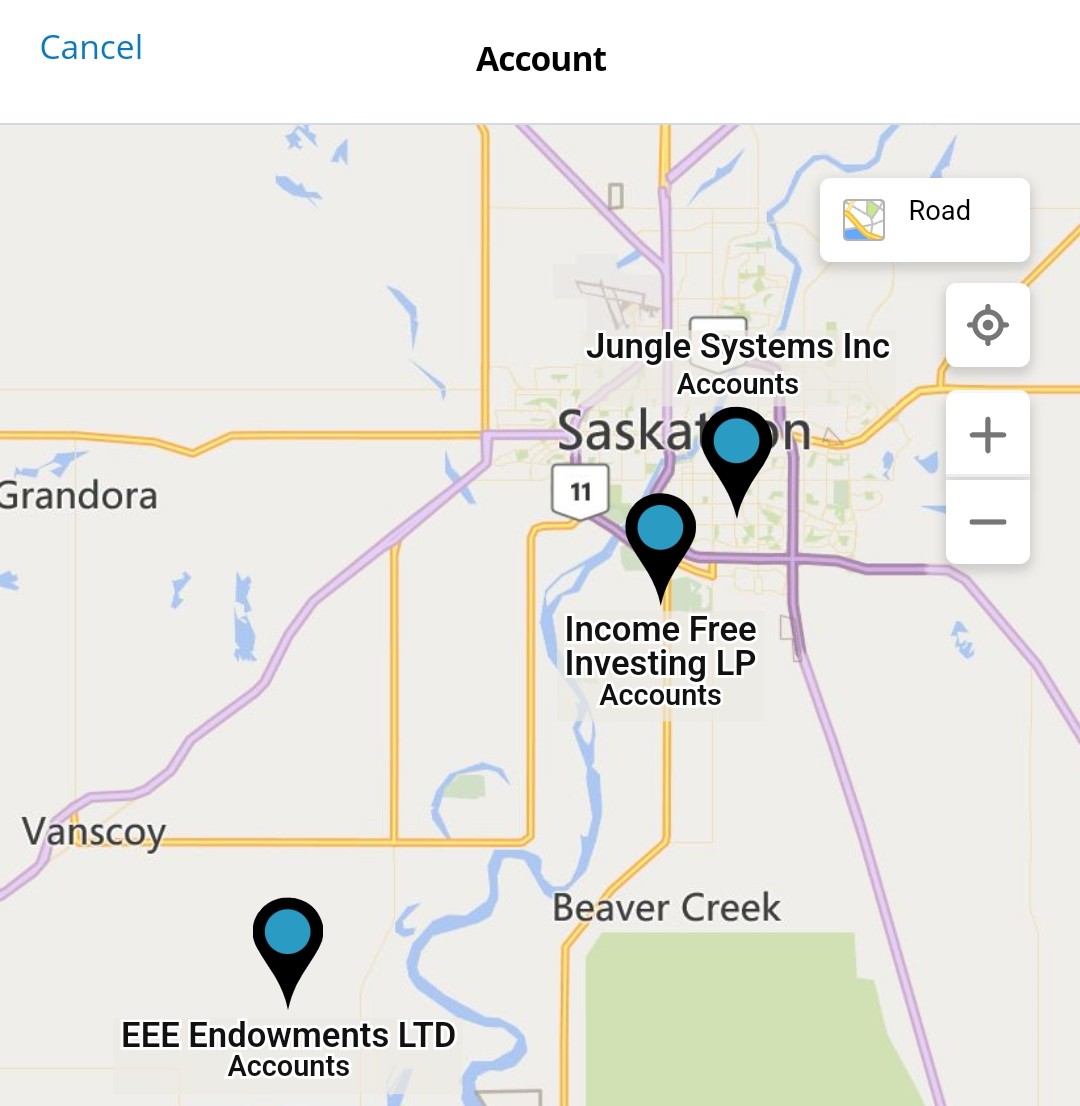
Finding Nearby Records
There are several different places in the application where you can find records near your current location, a record you are viewing, or a provided zip or postal code.
From a module's list view or a subpanel list view (i.e., via the Related tab), you can build a filter to find records within a radius from either a specific zip code or your device's current location. Add a filter criteria on the Distance field, which gives you two operators to choose from:
- In a Radius from Zip Code: Select this operator to provide a radius in miles or kilometers from a zip or postal code in a specific country. The filter will match records that are geocoded within the specified radius of the zip code.
- Nearby: Select this operator to provide a radius in miles or kilometers from your current location. The filter will match records that are geocoded within the specified radius of your mobile device's current GPS location.
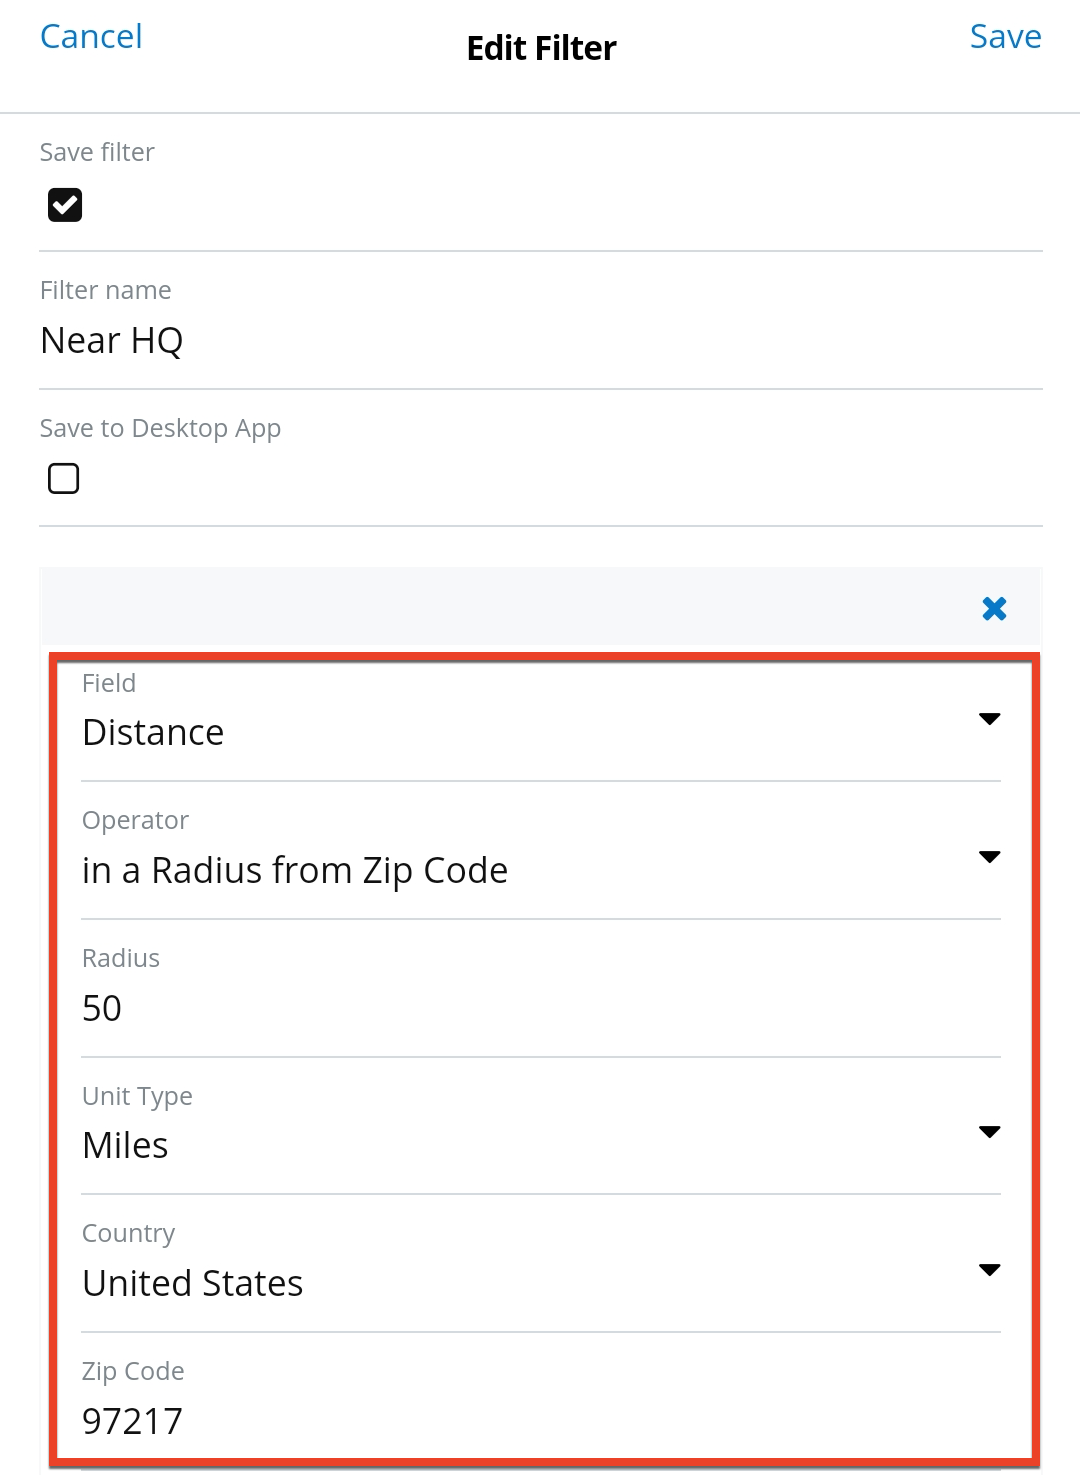
You can apply more filter criteria and use list sorting as normal to further refine the list of results.
Alternatively, from the Maps subpanel, you can create a filter to find records within a radius of the current record you are viewing. Open the Maps subpanel to view the list of nearby records and build a filter to define the subset of records you wish to compare to and the radius to search.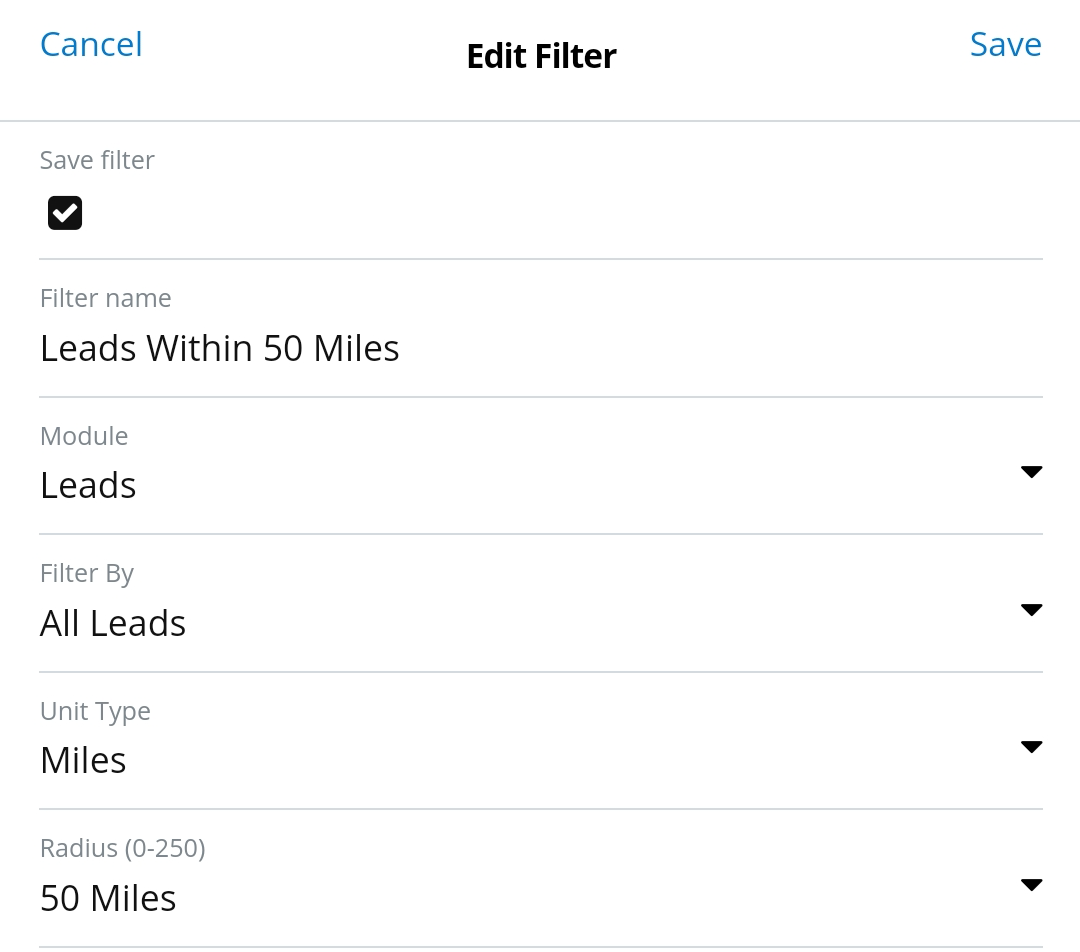
When the filter is applied, use the sort order field in the top right to sort by nearest or farthest first, and use the distance value displayed next to each record to see how far from the current record each result is.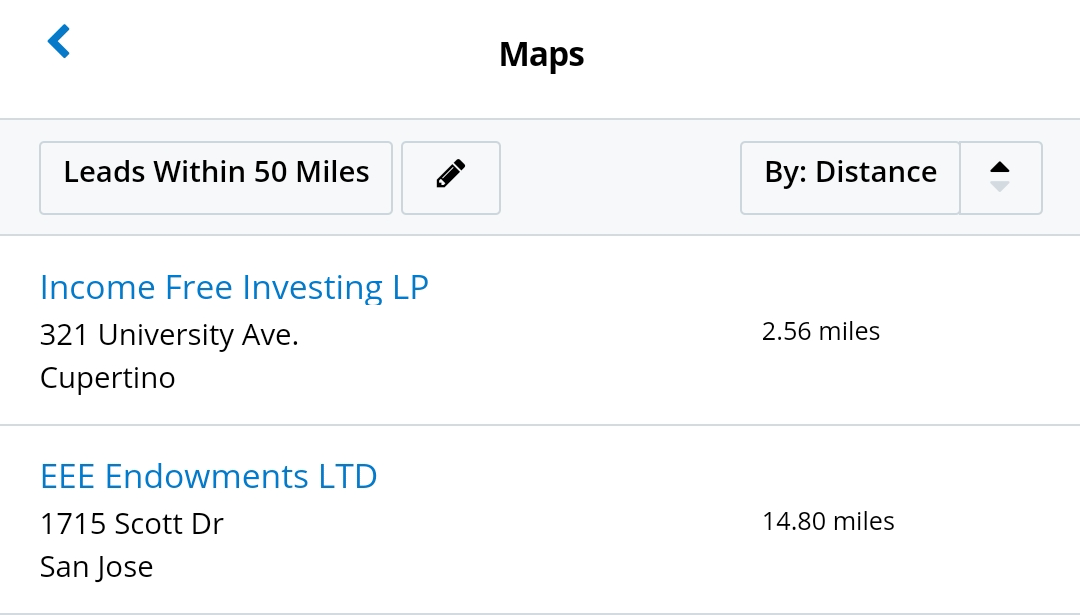
If you do not build your own filter, the default filter is set to a radius of 250 miles or kilometers from the target record, depending on the distance unit configured by the admin.
Once you have filtered the list as desired, use the options in the Actions menu to map, view directions, or create a route that includes one or more of the nearby records.
Routing Between Records
When viewing a list of records, you can select multiple records to create a route between them, which opens a map in Sugar Maps with directions that include all the selected records.
In any list view or subpanel, press and hold a record to initiate multiple selection and then choose all the records you wish to include in the route. Once you have chosen the records, use either the "Directions" or "Directions from current location" action from the Mass Actions menu (i.e., three-dots menu) in the top right corner to see the map and directions between the records on a route. Note that the records will be added to the route in the order you select them and that there is a maximum of eight selections; if you choose more than eight, the first eight will be used.
You can also route between nearby records in the Maps subpanel using the steps above to create a route between records near the target record or from your current location to the selected records. In addition, the Maps subpanel also includes a third option, "Directions from current record", that creates a route from the target record (i.e., the record whose Maps subpanel you are viewing) to the selected nearby records.
The table below describes the options available to create a route and where each action can be taken.
| Option | Action | List View | Record Subpanels | Maps Subpanel | Single Record |
| Directions | See directions between all selected records, starting with the first record you selected and ending with the last. | ✔ | ✔ | ✔ | |
| Directions from current location | See directions from your device's current location to the selected records, starting at your location and then proceeding to each record in the order you selected them. | ✔ | ✔ | ✔ | ✔ |
| Directions from current record | See directions from the target record (i.e., the record whose Maps subpanel you are viewing) to the selected nearby records, starting at the target and then proceeding to each record in the order you selected them. | ✔ | ✔ |
You can perform all of the above actions on multiple records at once, but only the second two on a single record, since they take another point into consideration (i.e., your current location or the current record's address).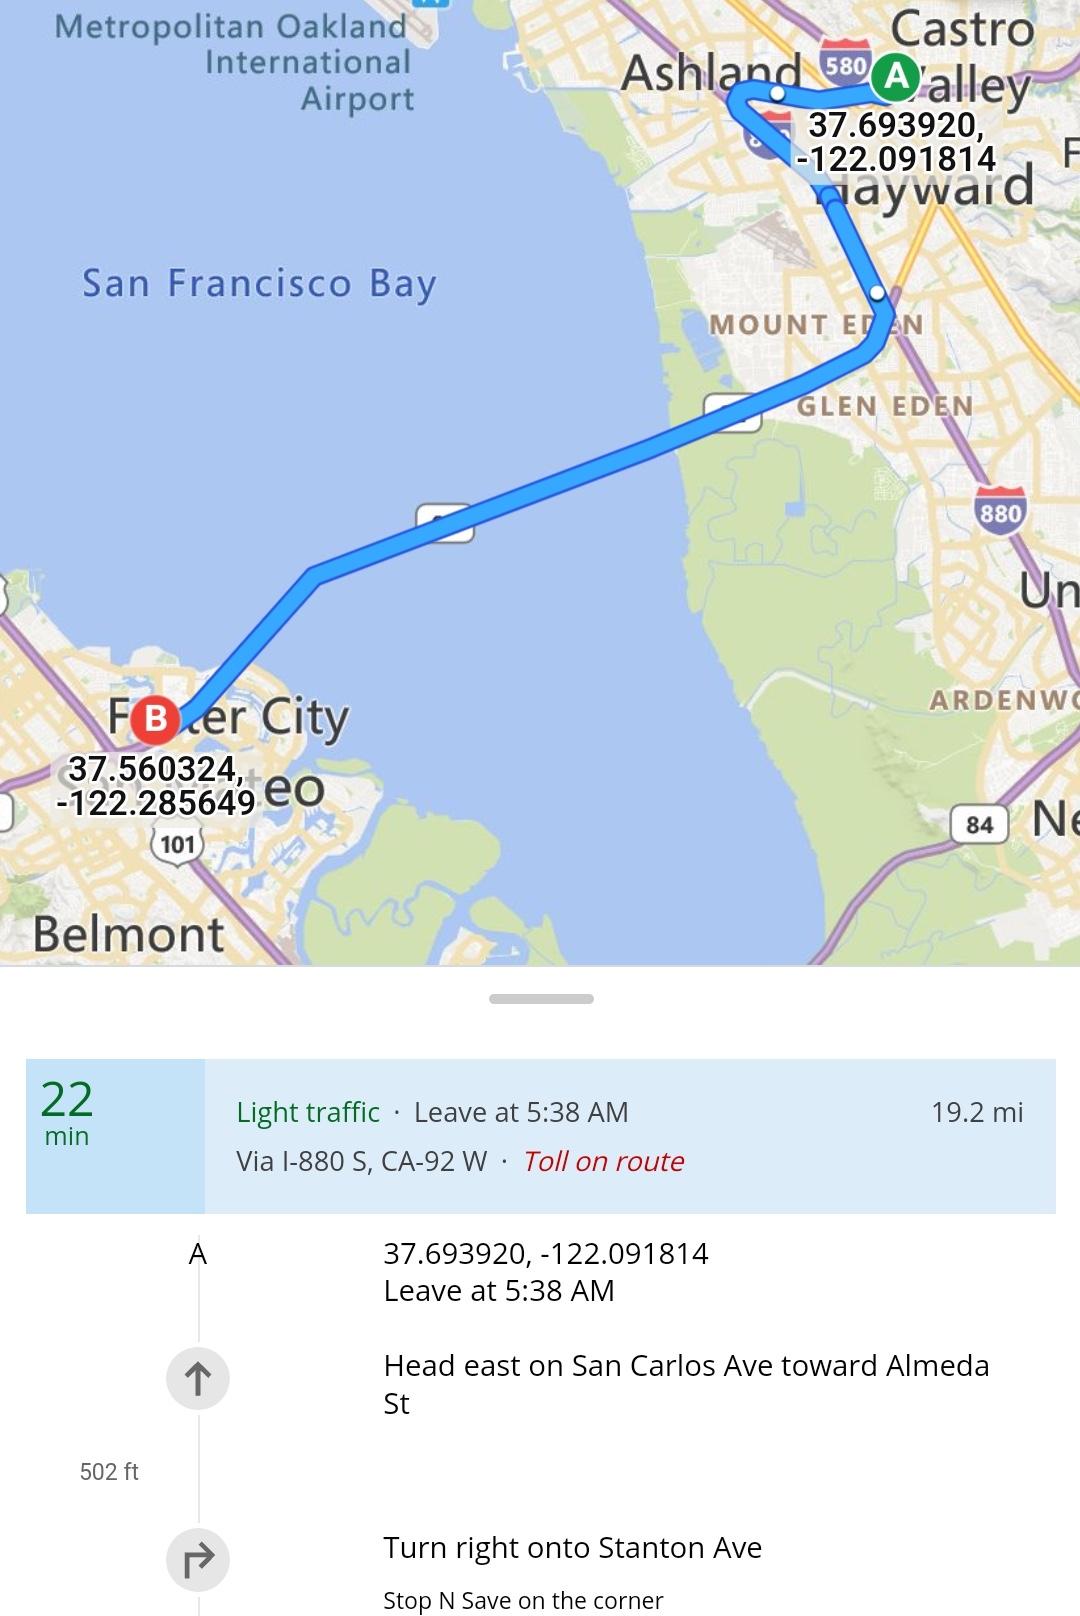
Geocoding Records
Records must be geocoded in order for Sugar Maps to know the coordinates of their physical location. This is done automatically by a scheduled job for most records, but there may be occasions where you need to manually geocode a record. To do so, select the Geocode option from the More Actions menu (i.e., three-dots menu) on detail view; you may also be prompted to geocode if you try to map a record that has not yet been geocoded. This opens a map with a search bar where you can type in an address to find the location of the record. Alternatively, you can simply tap a point on the map to choose that location. Tap "Save" in the top right corner to save the selected location as the geocoded pin for the record. After doing this, you can use Sugar Maps to map this record, but note that updating the geocoded pin does not change any address fields on the record. See the Sugar Maps documentation for more details on manually geocoding records.
External Mapping Applications
If your instance does not have Sugar Maps, performing any mapping action in the SugarCRM mobile app will always open your default external mapping application. Most of the actions described in the above sections also apply to external mapping applications.
Note: Only Sugar Maps and the following mapping applications support routes with multiple stops: Apple Maps, Google Maps, and Baidu Maps. In addition, only Sugar Maps can display multiple records on a map at once (i.e., not as a route) using the Map action.
If a record has a populated address field, you can tap the Map option in the record's Actions menu or the address itself in the Details tab. Please note that if your instance does not have Sugar Maps, the Map icon will be grayed out if the record's address field is not populated.
Both the Android and iOS apps can open addresses in Google Maps, Waze, Baidu Maps, or Amap. Additionally, the iOS app can also open addresses in Apple Maps. If your instance does not have Sugar Maps and you have more than one of these apps installed, you will be asked which application to use when you select "Map".
To return to the SugarCRM mobile app, simply exit the mapping app then tap the SugarCRM cube icon again.
Sharing Records
Links to records can be sent to other users in your organization using the Share option from a record's detail view. The link will be sent via email, text message, or other method depending on your device's sharing options. From the desired record's detail view, tap the vertical ellipsis icon on the top right then select "Share" from the More Actions menu. 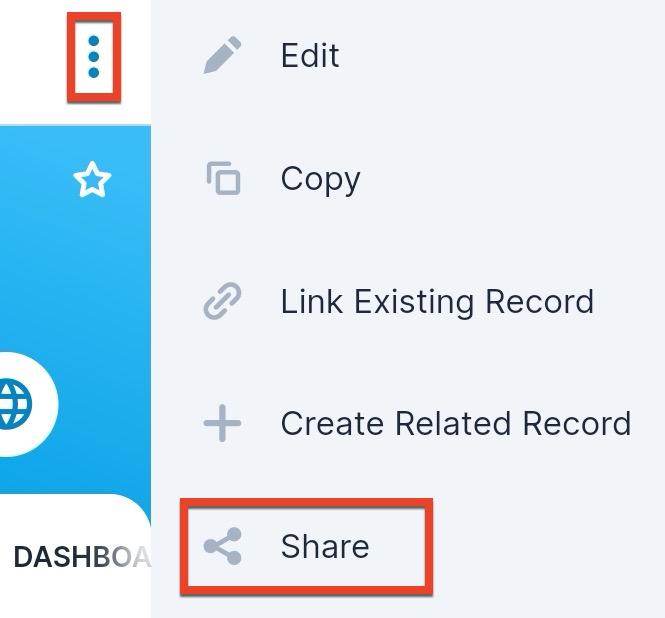
The recipient can simply click the link in the email, text, etc. to access the record in their Sugar account. If the recipient opens the link from their mobile device and they have the SugarCRM mobile app installed, they will have the option to view the record in the app. Please note that the user must log in to Sugar to access the record. Users will only be able to view the shared record as allowed by their team membership, user access type, and assigned roles. For more information on teams and roles, please refer to the Team Management and Role Management documentation.
Exporting Records
Using the Mass Actions menu in any list view, you can export records to a CSV file that can be opened in a spreadsheet application. Simply select several records and choose the Export CSV mass action from the three-dots menu in the top right corner: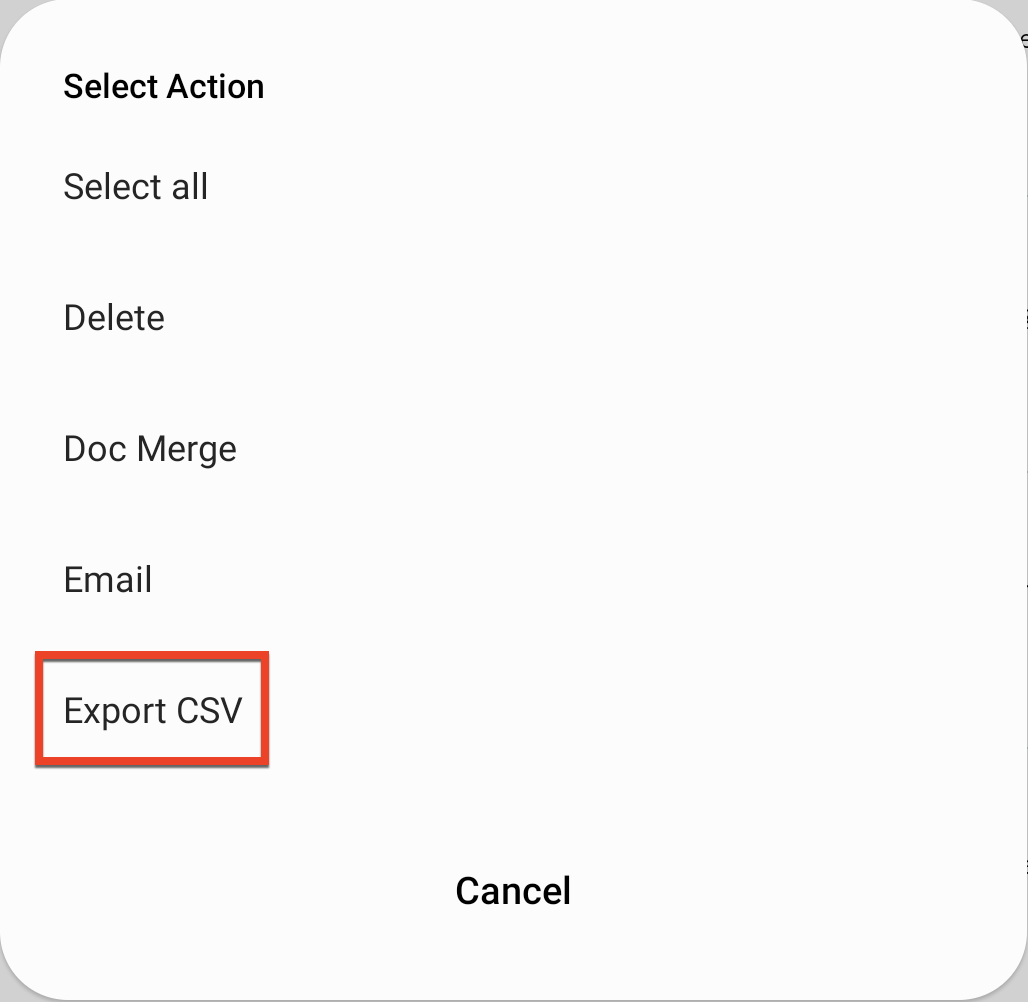
You can also use the Select All option in the menu to select all records in the result set, but note that there is a maximum of 1000. To export more than 1000 records, use filters to group the records into smaller batches for export.
The field values that will be exported for each record are those that are currently visible in the mobile app's list view. These fields are configurable and can be changed per module using List View Builder, which you can access via the gear icon in the top right corner.
For more details on exporting Sugar records to CSV files and how to work with these files, see the Export documentation in the Application Guide.
Uploading Record Files
Users can easily upload image or file attachments (e.g., .pdf, .doc, .csv, .xls, .xml, .jpg, .png, .txt, video, audio) to records that have a File-type field (e.g., Attachments), such as notes. Once a file is uploaded, other users can download or view the attachment via the mobile app and the desktop application. If the file is an image, you can choose to resize it before saving; select a smaller size to reduce the quality of the image if you want to also reduce the upload time. See the Editing Image Fields section for more details on image resizing.
Certain restrictions are applied to the upload of HEIC files:
- The resolution must not exceed 4,096 x 4,096 px.
- The file must have EXIF data present.
Note: If the Attachments field and File action do not appear for a module, check with your Sugar administrator. For more information on editing mobile layouts, please refer to the Studio documentation.
The following steps cover uploading two files to a note record as an example:
- Tap the verticle ellipsis Quick Create button at the top right of the Global Search page and select "Create Note".
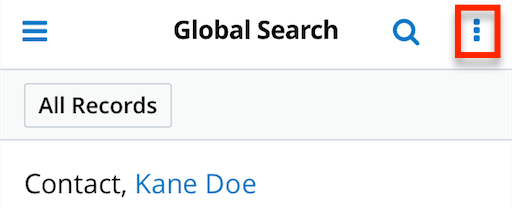
- Once the edit view opens, tap the Attach link under the Attachments field.
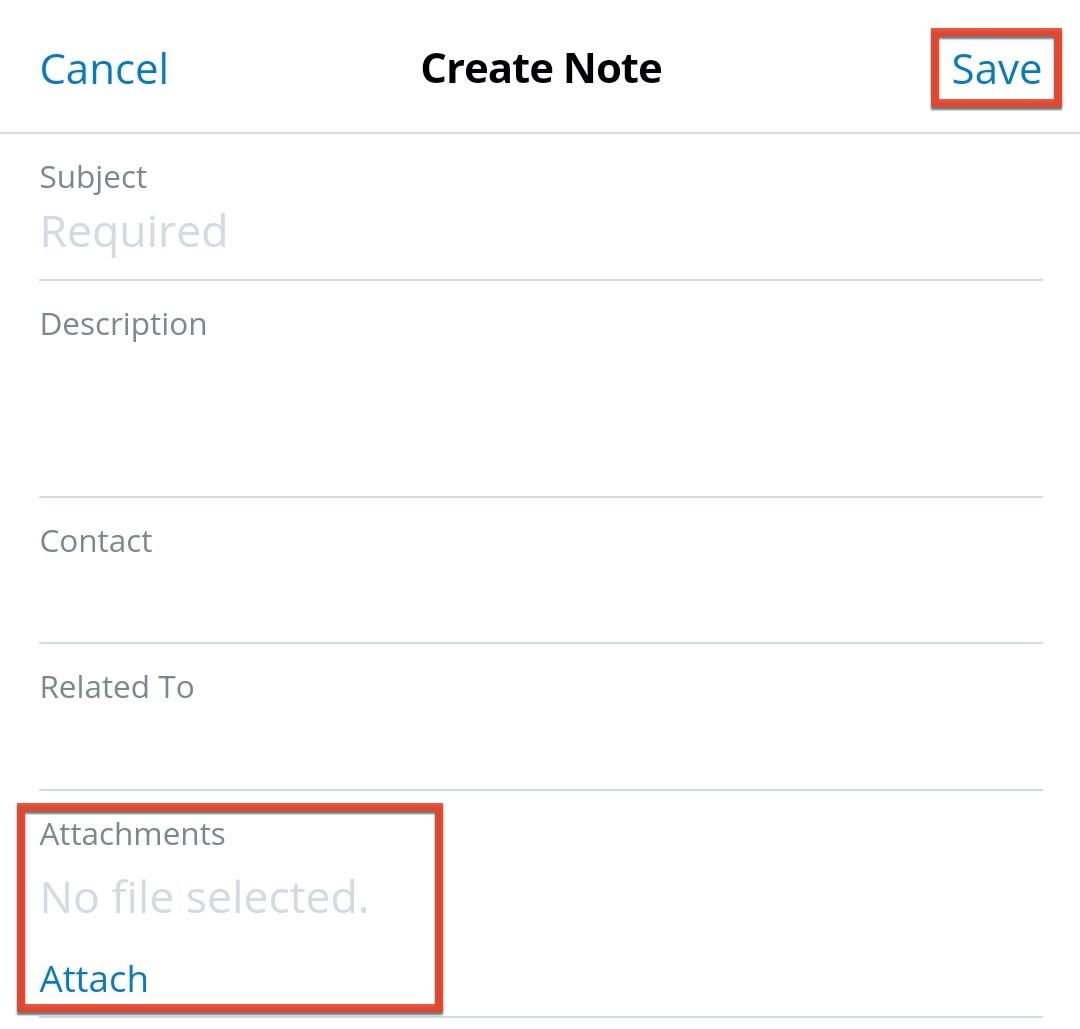
- Select one of the desired files from your device's list of available options (e.g., Google Drive, photo). Note that you cannot select multiple files at once to attach.
- If you wish to change the name of the file before uploading, press and hold the name of the file. A pop-up will appear allowing you to provide a new name.
- Tap "Attach" again to select the second desired file. Optionally, you can resize the images before saving by tapping "File Size" and selecting a new size.
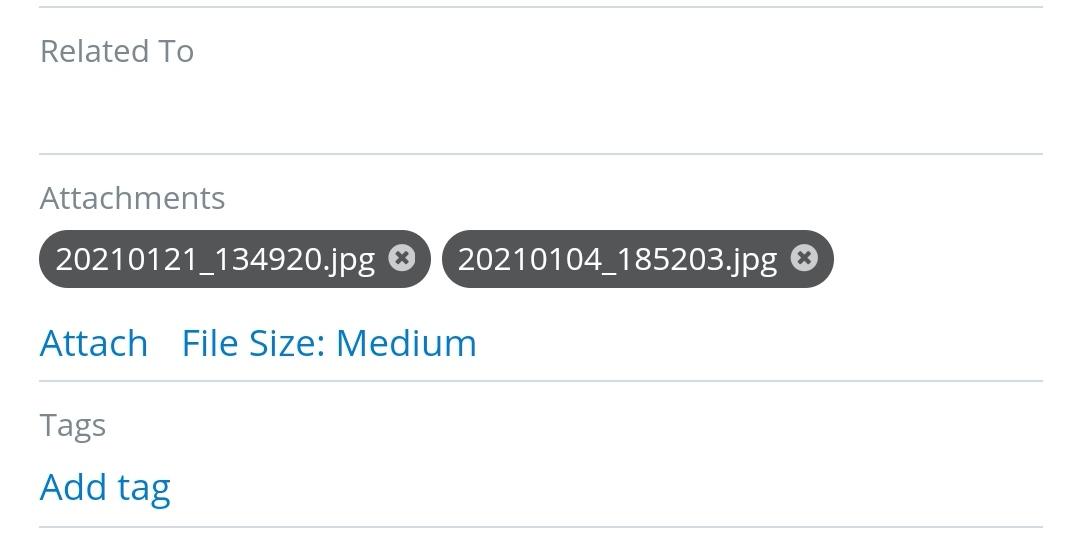
- Tap "Save" to preserve the changes. Both files are now accessible via the File icon.
Note: File attachments from your computer are stored in the Notes module, so you must have permission to create notes to upload attachments. If you do not have permission to create notes, the ability to add attachments will be hidden. For more information on configuring roles in Sugar, refer to the Role Management documentation in the Administration Guide.
Viewing Record Files
When a record contains one or more images or file attachments, you can tap the File icon in the record's Actions menu to download the files. The File icon will be greyed out if the record's File-type field (e.g., Attachments) is not populated. It is important to note that if the admin has added an image field to the detail view, it is not displayed within the list of fields; instead, its image file is accessible via the File icon.
Note: If the Attachments field and File action do not appear for a module, check with your Sugar administrator. For more information on editing mobile layouts, please refer to the Studio documentation.
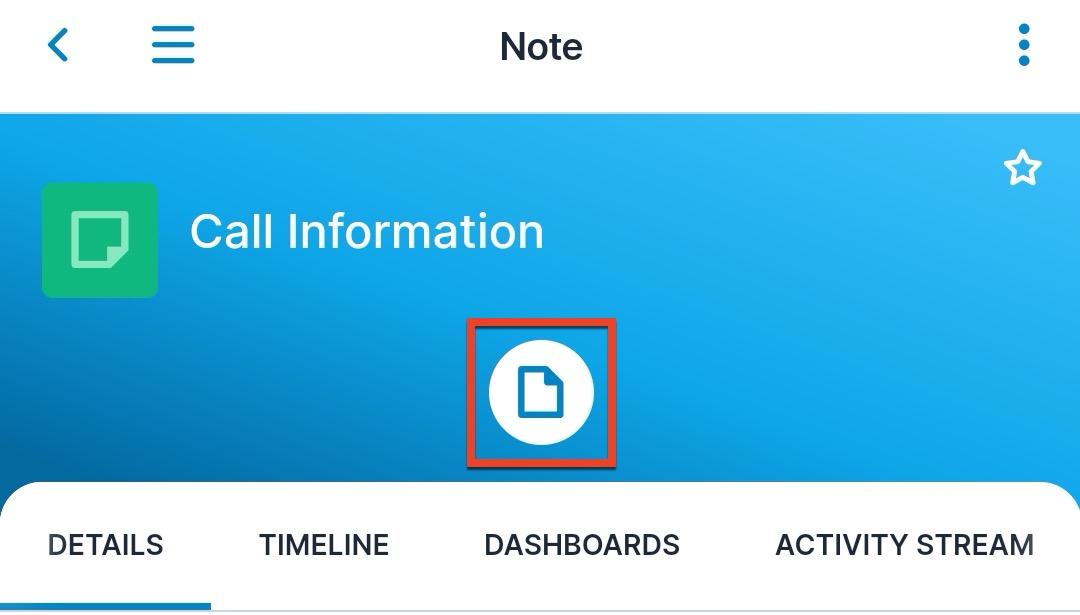
If there is a single attachment, the file will immediately be downloaded. If there is more than one, a pop-up will appear listing the files. Tap a file to download it.
Once the download is complete, you will be able to view the file (e.g., .jpg, .gif, .doc, .pdf, video, audio) from within the mobile app. In addition, you can also share the file via email, text message, or other available options:
On Android, tap the Share option in the menu that appears.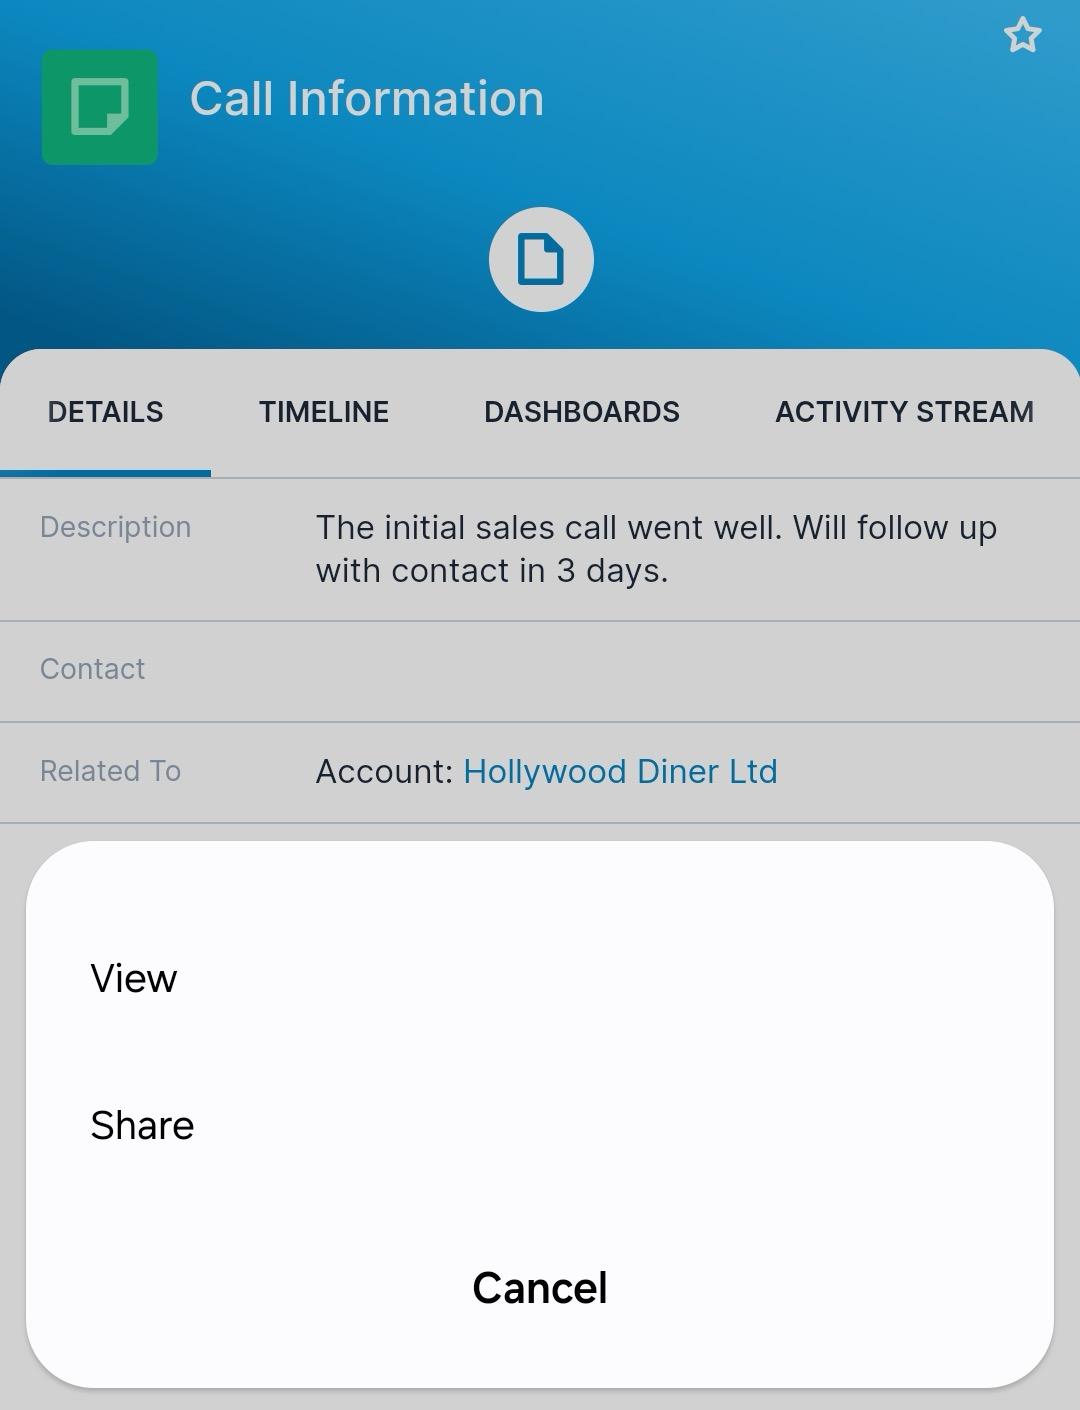
On iOS, tap your device's Share menu.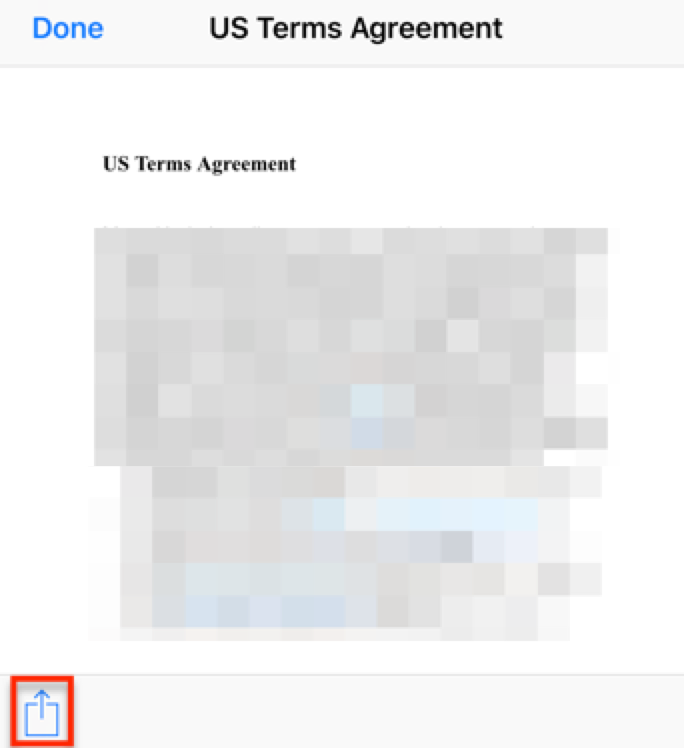
Importing Files From Emails
When viewing image or file attachments from your device's email application (e.g., Mail, Gmail), you have the option to import the file (e.g., .xls, .xlsx, .htm, .html, .pptx, .pdf, .xml, .txt, .ods, .doc, .docx, .csv, .gif, .jpg, .svg, .png, .bmp, .mov, .zip) directly to the mobile app. On Android, simply select "SugarCRM" from your device's applicable menu (e.g., Open with). On iOS, select the "Import with SugarCRM" option in your device's Share menu to create a new note record including the file attachment.
If the file is an image, you can choose to resize it before saving; select a smaller size to reduce the quality of the image if you want to also reduce the upload time. See the Editing Image Fields section for more details on image resizing.
Importing in Android
Use the following steps to import a file attachment from the email application to the Notes module on an Android device:
- Tap the file (e.g., MyAttachment.pdf) in the email.
- Select "SugarCRM" from the "Open with" menu.
Note: If asked to choose "Always" or "Just Once", select "Always" to set SugarCRM as the default app and bypass the menu going forward. Select "Just Once" if you wish to select an app each time via the "Open with" menu.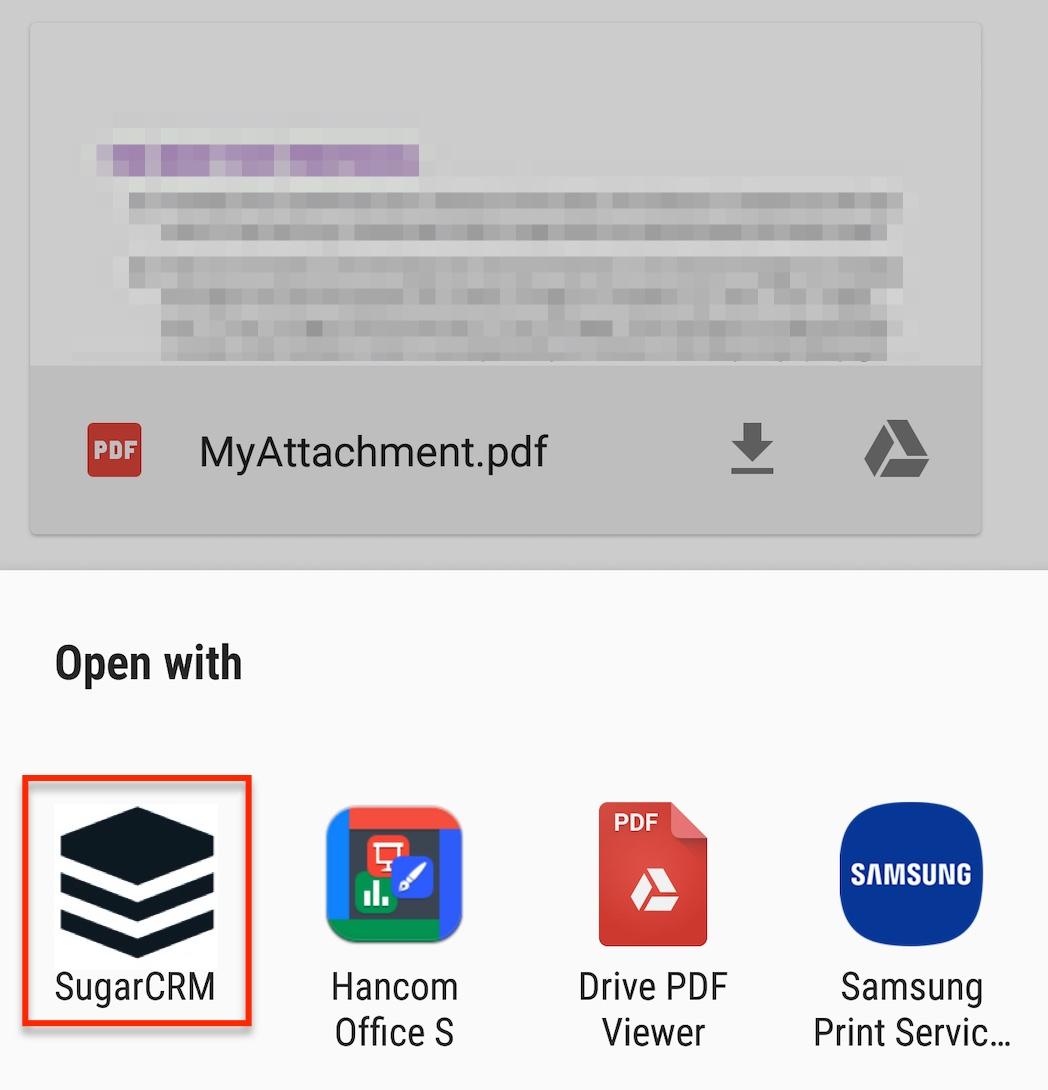
Note: For image-type files, tap the image then tap the vertical ellipsis on the upper right of the image viewer and select "Share". Select "SugarCRM" from the menu that appears asking you to choose which application to use to complete the action.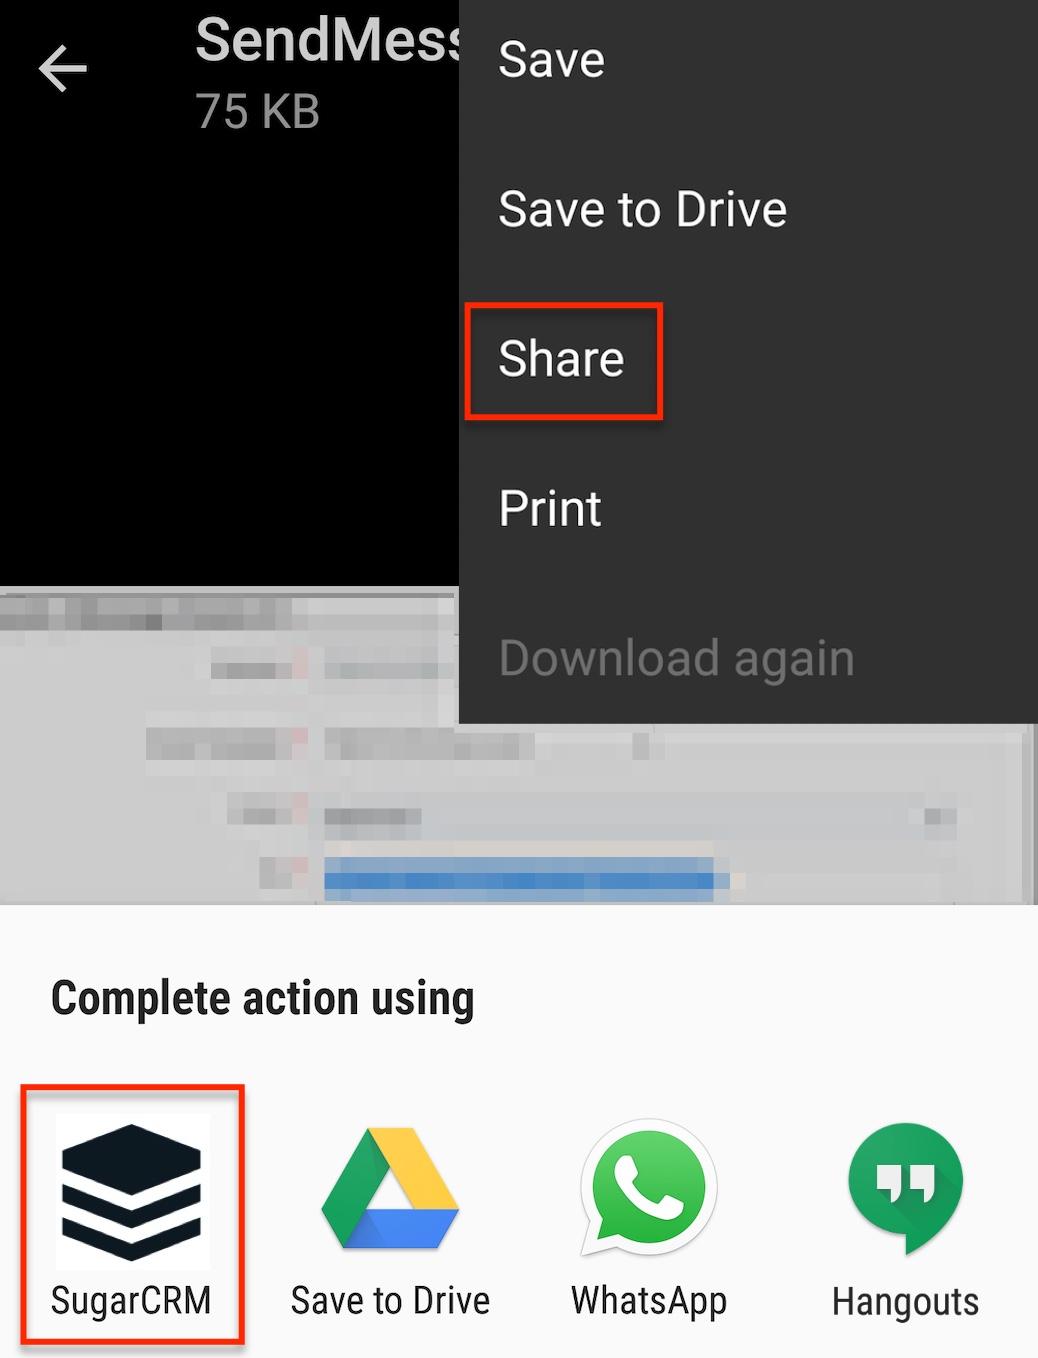
- The mobile app will open and display the Create Note page. The file will automatically be attached to the note.
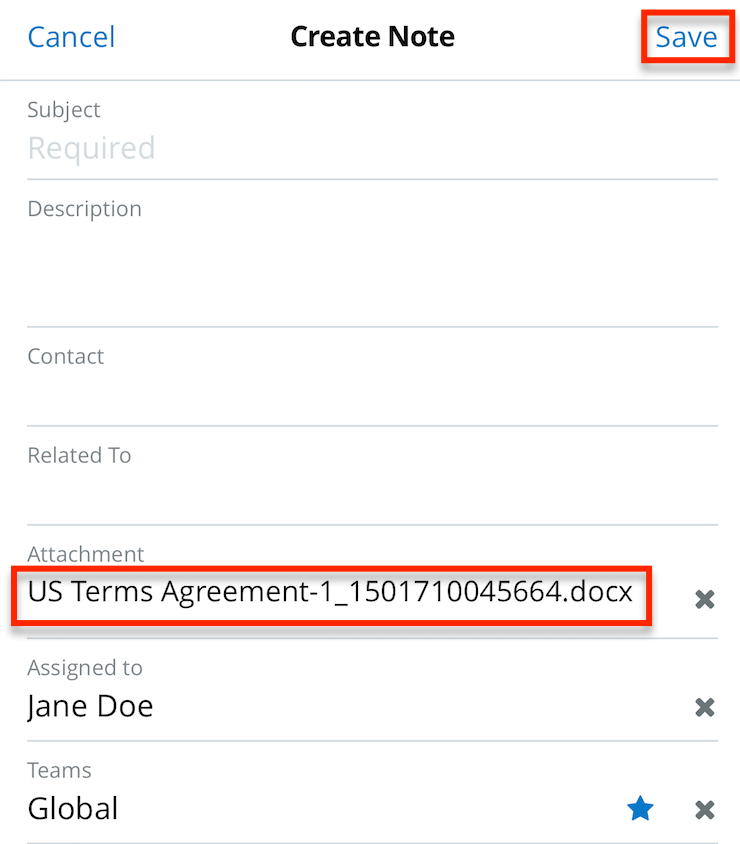
- Fill in the appropriate fields then tap "Save" to create the record.
Note: All required fields will indicate "Required" and must be completed prior to saving.
Importing in iOS
Use the following steps to import a file attachment from the email application to the Notes module on an iOS device:
- Tap the file (e.g., filename.docx) in the email, then tap your device's Share menu.
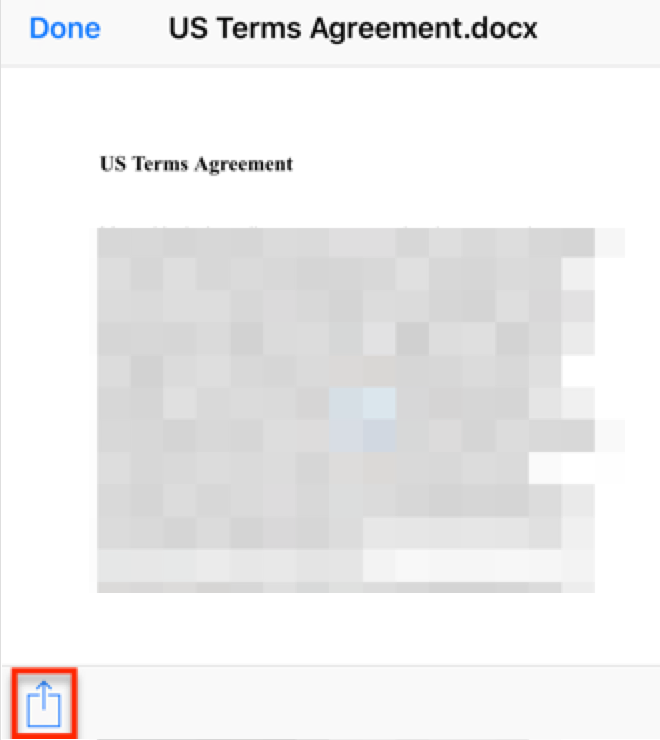
- Next, select the "Import with SugarCRM" option in the menu.
Note: To import image-type files for iOS 9, you will first select "Quick Look" in the Share menu, tap the Share icon on the following screen, then select "SugarCRM".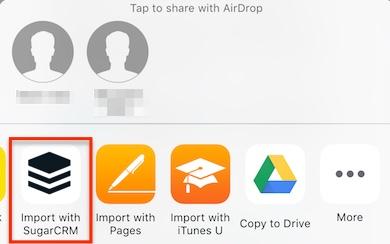
- The mobile app will open and display the Create Note page. The file will automatically be attached to the note.
- Fill in the appropriate fields then tap "Save" to create the record.
Note: All required fields will indicate "Required" and must be completed prior to saving.
Visiting Record Websites
If a record has a populated website field, you can tap the Web option in the record's Actions menu to open the site in your device's web browser. When viewing a record's detail view, you can tap the Web icon in the Actions menu. Please note that the Web icon will be grayed out if the record's Website field is not populated. Additionally, you can tap the Website field's value on the Details tab.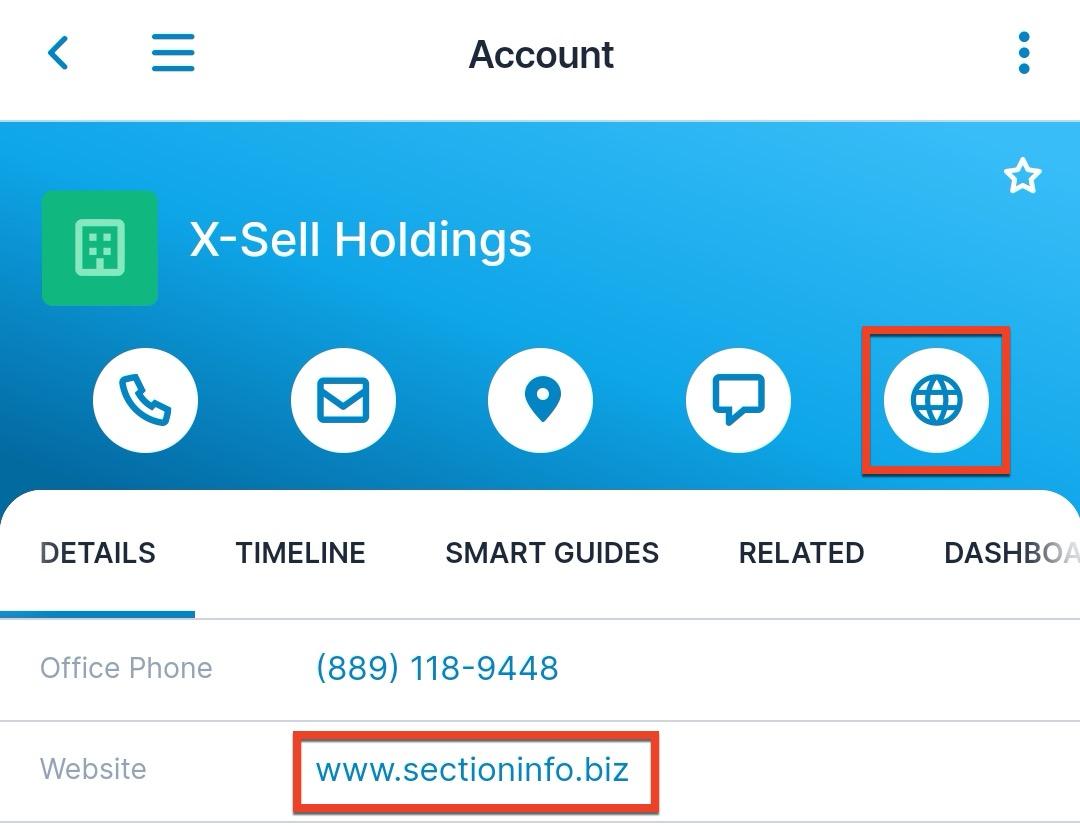
From a list of records such as Global Search, list view, dashlets, or lists of related records, you can select the "Web" action from the row's Actions menu as described in the Accessing Actions Menus From Lists section above.
To return to the SugarCRM mobile app, simply exit the browser then tap the SugarCRM cube icon again.
Note: If the Website field and Web action do not appear for a module, check with your Sugar administrator. For more information on editing mobile layouts, please refer to the Studio documentation.
Refreshing Pages
To refresh pages (e.g., list view, activity stream, global search) in the mobile app, simply place your finger on the middle of the page then drag the page down and release. This action will refresh the page to display the most current list of records, entries, results, etc. For detail view, you will need to navigate away from the record then return to the detail view to see and updates. 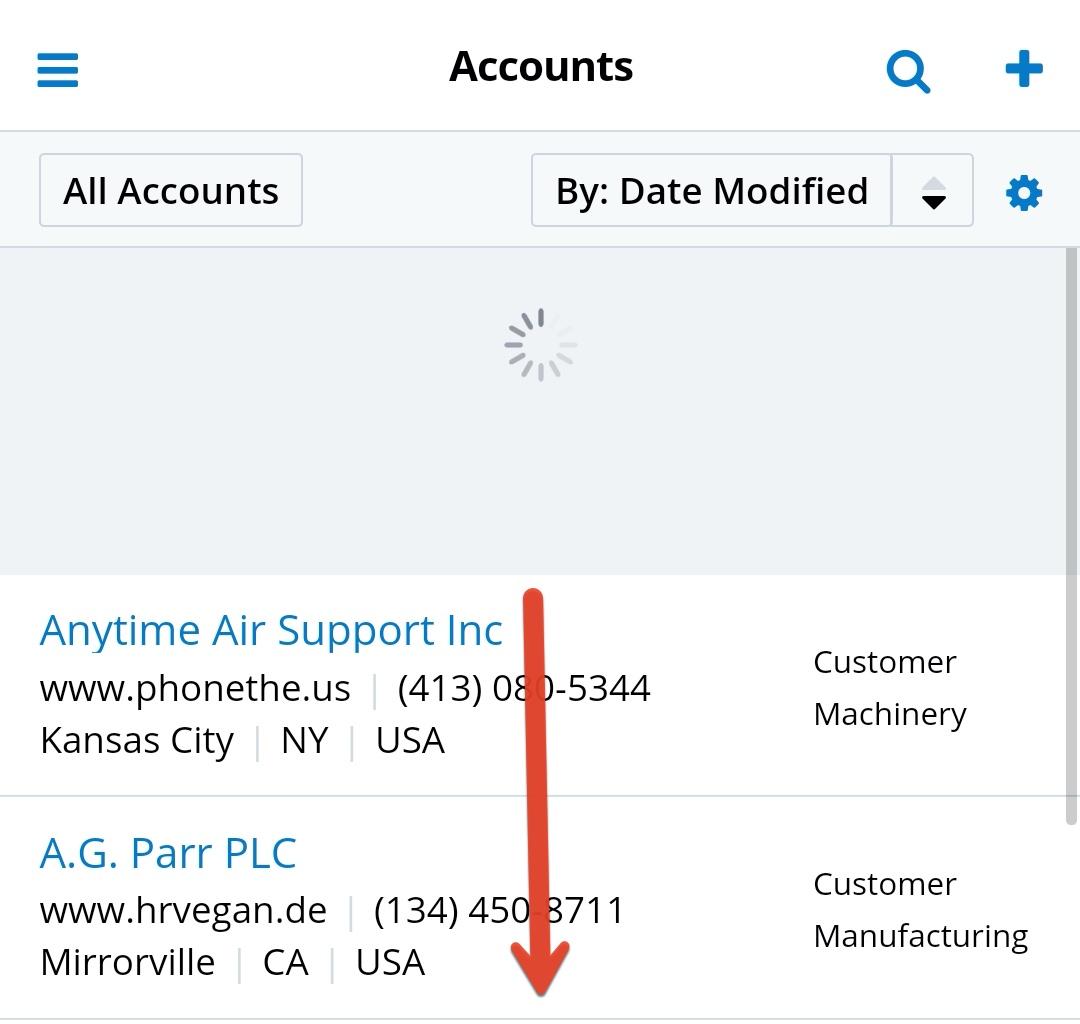
Working With Erased Fields
Depending on your organization's data privacy policies, there may be occasions when you need to immediately and permanently remove information from your Sugar instance. One example is fulfilling a request to erase an individual's personal information. Fields which have been designated as personal information in Admin > Studio can be erased via a data privacy record. For detailed information about data erasure in Sugar, please refer to the Data Privacy Guide.
Once a field (e.g., office phone, address) gets erased in a Sugar record (e.g., contact), "Value Erased" will be displayed in the mobile app as a placeholder where the value used to appear.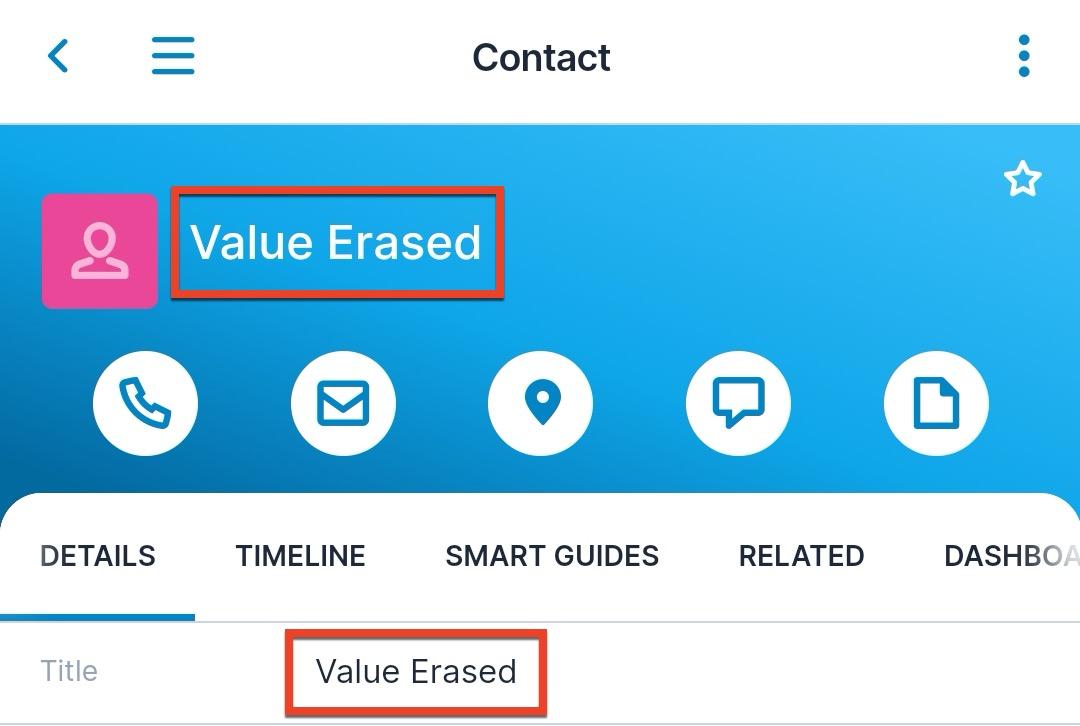
"Value Erased" will also appear in grey when editing erased fields although users have the ability to re-populate the erased field. However, the field should only be re-populated if the individual has provided their consent for your organization to use the information, or as specified by your organization's data privacy policy.
Conflict Resolution
As you make changes to records in the mobile app, changes may also be made to the same records by other users. This is especially likely when reconnecting to internet access after operating offline. When a field has a new value on both the instance and your mobile device, the following will occur:
| Online Mode |
The mobile app provides a message and choice:
|
| Offline Mode | The mobile app's new value for the field overrides the change stored in the instance. See the Understanding Conflict Resolution in Offline Mode section for a more detailed example of how this works. |
Understanding Conflict Resolution in Offline Mode
While offline, if your changes to a record conflict with changes made to the record by someone else, the mobile app syncs the values at the field level, preserving any field values saved in the mobile app while offline over any changes that may have been made by someone online. It is important to note that this field-level conflict resolution only applies to offline mode. When online, conflicts are resolved as described in the table in the Conflict Resolution section, where you are presented with two options to resolve the conflicting data. The following is an example scenario where changes are made to multiple fields in the mobile app while offline while they are also changed by another user in the desktop application at the same time:
- The initial state of an account record has the following field values:
Field Value Industry Apparel Office Phone (589) 685-0571 Email Address phone92@example.net - Sally is using the mobile app and goes offline with the above account data cached in her device.
- Chris edits the account while online in the desktop application. He changes the values to the following:
Field Value Industry Banking Office Phone (094) 158-0575 Email Address im45@example.tv - After Chris has saved his changes, Sally, still offline, changes the Industry value to "Communications" but leaves the other fields the same. She does not yet see Chris's changes because she is offline, so she still sees the initial values of the other two fields. In the Sugar instance, Sally's change is not visible because the app cannot yet connect to the server.
- Soon after, Sally's device returns online and the mobile app starts to sync with the instance. The app identifies that Sally made a change to the Industry field and pushes only that field's value to the Sugar instance, overwriting Chris's value. The other two fields are updated on the mobile app to show the values Chris selected because Sally did not change these fields. In other words, only the field that Sally changed, the Industry field, was pushed to the server and overwrote Chris's entry. The final values in both the mobile and the desktop apps are as follows:
Field Value Industry Communications Office Phone (094) 158-0575 Email Address im45@example.tv
Administering the Mobile App
Sugar users with administrator access can configure the SugarCRM mobile app to suit their users' needs. In Admin > Mobile, you can configure which modules are available for use in the app. For more information on enabling modules for use in the application, refer to the System documentation. Administrators can also configure the mobile app's edit views and detail views for each module. For more information on configuring mobile layouts, refer to the Studio documentation.
Server Configuration Changes
After an administrator makes mobile app configuration changes in Admin > Mobile or Admin > Studio, your app will display the following alert: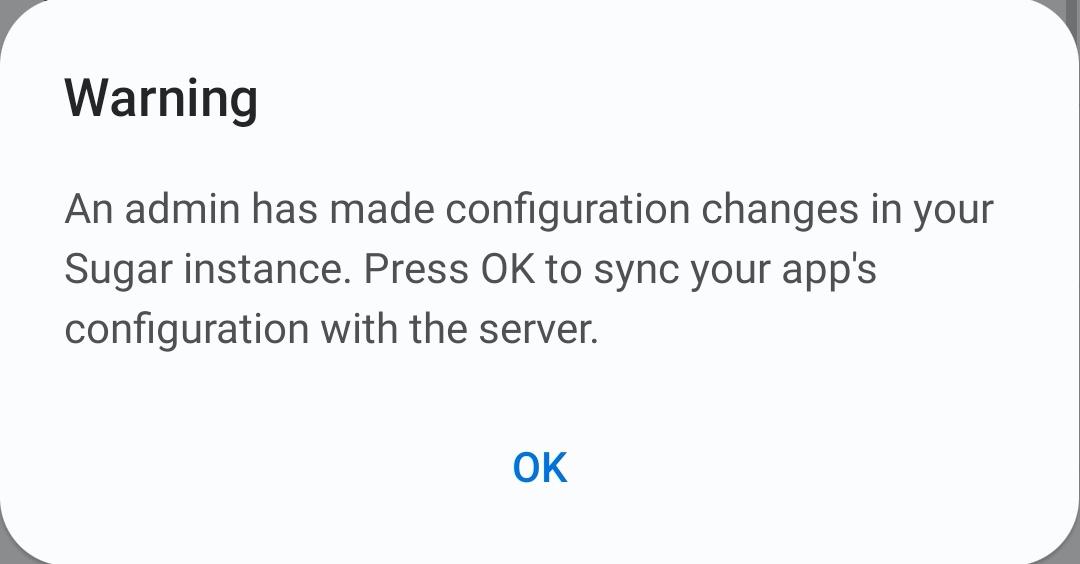
Tap "OK" to sync your app's configuration with the server and resume working in the app.
Configuring and Deploying via MDM
Administrators can configure and distribute the SugarCRM mobile app using Mobile Device Management solutions. The following configurations are available to control via MDM:
| Setting | Key | Default | Description |
| Touch ID | loginTouchId | 1 (Enabled) | Determine whether iOS users will have the option to log into the app using their fingerprint via iOS's Touch ID service. |
| Instance URL | serverUrl | Pre-populate your instance's URL to prevent users having to manually enter this value. | |
| Secure Connection | useHttps | 1 (Enabled) | Pre-populate the secure connection checkbox during login. Configure this to "0" in order to disable SSL and allow VPN to be enabled. |
| Single Sign-On | ssoOption | 0 (Disabled) | Pre-populate whether single sign-on is enabled during login. |