Sugar Self-Service Center User Guide
Overview
The Sugar Self-Service Center is a robust self-service portal for users (e.g., customers). Through the Self-Service Center, users can track the progress of their cases, communicate directly with service agents working within Sugar, as well as view documents.
This guide will assist users with how to complete actions and communicate with agents in the Self-Service Center. Please see the Sugar Self-Service Center Agent Guide for help for agents and the Sugar Self-Service Center Administration Guide for admins.
Accessing the Sugar Self-Service Center
Access the Self-Service Center by navigating to its URL. If you do not have access to the Self-Service Center or you do not have your Self-Service Center URL, please contact your administrator.
Logging In
Navigate to your Self-Service Center URL and enter your username, which is the email address that received the invite. Click "Continue" and then enter your password. You cannot access the site until you are authenticated.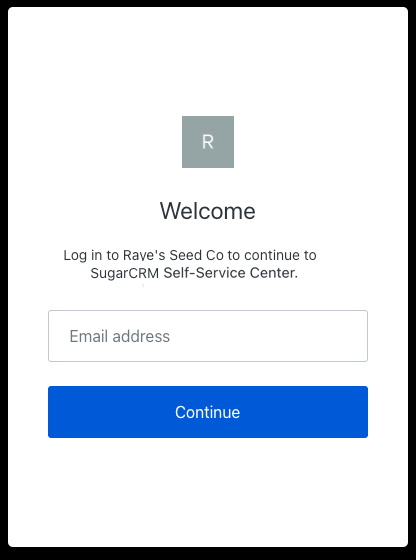
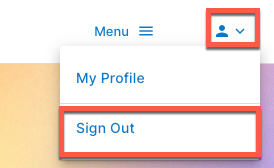
Once logged in, you can log out by clicking the profile icon in the upper-right corner and clicking "Sign Out".
When you first log in to the Self-Service Center, you will see a pop-up on the home screen asking for your first and last name. Please fill these out, click "Save", and then you can use the application.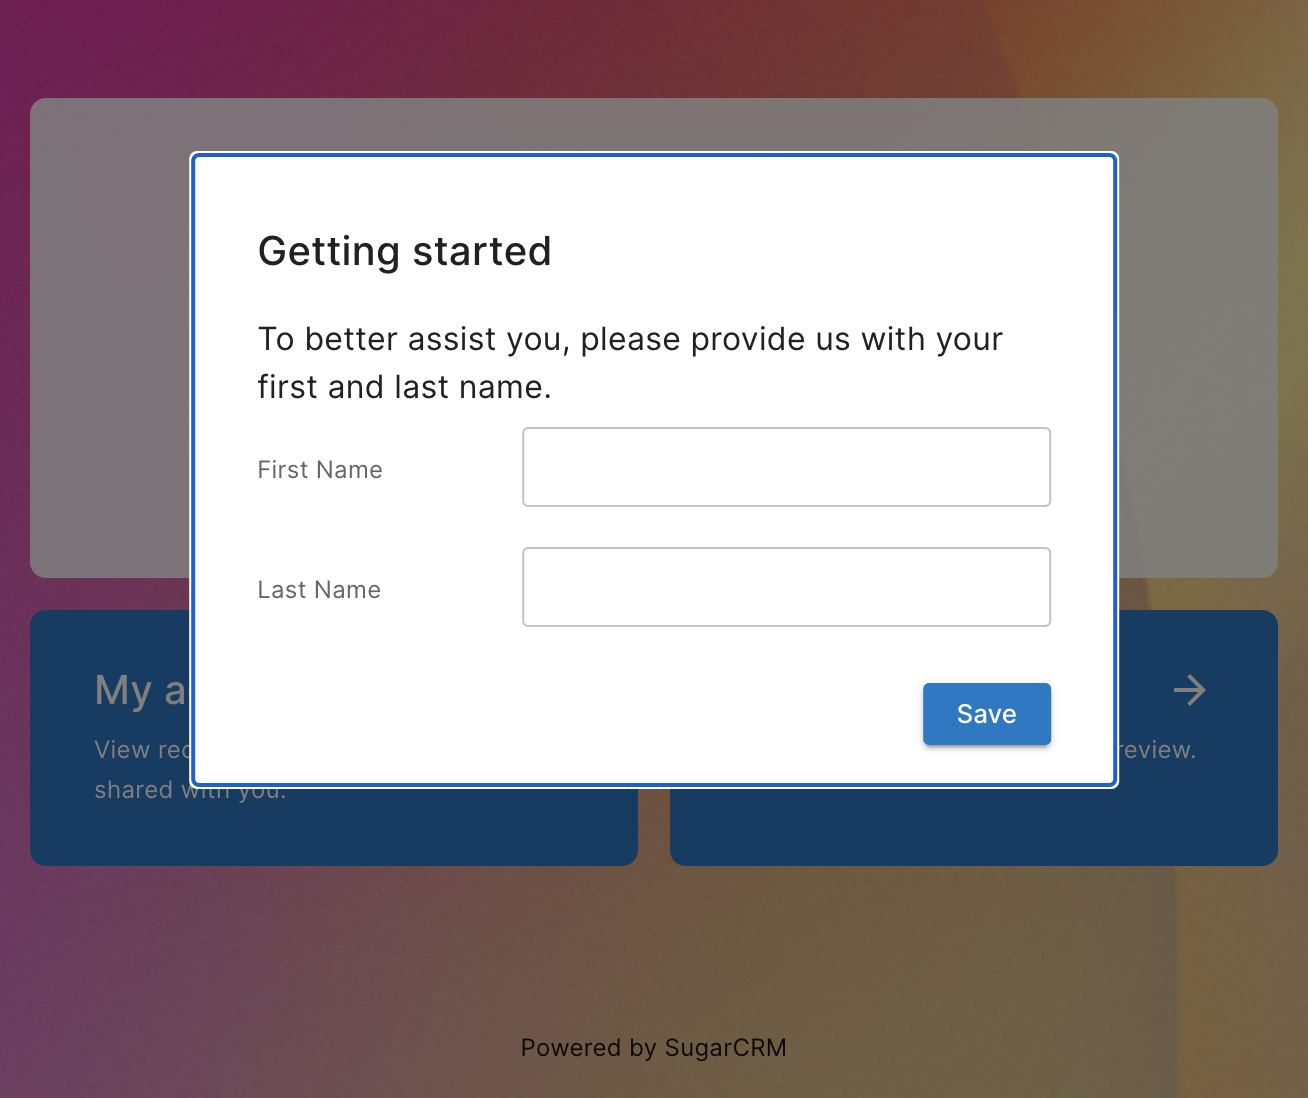
Setting or Resetting a Password
You may reset your password when attempting to log in to the Self-Service Center. First, you will need to enter your email address and press the Continue button. Then, click the Forgot Password link. 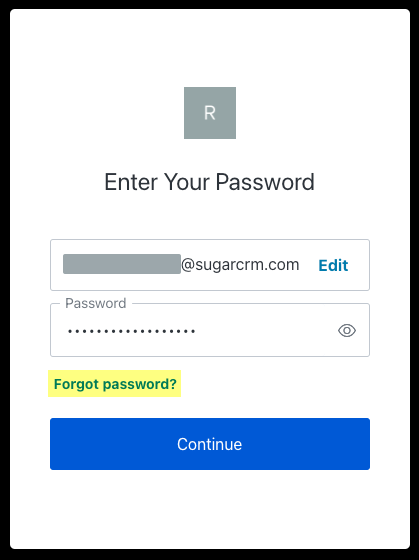
If your email address is a known user, you will be emailed a link to reset your password. Click the link and create a new password when prompted. Then, you can log in as expected.
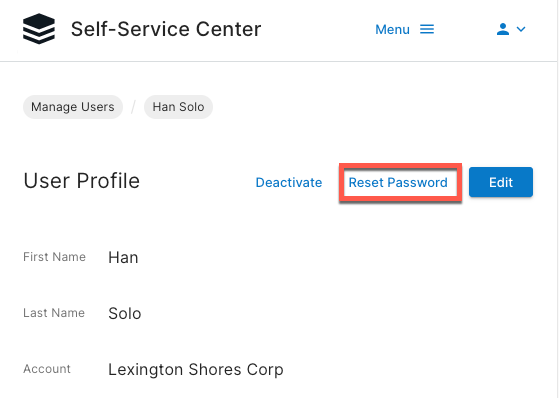
You may also reset your password by clicking the Reset Password link in your profile. Additionally, administrators and account managers can also send a reset password link to users.
Configuring Profiles
Navigate to the profile icon in the upper-right corner and select "My Profile". Here you will be able to view and edit your profile.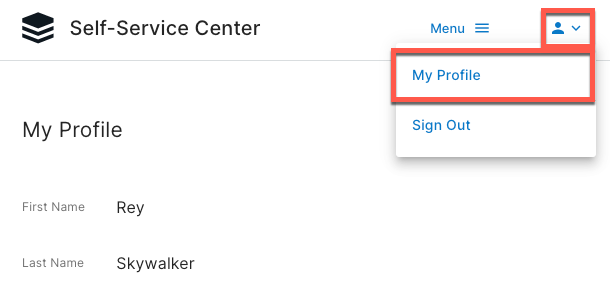
To edit this information, click the Edit button, make your changes, and then click "Save Changes" when you are finished. This information is stored and will be viewable by agents. You can view or modify the following fields:
- Name: The name you wish to use to represent yourself.
- Account: The name of your company or organization. This cannot be edited.
- Office Phone: The phone number for your office phone.
- Mobile Phone: The phone number for your mobile phone.
- Email: The email address associated with your account. This cannot be edited.
- Language: The language you wish to see in the user interface.
Next to the Edit button, there is a Reset Password link. Click this link to send yourself an email to change your password.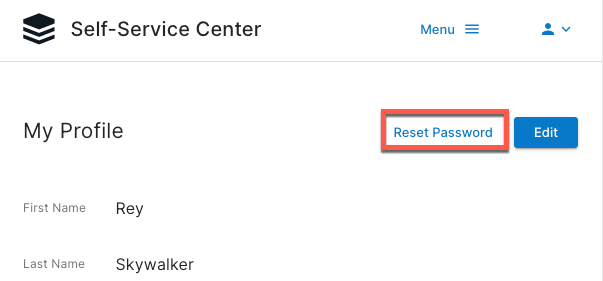
Self-Service Center Home Page
Once logged in to the Self-Service Center, you are presented with the home page. From this screen, you can search existing cases, view cases, and view documents. Navigate to the menu in the upper-right corner to view cases and documents, and click the profile icon to edit your profile or log out. Whenever you wish to go back to the home page, click the Self-Service Center logo or name in the upper left-hand corner. 
When using the search bar on the home page, or anywhere else on the site, you can search by Case ID or Subject. If you choose to search by subject, by default you must search by the subject's starting word. For example, if the subject is "A Big Problem", searching "Problem" will not return any results. However, if you add a wildcard operator, %, and search "%problem" the activity will be found.
List View
The user interface of the Self-Service Center provides an intuitive and easy-to-use layout. Several areas have very similar layouts so this section will cover the list view elements common to many areas of the application.
The list view is where you will see all of your records in one view. You can find this throughout the user interface, including when viewing cases or users. All sorting and column visibility preferences are stored with the user, so you will have the same experience across browsers and devices. Below are the different elements in the list view interface, regardless of whether you use standard or compact view.
- Search bar: Search records. You may search by record name or ID if applicable.
- View switcher: Toggle between the standard view and the compact view.
- Three-dots menu: A menu containing the following options:
- Sort by: Choose which fields to sort by and the sort order. Alternatively, you can click on the columns in the standard view to sort by the clicked field.
- Show/Hide: Add or remove columns from view by toggling the column on or off.
Standard View
When you first open the list view, the default view is the standard view. In this view, you will see a list of records and you may sort the columns by clicking the headers. At the bottom, you can page through 10 records at a time.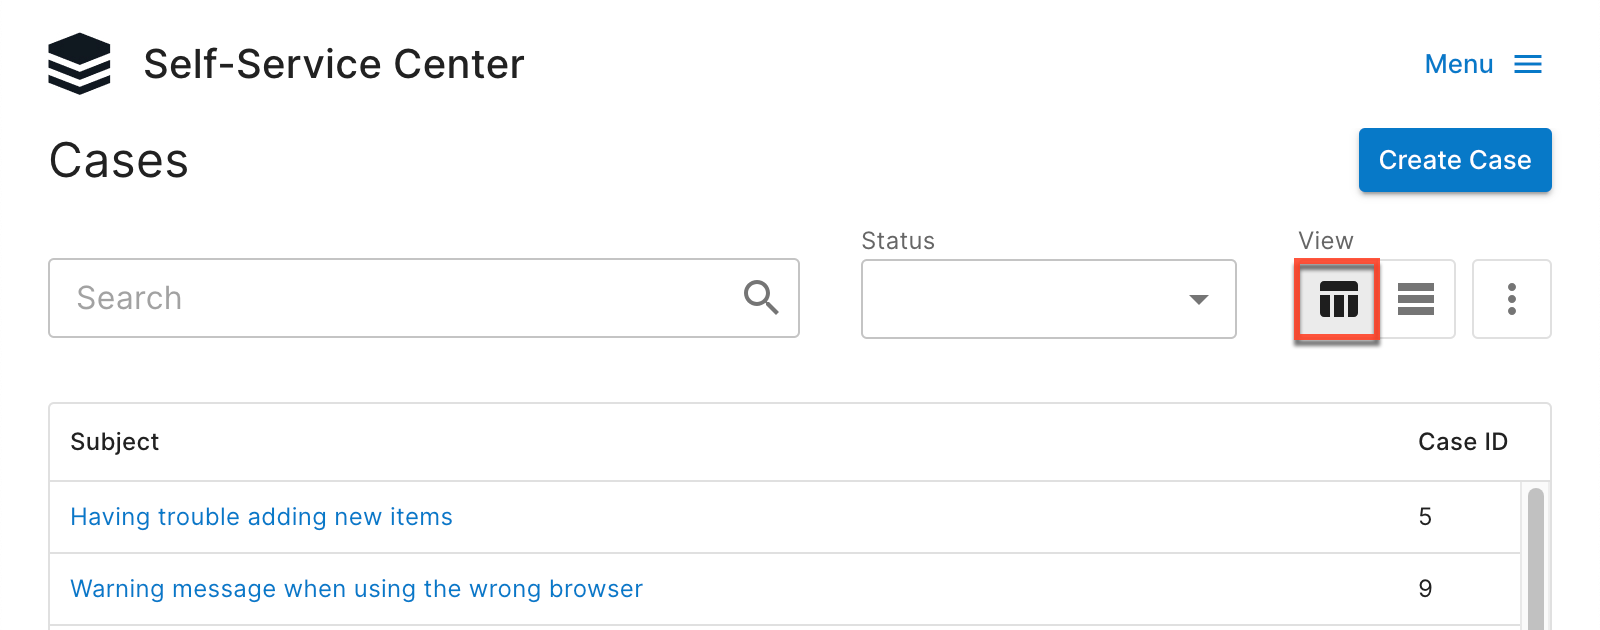
Compact View
The compact view is optimized for devices with smaller screens, such as mobile phones. If you wish to sort in this view, you must use the "Sort by" option in the three-dots menu. 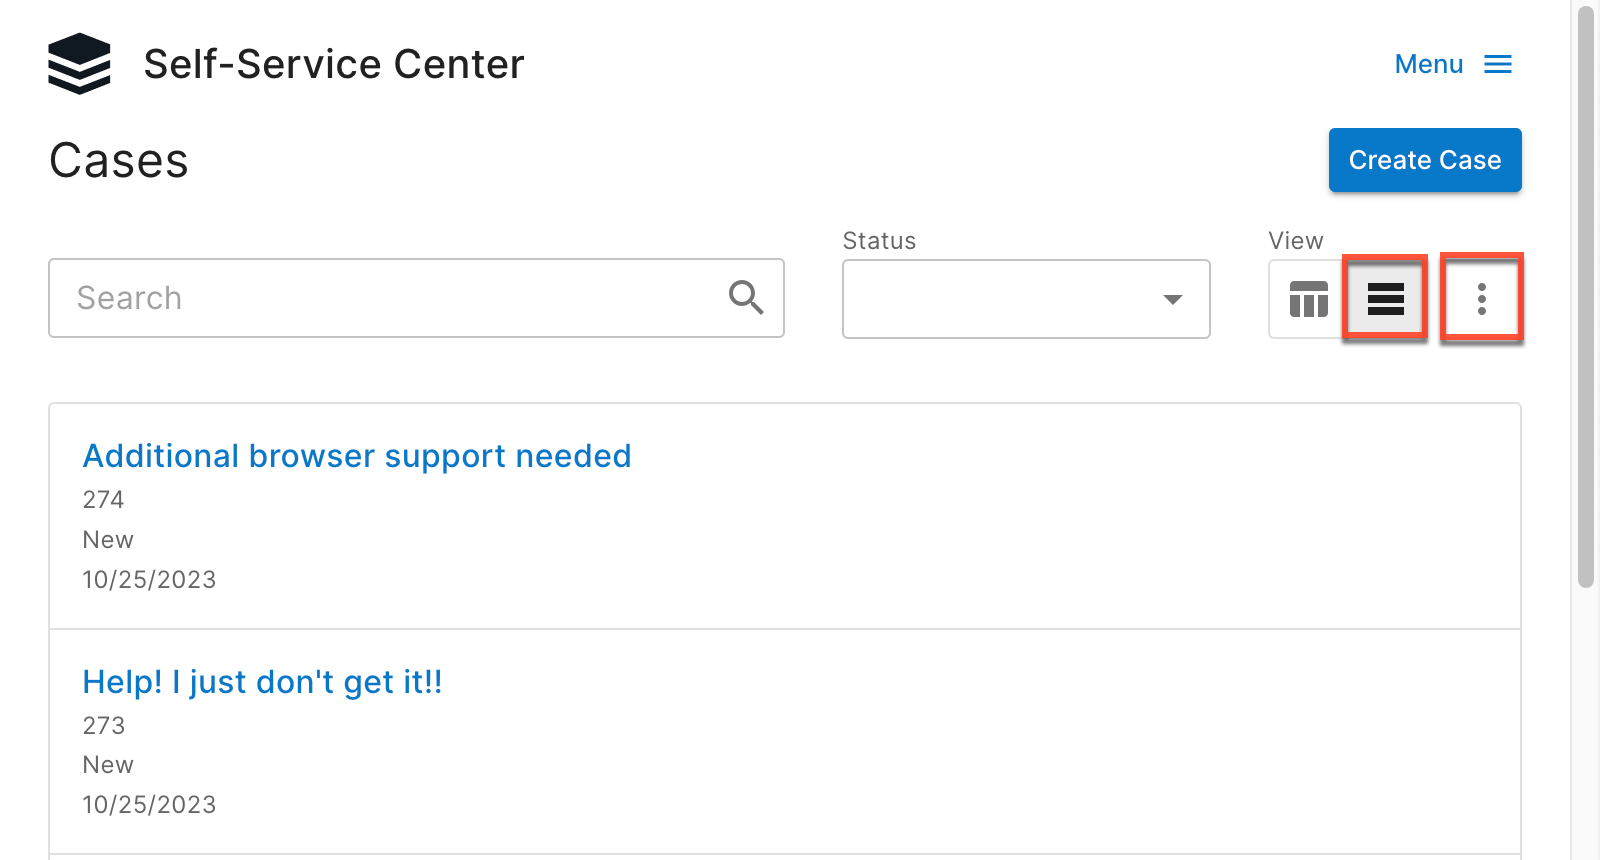
Cases
The Cases area of the Self-Service Center allows users to view and submit cases. Additionally, users can reply to their case to help the agent close it. Cases can be accessed by clicking "Cases" in the Menu or clicking the Cases button on the Self-Service Center Home Page.
Cases List View
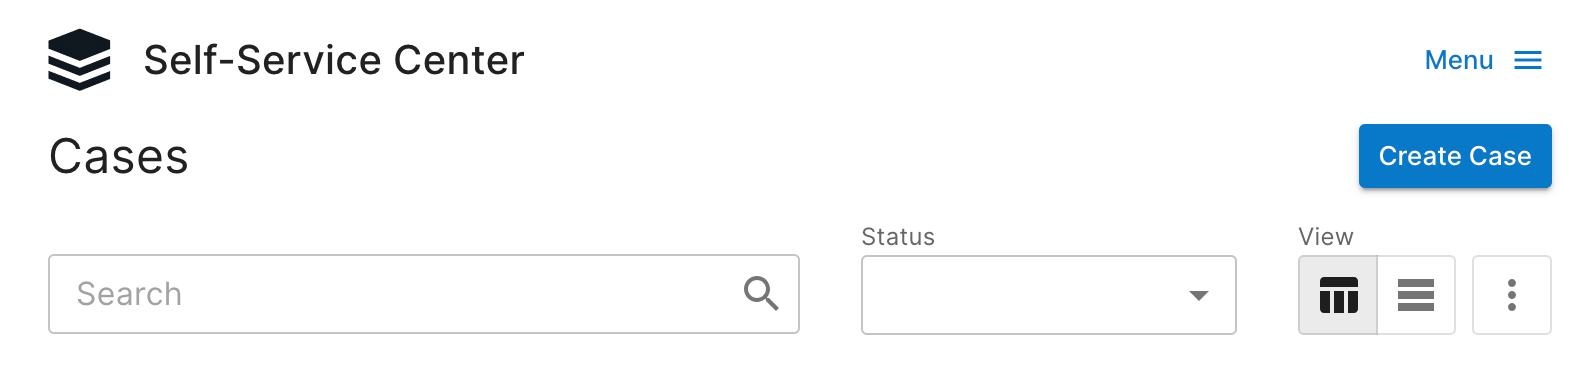
The Cases list view is similar to the typical list view; however, there are some differences. Below are the different elements specific to the case interface, regardless of whether you use standard or compact view.
- Status dropdown: Filter cases by one or more activity statuses. Please note that by selecting one or more statuses, you will no longer see any records where the status is empty.
- Create Case: Click this button to open a new case.
Cases Record View
The Cases record view allows you to view specific details of a case, as well as any communication associated with it. On the left side of the record view, you will see the case subject and body. Any attachments created during case creation will be below the body text.
Below the subject and body, you will find the activity log. This shows communication and other replies between the Self-Service Center's user and the agent. You may sort these comments by oldest or newest first and all users may also add attachments in their replies. Attachments created when replying will have the attachment below the reply. Please see the Replying to a Case section for further information.
Note: Most file types are supported for upload, but the following file extensions are not allowed: .php, .php3, .php4, .php5, .pl, .cgi, .py, .asp, .cfm, .js, .vbs, .html, .htm. Unsupported file types may be uploaded as a .txt file.
On the right side, you can see the case's status, priority, and a complete list of all attachments made during both creation and subsequent replies.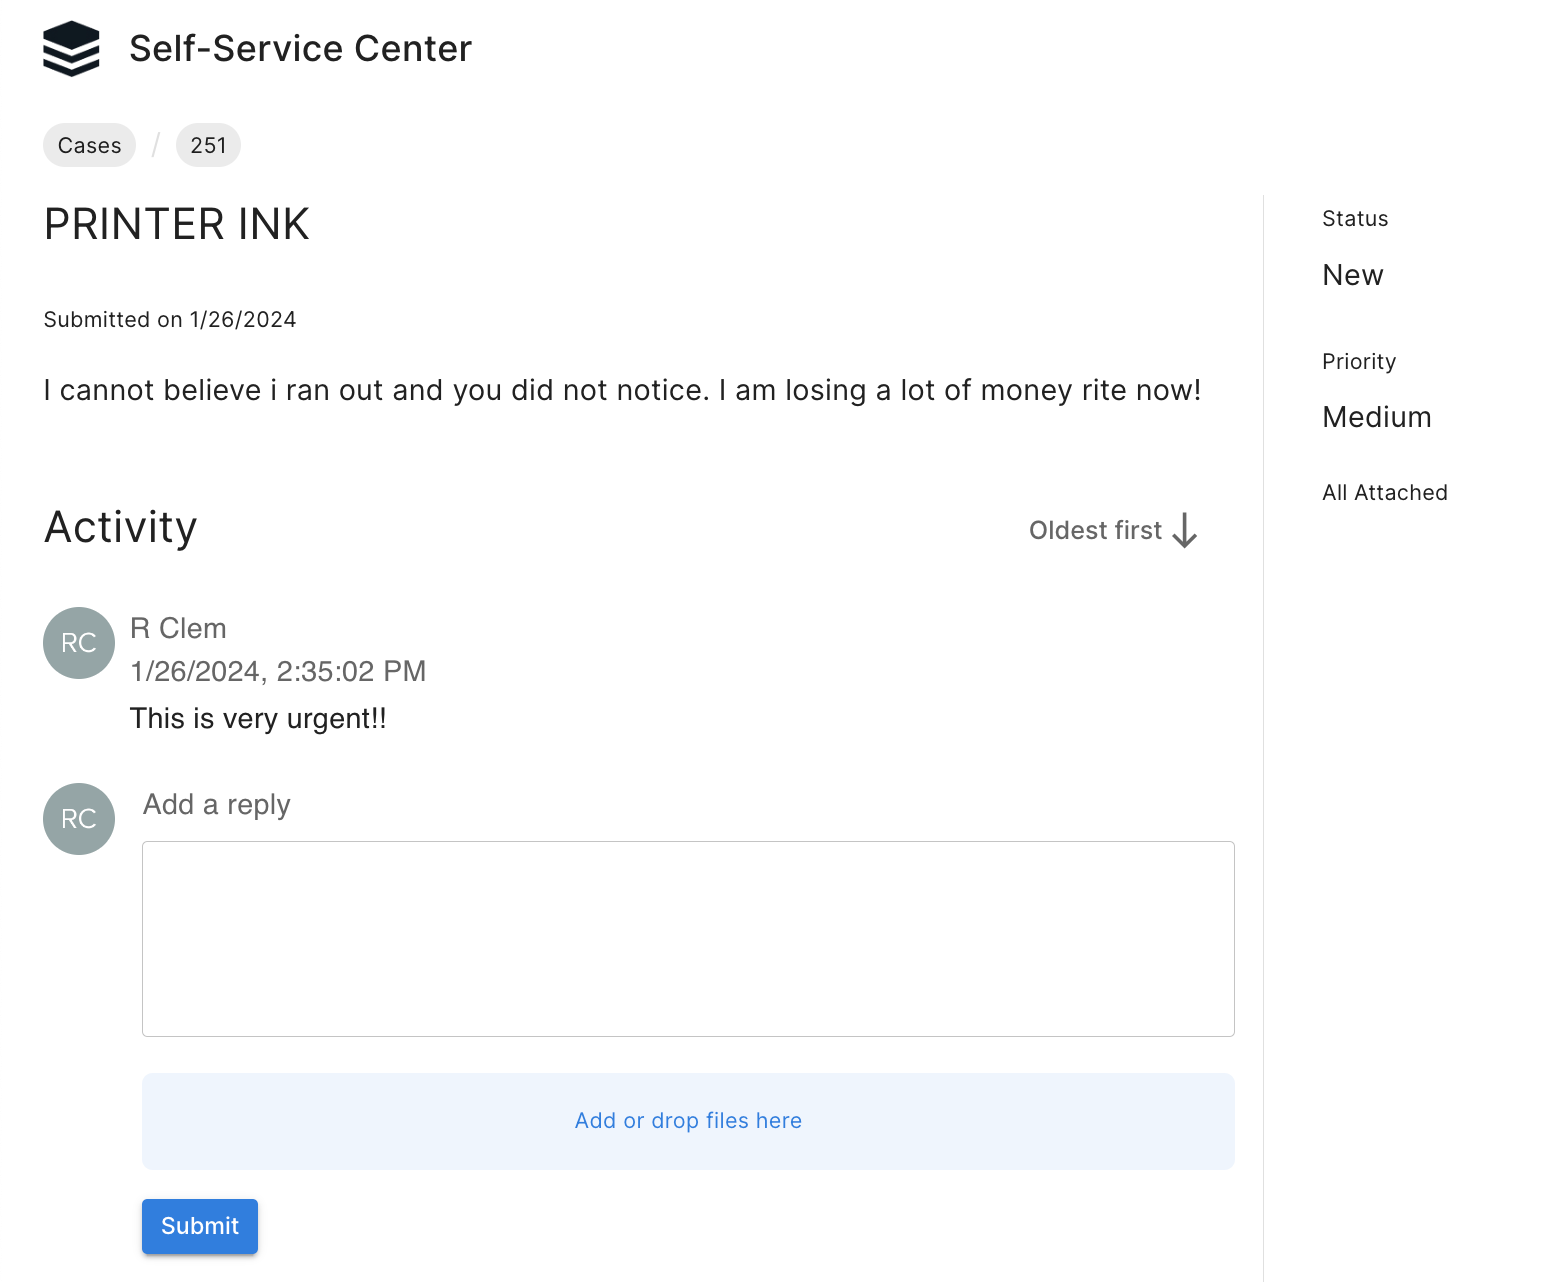
Working With Cases
Cases are types of records used to communicate between you and an agent. These records are opened to initiate communication with an agent to resolve any issues you are experiencing.
Creating a Case
To create a case, click the Create Case button in the Cases list view. From there, you will be presented with a screen asking for a subject and description. You may also add or drop files to attach to the case. Click "Submit" or use ctrl+enter or cmd+enter on your keyboard when you are done. 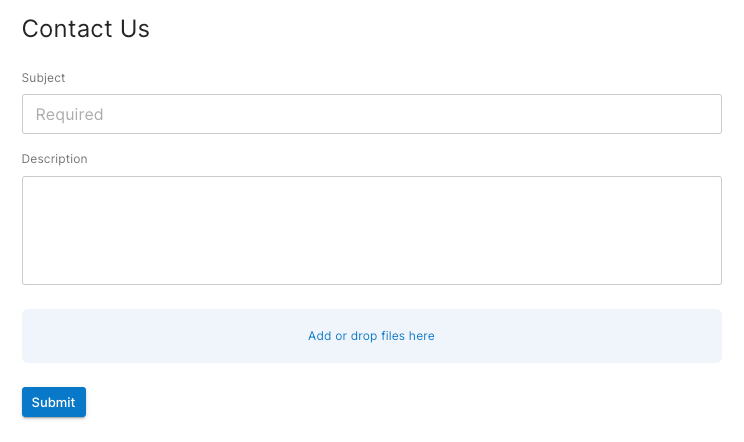
After submitting your case, you will be taken to the case's record view.
Replying to a Case
To leave a reply to a case, use the "Add a reply" text area field in the case's record view and add the communication you wish to send. You may also upload files to attach to the case. When you are done, click the Submit button or press ctrl+Enter or cmd+Enter on your keyboard to send your reply. 
Note: Most file types are supported for upload, but the following file extensions are not allowed: .php, .php3, .php4, .php5, .pl, .cgi, .py, .asp, .cfm, .js, .vbs, .html, .htm. Unsupported file types may be uploaded as a .txt file.
Documents
The Documents area of the Self-Service Center allows users to download documents shared with them. Documents may be accessed by clicking "Documents" in the Menu, or clicking the Documents button on the Home page. 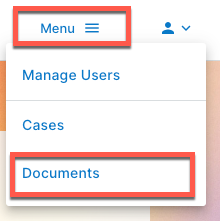
Documents List View
The Documents list view is similar to the typical user interface, however, there are some differences. The following element is specific to the Documents interface, regardless of whether you use standard or compact view.
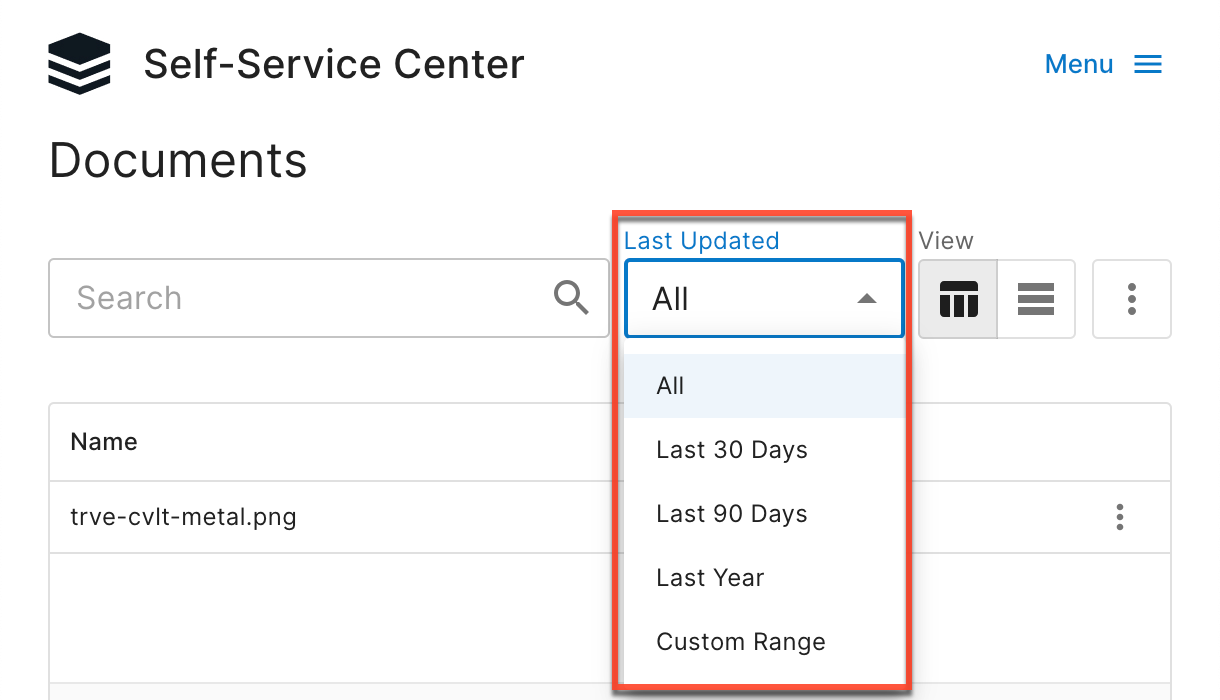
- Last Updated: Filter documents by when a document was last modified. The following filters are available: All, Last 30 Days, Last 90 Days, Last Year, and Custom Range. The default filter is set to "All".
Working with Documents
To download documents shared with your organization click the file name or the three-dots menu at the end of the document you wish to download, then, click the "Download" option. The downloaded document is the same file type of document that was uploaded (e.g., an uploaded .pdf will be downloaded as a .pdf). Once the document is downloaded, you may print or email the document or simply keep it with your downloaded files on your device.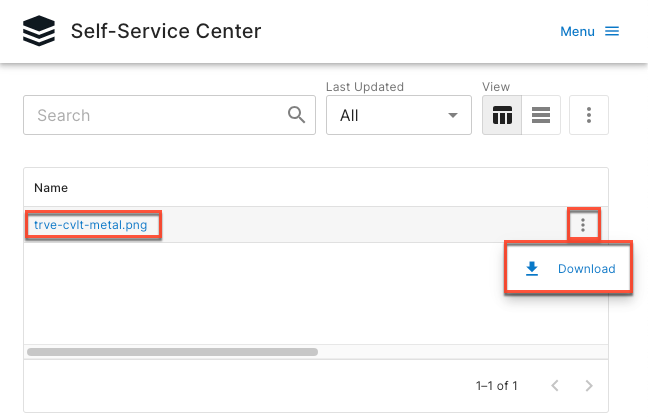
Live Chat
The Self-Service Center has a live chat widget that allows users to communicate with an agent and is opened by clicking on the chat bubble button in the lower-right corner. This button only appears if the chat is enabled. For information on how administrators can enable this, please see the Sugar Self-Service Center Administration Guide.
When you start a chat, that chat window opens and you can read incoming messages from the system or an agent and type in the text box to respond. Press Enter or Return on your keyboard to send your typed message.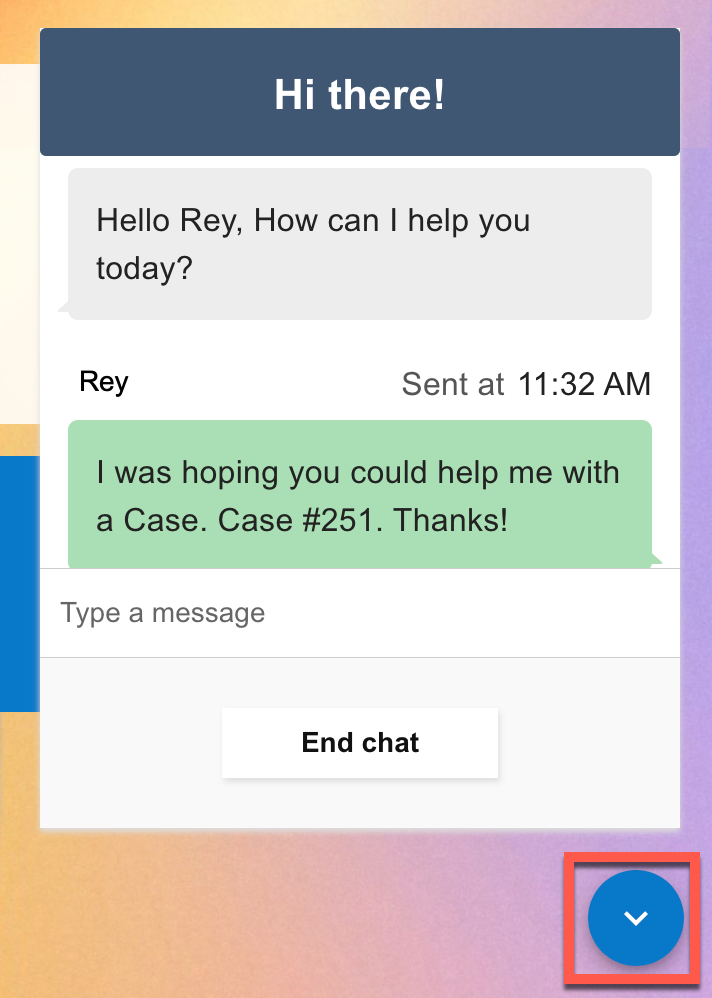
The chat window stays open as you navigate through the Self-Service Center, but you can minimize it using the down arrow button and open it again at any time to resume your conversation. When you are done chatting, click the End Chat button to close the chat session. Please be aware that refreshing your browser while in a chat will end the session, whether it is minimized or maximized at the time.
Additionally, live chat is only supported for use with certain web browsers. For more information, refer to the Supported Platforms page.
Managing Users
The Manage Users area of the Self-Service Center allows account managers and administrators to allow and deny access to the application. To determine if you are an administrator or account manager, click the Menu in the upper-right corner.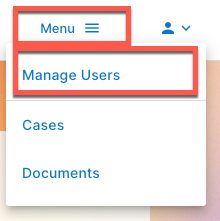
If you do not see "Manage Users" in the Menu of the Self-Service Center, you are a regular user and the following information does not pertain to you.
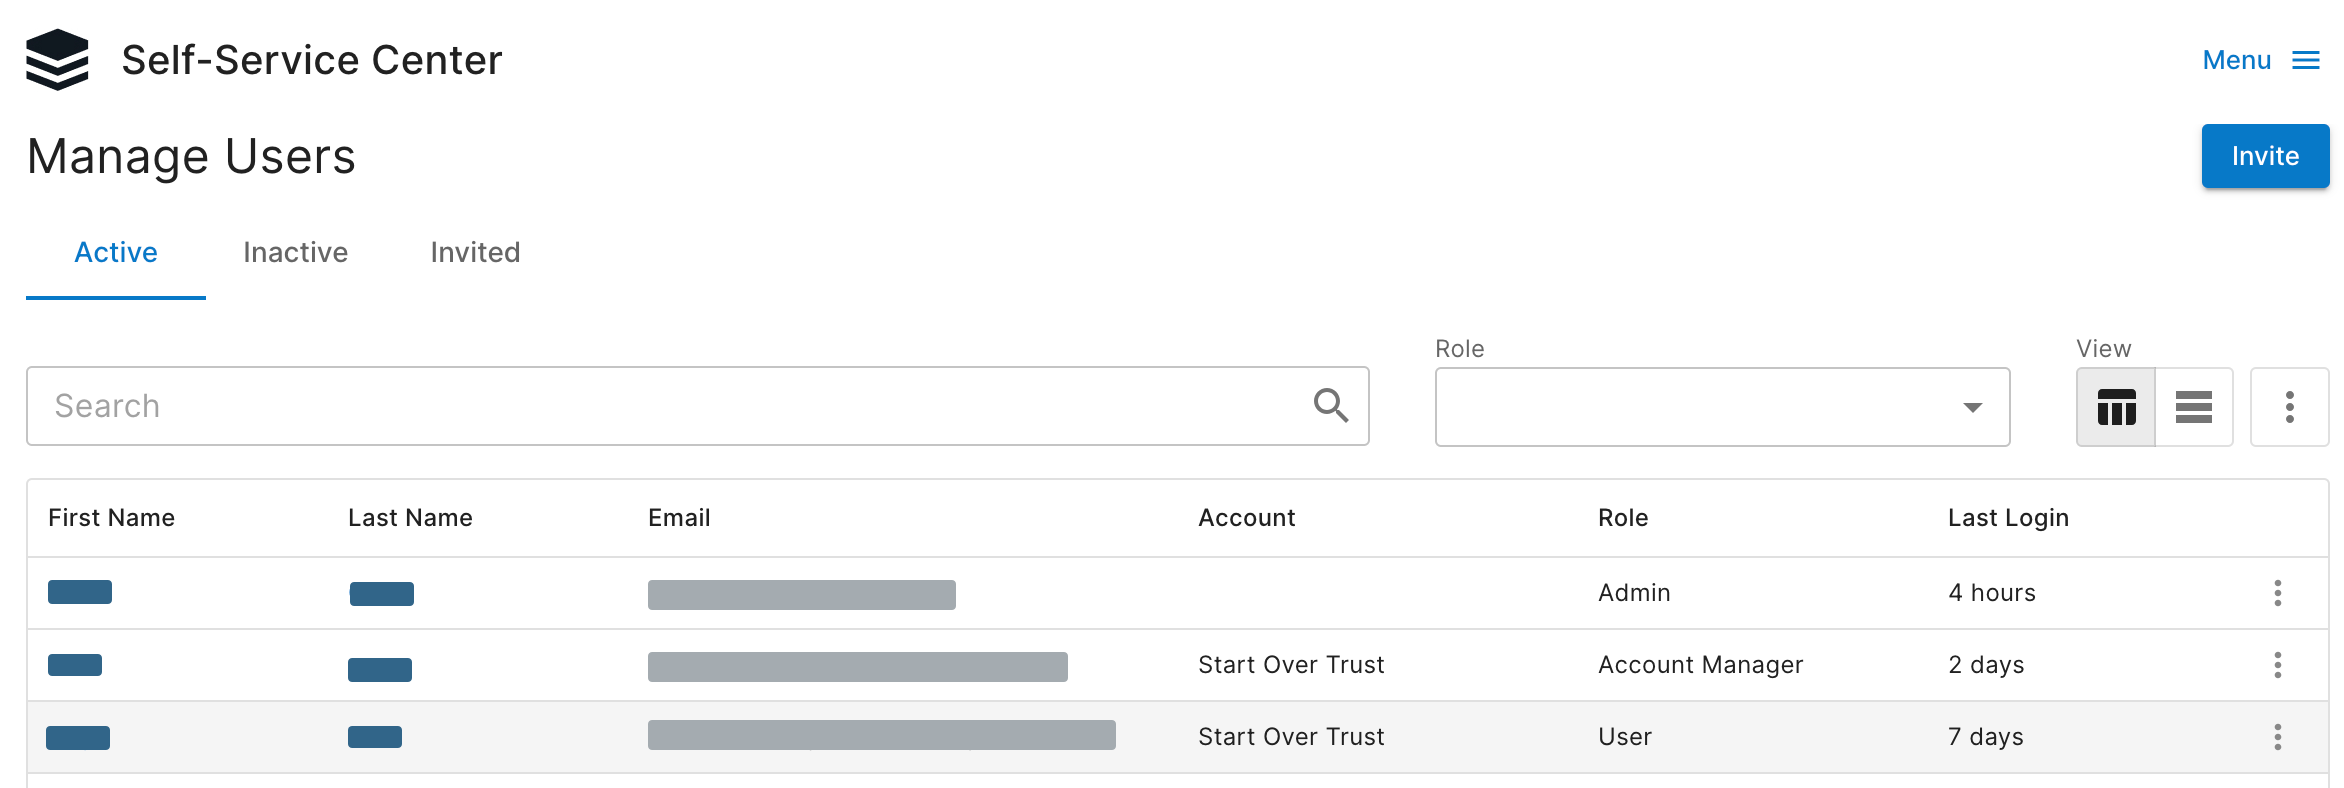
Manage Users List View
The Manage Users list view is similar to the typical list view; however, there are some differences. At the top of the list view you will see three tabs:
- Active: This tab contains every active user, no matter their role.
- Inactive: This tab contains all the deactivated users, who cannot log in to the Self-Service Center.
- Invited: This tab contains all users you have invited to join the Self-Service Center but who have not completed their registration yet.
Below are the different elements in the list view interface, regardless of whether you use standard or compact view.
- Invite Users: The button, when clicked, allows you to invite users.
- Search bar: Search users. You may search by name and email.
- Role dropdown: Filter users by one or more roles (i.e., administrator, account manager, user).
- View switcher: Toggle between the standard view and the compact view.
- Three-dots menu: A menu containing the following options:
- Sort by: Choose which fields to sort by and the sort order. Alternatively, you can also click on the columns in the standard view to sort by the clicked field.
- Show/Hide: Add or remove columns from view by toggling the column on or off.
The rows of data have additional columns:
- Name: The first and last name used to represent the user.
- Email: The email address associated with the user.
- Account: The name of the company or organization associated with the user.
- Role: The role associated with the user (i.e., administrator, account manager, user).
- Last Login: The duration of time since the user has logged in to the Self-Service Center.
At the end of each row, there is a three-dots menu with three more options:
- View: Navigate to the record view of the user. This is the same as clicking the user's name.
- Reset Password: Send an email to the email address listed to reset the user's password.
- Deactivate: Remove access to the Self-Service Center for the user.
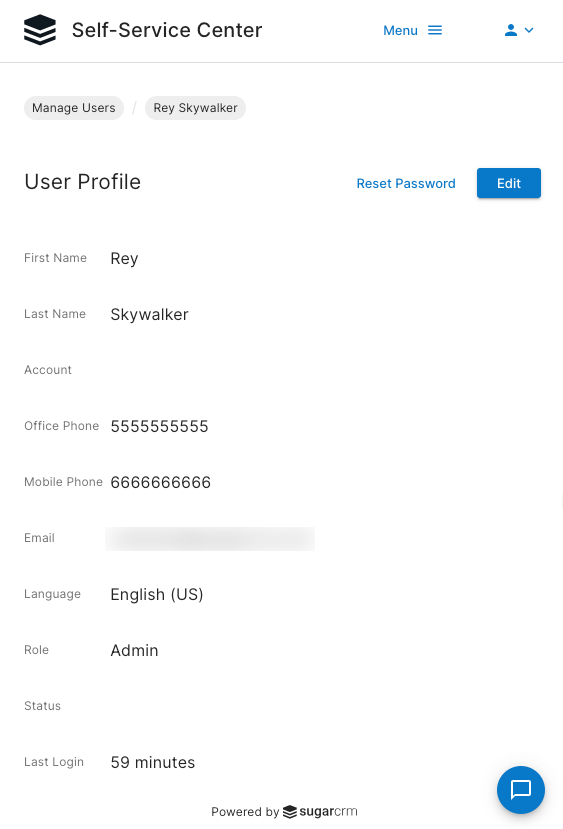
Users Record View
Navigate to the Users record view by clicking the user's name or choosing "View" from the three-dots menu at the end of the row in the list view. The Users record view is similar to a user's profile, with some added options. The fields you will see are:
- First Name: The first name, or given name, of the user.
- Last Name: The last name, or family name, of the user.
- Account: The account the user is associated with. This is not editable.
- Office Phone: The phone number for the user's office.
- Mobile Phone: The phone number for the user's mobile device.
- Email: The email associated with the user. This is not editable.
- Language: The language chosen by the user. The following languages are available: English (US), German, Spanish, French, Italian, Portuguese (Brazilian), Chinese (Simplified), and Chinese (Traditional).
- Role: The role selected when the user was created (i.e., administrator, account manager, user). This is not editable.
- User Status: The status of the user. It can either be Active or Inactive. This is not editable.
- Last Login: The last time the user logged in to the Self-Service Center. This is not editable.
Below the fields, you will find additional options:
- Edit: Click this button to edit the user's profile. Please note that the following fields are not editable: Account, Email, Role, Account Status, and Last Login.
- Reset Password: Click this link to send an email to the user to reset their password.
- Deactivate/Activate: By default, this link says "Deactivate". Click this button to deactivate the user. If the user is deactivated, the link says "Activate" and can be clicked to make the user active again.
Working With Users
The following sections will provide helpful information on how to perform most actions on users an administrator or account manager needs to understand and accomplish in the Self-Service Center.
Understanding User Roles
The following are the roles available for users:
- Administrator: This user should also be an administrator in their CRM. They have access to see all records related to all accounts. They can invite users to any account in their CRM.
- Account Manager: This user is the manager of their specific account. They can see all records related to their account, invite users to the account, and edit those users as well.
- User: This user can see all records related to their account but cannot invite any users.
Note: It is recommended that any user invited as an administrator in the Self-Service Center is also an admin in the CRM. Otherwise, an admin could see records in the Self-Service Center that they cannot see in the CRM.
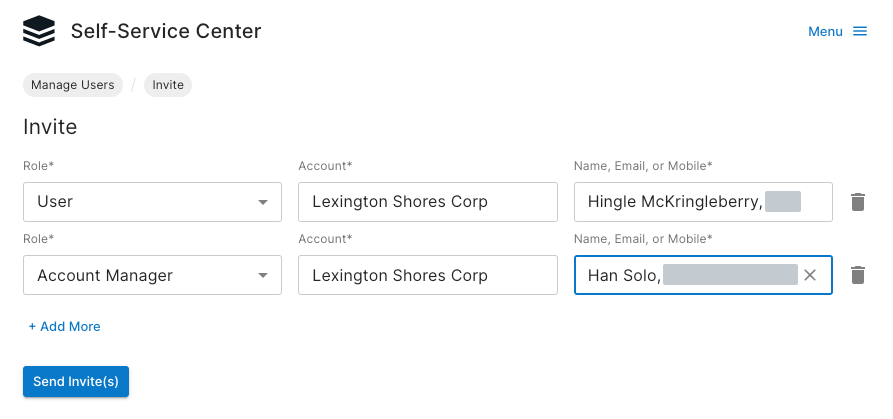
Inviting Users
At the top of the Manage Users list view, there is an Invite button. Click this button to open a screen where you can enter up to five users at a time that you would like to invite. The fields are not editable after the user is invited, so be sure to review the data before submitting.
- Role: This is the role the user will have assigned to them.
- Account: This is the account the user will be associated with. If you are an administrator, type three characters or more to retrieve the accounts from the CRM. The account name must exactly match the name in the CRM. If you are an account manager, you may only invite users to your own account and not others.
- Name, Email, or Mobile: This information is used to look up the contact the user will be associated with. Type three characters or more to retrieve the contact name, email, or mobile number from the CRM. The field used to look up the contact must exactly match the field in the CRM.
After filling out the fields, click the Send Invite(s) button or press ctrl+Enter or cmd+Enter on your keyboard.
Creating a Contact
When inviting a user, you might not see their name, email, or mobile number available. If there are no matches when typing at least the first three characters of the name, email, or mobile number, you will see an option that says "Create New Contact". Click this, and you will be asked to fill in some basic information regarding this new user. The First Name, Last Name, and Email fields are mandatory, while the Mobile phone number is optional. 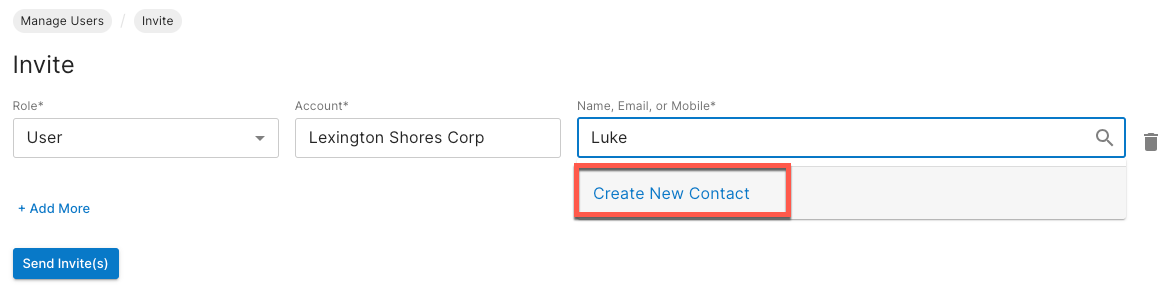
The First Name, Last Name, and Email fields are mandatory, while the Mobile phone number field is optional. 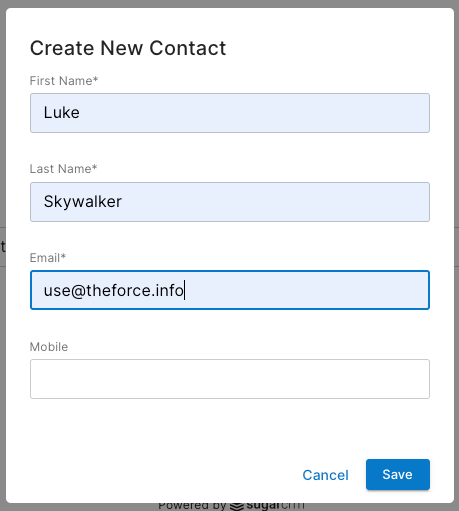
After clicking the Save button, the contact will be created and automatically populated alongside the initial role and account chosen.
Activating and Deactivating Users
To deactivate an active user or vice versa, click "Deactivate User" or "Activate User" at the end of the three-dots menu in the Users list view. 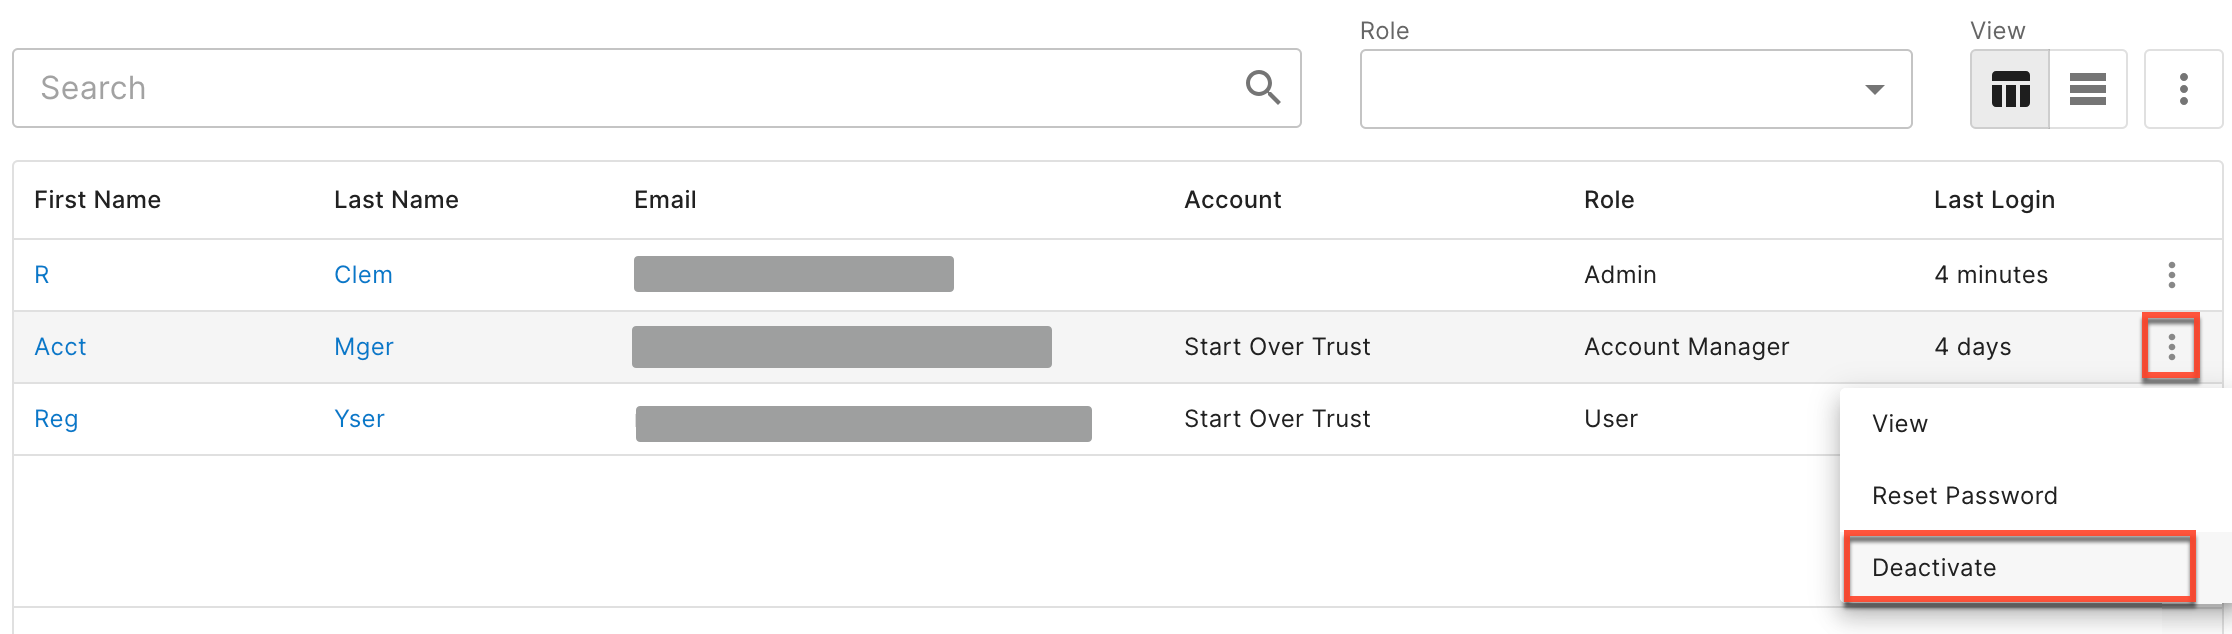
Also, you can navigate to a user's record and click the Deactivate or Reactivate link at the top of their profile.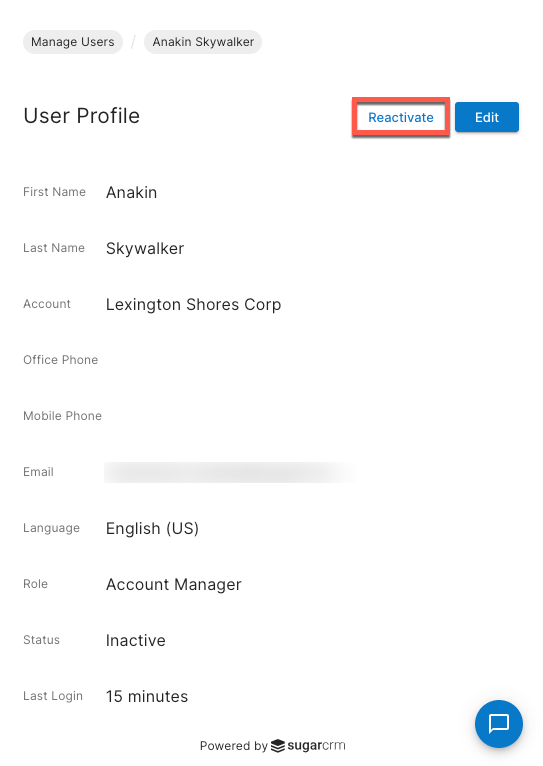
Note: When a user tries to log in after their user has been deactivated, they will see an error that says "Unauthorized".
Resetting Passwords
To reset a user's password, click "Reset Password" at the end of the three-dots menu in the Users list view. 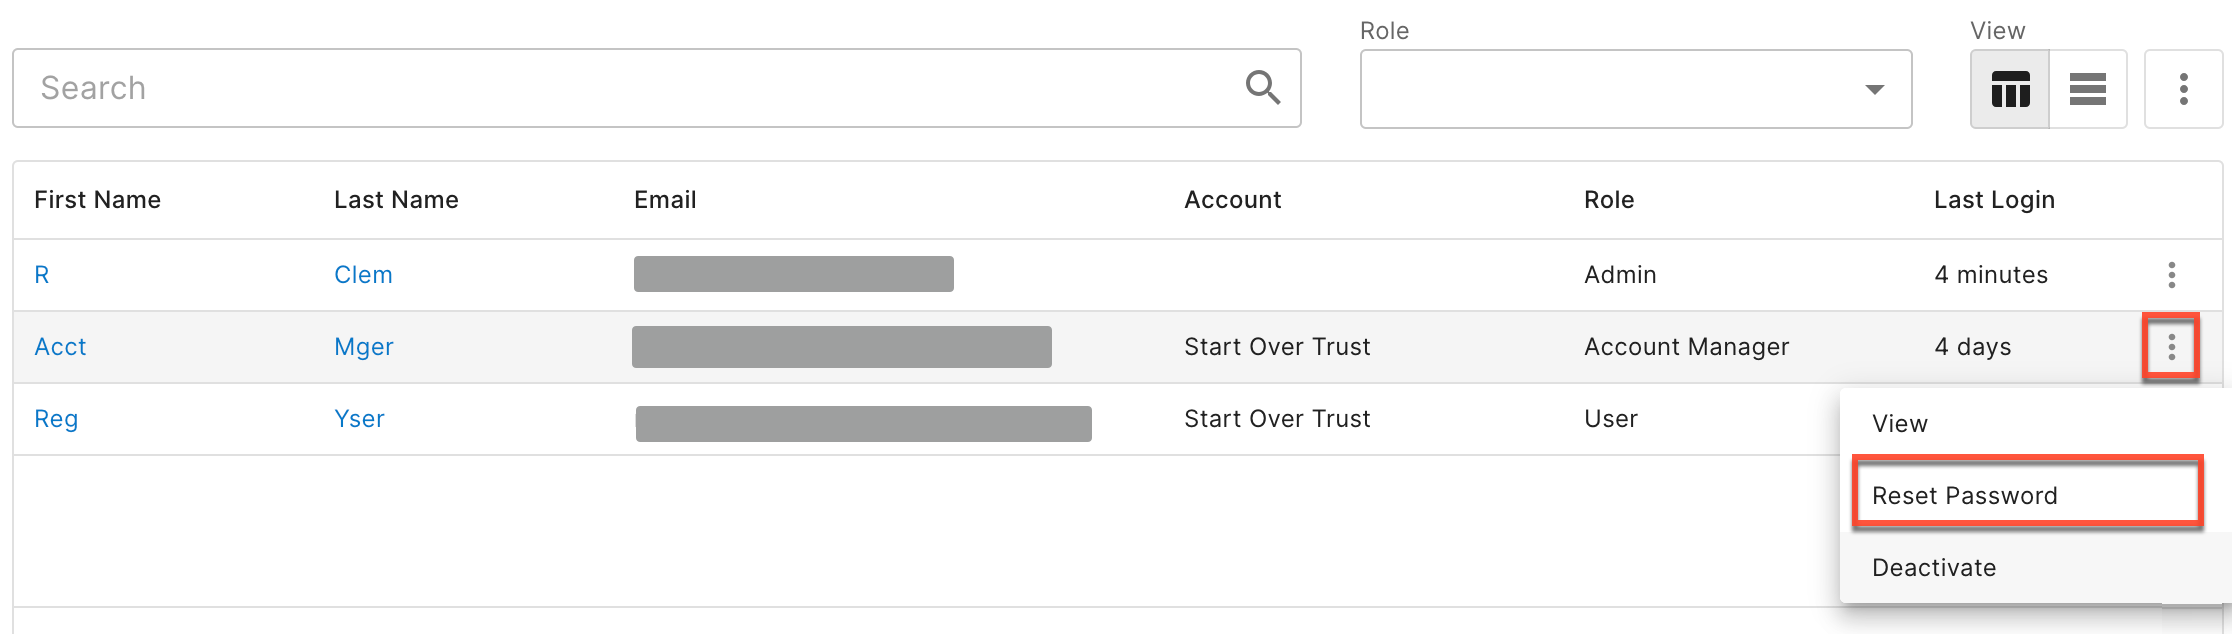
You can also navigate to the user's record view and click the Reset Password link at the top of their profile.