Sugar Self-Service Center Agent Guide
Overview
The Sugar Self-Service Center is a robust self-service portal for your users (e.g., customers). Service agents work within Sugar to manage their communications and interact with end users, while end users can use the self-service center to create and track the progress of their cases. Agents must have a Sugar Serve license type to access most of the features within Sugar that let them communicate and work with end users in the self-service center. To learn more about licenses, please review the License Management page in the administration guide.
This guide will assist service agents with completing actions in Sugar to communicate with end users in the self-service center. For more information on how end users interact with the self-service center, please see the Sugar Self-Service Center End User Guide. Additionally, for more information on how Administrators in the Self-Service Center can configure it, please see the Sugar Self-Service Center Administration Guide. Please note that administrators can change or even restrict certain features within your instance of Sugar to best suit the needs of your company. If you do not see some or all of the features in this guide, please contact your administrator.
The Cases module provides the means of communication between service agents and end users via case records. Within Sugar, the Service Console provides the ideal space for service agents to manage their cases. This documentation will give an overview of both and how they are used to communicate with your end users. For more information on these areas of Sugar as a whole, please refer to the Cases and Service Console documentation.
Creating Cases
Cases are created by agents or end users to open up communication about various issues the end user may experience. There are several ways for an agent to create cases in Sugar. No matter which way a case is created, you will see the same record creation screen.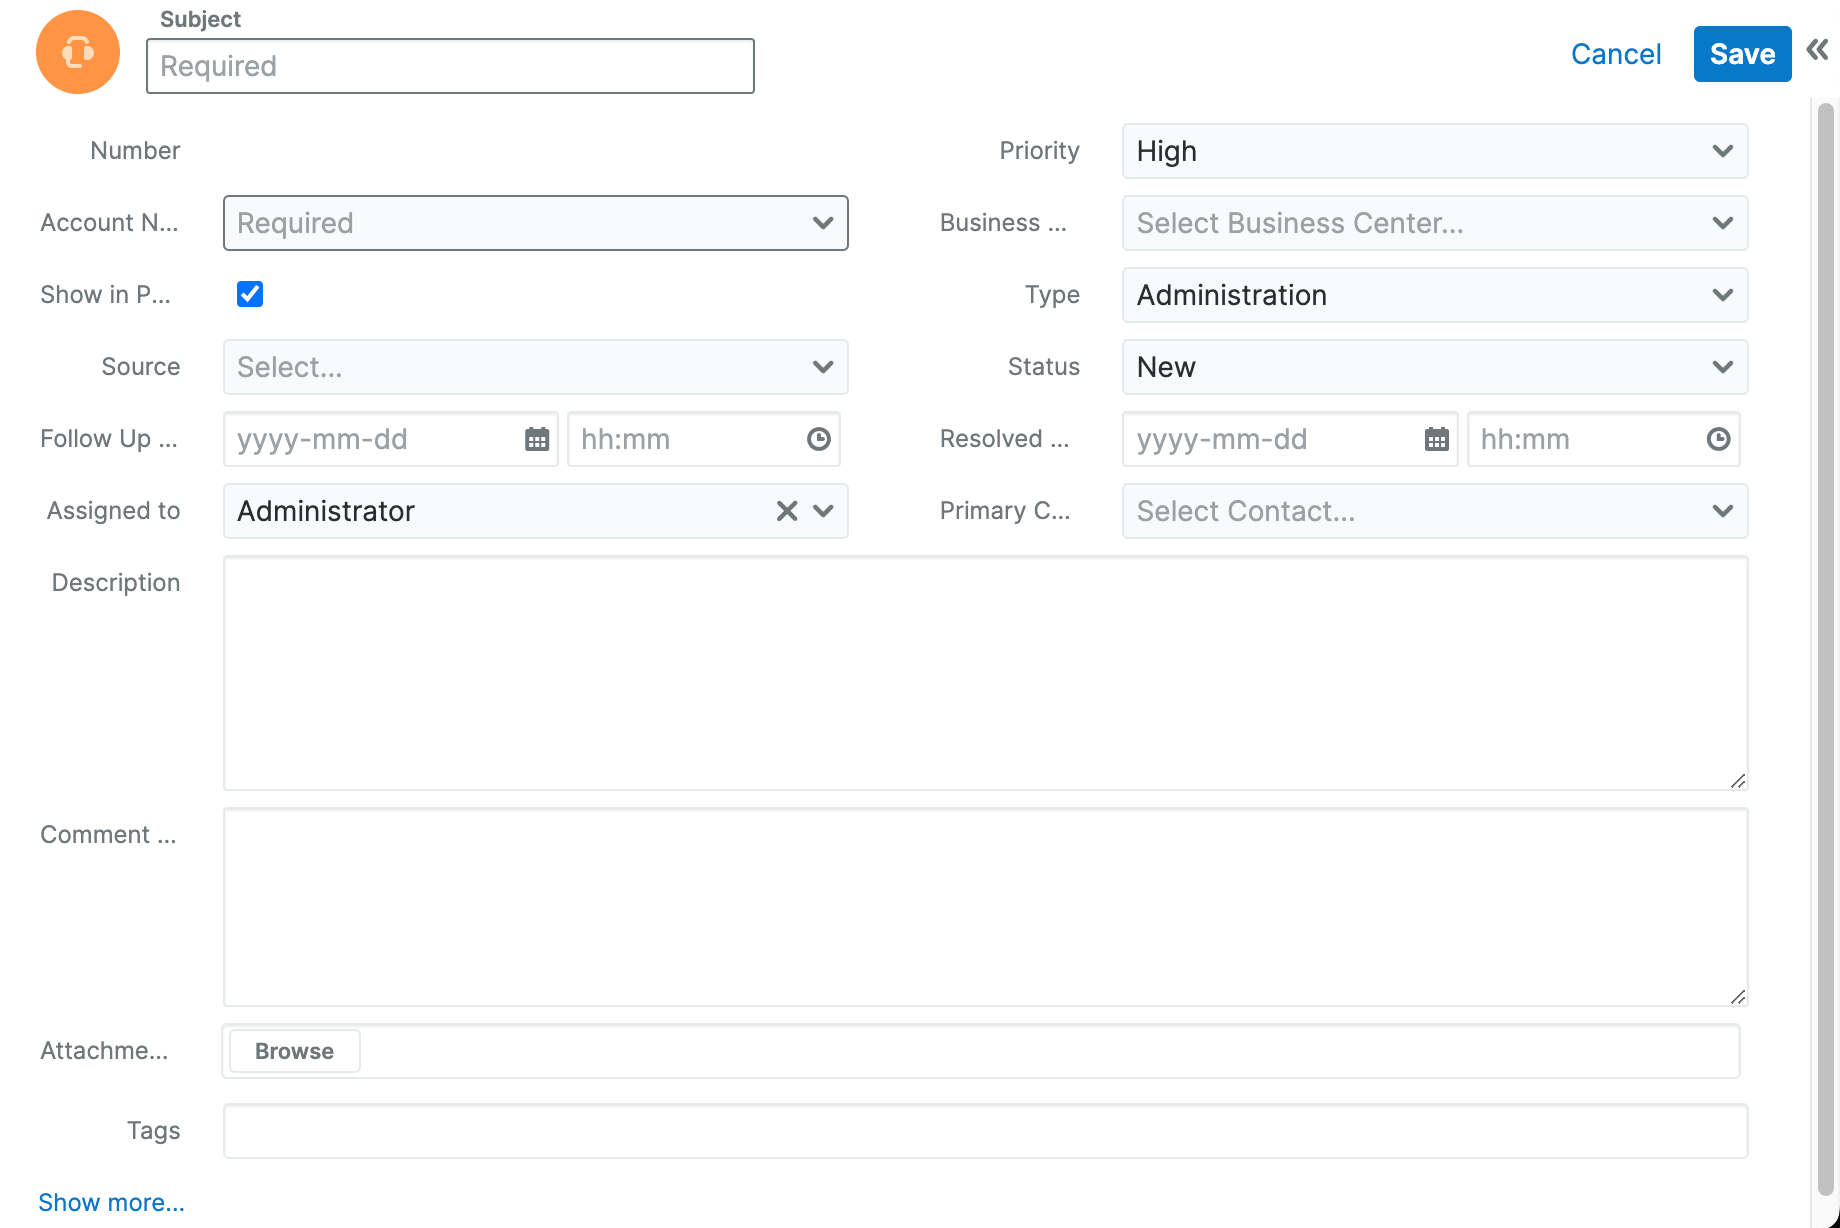
Out of the box, a case created in Sugar must have a subject and must be related to an account. In addition to these two fields, end users are also able to view the case's description, priority, status, and any attachments. Therefore, it is a good idea to populate these fields to further assist the end user. There are several places in Sugar where a case can be created. See the following pages in the Sugar Application Guide:
If you wish to open a case while communicating with an end user via SugarLive, the preferred method is to use Quick Create: 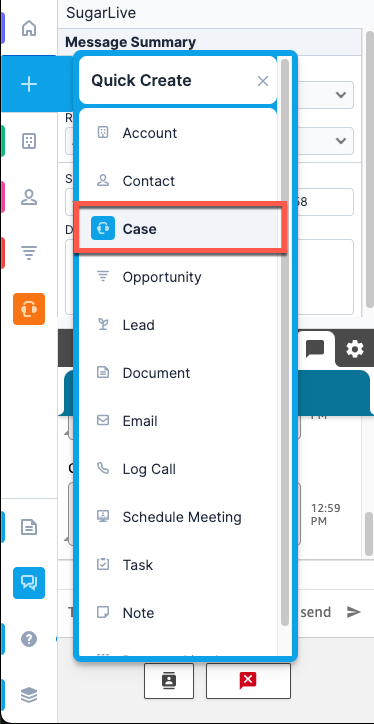
If you create a new case using Quick Create while having a contact open in the Contact tab of SugarLive, the Primary Contact and Account fields are automatically populated during case creation. The Source field of the case is also populated with "Chat" or "Phone". Please review the SugarLive page in the Application Guide for further information.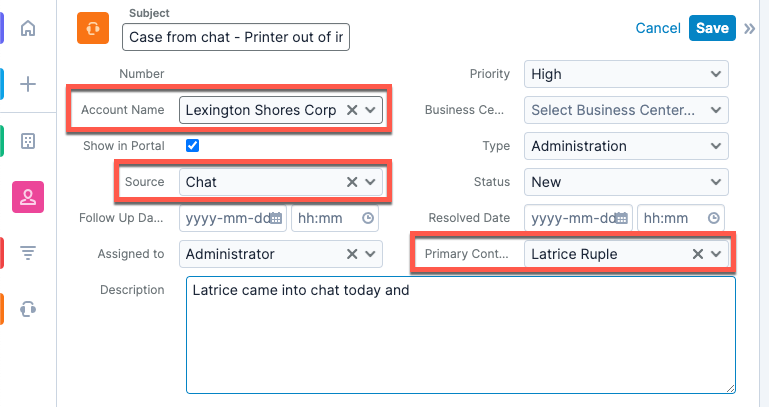
If you prefer another case creation method, you must put SugarLive into compact view first: 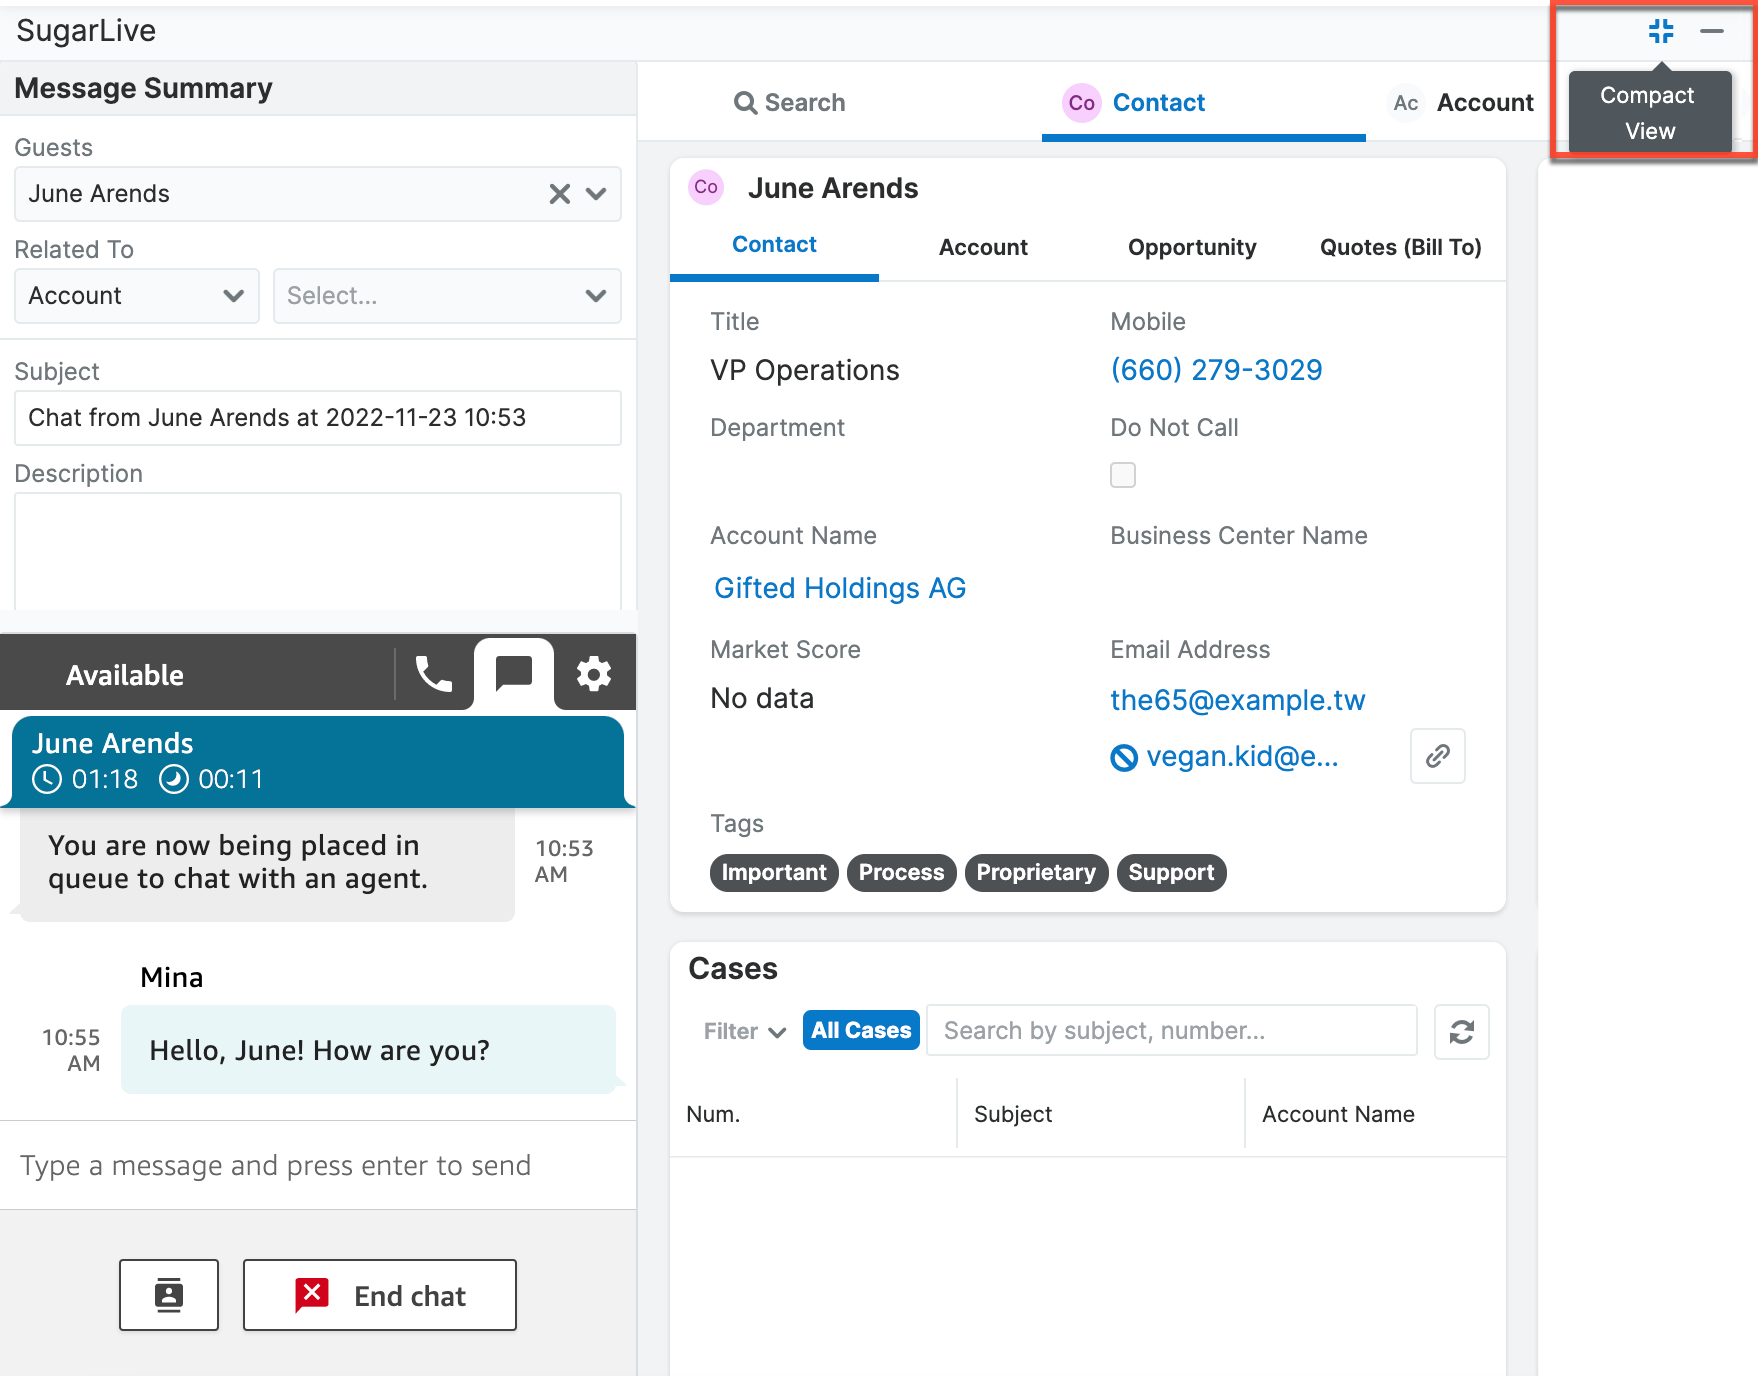
For more in-depth information, please review the Cases, SugarLive, and User Interface documentation.
Viewing Cases Created by Users
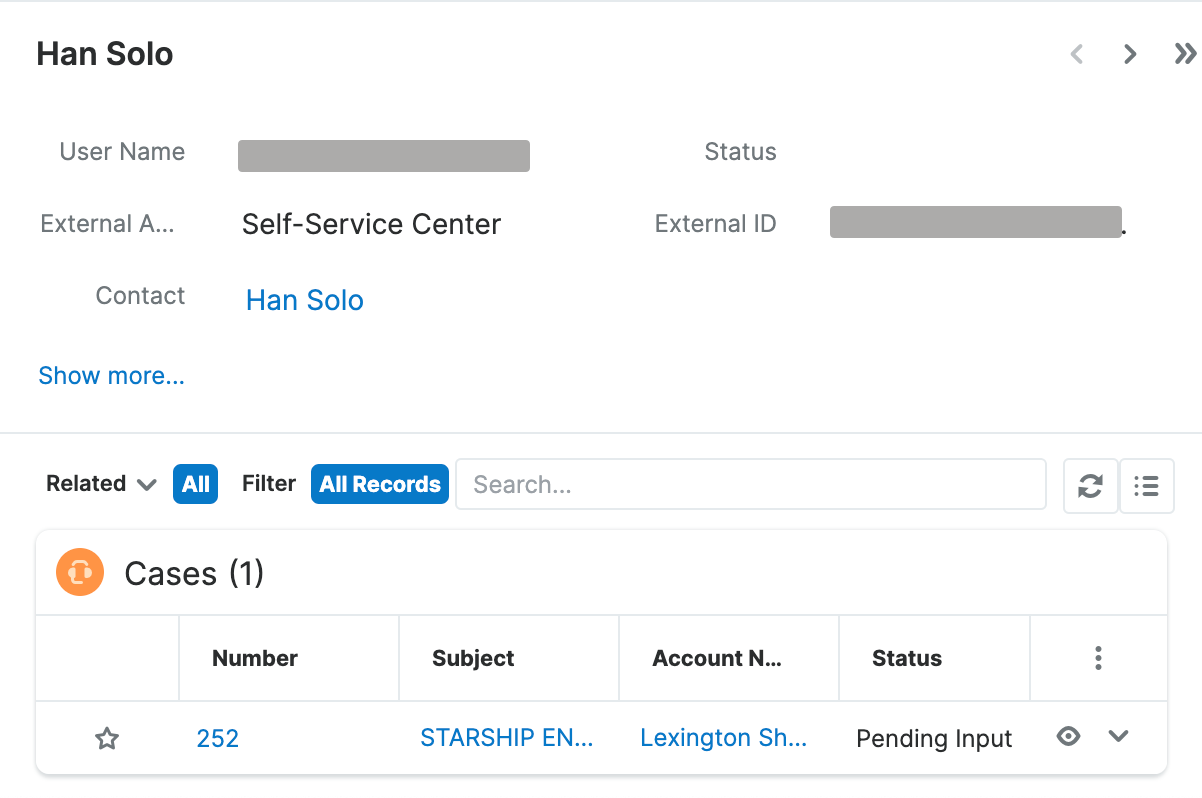
In Sugar 14.0 and higher, you can see all cases created by users including self-service center users, by viewing the contact record. It is not necessary to have the External Users module visible, as all cases related to the external user record are implicitly related to and displayed on the contact record.
In Sugar 13.0 and lower, to view cases made in the Self-Service Center, you must use the External Users module to see a contact's related cases. Alternatively, you can see the case implicitly related to the contact's account. For additional information on external users, please view the Users documentation.
If you cannot see the External Users subpanel in the Cases module, please have your administrator view the Troubleshooting Missing Modules article for information on how to add it.
Working Cases
Once a case has been created, you can view it within Sugar from a few different places. Typically, cases are viewed in the Service Console. The Service Console allows you to view cases that are assigned to you or your team, or through other views that your administrator has deployed. These tabs are called metric tabs. When clicking on a metric tab you will see a list of cases. If you click a row in the list, you will be able to view and work on the case from within the Service Console. 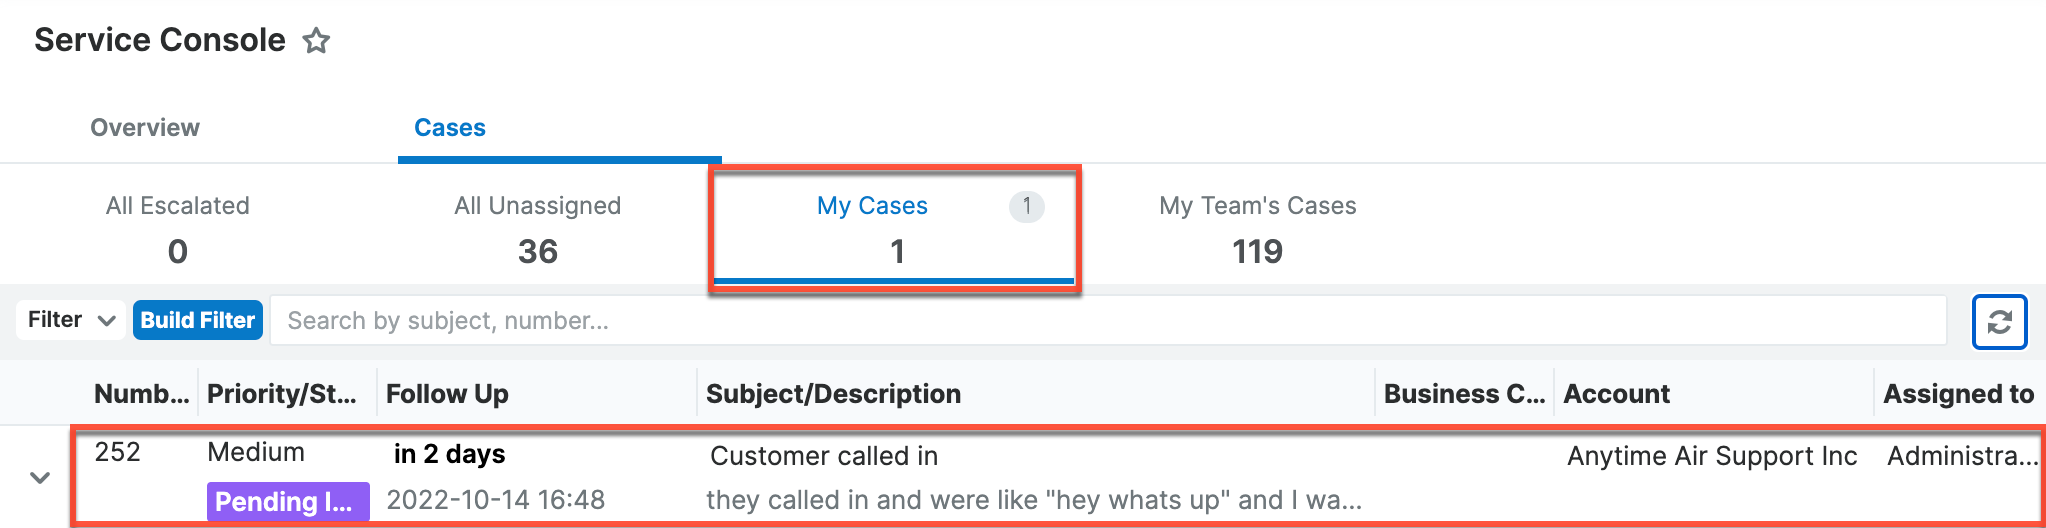
Alternatively, cases are viewed in the Cases module from the list view or by navigating directly to the record view. For further information, please view the Cases, Service Console, and User Interface documentation.
Replying to Cases
When you reply to a case, it creates a conversation with the end user. Support agents will likely spend a lot of their time reading and crafting replies to end users. This section will show you how to communicate using the Service Console or directly from the Cases module.
The Service Console is a place to conveniently reply to your end user. Clicking a line in the console will open the Case Details focus drawer. Hover over the Case Timeline dashlet to display icons and click the plus sign. To send direct communication with the end user, send an email or note. However, you can also log a call, message, or meeting. 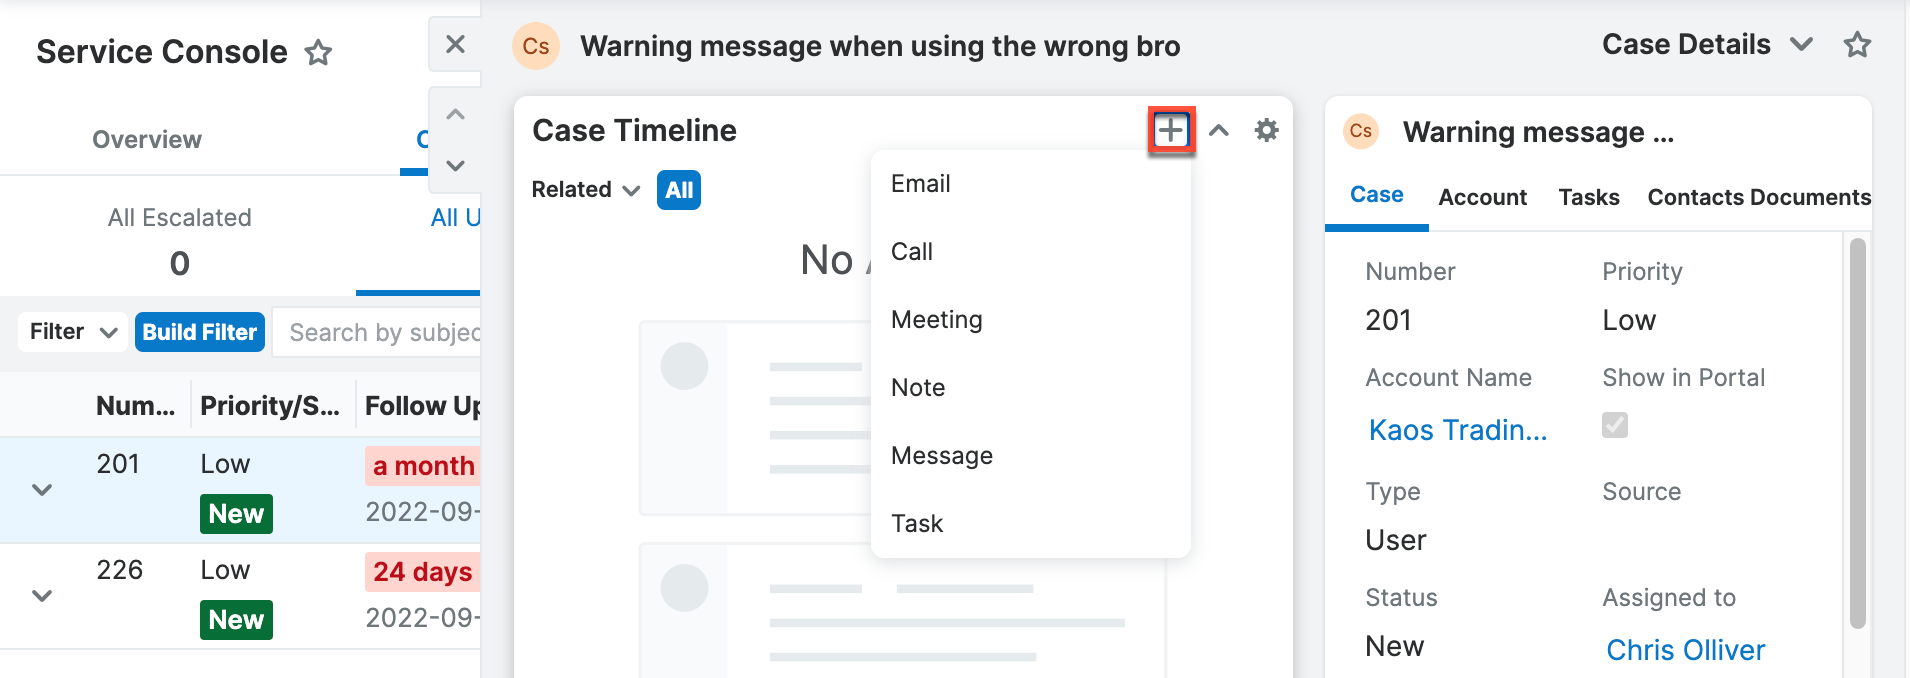
You can also reply to a case in the record view by navigating to the Notes subpanel. Click the Note option in the Case Timeline dashlet in the Service Console, or the plus icon on the subpanel in the Note record view, and a drawer will appear to create a note: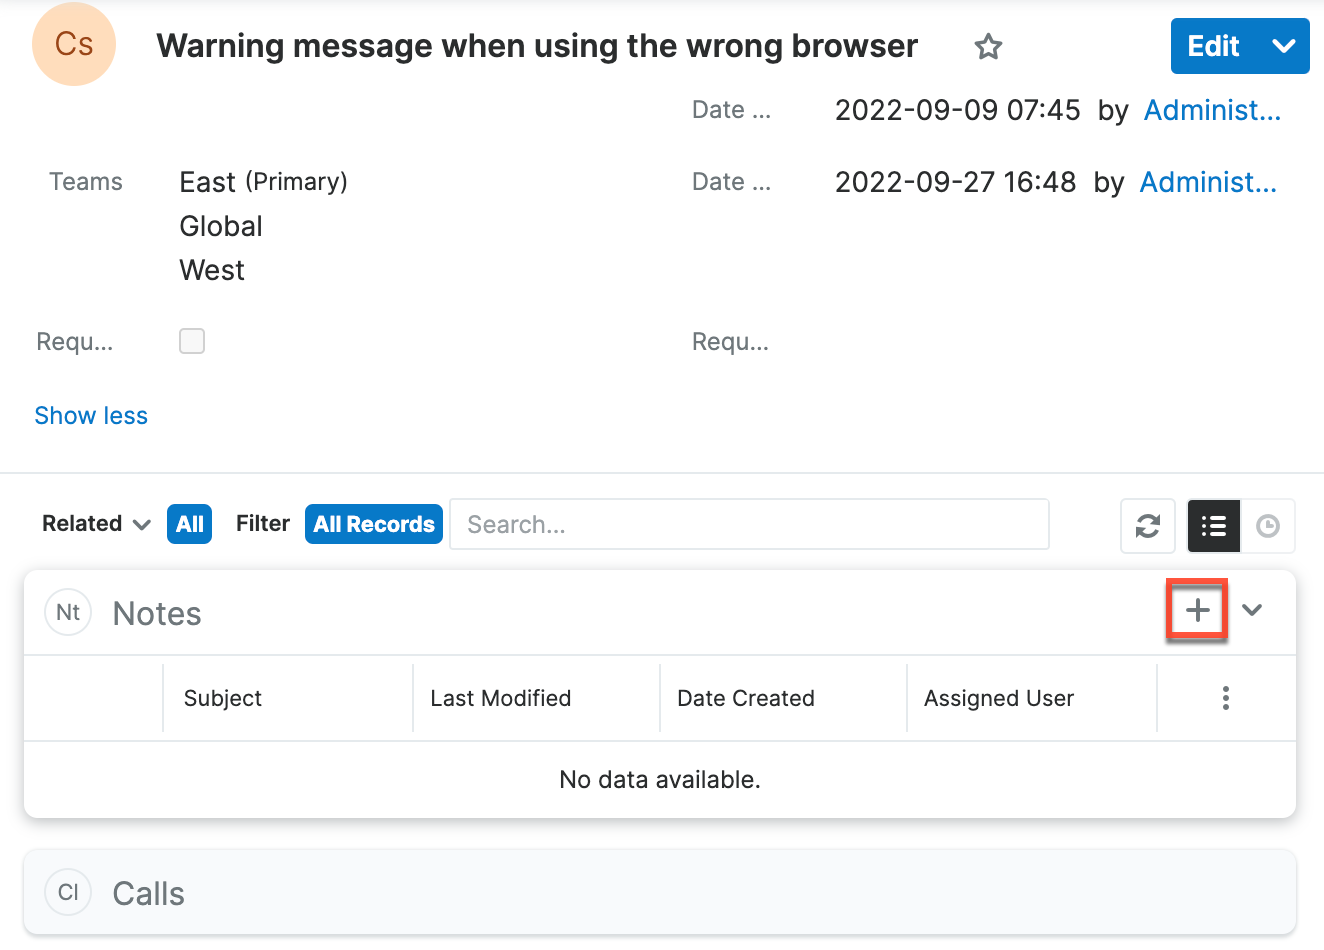
Only the note's description will be available to the end user in their self-service center; the end user will not see your note's subject, so it is important to not put anything intended for the reader in the note subject. To send an attachment, use the Browse button in the Attachments field. You may send multiple attachments to your end user, as long as they do not exceed 32MB. Additionally, if you want to add a note to a case, but do not want it to be seen by the end user (e.g., server logs for internal reference), you may uncheck the Available Externally checkbox.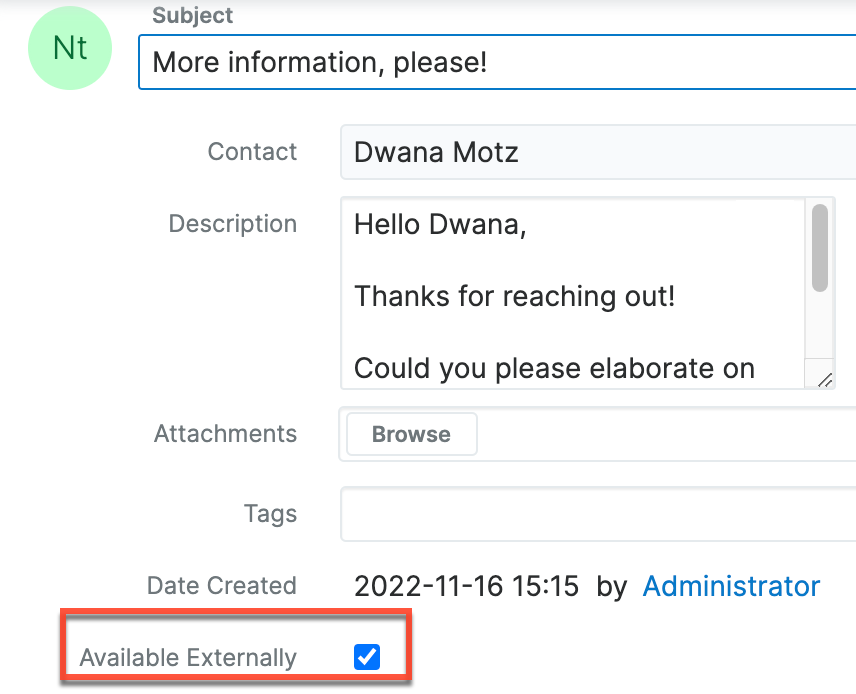
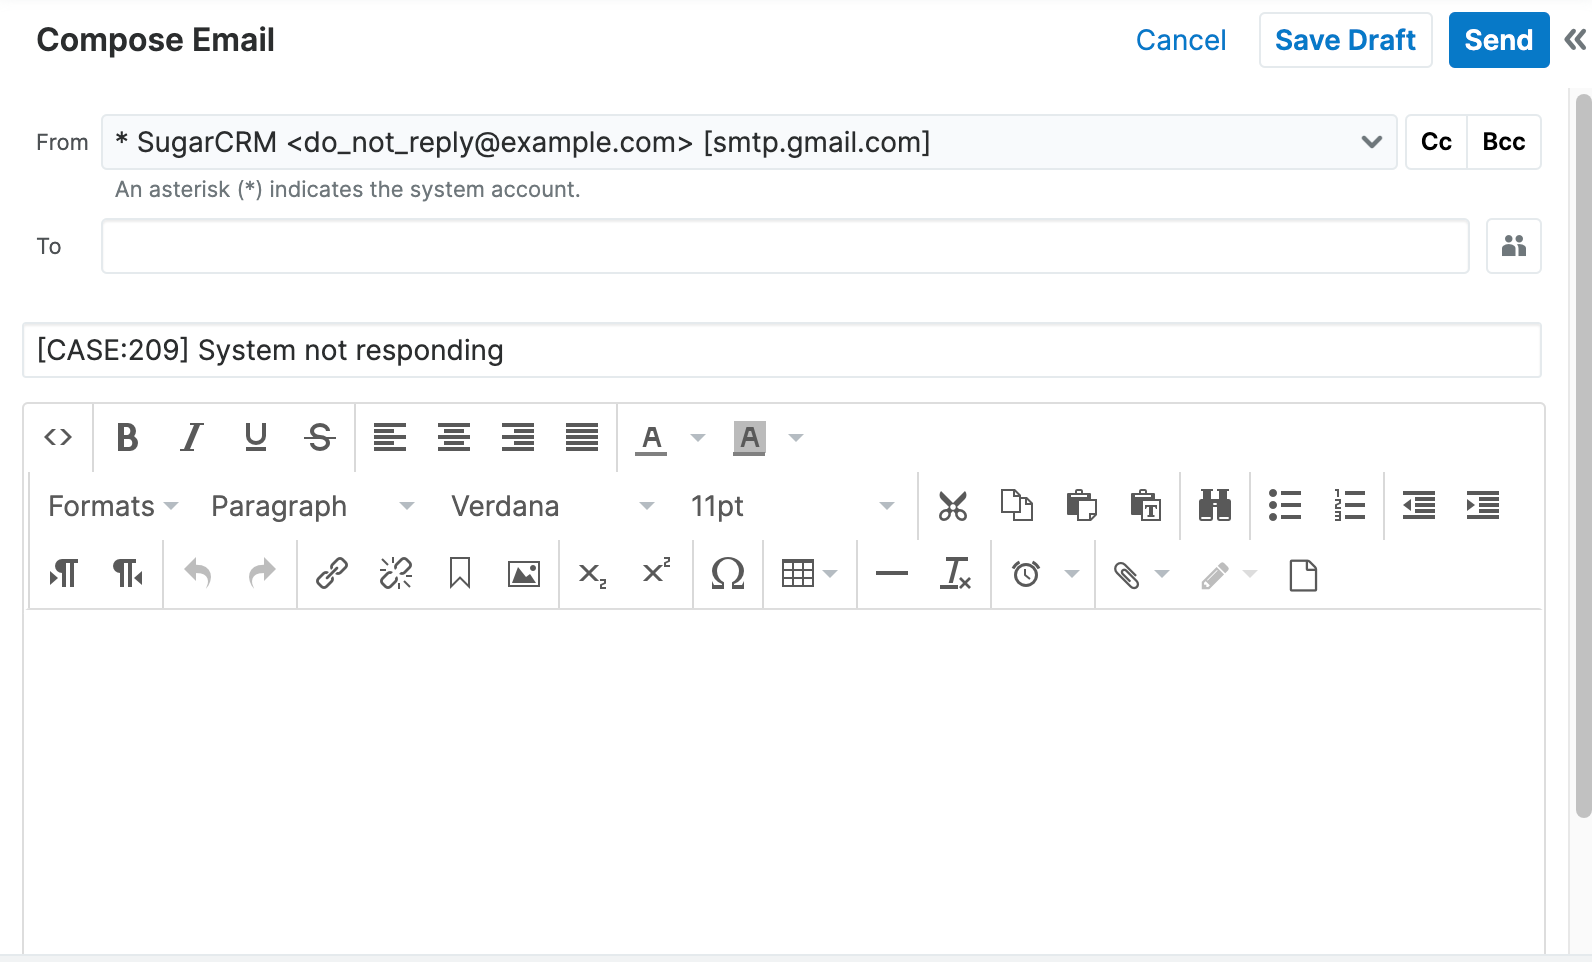
You can also send an email to your end user. Clicking the Email option in the Case Timeline dashlet, or clicking the plus sign on the Emails subpanel, shows an editor to compose an email to the end user. For more information on how to send emails, please see the Cases documentation.
For more information, refer to the Cases and Service Console documentation.
Note: Please keep in mind that only the note's description will be available to the end user in their self-service center; the end user will not see your note's subject.
Creating and Sharing Documents
Documents are created by agents to send quotes, proposals, or any other document you want to share. To share a document with a user in the Self-Service Center, you must first create the document in Sugar via the Documents module by navigating to the account record and clicking the plus sign on the Documents subpanel. Without a related account, only administrators will be able to view the document in the Self-Service Center. Once a document is related to the account, all Self-Service Center users (i.e., External Users) related to the account will be able to download the document. Additionally, the document must be marked as "Available Externally", otherwise the document will not appear in the Self-Service Center at all.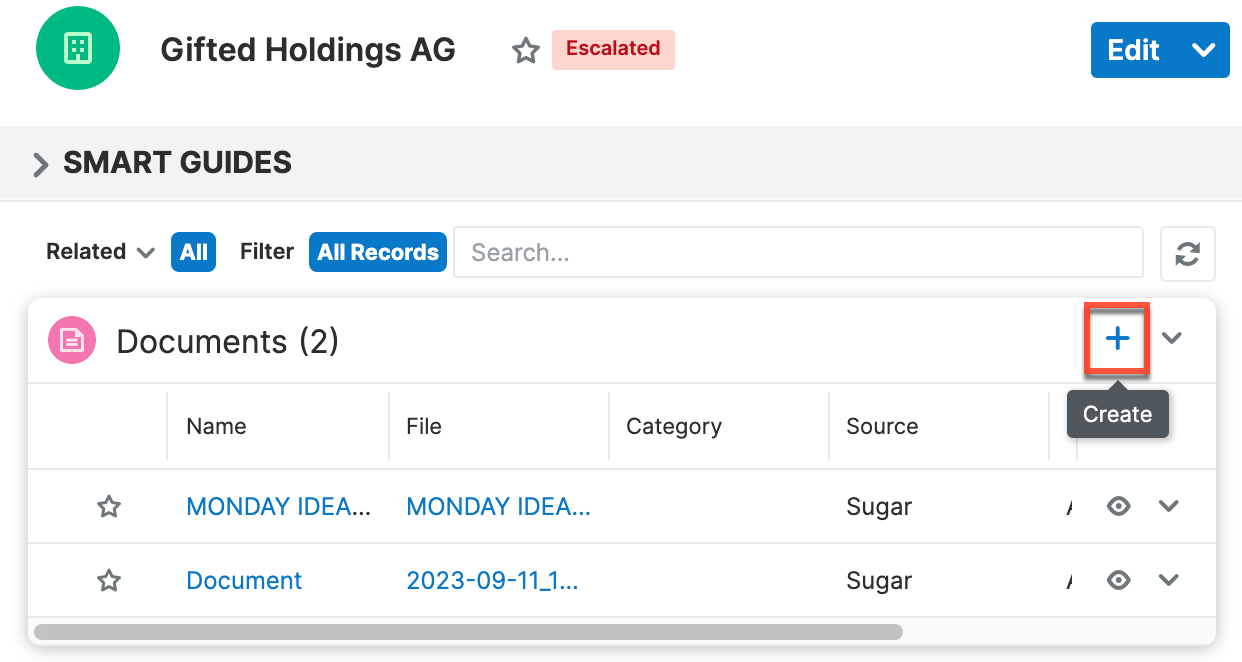
To share a document, upload your file and be certain the Available Externally checkbox is checked. Otherwise, the document will not appear in the Self-Service Center. 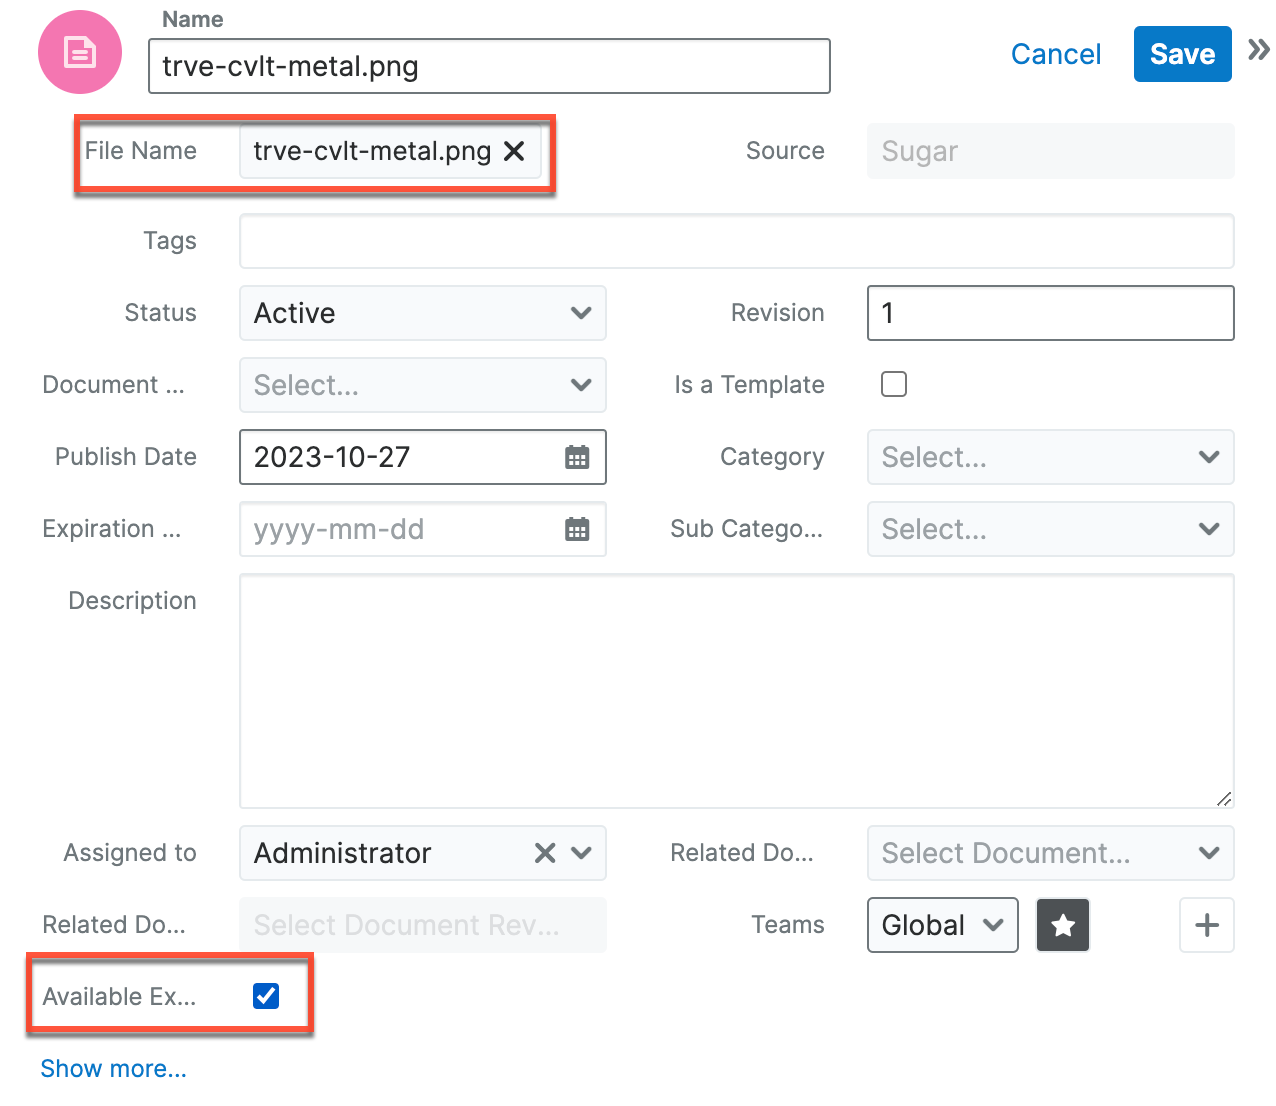
Note: Most file types are supported for upload, but the following file extensions are not allowed: php, php3, php4, php5, pl, cgi, py, asp, cfm, js, vbs, html, htm. Unsupported file types may be uploaded as a .txt file.
For further information on the Documents module, please refer to the Documents page.
Configuring Self-Service Center Access for Users
If you are a Self-Service Center administrator or account manager, you can invite users to access the portal. You can easily check this by logging in to the Self-Service Center and seeing if you have "Manage Users" available in the menu: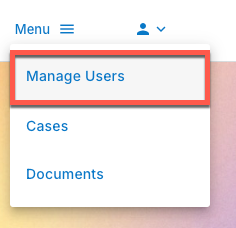
If you do not see this, please reach out to your administrator so they can invite users instead.
Administrators and account managers can log in to the Self-Service Center, and from there, they can invite account managers, regular users, and even other administrators. Please refer to the Self-Service Center User Guide for more information on how to create and manage users.
Communicating With SugarLive
End users can use the Self-Service Center to communicate directly with agents via live chat. Inside of Sugar, SugarLive is used to communicate with these customers. SugarLive must be set up by the CRM administrator before customers may use it. For more information on how an administrator can configure SugarLive, please see the Sugar Self-Service Administration Guide.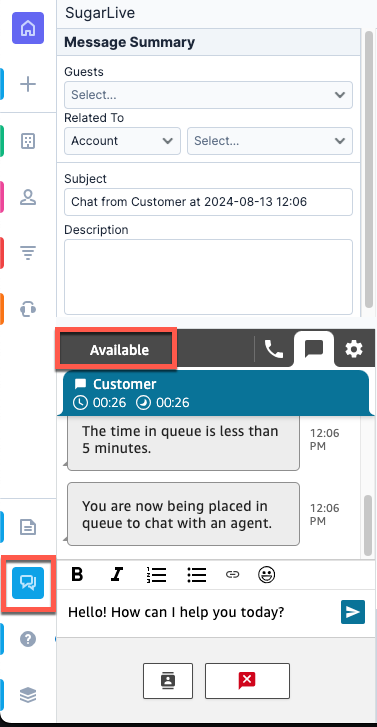
To use SugarLive, click the SugarLive icon in the navigation bar to open up the SugarLive panel, then change your status from "Offline" to "Available" and you can communicate with people who call or chat in for assistance. When on an active chat or call, the SugarLive panel automatically searches for a matching record to easily and quickly log the communication.
For in-depth information on how to use SugarLive to communicate with customers, please see the SugarLive documentation in the Application Guide. For additional details on how end users will use SugarLive chat, please see the Sugar Self-Serive Center User Guide. Lastly, for additional information regarding creating a case while using SugarLive, please review the Creating Cases section of this article.