How to save a search on your mobile device
Overview
This guide will show you how to save your often used searches in sales-i, saving you valuable time carrying out admin, giving you more time to sell.
Download a PDF version
Apple
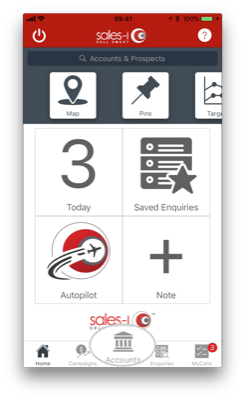
Step 1: Select Accounts
Tap Accounts from the menu at the bottom of the screen.
Step 2: Tap magnifying glass icon
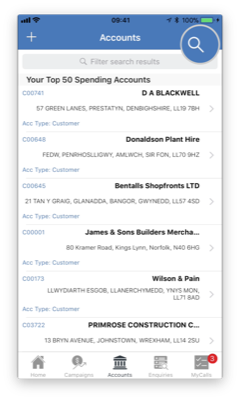
Accounts in the sales-i app will default to show you a list of your Top 50 Spending Accounts. To start a new search tap the magnifying glass icon in the top right corner of the screen.
Note: Filter search results allows you to filter the results list of a search – this does not conduct a new search.
Step 3: Select your Search options
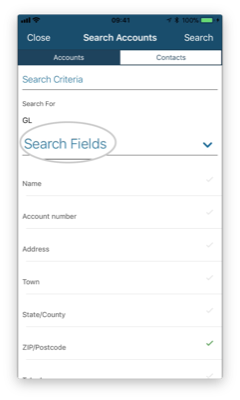
This will bring you to the Accounts Search screen. You can use Search Fields and Account Types to specify your search criteria.
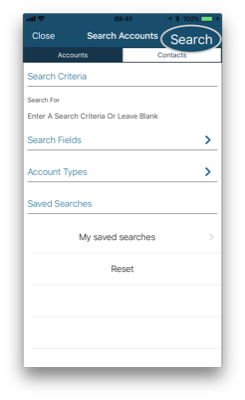
Step 4: Tap Search
When you’re happy with the search criteria, tap Search to view the results.
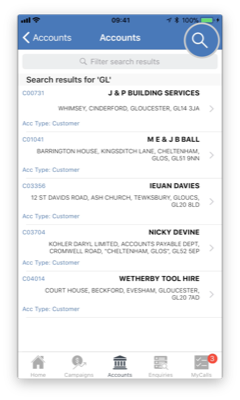
Step 5: Tap magnifying glass icon
To save this search tap the magnifying glass icon in the top right corner of the screen.
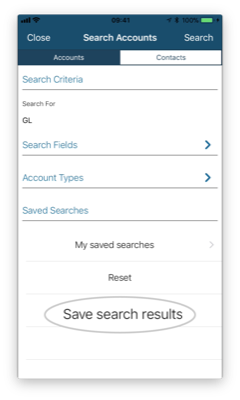
Step 6: Tap Save Search Results
You will now see the option to Save Search Results at the bottom of the Accounts Search screen.
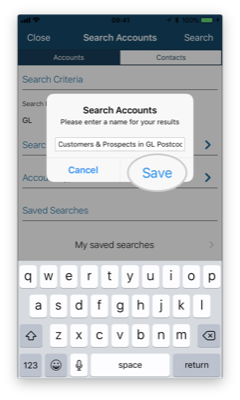
Step 7: Enter search name and Tap Save
Enter a name for your search in the pop-up window and tap Save.
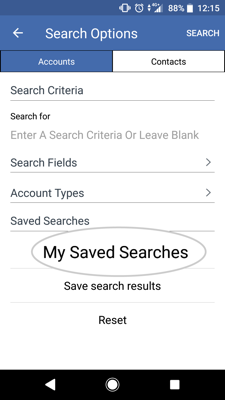
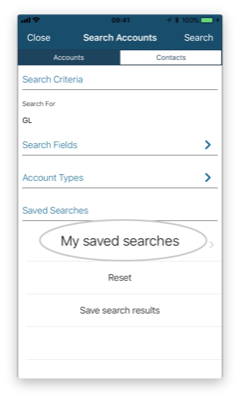
Step 8: My Saved Searches
Your search is now saved. You can access this search by tapping My Saved Searches at the bottom of the Accounts Search screen*.
Please note: Every time you access this saved search your search results will be automatically updated with any new accounts that match your search criteria.
Android
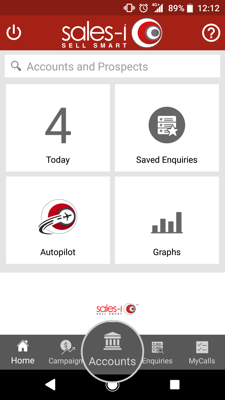
Step 1: Tap Accounts
Tap Accounts from the menu at the bottom of the screen.
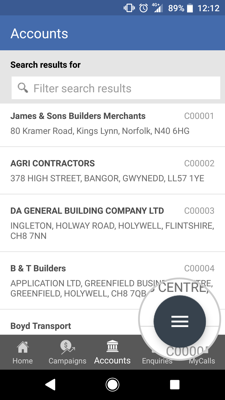
Step 2: Tap the three lines icon
Tap the three lines icon to open up further options.
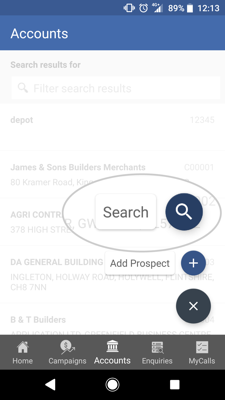
Step 3: Tap magnifying glass icon
Accounts in the sales-i app will default to show you a list of your Top 50 Spending Accounts. To start a new search tap the magnifying glass icon.
Note: Filter search results allows you to filter the results list of a search – this does not conduct a new search.
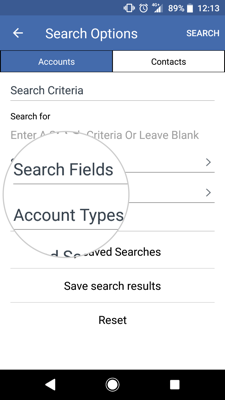
Step 4: Select your Search options
This will bring you to the Accounts Search screen. You can use Search Fields and Account Types to specify your search criteria.
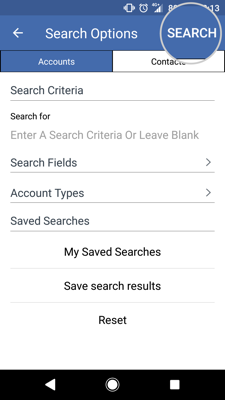
Step 5: Tap Search
When you’re happy with the search criteria, tap Search to view the results.
Step 6: Tap the three lines icon
Tap the three lines icon to open up further options.

Step 7: Tap magnifying glass icon
To save this search tap the magnifying glass icon.

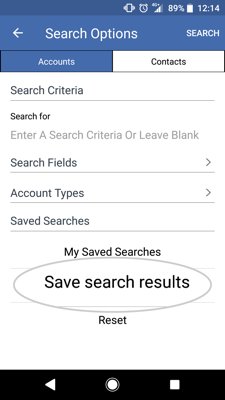
Step 8: Tap Save Search Results
You will now see the option to Save Search Results at the bottom of the Accounts Search screen.
Step 9: Enter search name and Tap Save
Enter a name for your search in the pop-up window and tap Save.

Step 10: My Saved Searches
Your search is now saved. You can access this search by tapping My Saved Searches at the bottom of the Accounts Search screen*.
Please note: Every time you access this saved search your search results will be automatically updated with any new accounts that match your search criteria.
