How to import contacts into your sales-i (Classic) app
Overview
This guide will explain how to import your saved contact details from your device's Contacts directly to the sales-i app. Information such as a contact’s name, phone, email & address can be copied across - this will save valuable time.
Apple
Download a PDF version
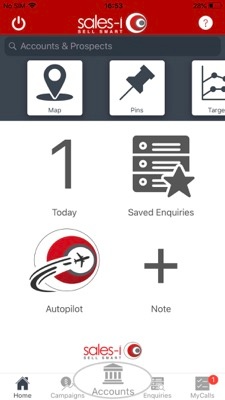
Step 1: Quick Search bar
From the sales-i home screen, use the Quick Search bar to search for the account you would like to add a contact to.
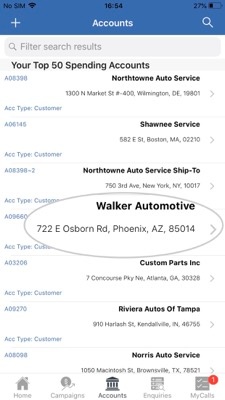
Step 2: Select Account
Select the desired Account from the results list.
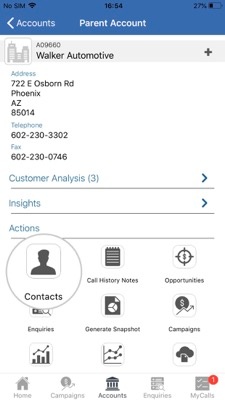
Step 3: Tap Contacts
Scroll down to the Actions section and tap Contacts.
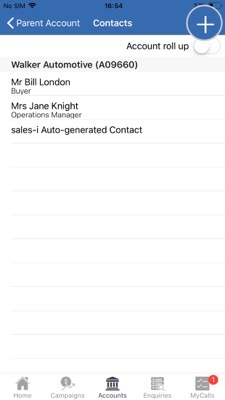
Step 4: Tap +
Tap the + symbol in the top right hand corner of your screen.
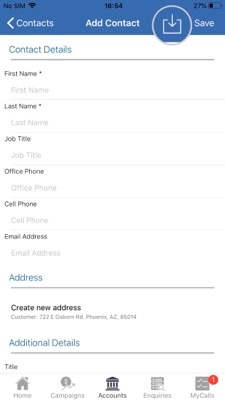
Step 5: Tap Import icon
To import a contact, tap the Import icon in the top right hand corner.
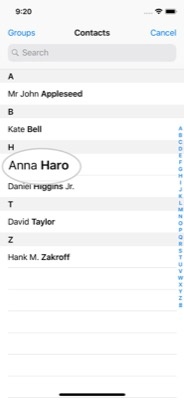
Step 6: Tap contact to upload
Next, tap on the contact you would like to import from your device's Contacts.
Please Note: You will need to allow sales-i to access your contacts.
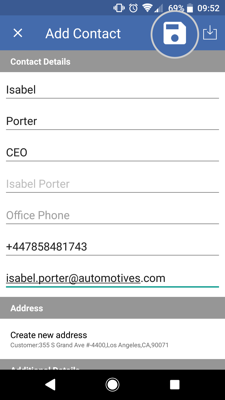
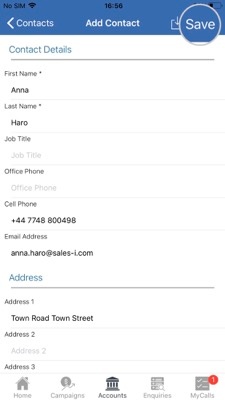
Step 7: Tap Save
You will now see the details being added against the contact's name.
You can add and amend information as required.
Once ready, tap Save in the top right hand corner.
Android
Download a PDF version
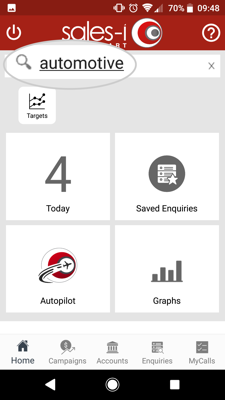
Step 1: Quick Search bar
From the sales-i home screen, use the Quick Search bar to search for the account you would like to add a contact to.
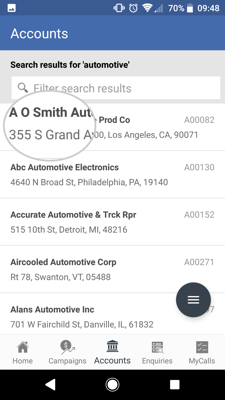
Step 2: Select Account
Select the desired Account from the results list.
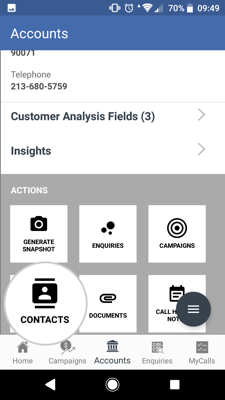
Step 3: Tap Contacts
Scroll down to the ACTIONS section and tap CONTACTS.
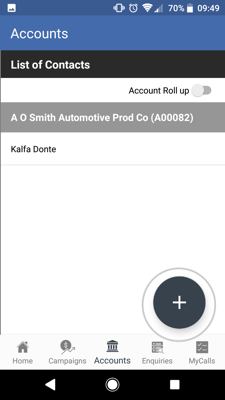
Step 4: Tap +
Tap the + symbol in the bottom right hand corner of your screen.
Step 5: Tap Import icon
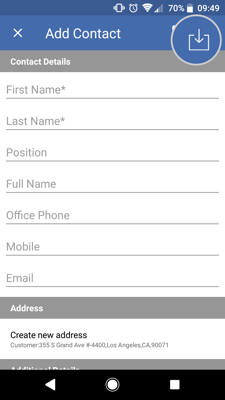
To import a contact, tap the Import icon in the top right hand corner.
Step 6: Tap contact to upload
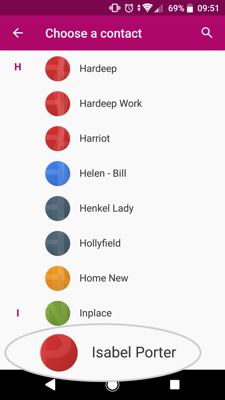
Next, tap on the contact you would like to import from your device's Contacts.
Please Note: You will need to allow sales-i to access your contacts.
Step 7: Tap Save
You will now see the details being added against the contact's name.
You can add and amend information as required.
Once ready, tap the Save icon in the top right hand corner.
