Managing Nurtures
Overview
In the Nurtures list view, you can access your nurtures to do any of the following:
- Editing nurtures
- Pausing nurtures
- Unscheduling nurtures
- Unpublishing nurtures
- Renaming nurtures
- Copying nurtures
- Deleting nurtures
- Measuring success with analytics
To access the Nurtures list view click the Nurtures icon in the navigation bar.

Searching for Nurtures
The Nurtures list view defaults to the most recent nurture at the top. If you prefer to browse by the folder in which the nurture is saved, then click the Folder View icon in the toolbar.
To sort the view:
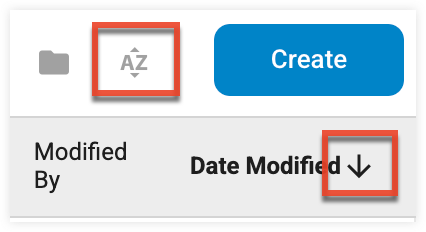
- Click the Sort icon in the toolbar to choose a field on which to sort. The list is sorted in ascending order.
- Click any column heading to change the sort the list by that column. Click the column again to change the sort order to descending or ascending.
To quickly locate specific nurtures:
- Type the nurture name, or portion of the name, in the Search field and then click the magnifying glass icon.

Viewing Nurture Details
Select a row to display nurture details in a panel on the right-hand side of the page. Click anywhere in the row except for the nurture name or ID, which will open the Nurture builder if the nurture is in the draft status, and the Analytics View if the nurture is in the published status.

Status Types
You can view the status of a nurture in the Status column:
- Draft: Nurture is incomplete.
- Error: There was an error in publishing the nurture. Please contact Sugar Support if your nurture shows an error status.
- Published: Nurture is active.
- Publishing: Temporary status while a nurture publish is in progress.
- Scheduled: Nurture has been designed and is scheduled to be activated in the future. The scheduled start date and time are displayed in the details panel.
- Staged: Previously published nurture has been edited but not republished.
- Unpublished: Nurture was previously published but has been deactivated.
- Unpublishing: Temporary status while a nurture unpublish is in progress.
Editing Nurtures
In the Nurture builder you can edit nurtures, including adding or deleting workflow steps, adjusting settings, and updating recipients.
The process to edit a nurture varies slightly depending on whether or not it has been published yet. To edit an already published nurture, refer to the Editing Published Nurtures section. To edit a draft or unpublished nurture, follow these steps:
- From the Manage list view, click a nurture name to open the nurture for editing in Nurture Builder.
- Navigate to the desired location in the builder and make your changes.
- Click the Save and Exit button in the builder toolbar when complete.
Editing Published Nurtures
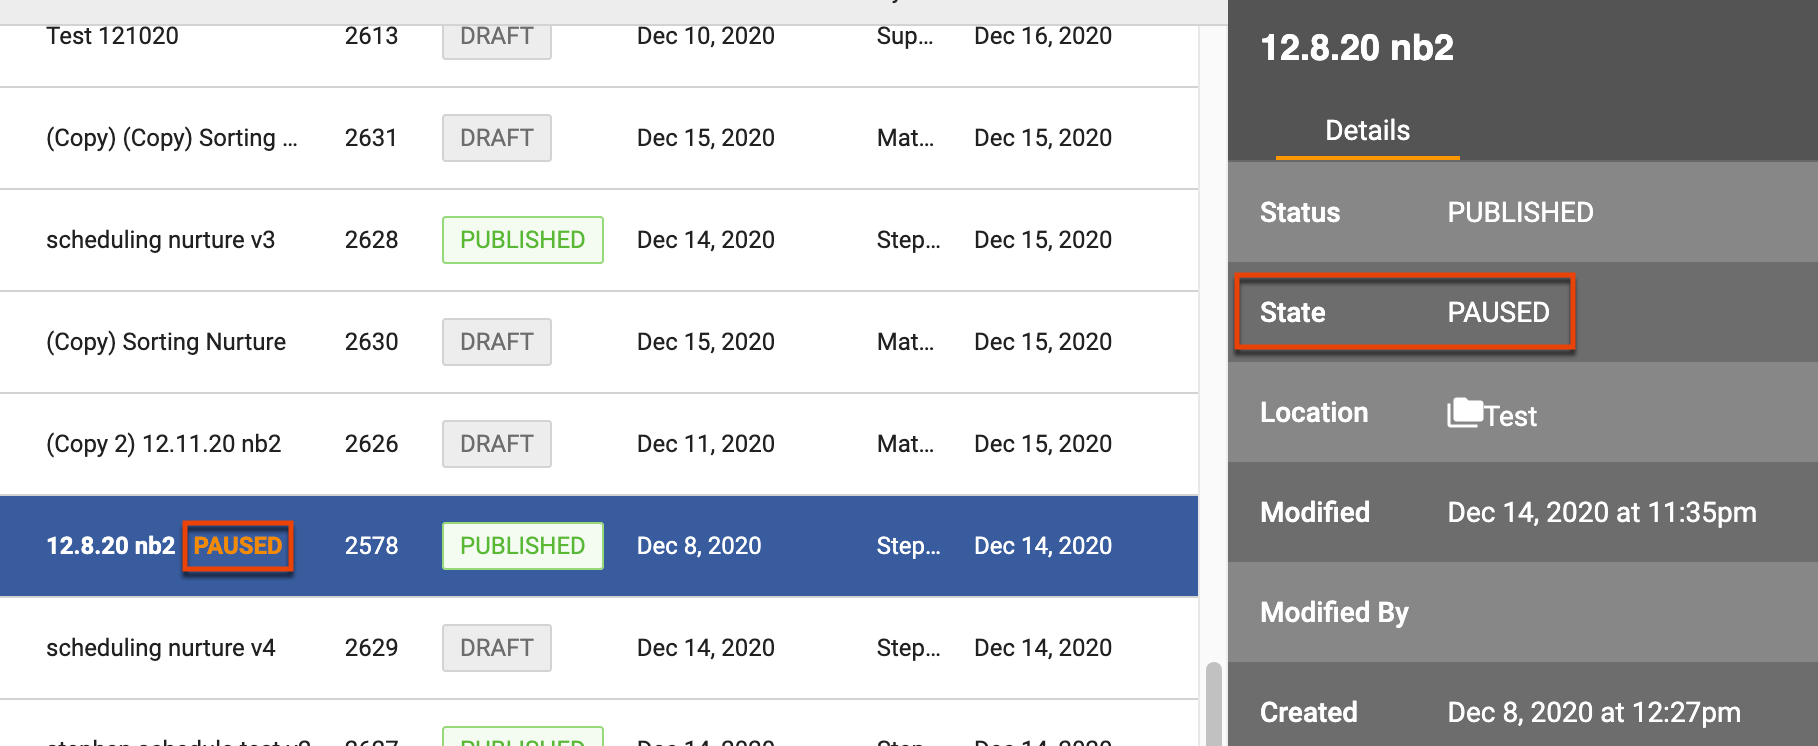
Before editing a published nurture, consider whether you want to pause the nurture to temporarily stop recipients from flowing through while you are editing. When you pause a published nurture, the recipients remain at the current nurture step until you republish the nurture. The nurture is identified in the Manage list view in a Paused state, both next to the nurture name and in the details panel:
Important: If your workflow includes Pause elements, the defined time period stops decrementing when you pause the nurture. Additionally, if you make edits that create a new version of the nurture, the time is reset when you republish the nurture. This behavior is different from the legacy nurture builder, in which the time would continue to decrement while a nurture was in Inactive status.
If you do not pause the nurture while you are editing, then recipients will continue to flow through the original version of the nurture until the updated version is published.
To edit a published or staged nurture:
- From the Manage list view, click a nurture name to open the nurture for editing in Nurture Builder.
- The following confirmation dialog displays, requiring you to choose whether or not to pause the nurture:
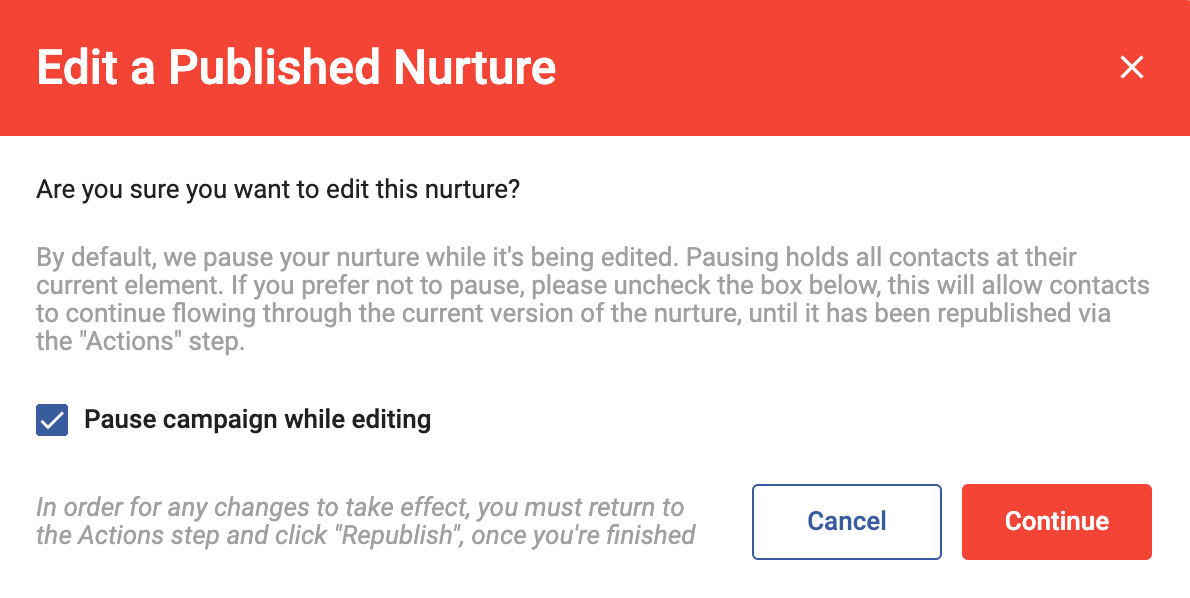
- To pause the nurture while you are editing, leaving recipients at their current step in the workflow, leave the "Pause campaign while editing" option enabled, and then click the Continue button.
- To allow recipients to continue flowing through the original version of the nurture while you edit, de-select the "Pause campaign while editing" checkbox, and then click the Continue button.
- Make the desired changes, and then click the Republish button on the Actions step to activate the new version of the nurture.
When republished, contacts will flow through the new version, including all edited elements in the new version. Recipients that were already within the flow at the time of republishing will continue from the element they were on and flow through the edited version. For more information on nurture versions, refer to the About Nurture Versioning section.
Note: When deleting elements from a published nurture flow, you will be prompted to move contacts that are currently flowing through that step to another step. For more information on deleting elements, please refer to the Designing Nurtures page.
Adding Recipients to Nurtures
You can add individual recipients or a list to a published nurture without going through the process outlined above.
To add an individual recipient to a Published nurture:
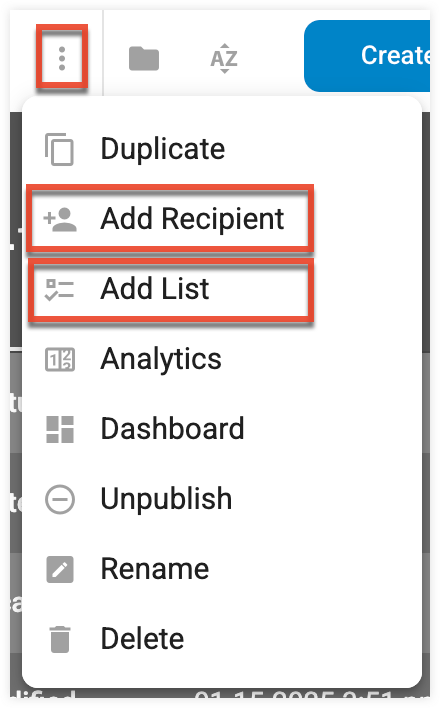
- From the Manage Nurtures list view, select the row with the nurture, and then expand the three-dots menu in the toolbar.
- Select "Add Recipient" or "Add List".
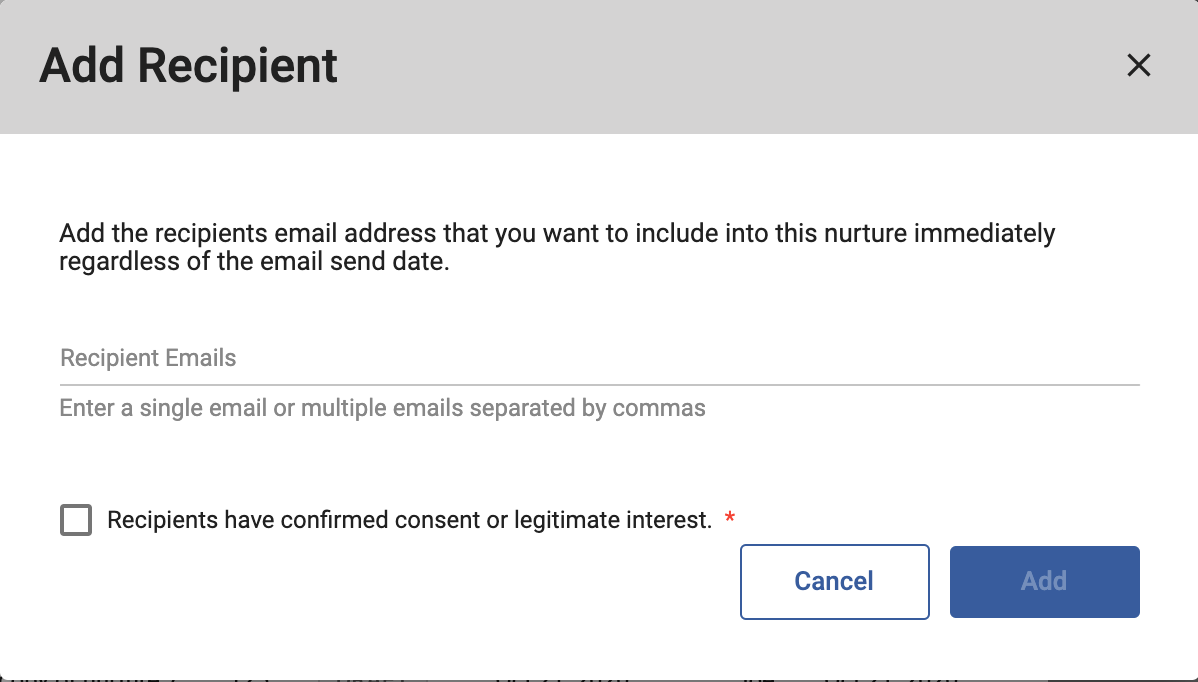
- To add a single recipient, type out the recipient's email address, select the consent checkbox, and then click the Add button.
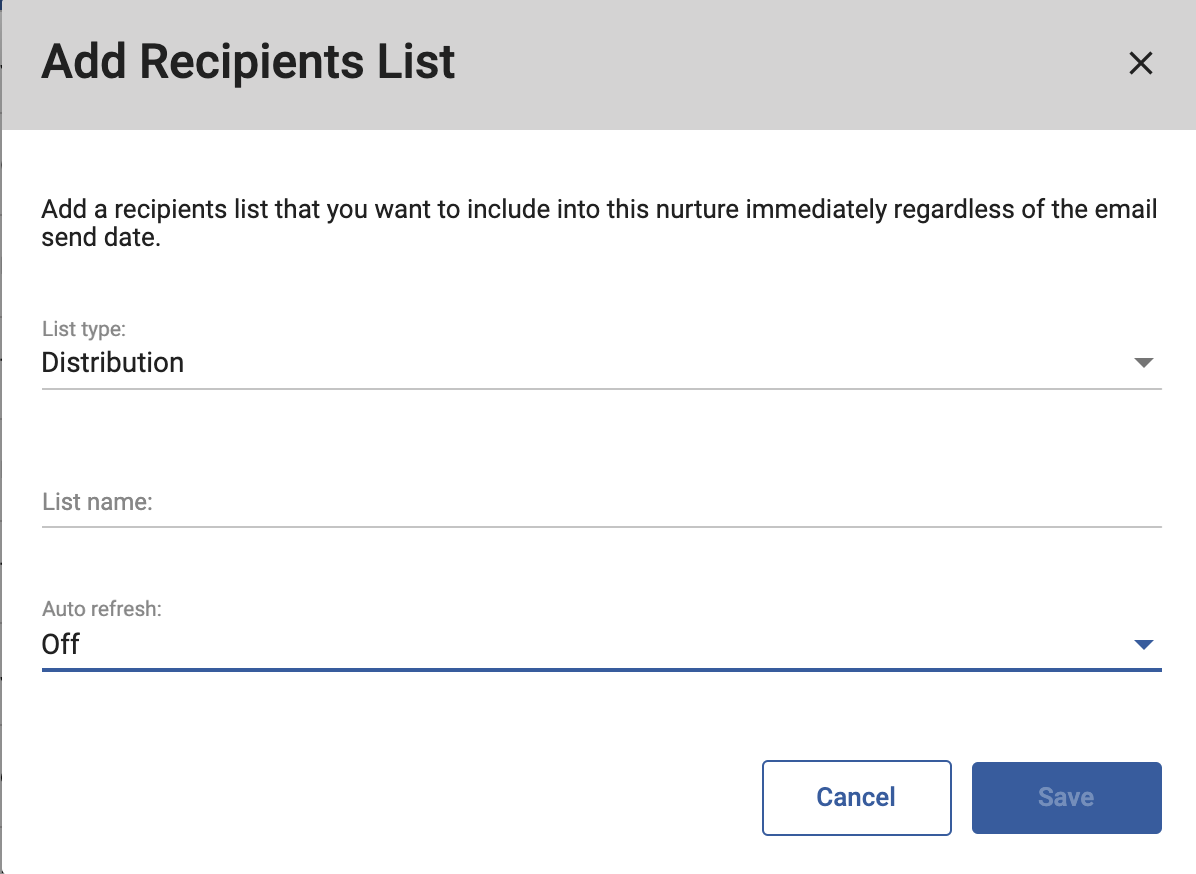
- To add a list, select the list type and list name.
- Choose an Auto Refresh option to determine the interval at which Sugar Market will update the list members according to the latest sync.
- Click the Add button.
Pausing Nurtures
You can pause a published nurture without making any edits to the nurture. To do this, follow the steps above to edit a nurture, selecting the "Pause" option, and save it without making any changes. The nurture will remain in Published status with a state of "Paused". After you republish this nurture, a new version will not be created since no changes were made.
Unscheduling Nurtures
Nurtures that are in Scheduled status can be unscheduled up until the time it is scheduled to be published as defined in Step 5 of the Nurture Builder.
To unschedule nurture:
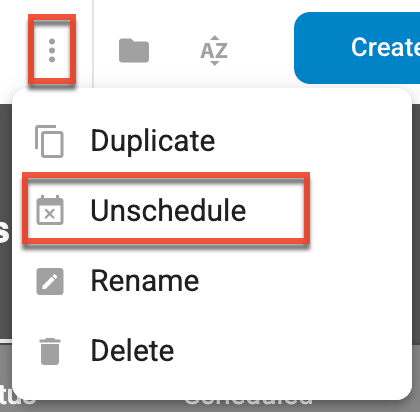
- From the Manage Nurtures list view, select the row with the nurture, and then expand the three-dots menu in the toolbar.
- Select "Unschedule", and then click the Yes button in the confirmation dialog. The nurture will be sent to the queue to be updated and when complete, the status will change to Draft.
Unpublishing Nurtures
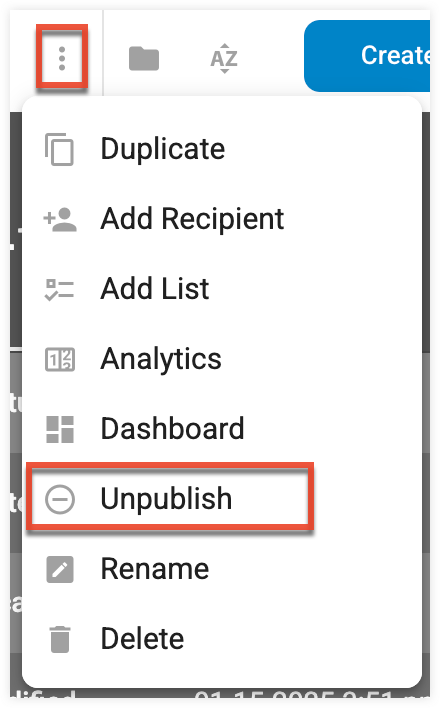
Unpublishing a nurture movesit from Published to Unpublished status, which deactivates the nurture.
To unpublish a nurture:
- From the Manage Nurtures list view, select the row with the nurture, and then expand the three-dots menu in the toolbar.
- Select "Unpublish", and then click the Yes button in the confirmation dialog. The nurture will be sent to the queue to be updated and when complete, the status will change to Unpublished and all recipients will cease to flow through the nurture.
Renaming Nurtures
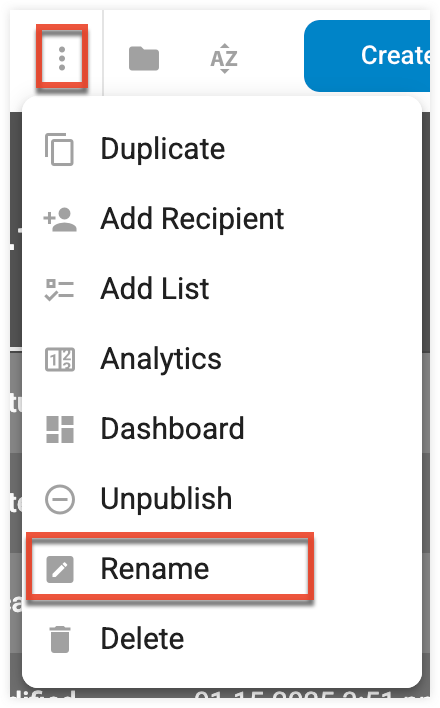
- From the Manage Nurtures list view, select the row with the nurture, and then expand the three-dots menu in the toolbar.
- Select "Rename".
- Identify a new name, and then click the OK button.
Copying Nurtures
You can copy any nurture in any status. Only the nurture flow is copied; recipients and date/time rules are not applied to copied nurtures.
To copy a nurture:
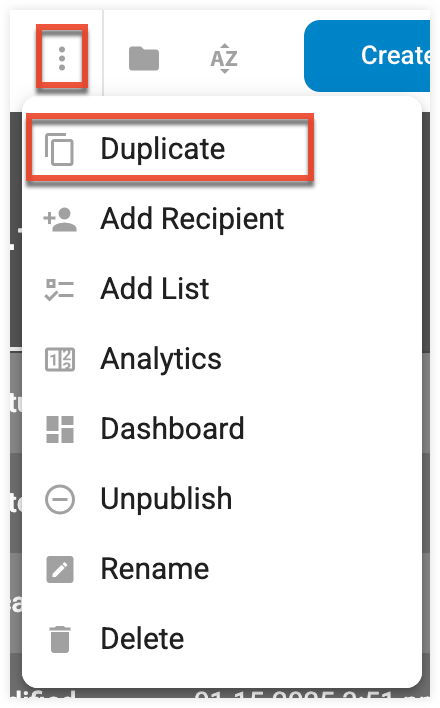
- From the Manage Nurtures list view, select the row with the nurture, and then expand the three-dots menu in the toolbar.
- Select "Duplicate". Copied nurtures are set to Draft status and are identified with a (Copy) prefix.
Deleting Nurtures
You can permanently delete any nurture in any status.
To delete a nurture:
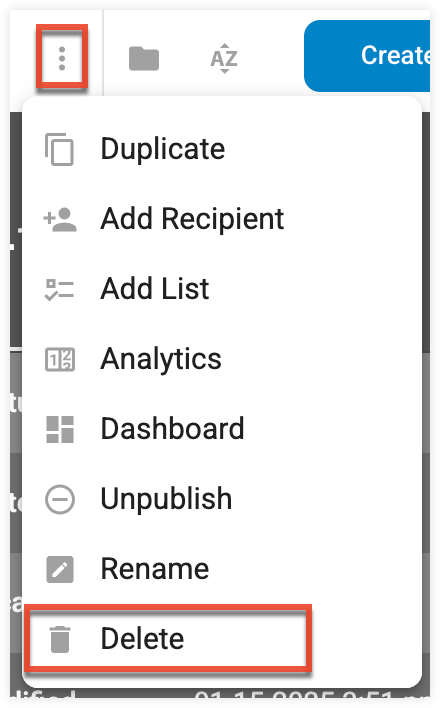
- From the Manage Nurtures list view, select the row with the nurture, and then expand the three-dots menu in the toolbar.
- Select "Delete", and then click "Yes, delete" in the confirmation dialog.
Measuring Success with Analytics
The Nurture Builder Analytics Views provide detailed nurture metrics through a dashboard, the specific path followed by individual recipients, and the most common path followed in the nurture.
To access the Analytics Views, either click a published nurture name or ID in the Manage Nurtures list view or:
- Select the row with the nurture and then expand the three-dots menu in the toolbar.
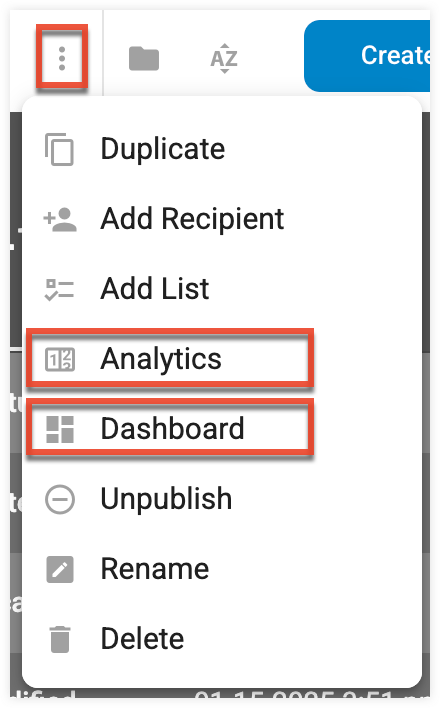
- Select "Analytics" to go to the main view, or "Dashboard" to go directly to the analytics dashboard summary.
About Nurture Versioning
Every time a published nurture is edited, a new version of the nurture is created. When multiple versions of a nurture exist, a Nurture Version History list is displayed at the top right of the Analytics views, with the exception of the Dashboard. The version that is currently displayed on the canvas is identified with a green checkmark. While previous versions cannot be edited, they are accessible in the Analytics views where you can compare the versions by toggling between the versions in the list, which updates the displayed version on the canvas. 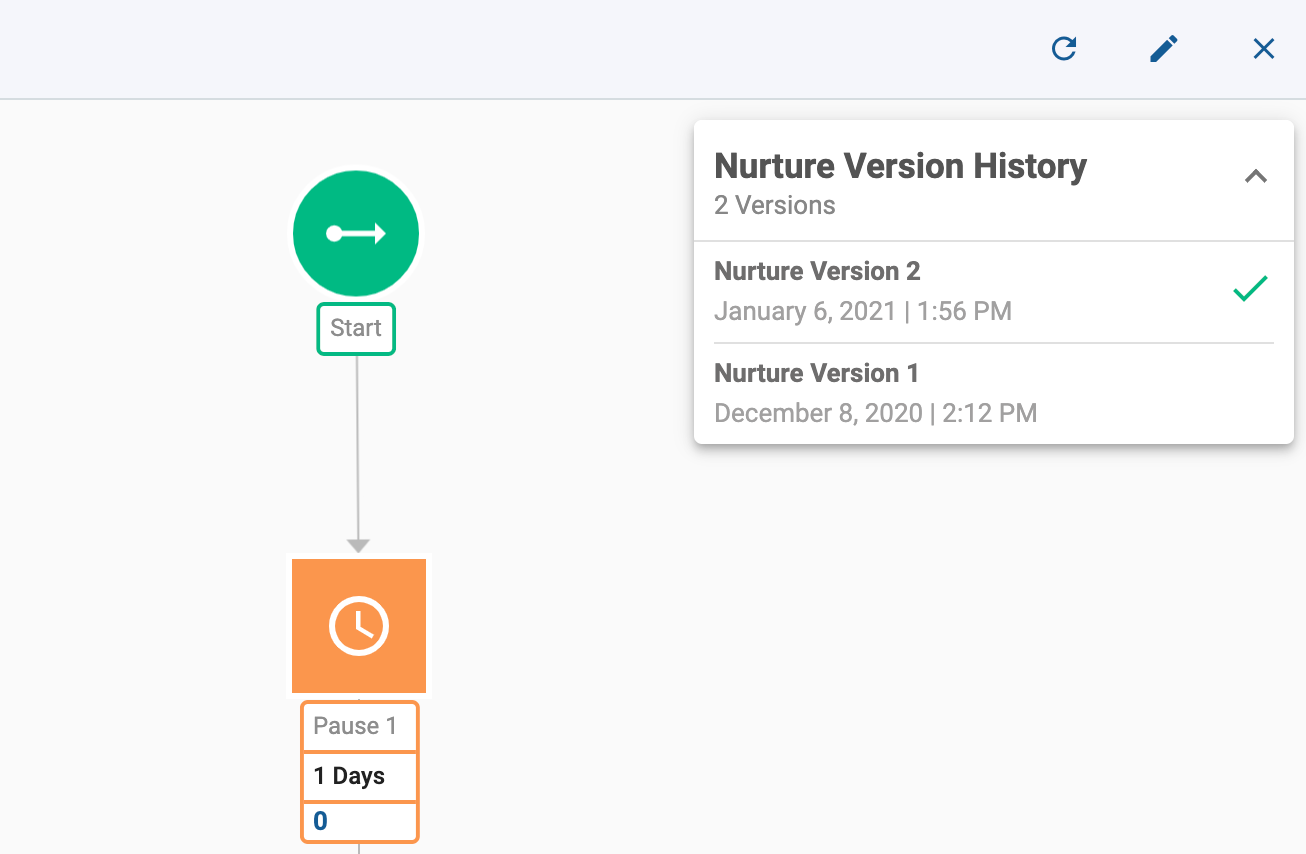
Note: There is currently no reporting on individual nurture versions. The Analytics view is the only location that displays versions and all nurture reporting is only on the most recent version.
The following table shows whether the changes you make to your published nurture will create a new version when you republish the nurture:
|
Action |
Create New Version? |
| Add element | ✔ |
| Delete element | ✔ |
| Change element settings | ✔ |
| Add recipients | |
| Add exclude lists | |
| Edit element label | |
| Change any details on builder Step 1: Basics | |
| Pause nurture/put nurture in edit mode without making changes | |
| Edit email content | |
| Change date/time, throttle, or blockout calendar settings |
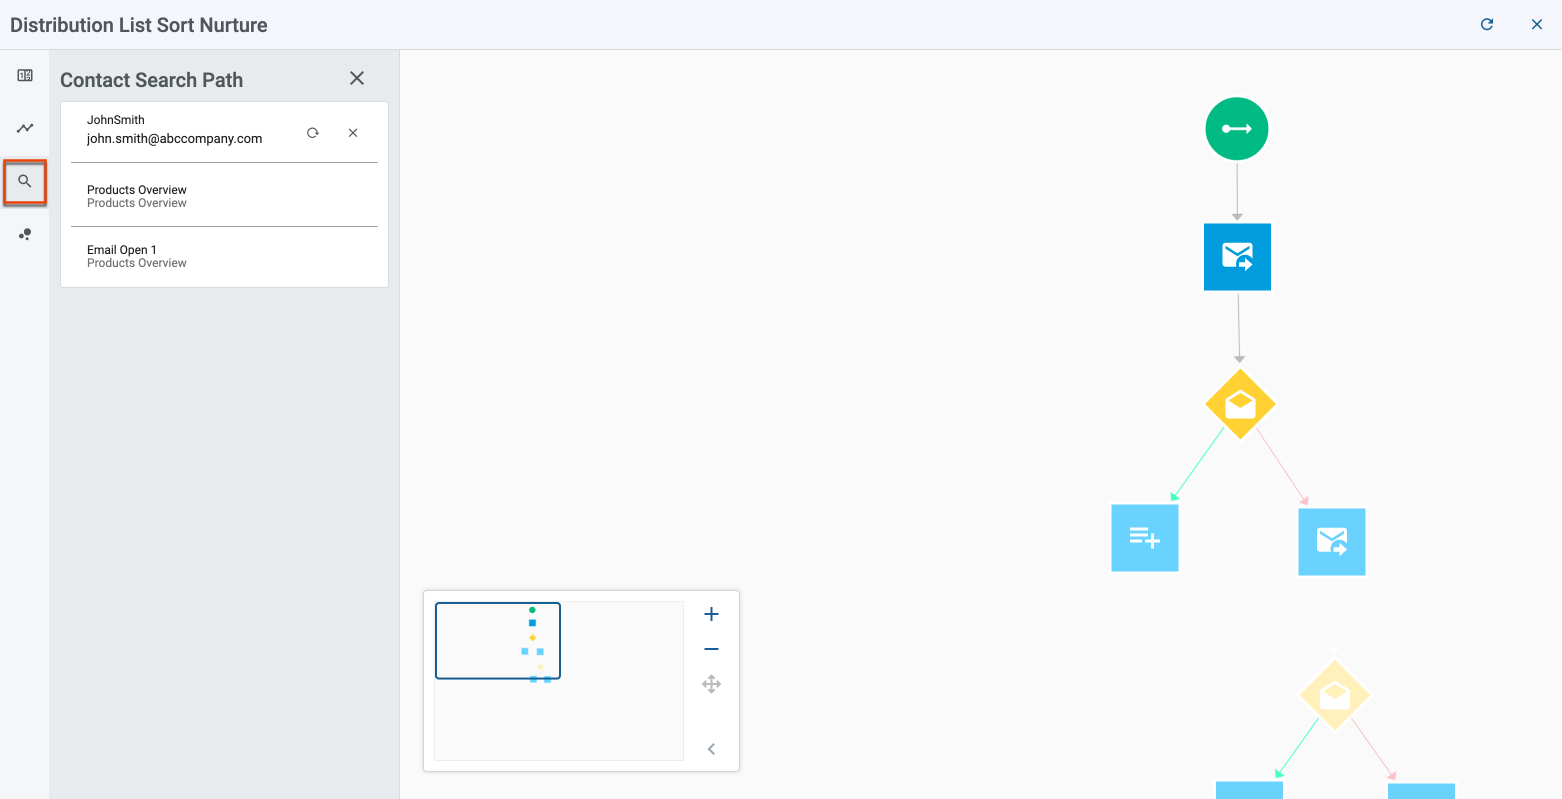
When viewing the Contact Search Path, keep in mind that the contact you are searching for may not have flowed through every version. Select each version in the version history to compare results for an individual contact.
Note: If you edit a nurture that was published prior to November 11, 2020, the display and counts for Version 1 are replaced by the subsequently published version, making the flow and recipient counts shown for the original version inaccurate. This is indicated by the "Invalid date" label below Nurture Version 1 in the Nurture Version History list.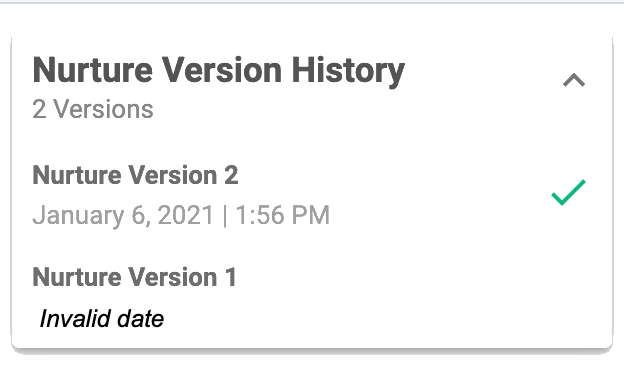
Timed Steps in Versions
When you change the time increment set in conditional elements, the total time span is respected from the previous nurture version, with the exception of Pause steps. For example, your Link Click element was set for three days in version 1 and you edit the time increment to five days in version 2. A contact flowing through that step is on day two without clicking the link. In version 2, the contact will remain in the Link Click step for another three days to respect the new five-day increment.
The notable exception to this is with Pause steps. When you make edits to a nurture that creates a new version, and the nurture contains Pause steps, the time increment is reset with each new version. For example, if your original version contains a Pause step configured for seven days and you create a new version of the nurture, a contact that was flowing through the fifth day of the Pause step will remain in that step for another seven days.
Working in the Analytics Views
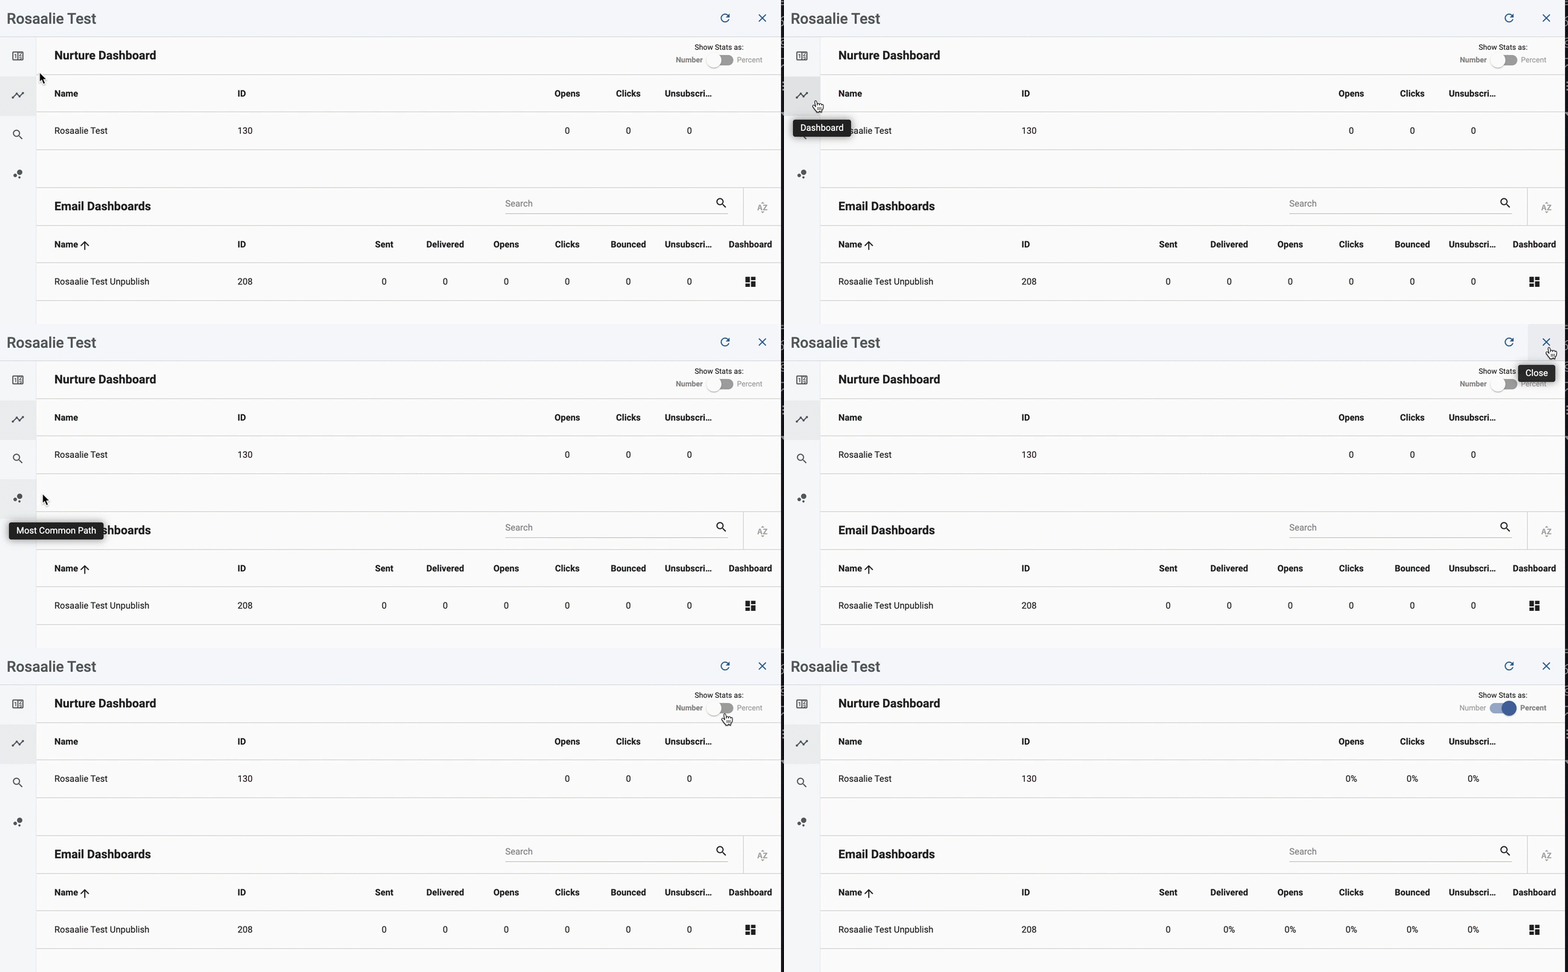
Nurture Builder provides four different analytics views to meet different needs. Use the icons in the left-hand vertical toolbar to toggle between the views. Click the refresh icon in the top horizontal toolbar to view the most recent results, and click the X icon to close the analytics view and return to the Manage nurtures experience.
Default Analytics
The Default Analytics view shows the nurture design with labels displayed and the number of people who flowed through each step. Conditional steps show the total number of contacts that flowed through both the yes and no paths. When participants flow through the nurture more than once, the nurture is counted every time they flow through.
Note: The number of participants that flow through a nurture step is only incremented after the completion of the step. For more information, see the Understanding Participant Count in Nurture Analytics article.
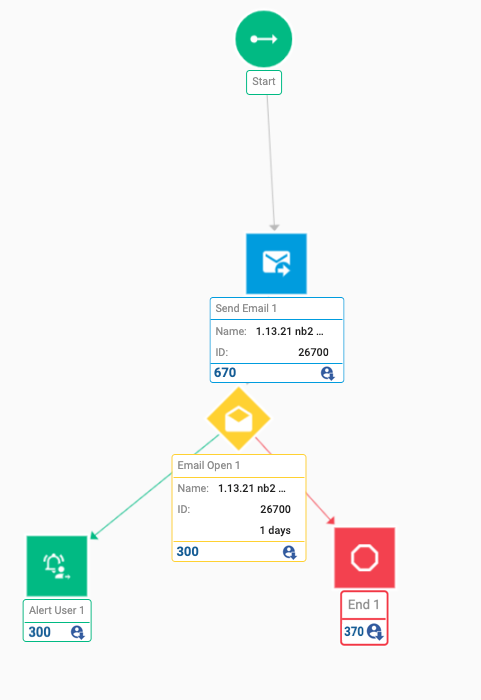
Determining Which Contacts Completed Each Step
To download a list of all contacts that completed each nurture step:
- Click the Refresh icon at the top of the Default Analytics view to ensure you are accessing the most recent data.
- Click the person icon next to the participant count in a nurture step.

- Type the email address where you want the report sent, and then click the Send button.

Dashboard
The Nurture Dashboard displays metrics for all emails sent via the nurture and a breakdown of the metrics for each unique email.
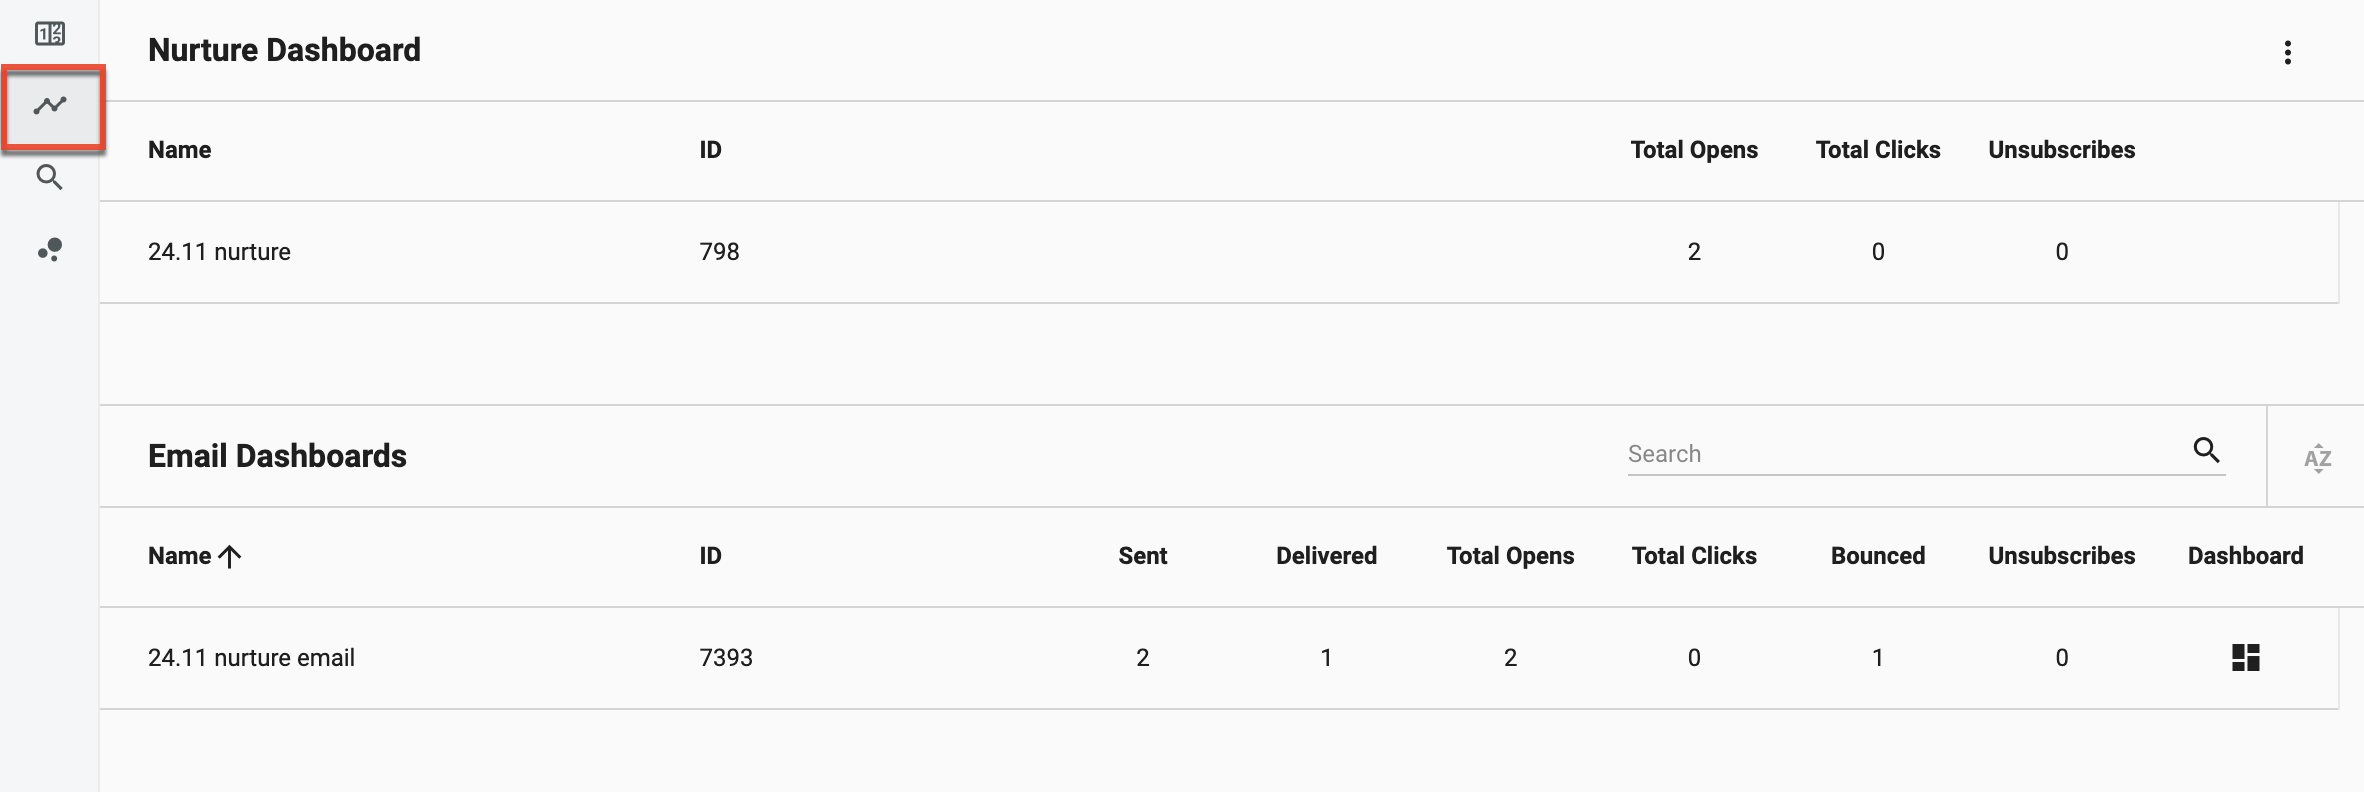
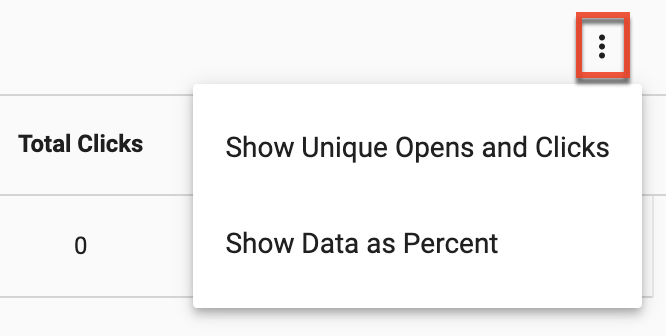
From the three-dots menu, you can display the total number of unique opens and clicks across the dashboard and the totals as percentages.
Contact Search Path
The Contact Search Path view allows you to locate the specific path an individual took through the nurture. Type a contact name or email address in the search field to display the steps the contact took in the path alongside the full nurture flow on the canvas:

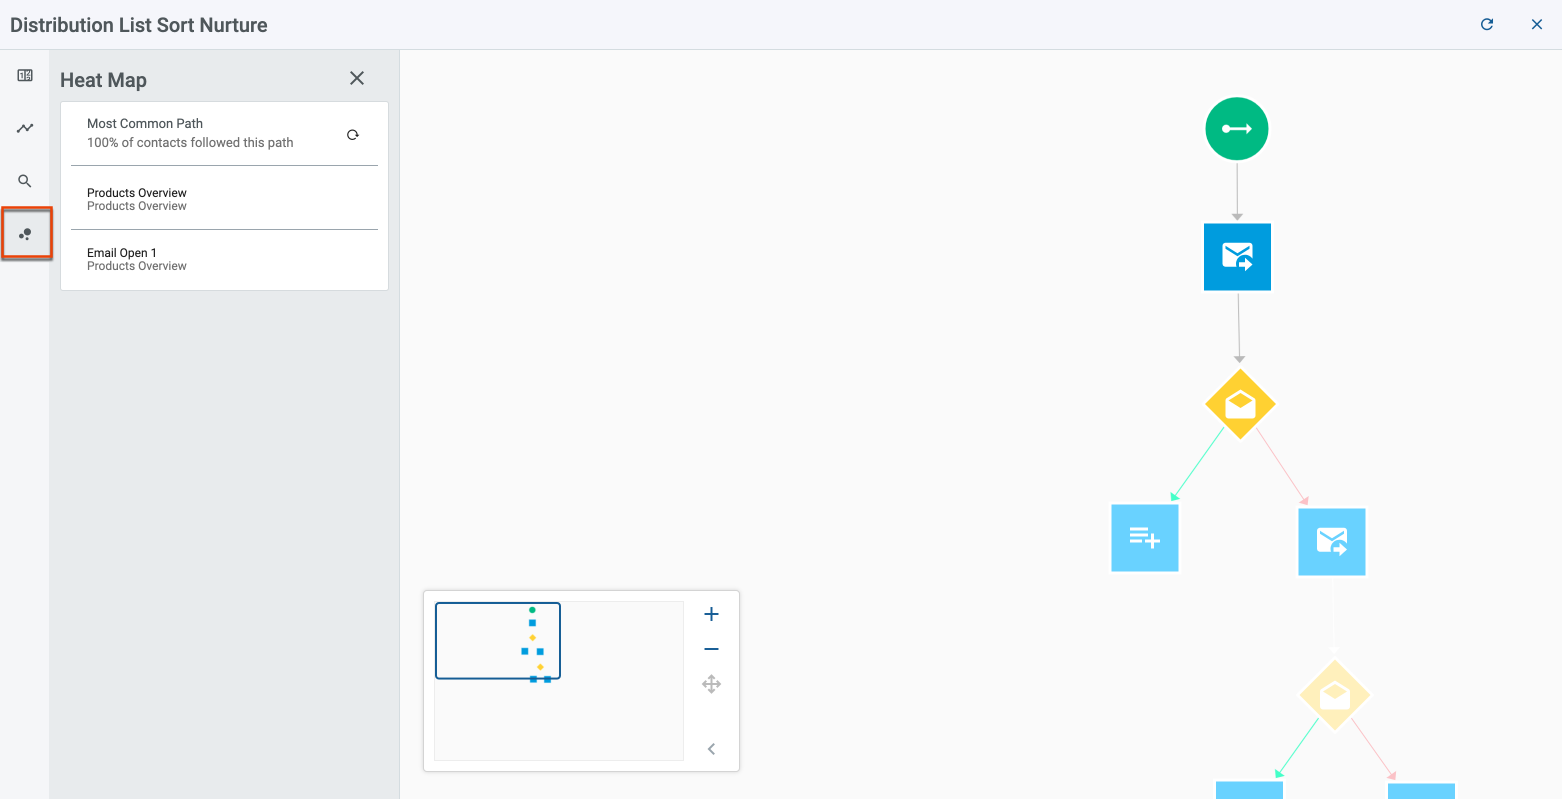
Most Common Path
The Most Common Path view displays the path followed by the highest percentage of users.
