Creating Specialized Teams for Process Users
Overview
When working with SugarBPM, form-based activities can pause a process while a user approves, rejects, or reviews a record. Often, the types of user assigned to these activities share a common organizational role. SugarBPM allows you to delegate tasks to users within a particular role by placing them in teams. This provides security benefits, as only users belonging to that team can make changes to a record or administer an approval. For example, the Customer Support team should not typically adjust the status of a quote record. Instead, this activity is better suited for the Sales Management team to handle. This article will cover how to best to evaluate your business process, create the appropriate custom teams, and create a process definition that allows a specialized team to claim pending approvals.
Prerequisites
You must have administrator or developer access in Sugar to create and manage custom teams and SugarBPM records.
Use Case
For this example, a company has a policy that routes an approval process to a particular team (e.g. Sales Management) if a user creates a Sugar quote record with a total discount amount greater than $0.
Steps to Complete
The following sections explain how to determine if your business process requires specialized teams, how to create those teams, and how to use them in a process definition.
Evaluating the Business Process
Take the time to fully understand the individual steps that make up the business process you wish to automate before creating the process definition and any new teams in your Sugar instance.
- Make a list of each event in the business process.
- Match the appropriate process definition element to the events. For more complicated processes, it may help to sketch a diagram.
- Identify the points in the process that require a user activity (approve/reject or route).
- For each user activity, indicate the person or group of persons that will execute the activity.
- Note: This could be a specific user, a user role, a department in your organization, or a person with a relationship to the user whose record triggered the process (e.g. the manager of the record owner).
Note: If any activities need to be executed by members of a certain group, it will be beneficial to create a specialized team via Admin > Team Management.
Creating Custom Teams
Once you have determined that a specific group of people will be responsible for an Activity in your process, you can create the corresponding team in Sugar to be defined in the process definition. For our example, a member of the Sales Management team must approve new quotes with a total discount amount greater than $0.
Use the following steps to create a custom Sales Management team in Sugar:
- Navigate to Admin > Team Management.
- Click the triangle in the Teams module tab to open the actions menu and select "Create Team".

- Enter the desired team name (e.g. Sales Management) and click "Save".
- On the team's detail view, click "Select" in the Users subpanel to add the users who will be in charge of approving or rejecting new quotes.
For more information on teams, please refer to the Team Management documentation.
Creating a Process Definition
Once you have evaluated the business process and created the custom team, you are now ready to build the process definition. Round Robin and Self Service are the two process-assignment options that will limit process activities to a specific team. Round Robin will choose a process user based on which user is next in the sequence of process assignment. Self Service allows members of the team to assign the process to themselves.
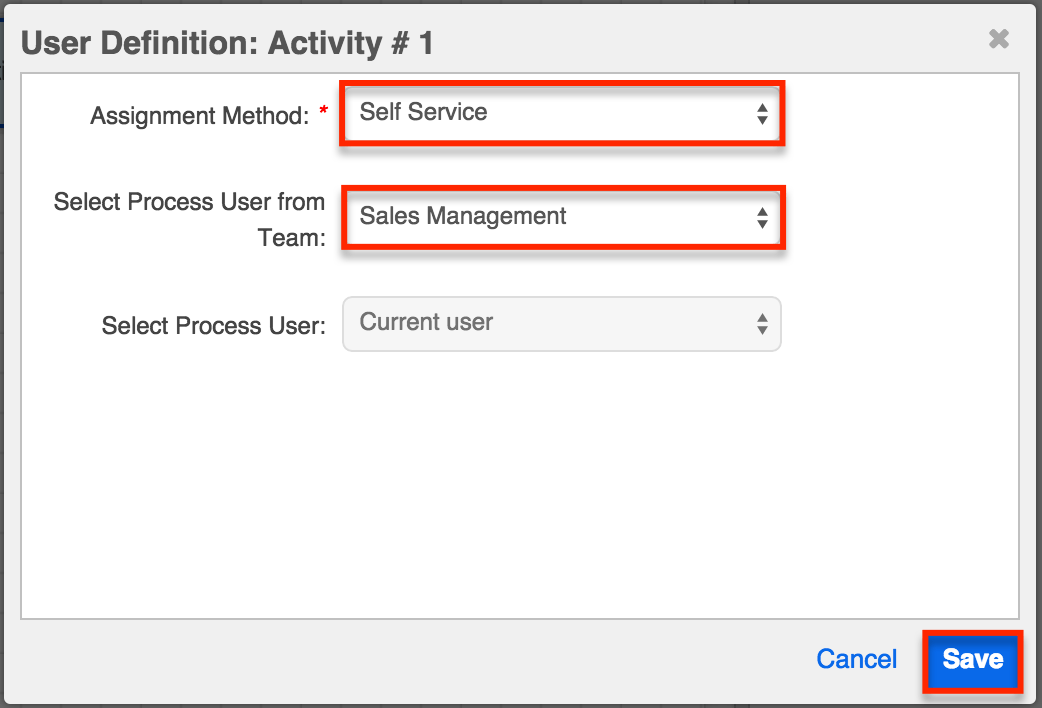
In this example, we will use the Self Service assignment method to allow users on the Sales Management team to claim any pending quote approvals as they have time.
- Navigate to the Process Definitions module.
- Note: The Process Definitions module tab is typically found by clicking the arrow to the right of the module tabs on the navigation bar. Simply click "Process Definitions" from the list of modules to access the list view.
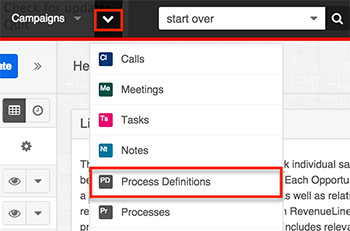
- Click the Create button on the upper right of the Process Definitions list view.

- Enter the following information on the record view layout and click "Save and Design".
- Name : High-Value Quote Approval
- Target Module : Quotes
- From the Visual Designer, add a Start event by dragging the target module Start event icon onto to the design canvas.
- Note: The Start event is represented by a Sugar cube icon in the design toolbar.
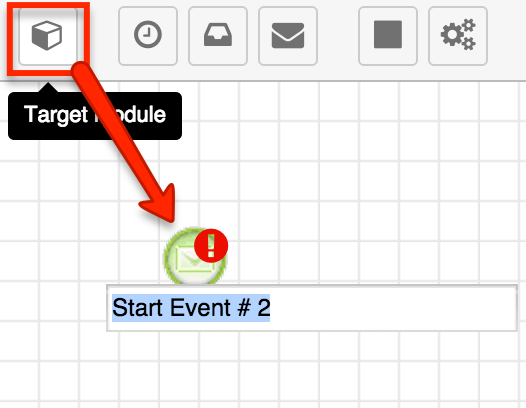
- Double click on the Start event's label and rename it "When Quote Changes", then hit "Enter".
- Configure the Start event as follows:
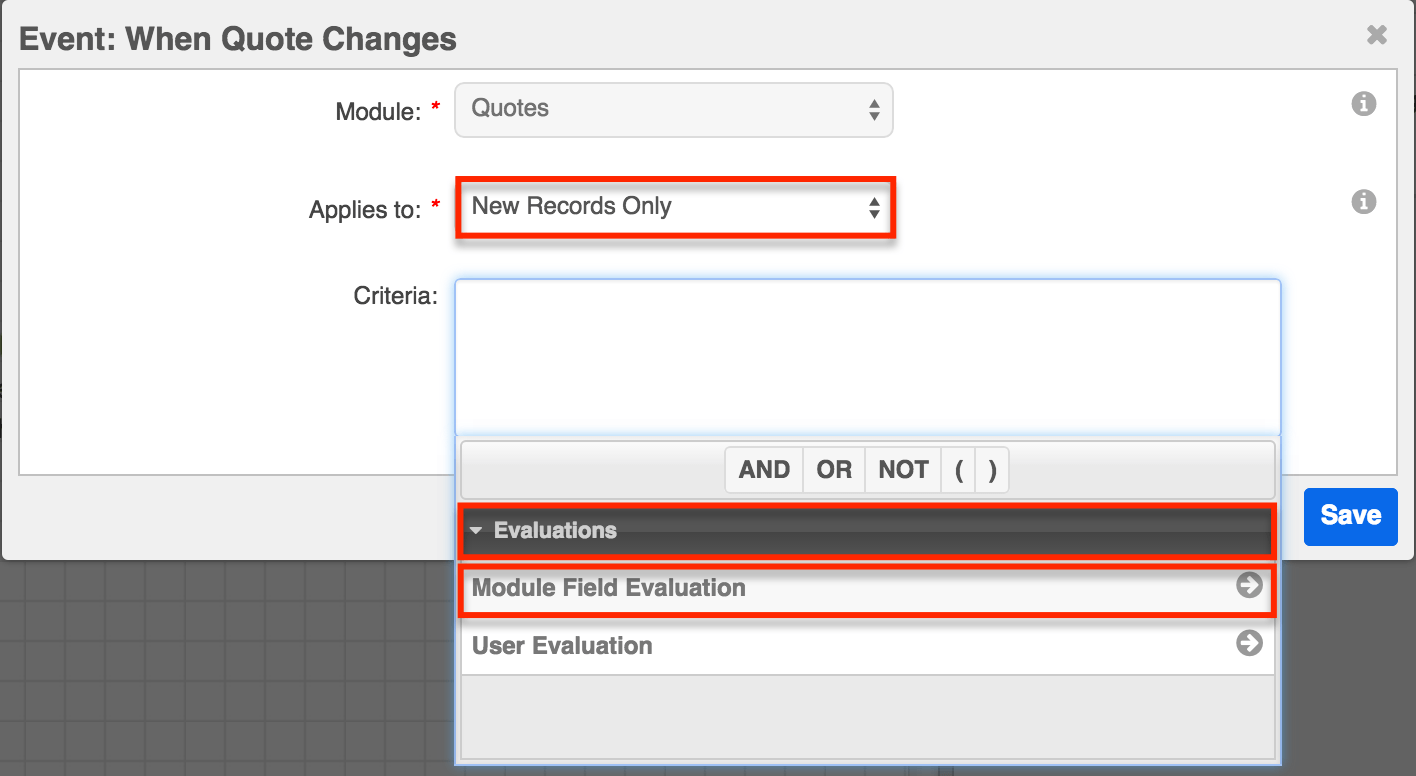
- Right click on the start event and select "Settings".

- Select "New Records Only" from the Applies to field. Click inside the Criteria field and select "Evaluations" then choose "Module Field Evaluation".
- Select "Discount Total (US Dollar)" from the Field dropdown menu and set the condition to "is greater than". Enter "0" for the value then click "Submit" to add this criteria.
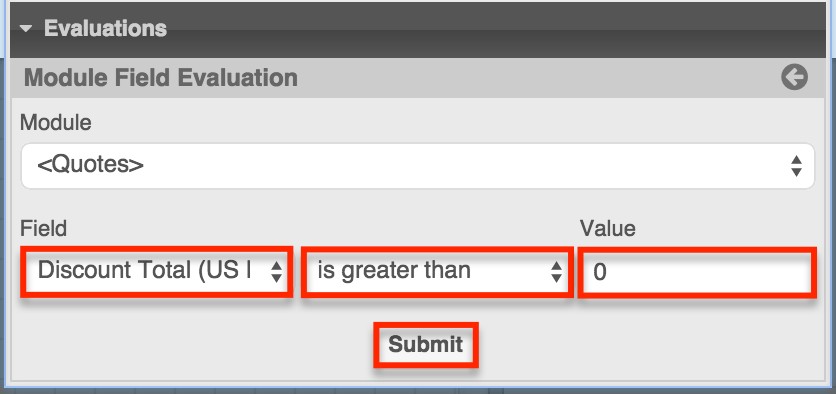
- Click "Save" to finalize the changes.
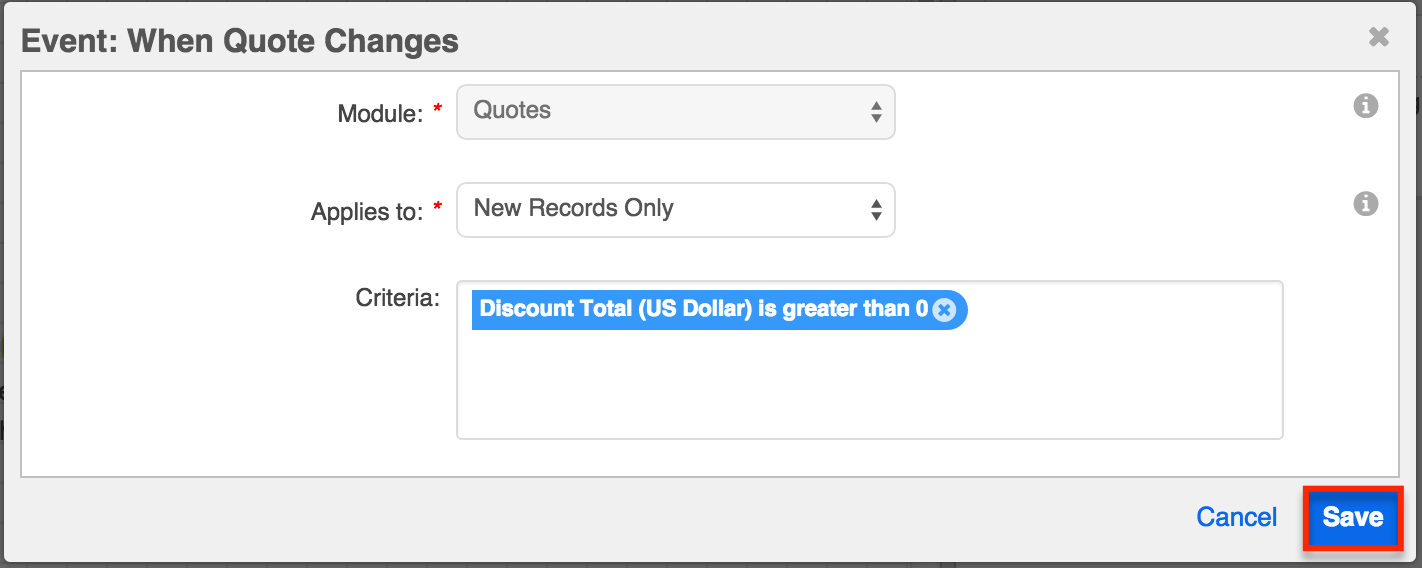
- Right click on the start event and select "Settings".
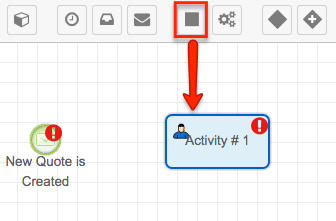
- Drag an Activity element onto the design canvas.
- Note: The label will default to "Activity #1", but you may change this label if desired.
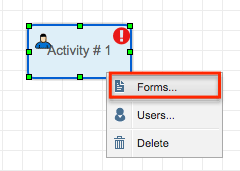
- Right click on the Activity element and select "Forms".
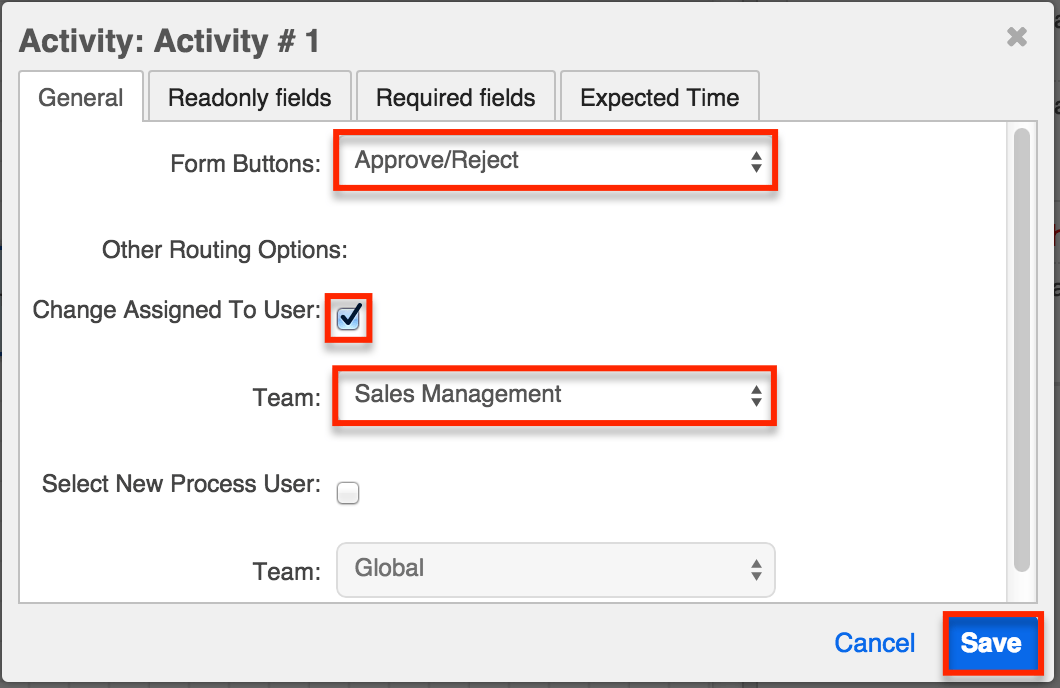
- Configure the Activity form fields as follows then click"Save".
- Form Buttons : Approve/Reject
- Change Assigned To User : Select this option
- Team : Sales Management
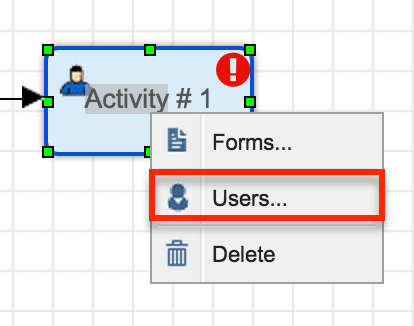
- Right click on the Activity element again and select "Users".
- Select "Self Service" from the Assignment Method dropdown menu, then select the team (e.g. Sales Management) that will be tasked with approving new quotes. Click "Save" to return to the design canvas.
- Drag a connector line from the Start event to the Activity element.
- Drag an End event onto the design worksheet and place it to the right of the Activity element. There is no need to configure the End event as it will default to "Do Nothing".
- Drag a connector line from the Activity element to the End event. The completed Process Definition should look similar to this:
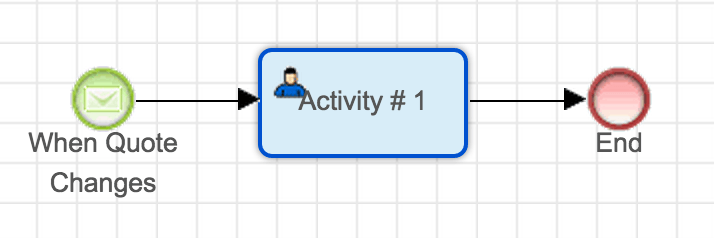
Once the Process Definition is enabled, a reviewer on the Sales Management team will be able to manually claim any pending quote approvals as they have time.
Note: New process definitions are set to "Disabled" by default. Please refer to the Enabling a Process Definition section below for more information on enabling a process definition.
Downloads
The process definition record created in this article is provided here for your convenience. Always review the settings of imported SugarBPM files to confirm that they are configured as expected. Please follow these general steps to use the sample file in your instance:
- Create the required custom team(s) in your instance as explained in the Creating Custom Teams section of this page.
- Download the process definition file in .bpm format here: Download Link.
- Import the downloaded .bpm file to the Process Definitions module as explained in the SugarBPM documentation.
- Open the process definition in design view.
- Edit the Activity's settings to point to the team you created earlier.
- Save and then enable the process definition for testing.
New process definitions are set to "Disabled" by default. This is a preventative feature that ensures a process instance is not triggered inadvertently during the design phase. After the design is fully configured, exit the Visual Designer and set the process definition to "Enabled" via the Process Definitions dashlet or list view. For more information, please refer to the Process Definitions documentation.