Capturing the Sales Stage When an Opportunity Closes
Overview
At which point in the sales cycle does your team typically win or lose business? In order to track and report on this insightful data in Sugar, you need to know what the opportunity's Sales Stage value was before it changed to "Closed Won" or "Closed Lost". This article uses SugarBPM to capture the last sales stage before an opportunity closes.
Use Case
For this example, we create a custom field that mimics the Sales Stage field's value. When the opportunity's Sales Stage field changes to "Closed Won" or "Closed Lost", the custom field stops copying the sales stage value so that it retains only the most recent sales stage before the opportunity was closed.
Prerequisites
- You must be an administrator or have developer-level role access in Sugar to create and manage SugarBPM records and to create custom fields as required by this article.
- You should have a basic understanding and knowledge of SugarBPM.
Note: This article is written for a Sugar instance that is configured to use Opportunities without Revenue Line Items. If your instance utilizes the Revenue Line Items module, simply perform the same steps below for the Revenue Line Items module instead of the Opportunities module.
Steps to Complete
-
First, create a custom field in Studio called "Last Stage" where the process will store the name of the most recent sales stage. Navigate to Admin > Studio > Opportunities > Fields and click "Add Field". Configure a field with the following settings:
- Field Type : TextField
- Field Name : last_stage
- Reportable : Yes (checked)

- Next, create a new process definition record. Name the record "Capturing Last Sales Stage" and set the Target Module as "Opportunities". Please refer to the Process Definitions documentation for complete steps to create a new process definition record.
- Click "Save & Design" to continue to the Visual Designer canvas.

- Drag a Start event onto the canvas.
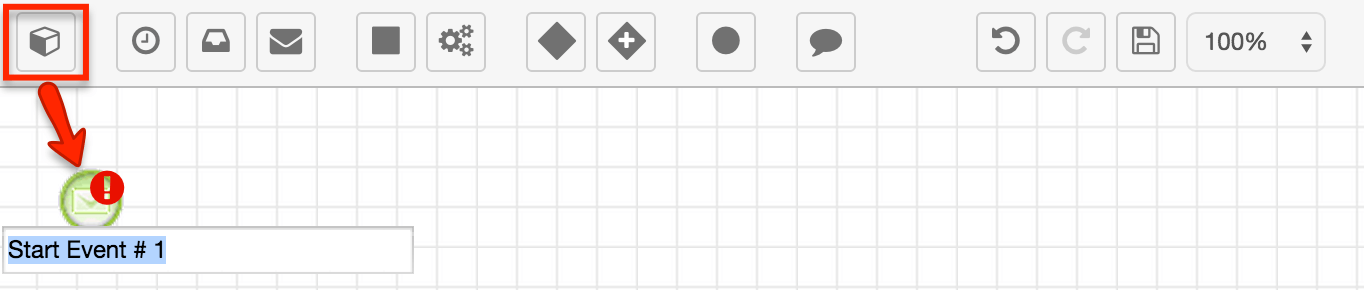
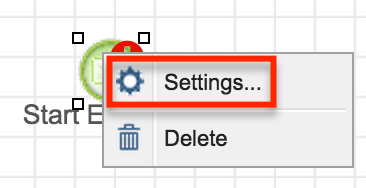
- Right-click the Start event and then select "Settings" to configure the Start event.
- Using the Applies To dropdown menu, specify when the process definition should activate. For this use case, select "Updated Records Only (All Updates)" so that a new process begins every time an opportunity changes. Click "Save" to return to the design canvas.
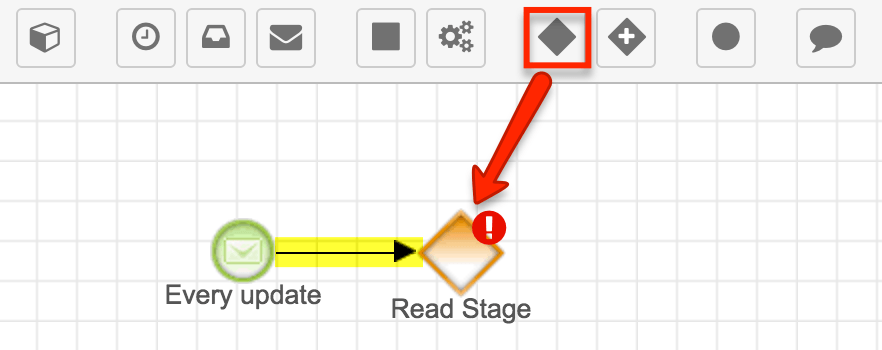
- Next, the process will read the value of the Sales Stage field and react differently depending on which stage the opportunity is in. This requires a gateway to evaluate all of the possible field values and direct the process' flow to the corresponding outcome. Because only one outcome should occur each time the process runs, find the Exclusive gateway element in the toolbar and drag it onto the design canvas and then connect the Start event to the gateway element.
- Before you can configure the gateway, you must connect it to elements on the canvas that represent each potential outcome. For this use case, we have the following potential outcomes:
- The Sales Stage field contains one of the eight stages that we consider "open": In any of these circumstances, the process should update the Last Stage field with the name of the corresponding sales stage. For this collection of outcomes, drag eight action elements onto the canvas, each labeled according to the sales stage (e.g. Prospecting, Qualification, and Proposal) it will represent. One by one, connect the gateway to each of the actions. Right-click on each action and select "Change Field" before proceeding to the next step.
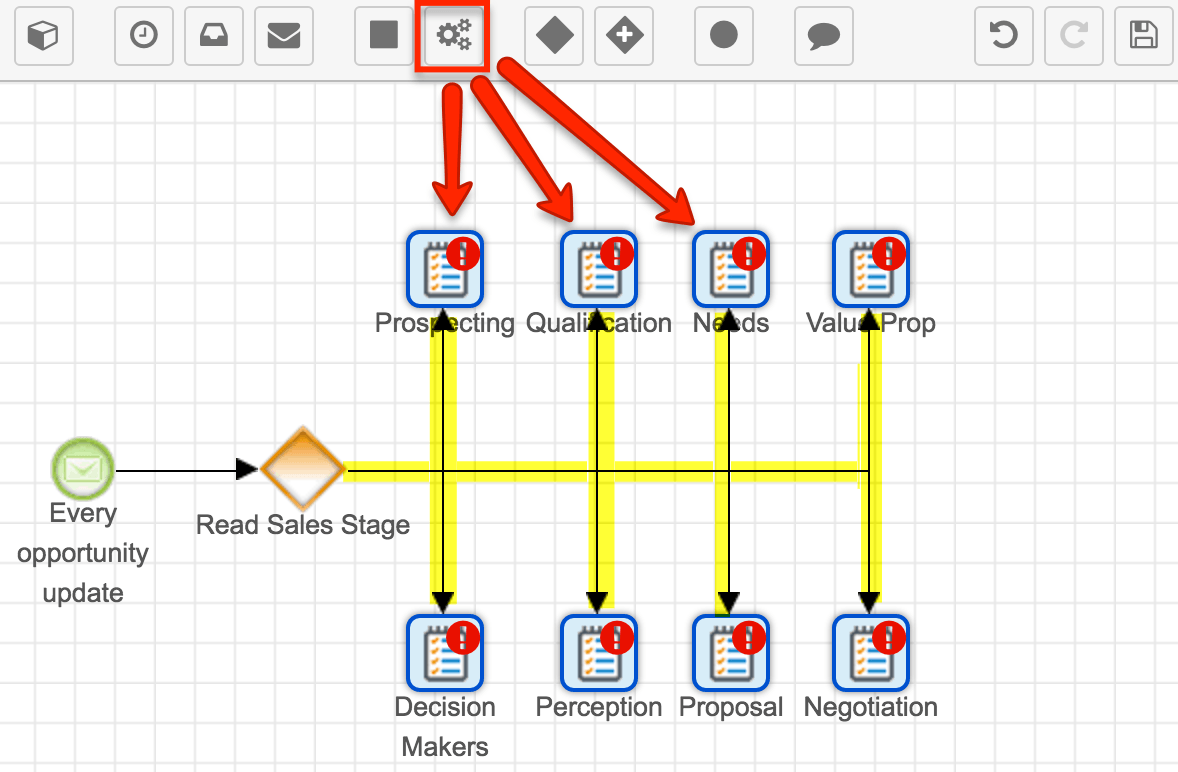
- The Sales Stage field contains one of the two stages that we consider "closed": In this case, the process should retain the most recent Last Stage value and end. Because both field values have the same result, simply add one End event to the canvas and we will later configure it as the outcome for both "Closed Won" and "Closed Lost". Connect the gateway to the end event.

- The Sales Stage field contains one of the eight stages that we consider "open": In any of these circumstances, the process should update the Last Stage field with the name of the corresponding sales stage. For this collection of outcomes, drag eight action elements onto the canvas, each labeled according to the sales stage (e.g. Prospecting, Qualification, and Proposal) it will represent. One by one, connect the gateway to each of the actions. Right-click on each action and select "Change Field" before proceeding to the next step.
- Now configure the gateway:
- Right-click on the gateway element and set the Default Flow to the end event, labeled "Closed - accept Last Stage" in this example.
- Right-click the gateway again, this time selecting "Settings".
- For each criteria window, create a Module Field Evaluation that corresponds with the appropriate sales stage (e.g. Prospecting) on the action. For example, next to "Criteria (Prospecting)", click inside the adjacent formula window and then click Evaluations > Module Field Evaluation > Sales Stage (is equal to) Prospecting. Click "Submit" to add the condition to the canvas.
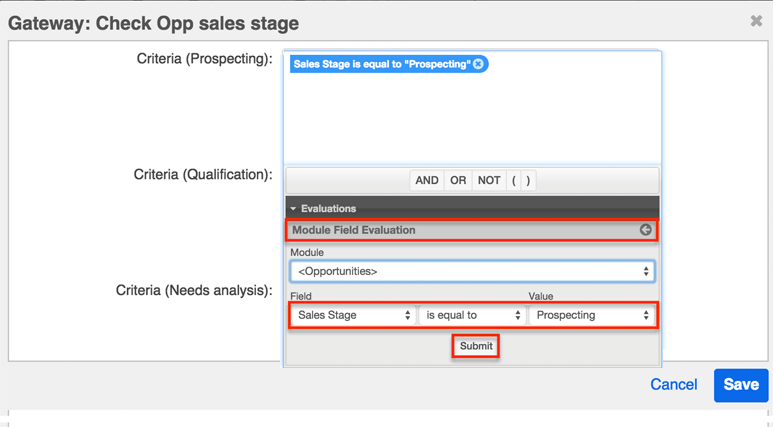
- Repeat Step 9 for all of the gateway's criteria windows, selecting the corresponding stage for each. Click "Save" after setting these conditions. Please note that there is no criteria window for the End event because we designated it as the default flow. If none of the configured criteria are true, the flow will be routed through the default flow.
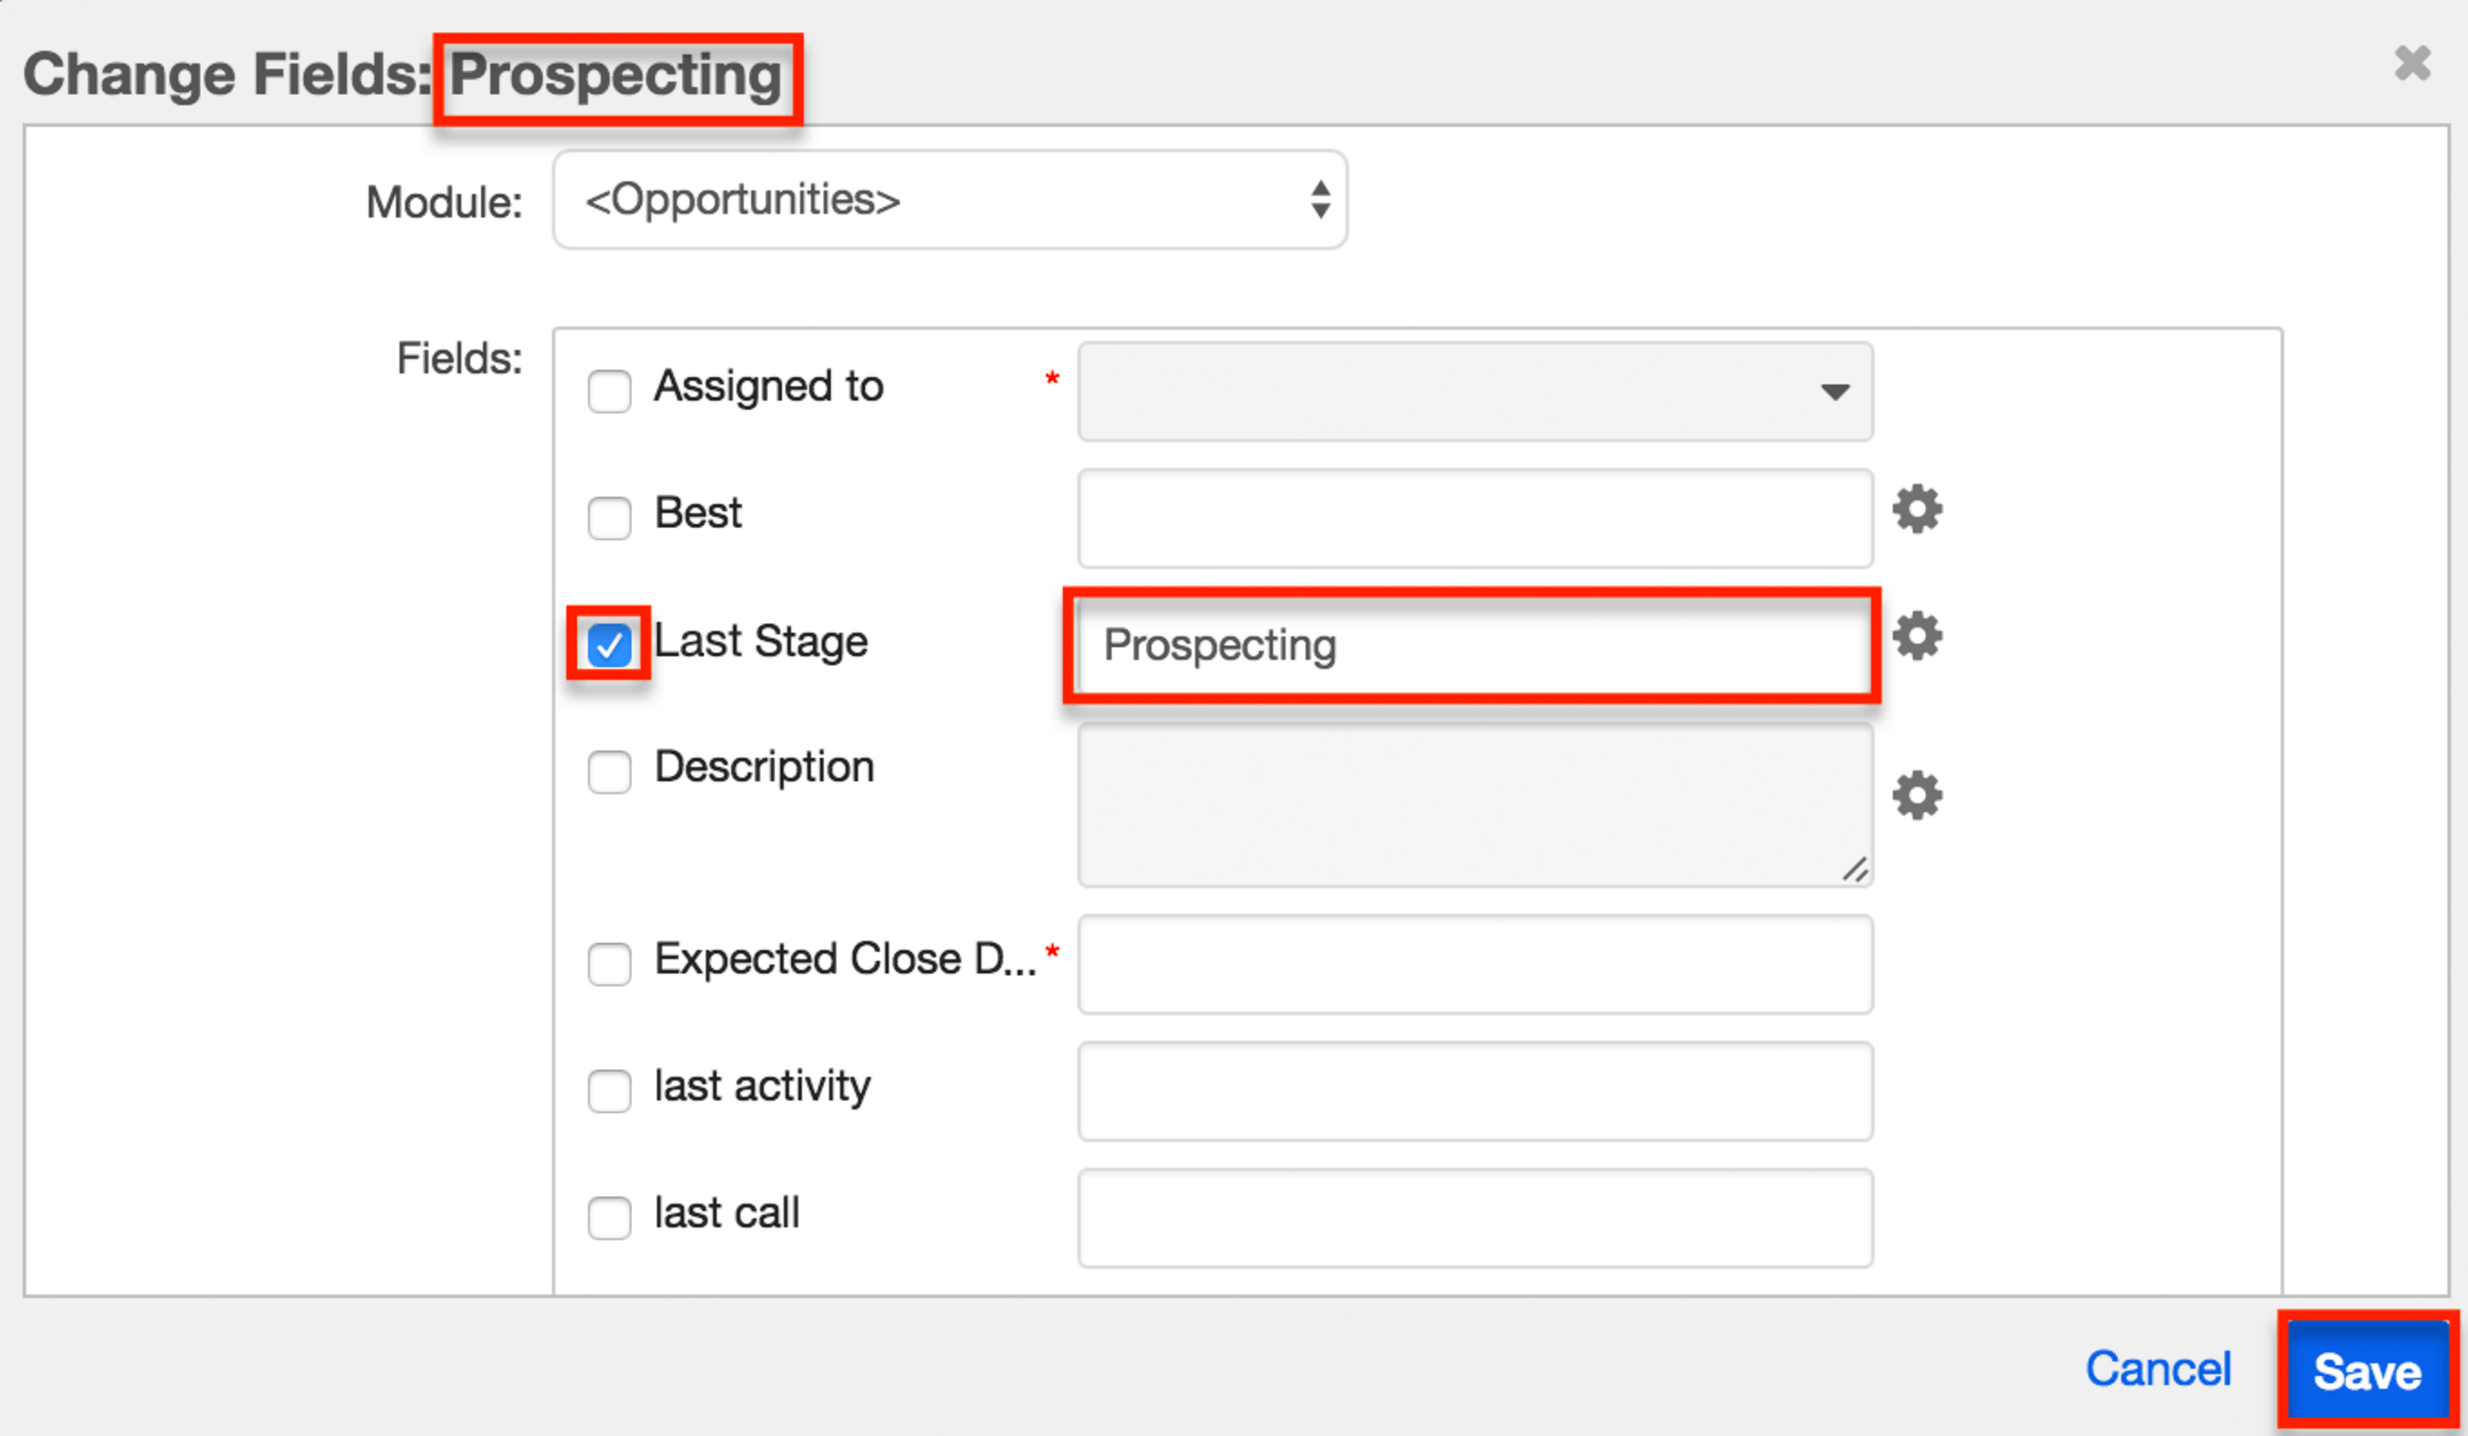
- Next, configure each of the Change Field actions to store the Sales Stage field's value as a text string in the Last Stage field. For example, when the gateway directs the process flow to the action labeled "Prospecting", the action will replace the contents of the opportunity's Last Stage field to "Prospecting". Follow these steps to configure the prospecting action as an example:
- Right-click on the action element and select "Settings".
- Click inside the checkbox next to "Last Stage" to enable editing in the field.
- Click inside the adjacent text box and type the word "Prospecting".
- Repeat this step (Step 11) for all of the Change Fields actions, typing in the appropriate Sales Stage value for each one.
- Complete the process by dragging connectors, one by one, from each action to the End event from Step 8.
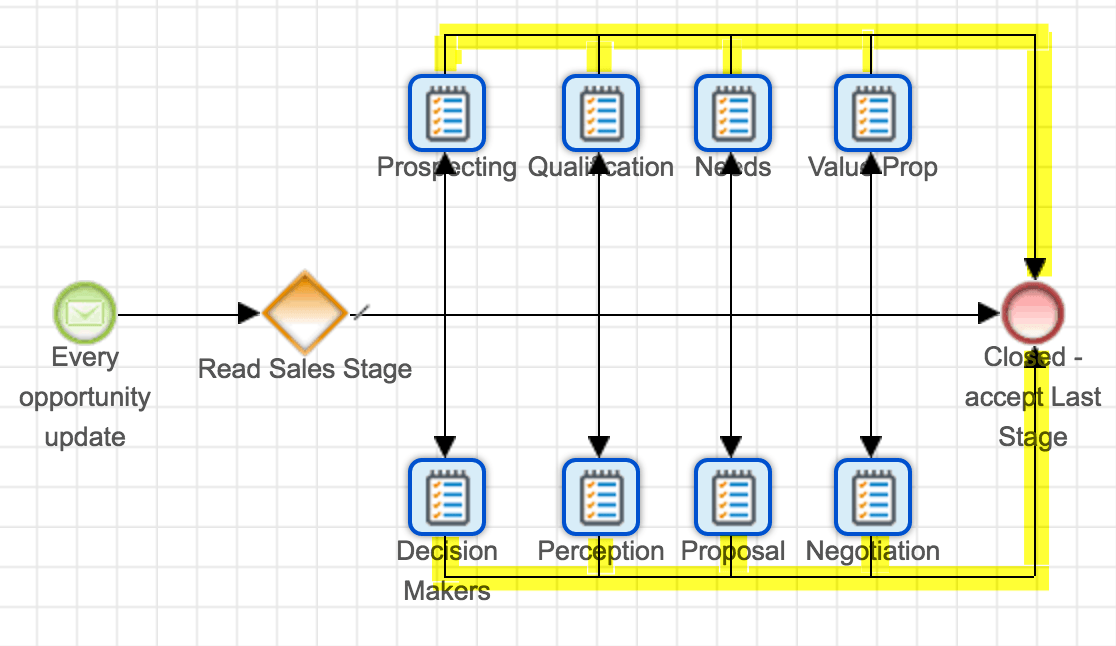
The completed process definition will behave as follows:
- When a user updates an opportunity, a new process begins.
- The process then evaluates the opportunity's Sales Stage field.
- If the sales stage is any open value (e.g. Prospecting, Value Proposition), the Last Stage field will change accordingly.
- Eventually, the evaluation will assess the sales stage as "Closed Won" or "Closed Lost" and direct the process flow to the End event, preserving the most recent Sales Stage value immediately before it changed to "Closed Won" or "Closed Lost" in the Last Stage field.
Enabling the Process Definition
New process definitions are set to "Disabled" by default as a preventative feature to ensure a process instance is not triggered inadvertently during the design phase. After the design is fully configured, exit the Visual Designer and set the process definition to "Enabled" via the Process Definitions dashlet or list view. For more information on enabling process definitions, please refer to the Process Definitions documentation.
Application
As a best practice, include the functionality in this article as a parallel branch of a more complex process definition so that only one process runs against an opportunity at a time. The following sections discuss optional ways to utilize the fields and the data they contain.
Reporting on the Last Stage
The Last Stage field can be used in a report to identify patterns for a particular stage of your organization's sales cycle. Using reports similar to the following summary report examples, a sales manager can evaluate the most common sales stages where business is won versus where it is lost. As expected, the won business analysis (left) shows that most opportunities are won in the Proposal/Price Quote or Negotiation/Review stages. The lost business analysis (right) shows that most opportunities are lost in the earlier Prospecting or Qualification stages. Any variation to these patterns could indicate a problem with the sales process or that the users are not properly cycling through the sales stages in the CRM.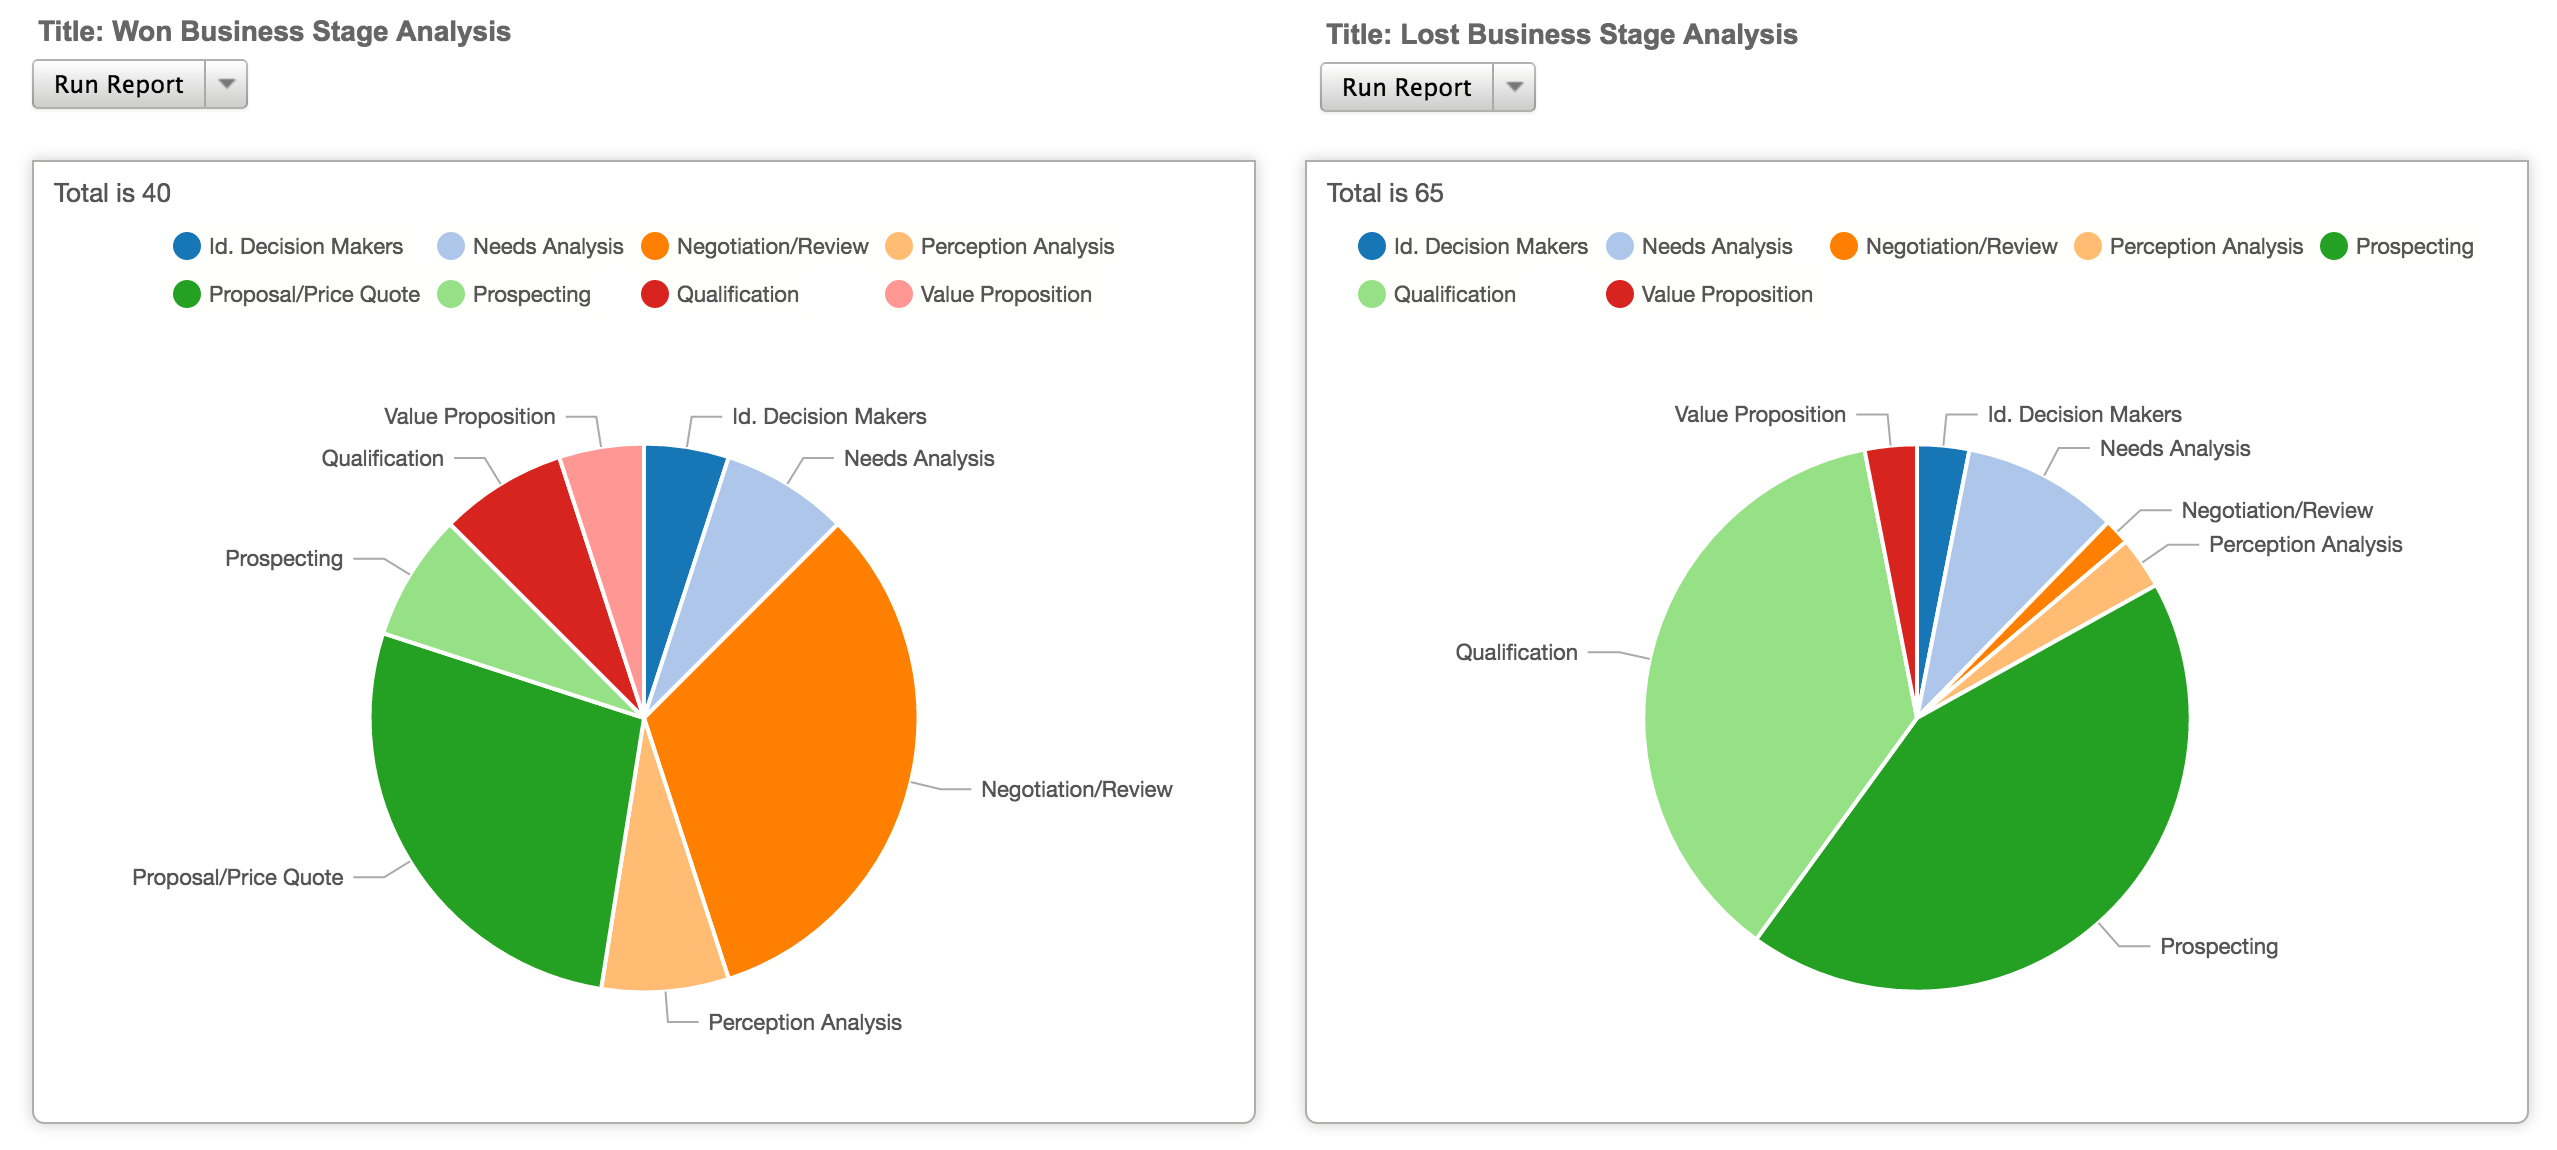
To create a similar report, follow these basic steps:
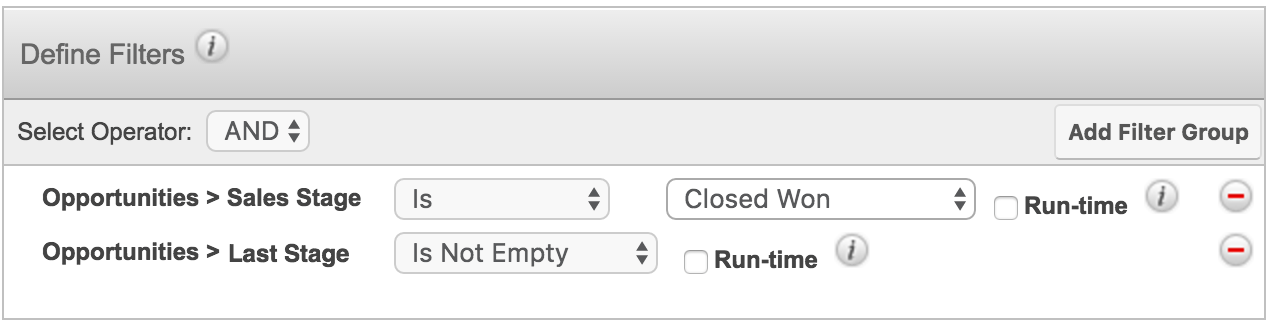
- Create an Opportunities-based Summation report.
- Create two filters: one for the "Closed Won" or "Closed Lost" sales stage and another to specify that the Last Stage field should not be empty.
- Group the results by the Last Stage field.
- Select "Count" for the display summary on the next step.
- Insert a chart to visualize the data results.
- Save and Run the report.
For more information on creating reports in Sugar, please refer to the Reports documentation.
Downloads
The process definition created in this article is provided here for your convenience. Always review the settings of imported SugarBPM files to confirm that they are configured as expected. Please follow these general steps to use the sample file in your instance:
- Create the required custom field in your instance as explained in step one of the Steps to Complete section.
- Download the process definition file in .bpm format here: Download Link
- Import the downloaded .bpm file to the Process Definitions module as explained in the SugarBPM documentation.
- Open the process definition in design view.
- Edit each of the Action elements to point to the custom field in your instance.
- Save and then enable the process definition for testing.
Note: This process definition contains references to a custom field. SugarBPM relates to fields and records via ID and not name, so you must re-configure the Action elements in the imported process definition to point to the custom field in your instance.
New process definitions are set to "Disabled" by default. This is a preventative feature that ensures a process instance is not triggered inadvertently during the design phase. After the design is fully configured, exit the Visual Designer and set the process definition to "Enabled" via the Process Definitions dashlet or list view. For more information, please refer to the Process Definitions documentation.