Capturing How Long a Record Spends in Each Status Using SugarBPM
Overview
This article explains how to use SugarBPM to monitor the length of time that records spend in each status or sales stage.
Note: Due to a now-resolved known issue, the steps in this article are not compatible with Sugar version 7.8.x.
Use Case
Sales managers can use Sugar to identify patterns in selling behavior that may lead to higher revenue. In this tutorial, we will create a process definition that tracks the number of days that an opportunity spends in each status of the sales cycle. The data can be used in reports to understand the overall customer journey and align it with the sales strategy.
Prerequisites
- You must have administrator or developer access in Sugar to create and manage SugarBPM records.
- Schedulers, specifically the SugarBPM Scheduled Job scheduler, must be running.
- Before performing the steps in this article, you should have a basic understanding of SugarBPM and be familiar with creating fields in Studio.
- In the SugarBPM settings, there is a setting called "Error Number of Cycles" that specifies how many times a process can loop before the system stops the process definition. By default, this is set to 10. As we are counting days, this number should be increased to allow the process to run for more than ten days. Please note that in some circumstances, increasing the number of cycles could negatively affect performance.
Note: This article is written for a Sugar instance that is configured to use Opportunities without Revenue Line Items. If your instance utilizes the Revenue Line Items module, simply perform the same steps for the Revenue Line Items module instead of the Opportunities module.
For more information on any of these items, please refer to the User Management, Role Management, SugarBPM, and/or Studio documentation.
Steps to Complete
The following sections walk through setting up auto-increment functionality for custom integer fields in a well-designed process definition. First, create an integer field to represent each sales stage to be counted by the process definition.
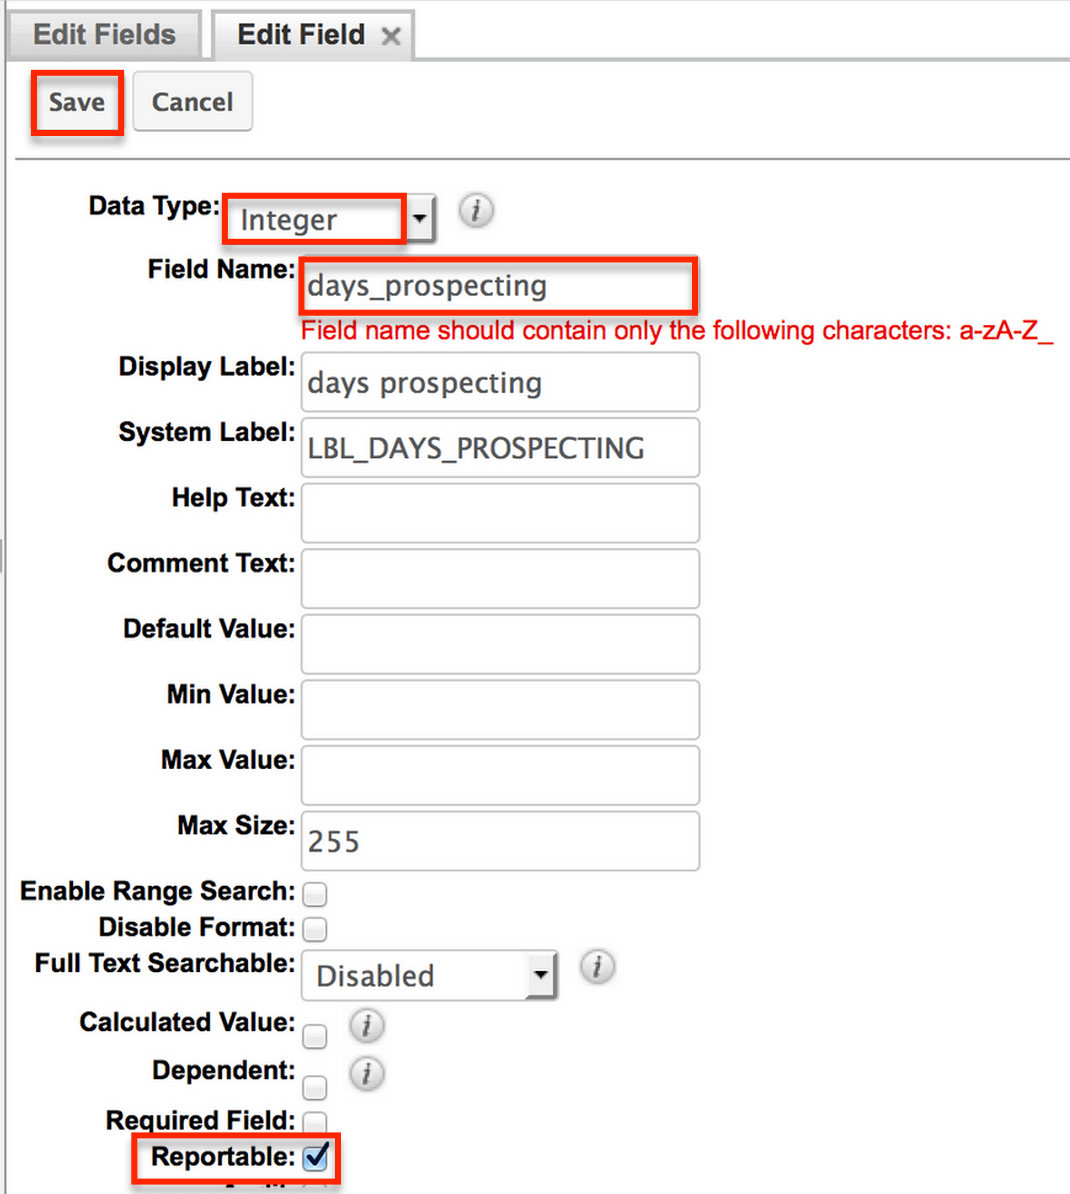
- For each pre-close sales stage in your Sugar instance, create a custom integer field. This example will use the out-of-the-box sales stages but, if you have edited these values to suit your organization's needs, you should adjust the custom fields to match them. Navigate to Admin > Studio > Opportunities > Fields and then click on "Add Field". Configure the fields with the following settings:
- Field Type : Integer
- Field Name : days_salesstage (replace "salesstage" with the current Sales Stage value, e.g. days_prospecting)
- Reportable : Yes (checked)
Repeat this step for each sales stage that is not considered closed. In a stock Sugar instance, you will have created eight new integer fields: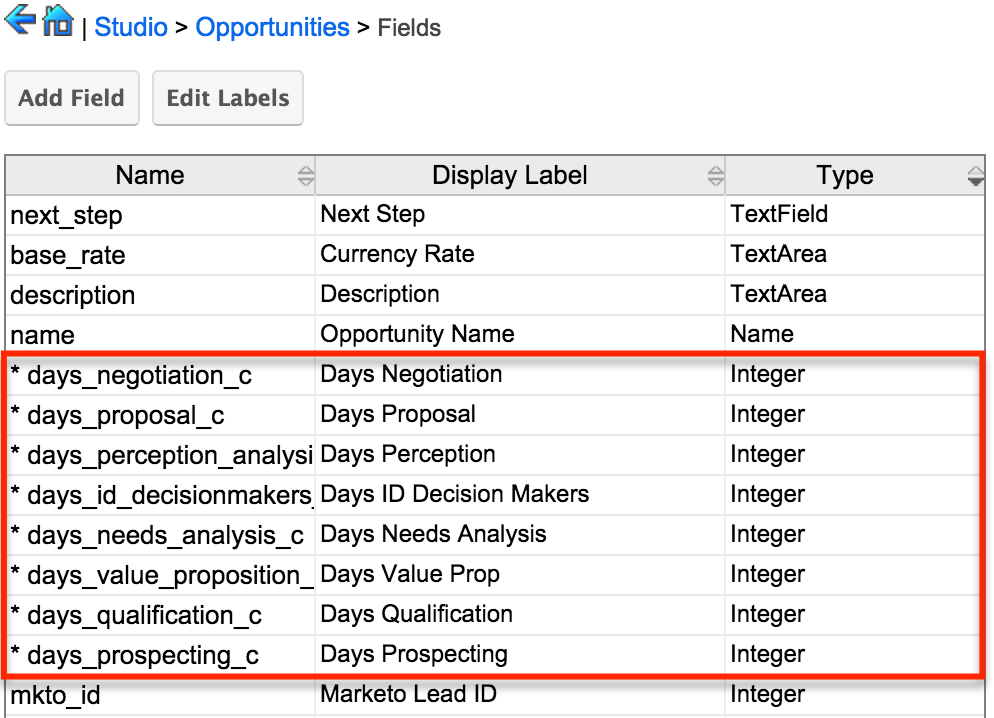
- Create a new process definition record. Name the record "Sales Stage days monitor" and set the Target Module as Opportunities. Please refer to the Process Definitions documentation for complete steps to create a new process definition record. Click "Save & Design" to continue to the Visual Designer canvas.
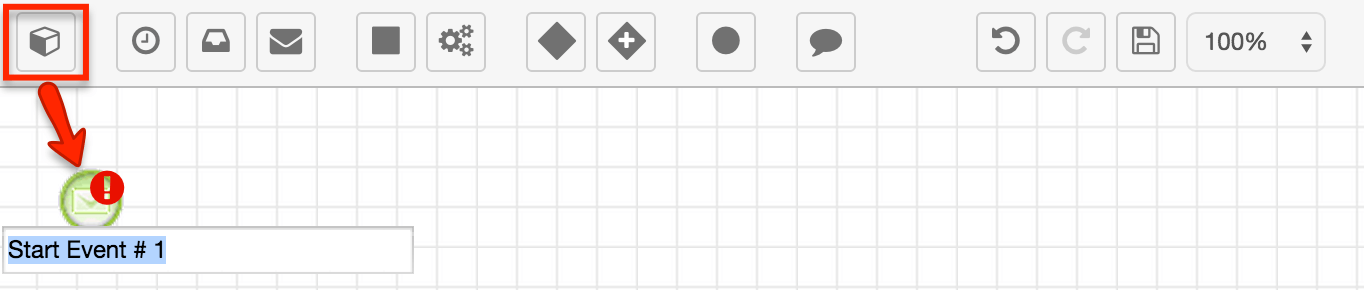
- Drag a Start event onto the canvas.
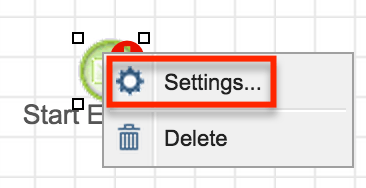
- Right-click the Start event and then select "Settings".
Using the "Applies To" dropdown menu, determine when the process definition should activate. For this use case, select "New Records Only" because we need to run the process from the time the opportunity is created until it is closed. So, even though we only start a process when an opportunity is new, it continues counting on future updates because it is still a running process until the sales stage changes to "Closed Won" or "Closed Lost". To track all new opportunities, do not enter any conditions in the Criteria window. Click "Save" to return to the design canvas.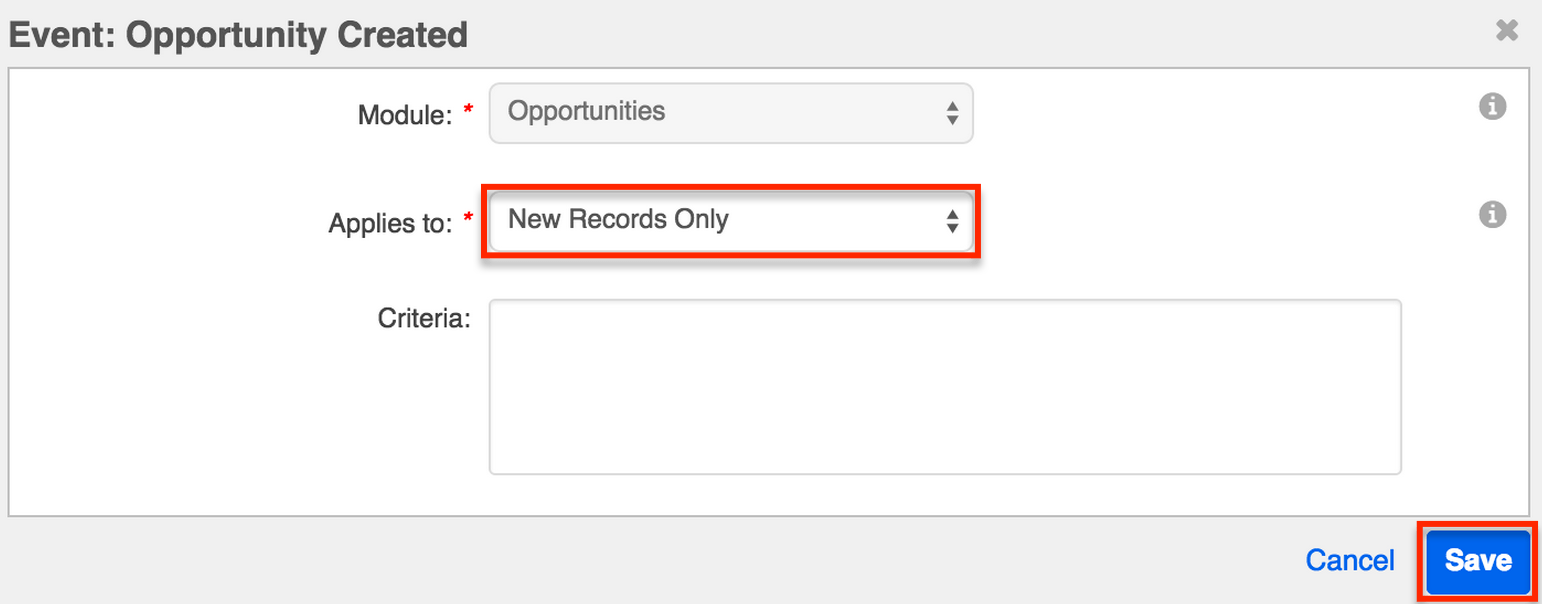
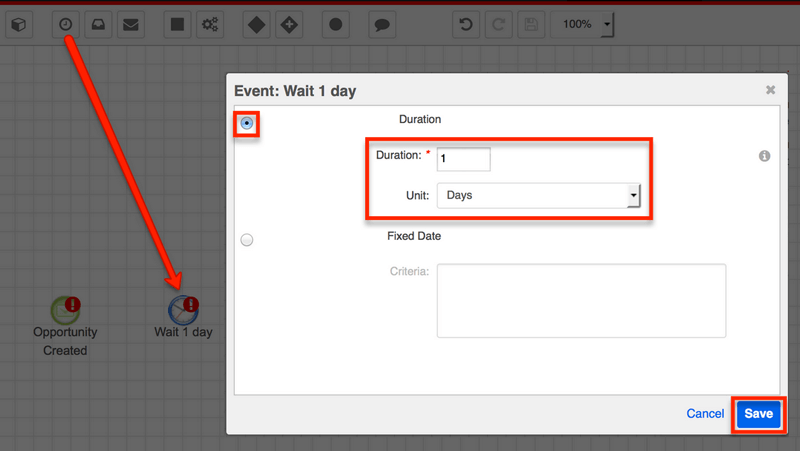
- Drag a Wait event onto the canvas. Right-click on the icon and select "Settings". Set the duration to one day. This element will restrict the relevant day-counter field to incrementing only one time per day. Click "Save" to return to the design canvas.
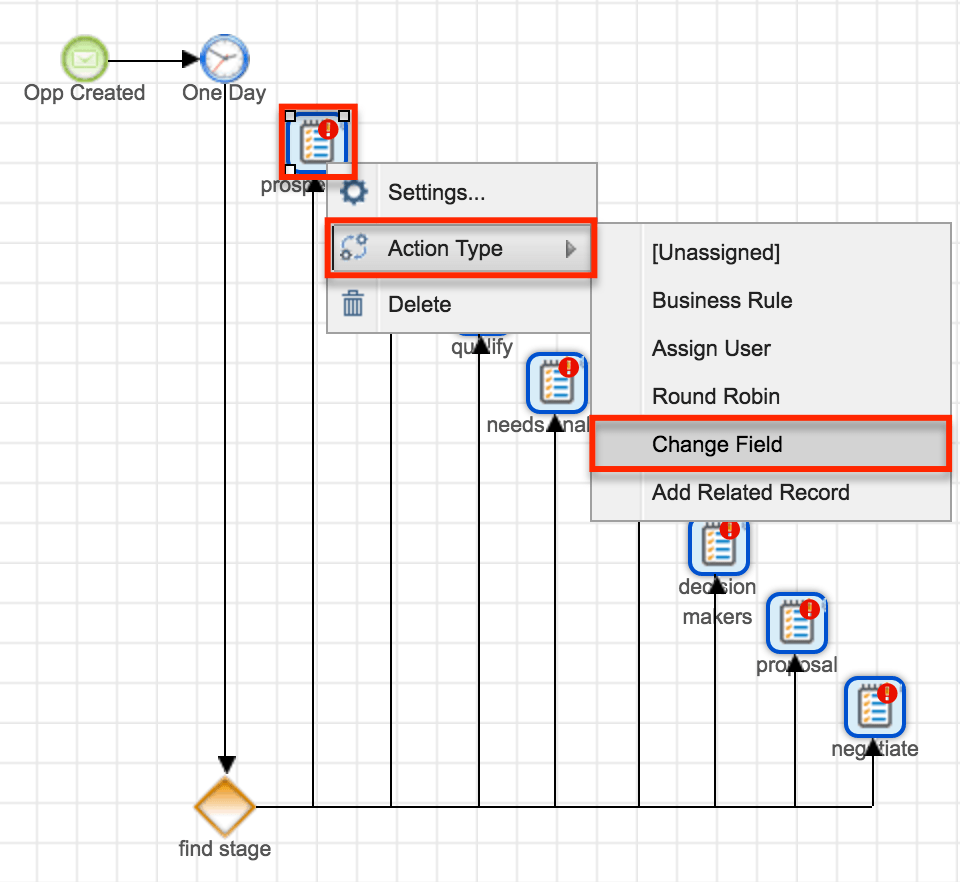
- After one day has passed, the process must check the opportunity's sales stage and then increment the corresponding field. This requires one Exclusive gateway connected to one action for every monitored sales stage. Add these elements to the canvas and connect the Wait event to the gateway and then, one by one, connect the gateway to the actions. Right-click on each action and select "Change Field" before proceeding to the next step.
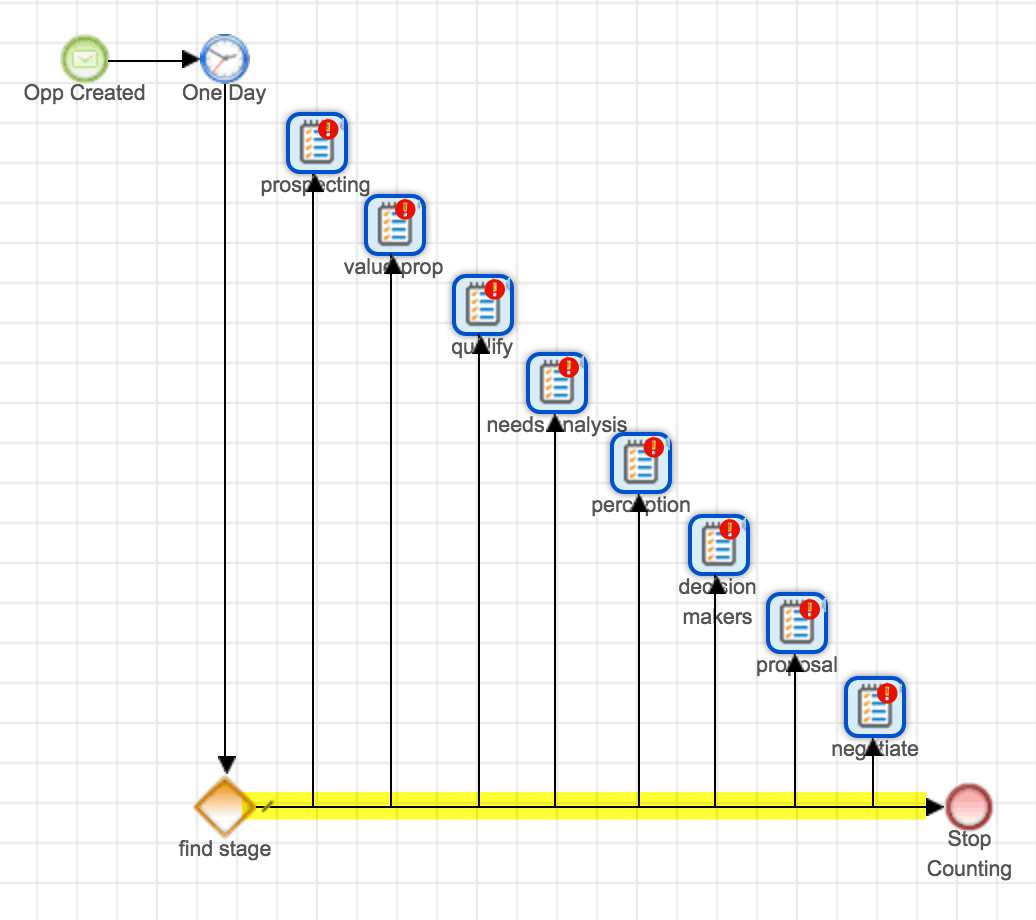
- Drag an End event to the canvas and label it "Stop Counting". This will stop the process when the gateway evaluates the opportunity as closed. Connect the gateway to the End event.
- Now configure the gateway:
- Right-click on the gateway element and set the Default Flow to "Stop Counting".
- Right-click the gateway again, this time selecting "Settings".
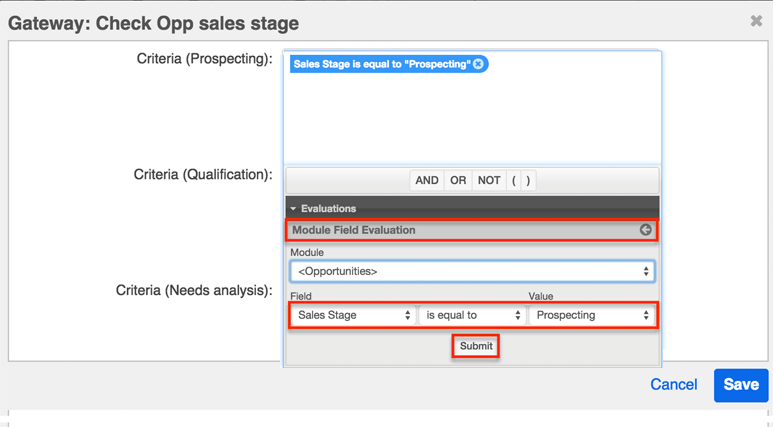
- For each criteria window, create a Module Field Evaluation that corresponds with the appropriate sales stage on the action. For example, next to "Criteria (prospecting)", click inside the adjacent formula window and then click Evaluations > Module Field Evaluation > Sales Stage (is equal to) Prospecting. Click "Submit" to add the condition to the canvas.
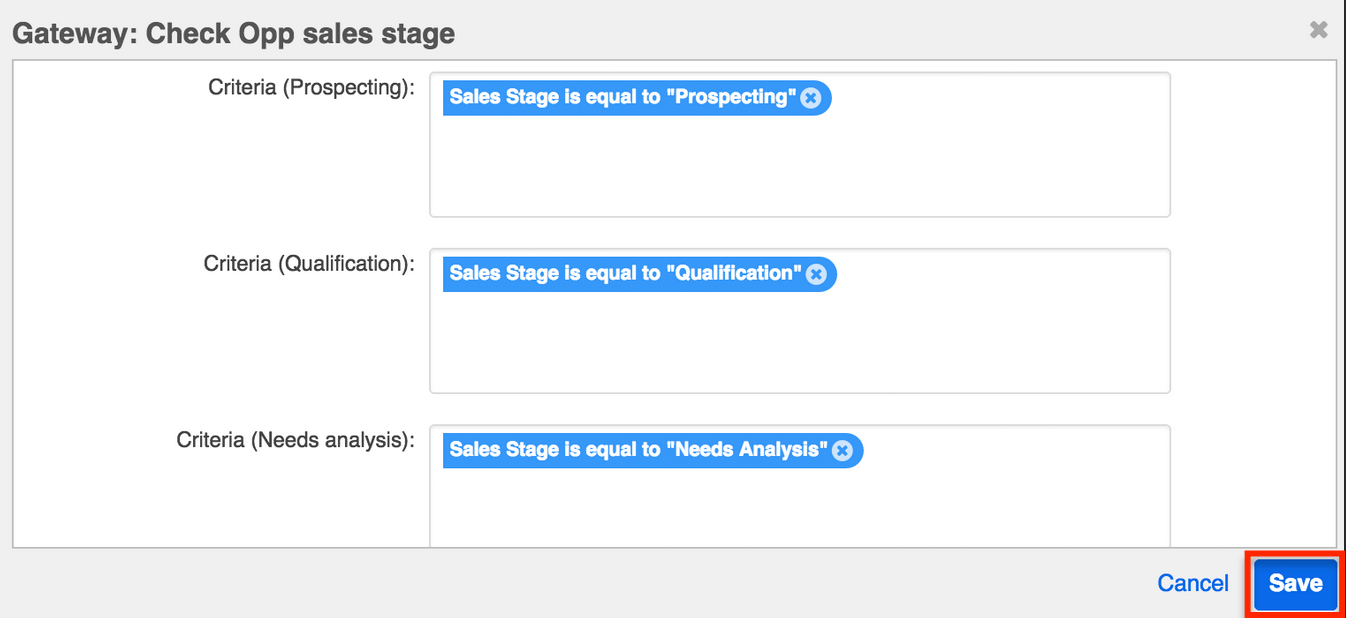
- Repeat step 8 for all of the gateway's criteria windows, selecting the corresponding stage for each. Click "Save" after setting these conditions.
- Next, configure each of the Change Field actions to increment their corresponding day-counter field by 1. For example, when the gateway directs the process flow to the action labeled "Prospecting", the action will add +1 to the opportunity's "Days Prospecting" field. Follow these steps to configure the prospecting action as an example:
- Right-click on the action element and select "Settings".
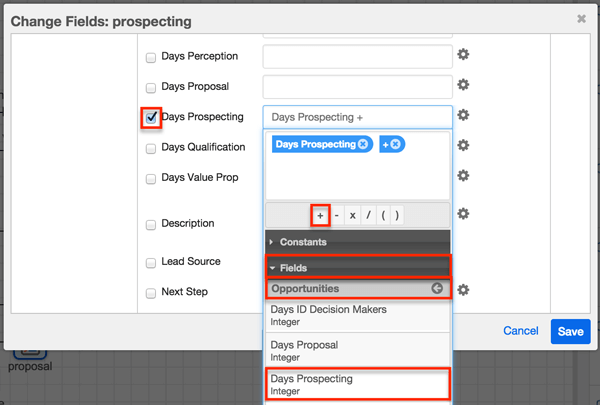
- Click inside the checkbox next to "Days Prospecting" to enable editing in the field.
- Click inside the adjacent text box and then click on Fields > Opportunities > Days Prospecting to move the field into the criteria window.
- Click on the plus (+) sign in the operators bar to move the addition symbol into the criteria window.
- Click on Constants > String, Number and Boolean. Type the numeral 1 in the Value field and click "add number" to move the digit into the criteria window.
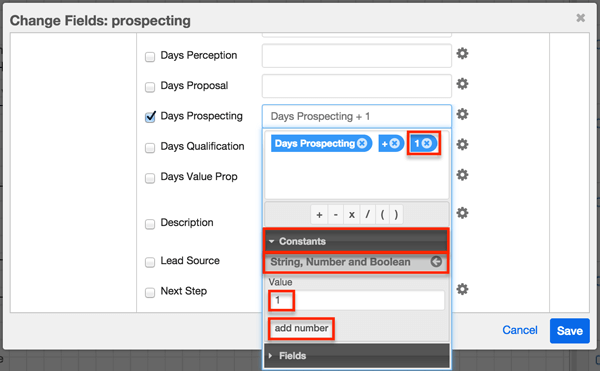
- Click the Save button to return to the design canvas.
- Repeat this step (Step 10) for all of the Change Fields actions, selecting the appropriate day-counter field for each one.
- Complete the cycle by dragging connectors, one by one, from each action to the Wait event from step 5.
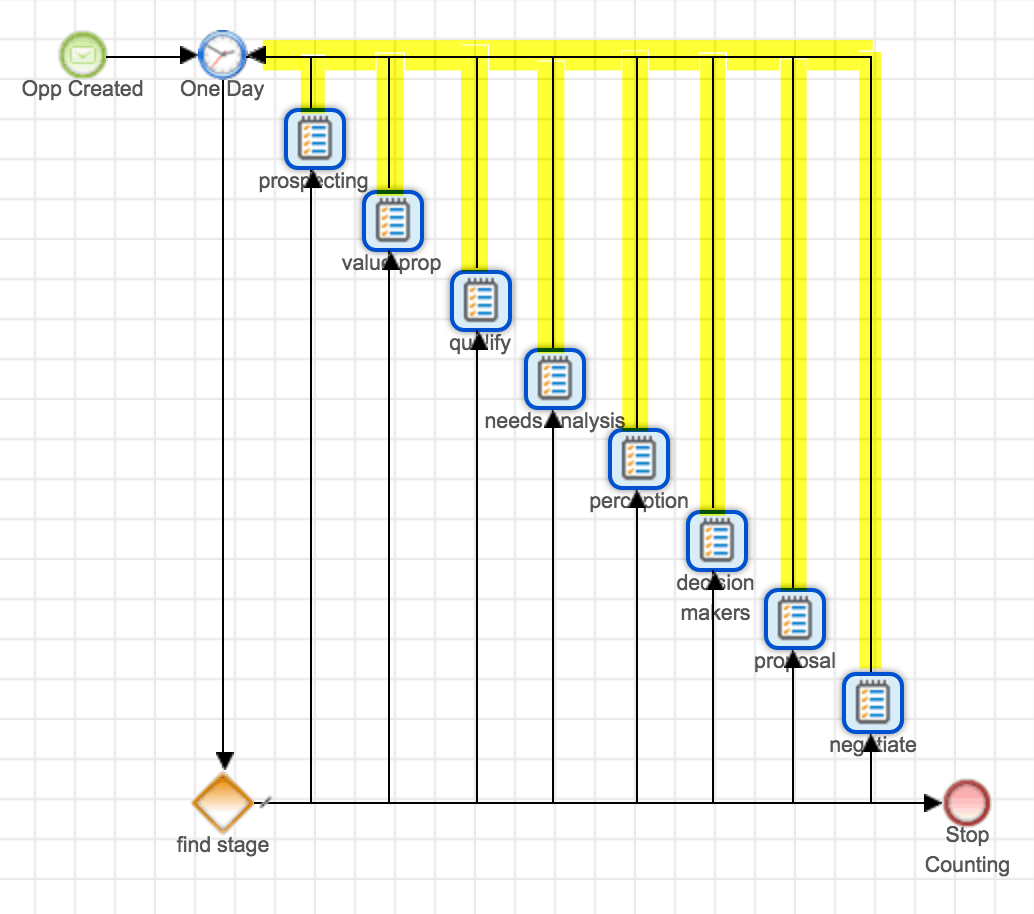
The completed process definition will behave as follows:
- When an opportunity is created, a new process begins.
- One day after creation, the process will evaluate the opportunity's Sales Stage field.
- If the sales stage is any open value (e.g., Prospecting, Value Proposition, etc.), the stage's corresponding field will increase by one, tallying an additional day that the opportunity existed in that stage.
- The process will then loop back to the Wait event and repeat the evaluation on the next day. Please note that the process will only repeat as many times as the Error Number of Cycles permits in the SugarBPM settings.
- Eventually, the evaluation will assess the sales stage as Closed Won or Closed Lost and direct the process flow to the End event.
Enabling the Process Definition
New process definitions are set to "Disabled" by default as a preventative feature to ensure a process instance is not triggered inadvertently during the design phase. After the design is fully configured, exit the Visual Designer and set the process definition to "Enabled" via the Process Definitions dashlet or list view. For more information on enabling process definitions, please refer to the Process Definitions documentation.
Application
As a best practice, include the day-counter functionality as a parallel branch of a more complex process definition so that only one process runs against an opportunity at a time. This will reduce the chance of a conflict between processes and other automation tools in your instance. The following sections discuss optional ways to utilize the fields and the data they contain.
Adding the Fields to Record View
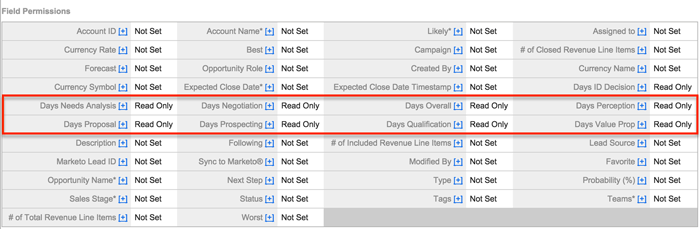
To display the day-counter fields on the Opportunity record, add the fields to the record view layout via Studio and set the field-level permissions to "Read Only" for all users. This restriction will prevent any accidental or deliberate tampering with the values of the fields.
Follow these steps to prohibit manual editing of these fields:
- Create a new role named "Global Locked Fields".
- Add all users to this role.
- On the left side of the role's settings page, click on the Opportunities link.
- Set all of the day-counter fields to "Read Only".
- Click the Save button to preserve these changes.
For more information about Studio layouts and Role Management, please refer to the Studio and Role Management documentation.
Counting the Total Days in the Sales Cycle
To display the total number of days that the opportunity is open, create a custom integer field labeled "Days Overall". This field will represent the overall length of the sales cycle.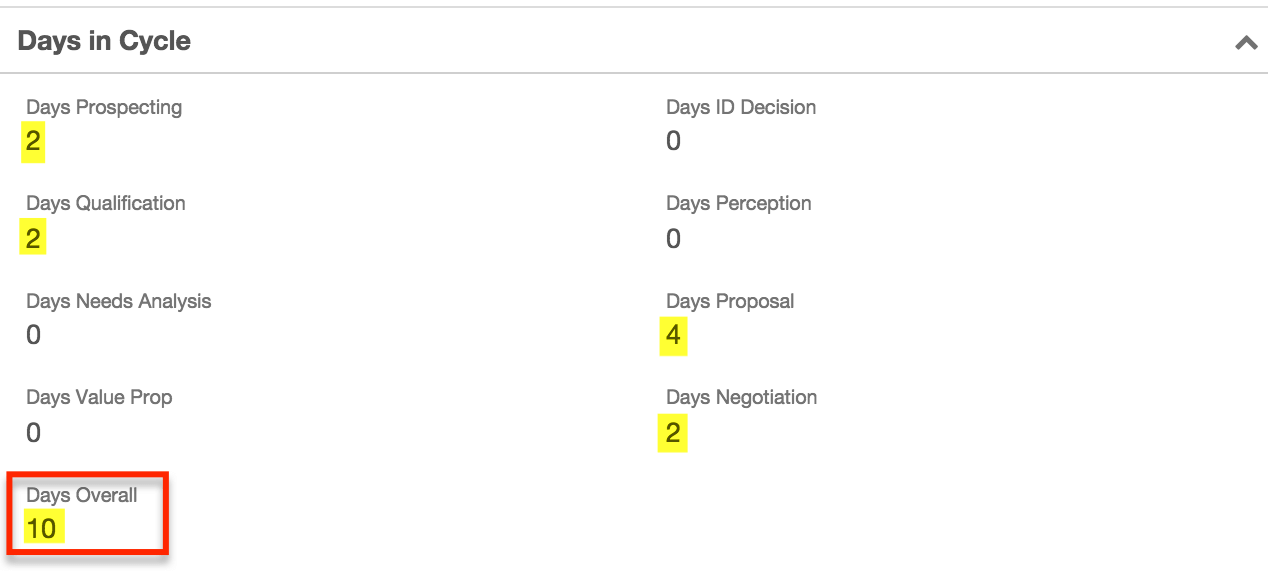
Implement the counting behavior in one of the following ways:
- Build the counter into the process definition:
- Edit each Change Field action to also add 1 to the Days Overall field (see step 10).
- This will increment every time the process loops through an open sales stage.
- Configure the counter as a calculated field using Sugar Logic:
- Enable the Calculated option in field settings for the Days Overall field.
- The following formula calculates the number of total days in the sales cycle for an opportunity in this article's use case. For more information about creating calculated fields with Sugar Logic, please refer to the Knowledge Base article, Introduction to Calculated Fields.
abs(add($days_id_decision_c,$days_needsanalysis_c,$days_negotiation_c,$days_perception_analysis_c,$days_proposal_c,$days_prospecting_c,$days_qualification_c,$days_valueprop_c))
Reporting on Average Days
The new fields can be used in a report to determine the average number of days in any particular stage of your organization's sales cycle. By grouping opportunity reports by team or user, it is possible to compare the statistics of top-performing sales entities against those that are less successful and develop a corresponding key performance indicator (KPI) for your organization.
In the following summation report, the performances of Chris and Max are compared in terms of their average sale amounts and total days in their respective sales cycles. Chris has a significantly higher average sale amount (AVG Amt) than Max's average. Chris also has a shorter typical sales cycle (Total Days) than Max does. In this scenario, the sales manager may create a goal for Max to expedite the length of time he takes to complete a sale, using the logic that a shorter sales cycle results in a higher average sale.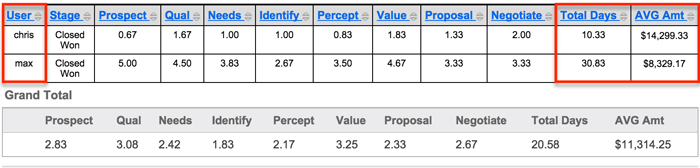
To create a similar report, follow these basic steps:
- Create an Opportunities-based Summation report.
- Filter the report by the relevant team or user names and the Closed Won sales stage.
- Add an AVG (average) display summary for every days-counter and currency field you would like to compare.
- Save and Run the report.
For more information about creating reports in Sugar, please refer to the Reports documentation.
Downloads
The process definition record created in this article is provided here for your convenience. Always review the settings of imported SugarBPM files to confirm that they are configured as expected. Please follow these general steps to use the sample file in your instance:
- Create the required custom fields in your instance as explained in step one of the Steps to Complete section.
- Download the process definition file in .bpm format here: Download Link
- Import the downloaded .bpm file to the Process Definitions module.
- Open the process definition in design view.
- Edit each of the Change Fields actions to point to the corresponding custom fields for your instance.
- Save and then enable the process definition for testing.
New process definitions are set to "Disabled" by default. This is a preventative feature that ensures a process instance is not triggered inadvertently during the design phase. After the design is fully configured, exit the Visual Designer and set the process definition to "Enabled" via the Process Definitions dashlet or list view. For more information, please refer to the Process Definitions documentation.