Troubleshooting Missing Data in Discover Reports
Overview
When working with historical reports in Discover, especially those using Snapshot Date to filter results, you may find yourself asking:
- “Why is my report not showing X opportunity?”
- “Why is there no data for Y month?”
These issues typically come up when you are tracking changes over time, instead of viewing current data like a typical CRM report. This guide explains a common cause of missing report results and walks you through a step-by-step process to investigate and resolve these discrepancies.
Snapshot Date vs. Expected Close Date
One reason you may not be seeing a specific result in your report is that it is past the expected close date as entered on the record, but the opportunity is not actually in a closed state. It is important to know that in stock Sugar instances, "Expected Close Date" shows planned activity. This field is manually populated, and users may neglect to update this field upon closing the opportunity. Due to this, "Expected Close Date" may not always reflect what actually happened. Only "Snapshot Date" gives you a reliable history of how a record really existed on a specific date.
For example, an opportunity might have an "Expected Close Date" of 1/1/25, but it did not actually move to "Closed Won" until 2/1/25. The snapshot history will show the real sequence of events just as they were on the selected date.
To gain further insight into why a record may be excluded from your reports, you will have to investigate how that record looked over the time period selected in your report, and whether it met your report's filter criteria during that time period.
Investigate the Record’s History
Follow these steps to dig into the historical state of an opportunity record, as an example, to identify why it may be missing from a report.
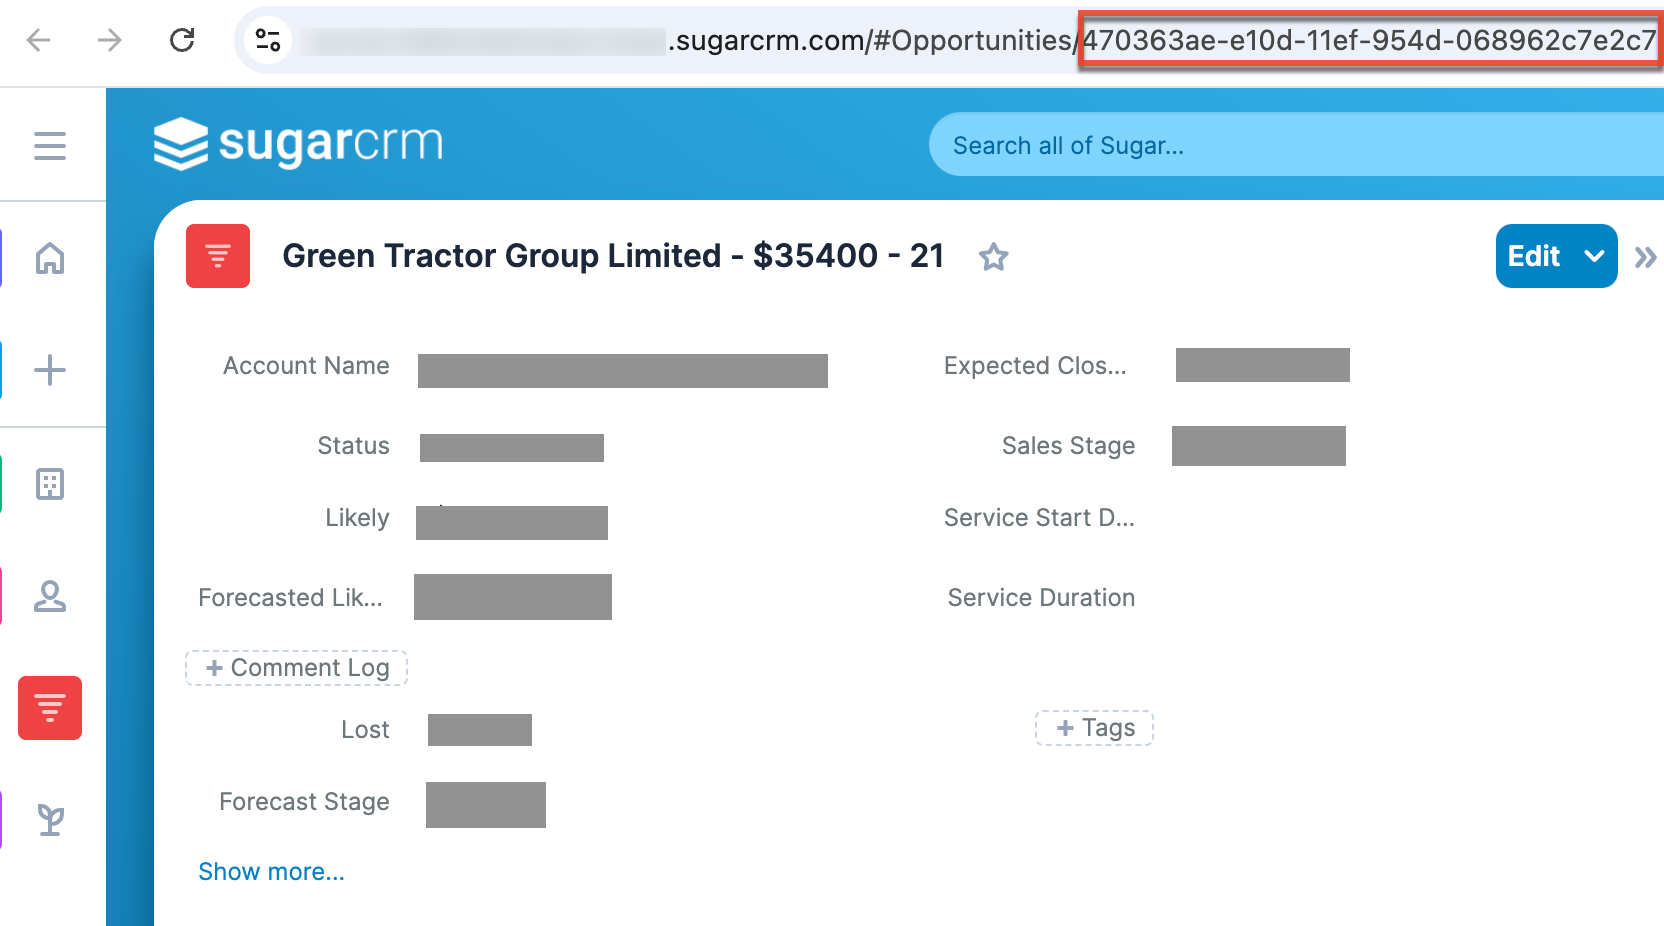
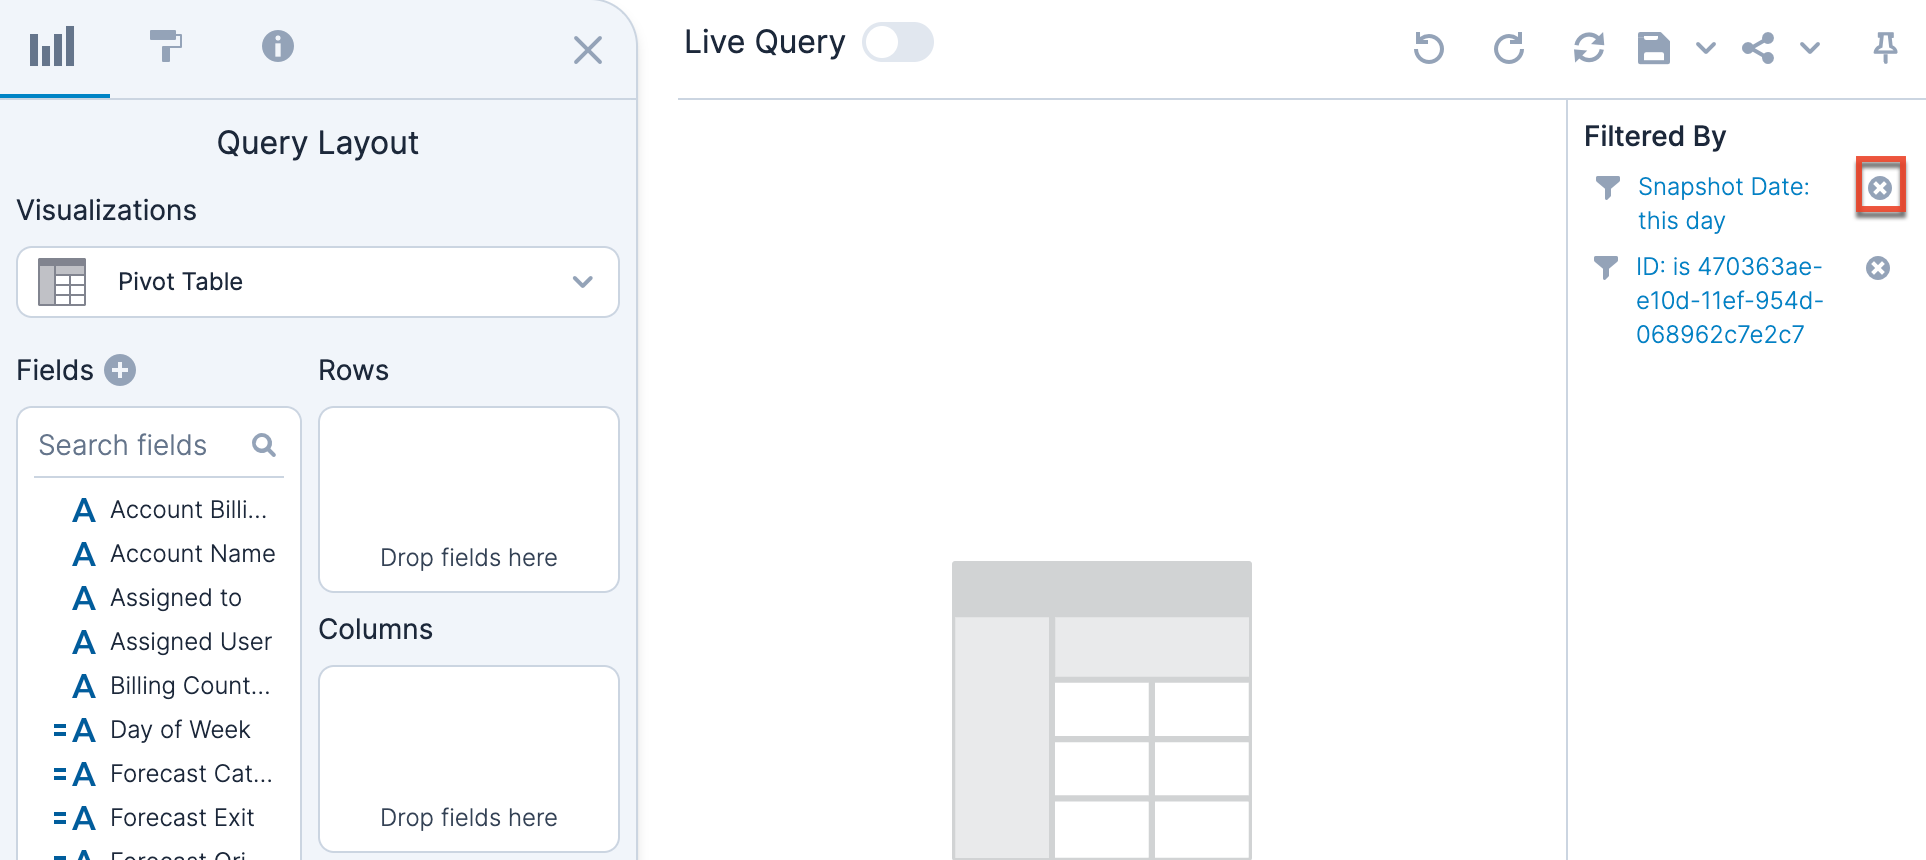
- Find the record ID of the opportunity in question. You can get this from the URL in Sugar. The record ID is a 32 character, unique identifier separated by dashes that is found directly after the module name inside your Sugar URL (e.g., 470363ae-e10d-11ef-954d-068962c7e2c7). For this example, it is located after "#Opportunities/".
- In Discover, start a new report. Choose the opportunities dataset where the record in question is stored.
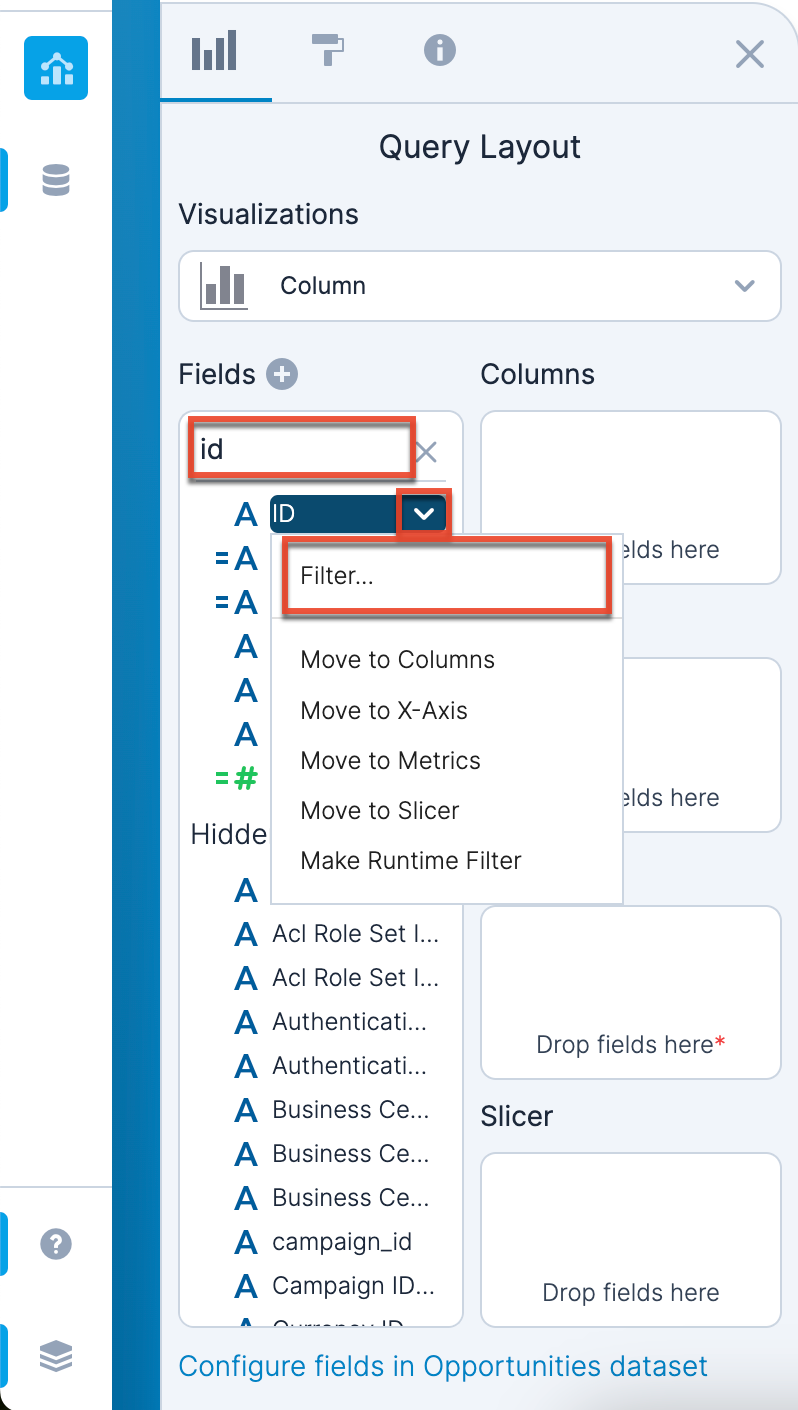
- Search the fields list for the ID field. This field is named "ID" by default, but you may have to check your system for the exact field name if this field has been renamed in your instance.
- Once you have located the ID field in your Fields list, select the dropdown arrow next to the field name, then select "Filter..." from the dropdown menu.
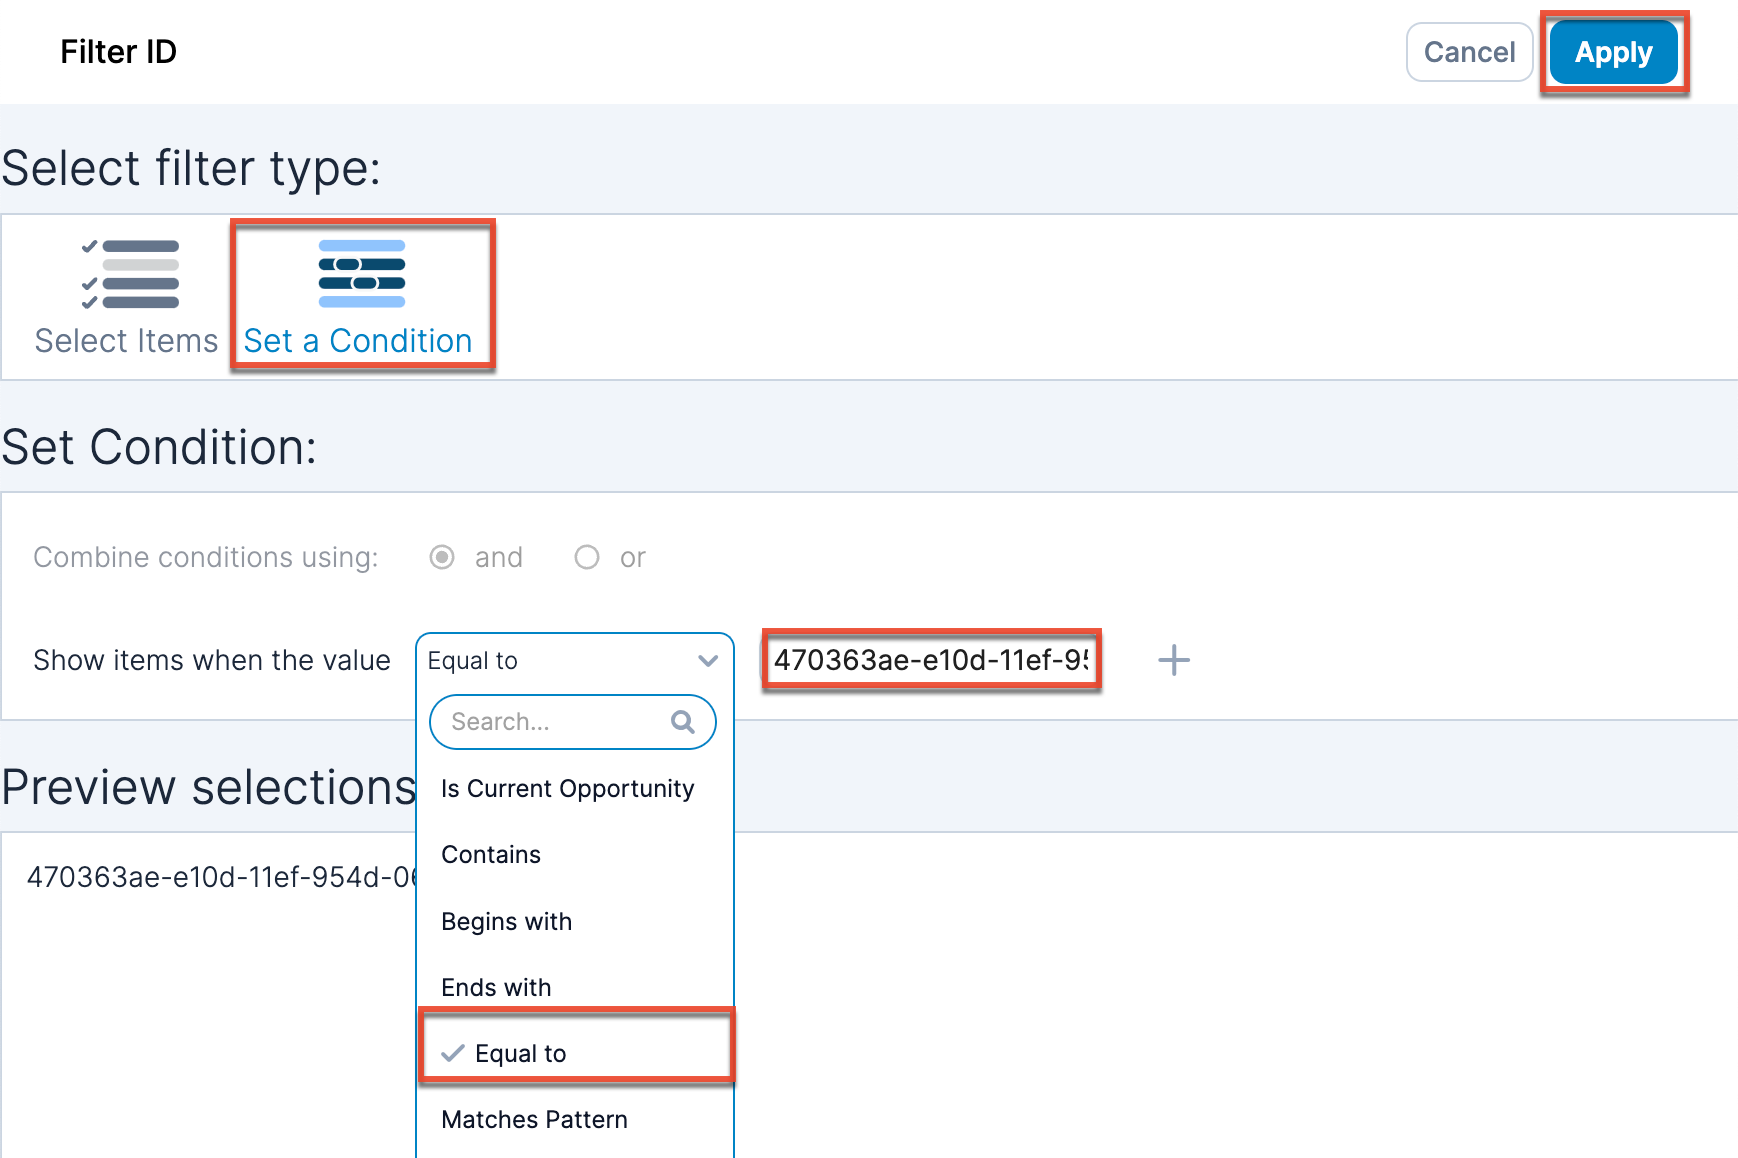
- Select the filter type "Set a Condition," then use the dropdown menu to select "Equal to" and paste the record ID obtained in step 1 into the search bar. Click "Apply". This narrows your report results to the individual opportunity you are investigating.
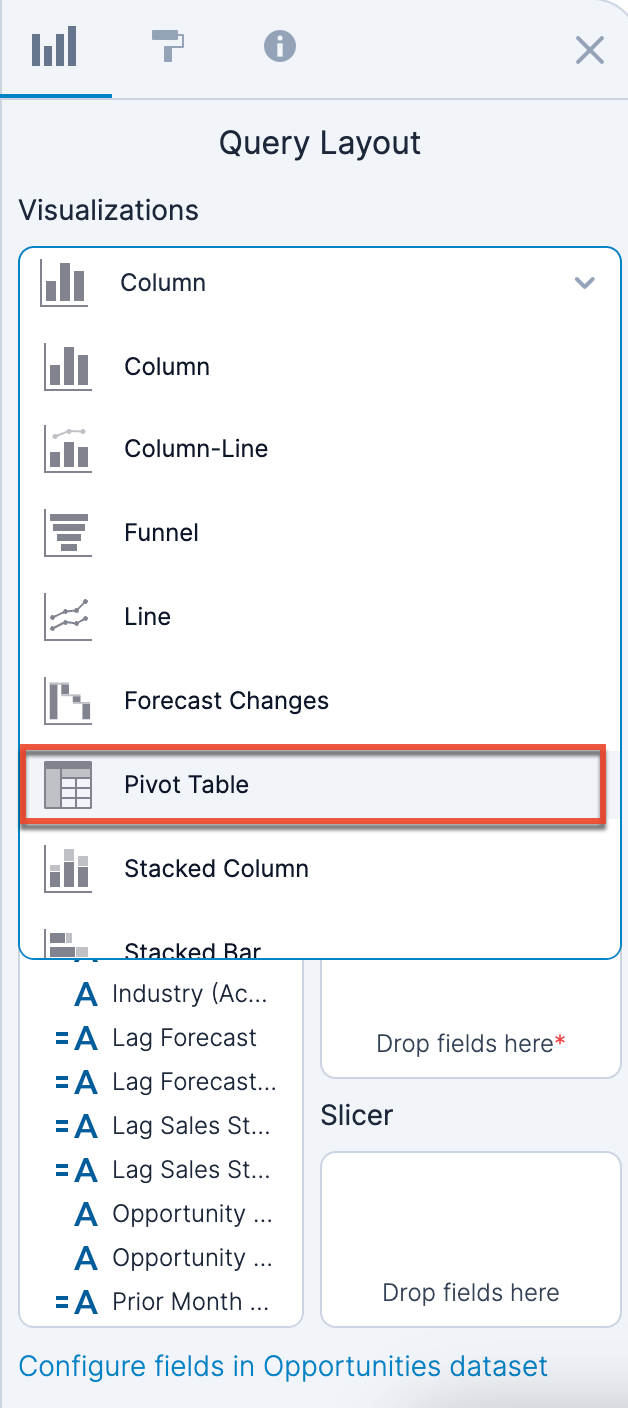
- Change the report type to "Pivot Table" so you can explore how the record has changed over time by selecting "Pivot Table" from the visualization dropdown.
- Discover reports are created with a "Snapshot Date: this day" filter by default. Remove this filter by selecting the "X" to the right of the filter so that you can view historical data.
- Drag the Snapshot Date field to the Rows shelf. This will show every date a snapshot of the selected record exists.
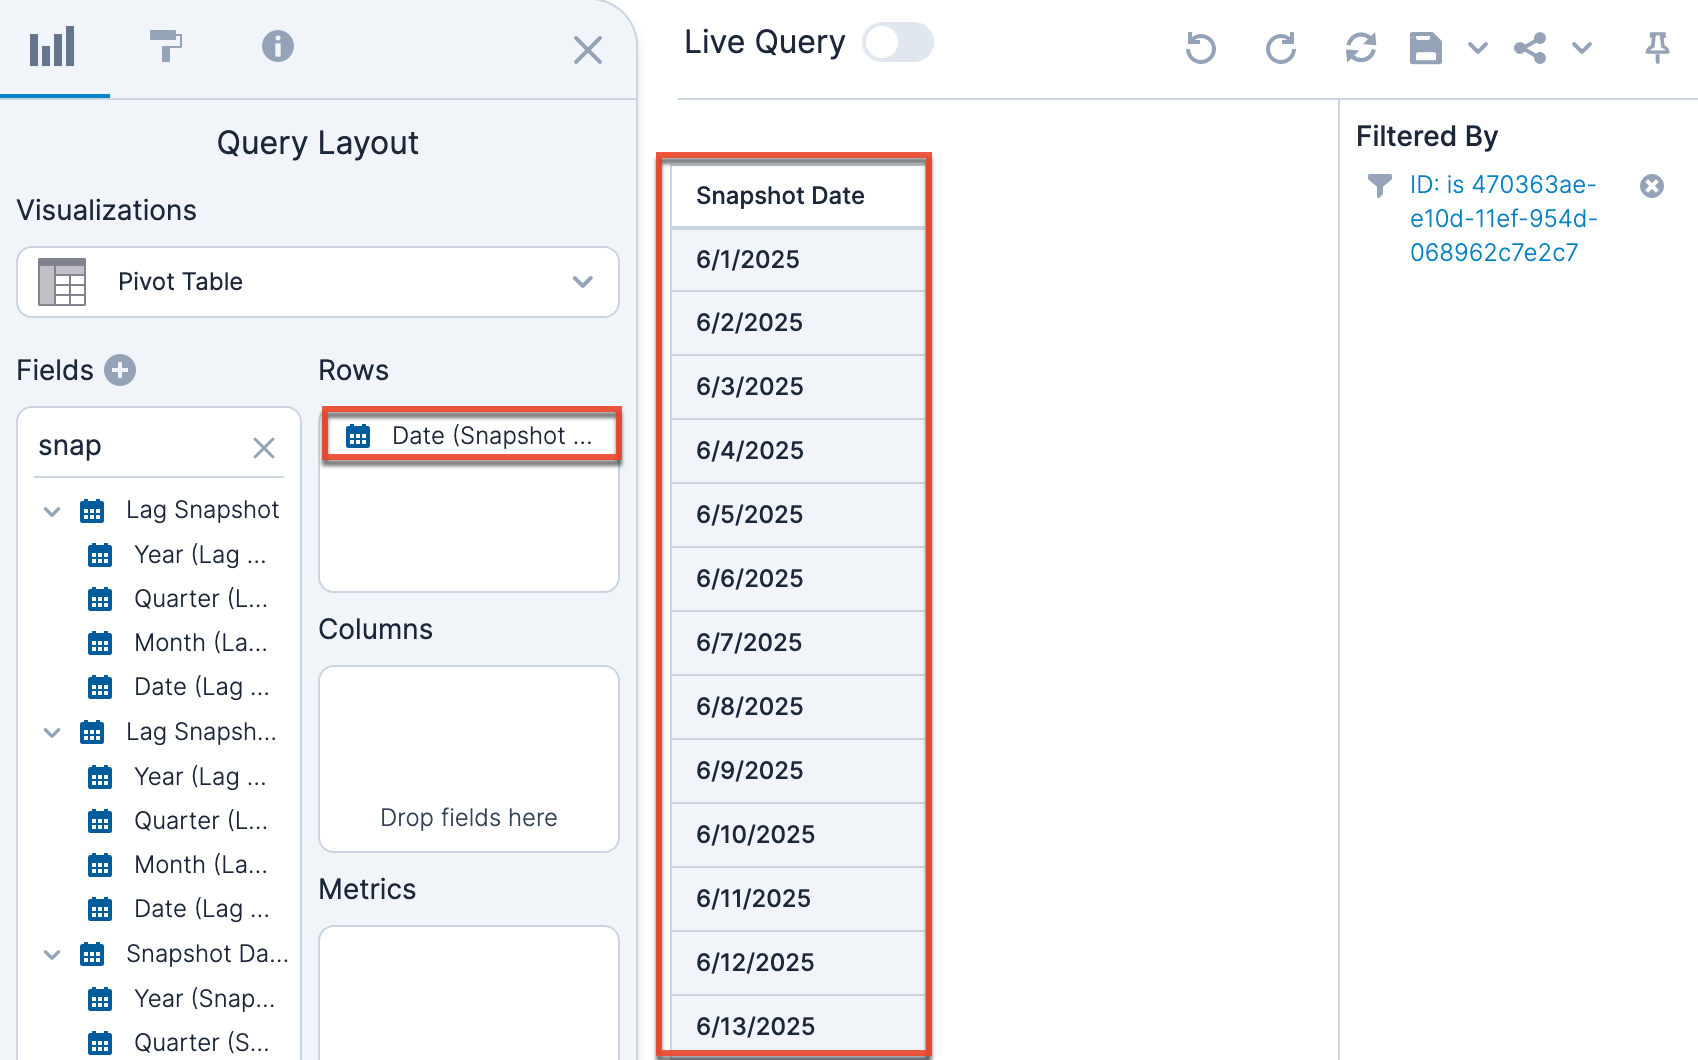
If there’s no data for Y month: That means there was no snapshot of the record during that time. It might not have existed yet.
If data exists: Continue to the next step. - Begin adding other fields to the Rows shelf, such as "Sales Stage" or "Expected Close Date", to see how those values looked on different snapshot dates.
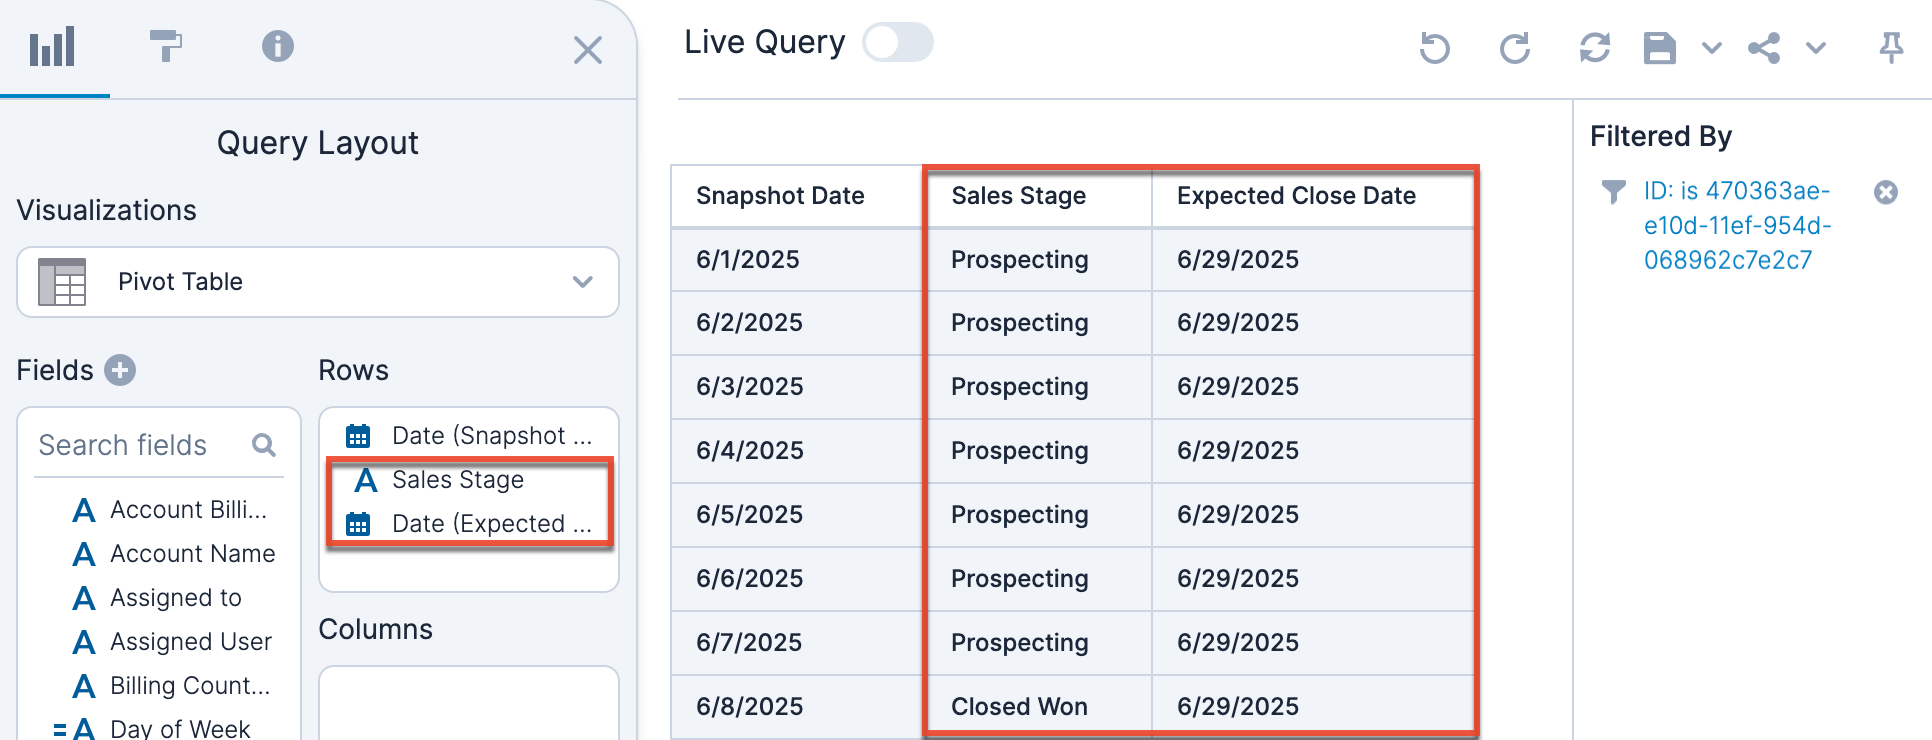
For example, if your original report filters by "Sales Stage = Closed Won", check whether that opportunity had a "Closed Won" status during the relevant dates in your original report.
Continue adding relevant fields to understand why the record may not have met the report’s filter conditions during the timeframe captured in the original report.