Editing a Module's Dashlet
Overview
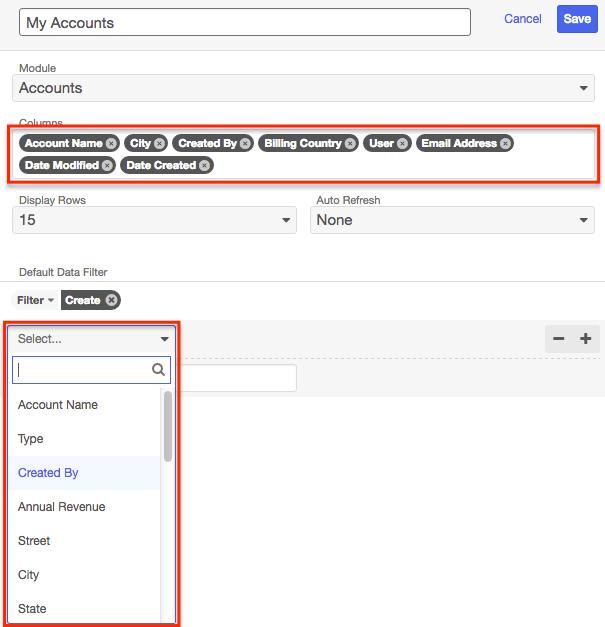
Sugar® dashlets let users get a quick view of various records, activities, reports, etc. from their home pages or intelligence panes. Every user in Sugar can easily customize their dashlets to meet their individual needs. List view dashlets are a type of dashlet which displays tables of records. When configuring these dashlets, users can choose the column fields the dashlet will display as well as build filters controlling which records will show. 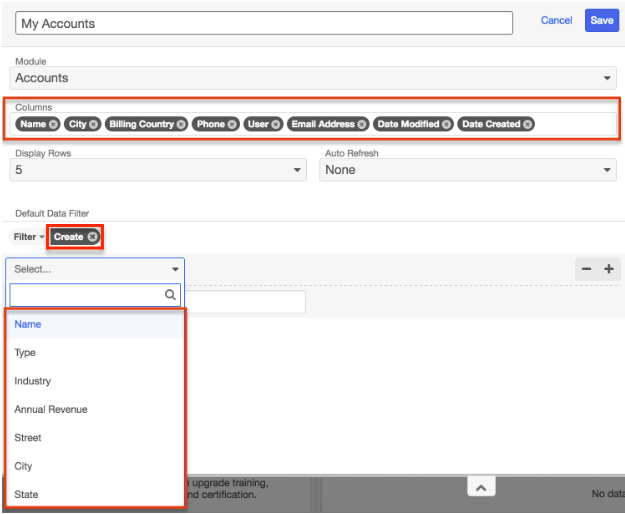
Sugar administrators control which fields are available to display or be used as filters. This article will cover how to specify which fields are available in a module's list view dashlet via Admin > Studio.
For more information on how users can modify their list view dashlets, please refer to the Dashboards and Dashlets documentation.
Use Case
As an example, we will configure the list of fields that are available when configuring the My Accounts dashlet's display columns and filters. In Studio, each module's List View layout and Search layout controls the fields available for display or filtering in the list view dashlet. We will make the following changes to the My Accounts dashlet by configuring the Accounts List View and Search layouts via Admin > Studio:
- Add "Created By" to the list of available display columns and filters.
- Remove "Phone" from the list of available display columns.
- Remove "Industry" from the list of available filters.
- Change the label of the Name field to "Account Name" in both the display columns and filters.
Prerequisites
To make the following changes in Admin > Studio, you must be an administrator or have developer-level role access to the dashlet's module.
Steps to Complete
Modifying List View Dashlet's Display Columns
When configuring a list view dashlet, end users can select and order the columns it will display. Administrators control the list of field columns available for the dashlet by modifying the module's List View layout via Admin > Studio. Please note that changes made to the List View layout will also apply to the list of available fields for the module's list view (e.g. Accounts). The same fields will be available for display in the module's list view as in the module's list view dashlet.
Use the following steps to modify the list of available display column fields for a module's list view dashlet:
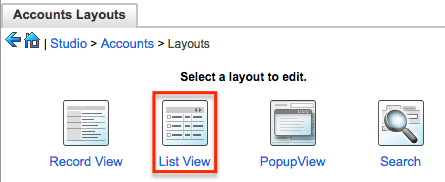
- Navigate to Admin > Studio > {Module Name} > Layouts > List View. For our example, we will select the Accounts module.
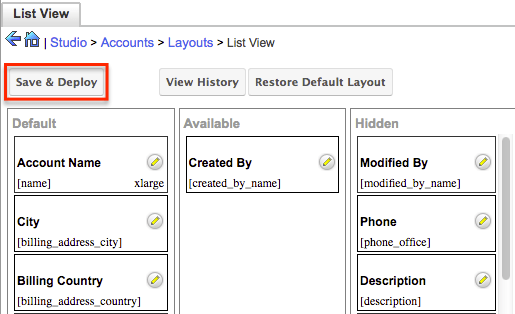
- To make a field available in the list view dashlet, drag and drop it (e.g. Created By) from the Hidden column to either the Available or Default columns. Placing a field in either column will allow it to appear as an available display column field when editing the list view dashlet.
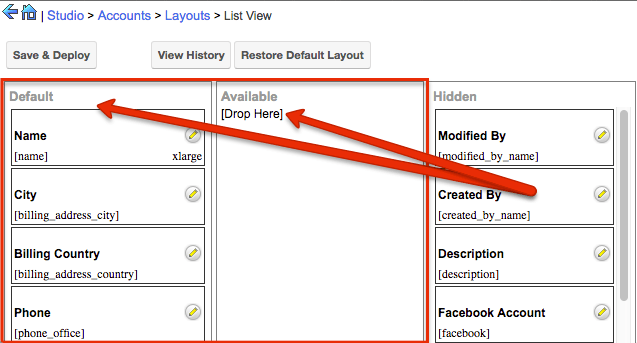
Note: These settings will also affect the module's list view. Fields in the Default column will display by default in the module's list view while fields in the Available column will be available to be added to the list view by end users. - To remove a field from being available in the list view dashlet, drag and drop fields (e.g. Phone) from the Default or Available columns to the Hidden column.
- To change the default order of the display fields in the list view dashlet, simply drag and drop fields up or down within the Default list. The top-to-bottom order of fields here corresponds with the left-to-right order of fields displayed on the dashlet.
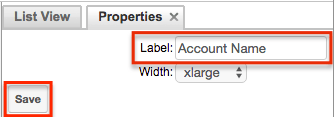
- To change the label of a field, click the pencil icon to the right of the field's name. For our example, we will change the Name field's label to "Account Name". Click "Save" to preserve the change.
- After finalizing the layout, click "Save & Deploy" to push the changes out to any new list view dashlets that are created by users for this module. Please note that existing dashlets will retain their old layout settings and must be reconfigured to display the new columns.
Modifying List View Dashlet's Filters
List view dashlets filter which records they display using pre-defined filters such as "My Favorites" or any other filters the end user creates. Admins control which fields are available to filter by using the module's Search layout in Studio. Please note that changes made to the Search layout will also affect the list of fields available for filtering the module's list view.
Use the following steps to modify the list of available filter fields for a module's list view dashlet:
- Navigate to Admin > Studio > {Module Name} > Layouts > Search. For our example, we will select the Accounts module.
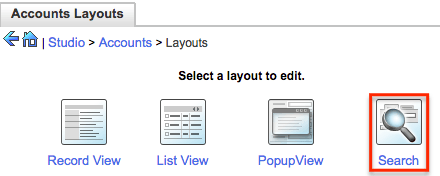
- To make a field available for filtering in the list view dashlet, drag and drop it (e.g. Created By) from the Hidden column to the Default column.
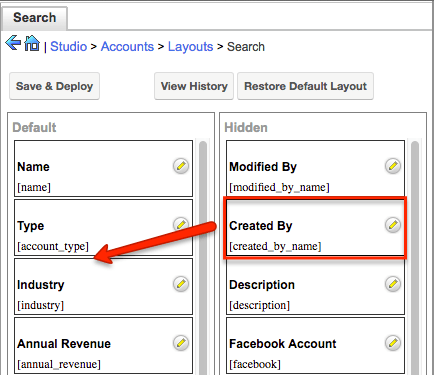
- To make a field unavailable for filtering in the list view dashlet, drag and drop it (e.g. Industry) from the Default column to the Hidden column.
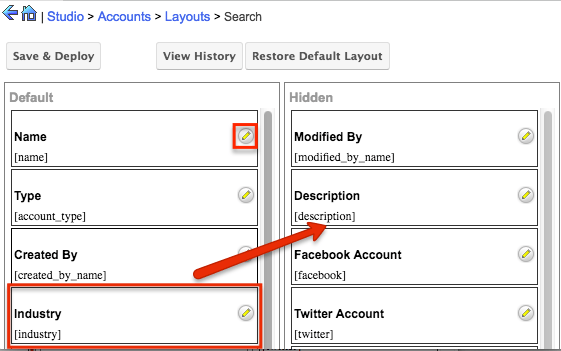
- To change the default order of the fields as they appear in the Filter list, simply drag and drop fields up or down within the Default list. The top-to-bottom order of fields here corresponds with the left-to-right order of filter fields displayed when configuring the dashlet.
- To change the label of a field, click the pencil icon to the right of the field's name. For our example, we will change the Name field to "Account Name". Click "Save" to preserve the change.

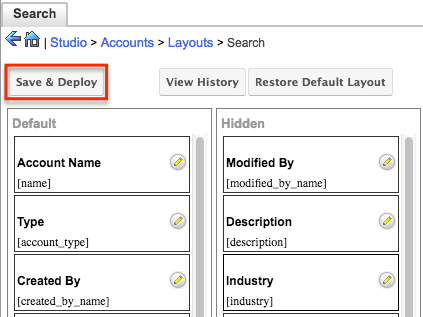
- After finalizing the available filters, click "Save & Deploy" to push the changes out to any new list view dashlets that are created by users for this module. Please note that existing dashlets will retain their old filter settings and must be re-configured to utilize the new fields.
Application
After changing the module's List View and Search layouts, users can configure their list view dashlet (e.g. My Accounts) with the new display columns and filters. Please keep in mind that existing list view dashlets will not automatically reflect the changes made in Studio, and each user will have to edit their dashlets in order to make use of the newly available display and filter fields. If the newly added display column field does not appear in the Columns field of the Configuration Options page, simply click your mouse in the field to select from the list of available fields that appear.