Creating Role-Based Dropdown Lists
Overview
Role-based dropdown lists enable administrators to control the dropdown options that are available for users to select when creating or editing records. The options users should be able to select may vary among users depending on their function in the organization. For example, users associated with the marketing or sales roles may see more sales-related dropdown values than users in a customer support role. This article covers how to create a role-based dropdown list and modify the list of options available for users to select based on their assigned role.
Administrators can also create role-based record views to define customized layouts for users depending on their assigned role. For more information, please refer to the Creating a Role-Based Record View article.
Note: Role-based dropdown lists are only available for Sidecar modules. For more information on role-based dropdown lists in Sugar, please refer to the Developer Tools documentation.
Use Case
As an example, we will create a dropdown field on the Accounts module called "Customer Type" where users assigned to the "User Role" will only be able to select "Basic" and "Silver" while users assigned to the "Manager Role" will be able to select additional options.
Prerequisites
- You must be an administrator or have developer-level role access to make the necessary changes in Admin > Dropdown Editor and Admin > Studio.
- Before configuring a role-based dropdown list, you must have at least one role in your instance. For this example, we have already created two new roles: "Manager Role" and "User Role". Additionally, you should already have users assigned to these roles. For more information on creating and assigning roles, please refer to the Role Management documentation.
Steps to Complete
We will create the new dropdown list, configure it to restrict some options for certain roles, create the dropdown field that uses the new list, then add the new field to applicable layouts.
Creating the Role-Based Dropdown List
In order to restrict users in the User Role from selecting the Gold and Platinum options, we will customize that role-list to disable those options. The Manager role-list does not need to be altered since it automatically inherits the Default-role list (as indicated by the absence of an asterisk next to its name).
The following steps cover creating a new dropdown list and configuring the list for the "User Role" as an example:
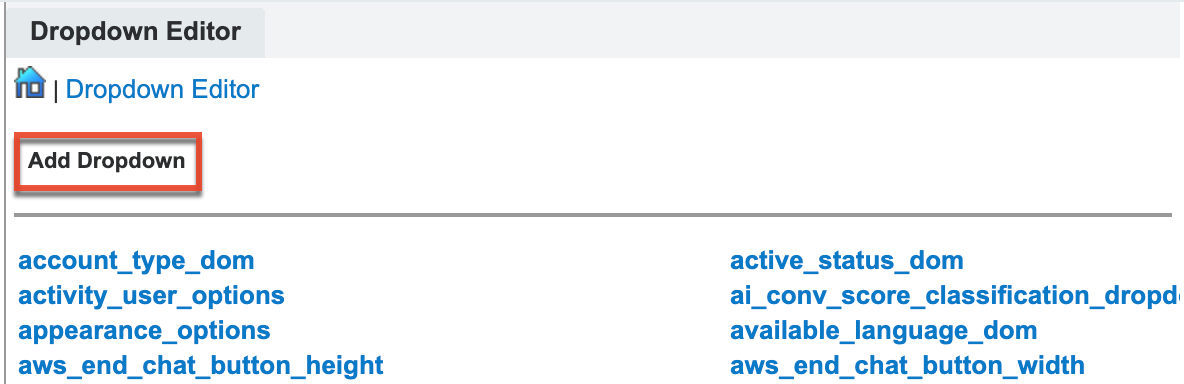
- Navigate to Admin > Dropdown Editor and click "Add Dropdown" above the list of existing dropdown lists.
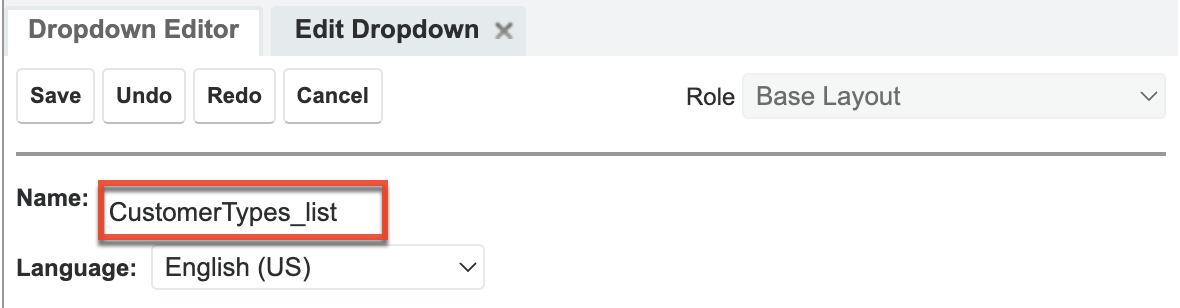
- Enter the desired name for the dropdown list in the Name field (e.g., "CustomerTypes_list").
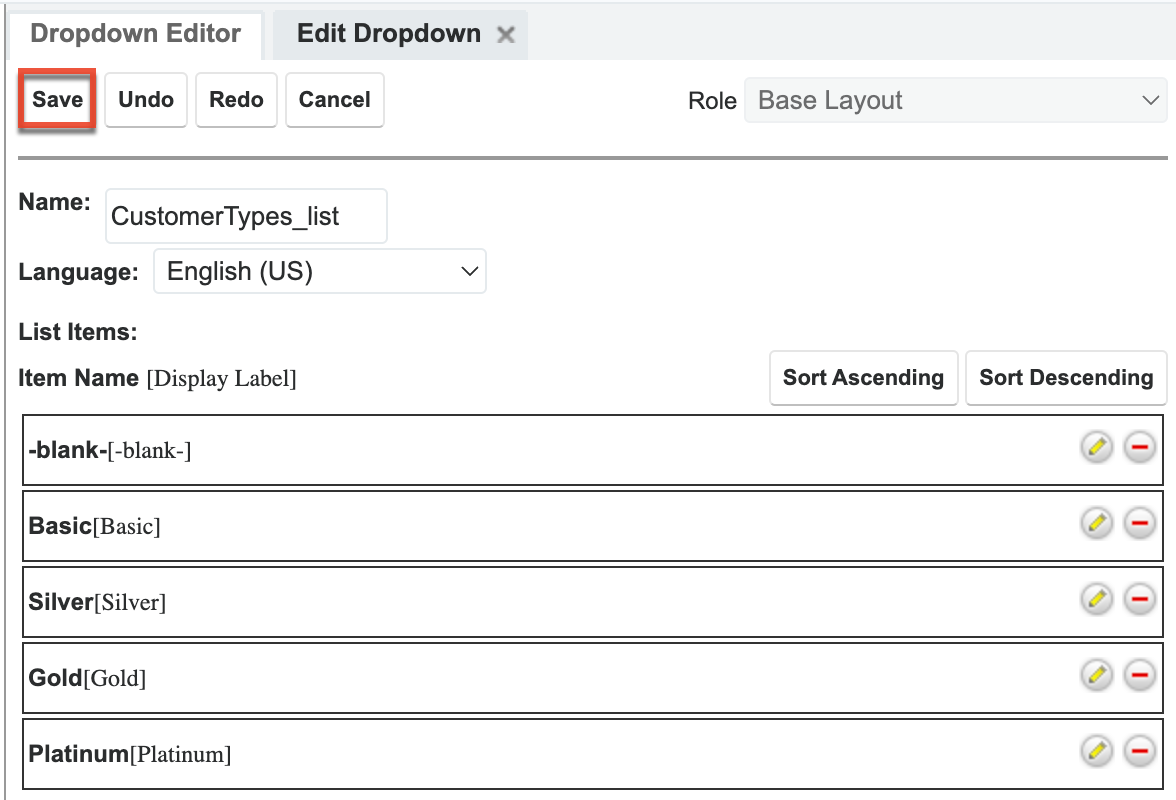
- Create the items that will appear in your dropdown list by entering the "Item Name" and "Display Label" and then clicking "Add". For this example, we added the following items:
Note: To add a blank (NULL) value as the default for your dropdown list, simply click the Add button without entering any values in the Item Name and Display Label fields. The blank value will be added as the first item of the dropdown list and become the default value for the field.Item Name Display Label -blank- -blank- Basic Basic Silver Silver Gold Gold Platinum Platinum - Click "Save" to create the new dropdown list.
- Once the dropdown list is created, click the list's name to edit the list.
- From the Role dropdown on the upper-right corner of the edit dropdown screen, select the role you wish to modify. For this example, select the "User Role" where we will reduce the list of options available to select.
- Note: You have the option to disable or reorder the existing items in the dropdown list.
-
- Note: Once the changes are saved, an asterisk (*) will display next to the "User Role" in the Role dropdown to indicate that it is customized.In this example, we will disable the Gold and Platinum options by unchecking the boxes to the right of the option's row. The list items will now appear grayed out with a strikethrough. Click "Save" to preserve your changes.
Creating the Dropdown Field
Once the new role-based dropdown list has been created, we will now create the dropdown field that will contain this list. If you already have an existing dropdown field created, simply edit the field to associate the new dropdown list.
Use the following steps to create the dropdown field:
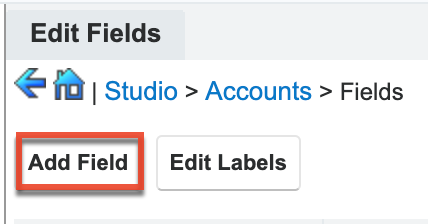
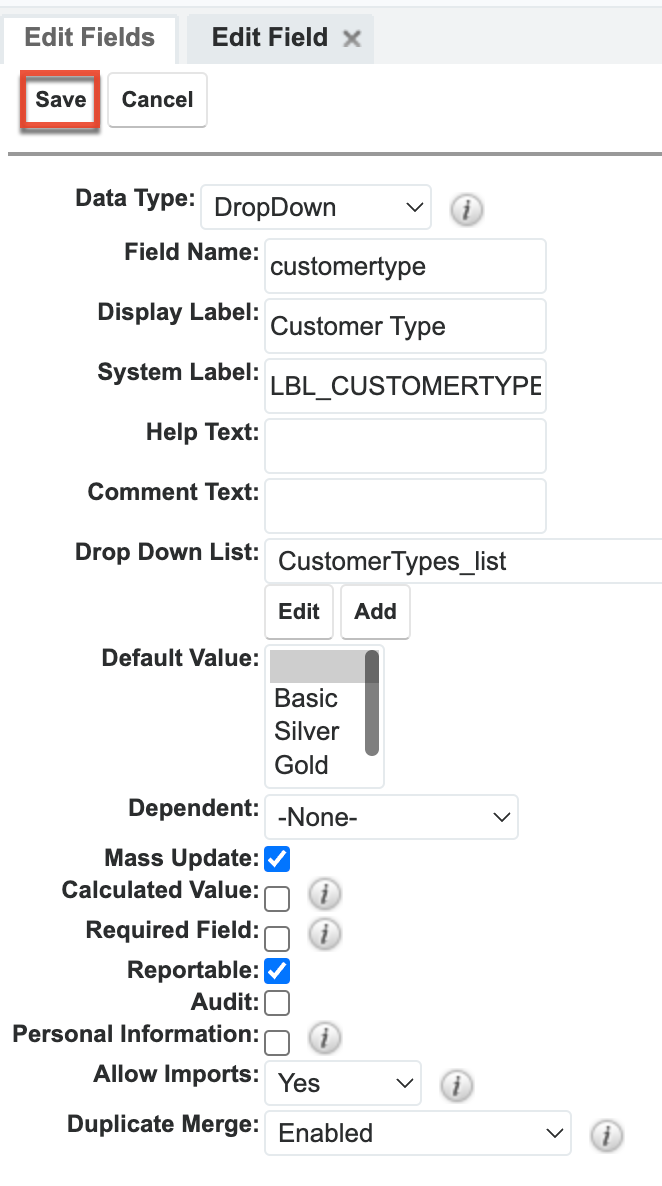
- Navigate to Admin > Studio > Accounts > Fields and click "Add Field".
- Create a new dropdown field with the following values:
- Data Type: DropDown
- Field Name: customertype
- Display Label: Customer Type
- Drop Down List: CustomerTypes_list
- Default Value: Blank
- Click "Save" to create the field.
Adding the Dropdown Field to Layouts
After creating the dropdown field and relating it to the Customer Types dropdown list, add the field to the appropriate layouts in Sugar (e.g., record view, list view, search). For more information on editing layouts via Admin > Studio, please refer to the Studio documentation or the Editing a Module's Layouts article.
The following steps cover adding the Customer Type dropdown field to the Account module's Record View layout as an example:
- Navigate to Admin > Studio > Accounts > Layouts > Record View.
- Locate the Customer Type field in the Toolbox on the left of the screen and drag it to the desired location on the record view layout.

-
Click "Save & Deploy" to preserve the changes to the layout.
Application
Once the above steps have been completed, you can test this out by having a user assigned to the "User Role" edit an existing account record to confirm that they are only able to select the "Basic" or "Silver" options from the Customer Type dropdown field.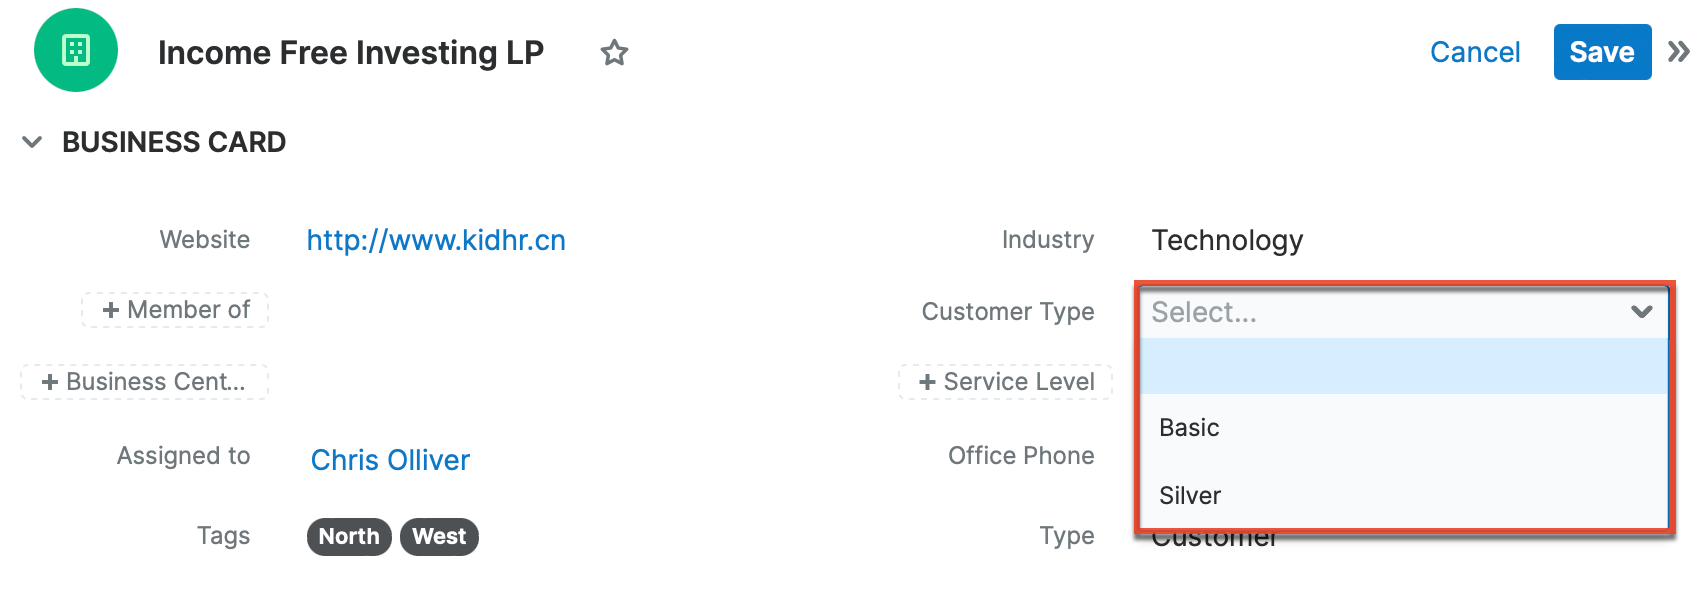
In addition, users who are assigned to the "Manager Role" should be able to select from the full list of available options in the Customer Type field.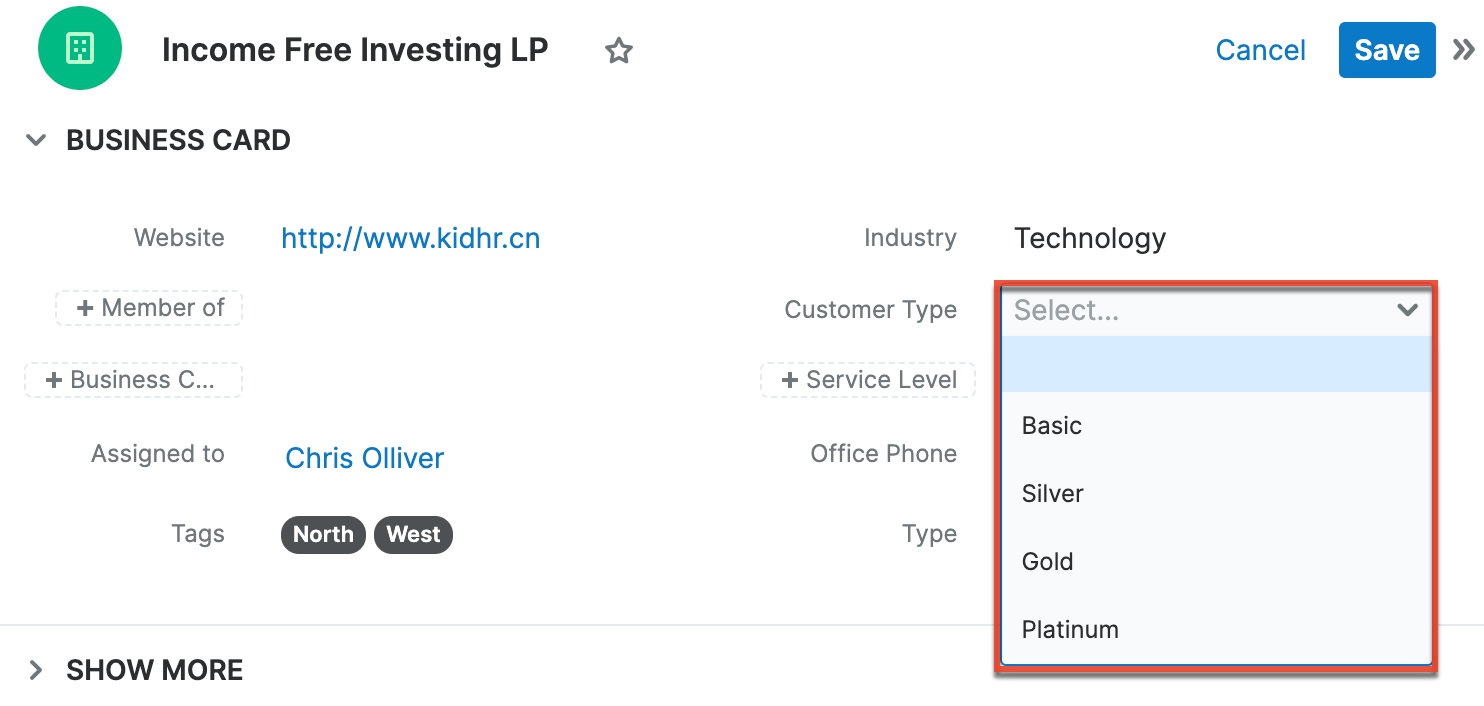
Note: Role-based dropdown lists do not prevent users from viewing a dropdown value that is restricted from their role if that value is already selected for a record they are viewing. In other words, users who cannot select a certain value are not precluded from seeing that value if it has been selected by another user.