Converting a DropDown Field to a TextField
Overview
As part of configuring Sugar® to match your business process, you may initially create various dropdown fields. As time goes by, you may need to add more values to your dropdown lists to keep up with the growth and change in your business. Before you know it, a dropdown field may not seem like the best solution as you need more customizable and general values. To better suit your needs, you may decide to convert this dropdown field into a text field. This article covers how to move an existing dropdown field's value to a new text field using Sugar's import tool.
Use Case
In this example, we will move the values from the "Custom Field 1" dropdown field to a new text field (e.g. New Text Field) in the Accounts module.
Prerequisite
You should have existing records with a dropdown field that has values. You must be familiar with creating new fields and editing layouts in Studio. For more information on creating fields, please refer to the Studio documentation.
Steps to Complete
Currently, data types cannot be changed for existing fields in Sugar. The ability to do so is an existing enhancement request.
In order to manually convert a dropdown field to a text field, please follow the steps in the sections below:
Creating a Report
First, we will create a Rows and Columns-type report to export the existing dropdown values for your records. Use the following steps to create the report:
- Navigate to the Reports module and select "Create Report".
- Choose "Rows and Columns" as the report type and "Accounts" as the target module.
- On the Define Filters step, choose your dropdown field from the Available Fields panel. For this example, we will select "Custom Field 1" as our dropdown field.
- Choose "Is Not Empty" to include all records with a value in this field. Click "Next".
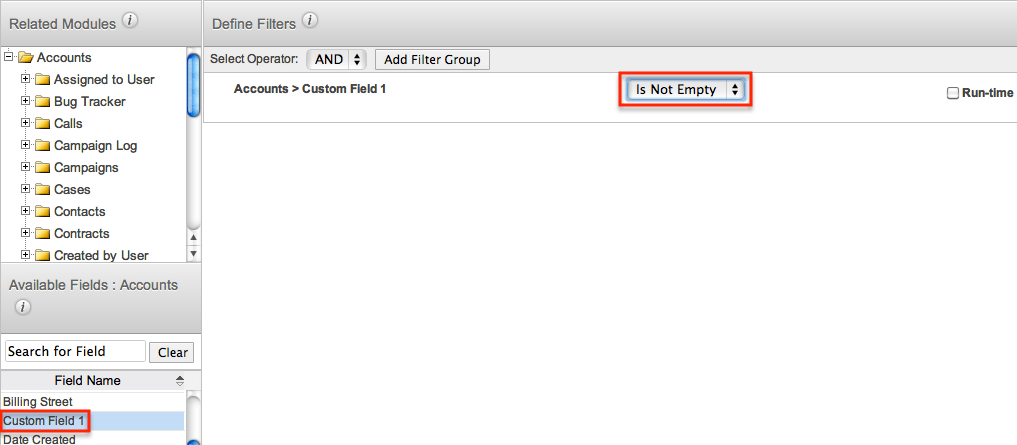
- On the Choose Display Columns step, select "ID", "Custom Field 1", and any required fields such as "Name" for the Accounts module. Click "Next".

- Enter a name for the report and click "Save and Run".
- Choose "Export" from the Actions dropdown menu to create a .CSV (spreadsheet) file of your data.
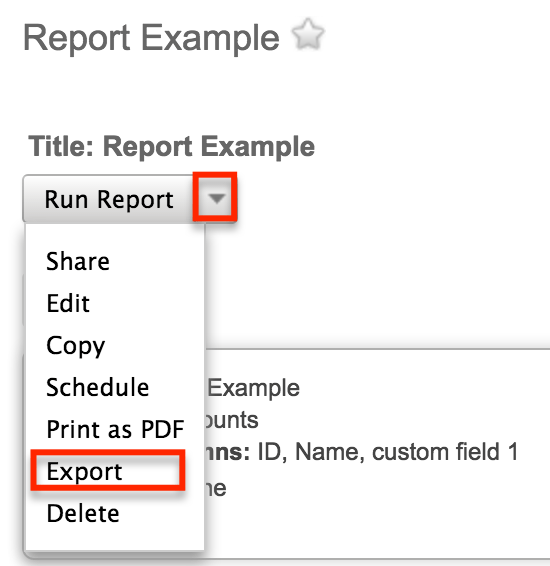
- Save the exported .CSV file to your computer.
Creating a New Text Field
Next, we will create a new text field where the existing values from the dropdown fields will be mapped. Use the following steps to create the new text field via Admin > Studio:
- Navigate to Admin > Studio > Accounts > Fields and click "Add Field".
- Select "TextField" as the Data Type then enter the field name (e.g. New Text Field). Click "Save".
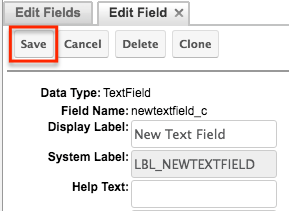
- Place the new text field in each layout where the existing dropdown field appears (e.g. Record View, EditView, Detailview, and List View).
- Note: For more information on adding fields to layouts, please refer to the Editing a Module's Layouts article.
Importing the Data
Now we will import the .CSV file from your report and map the values from the dropdown field to the new text field. For more information on updating records via import, please refer to the Updating Records Via Import article. Use the following steps to import the .CSV file to update the text field:
- Click the triangle in the Accounts module tab and select "Import Accounts" from the actions menu.
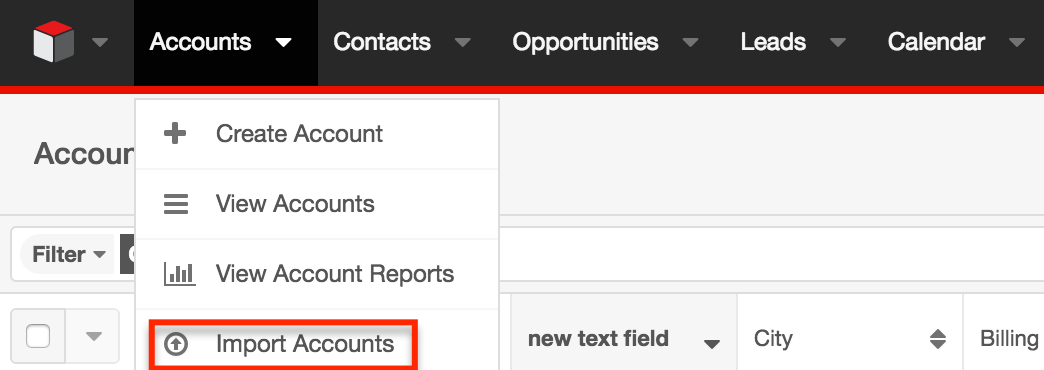
- On Step 1, click the Choose File button and locate your .CSV file. Then choose "Create new records and update existing records". Click "Next".
- In Step 2, confirm that the file is being read correctly and click "Next".
- In Step 3, map the necessary fields. Since we are moving the existing dropdown values to the text field, map "Custom Field 1" to "New Text Field" in the Module Field column. Click "Next".
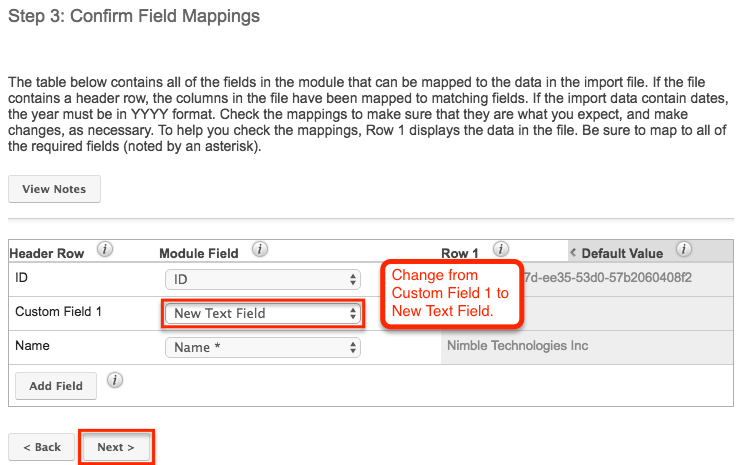
- In Step 4, you do not need to check for possible duplicates since you are updating existing records. Click "Import Now".
- Once the import completes, the View Import Results summary will display a successful message and the total number of updated records.
Confirming the Data
Now that the account records have been updated successfully, navigate to the Accounts module and confirm that the imported data appears as expected. Use the following steps to verify that the dropdown values carried over to the text field:
- Navigate to the Accounts list view by clicking the module tab.
- Verify that the appropriate values carried over from "Custom Field 1" to "New Text Field".
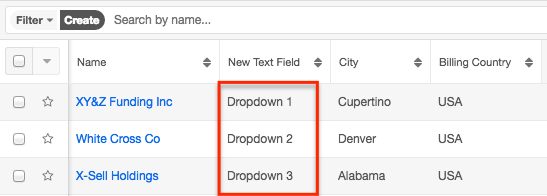
- Check the account's record view as well to confirm that the appropriate value shows up in your new text field.
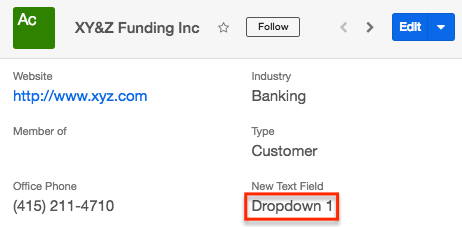
Cleaning Up
Use the following steps to remove the old dropdown field from the Accounts module:
- Navigate to Admin > Studio > Accounts > Fields.
- Select "Custom Field 1" from the fields list then click the Delete button to remove the field.
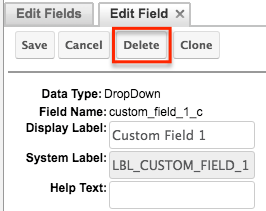
Note: If the dropdown is a stock field that cannot be deleted, please remove it from the appropriate layouts (e.g. Record View, EditView, DetailView, and List View) so that it will no longer be seen or used.
Application
Now that the drop down field has been converted successfully, you can use the new text field to input unrestricted values moving forward.