Reporting on Campaign Results
Overview
Sugar's Campaigns module can be used to create both email and non-email based campaigns. Email- and newsletter- type campaigns consist of mass emails sent from Sugar® to a relevant set of contacts, leads, targets, accounts, or users. The results are tracked to measure the overall success of the campaign, and you can view the results via the Campaign Status page. For more information regarding campaign statuses, please refer to the Campaigns documentation.
Currently, the information you can generate from the Reports module is limited when reporting on campaign results. There are some requested feature enhancements such as the ability to export campaign status information and report on campaign tracker URLs which will be prioritized accordingly for new development in the future.
This article will walk through creating a report using the Campaign Log module which will provide aggregate campaign results data for all targets (e.g. Contacts, Leads) in a single report. Please note that you will not be able to view any record names (e.g. Contacts, Leads) when the report is created based on the Campaign Log module. If you wish to view the record names in the report, please refer to the section Including Campaign Target Names in Report.
Beginning with version 9.1.0, each user's license type (e.g. Sugar Serve) determines what functionality is available as described in the License Types Matrix documentation. Please note that the Campaigns module is not available for Sugar Serve users.
Use Case
In this example, we will create a Summation with Details-type report to generate campaign result data grouped by activity type (e.g. Message Sent/Attempted, Viewed Message). If desired, you can export the report as a CSV file; however, if you wish to do so on Sugar versions prior to 9.0.x, you will need to duplicate it as a Rows and Columns-type report first. For more information on how to create and export reports, refer to the Reports documentation.
Steps to Complete
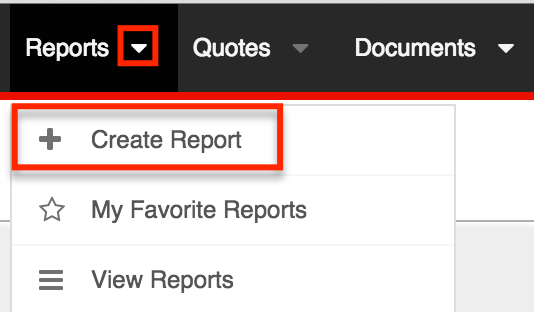
- Choose "Create Report" from the Reports actions menu.
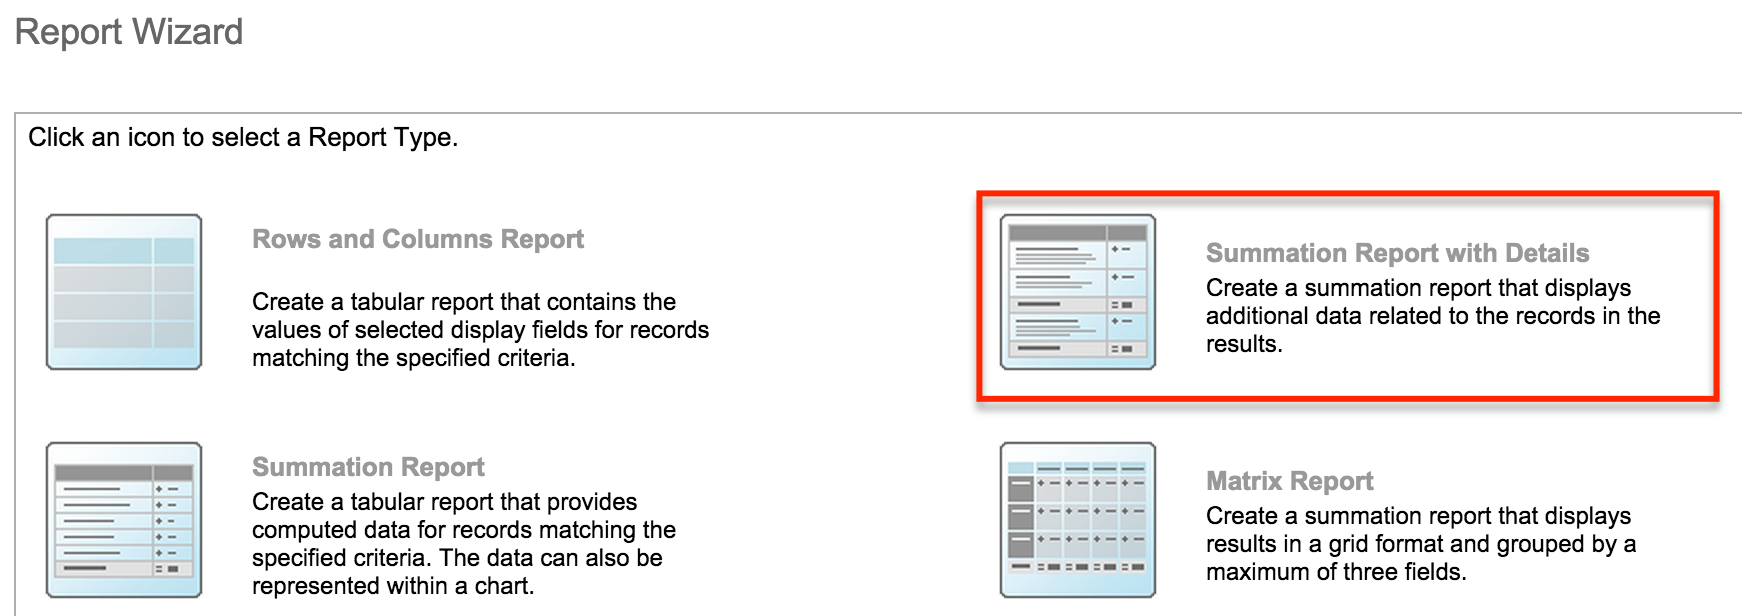
- For the first step of the report wizard, choose "Summation Report with Details".
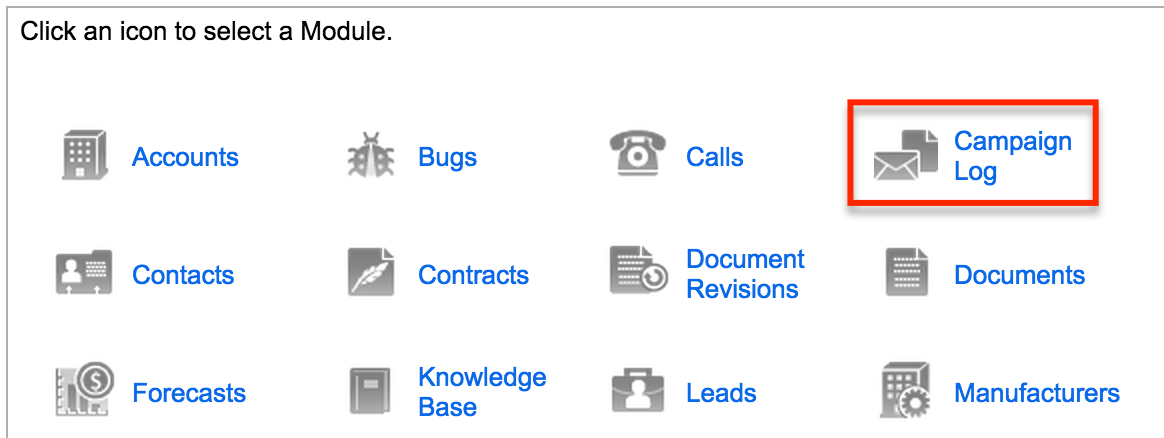
- Next, select "Campaign Log" as the target module.
- On the Define Filters step, select the related Campaigns module then click on the Name field to add to the filter. Select or enter the specific campaign name (e.g. January 2015 Specials) for the filter value and click "Next". For more information on report filters, please refer to the Understanding Report Filters article.
Note: Check the Run-time box if you wish to have this filter appear on the generated report view. This will enable users to quickly change the filter value without having to edit the report.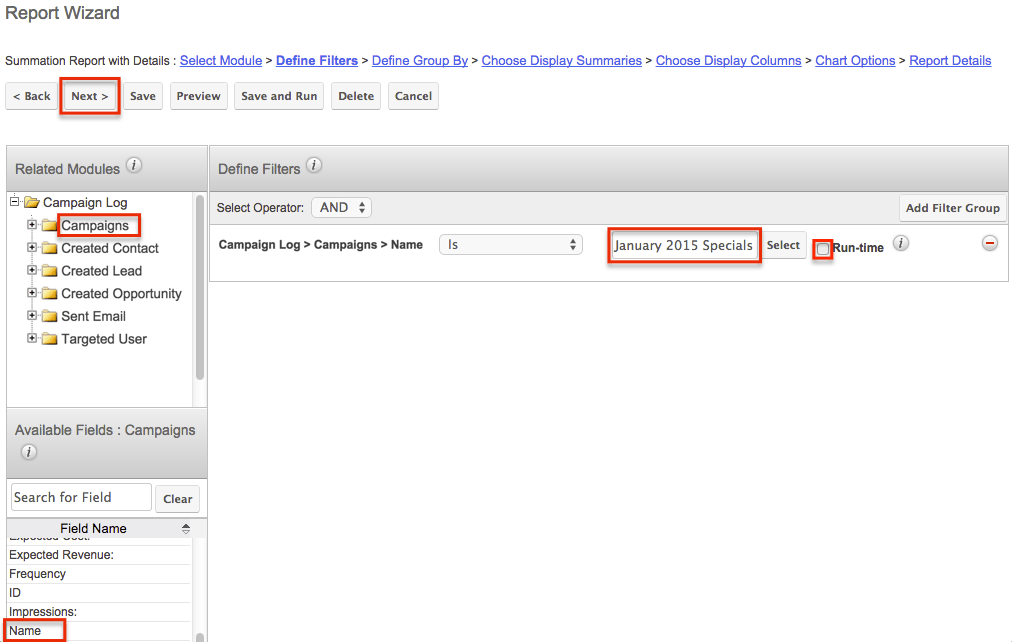
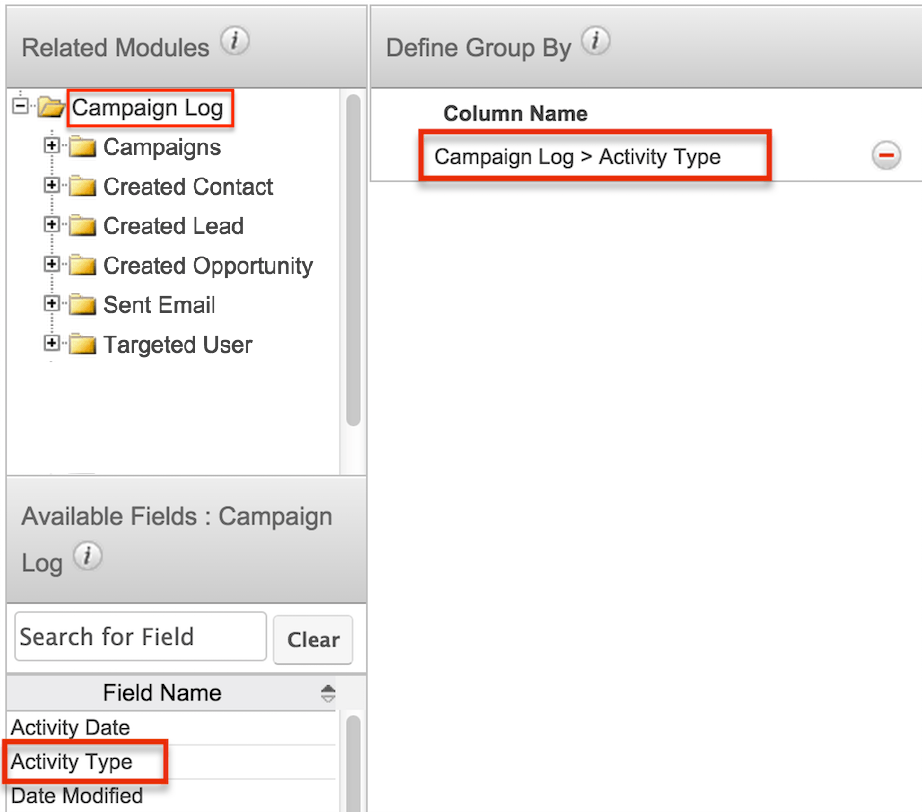
- On the Define Group By step, click on the Activity Type field for the Campaign Log module. Click "Next".
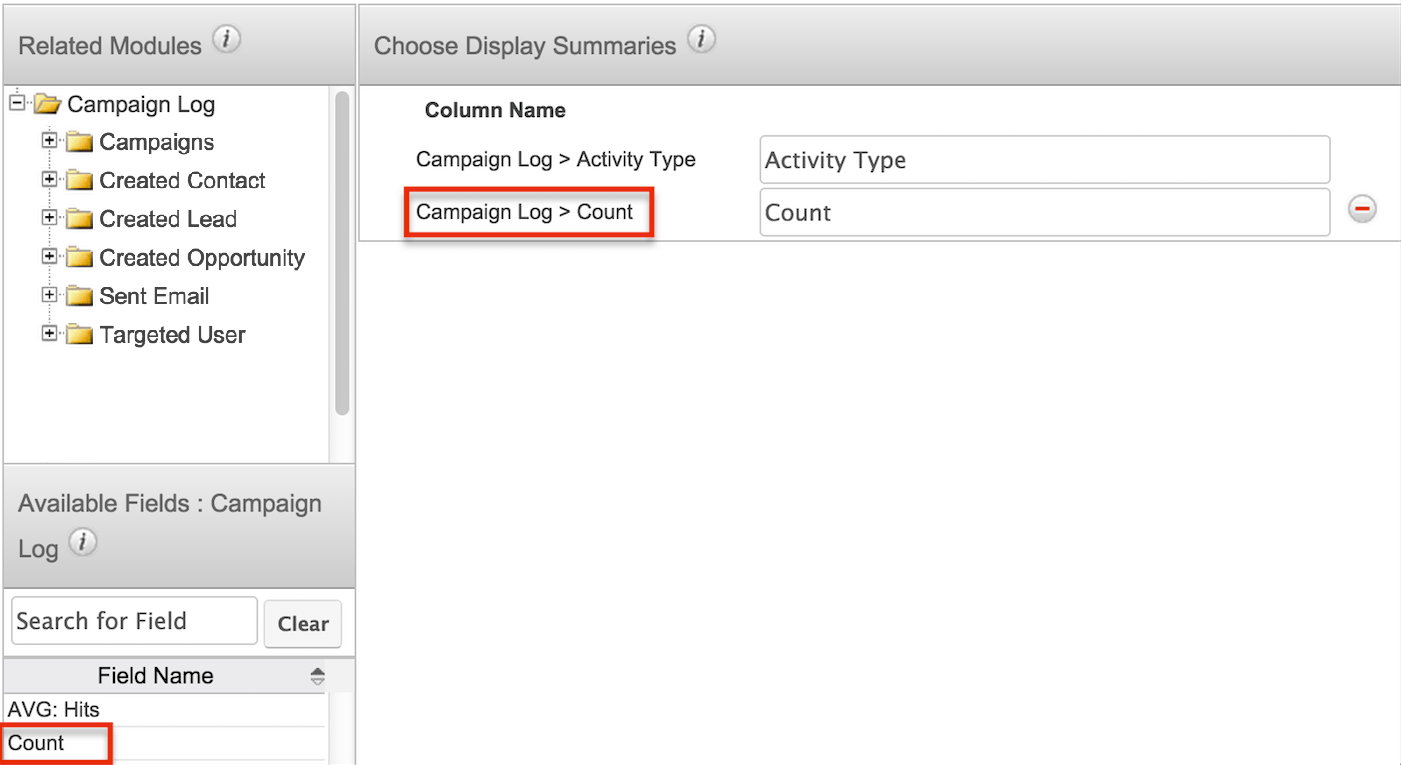
- On the Choose Display Summaries step, click on the Count field to display the total count for each activity type. Click "Next".
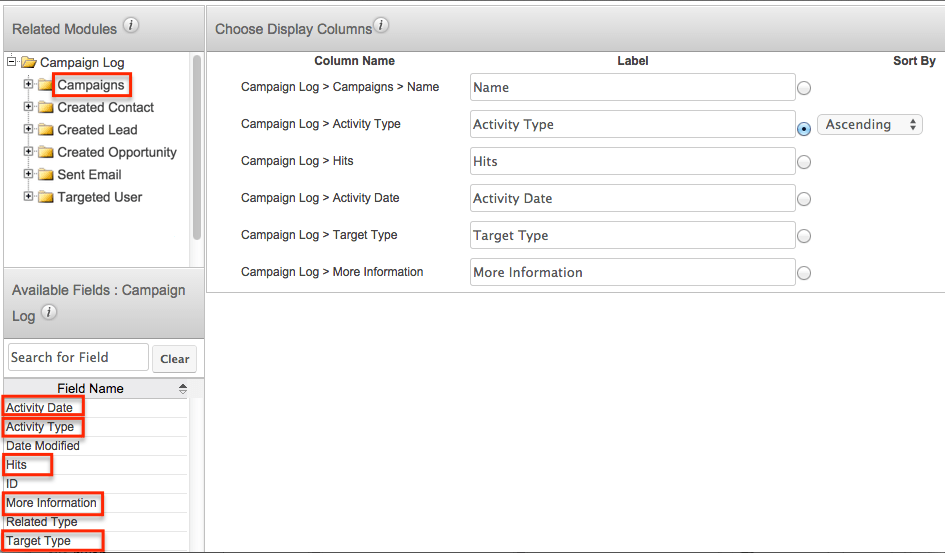
- On the Choose Display Columns step, select the fields you wish to view in the report. Click "Next".
- By default, the target module (Campaign Log) fields are displayed in the Available Fields list. Select "Activity Type", "Hits", "Activity Date", "Target Type", and "More Information" to add as display columns.
- Next, choose "Campaigns" from the Related Modules list at the top left, then click on the Name field from the Available Fields list.
- To place the fields in different order on the report, drag and drop the field rows within the display column list. For our example, we will move the Campaigns module's Name field to the top of the list as this will be the first column of the report.
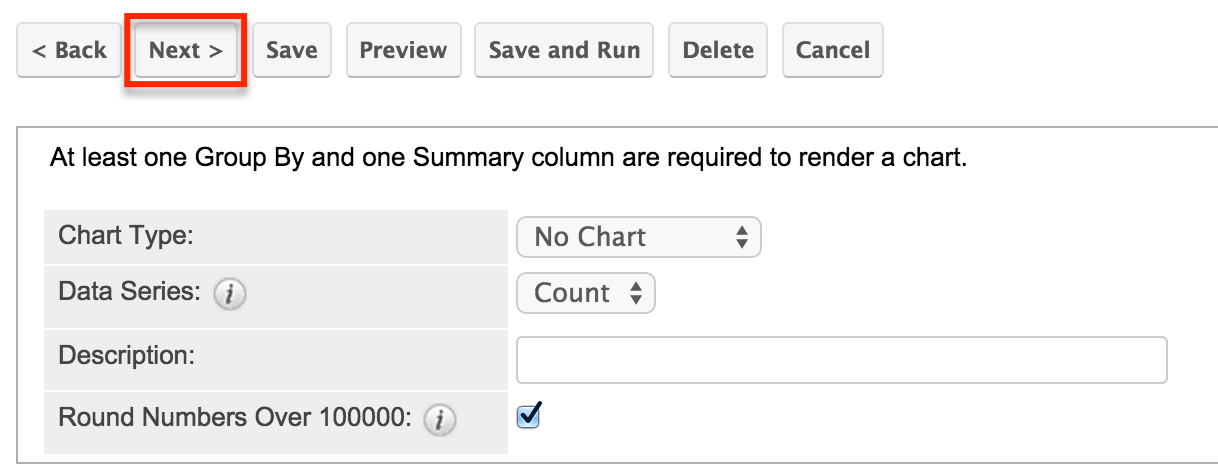
- On the Chart Options step, you can select a Chart type to display on the report if you wish. For our example, we will not select a chart type. Click "Next".
- On the Report Details step, enter a name for the report and assign it to the appropriate user and team.
- Once the appropriate report details are entered, click "Save and Run" to view the campaign results.
Note: You can click the campaign's name (January 2015 Specials) in the report to view the campaign's details.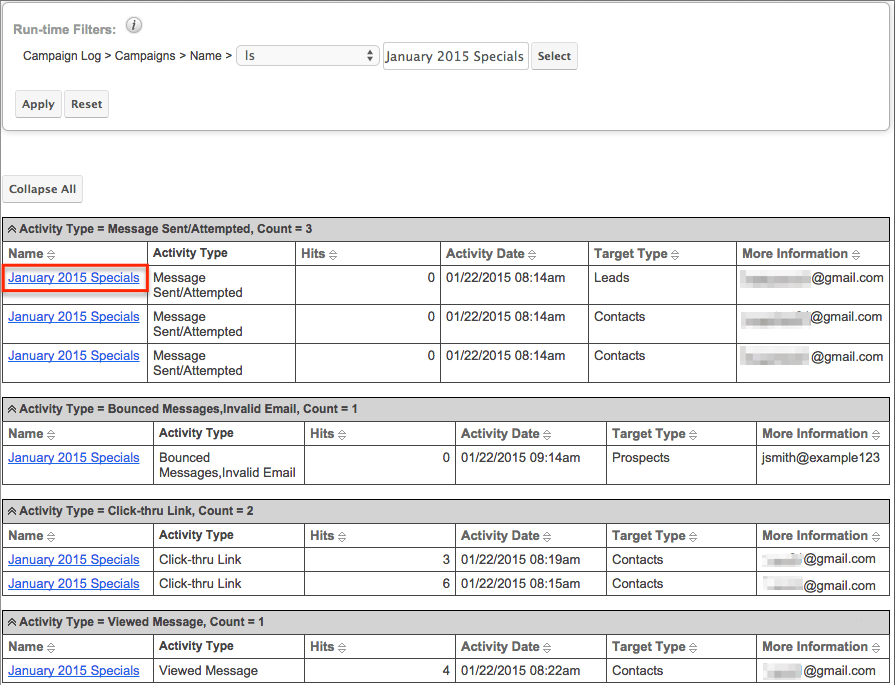
Application
Now that the report is created, you can go back to the report as necessary to view campaign results for other campaigns your organization runs. Simply open up the report (e.g. January 2015 Specials- Campaign Results) and select or enter the name of the new campaign in the Run-time Filters panel. Click "Apply" or "Run Report" to generate the report based on the new filter value.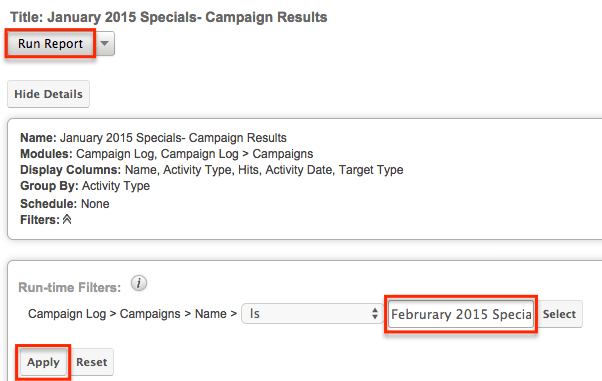
Please note that the report wizard retains the original filter value(s) you set when building the report regardless of the changes made on the run-time filters. If the report is shared by a team, then each user can run the report with different run-time filter values to meet their individual needs. The run-time filter values set by each user will be preserved for future viewing until they change or reset the value.
Exporting Reports
For supported versions of Sugar, all report types can be exported to a CSV (comma-separated values) file. However, if you wish to export the report results on some older, unsupported versions of Sugar, you must duplicate the report as a Rows and Columns-type report using the Copy option from the report's Actions menu.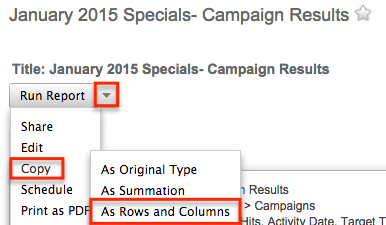
Please note that the report wizard will be pre-populated with the filters and display columns from the original report. On the Report Details step, enter a new name for the report then click "Save and Run". Once the report is generated, click the report's Actions menu and select "Export" to export the report.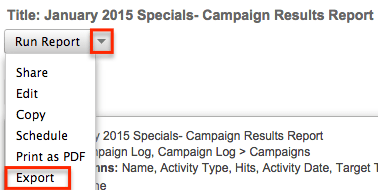
Including Campaign Target Names in Report
If you wish to view the names of the campaign recipients on your report, you can build a report based on one of the following modules: Accounts, Contacts, Leads, or Targets. For example, you can create a Rows and Columns-type report using the Contacts module and add the Name field to the display column as well as fields (e.g. Activity Type, Activity Date) from the related Campaign Log module. For more information on adding report filters and display columns, please refer to the Reports documentation.
Note: Beginning with version 9.1.0, the Leads and Targets modules are not available for Sugar Serve users. For more information on license types and the functionality available for each, refer to the License Types Matrix documentation.
Please note that you will need to create a separate report for each module as it is currently not possible to build a report based on multiple modules. There is an open feature enhancement for the ability to create a report with multiple base modules. As a workaround, you can export the report results for each module then combine the information into a single CSV file using MS Excel. For more information on exporting reports, please refer to the Reports documentation.