Introduction to Smarty Modifiers for Sugar PDF Templates
Overview
Smarty™ is a template engine for PHP that allows users to make front-end presentation changes without having to access the back-end code. The markup tags that can be used in Sugar® to add style and functionality to PDF and email templates are called Smarty modifiers. You can use Smarty modifiers to force formatting elements such as capitalization, hyphenation, and date style, or to transform your CRM's field values into more customer-friendly terms for your PDF documents.
This article will present example syntax that can be added to PDF templates in order to enhance the way that Sugar-generated PDFs display your data. After reviewing this introduction to Smarty syntax, please refer to the related Knowledge Base article Customizing PDF Templates With Smarty Modifiers to learn how to apply this knowledge.
Note: This article is based on Smarty 2.6.0. For information on applying conditional logic or advanced mathematical calculations to fields inside the Sugar application (i.e. not specific to PDF templates), please also refer to the Sugar Logic and Calculated Fields section of our knowledge base.
Smarty Functions
The functions discussed below can be added to the body of the PDF template composer in the PDF Manager. Alternatively, they can be added to the HTML version of the template via the HTML code view for the PDF Manager.
The Smarty Template Engine has many more capabilities than listed here. For the complete list of features in Smarty Template Engine and its documentation, visit the Smarty 2.6.0 documentation.
Basic Mathematical Calculations
Any fields that contain only numerals can have mathematical calculations performed against them. Even text and textarea type fields can be used for mathematical calculations as long as the field value contains only numerals (decimal point values are also acceptable).
| Mathematical Calculation | Symbol | Example |
| Addition | + | {$fields.name+$fields.description} |
| Subtraction | - | {$fields.name-$fields.description} |
| Multiplication | * | {$fields.name*$fields.description} |
| Division | / | {$fields.name/$fields.description} |
Assign Function
You can create variables that do not explicitly represent values in your Sugar records using the Assign function. The Assign function has three elements:
assign: This is a pre-defined function of Smarty syntax. Starting a variable with this tells the template that you intend to use this function.var: This sets the name of the variable. Reference this name later in the template when you choose to display this variable.value: This sets the value of the variable.
To reference the assigned variable in a template, use the following syntax:
{$var}: Place the name you defined with var preceded by a $ symbol inside curly brackets.
| Objective | Example Function | Variable |
| Assigning a specific value | {assign var=sample value='100'} |
{$sample} |
| Assigning an empty value | {assign var=empty value=''} |
{$empty} |
| Assigning another variable's value | {assign var=test value=$fields.name} |
{$test} |
For more information about Smarty's Assign function, please refer to the Smarty template engine documentation.
Concatenate Function
The Concatenate function allows you to join multiple values or variables into a single string. The key syntax |cat: should be preceded and followed by the values that you wish to join. In the following example, the variables $a, $b, and $c are defined using the Assign function as follows:
{assign var=a value="First"}{assign var=b value="Last"}{assign var=c value="Email"}
When the variables are used along with the concatenate function, you can expect the following results:
| Example | Result |
{$a|cat:$b} |
FirstLast |
{$a|cat:' '|cat:$b} |
First Last |
{$a|cat:' '|cat:$b|cat:', '|cat:$c} |
First Last, Email |
Truncate Function
The Truncate function removes all characters after a defined number of leading characters. There are three parameters that follow the key syntax |truncate:. Colons separate each parameter:
{$a|truncate:14}: The first parameter, represented here by the number 15, defines how many characters you want to display before the function truncates the string. The function attempts to cut off at the final word boundary before reaching this parameter unless the third parameter (described below) is specified as 'true'.{$a|truncate:20:', etc.'}: The second parameter, represented here by', etc.', defines the variable or characters to be added to the end of the displayed value. If this value is a variable, no quotes are necessary. If the value is a character string, then it must be surrounded by single quotes. When this variable is not specified, three periods will be added to the end of the truncated string.
Note: If this parameter is specified, the characters in this parameter value count towards the character count specified in the first parameter and should be considered when setting that value.{$a|truncate:20:', etc.':true}: The third parameter is a true or false value. If populated with 'true', the function will truncate at the exact character length specified in the first numeric parameter. If the parameter is not specified or set to 'false,' the function will truncate the string at the last word boundary before reaching the character limit parameter. For example, if you truncate the string "Hello world" at the 8th character, it would remove only part of the second word, returning "Hello Wo". When this parameter is false, the truncate function will step back to the preceding word break and return "Hello".
Note: To set this parameter, you must define all three parameters for the function.
In the following example, the variable $a is defined using the Assign function as follows:
{assign var=a value="cake muffin caramels"}
| Example | Result |
{$a|truncate:14} |
cake muffin... |
{$a|truncate:20:', etc.'} |
cake muffin, etc. |
{$a|truncate:20:', etc.':true} |
cake muffin ca, etc. |
For more details about truncating using Smarty, please refer to the Smarty template engine documentation.
Replace Function
Use the Replace function to display one specified character or string in place of another. The replace function has two parameters following the key syntax |replace:, with each parameter separated by colons:
- The first parameter defines the string to be replaced.
- The second parameter defines the string that will replace the first.
In the following example, the variable $a is defined using the Assign function as follows:
{assign var=a value="Please contact us."}
| Example | Result |
{$a|replace:'us':'your salesperson'} |
Please contact your salesperson. |
{$a|replace:'contact':'call'|replace:'us':'your salesperson'} |
Please call your salesperson. |
{$a|replace:'Please ':''|replace:'c':'C'} |
Contact us. |
For more details about replacing data using Smarty, please refer to the Smarty template engine documentation.
Strip Function
The strip function removes spaces, tabs, and line breaks and puts a specified value in their places. If no new value is specified, a single space character will replace the removed values. The strip function has one parameter following the key syntax, |strip:. This parameter defines the value you want to input into the variable's string in place of the spaces, tabs, or line breaks.
In the following example, the variable $a is defined using the Assign function as follows:
{assign var=a value="Name Title Email Phone"}- Note: There are two spaces between each word in this string.
| Example | Result |
{$a|strip} |
Name Title Email Phone |
{$a|strip:', '} |
Name, Title, Email, Phone |
{$a|strip:' & '} |
Name & Title & Email & Phone |
{$a|strip:'.'} |
Name.Title.Email.Phone |
For more details about using the strip function, please refer to the Smarty template engine documentation.
If/Else Construct
The if/else function performs different actions depending on specified conditions. Because the if/else function is a multi-section construct, it has three elements that surround the functions:
- The opening element has one parameter following the string
if. This parameter determines whether two values are equal or not equal and indicates the beginning of the multi-section construct. - The middle element of the function represents the 'Else' or 'Else/If' aspect of this function. This element is optional, and if it is not used, the function will not return any value when the 'If' element evaluates as false.
- When 'else' is used, a value can be specified that will be returned in any circumstance that the 'If' part of the function is false.
- When 'elseif' is used, you must specify a second 'if' equation. You can leverage multiple 'elseif' compontents to build a complex decision point which handles many scenarios.
- The closing part of the if/else function is always the same:
{/if}.
The functions you wish to perform are placed between the different parts of the function. Please note that in Smarty syntax, == represents "equals" and != represents "does not equal".
In the following example, the variable $a is defined using the Assign function as follows:
- {assign var=a value="Name"}
| Example | 'If' Result | 'Else' Result |
{if $a==''}
  NULL
{/if}
|
NULL | |
{if $a!=''}
  {$a}
{else}
  Name Withheld
{/if}
|
Name | Name Withheld |
{if $a=='Title'}
  Title
{elseif $a=='Name'}
  {$a}
{/if}
|
Title | Name |
For more details about using the if/else function, please refer to the Smarty template engine documentation.
Date Format Function
Date and time variables can be created that do not represent values in your Sugar records but instead represent the date and time the PDF file is printed. Following its key syntax |date_format:, the date format function has one encoded parameter. This parameter defines the format in which the date and time will appear in the PDF file. There are over 35 Smarty date_format parameter codes, but the following parameters are relevant to the examples below:
%m: month as a decimal number (range 01 to 12)%d: day of the month as a decimal number (range 01 to 31)%y: year as a decimal number without a century (range 00 to 99)%D: %m/%d/%y%X: preferred time representation for the current locale without the date%Z: time zone or name or abbreviation
Note: The date/time is determined by the timezone of your hosting server or the timezone specified in your server's php.ini. For instances hosted on Sugar's cloud service, the PHP configuration uses UTC.
The following example uses $smarty.now to capture the current date and time in a unique numerical format. The file was generated on March 22, 2013, at 12:39:58 PDT.
| Example | Result |
{$smarty.now} |
1363981198 |
{$smarty.now|date_format:"%D"} |
03/22/13 |
{$smarty.now|date_format:"%X"} |
12:39:58 |
{$smarty.now|date_format:"%Z"} |
PDT |
For the complete list of Smarty date parameters, please refer to the Smarty template engine documentation.
Application
The syntax discussed in this article can be combined in creative ways to further enhance PDF templates in Sugar. Below are two examples to get you started.
Conditionally Displaying Field Values
This example uses Smarty modifiers in a PDF template to check whether there is a shipping address saved to an account record. If a shipping address is found, the template will display a block containing the address. If a shipping address is not found, the template will display nothing as a result of this code.
To display an account's shipping address on a PDF template when a shipping address exists:
- Navigate to the Admin panel and click "PDF Manager" from the System section. Then, click the triangle in the PDF Manager module tab and select "+ Create PDF Template".
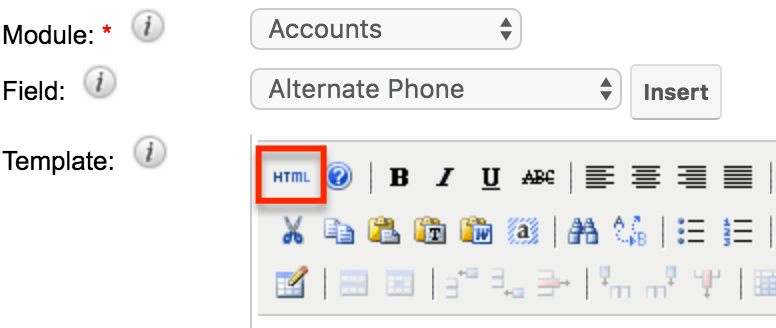
- Enter the template's name in the Name field and select "Accounts" as the value in the Module field.
- Click on the HTML icon in the template editor to open the HTML Source Editor window.
- Paste the following code into the HTML Source Editor:
{if $fields.shipping_address_street|cat:$fields.shipping_address_city|cat:$fields.shipping_address_state|cat:$fields.shipping_address_postalcode|cat:$fields.shipping_address_country|strip:""!=""}<strong>Shipping Address:</strong><br /> {$fields.shipping_address_street}<br /> {$fields.shipping_address_city}, {$fields.shipping_address_state} {$fields.shipping_address_postalcode}<br /> {$fields.shipping_address_country} {/if} - Click "Update" on the HTML Source Editor window.
- Add any other desired fields and content then click "Save" to finalize the template.
In the "if" part of this example, cat and strip respectively link the address elements together and then strip out any white space. After removing the white space and confirming that characters remain in the combination of shipping-address field values, the account's shipping address is returned as a formatted block of text on the PDF template. In the case that the shipping-address field values are blank or that no valid characters exist, then the construct will not output anything, preventing the blank shipping address from occupying space on the PDF template.
Transforming Plain Text Using Markup Language
This example creates a bulleted list from a record's Description field using a special markup language that we create using Smarty modifiers in the PDF template. We will use Smarty to specify that a dash (-) at the beginning of a new line should be output in the PDF as the beginning of a new bullet point.
For example, if a user types the following text into a record's description field:
- One
- Two
- Three
The generated PDF will display the content as a formatted bulleted list:
- One
- Two
- Three
Follow the steps below to use the if/else construct and the cat and replace functions in order to recognize the special markup in a contact record's Description field and then display a bulleted list accordingly:
- Navigate to the Admin panel and click "PDF Manager" from the System section. Then, click the triangle in the PDF Manager module tab and select "+ Create PDF Template".
- Enter the template's name in the Name field and select "Contacts" as the value in the Module field.
- Click on the HTML icon in the template editor to open the HTML Source Editor window.
- Paste the following code into the HTML Source Editor:
<p>Description</p> {if "\n"|cat:$fields.description|replace:"\n-":"*"=="\n"|cat:$fields.description } {$fields.description} {else} <ul> <li>{"\n"|cat:$fields.description|replace:"\n-":"</li><li>"}</li> </ul> {/if} - Click "Update" on the HTML Source Editor window.
- Add any other desired fields and content and then click "Save" to finalize the template.
To test this, create or open a contact record and enter text into the Description field using a dash at the beginning of each line to signify bullet points. For this example, we entered the following text:
- Past President of the Chamber of Commerce
- Needs to move on a decision in 60 days
- Involved with the local Arts Council
- Mission Statement:
"Serving the customer is our primary goal."
- Found this customer via referral from Jim Smith
After saving the record, download the PDF by opening the record's Actions menu and selecting the new template from under "Download PDF". The output from the sample text should look similar to this: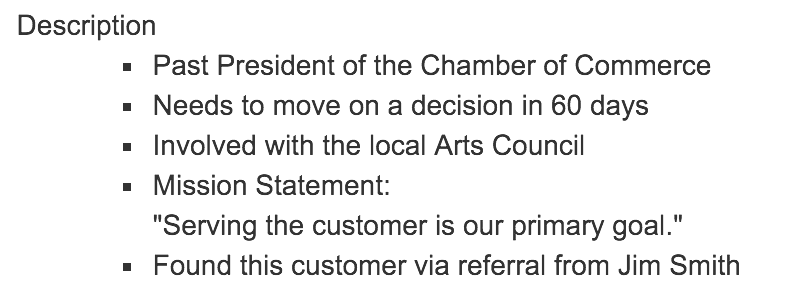
Here is a breakdown of how the Smarty formula works for this example:
| Formula Component | Explanation |
<p>Description</p> |
This line displays a text label on the PDF page. |
{if "\n"|cat:$fields.description|replace:"\n-":"*"=="\n"|cat:$fields.description } |
This is the condition of the if/else construct. It checks for any lines that contain the relevant markup by replacing occurrences of a new line and a dash with an arbitrary character; in this example, an asterisk. New lines are represented by \n, so the condition looks for \n- in the Description field's contents. If the text that survives this find-and-replace exercise matches the original text, then we know that no bullet markup was found. |
{$fields.description} |
This is the action assigned to the implied "then" for the previous "if" statement. In the event that no bullet markup was found, then the formula will simply output the contents of the Description field as plain text. |
{else} |
The lines that follow the "else" are executed only when the condition in the previous "if" statement is not true. In other words, the "else" executes when bullet markup exists in the description. |
<ul> |
This begins the HTML for the unordered list. |
<li>{"\n"|cat:$fields.description|replace:"\n-":"</li><li>"}</li> |
This is the list item (delineated by the surrounding <li></li> tags). The Smarty formula concatenates a new \n line character to the beginning of the Description field contents in case the first line is a bullet suggestion. This is because the first line of text is not recognized as a new line. Then the formula replaces occurrences of \n- in the Description field with "</li><li>". This string will end one line item and start a new one. |
</ul> |
This ends the HTML for the unordered list. |
{/if} |
This ends the if/else construct. |