Configuring SSO With Google Using SAML
Overview
Sugar®/SugarIdentity allows single sign-on authentication using Google and SAML so that Sugar can be integrated with a connected system using a single user ID and password. This article walks through configuring Google to allow external authentication using SAML 2.0.
If you are using SugarLive in Sugar Serve, you can also set up SSO in SugarLive using SAML 2.0. To do so, you will also need to configure Google Workspace (formerly G Suite) as an identity provider for Amazon Web Services (AWS). Refer to this blog post on Amazon's website for details on this setup.
For more information about external authentication methods, please refer to the following pages:
- Password Management documentation (for instances that do not use SugarIdentity)
- SugarIdentity Guide (for instances that use SugarIdentity)
- Understanding Security Layers for User Authentication article.
Prerequisites
- Your organization must have an active Google Workspace account (Basic, Business, or Enterprise).
- Your Sugar or SugarIdentity users should be users in your organization's Google Workspace account.
- You must have access to a Google Workspace administrator account in order to complete the steps in this article. For more information on signing in to the Admin console, please refer to this article on the Google Workspace Admin Help site.
- You must be familiar with Google Workspace and how to set up the SSO configurations that meet your organization's needs.
- You must be a Sugar administrator to configure the SAML settings for your instance. For instances that do not use SugarIdentity, SAML is configured in Sugar. For instances that use SugarIdentity, SAML is configured in SugarIdentity.
Steps to Complete
The following sections explain how to add SugarCRM as a SAML application in Google and enable the SugarCRM app for users.
Adding SAML Application in Google
Use the following steps to add a new SAML application for Sugar or SugarIdentity:
- Navigate to the Google Admin console in your web browser and log in with your Google Workspace administrator credentials.
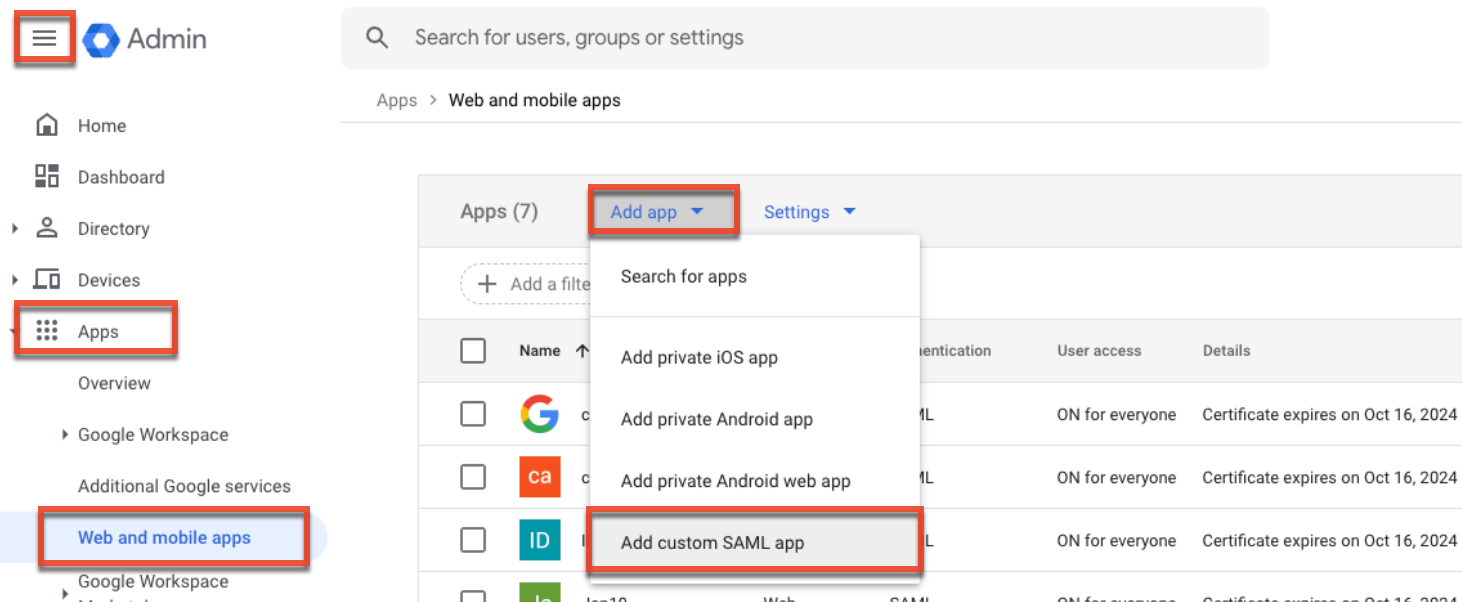
Note: For more information regarding the steps in this section, refer to the Step 1: Add the custom SAML app section of the Set up your own custom SAML app article on the Google Workspace Admin Help website. - On the Admin Console dashboard, click the three-lines icon and select "Apps" then "Web and mobile apps". On the Web and Mobile Apps page, click "Add app", then select "Add custom SAML app".
- On the App Details step of the Add Custom SAML App page, enter an application name of your choice (e.g., SugarCRM). Optionally, you can also upload an app icon. Click "Continue".
- On the Google Identity Provider Details step, click the Download Metadata button to download the IdP metadata file. Save the metadata file, which will be needed later when you configure the SAML authentication in Sugar or in SugarIdentity. Click "Continue".
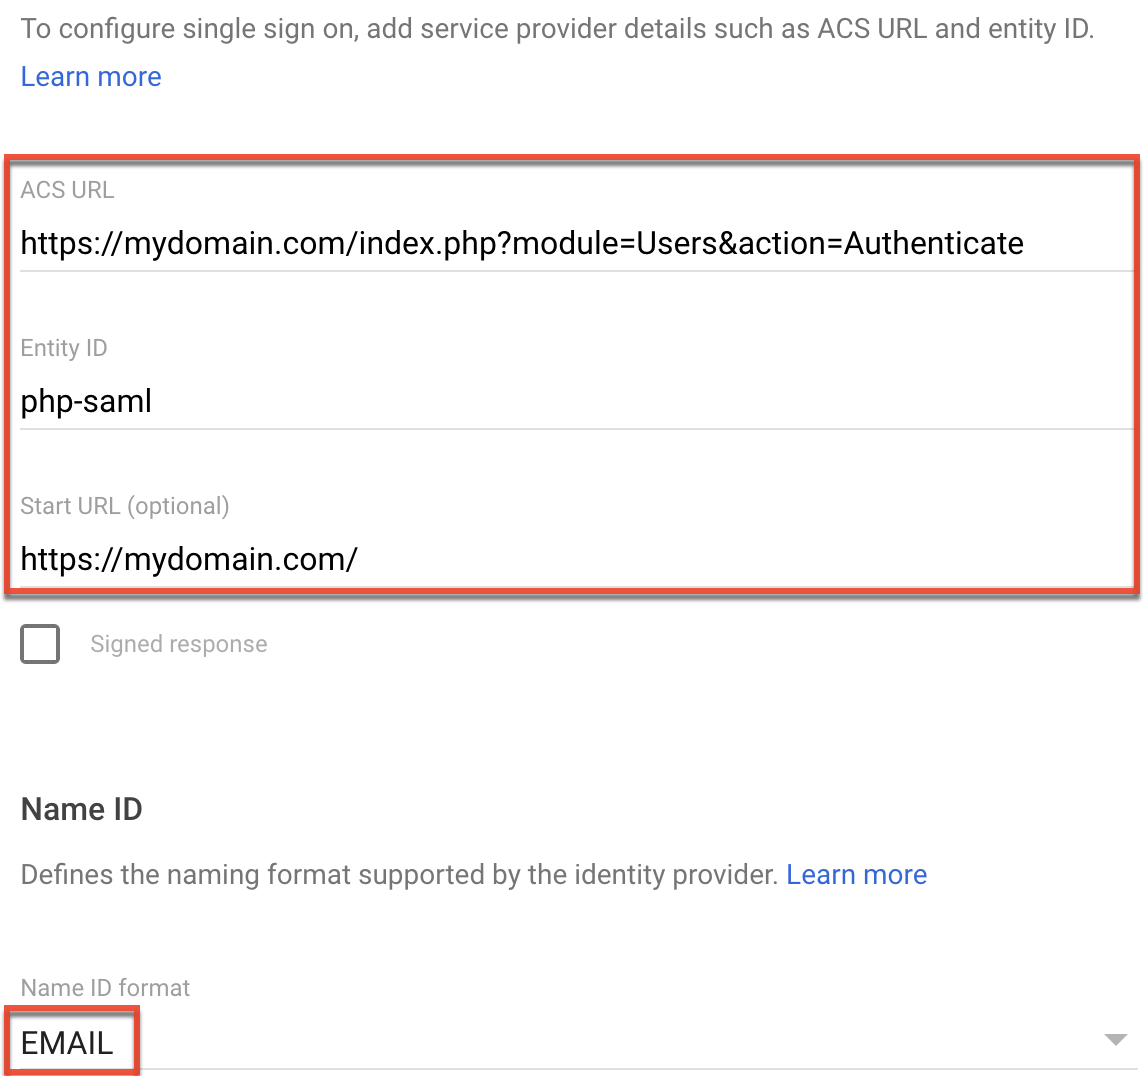
- On the Service Provider Details step, enter the following values into the corresponding fields:
- For instances that do not use SugarIdentity:
Note: Replace {your-sugar-url} with your Sugar instance's domain.
- ACS URL: https://{your-sugar-url}/index.php?module=Users&action=Authenticate
- Entity ID: php-saml
- Start URL: https://{your-sugar-url}/
- Name ID Format: EMAIL
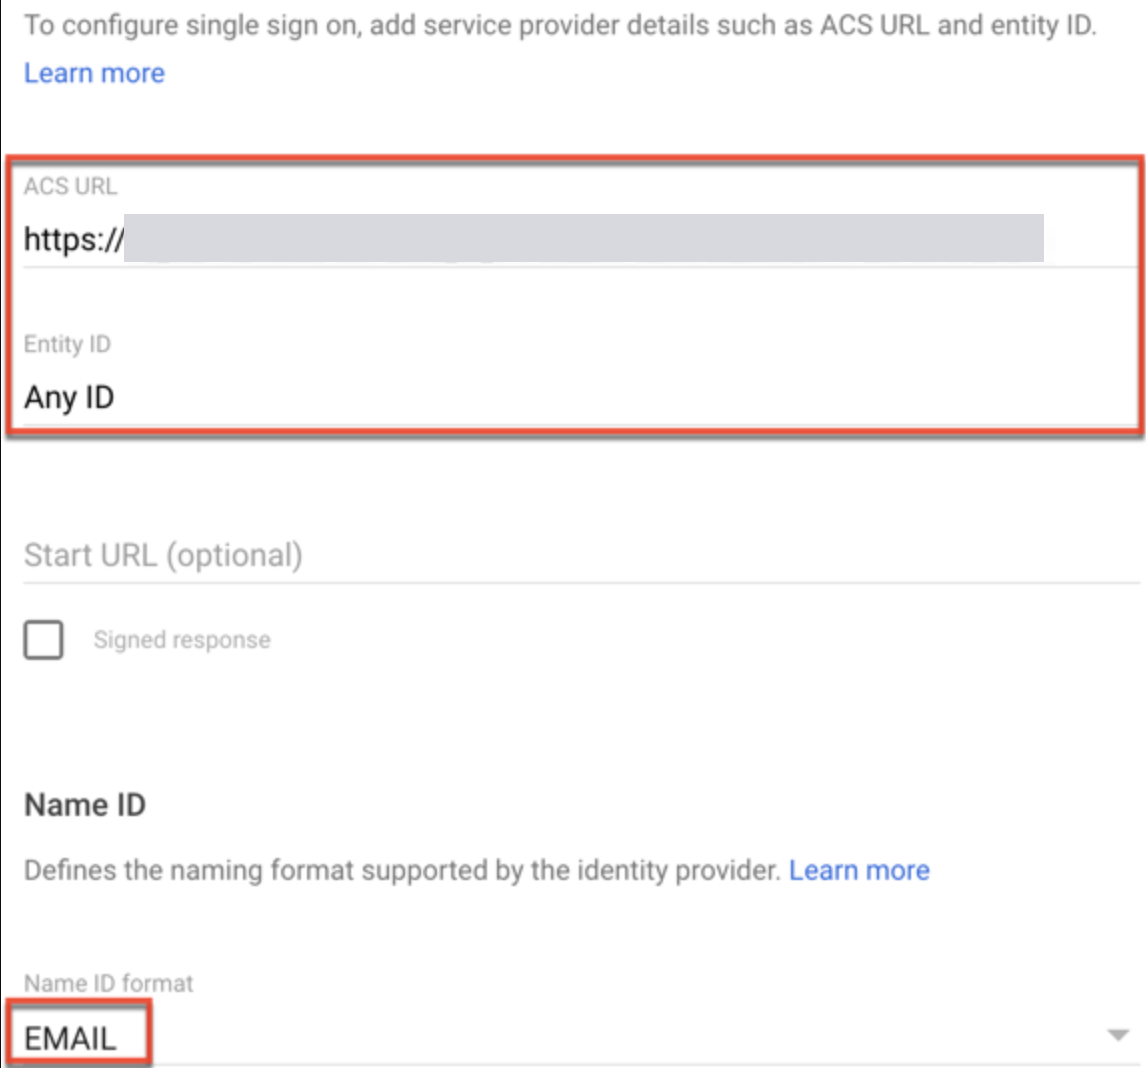
- For instances that use SugarIdentity:
- ACS URL: Enter the Assertion Consumer Service URL obtained from SugarIdentity.
- Entity ID: Any ID to define your company
- Name ID Format: EMAIL
- For instances that do not use SugarIdentity:
- Click "Continue", then click "Finish" on the following step.
Enabling the SugarCRM App for Users
To enable the SAML application for users, navigate to Apps > SAML apps in Google Workspace then select your SugarCRM app from the SAML apps list. On your SugarCRM app page, click the User Access panel then select the "On for everyone" option for the Service Status to enable the SAML application for all users.
Note: Please make sure that the email IDs for your Sugar or SugarIdentity users match those in your Google domain. For more information on enabling the new SAML app, please refer to this help article on the Google Workspace Admin Help site.
Once you have enabled the SugarCRM app for users, you can then configure SAML in Sugar or in SugarIdentity. For instances that do not use SugarIdentity, please refer to the Password Management documentation for more information. For instances that use SugarIdentity, please refer to the SugarIdentity Guide for more information.
Application
Once you have configured Google and completed the SAML configuration in Sugar or in SugarIdentity, going forward, when a user navigates to Sugar they will be redirected to Google Workspace's login page to enter their login credentials. Once the user's login credentials are authenticated in Google Workspace, they will be directed back to their Sugar instance and be automatically logged in. The user can also launch their Sugar account from Google Workspace by clicking the SugarCRM app from their dashboard. Their Sugar instance will open in a new browser tab, and the user will be authenticated and automatically logged in.