Configuring SSO With Azure Using SAML
Overview
SugarIdentity allows single sign-on (SSO) authentication using Microsoft Azure and SAML so that it can be integrated with a connected system using a single user ID and password. This article walks through configuring Microsoft Azure to allow external authentication using SAML 2.0 for instances that use SugarIdentity.
If you are using SugarLive in Sugar Serve, you can also set up SSO in SugarLive using SAML 2.0. To do so, you will also need to configure Microsoft Azure as an identity provider for Amazon Web Services (AWS). Refer to this article on the AWS website for details on this setup.
For more information about external authentication methods, refer to the following pages:
Prerequisites
- Your organization must have an active Microsoft Azure account. For information on setting up an Azure account for your organization, refer to their website at https://www.azure.com.
- Your SugarIdentity users should be users in your organization's Azure account.
- You must be familiar with Azure and how to set up the SSO configurations that meet your organization's needs.
- You must be a Sugar administrator to configure the SAML settings in SugarIdentity.
Steps to Complete
To configure Azure to allow external authentication using SAML 2.0 for Sugar instances that use SugarIdentity, you can either create separate SAML applications for each desired Sugar instance (e.g., production, sandboxes) or a single application to be used across your Sugar instances. Please refer to the appropriate section below that best meets your needs.
Adding SAML 2.0 Application in Azure
Creating Separate SAML Applications
You can create separate applications in Azure if you would like to split out the users between your Sugar instances (e.g., production, sandbox) and have each instance have its own application. Use the following steps to set up separate applications in Azure for your desired Sugar instances:
- First, log in to the Sugar instance (e.g., production) where you wish to configure SAML. Navigate to Admin > SugarIdentity, then click "SAML Settings" from the home page. Export the XML metadata file from the SAML Settings page. You will need to import this metadata file in step 7 below.
Note: For Sugar versions 13.0 and lower, navigate to Admin > SugarCloud Settings.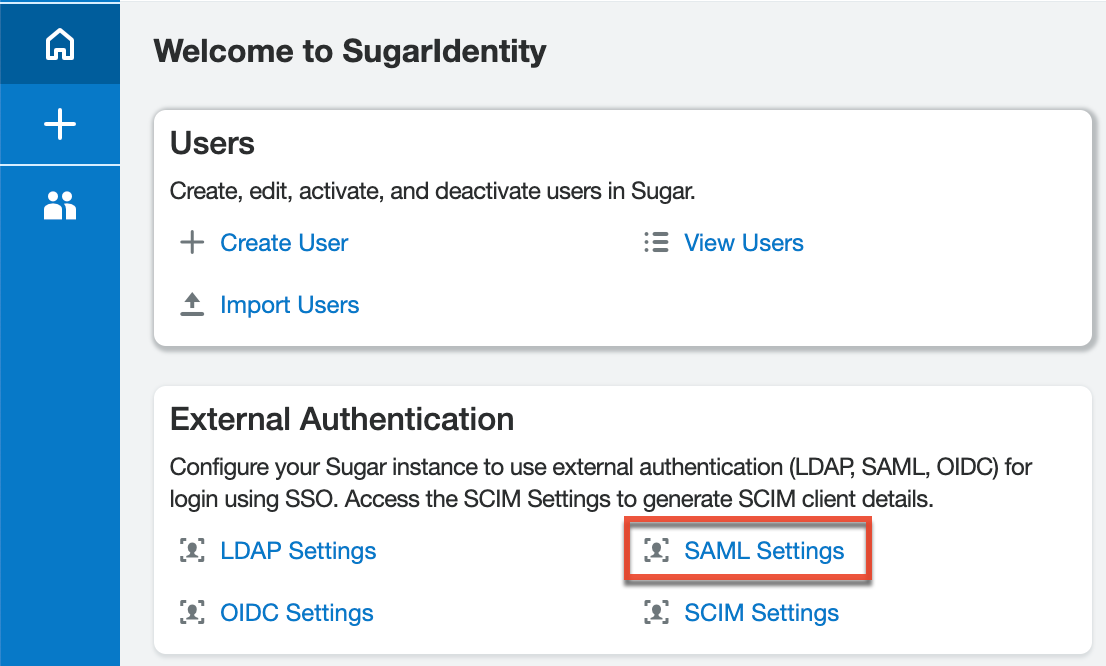
- Next, navigate to https://portal.azure.com/ in your web browser and log in.
- Select "Enterprise applications" under "Azure services" on the home page, then click the "+ New Application" button on the following page.
Note: If you do not see "Enterprise applications" on the home page, click "More services" then perform a search.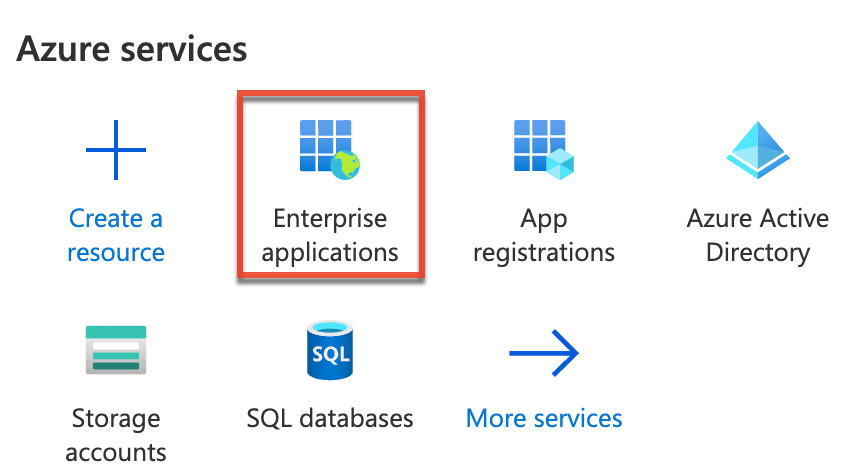
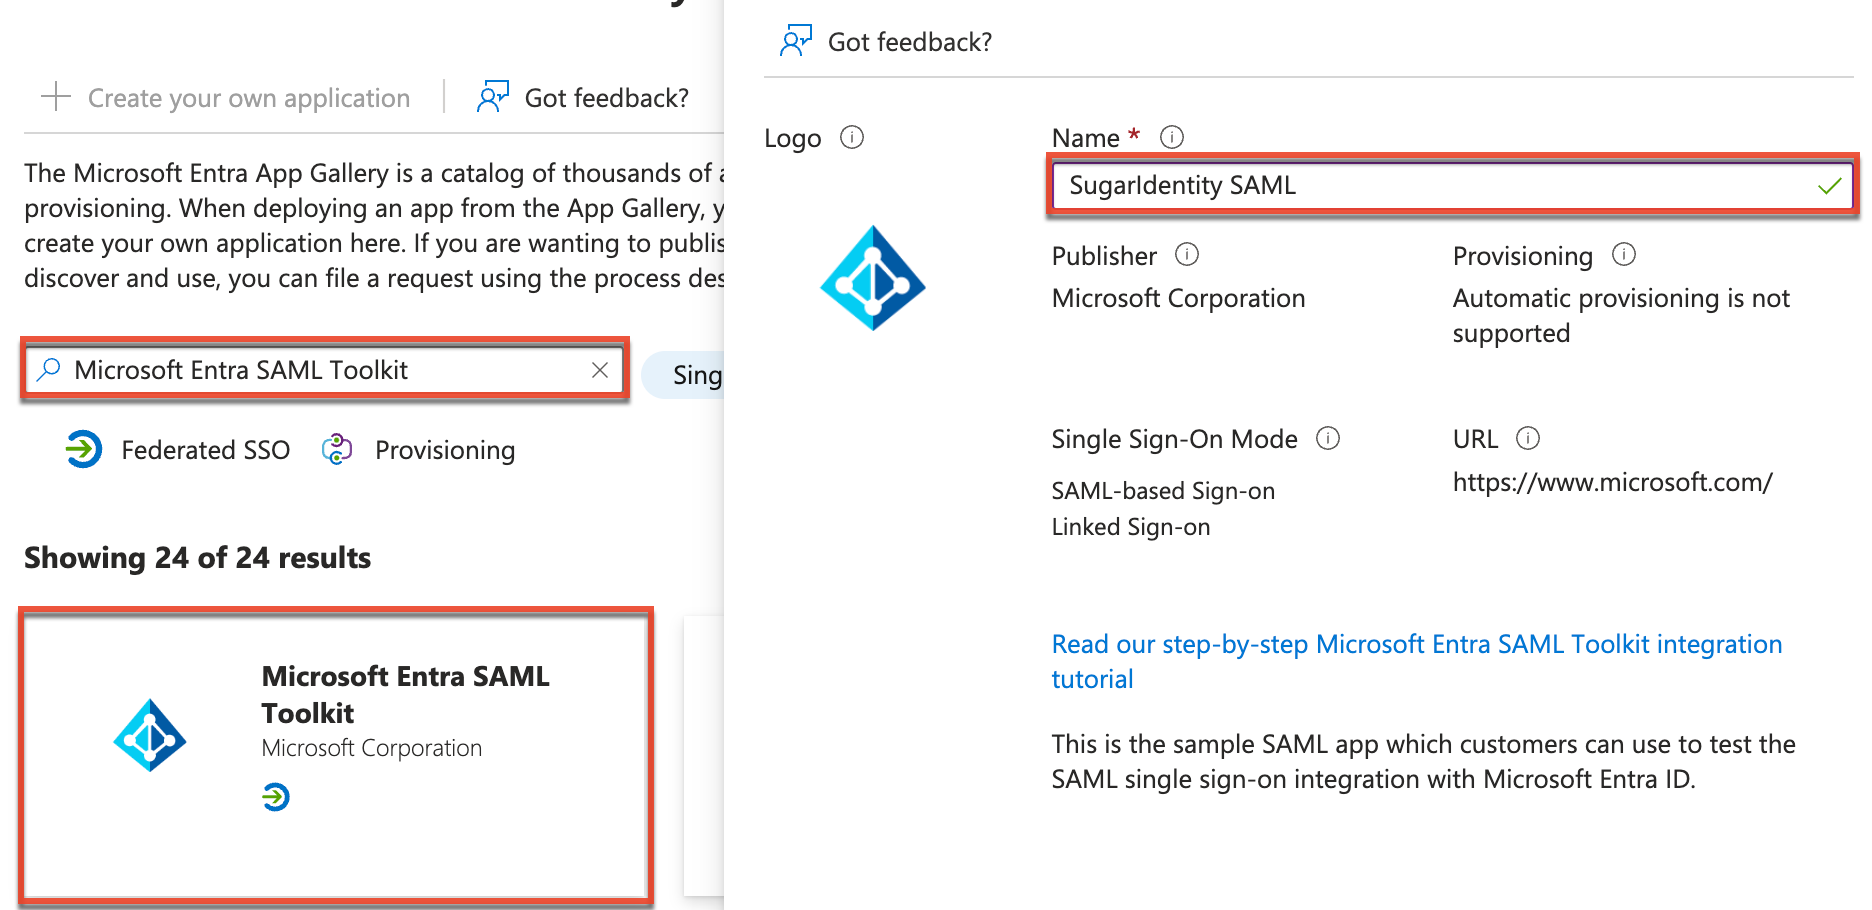
- On the Browse Microsoft Entra Gallery page, perform a search for "Microsoft Entra SAML Toolkit" or "SugarCRM" and select the option that appears in the results.
- In the new pop-up window, enter an application name (e.g., SugarIdentity SAML) of your choice, then click the Create button.
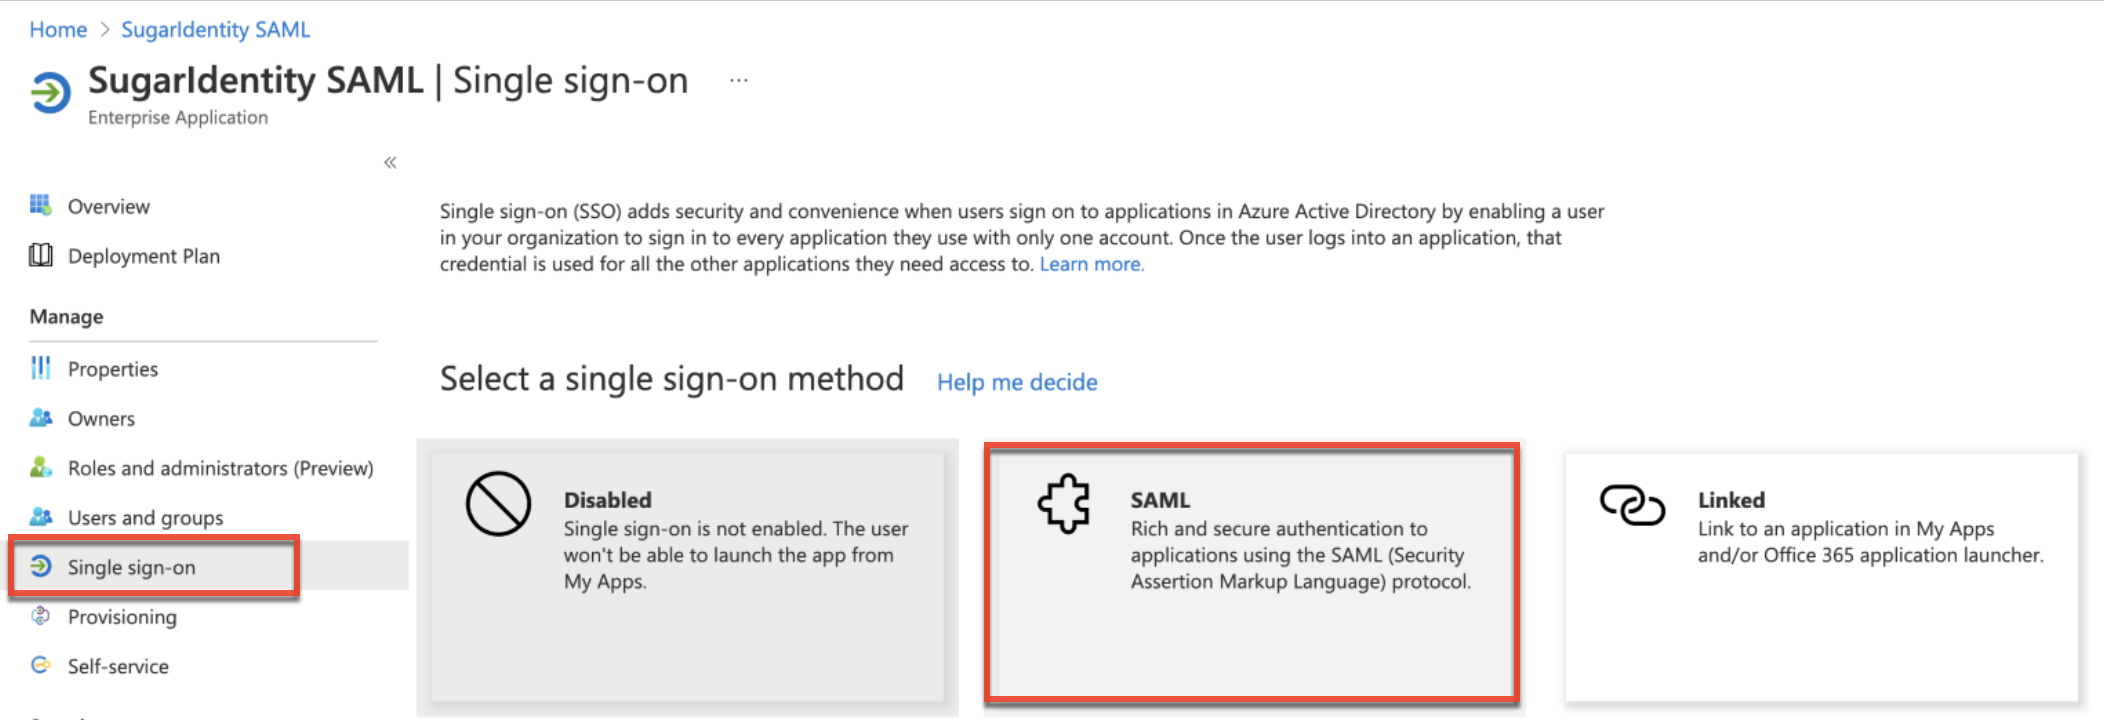
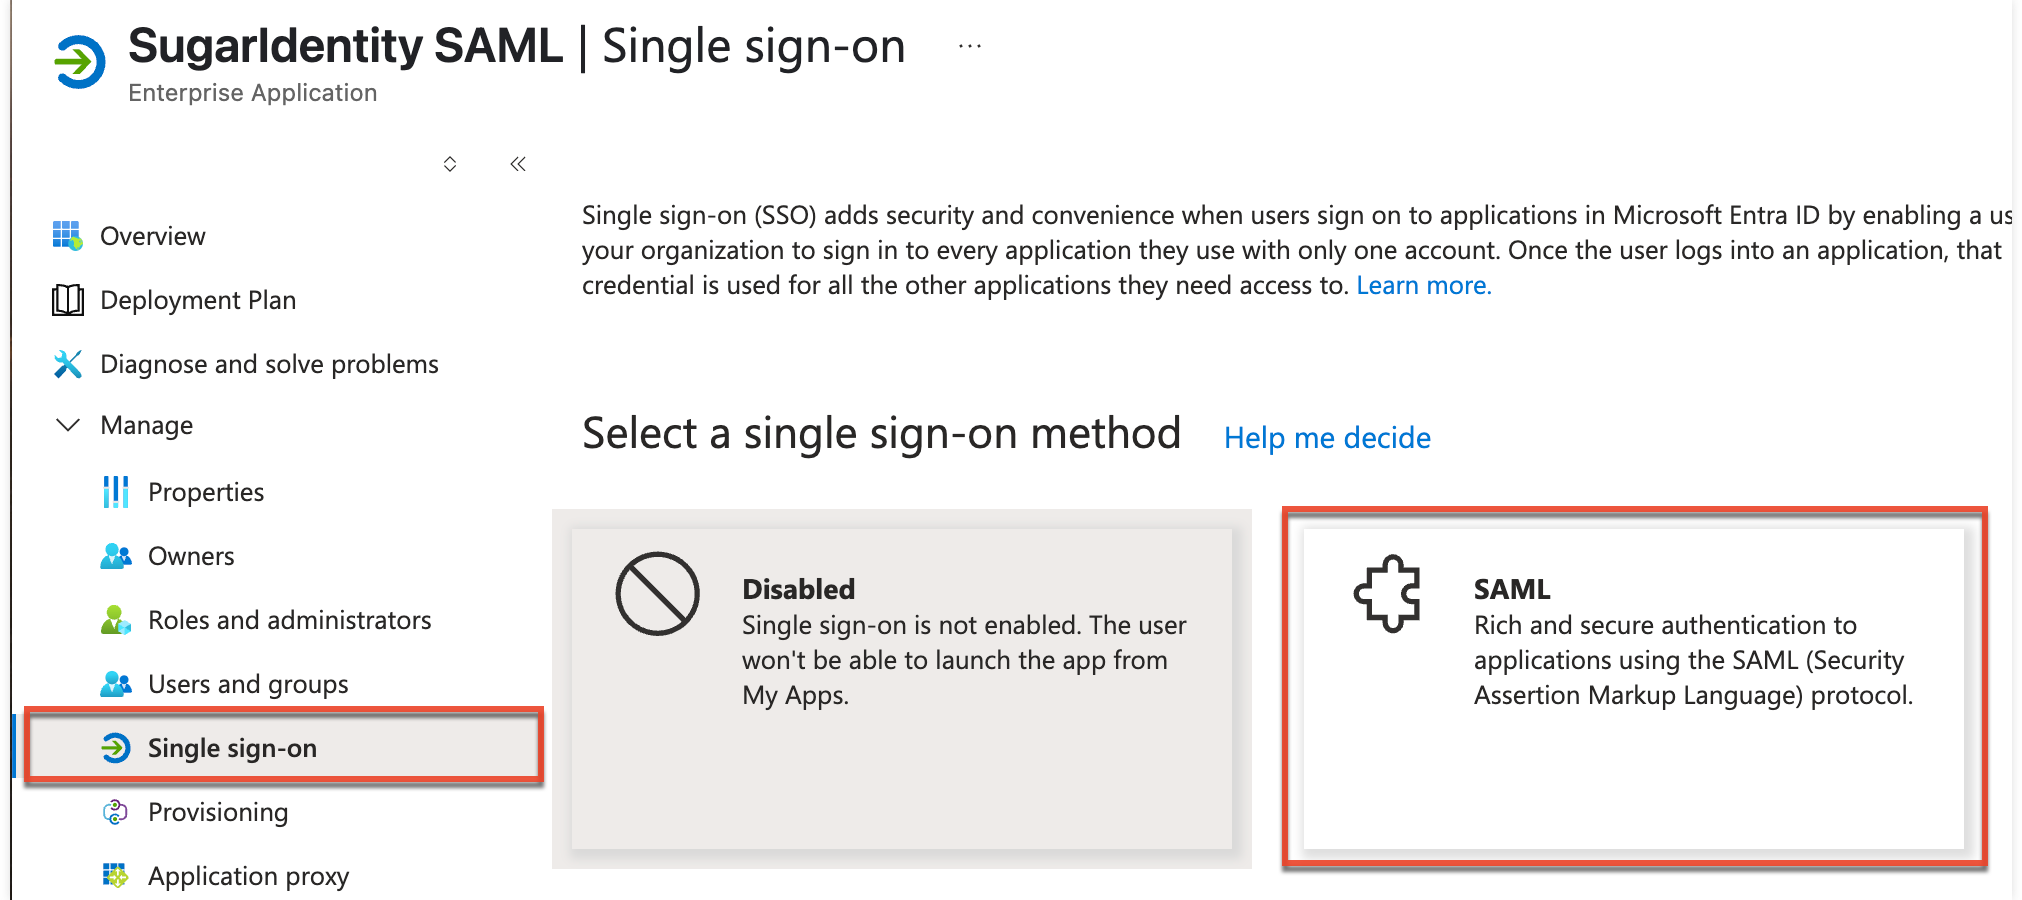
- Next, click the "Single sign-on" option on the left tree menu and select "SAML" for the single sign-on method.
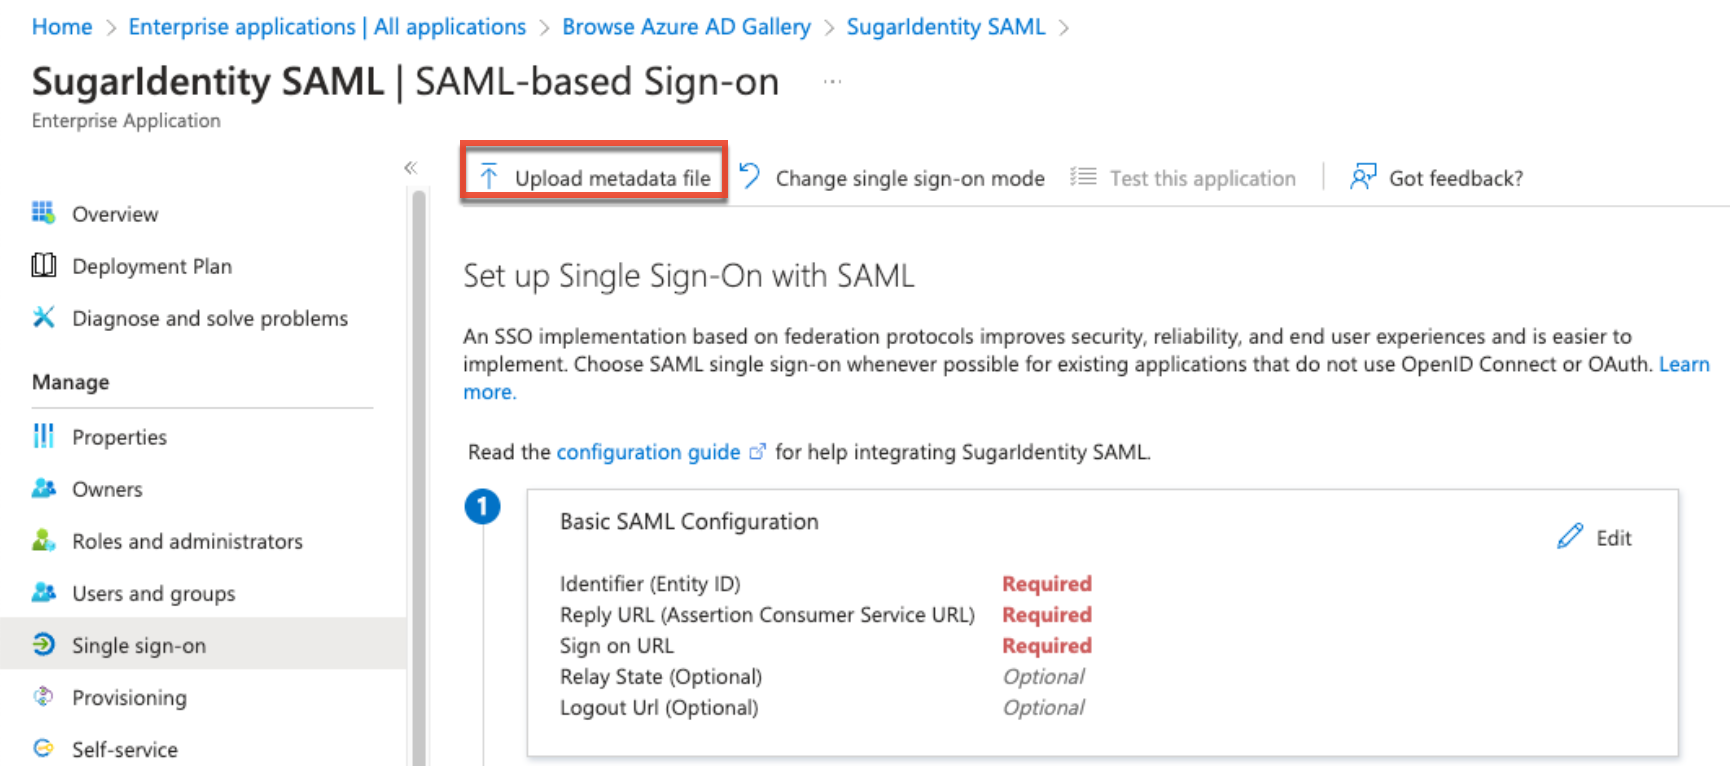
- Click the "Upload metadata file" button at the top of your new SugarCRM SAML application page to upload the metadata file you exported from SugarIdentity in step 1. After uploading the file, the Basic SAML Configuration form will open
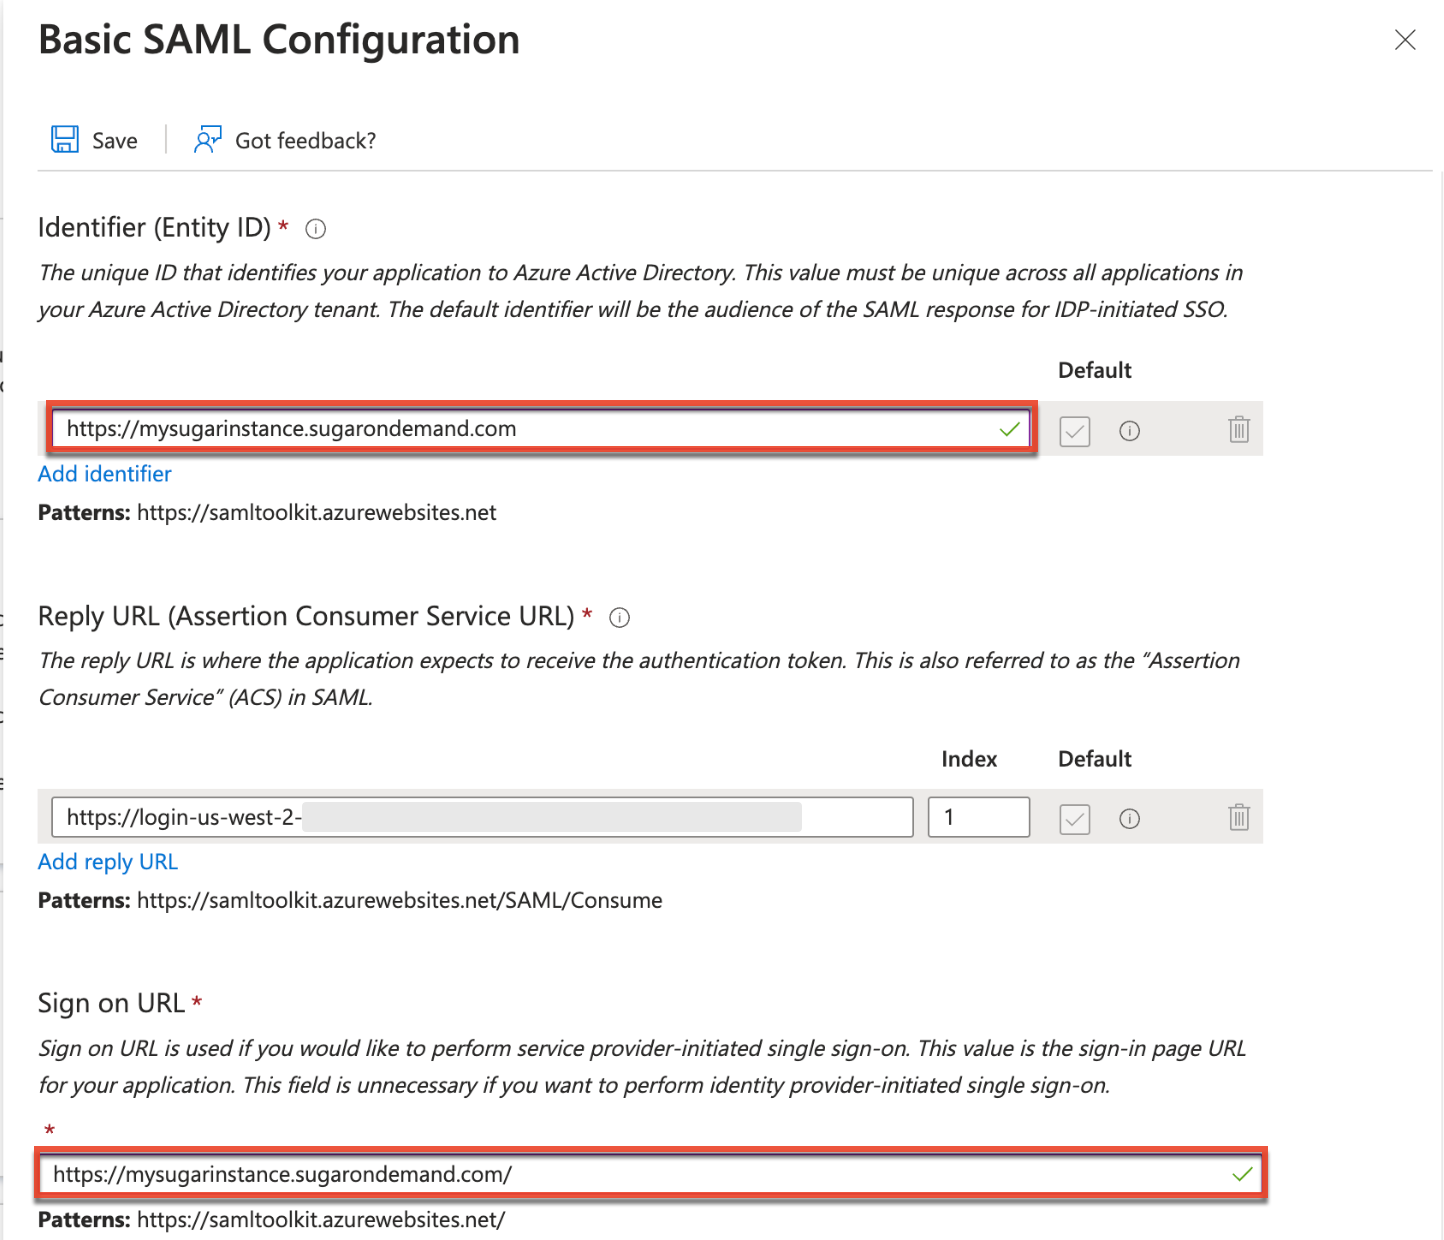
- On the Basic SAML Configuration form, enter your Sugar instance URL (e.g., https://mysugarinstance.sugarondemand.com) in the Sign on URL field. Then also update the Identifier (Entity ID) field with your Sugar instance URL. Click "Save".
- Finally, on the SugarIdentity SAML screen, click the Download link to the right of the Federation Metadata XML field in the SAML Signing Certificate panel.
Note: You will need to import this metadata file when configuring SAML in SugarIdentity.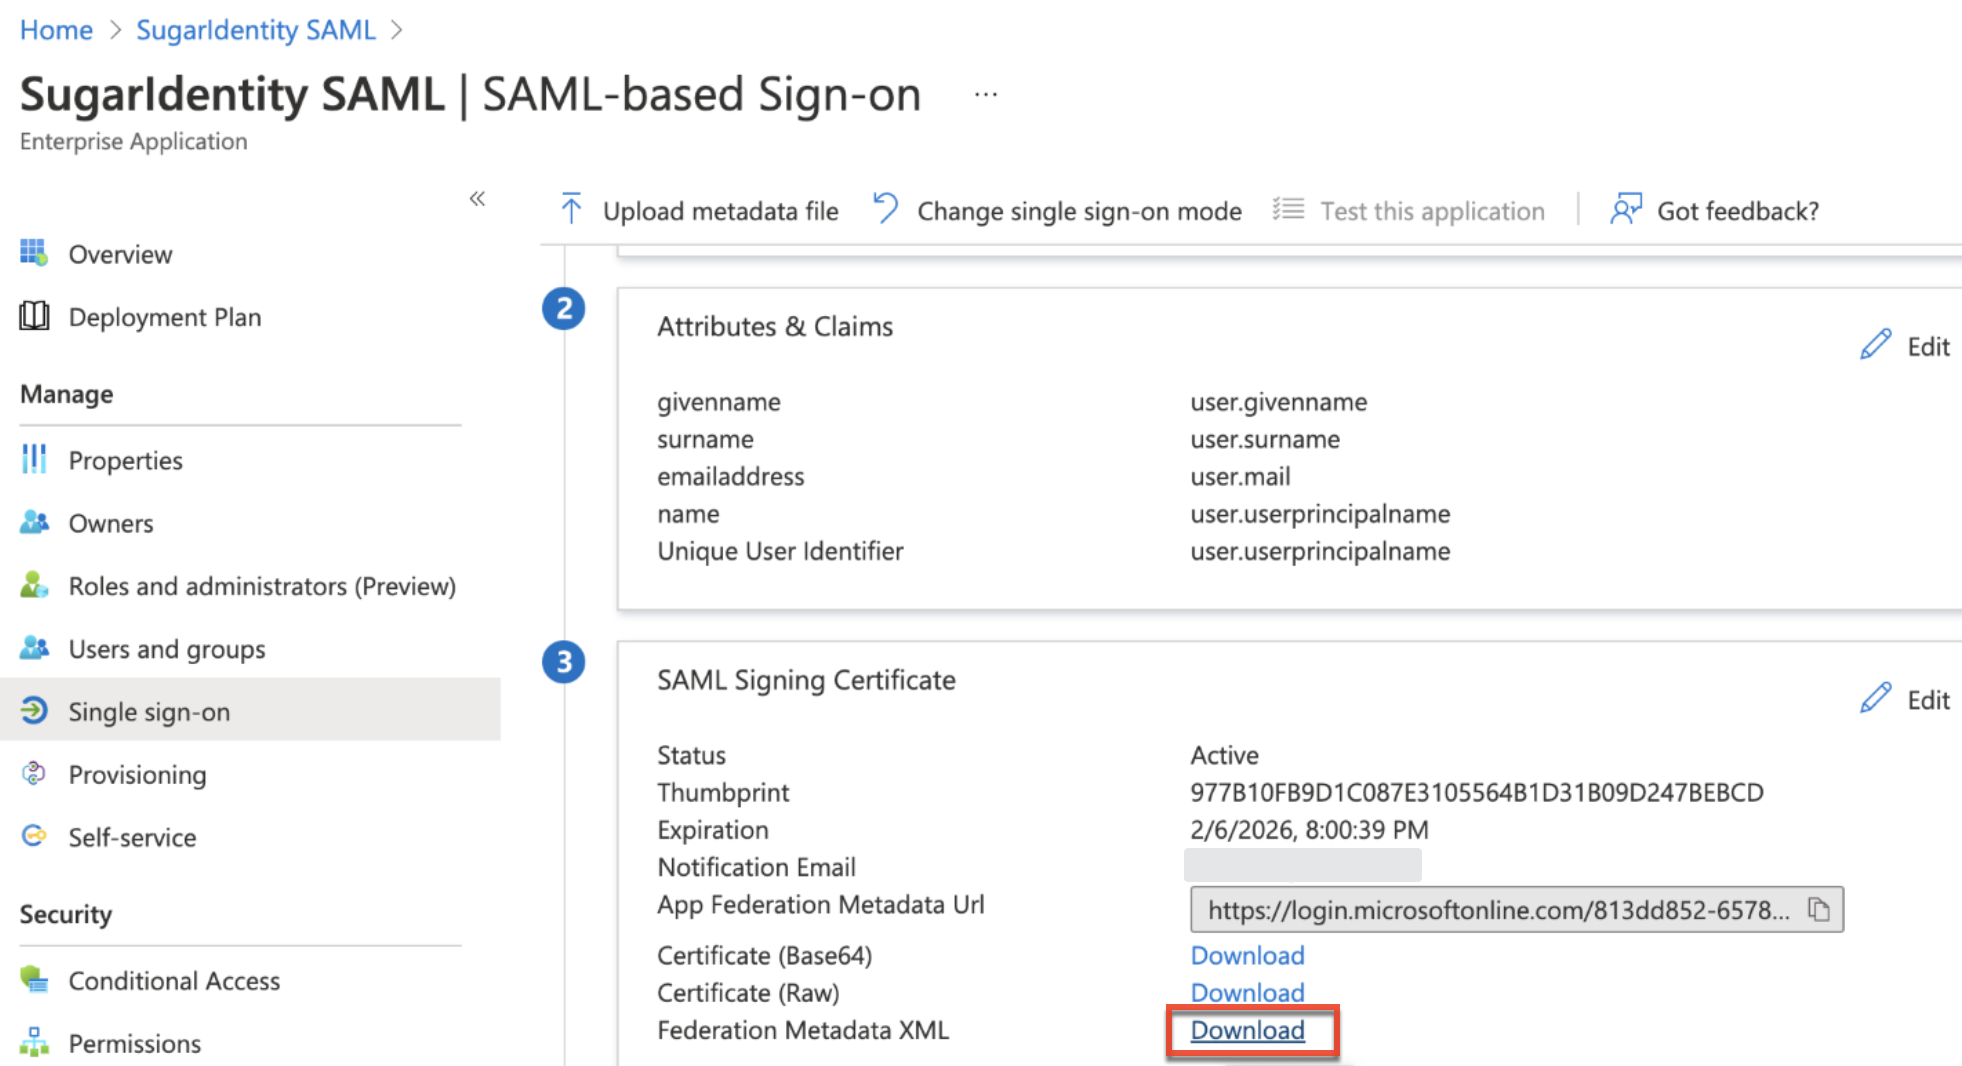
Repeat steps 1 - 9 to create another application in Azure and configure SAML for your other Sugar instances as desired.
Creating a Single SAML Application
You can configure multiple Sugar instances (e.g., production, sandboxes) to use a single application in Azure with the same set of users. Use the following steps to create a single application in Azure to be used across multiple Sugar instances:
- First, log in to the Sugar instance (e.g., production) where you wish to configure SAML. Navigate to Admin > SugarIdentity, then click "SAML Settings" from the home page. Copy the Assertion Consumer Service URL from the SAML Settings page. You will need to paste this information in step 7 below.
Note: For Sugar versions 13.0 and lower, navigate to Admin > SugarCloud Settings. - Next, navigate to https://portal.azure.com/ in your web browser and log in.
- Select "Enterprise applications" under "Azure services" on the home page, then click the "+ New Application" button on the following page.
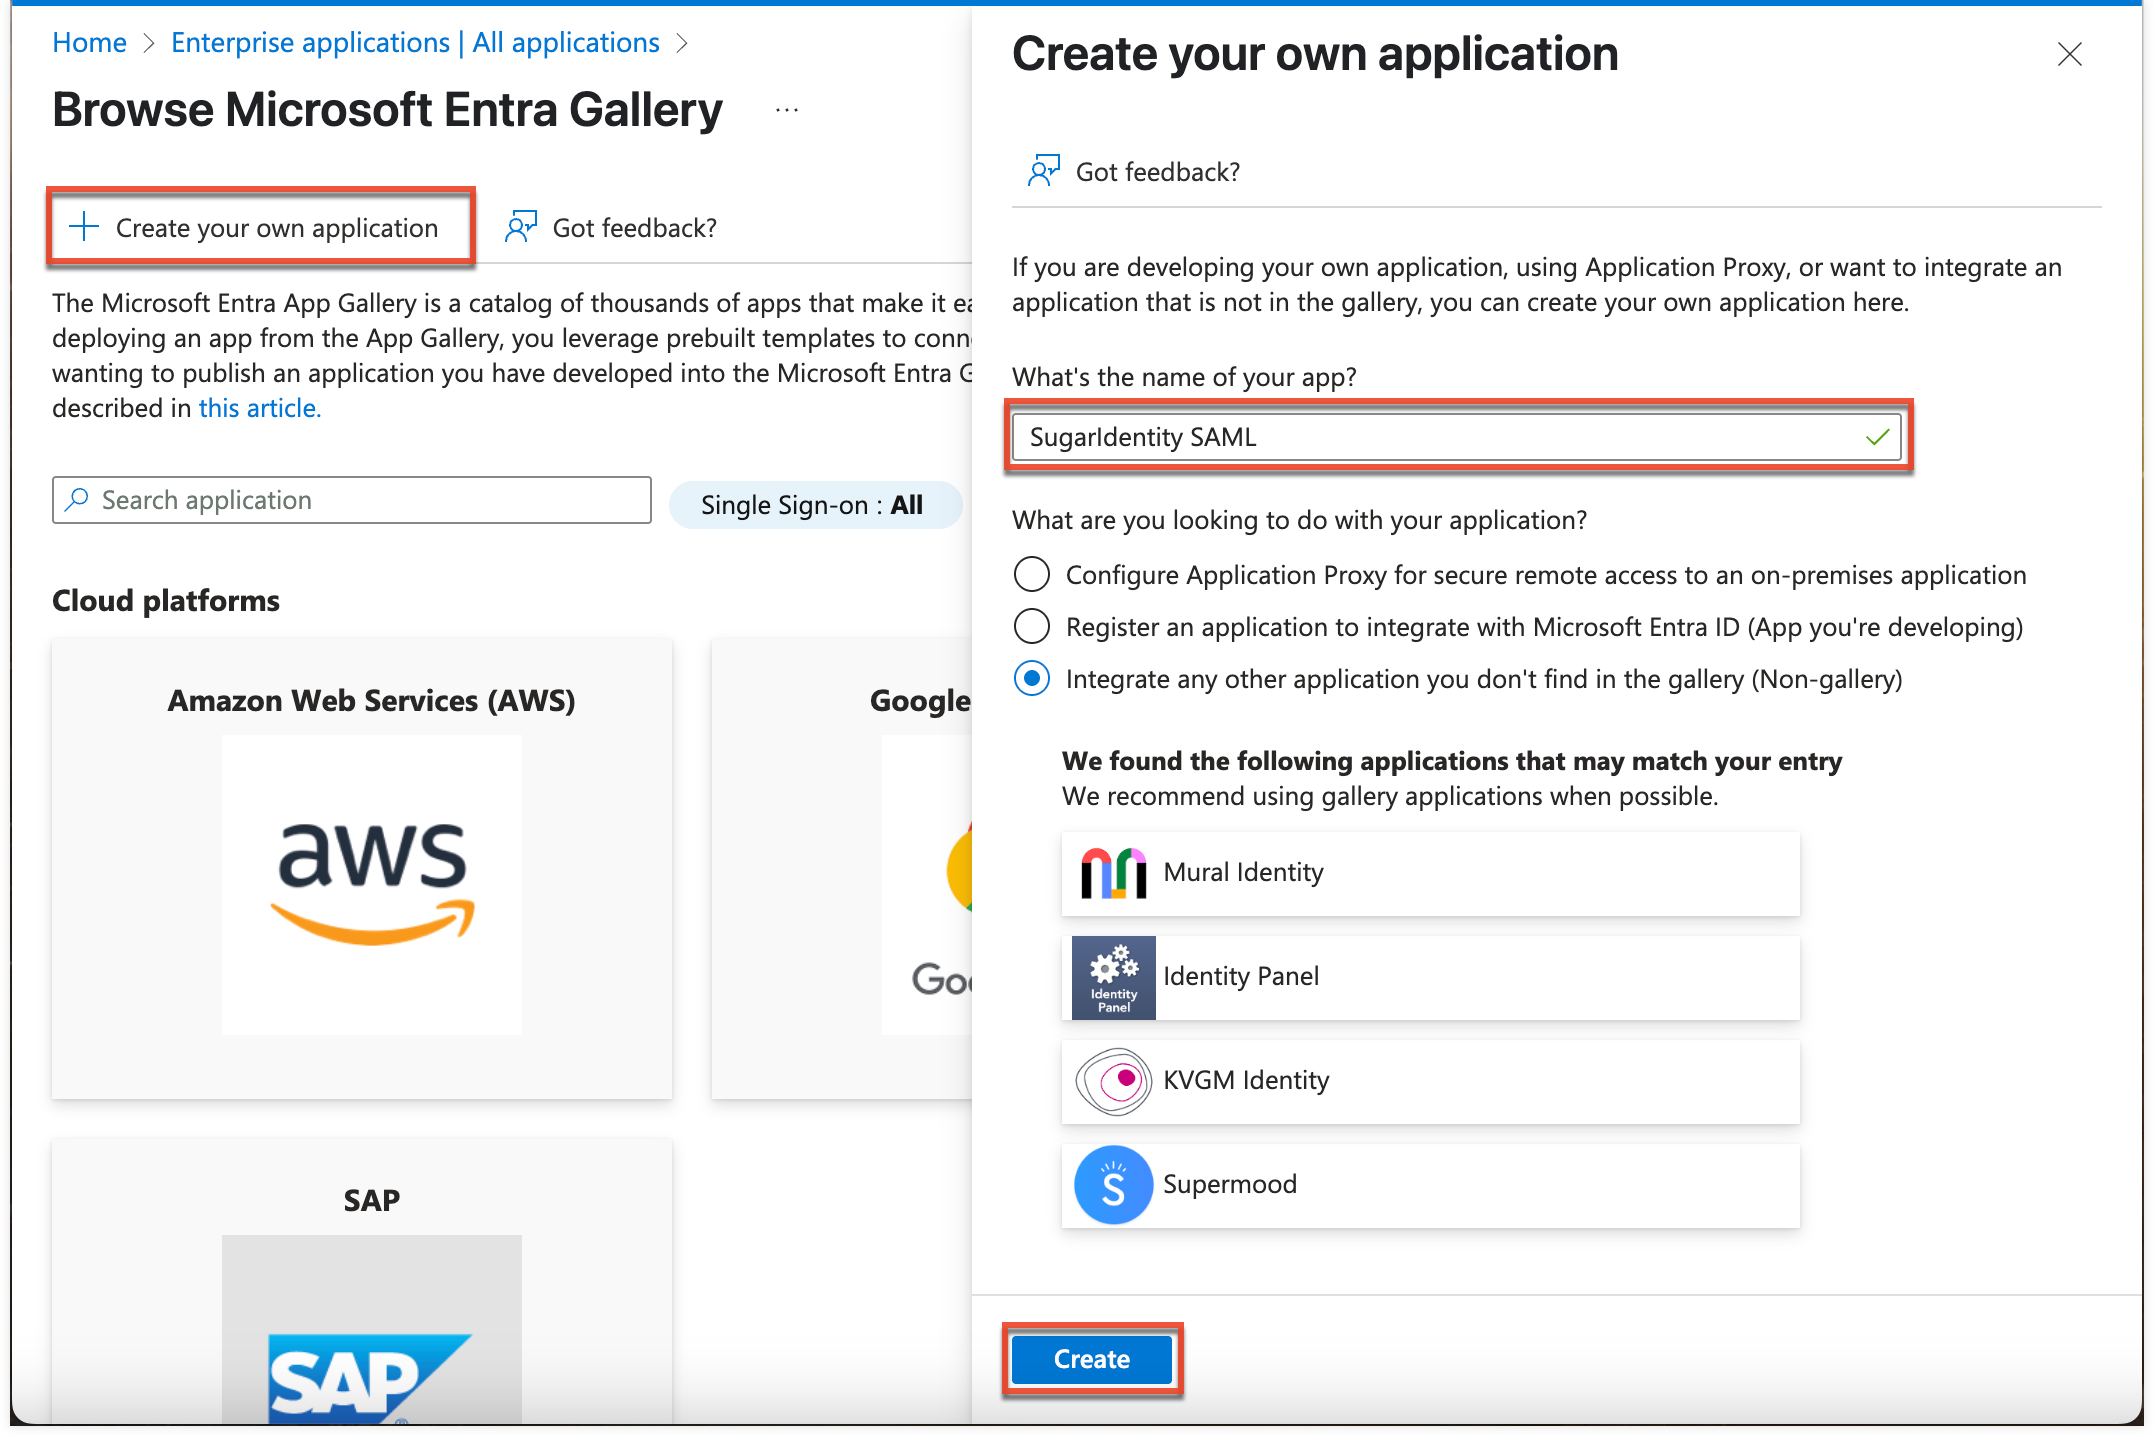
Note: If you do not see "Enterprise applications" on the home page, click "More services" then perform a search. - Click "Create your own application" on the Browse Microsoft Entra Gallery page. In the new pop-up window, enter an application name (e.g., SugarIdentity SAML) of your choice, then click "Create".
- Next, click the "Single sign-on" option on the left tree menu, and select "SAML" for the single sign-on method.
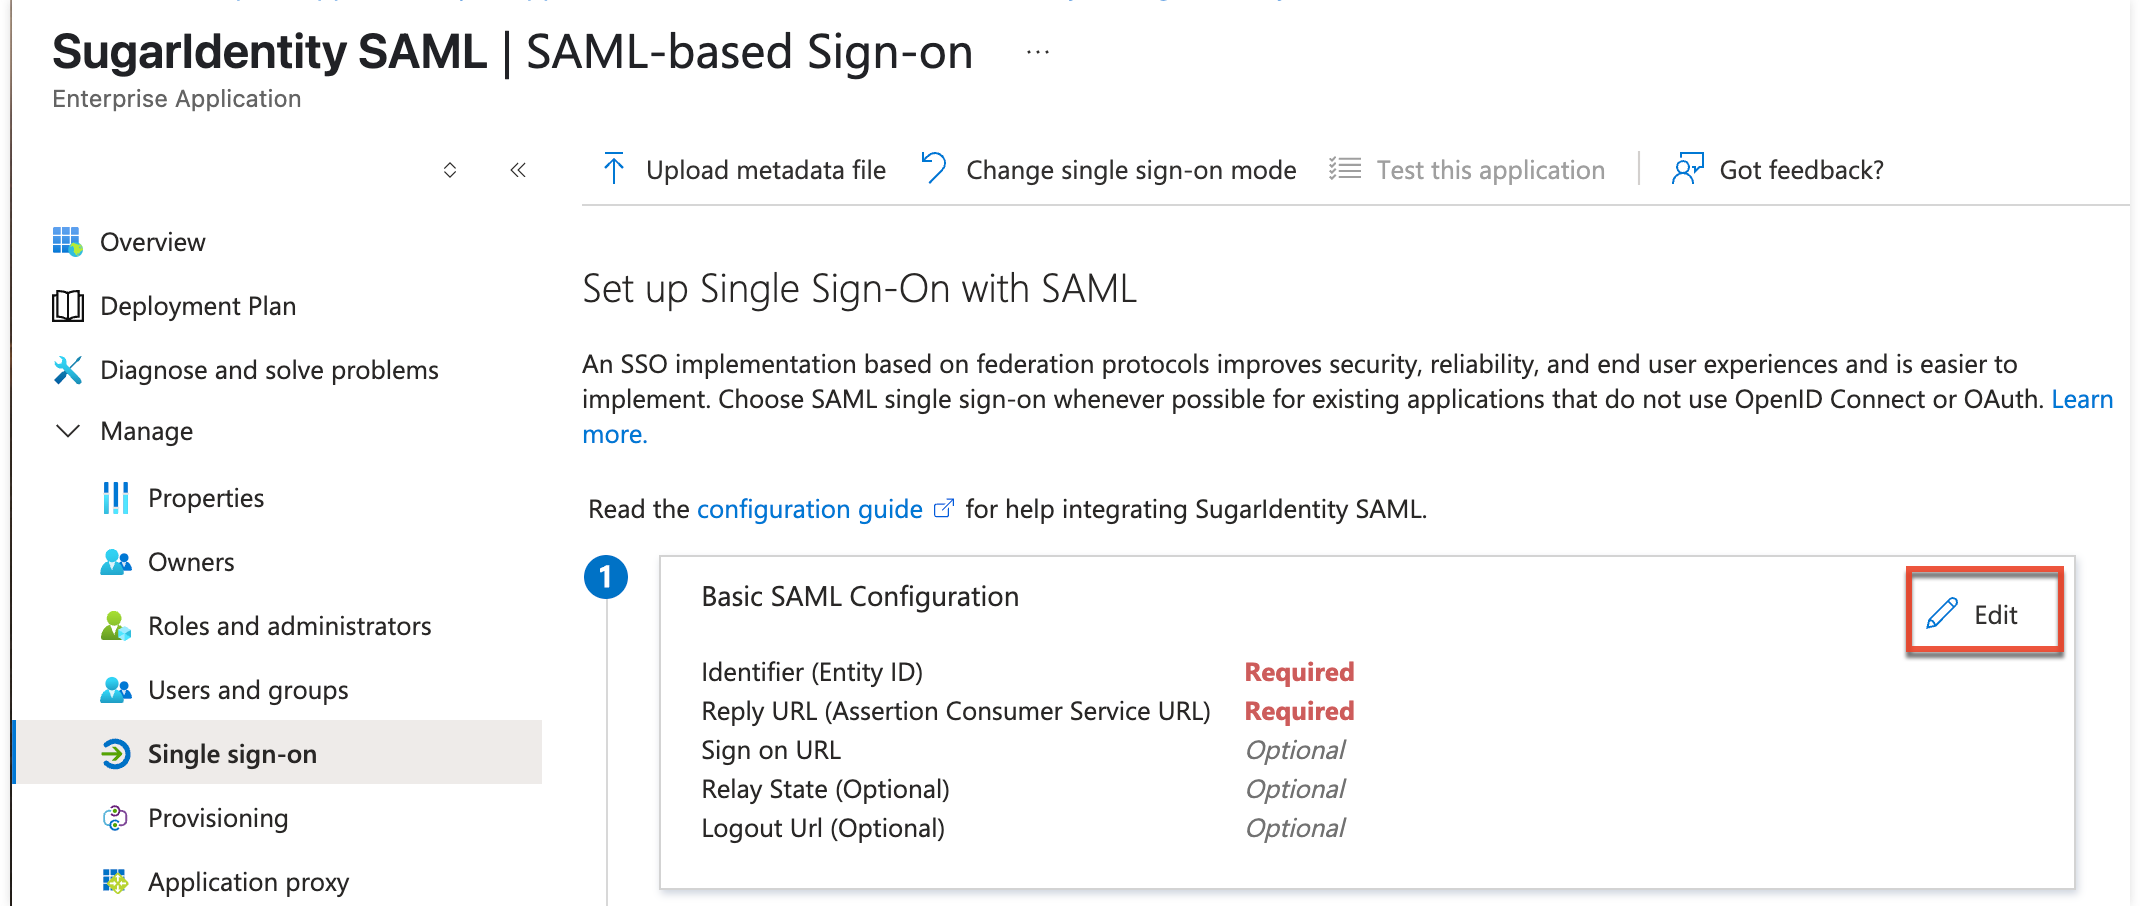
- Click "Edit" on the Basic SAML Configuration section of your new SAML application page.
- Paste the Assertion Consumer Service URL value you obtained from SugarIdentity in step 1 to the "Identifier (Entity ID)" and "Reply URL (Assertion Consumer Service URL)" fields.
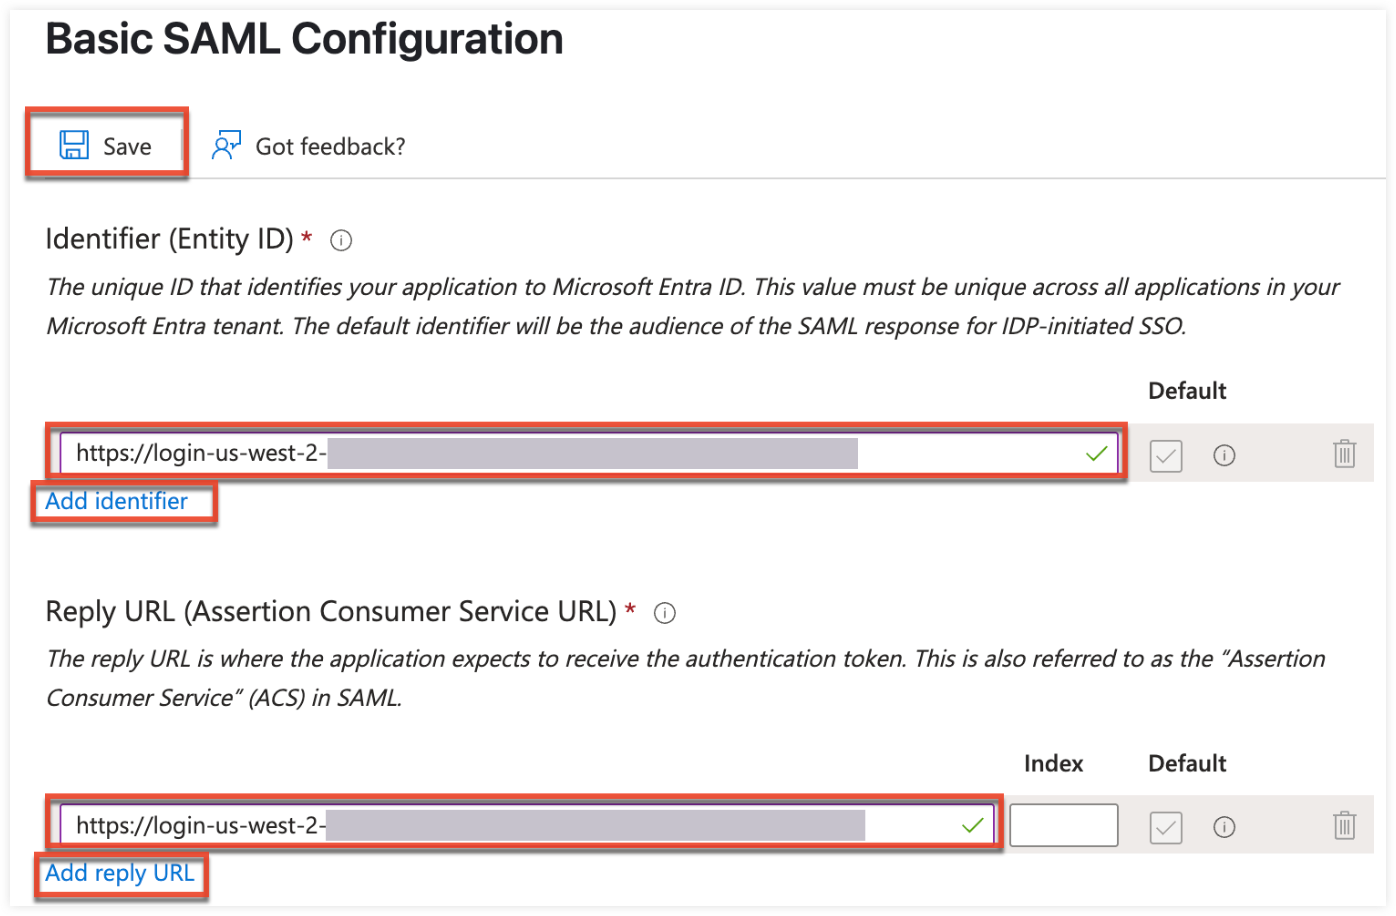
- To add additional Sugar instances to this SAML application, navigate to the other Sugar instance (e.g., sandbox) to obtain the Assertion Consumer Service URL from SugarIdentity's SAML Settings page. Then, in Azure, click the "Add Identifier" and "Add reply URL" links on the Basic SAML Configuration page (step 7) to paste the Assertion Consumer Service URL value. Repeat this step for any other Sugar instances you wish to add to this SAML application.
- Click "Save" on the Basic SAML Configuration page to preserve your changes.
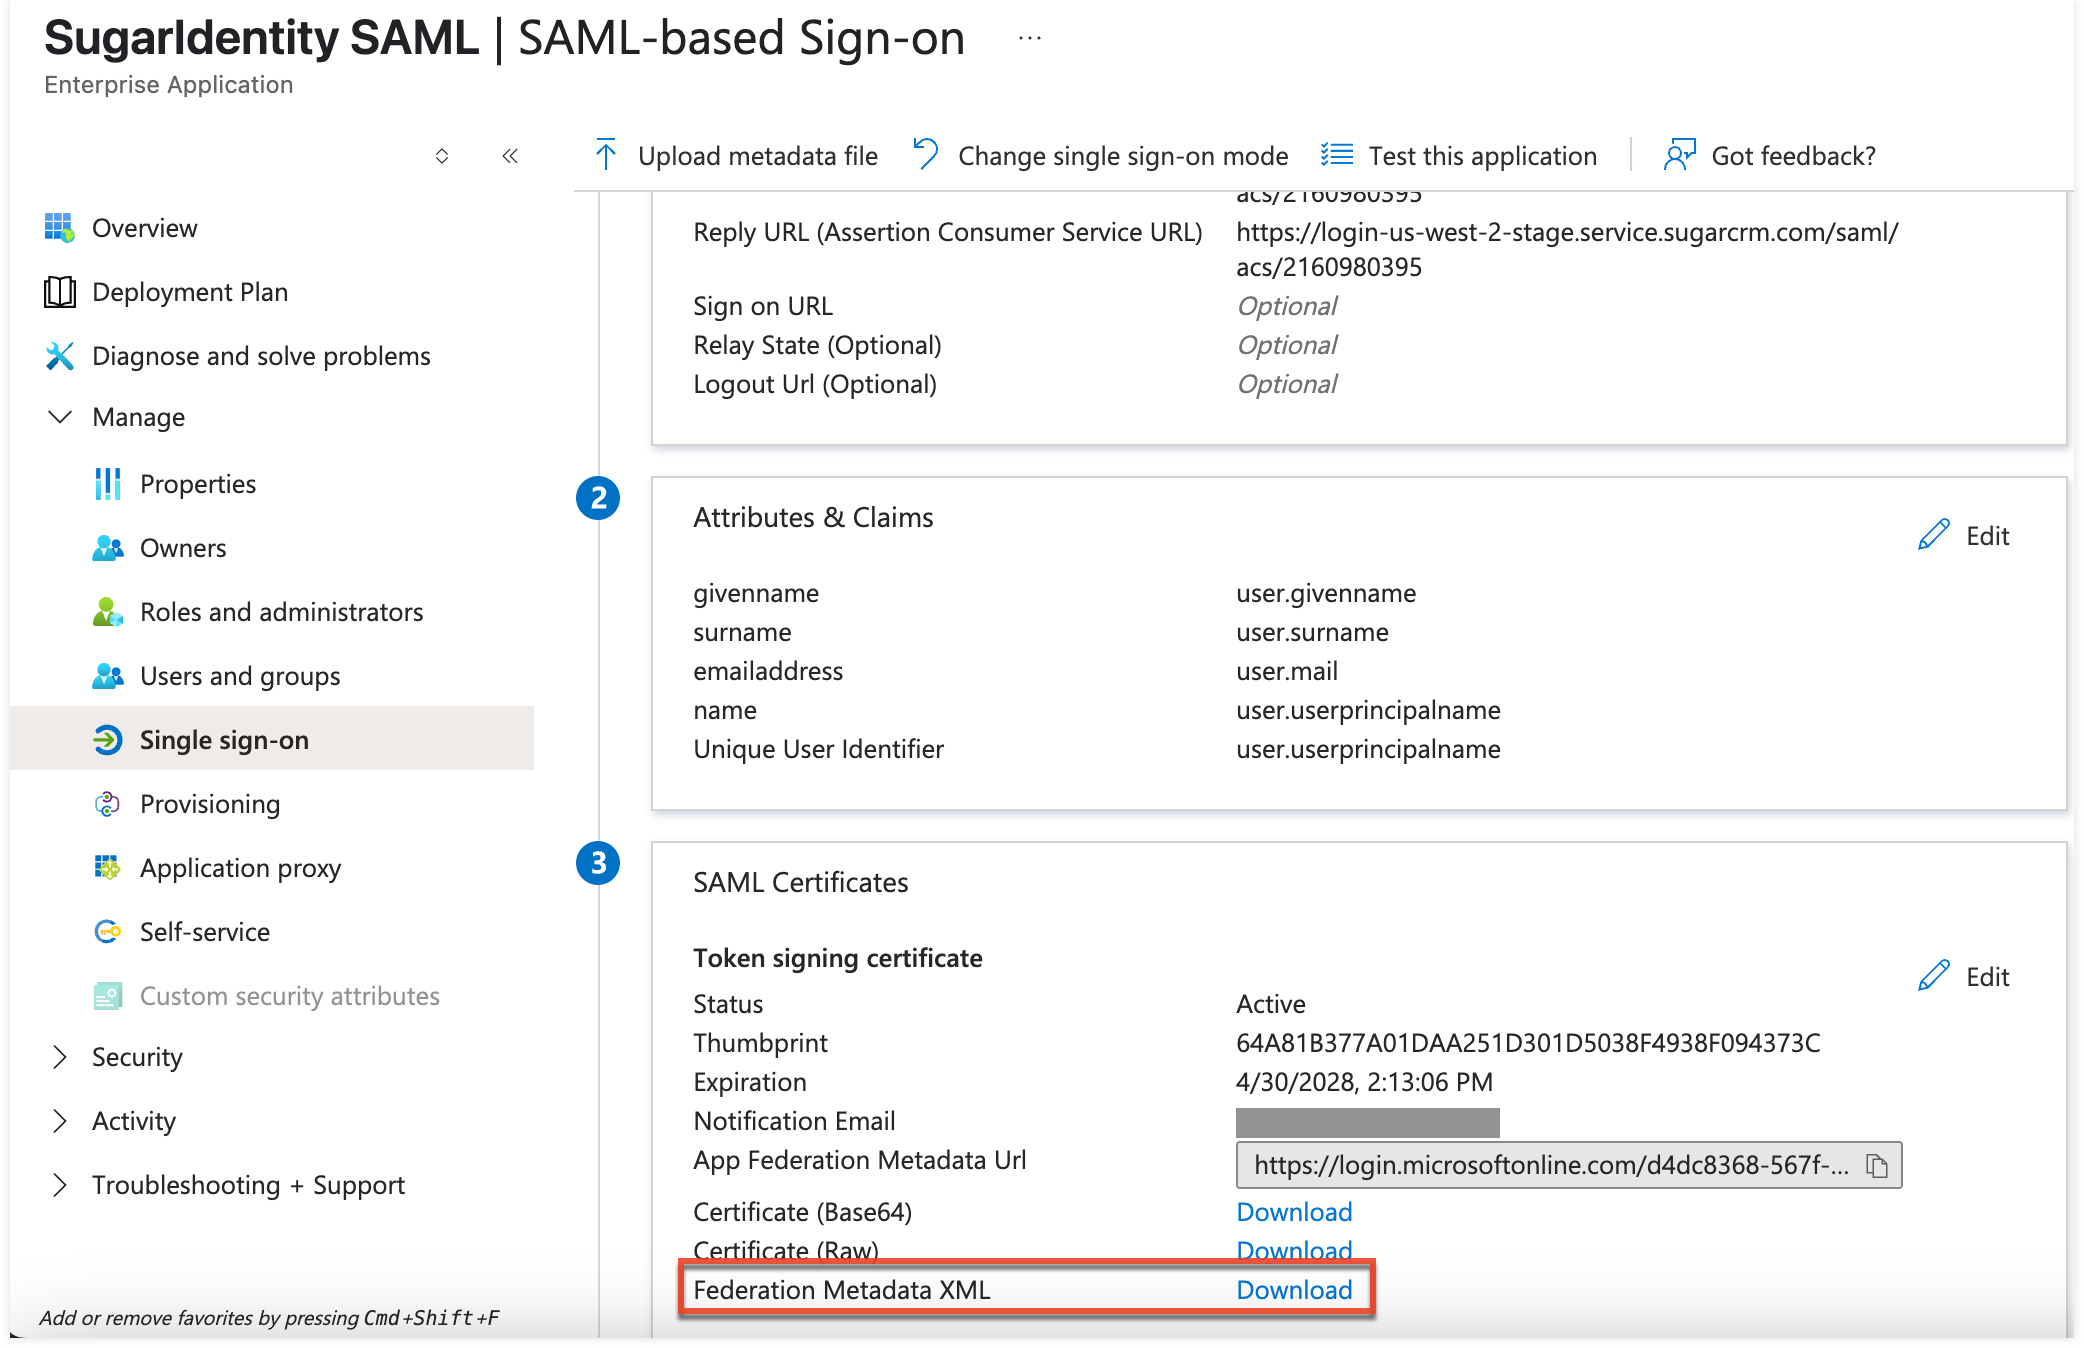
- Finally, on the SAML application page, click the Download link to the right of the Federation Metadata XML field in the SAML Certificates panel. You will need to import this metadata file when configuring SAML in SugarIdentity.
Importing IdP Metadata File in SugarIdentity
Once you have obtained the IdP metadata file from Azure using the steps in the section above, import the file in SugarIdentity to configure SAML for each Sugar instance:
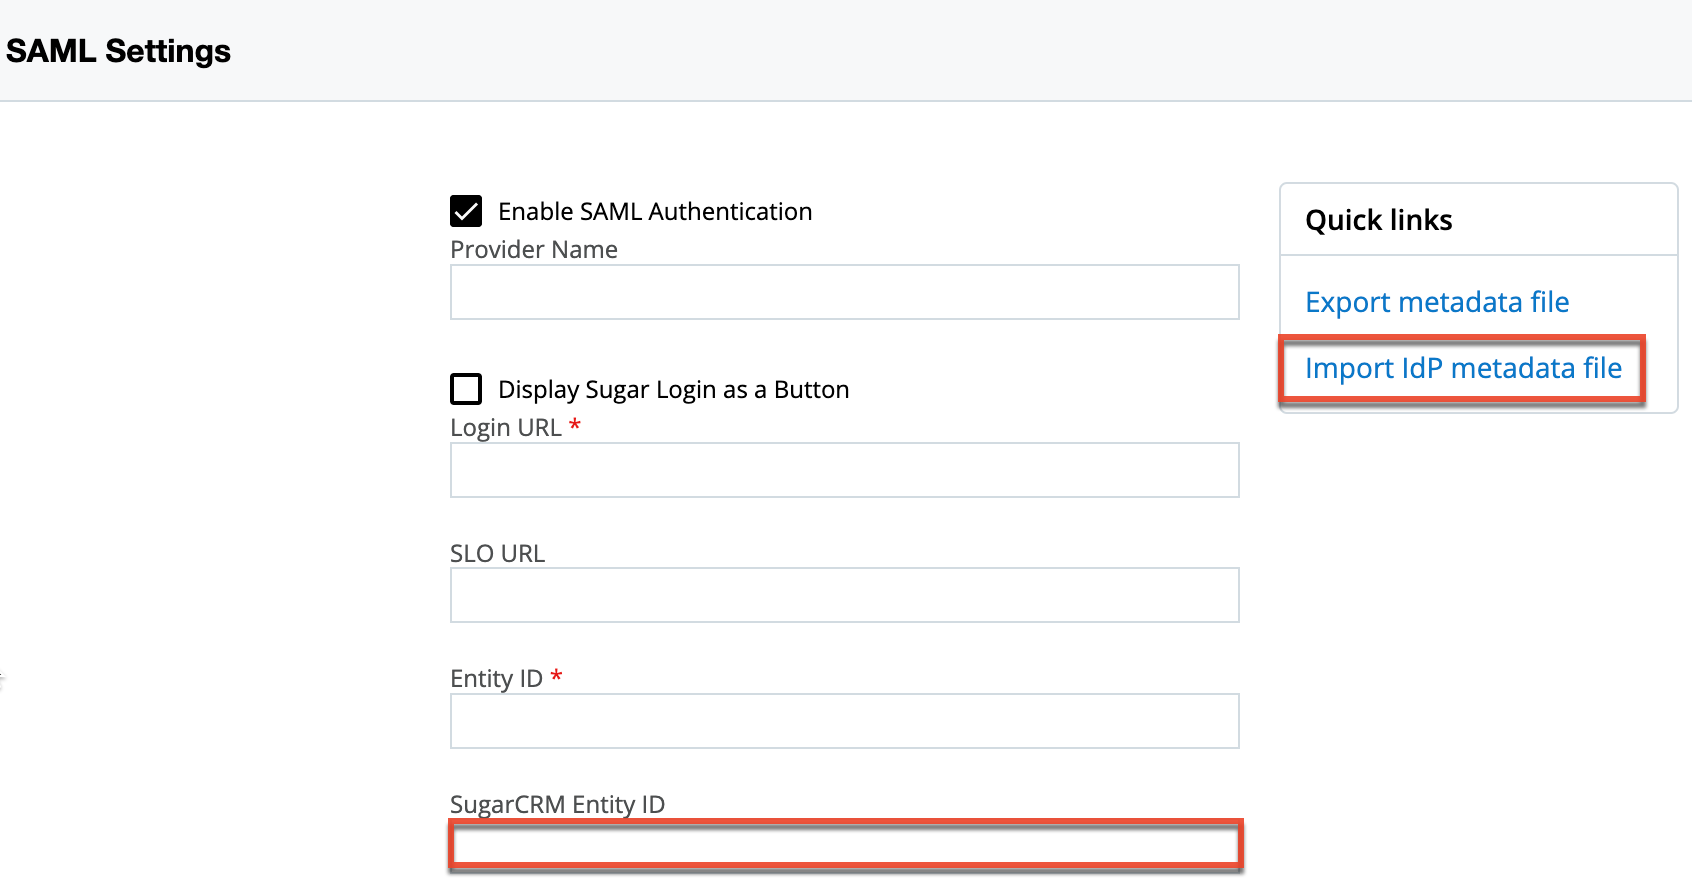
- In a new browser tab, access SugarIdentity and follow the instructions on the SugarIdentity Guide to import the IdP metadata file you downloaded in the section above.
- Next, enter the appropriate values in the SugarCRM Entity ID field as follows, then click "Save".
- For separate SAML applications: Enter your Sugar instance URL (e.g., https://mysugarinstance.sugarondemand.com) in the SugarCRM Entity ID field to match the Identifier (Entity ID) field in Azure (step 8 in section above).
- For a single SAML application: Copy and paste the Assertion Consumer Service URL to the SugarCRM Entity ID field.
Assigning the SugarCRM App to Azure Users
In order for SugarIdentity users to leverage the Azure login capability with Sugar, you must assign the new SugarCRM SAML app created in the section above to your organization's users in Azure. For information on assigning applications to users in Azure, refer to this article on the Microsoft website.
Mapping Attributes for Azure
If you wish to have the attributes (e.g., First Name, Last Name) from Azure map to the SugarIdentity user fields, you will need to set up the attribute mapping in Azure. Once the attribute mapping is configured, going forward, when a new user is created in Azure or the user's attributes are modified in Azure, these changes will sync to SugarIdentity when the user logs in to Sugar. For more information on setting up the attribute mapping, please refer to the Configuring SAML Attribute Mapping for SugarIdentity article.
Application
Once you have configured Azure and completed the SAML configuration in SugarIdentity, going forward, when a user that is provisioned in SugarIdentity navigates to Sugar they will be redirected to Microsoft Azure's login page to enter their Azure credentials. Once the user's login credentials are authenticated in Azure, they will be directed back to their Sugar instance and be automatically logged in.