Configuring SCIM for SugarIdentity With OneLogin
Overview
For instances that use SugarIdentity and have SAML authentication configured, the administrator can configure SCIM (System for Cross-domain Identity Management) for the identity provider (e.g., OneLogin) which will allow user identity information (e.g., phone number, email) to automatically sync from the identity provider to SugarIdentity. This article covers how to configure SCIM for OneLogin.
Supported Provisioning Features
The following provisioning features in OneLogin are supported for SugarIdentity:
- Create User: New users created in OneLogin will be automatically created in SugarIdentity.
- Update User: Changes made to the user's attributes (e.g., email, phone number) in OneLogin will be pushed to SugarIdentity to update the corresponding user record. Custom attributes are not supported.
- Deactivate User: Deactivating a user in OneLogin will update the user's status to "Inactive" in SugarIdentity.
- Delete User: Deleting a user in OneLogin will delete the user's record in SugarIdentity.
Note: Group push and password sync are not supported.
Prerequisites
- Your Sugar instance must be enabled for SugarIdentity.
- SAML authentication must be configured in SugarIdentity.
Configuring SCIM for OneLogin
Use the following steps to configure SCIM for OneLogin:
- Follow steps 1-4 in the Create Your SCIM Test App section of the Create a SCIM Test App page in OneLogin to add a new app.
- For step 2, search and select "SCIM Provisioner with SAML (SCIM v2)".
- If you have not already configured SAML authentication for SugarIdentity, please refer to the section below. If SAML authentication has already been configured for SugarIdentity then please skip to step 3.
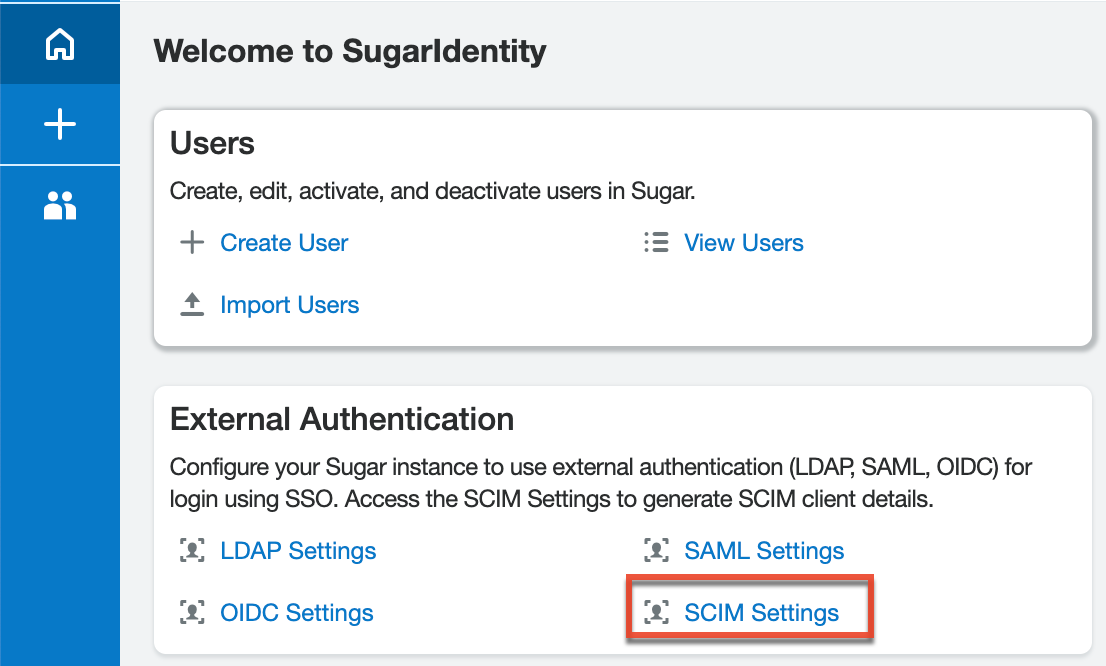
- Next, generate and obtain the "Server URL" and "Bearer Token" from SugarIdentity by clicking "SCIM Settings" on the home page. These values are required to complete the next step.
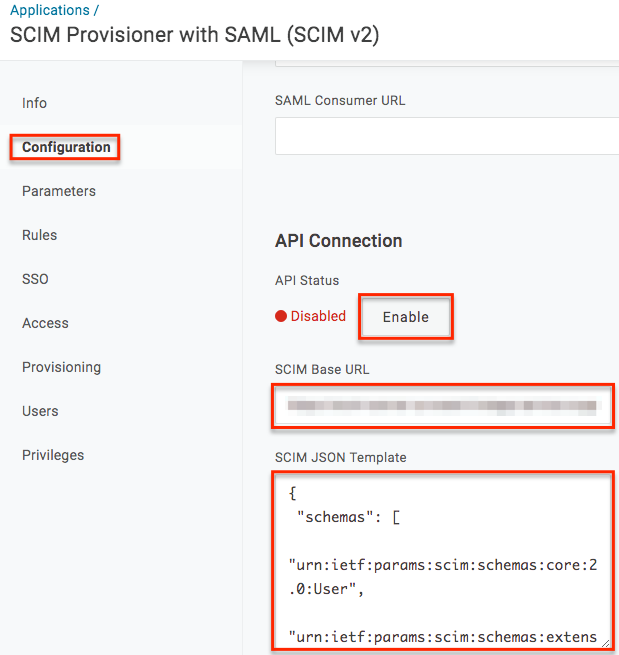
- Navigate back to OneLogin to access the SCIM app created in step 1. Select "Configuration" from the menu on the left then complete the following fields:
Note: For more information on configuring the SCIM app, please refer to the Create a SCIM Test App page in OneLogin.
- SCIM Base URL: Copy and paste the "Server URL" from step 3.
- SCIM Bearer Token: Copy and paste the "Bearer Token" from step 3.
- SCIM JSON Template: Copy and paste the following lines to define the default attribute mapping for SCIM:
{
 "schemas": [
   "urn:ietf:params:scim:schemas:core:2.0:User",
   "urn:ietf:params:scim:schemas:extension:enterprise:2.0:User"
 ],
 "userName": "{$parameters.scimusername}",
 "name": {
   "familyName": "{$user.lastname}",
   "givenName": "{$user.firstname}",
   "formatted": "{$user.display_name}"
 },
 "emails": [{
   "value": "{$user.email}",
   "type": "work",
   "primary": true
 }],
 "phoneNumbers": [
   {
     "primary": true,
     "value": "{$user.phone}",
     "type": "work"
   }
 ],
 "title": "{$user.title}",
 "urn:ietf:params:scim:schemas:extension:enterprise:2.0:User": {
   "department": "{$user.department}"
 }
}
- Next, click "Enable" under "API Status" then click "Save".
- Select "Parameters" from the menu on the left and map the SCIM Username field to "Email" then click "Save".
- Finally, select "Provisioning" from the menu on the left and configure the settings as follows:
- Enable provisioning: Enable the checkbox.
- Require admin approval before this action is performed: Disable the "Create user", "Delete user", and "Update user" checkboxes.
- When users are deleted in OneLogin, or the user's app access is removed, perform the below action: Set to "Delete".
Note: Setting this option to "Delete" will delete the user record from Sugar when the user is deleted in OneLogin.
- Click "Save" to preserve the settings.
Once you have completed the SCIM configuration for OneLogin, click the Users tab in the navigation bar to assign the SCIM application to your OneLogin users so that changes (e.g., email updates) made to the user's record syncs to SugarIdentity. For information on assigning applications to users, refer to the Assigning Apps to Users article in OneLogin.
Configuring SAML for SugarIdentity
When configuring the SCIM app in OneLogin, you have the option to create the SAML integration for SugarIdentity if you have not already configured SAML authentication. But please note that the SAML configuration options within the SCIM app are limited, and if you wish to implement SAML single logout, then you should instead create the SAML integration using the steps in the Configuring SSO With OneLogin article. Otherwise, please use the following steps to create the SAML integration for SugarIdentity from the SCIM app:
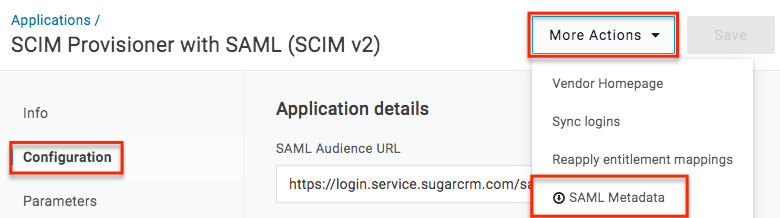
- From the SCIM app created in step 1 from the section above, select "Configuration" from the menu on the left and complete the following fields:
- SAML Audience URL: https://login.service.sugarcrm.com/saml/metadata
- SAML Consumer URL: https://login.service.sugarcrm.com/saml/acs
- Click "Save" then click the More Actions menu at the top of the page and select "SAML Metadata" to download and save the metadata file to your computer. You will need this file to complete the next step.
- In a new browser tab, access SugarIdentity to import the metadata file and configure SAML authentication.
Once you have configured SAML authentication in SugarIdentity, continue to step 3 in the section above.