Configuring SAML Attribute Mapping for SugarIdentity
Overview
SugarIdentity can be configured to accept Security Assertion Markup Language (SAML) for single sign-on if it is implemented at your organization. If you use SAML and would like to have SAML attributes (e.g., email) map to the SugarIdentity user fields (e.g., email), you will need to set up the attribute mapping in the identity provider (e.g., Okta) using the SAML attribute values listed in the table below. Once the attribute mapping is configured, going forward, when a new SAML user is created or the SAML attributes (e.g., email, title) are modified in the identity provider (e.g., Okta), these changes will sync to SugarIdentity when the user logs into Sugar. This article covers how to configure the SAML attribute mapping for the following identity providers:
| SAML Attributes | SugarIdentity User Fields |
| firstName | given_name |
| lastName | family_name |
| telephoneNumber | phone_number |
| title | title |
| department | department |
| streetAddress | address.street_address |
| city | address.locality |
| state | address.region |
| zipCode | address.postal_code |
| countryCode | address.countryCode |
Prerequisites
- Your Sugar instance must be enabled for SugarIdentity.
- SAML authentication must be configured in SugarIdentity.
- For Okta, you must have access to an Okta administrator account and be familiar with Okta in order to set up the attribute mapping. For more information regarding the administrator role, please refer to this Okta documentation.
- For OneLogin, you must have access to an administrator account in OneLogin and be familiar with OneLogin to set up the attribute mapping.
- For ADFS, you must have administrator access to the ADFS server in order to set up the attribute mapping.
- For AWS IAM Identity Center, you must have access to the AWS IAM Identity Center console and be familiar with it to set up the attribute mapping.
- For Azure, you must have administrator access to the Microsoft Azure account to set up the attribute mapping.
Mapping Attributes for Okta
To set up the attribute mapping in Okta, you must have already created the SAML integration for SugarIdentity using the steps in the Configuring SSO With Okta article. Once the SAML integration has been configured in Okta, use the following steps to set up the attribute mapping:
- Navigate to your Okta administrator account and click the Users tab and select "Profile Editor".
- Click the Profile button to the right of your application (e.g., SugarCRM Application) then click the "+ Add Attribute" button on the Profile Editor page.
Note: When adding the attributes, leave the Data Type field as "string" and populate the "Display Name" and "Variable Name" fields. Be sure to populate the Variable Name field using the SAML attribute values listed in the section above. When configuring single sign-on using OpenID Connect, you only need to map the Title and Department attributes if you wish to have these values map to SugarIdentity. Click "Save and Add Another" to add additional attributes.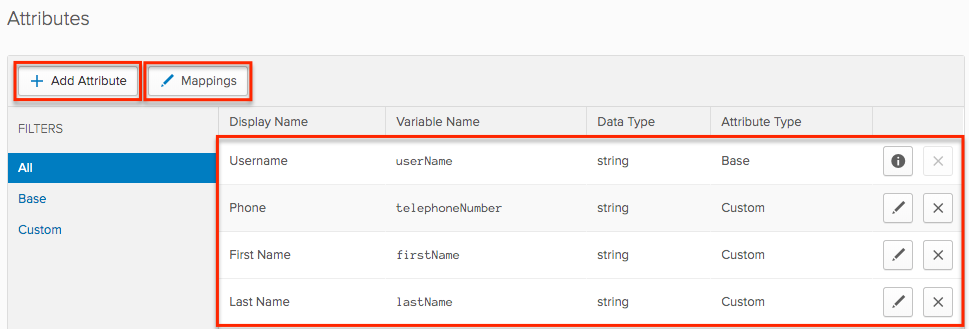
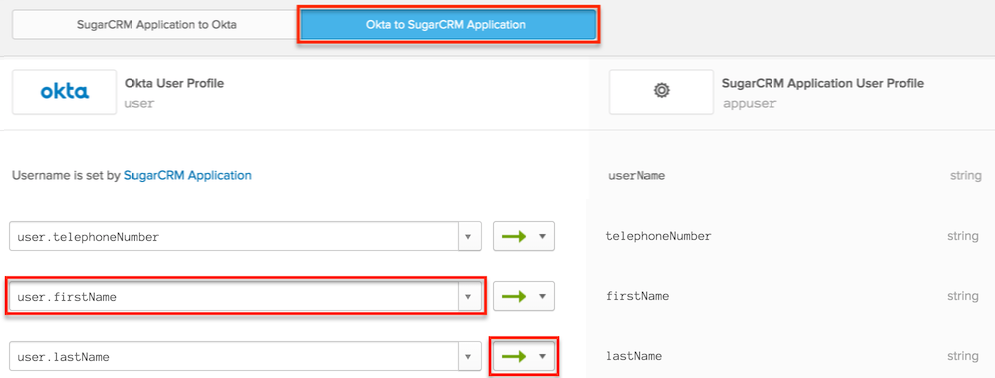
- After creating the attributes, click the Mappings button and follow steps 3-7 in the Map Profile Attributes documentation in Okta to map the attributes.
- For step 3, select the "Okta to <App Name>" tab at the top of the window.
- For step 5, select the "Apply mapping on user create and update" option (green arrow) for the profile push frequency.
- For step 7, once you click "Save Mappings", click the "Apply updates now" button.
- Once the mapping is complete, click "Applications" in the navigation bar, then select your application.
- Click the General tab then click "Edit" in the SAML Settings panel. Click "Next".
- On the SAML Settings step, scroll down to the Attribute Statements section and populate the Name and Value fields for each of the attributes as follows:
- Name: Type the variable name (e.g., firstName, lastName) for each attribute you added in step 2.
- Value: Type "user.<variable name>" (e.g., user.firstName).
- Click "Next" once all the attributes have been added.
Once the attribute mapping has been set up, you will need to assign the SugarCRM app to your Okta users if you have not done so already. For more information on assigning the app to Okta users, refer to the Configuring SSO With Okta article.
Mapping Attributes for OneLogin
To set up the attribute mapping in OneLogin, you must have already created the SAML integration for SugarIdentity using the steps in the Configuring SSO With OneLogin article. Once the SAML integration has been configured in OneLogin, use the following steps to set up the attribute mapping:
- Navigate to your OneLogin administrator account and click the Applications tab to select the SAML app for Sugar.
- Select "Parameters" from the menu on the left then enter the following field names and values in the table below to map the attributes to SugarIdentity:
Note: When adding the new field, be sure to enable the "Include in SAML assertion" checkbox.
Field Name Value firstName First Name lastName Last Name department Department telephoneNumber Phone title Title 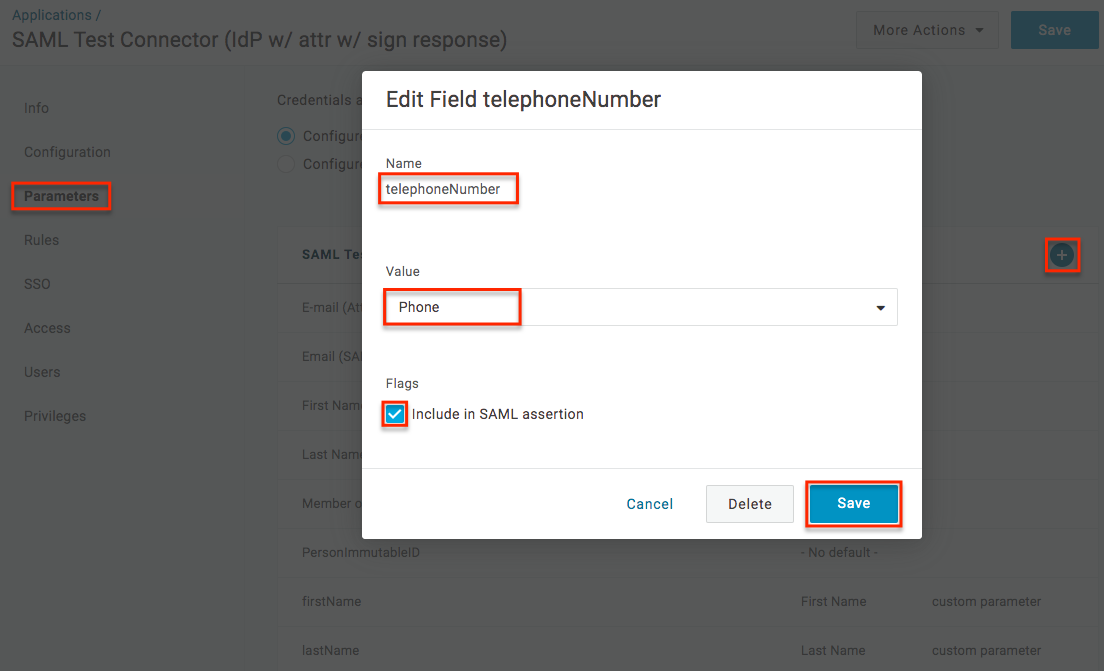
Once the attribute mapping has been set up, you will need to assign the SAML test connector app to your OneLogin users if you have not done so already. For more information on assigning the app to OneLogin users, refer to the Configuring SSO With OneLogin article.
Mapping Attributes for ADFS
Once you have configured SAML in SugarIdentity as well as configured a new trust relationship between SugarIdentity and ADFS, you can set up the attribute mapping in ADFS using the following steps:
- Follow the instructions in the Mapping attributes from Active Directory with ADFS and SAML (Enterprise) article on Zendesk. For the purpose of this article, please refer to the steps in the Full Name section of the Zendesk article.
- Enter the following values in the table below for the "LDAP Attribute" and "Outgoing Claim Type" in the claim rule.
Note: You can select the LDAP attribute values (e.g., Given-Name) from the dropdown list but will need to manually enter the values for city (i.e., I), zip code (i.e., postalCode), and country code (i.e., co) as they are not available values to select.
LDAP Attribute Outgoing Claim Type Given-Name firstName Surname lastName E-Mail-Addresses email Telephone-Number telephoneNumber Title title Department department streetAddress streetAddress State-Or-Province-Name state I city postalCode zipCode co countryCode - Click "OK" to save your settings.
Mapping Attributes for AWS
Once you have configured SAML in SugarIdentity and configured a new trust relationship between SugarIdentity and AWS IAM Identity Center, you can set up the attribute mapping in AWS IAM Identity Center using the following steps:
- Follow steps 1-5 in the Map Attributes in Your Application to IAM Identity Center Attributes article on the AWS website.
- Enter the following values in the table below to map the email address, first name, and last name attributes to SugarIdentity.
User attribute in the application Maps to this string value or user attribute in IAM Identity Center Format Subject ${user:email} emailAddress firstName ${user:givenName} unspecified lastName ${user:familyName} unspecified 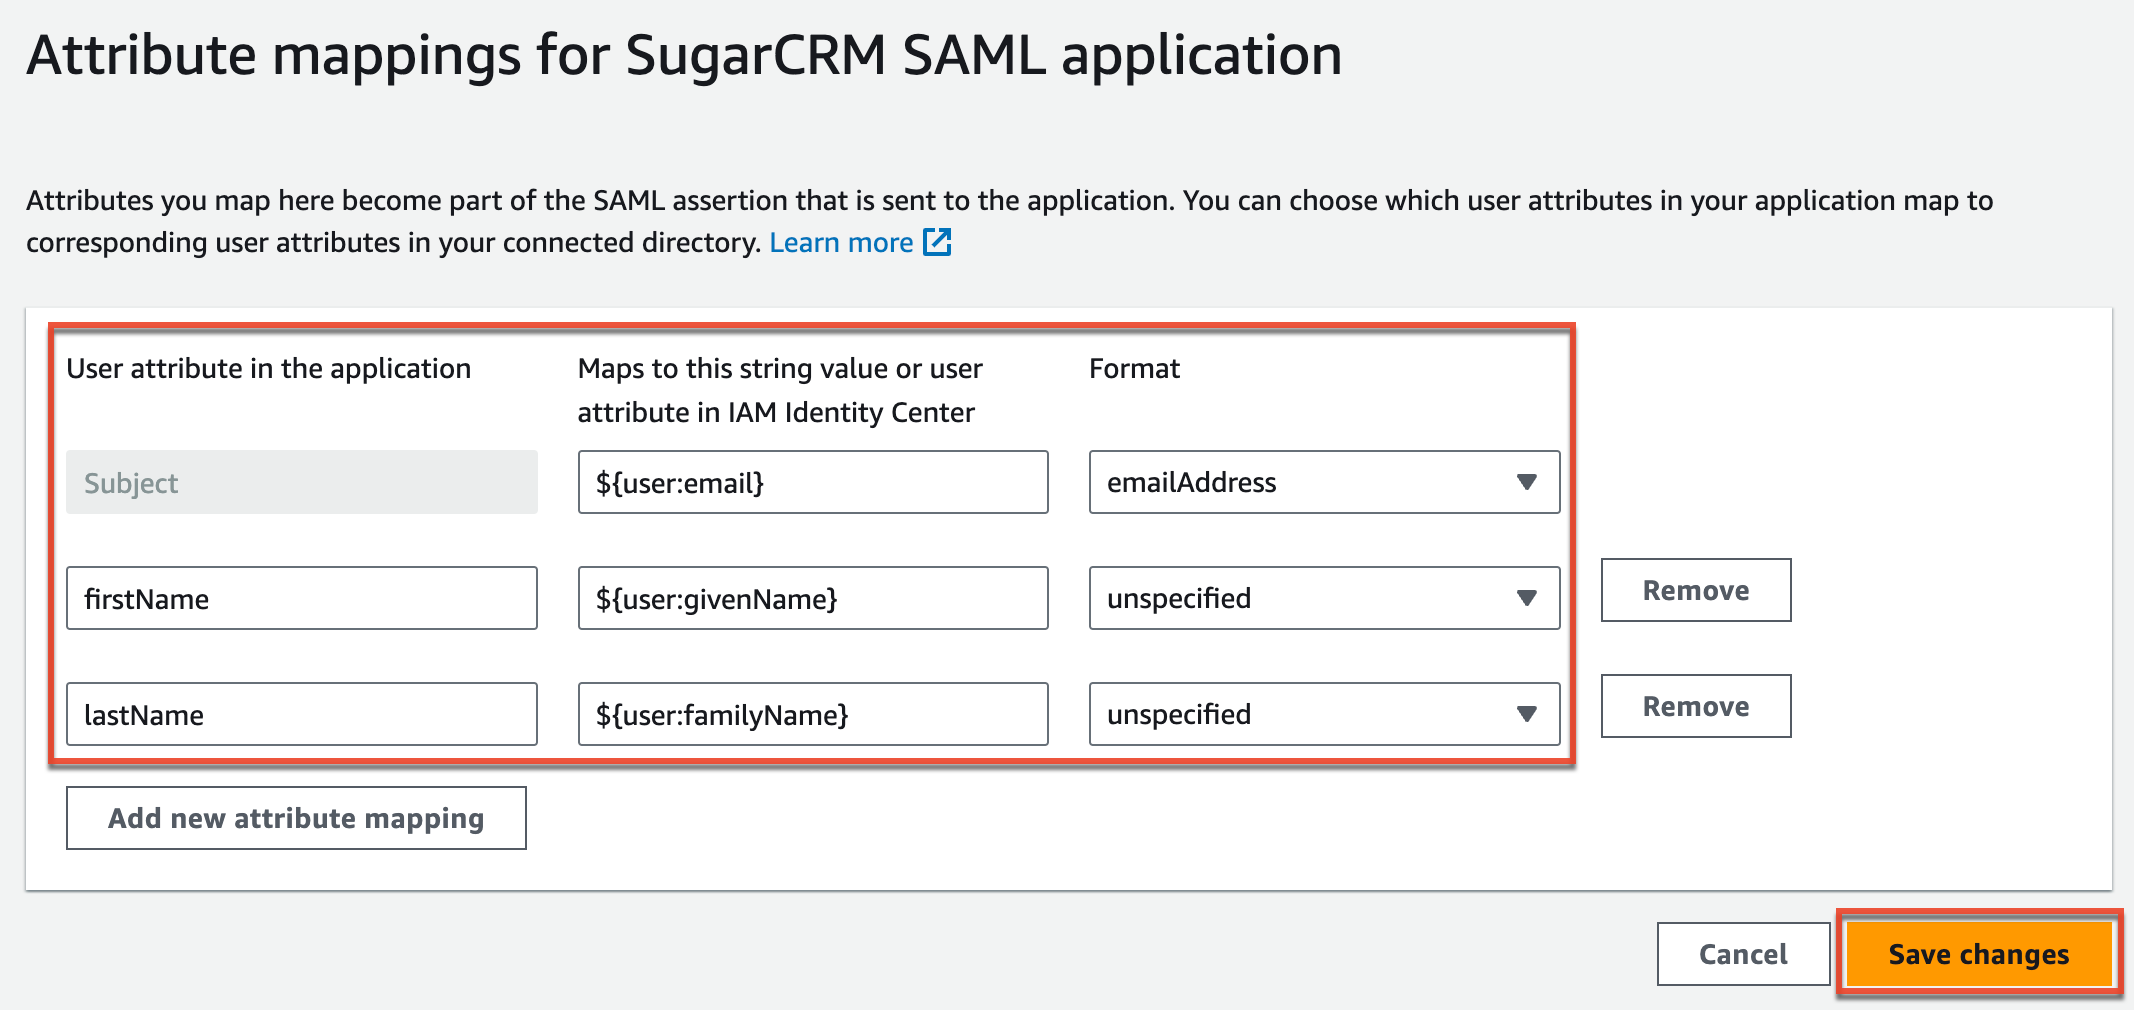
- Click the Save Changes button to save your settings.
Once the attribute mapping has been set up, you will need to assign the custom SAML 2.0 app to your users in AWS IAM Identity Center if you have not done so already. For more information on assigning the app to users, refer to the Configuring SSO With AWS Using SAML article.
Mapping Attributes for Azure
To set up the attribute mapping in Azure, you must have already created the SAML integration for SugarIdentity using the steps in the Configuring SSO With Azure Using SAML article. Once the SAML integration has been configured in Azure, use the following steps to set up the attribute mapping in your SugarCRM SAML application. Refer to the Customize Claims Issued in the SAML Token for Enterprise Applications article on the Microsoft website for information on editing attributes and claims.
- Click "Edit" in the Attributes & Claims panel of your SugarIdentity application page.
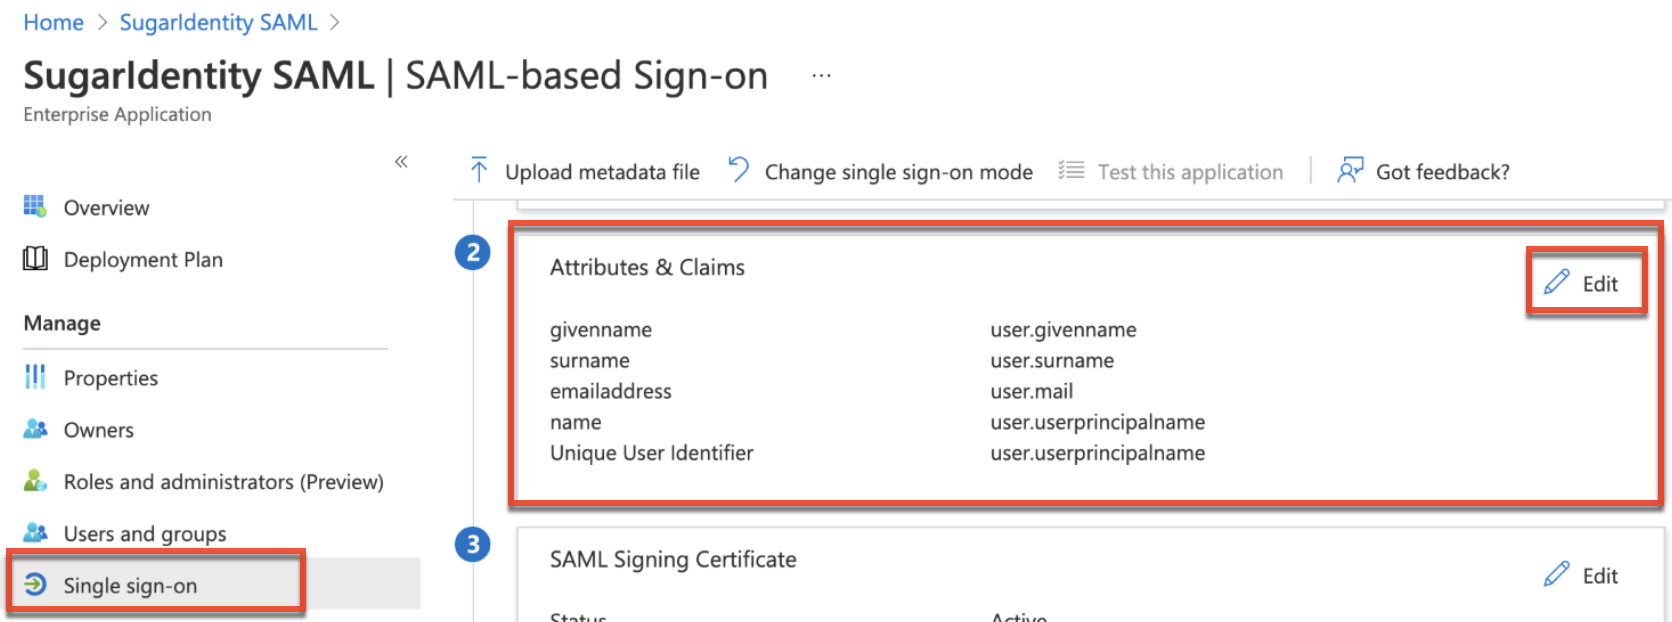
- Update the default claims (e.g., govenname, surname, emailaddress) on the Attributes & Claims page to match the claim name in the table below. For example, the givenname claim in Azure will need to be changed to "firstName" for the attribute to map correctly to SugarIdentity.
Note: When editing the claim, there could be cases where the Namespace field is auto-populated with a value (e.g., http://schemas.xmlsoap.org/...). Be sure to remove the value from this field to avoid unexpected errors.Claim Name Value firstName user.givenname lastName user.surname name user.userprincipalname email user.mail title user.jobtitle department user.department telephoneNumber user.telephonenumber streetAddress user.streetaddress city user.city state user.state zipCode user.postalcode 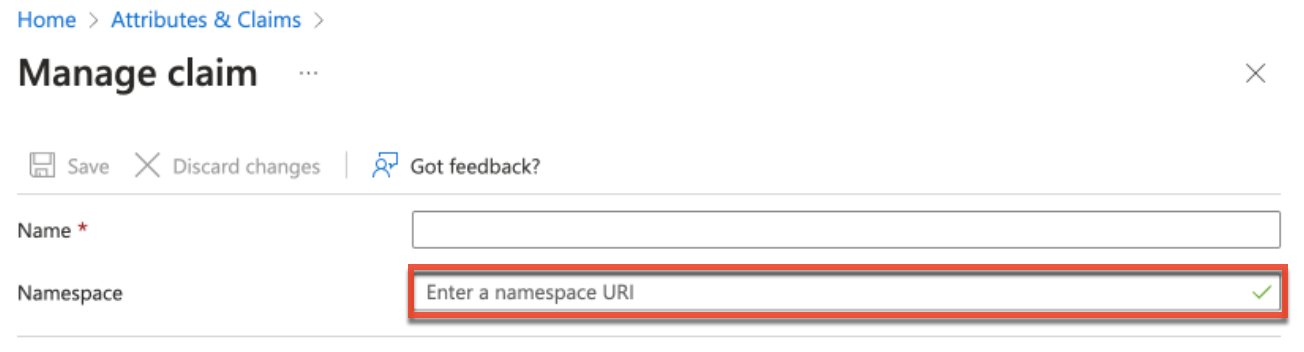
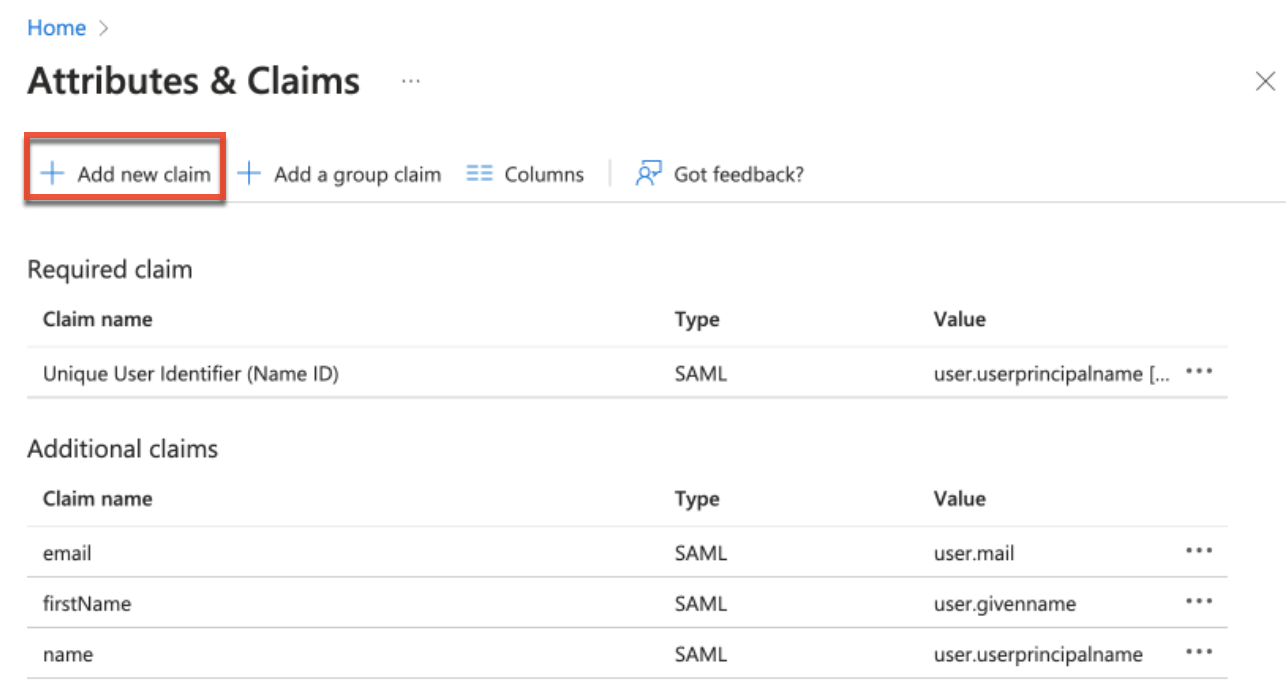
- Next, click the "Add new claim" button on the Attributes & Claims page to add the remaining claims (e.g., telephoneNumber, streetAddress) in step 2.
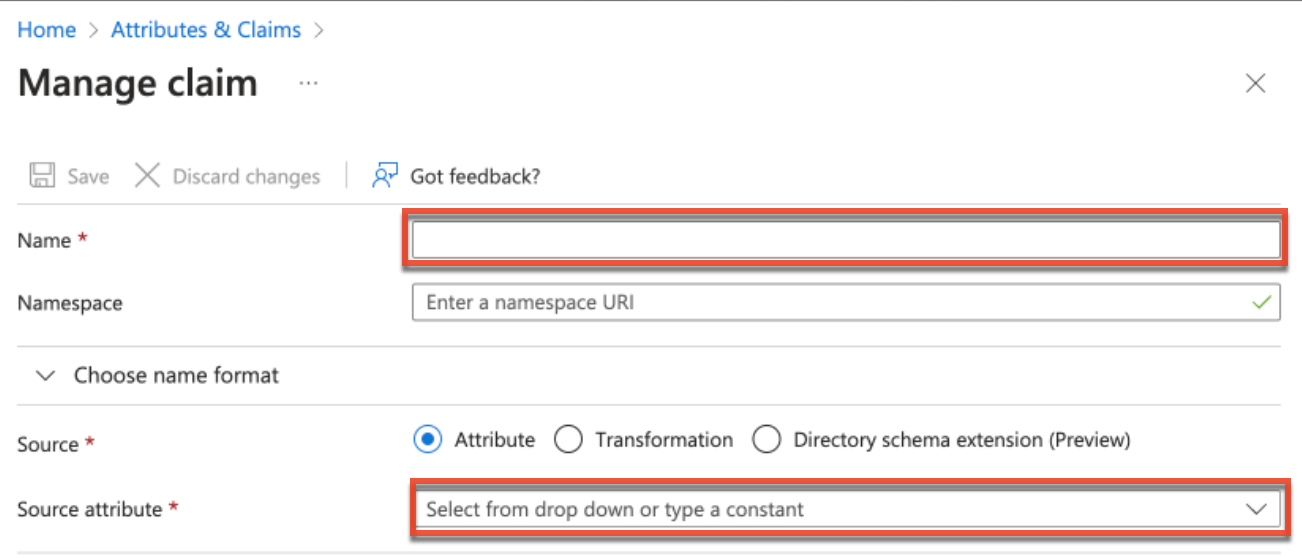
- On the Manage Claim form, enter the "Claim Name" (e.g., telephoneNumber) in the Name field then select the corresponding value (e.g.,user.telephonenumber) in the "Source attribute" field to map the attributes to SugarIdentity. Click "Save".
If not already, please be sure to assign the SugarCRM app to your Azure users to ensure that they are able to leverage the Azure login capabilities with Sugar. For more information on assigning the app to Azure users, refer to the Configuring SSO With Azure Using SAML article.