Configuring SSO With Auth0 Using OIDC
Overview
SugarIdentity allows single sign-on authentication (SSO) using Auth0 and OpenID Connect (OIDC) so that it can be integrated with a connected system using a single user ID and password. This article walks through configuring Auth0 to allow external authentication using OpenID Connect for instances that use SugarIdentity.
For more information about external authentication methods, refer to the following pages:
Prerequisites
- Your organization must have an active Auth0 account. For information on setting up an Auth0 account for your organization, please refer to their website at https://auth0.com/.
- Your SugarIdentity users should be users in your organization's Auth0 account.
- You must be familiar with Auth0 and how to set up the SSO configurations that meet your organization's needs.
- You must be a Sugar administrator to configure the OIDC settings in SugarIdentity.
Steps to Complete
Configuring Auth0 With SugarIdentity
Creating OIDC Application in Auth0
Use the following steps to create the OIDC application in Auth0 and obtain the necessary credentials to configure OIDC in SugarIdentity:
- Navigate to https://auth0.com/ in your web browser and log in.
- Click "Applications" on the left side menu and click the "+ Create Application" button.
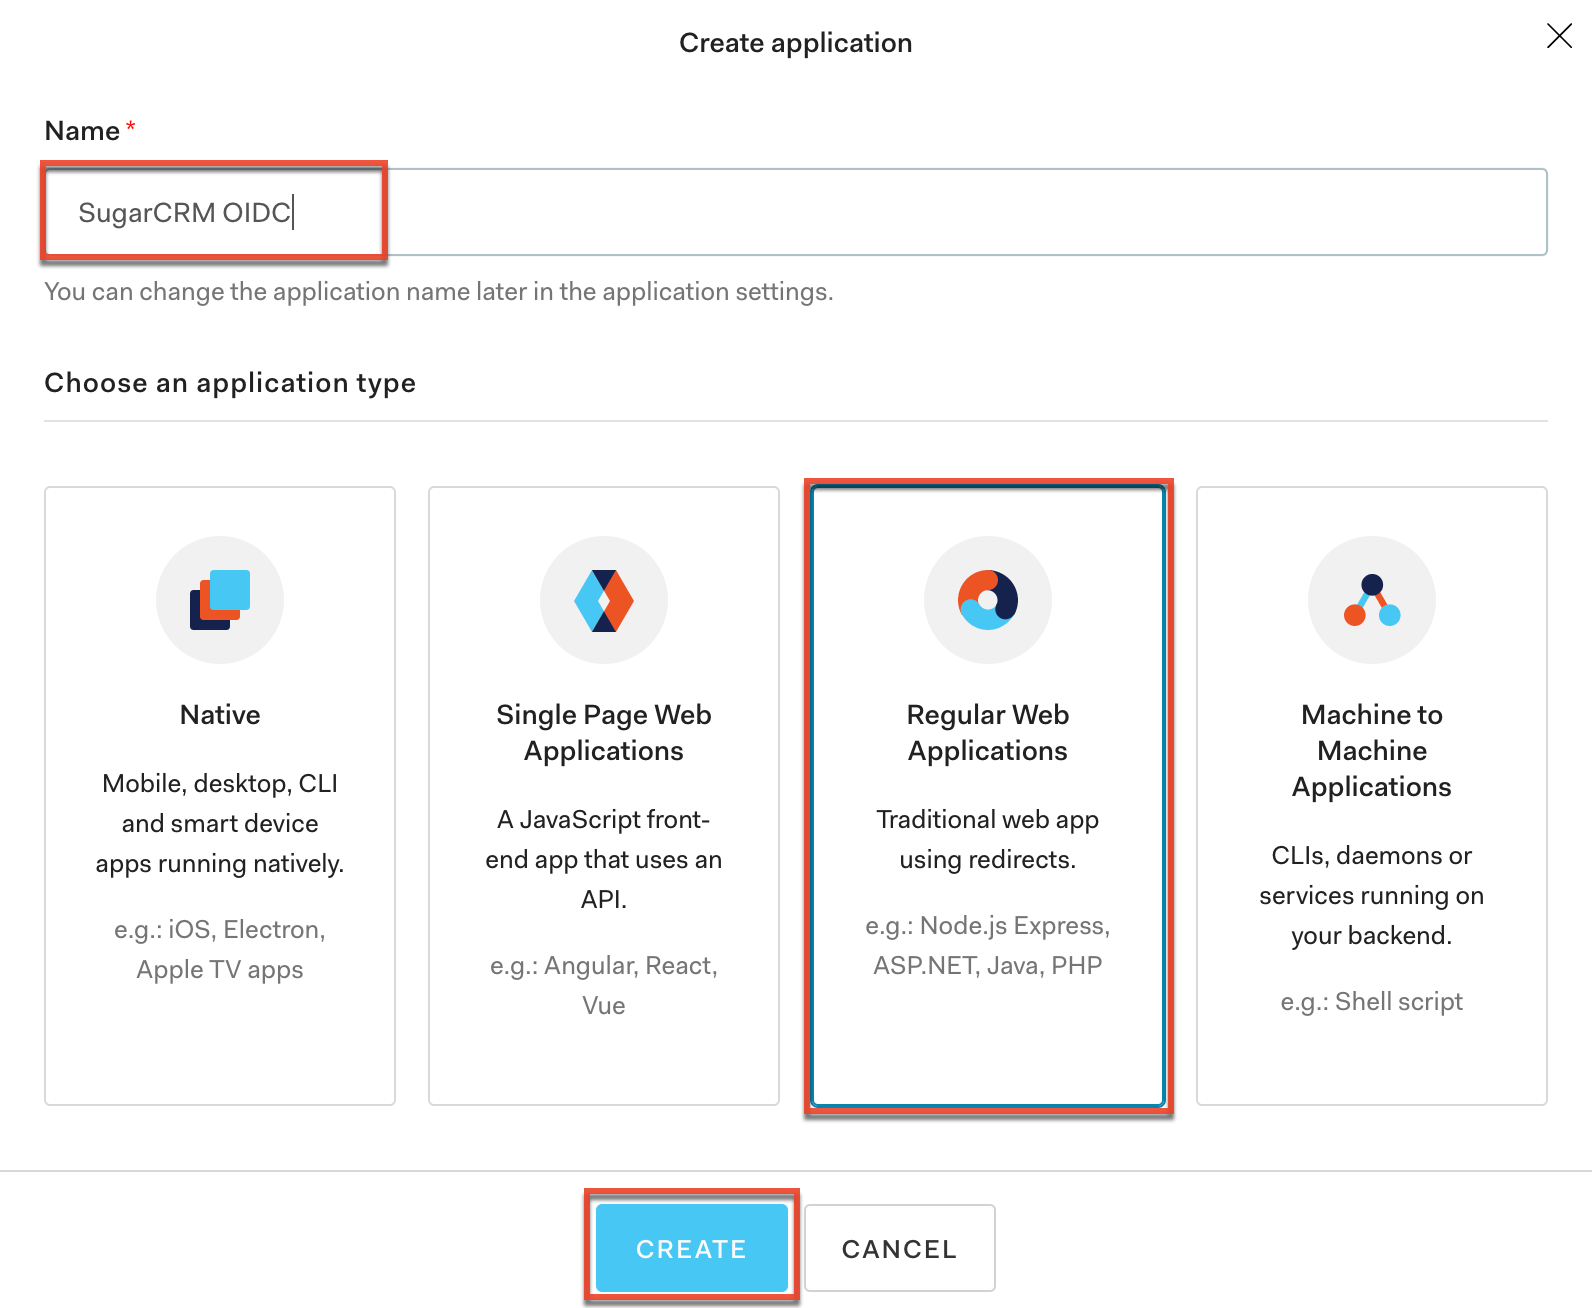
- In the Create Application pop-up window, enter an application name of your choice (e.g., SugarCRM OIDC) and select "Regular Web Applications". Click "Create".
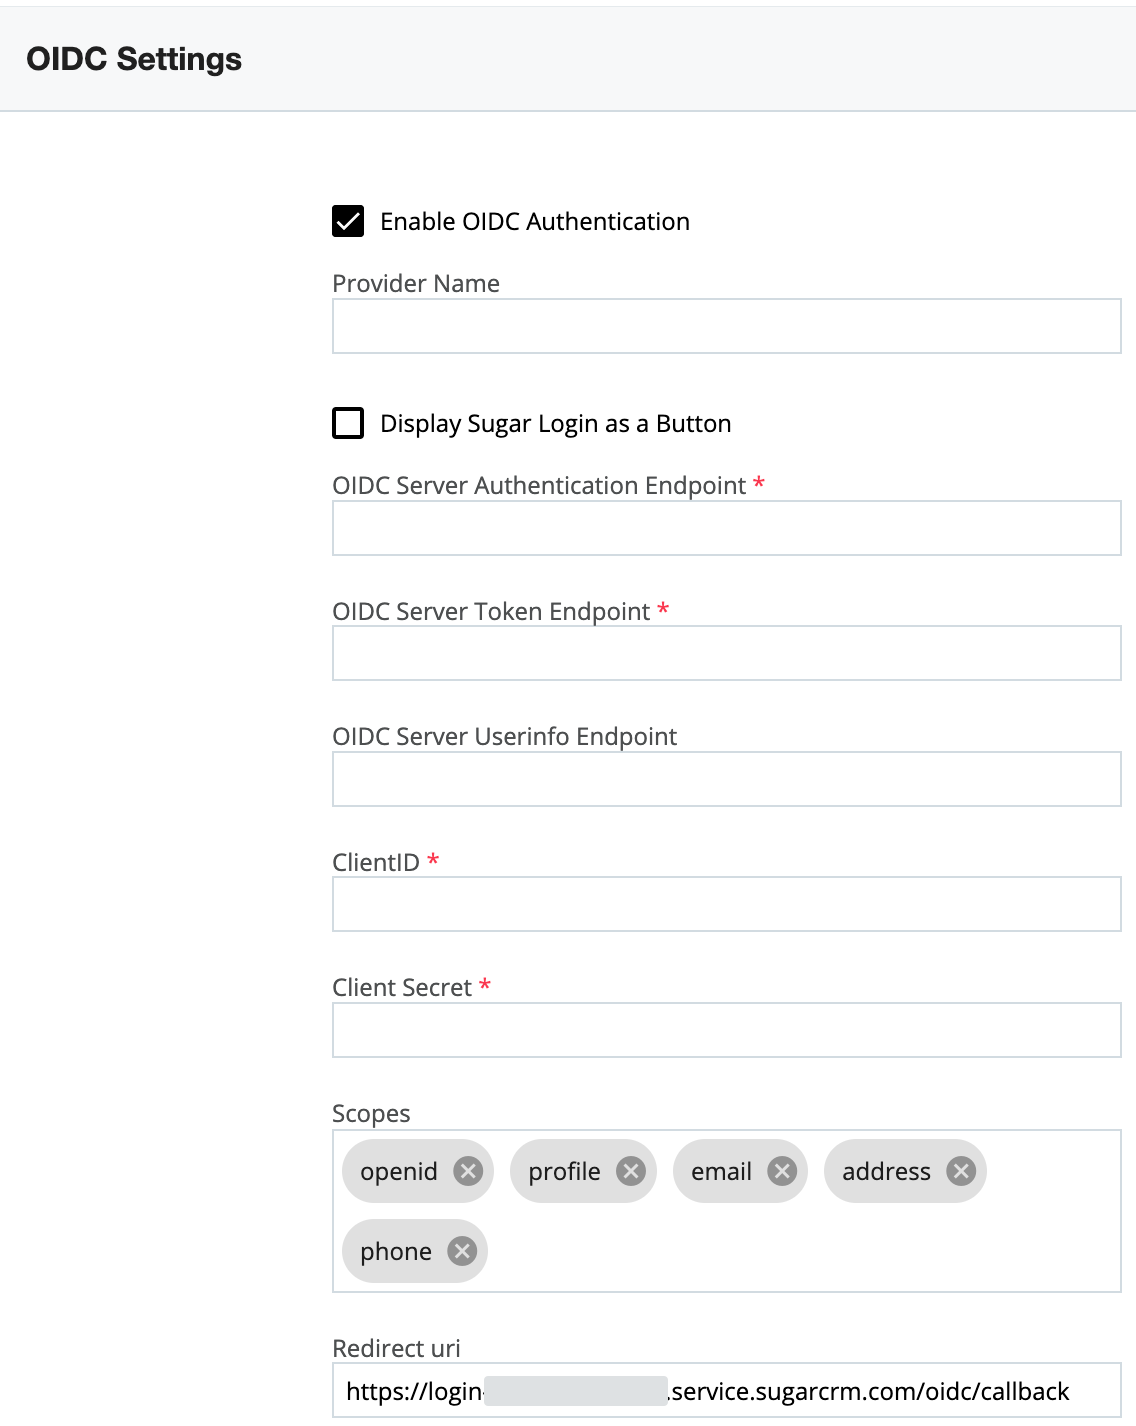
- In a new browser tab, access SugarIdentity, click "OIDC Settings" on the home page, then select the "Enable OIDC Authentication" option on the OIDC Settings page. Copy the Redirect URI value as this is required to complete the next step.
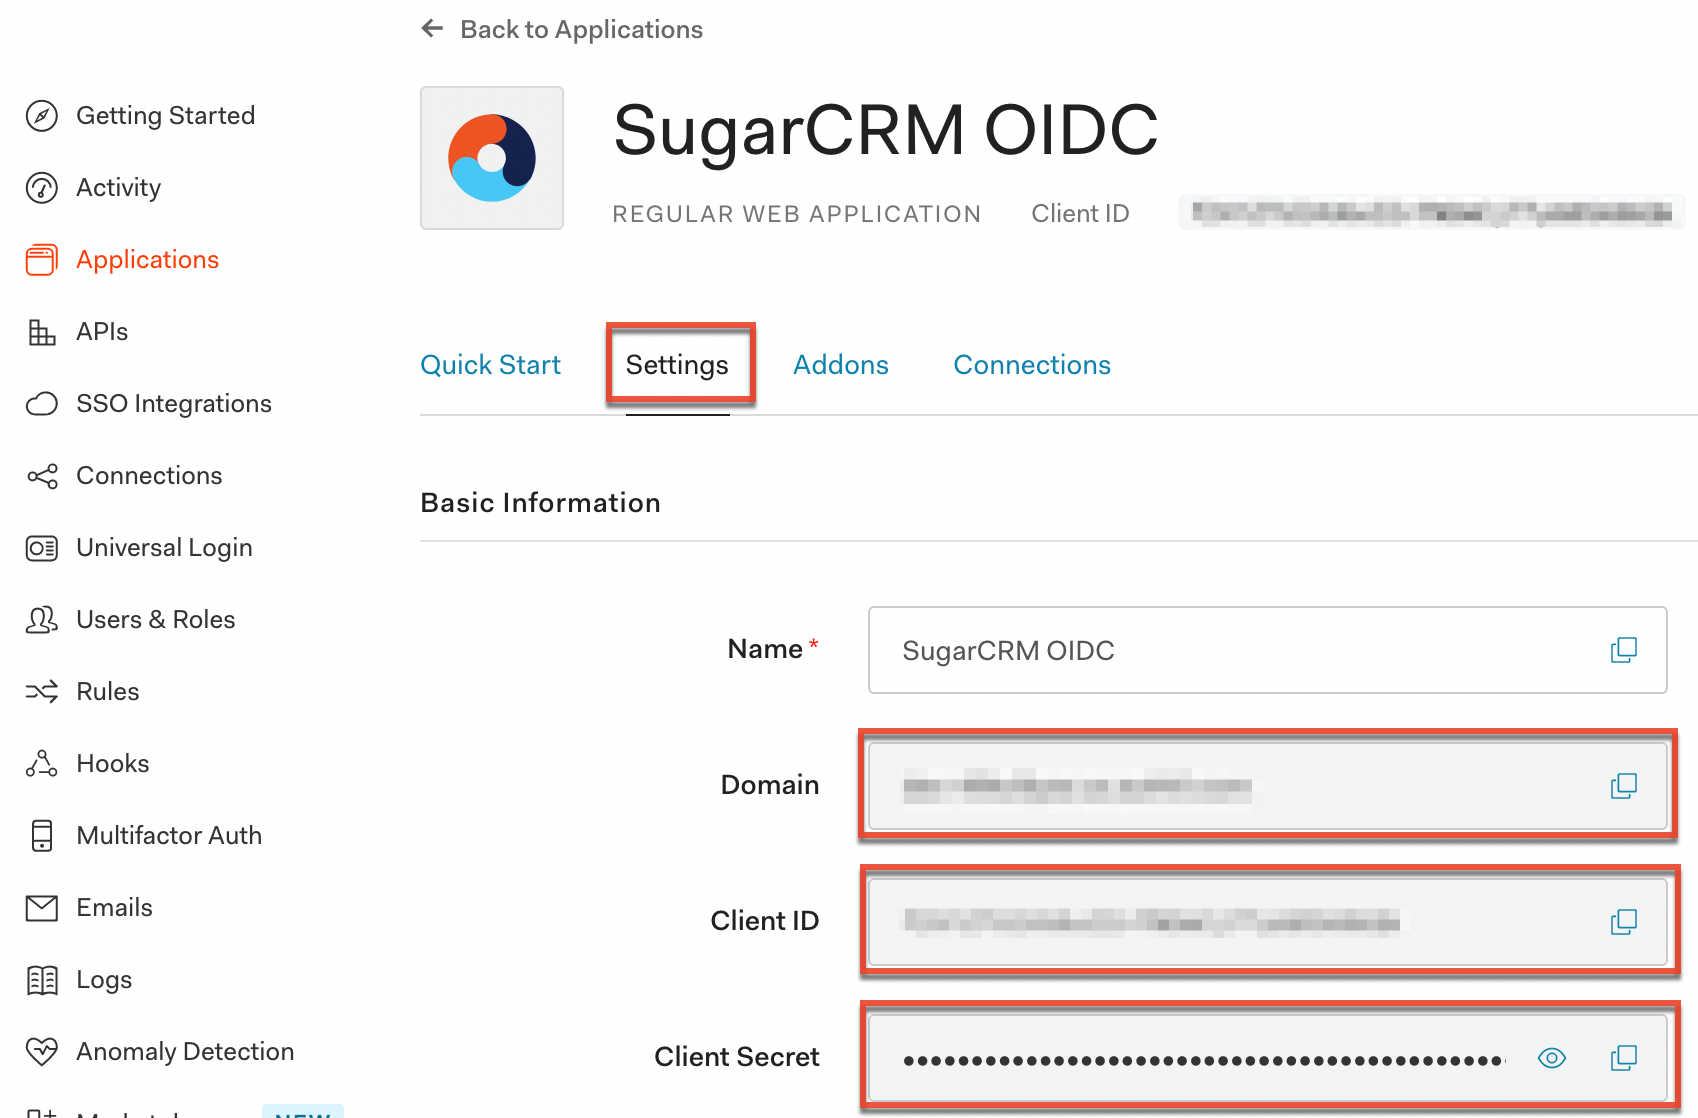
- Navigate back to your new SugarCRM applications page in Auth0 and click the Settings tab. Paste the Redirect URI value from step 4 into the Allowed Callback URLs field. Click "Save Changes".
- On your new SugarCRM applications page, record the Client ID and Client Secret values as it is required when configuring OIDC in SugarIdentity.
- Finally, record the Domain value from the SugarCRM applications page as it is required when configuring OIDC in SugarIdentity.
Once you have obtained the Client ID, Client Secret, and Domain information, navigate back to SugarIdentity to configure the OIDC authentication and complete the fields as follows:
Note: Replace {Domain} with the Domain value obtained in step 7 above.
- OIDC Server Authorization Endpoint: Enter https://{Domain}/authorize.
- OIDC Server Token Endpoint: Enter https://{Domain}/oauth/token.
- OIDC Server Userinfo Endpoint: Enter https://{Domain}/userinfo.
- Client ID: Enter the Client ID obtained in step 6 above.
- Client Secret: Enter the Client Secret obtained in step 6 above.
Application
Once you have configured Auth0 and completed the OIDC configuration in SugarIdentity, going forward, when a user that is provisioned in SugarIdentity navigates to Sugar they will be redirected to Auth0's login page to enter their Auth0 credentials. Once the user's login credentials are authenticated in Auth0, they will be directed back to their Sugar instance and be automatically logged in. Please refer to the SugarIdentity Guide for best practices on creating users in SugarIdentity.