Capturing Recipient Preferences From Your Preference Lists
Overview
In marketing, understanding your audience's preferences is crucial. In this article, preference lists and custom reports are used to help you understand the precise moment when contacts engage or disengage with your content.
By creating a personalized view and harnessing the power of custom reports, you gain insights that will elevate your communication strategy and provide a roadmap for action. You can use this information to alter your approach based on when contacts opt in or out. You could adjust your content, refine timing, or enhance personalization. The data from this custom report is your guide to making your communication strategy dynamic and effective.
This article originated from a discussion in SugarClub.
Prerequisites
Any Sugar Market user should be able to follow this article. If you cannot complete any actions, please contact your Sugar Market administrator for additional access.
You must have at least one preference list. If you do not have one, you can create one. To do this, open the menu and navigate to Lists > Preference Lists, and create a new preference list. For more information, please see the Preference Lists documentation.
Creating the Custom View and Custom Report
Use the steps below to first create the custom view and then the custom report.
Creating the Custom View
To create a custom view, click the Analytics section in the navigation bar. Then, click "Views", and lastly click the gray New button in the upper right corner to create a new view: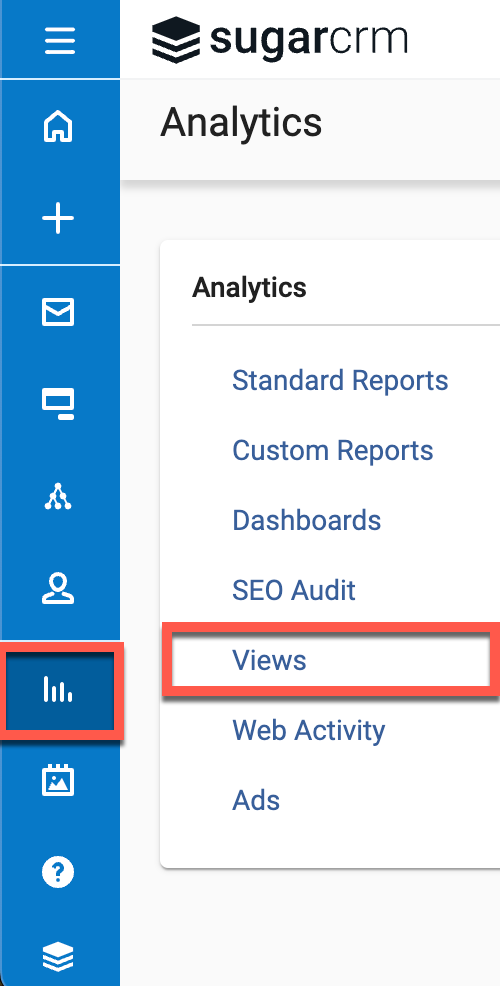
For this type of view, join the following tables together:
- Contacts
- Recipient
- PreferenceListEntry
- PreferenceListOptinHistory
- PreferenceList
The created view should appear like the following screenshot: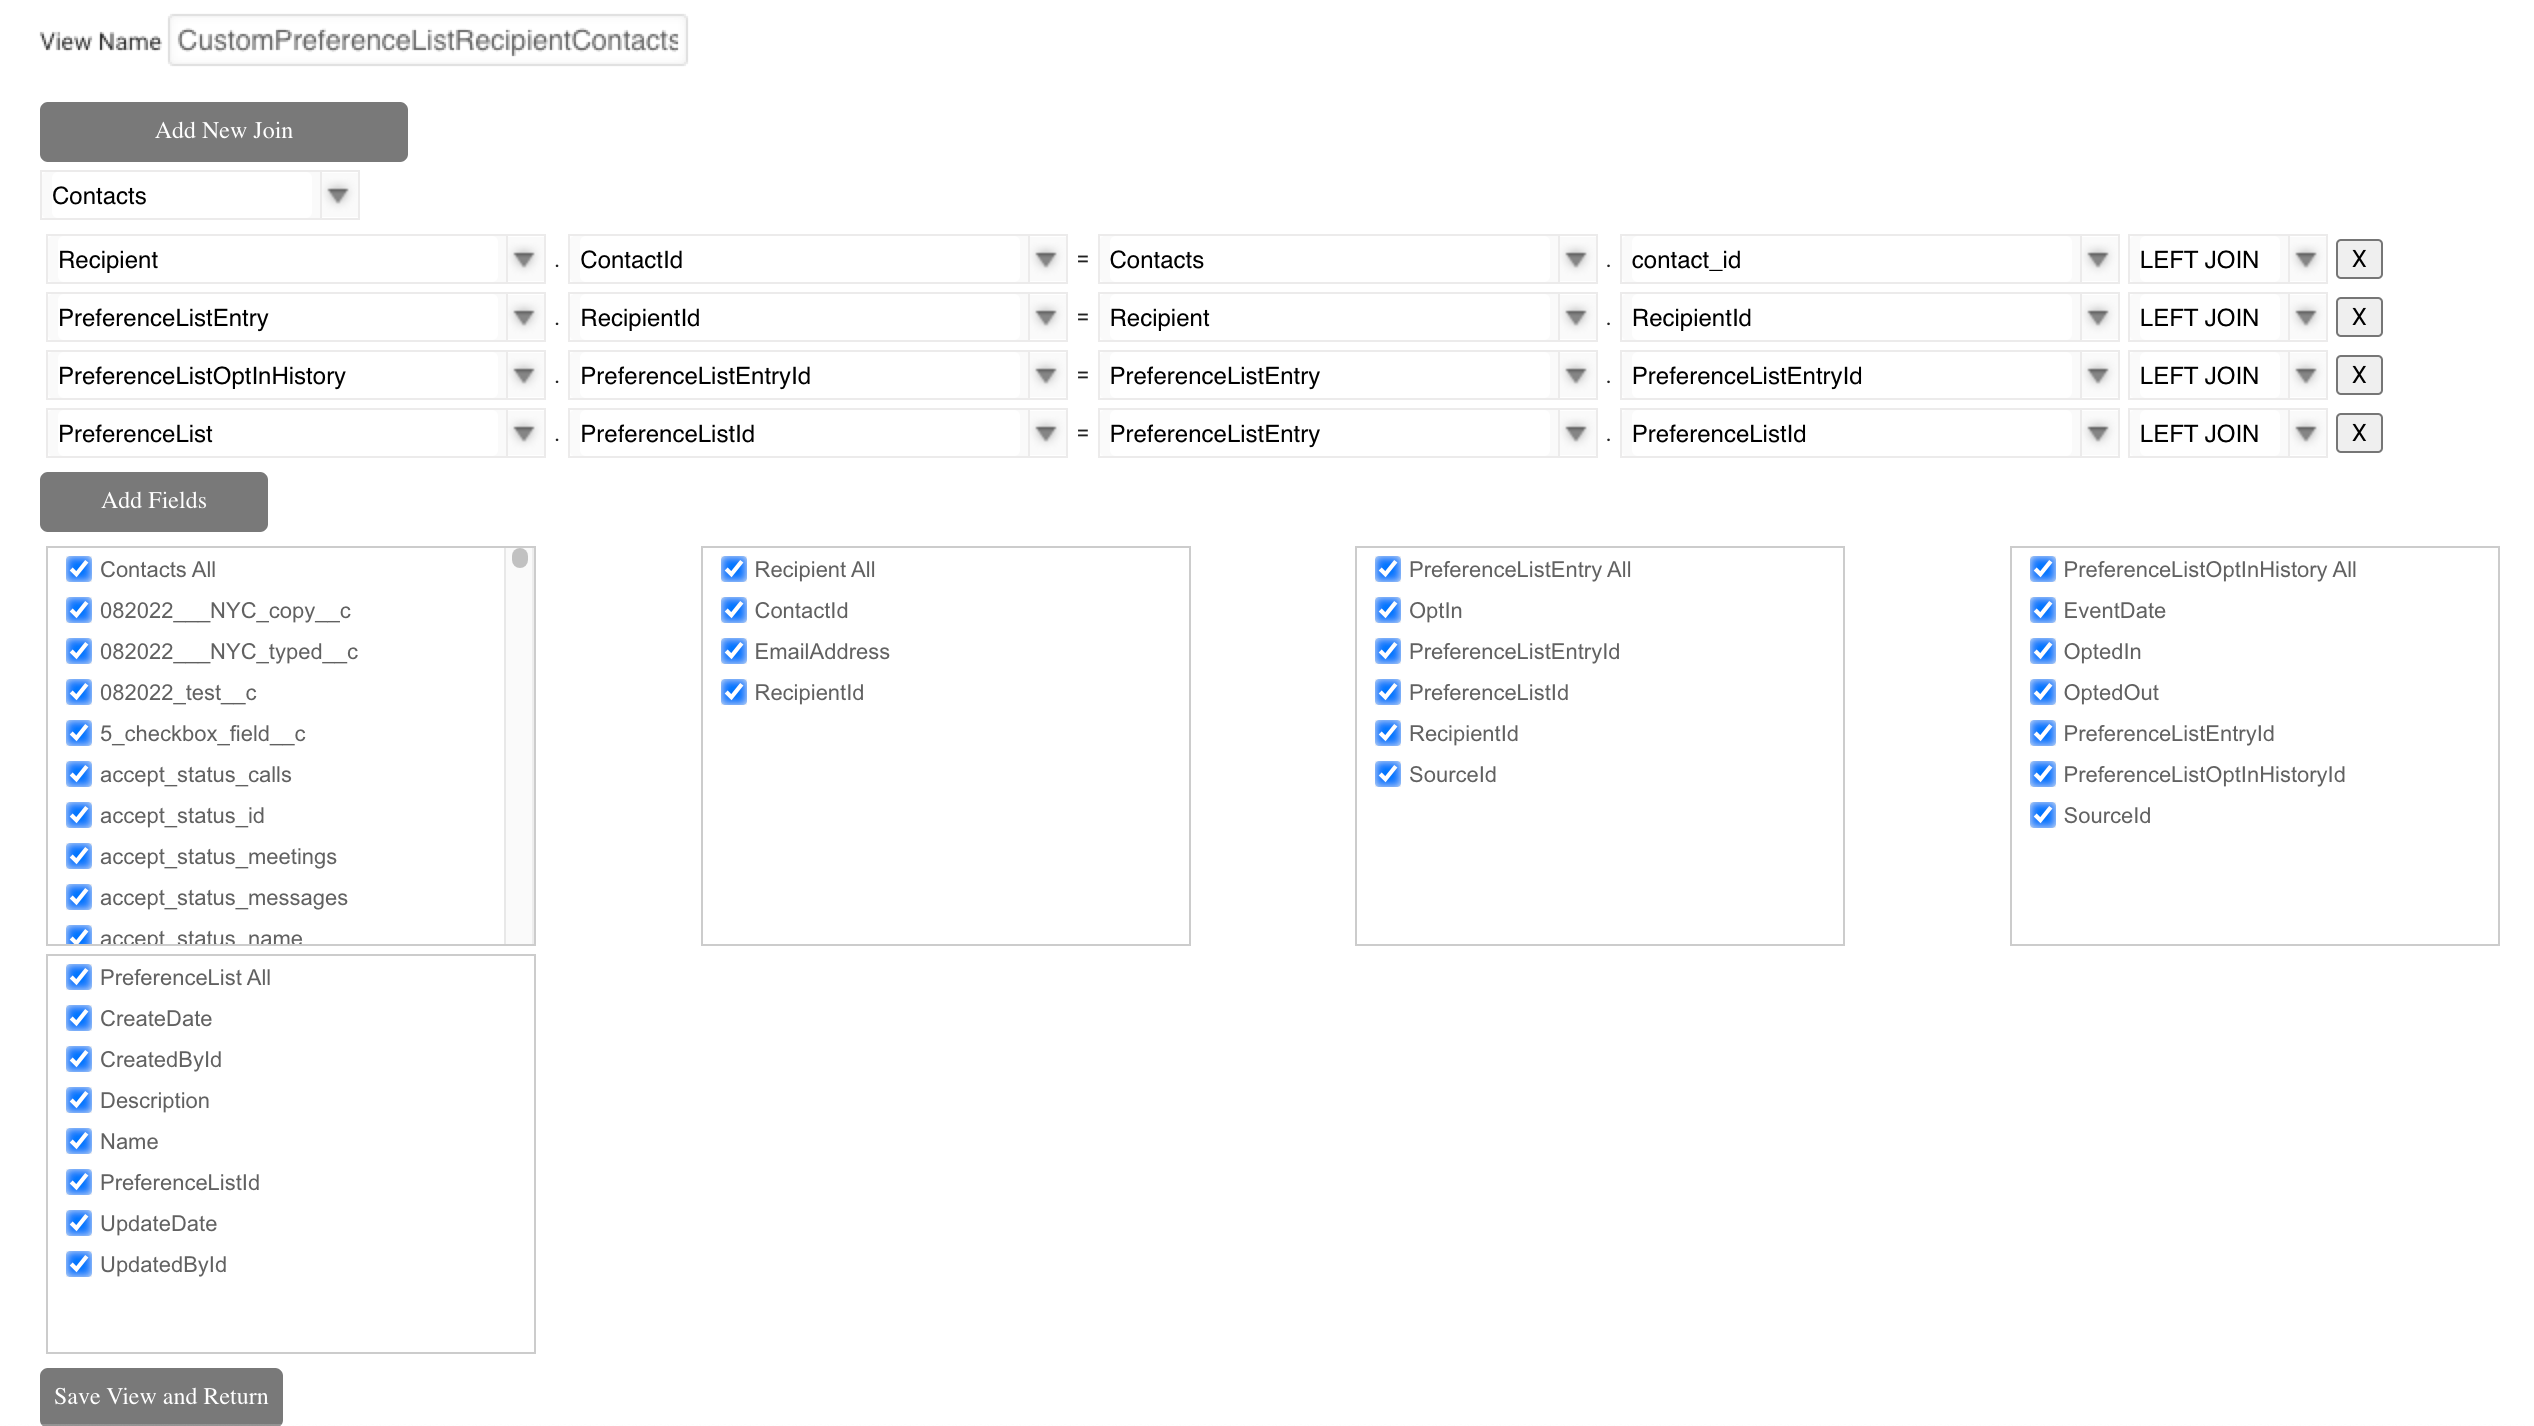
After the view is created, click "Save View and Return". For more information on views, please see the Report Views documentation.
Creating the Custom Report
With the view created, the custom report can be built. Navigate to Analytics > Custom Reports, click the Create button in the upper right corner, and click "Advanced Report":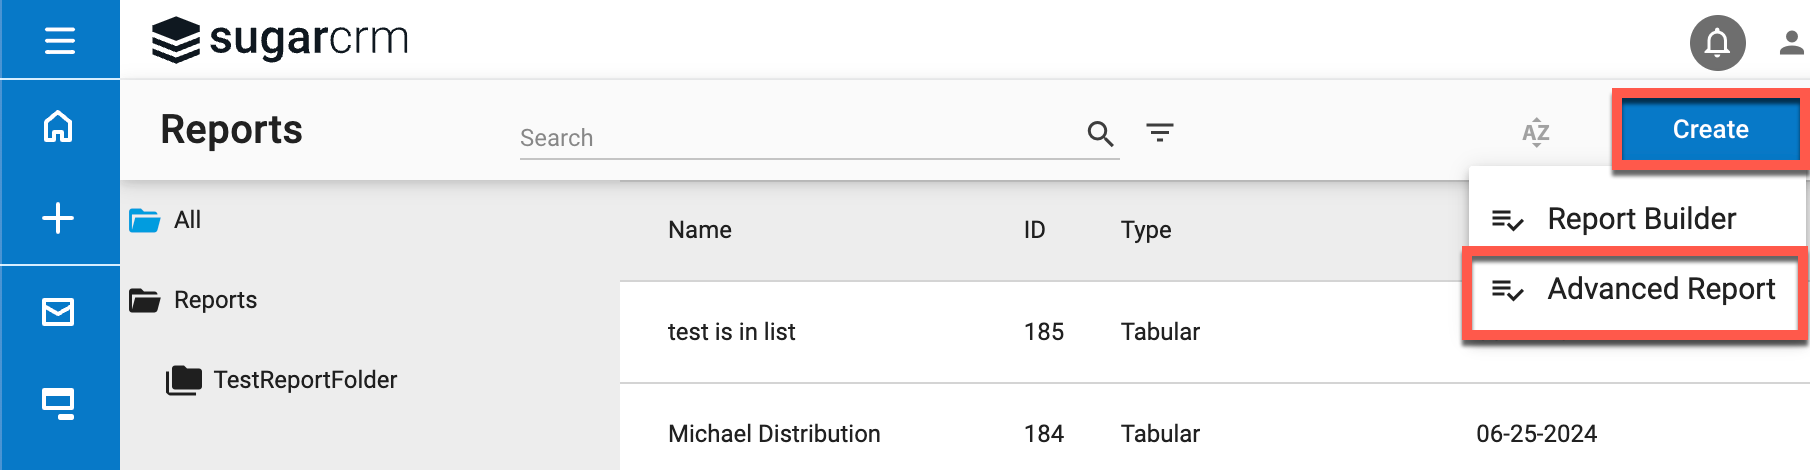
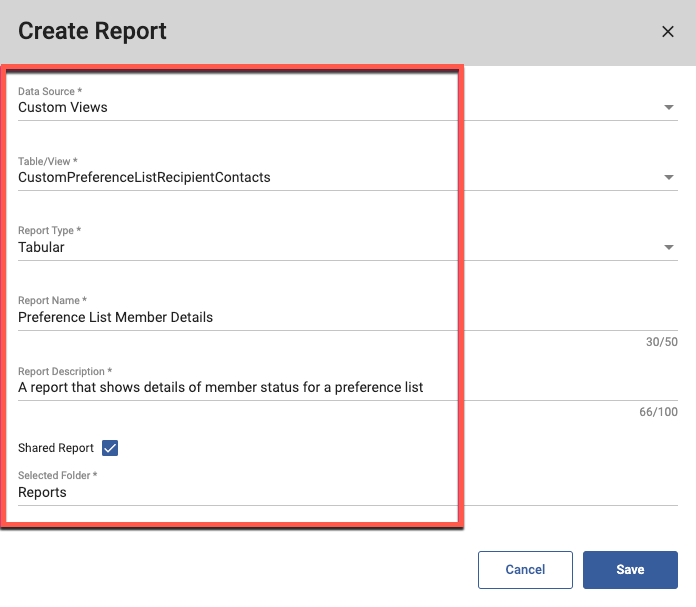
Enter the following and click "Save":
- Data Source: Choose "Custom Views" to select the previously created custom view.
- Table/View: Choose the name of your custom view (e.g., CustomPreferenceListRecipientContacts).
- Report Type: Choose "Tabular", as "Summary" will not provide the details needed.
- Report Name: Enter a name for the report (e.g., Preference List Member Details).
- Report Description: Enter anything you want here.
- Shared Report: Check this to share this report with other users.
- Select Folder: Select the folder to store this report in.
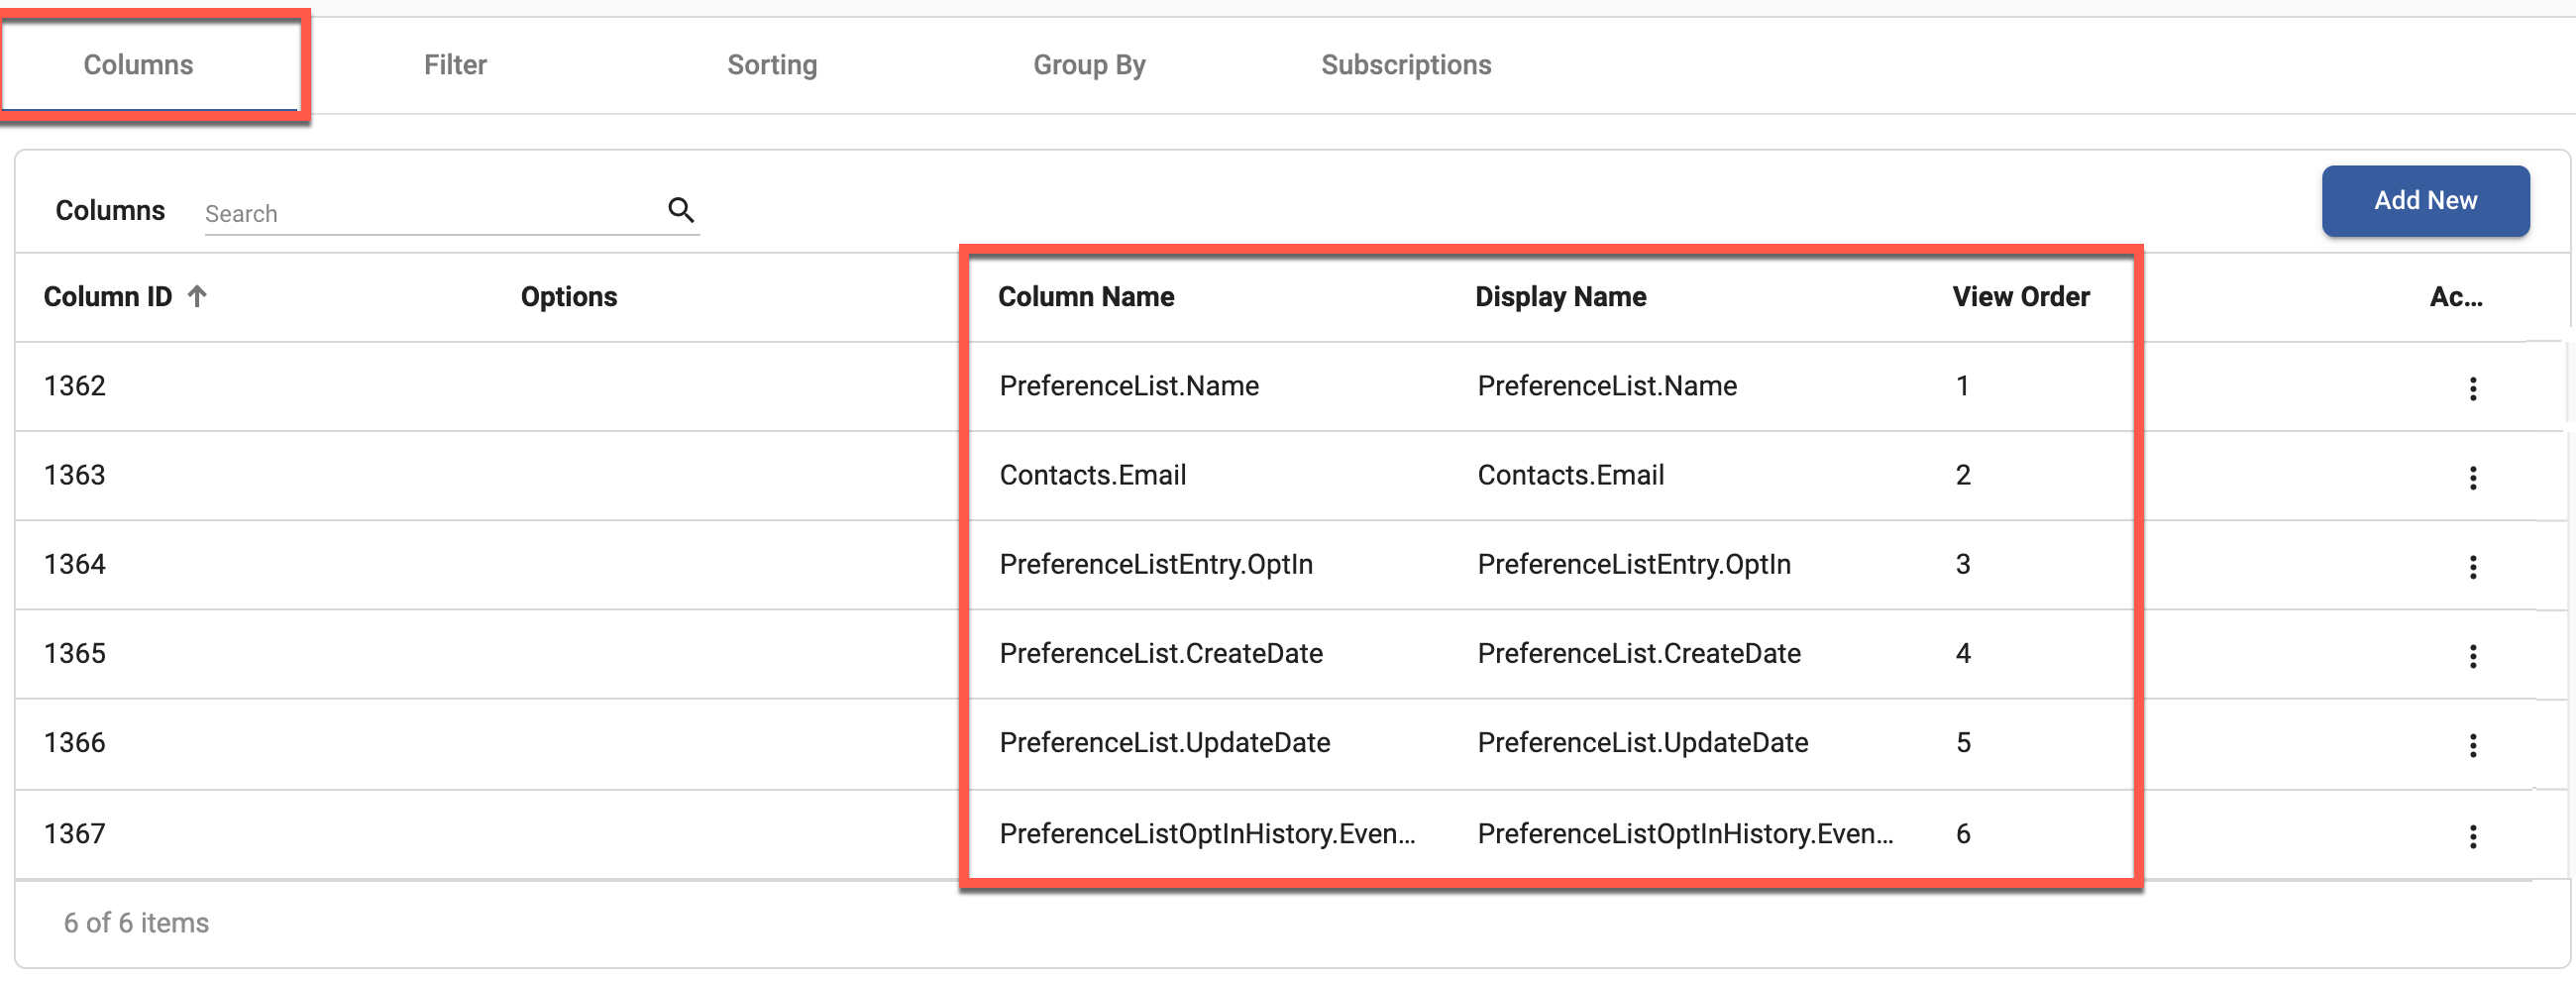
In the Columns tab, add the fields you want to see in the report by clicking the Add New button.
The fields that are added for this example are:
- PreferenceList.Name
- Contacts.Email
- PreferenceListEntry.Optin
- PreferenceList.CreateDate
- Preference.List.UpdateDate
- preferenceListOptInHistory.EventDate
You will need to create a filter where the preferenceListEntry.Optin field has a value of 1 or 0. This will ensure that you only see Contacts that have either opted in or out. 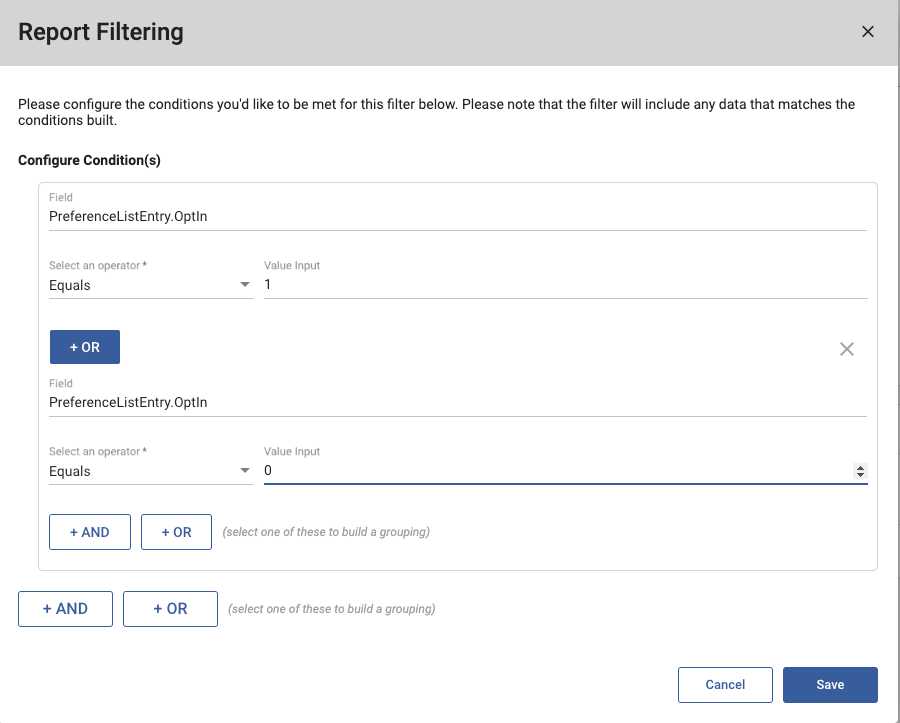
There are no filters on the preference list to show data across all preference lists. If you are interested in one specific preference list, you can add a filter of PreferenceList.PreferrenceListID > Equals > [ID of the preference list].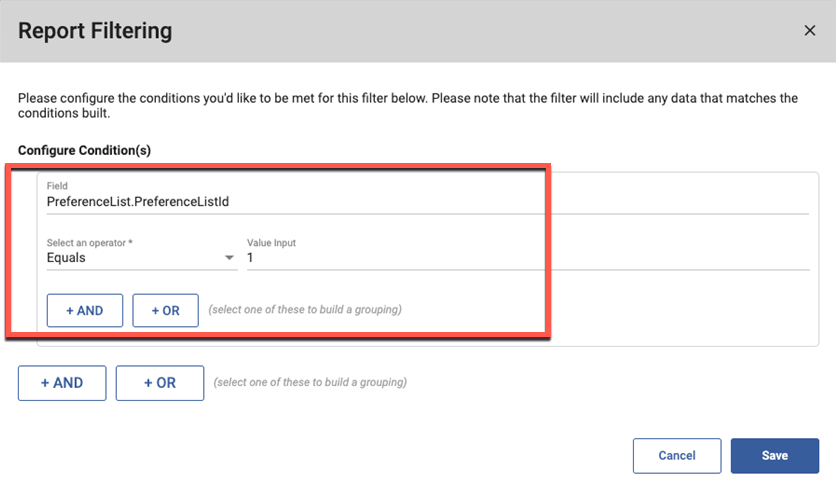
When you preview the report, it should look similar to this: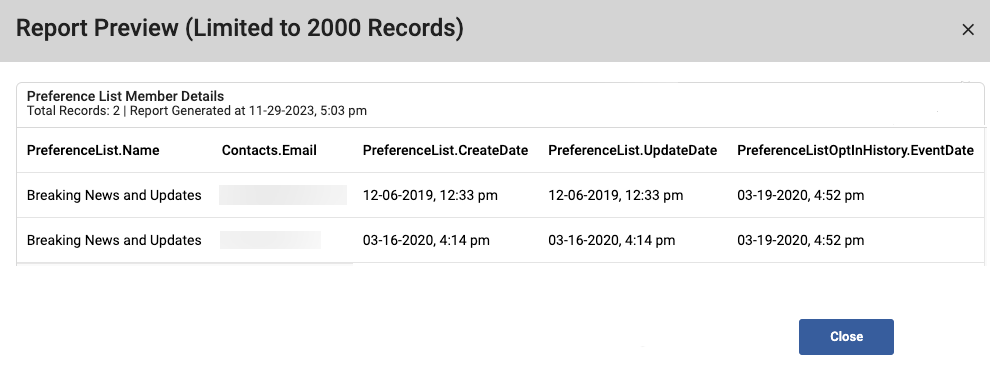
Please note the following in the results:
- PreferenceListEntry.Optin will say true if opted in, and false if not.
- CreateDate will give you the date when that contact or lead was added to the preference list.
- UpdateDate will provide the last time this entry was updated in the list.
To learn more about custom report creation in Sugar Market, please see the Reporting documentation.