Preview and Test your Campaign
Sugar Market offers three unique email testing options:
- Preview Mode: Launch a modal that will display your e mail as it would render for desktop or mobile clients and devices. This preview is recommended before testing your campaign.
- Send Test Email: Send yourself or other stakeholders a test of your email. Take the opportunity to evaluate how your email renders on your email client and mobile devices. Make sure to confirm that the merge fields are populating correctly.
- Advanced Testing: This feature is powered by Litmus and the results are available in the 'Test Center'. Advance testing will render your email in 38 unique email clients and devices. Review the most popular clients and devices first, and then secondary targets that may only make up a small percentage of your recipients. Give priority to the more popular email clients and devices.
Note: Although we would love to see our email render perfectly across all clients and devices, this will likely not occur without some distortion. Various clients use different methods to render content. For example, responsive design is not compatible with all clients.
Step 1: Preview Your Campaign
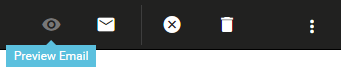
- From the 'Options' menu, select 'Preview Email' to prompt the preview modal.
- Evaluate the desktop and mobile renderings of your campaign. Check that the components are ordered correctly on the mobile device and make adjustments as needed. Remember, over 50% of your recipients are likely to open this campaign from a mobile device.
Step 2: Send Test Email
- Select 'Send Test Email' from the same drop-down menu.
- Designate either your A or B campaign if split testing.
- Select 'Link Encoding' and designate whether you would like to send the test with or without link tracking.
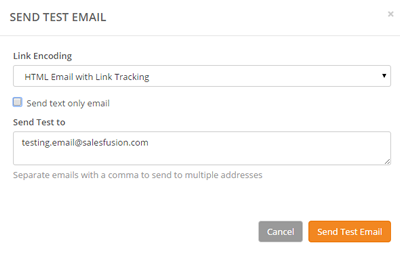
- Enter in the emails of the individuals that you would like to send the test email to. Make sure to separate each email address by a comma.
- Send Test Email - An alert will notify you that the email has been sent. Wait patiently for 5 -10 minutes for your email client to receive the test.
Step 3: Advanced Testing
- Select 'Advanced Testing' (powered by Litmus).
- Read the disclaimer, enter in your email address and select 'I Agree'. An alert will notify you that the email has been submitted to the Test Center and will be available in 5 -10 minutes.
- Go to the Test Center by clicking Analyze> Campaigns> Advanced Testing Previews.
- Select 'Actions and Preview' from the drop-down menu. This will prompt the 'Testing Results' where you can review 38 email preview images.
- Select the 'Results' link under each thumbnail to review your preview options.
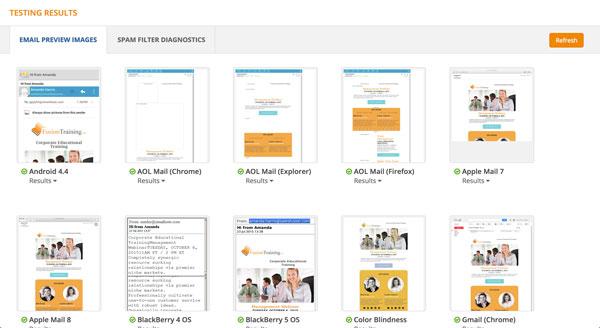
- Select Spam Filter Diagnostics to review any potential spam errors that have been surfaced by the Advanced Test.
If the email passes the spam diagnostics and you are satisfied with the preview image result, deploy your email campaign with confidence.