Creating an Email Bounce Report
Overview
Bounce reports provide insight into the emails that were not deliverable.
Steps to Complete
The process for creating bounce reports differs for soft bounces and hard bounces, as described below. Refer to the Bounce Codes page for bounce code categorization and descriptions.
Creating Soft Bounce Reports
- In the navigation bar, click the Analytics module.

- Click "Custom Reports".
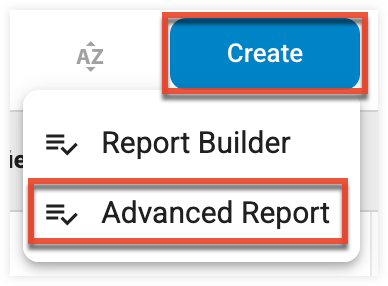
- On the Reports page, click the Create button in the toolbar.
- Click "Advanced Report" from the dropdown menu.
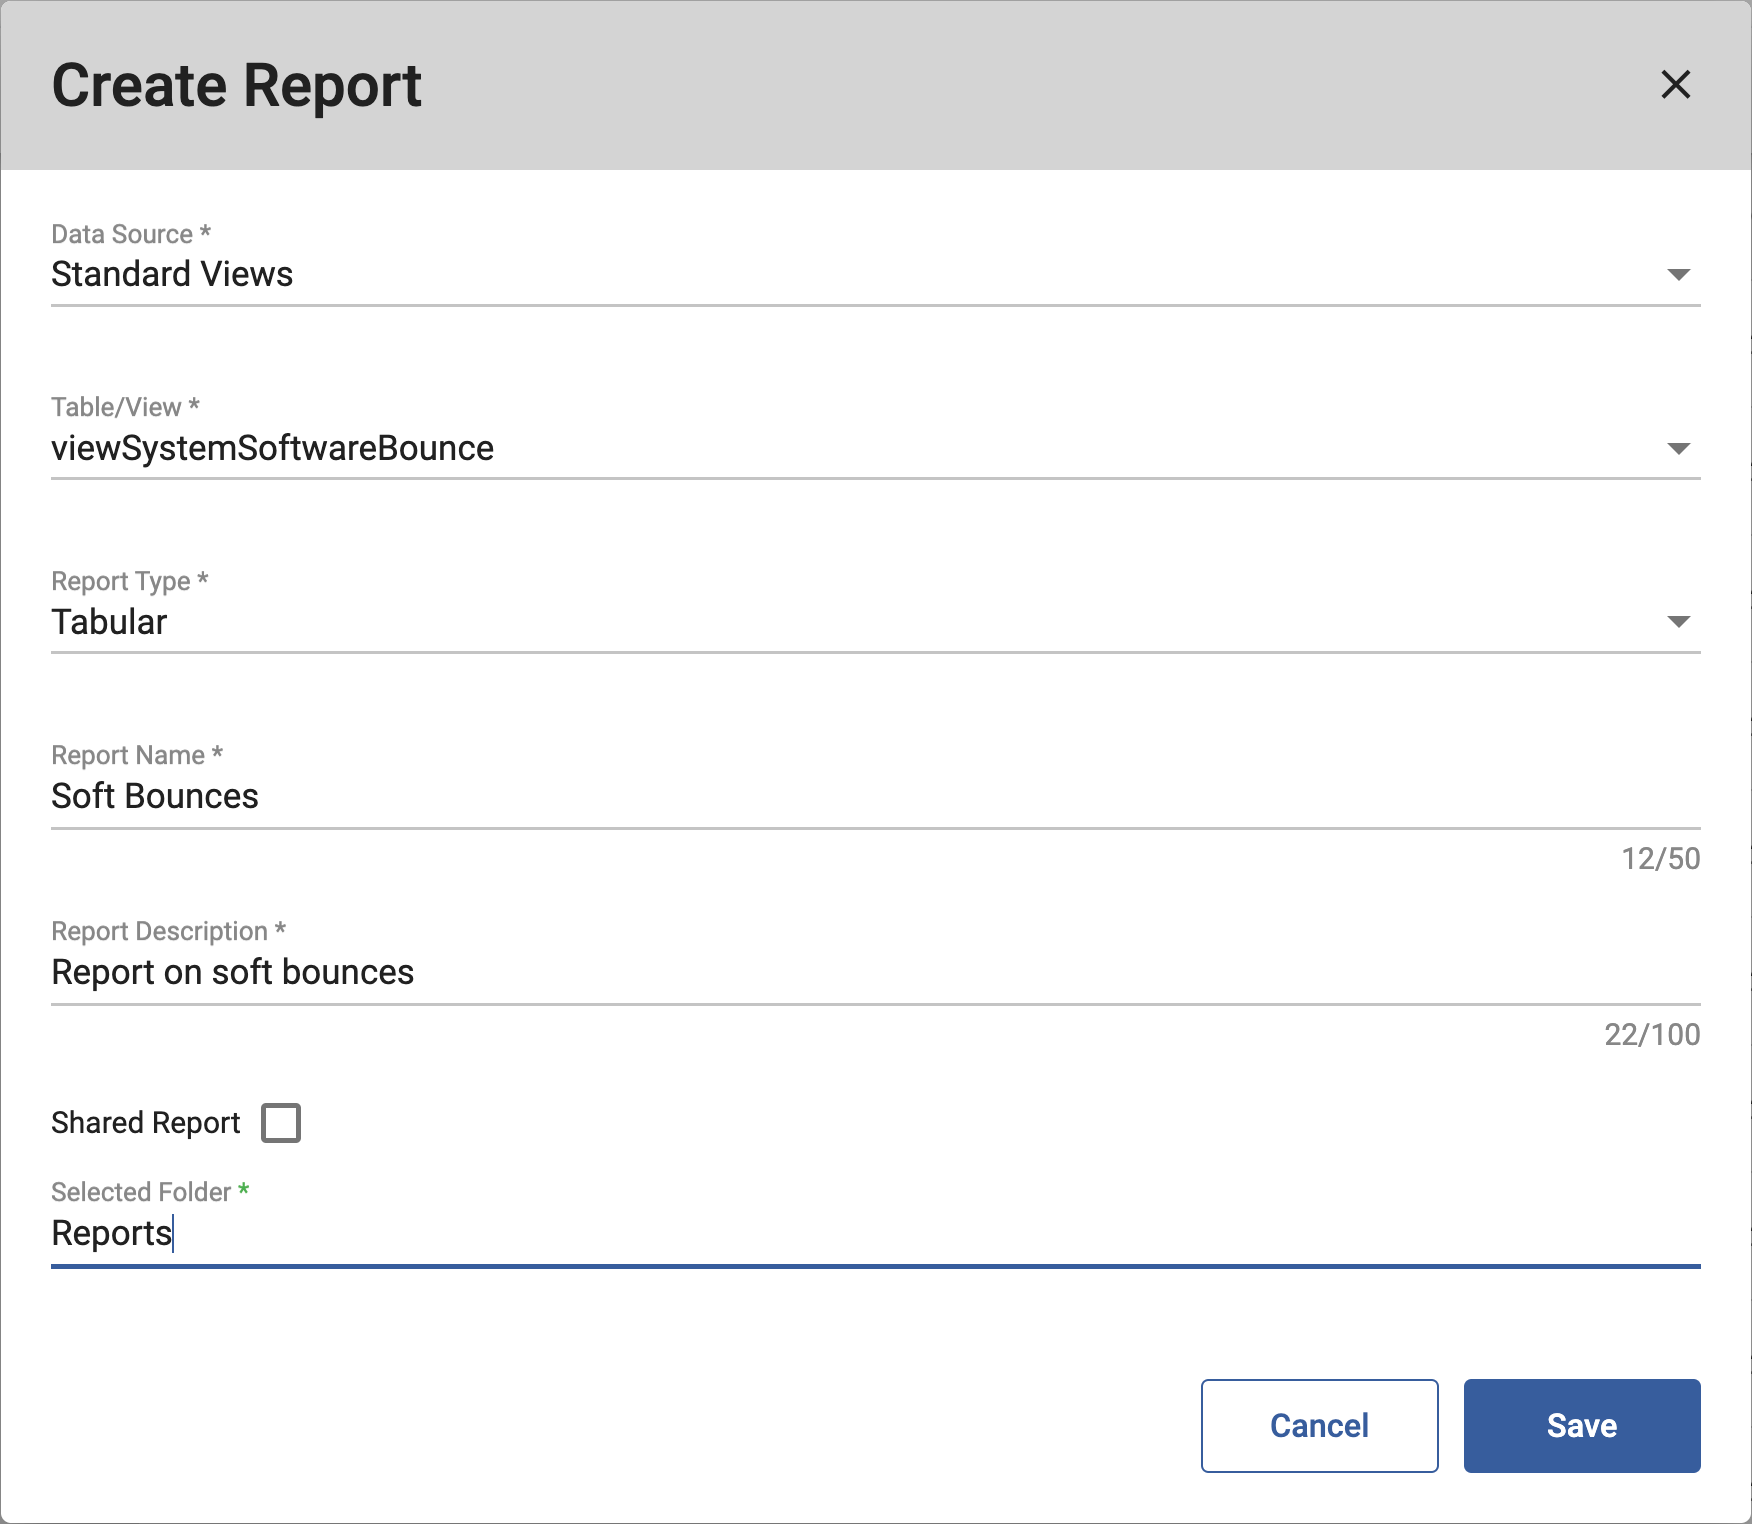
- Create the report using the following attributes:
- Data Source: Standard Views
- Table/View: viewSystemSoftwareBounce
- Report Type: Tabular
- Report Name: Your preferred report name
- Report Description: Your preferred report description
- Selected Folder: Which folder you would like your report saved in
- From the Report Editor page, access the Columns tab.
- Click the Add New button.

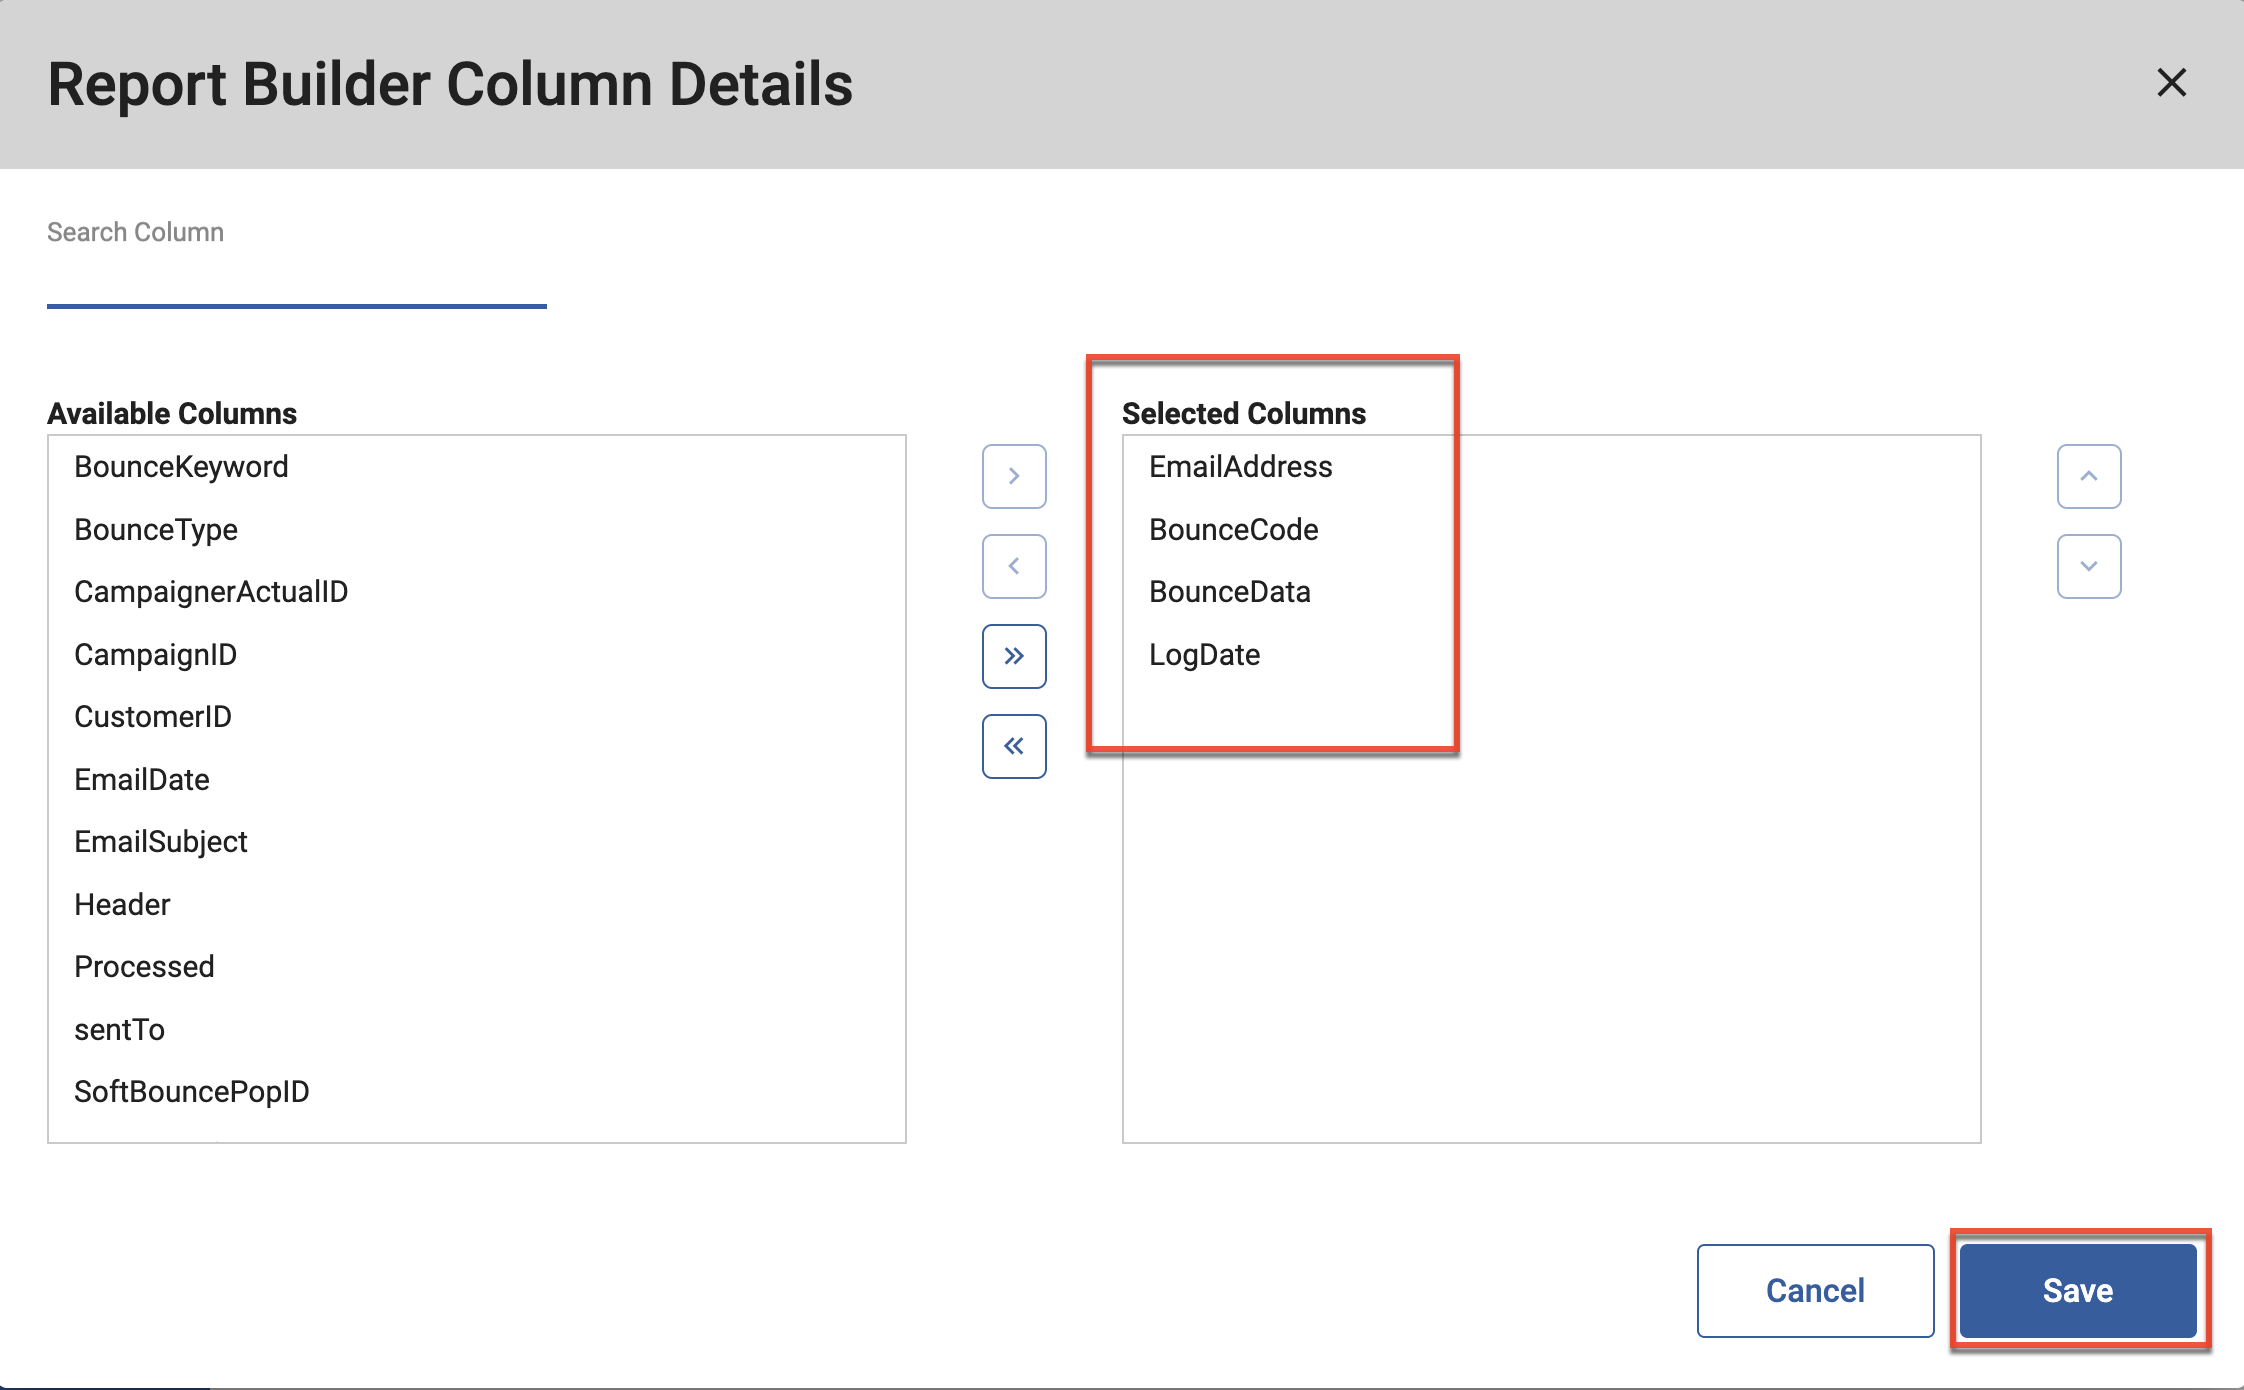
- Select the following fields, which will become the columns in your report, and then click the Save button:
- EmailAddress
- BounceCode
- BounceData
- LogDate
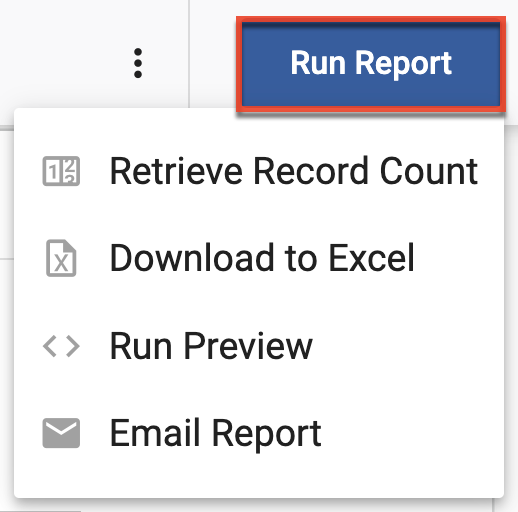
- From the Report Editor page, click the Run Report button and select your preferred option.
Creating Hard Bounce Reports
- In the navigation bar, click the Analytics module.

- Click "Custom Reports".
- On the Reports page, click the Create button in the toolbar.
- Click "Advanced Report" from the dropdown menu.

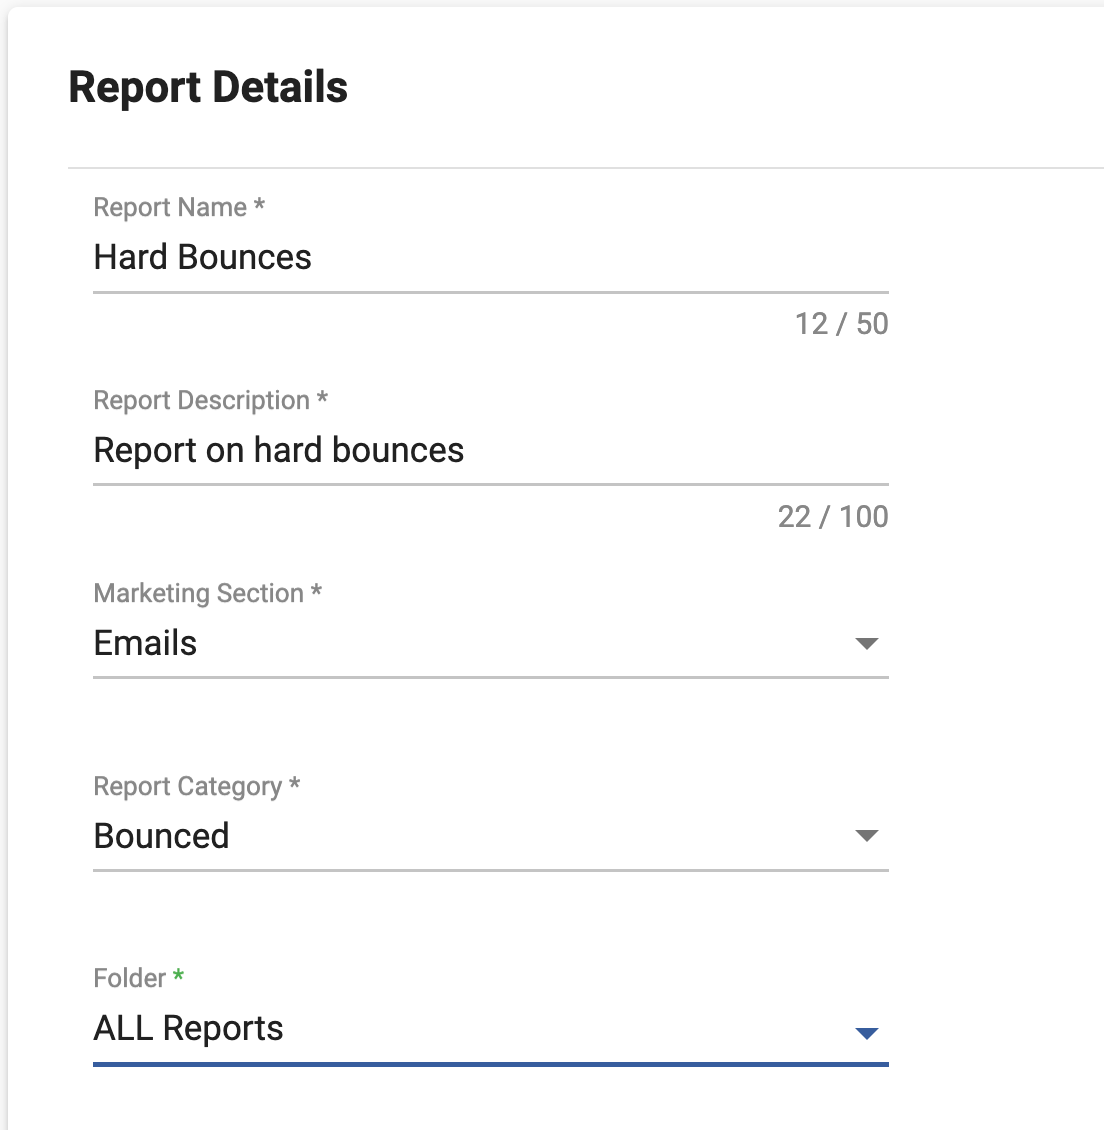
- Create the report using the following attributes:
- Report Name: Your preferred report name
- Report Description: Your preferred report description
- Marketing Section: Emails
- Report Category: Bounced
- Folder: Which folder you would like your report saved in
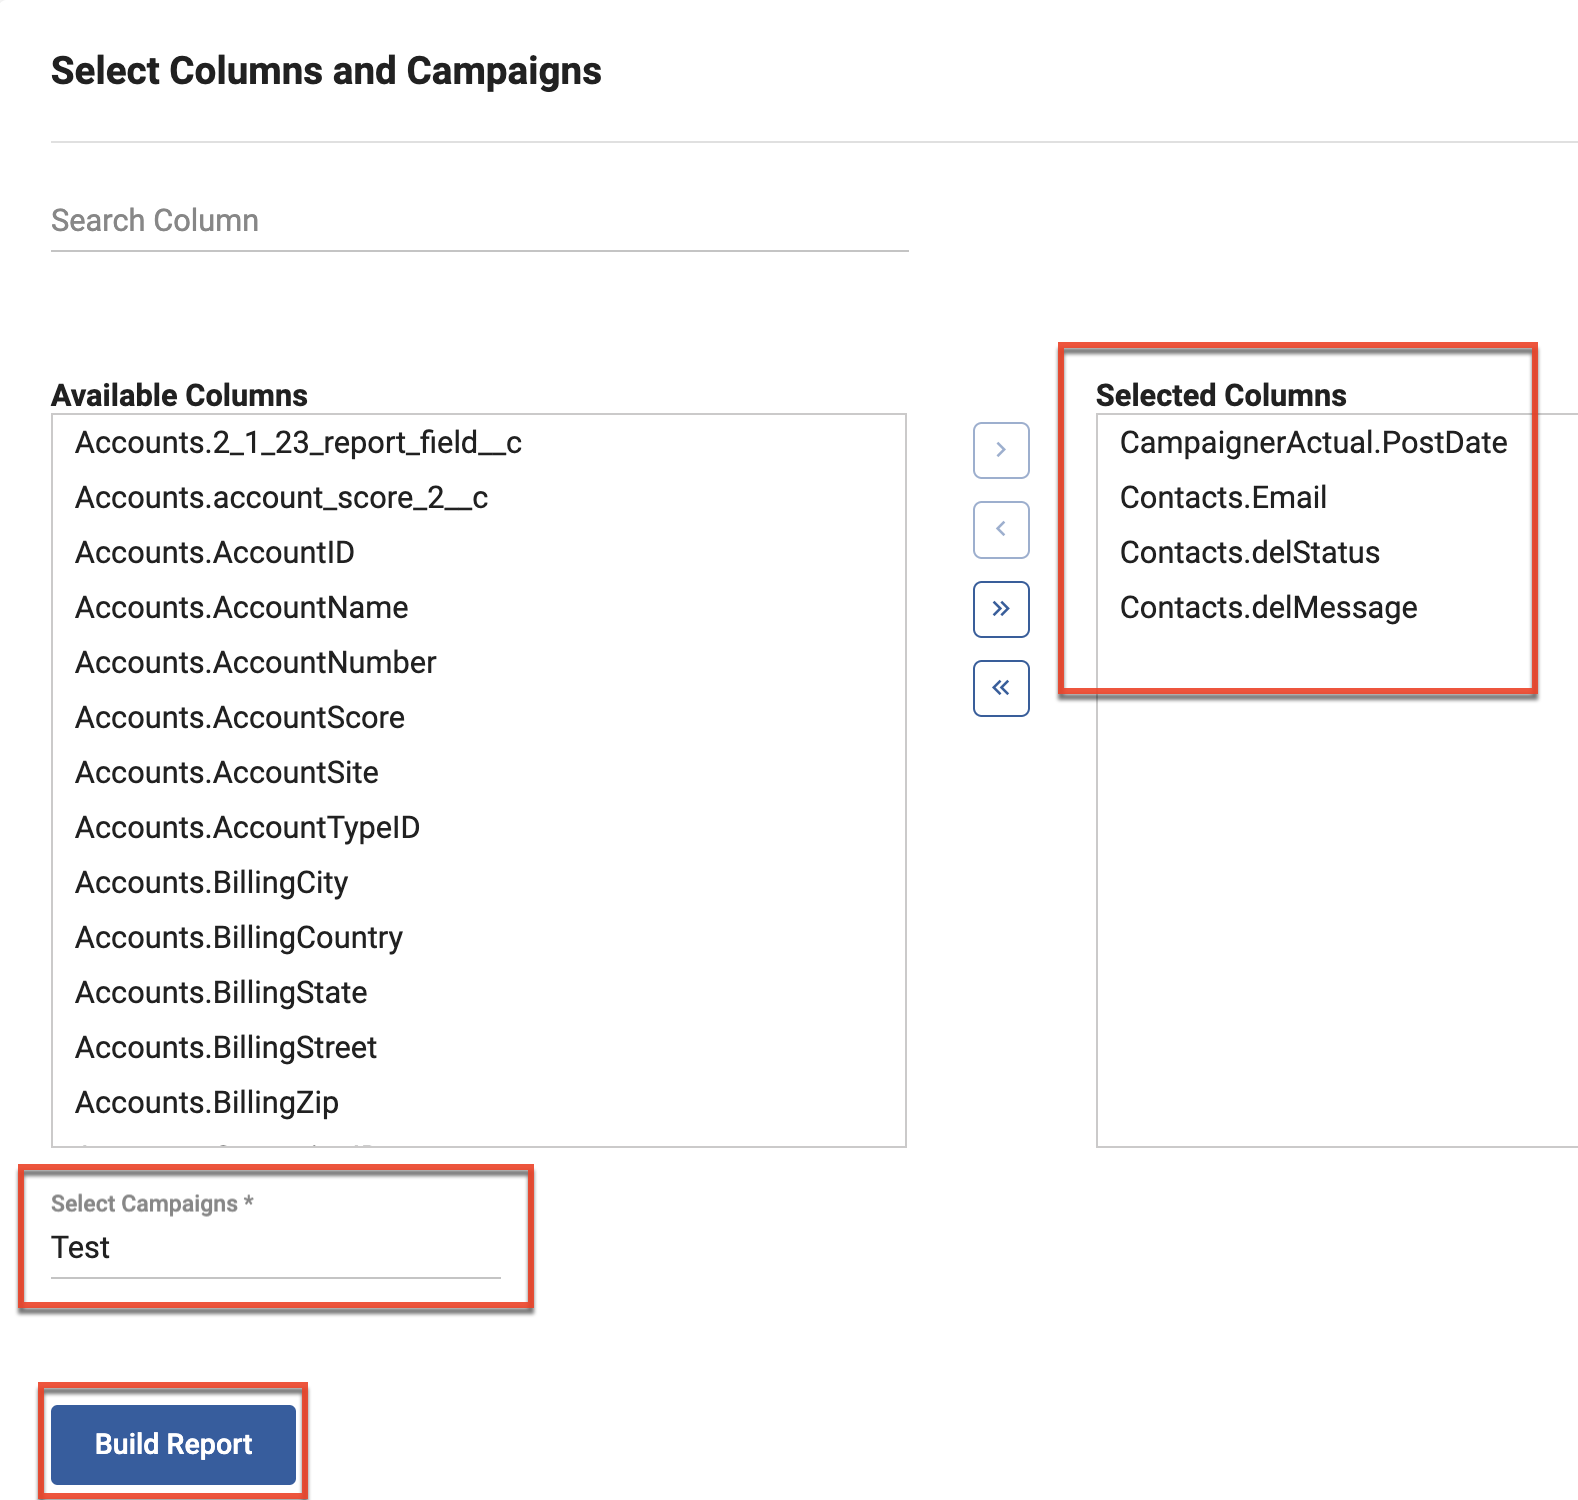
- From the Available Columns list, select the following columns:
- CampaignerActual.postDate
- Contacts.Email
- Contacts.delStatus
- Contacts.delMessage
- Select a campaign from the Select Campaigns dropdown field and then click the Build Report button.
- From the Report Editor page, click the Run Report button and select your preferred option.
