Using Import to Find Duplicates Across Modules
Overview
Sugar's contact qualification and workflow process starts from the Targets module. When a target is confirmed, the individual then becomes a lead, and when vetted, eventually becomes a contact. Of course, regardless of this process, users can still manually enter records directly into modules and may create a new lead record for a person who already has a contact record. With all of these different modules in Sugar, you may find yourself in the situation where there are duplicates across multiple modules that should be cleaned up.
Sugar's out-of-the-box duplicate checking only compares records in a single module but does not look across all modules for potential duplicates. We can instead use Sugar's powerful import functionality to find duplicates across different modules. In this example, we will export existing records from one module in Sugar (Leads), then use the import process to check these records against another module (Contacts). During the import's "Check for Possible Duplicates" step, we will be able to choose the fields we wish to use to identify matches between the Leads and Contacts modules. Once the import is complete, we will download the list of potential duplicates then undo the import to prevent these leads being created as contacts in your instance. Finally, we will mark these duplicate lead records as deleted in the .csv file then import the file to the Leads module in order to delete them from Sugar.
Note: Beginning with version 9.1.0, each user's license type (e.g. Sugar Serve) determines what functionality is available as described in the License Types Matrix documentation. The Leads module used as an example in this article is not available for Sugar Serve users, but using the import tool to find duplicates across modules works similarly for other modules.
Steps to complete
The following steps will find duplicates between the Leads and Contacts modules as an example:
- Navigate to your Leads list view and export some records. You can also use a report for this. Your goal will be to have the ID, First Name, and Last Name fields available, so if you are doing a report, just use these as the Display Columns of your Rows and Columns report.
Note: Test this with a few records before exporting your entire Leads list.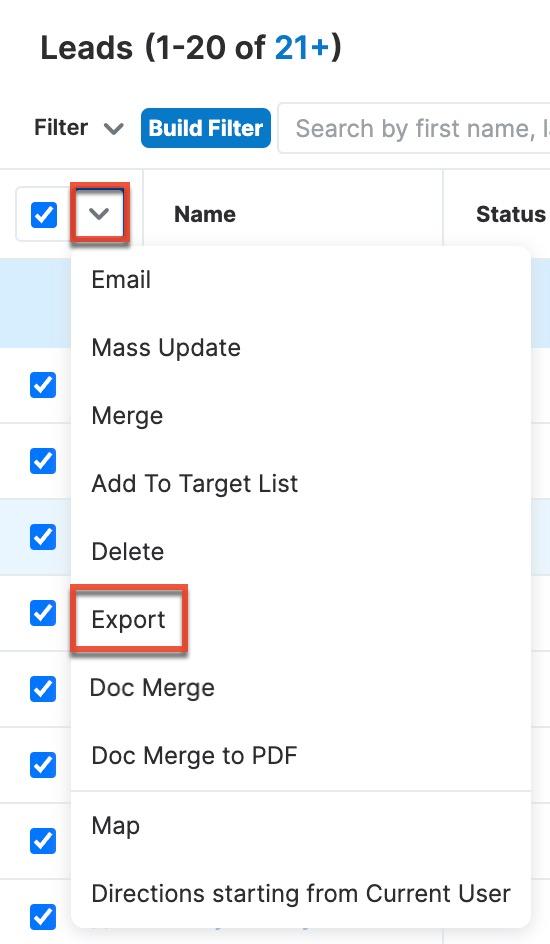
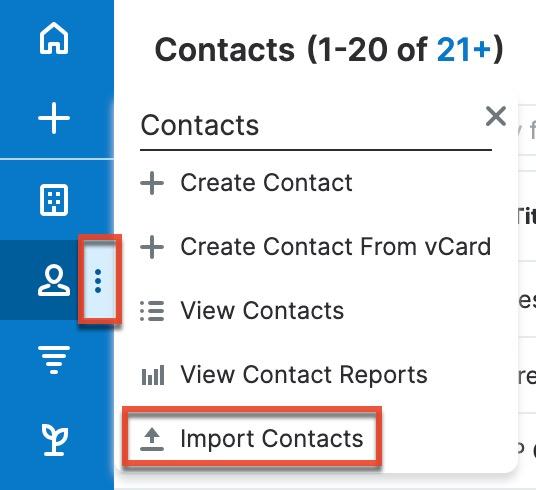
- Navigate to the Contacts module and click "Import Contacts".
- For "Import >> Step 1: Select Data Source", select "A file on my computer".
- For "Step 2: Upload Import File", select your CSV file you exported from Leads and use the "Create new records only" option.
- For "Step 3: Confirm Import File Properties", click "Next".
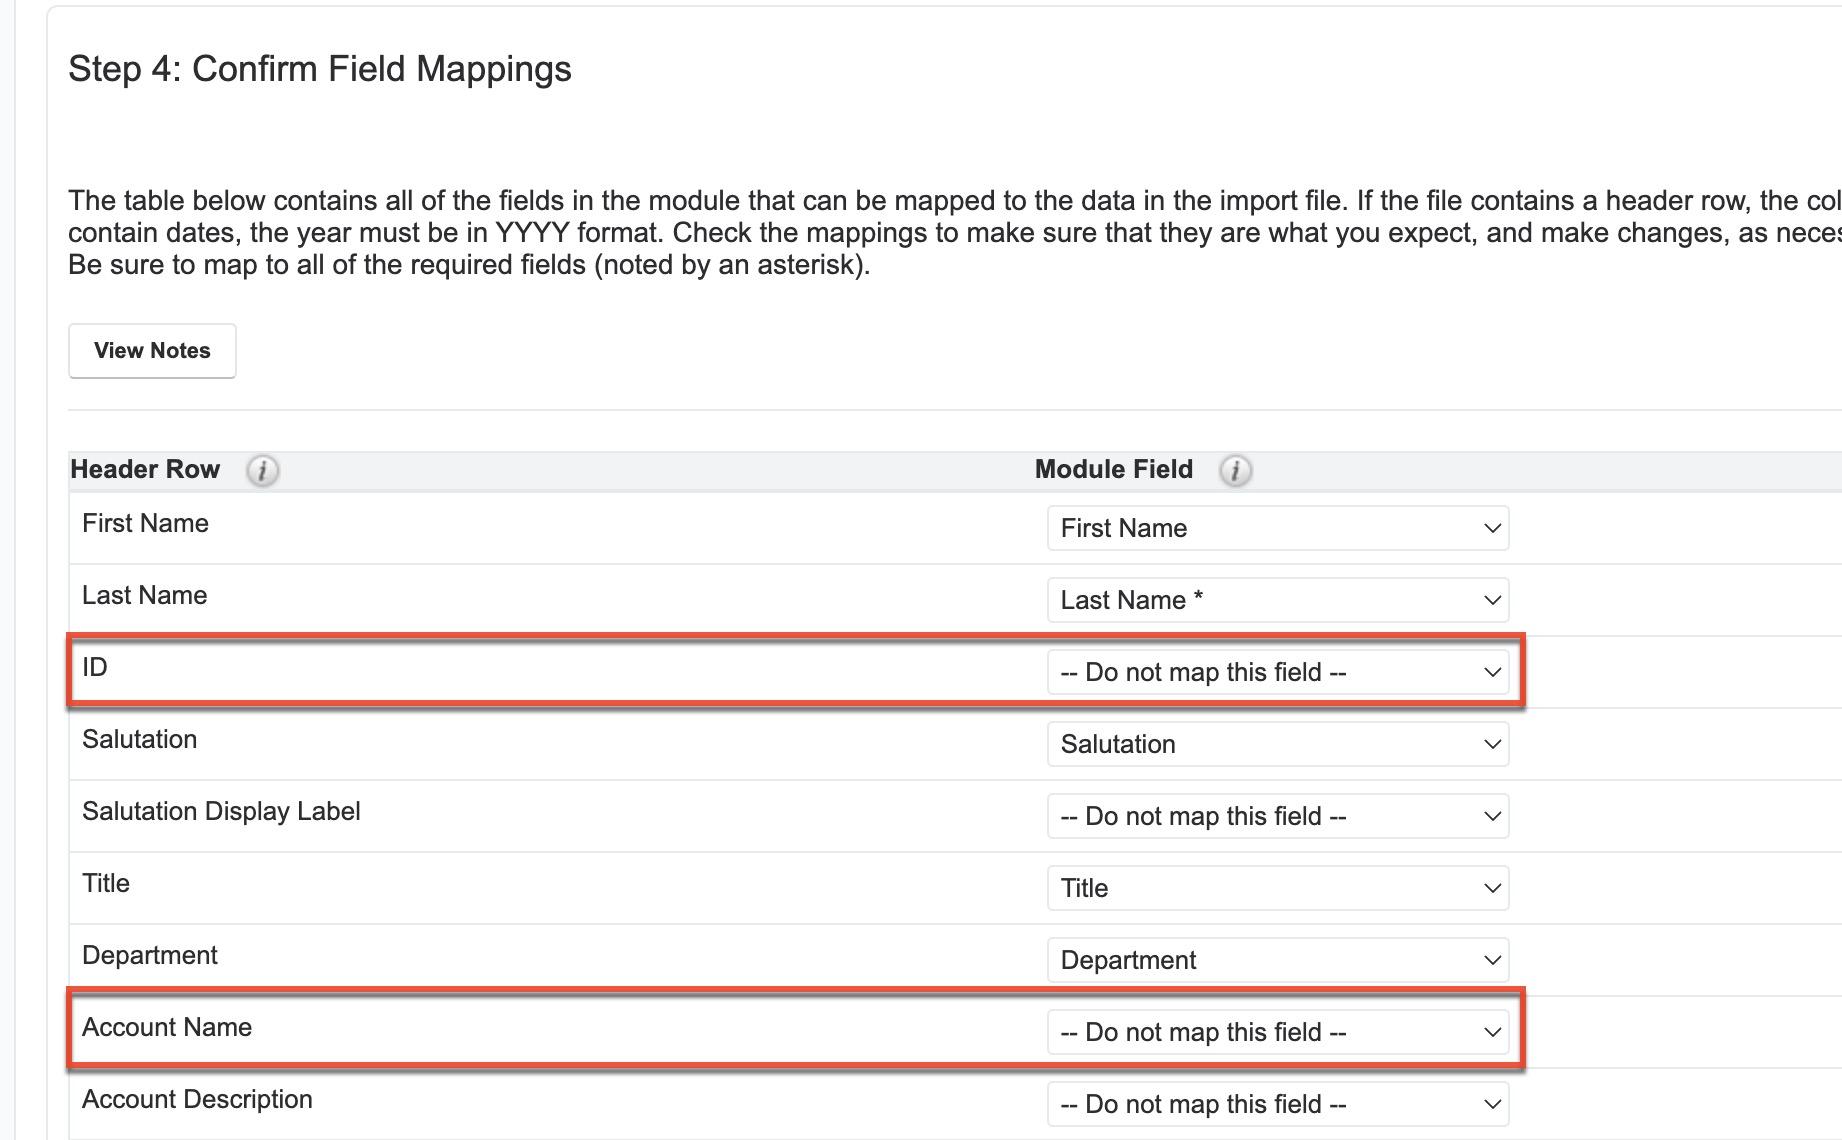
- For "Step 4: Confirm Field Mappings", change both "ID" and "Account Name" to "Do Not Map This Field" to ensure you do not create any new accounts with the leads you are importing.
- For "Step 5: Check for Possible Duplicates", move "Full Name" or any other fields which should be unique across records to the Fields to Check column.
Note: This is one of the most important and easiest to overlook steps in this process.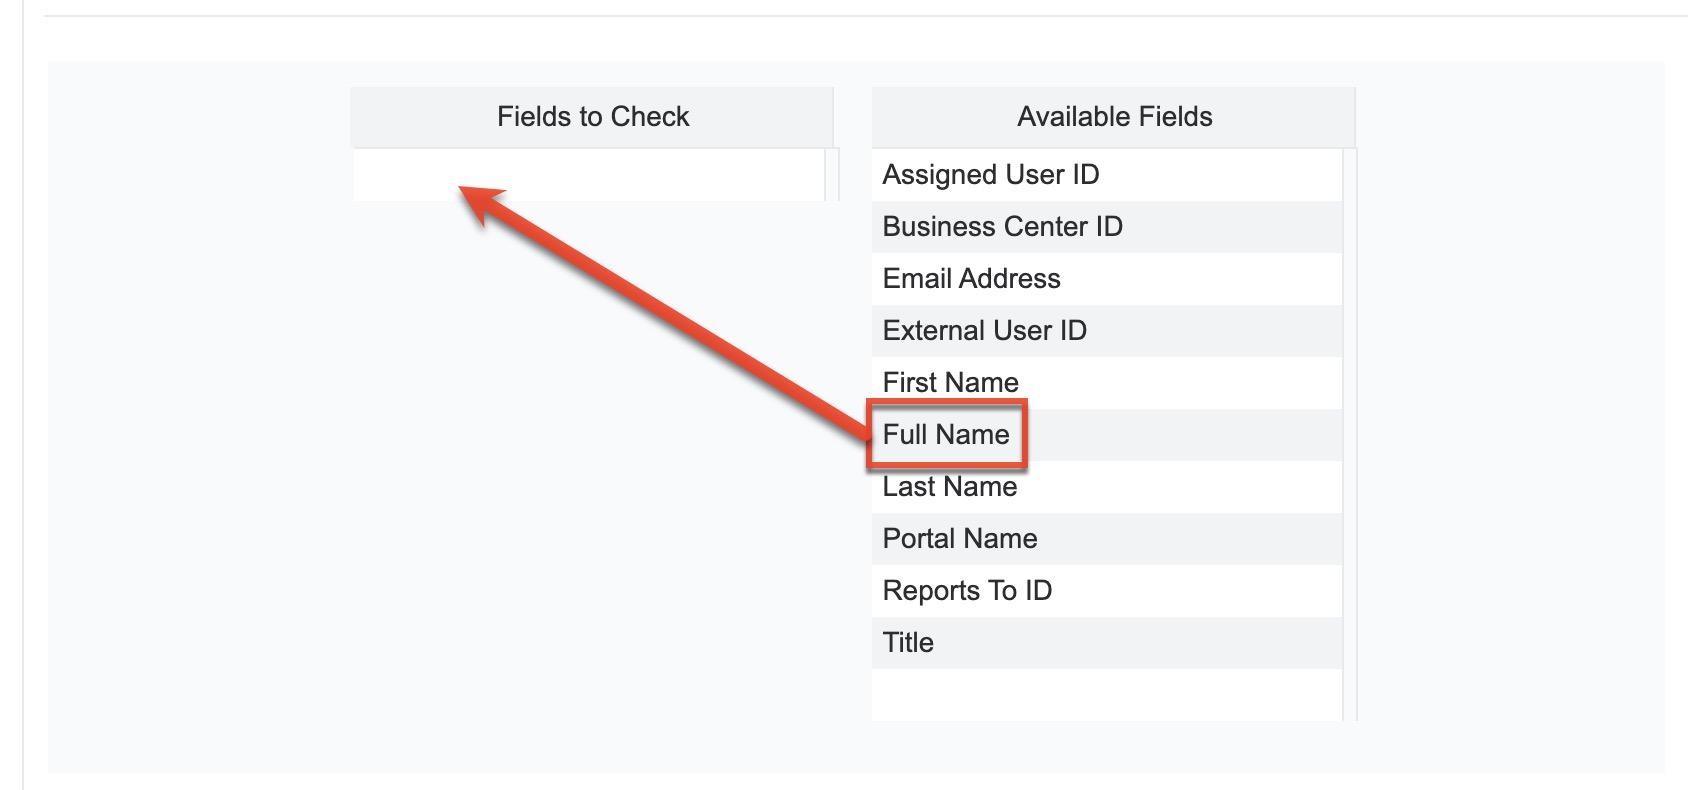
- Click "Import Now".
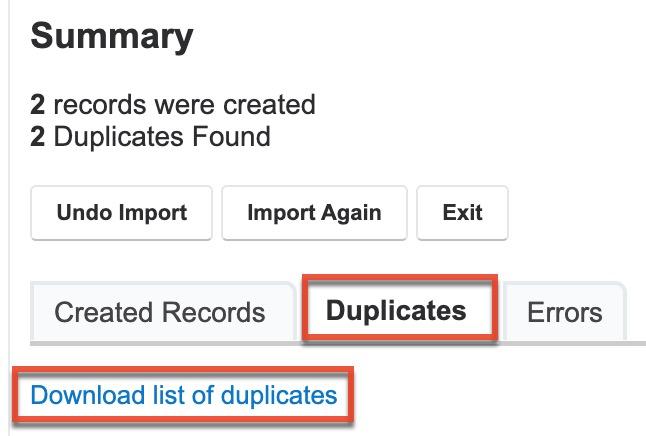
- For "Step 6: View Import Results", click the Duplicates tab and click "Download list of duplicates" to save the .csv file.
- Click the Undo Import button to remove all of the imported records since our goal was to get a list of duplicates, not to import these as actual records.
Note: Please be sure to undo the import to prevent these leads from being duplicated in your Contacts module.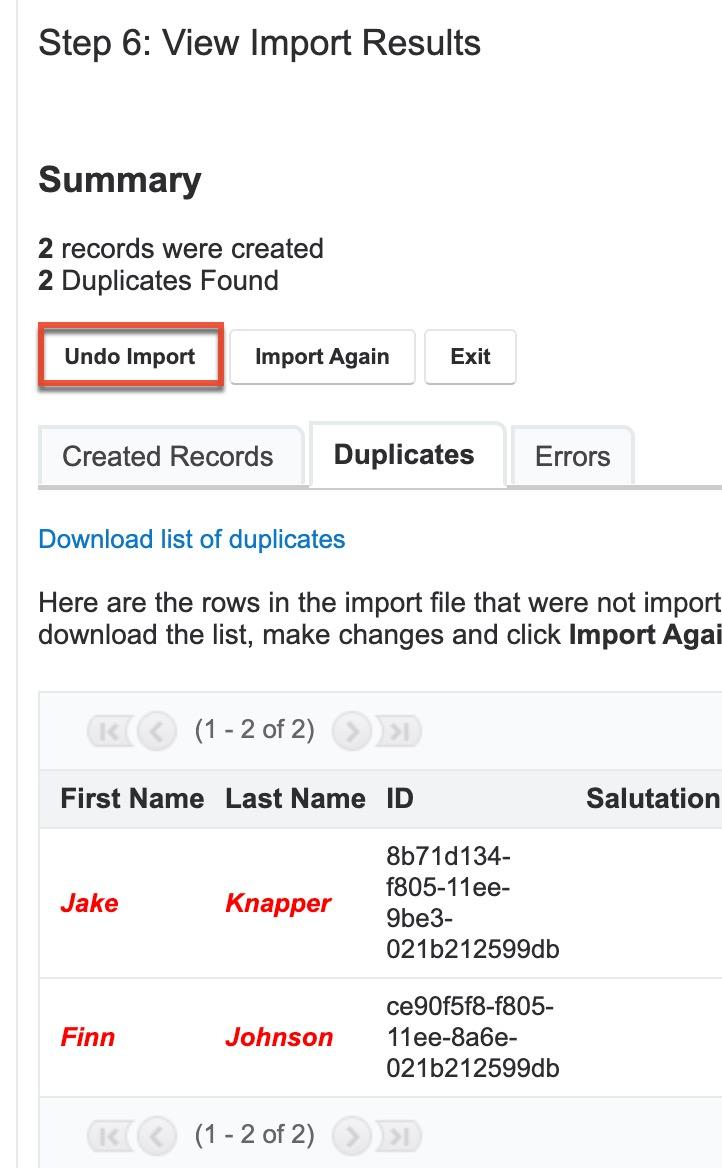
- Use Microsoft Excel or another spreadsheet software to open the .csv file that was downloaded by clicking "Download list of duplicates" from the step above.
- Remove all columns except for ID, Last Name, and Deleted. If a Deleted column is missing, create one by typing "Deleted" in the top row.
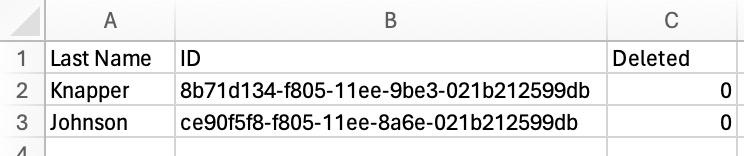
- Locate the Deleted field column and change all values from "0" to "1".
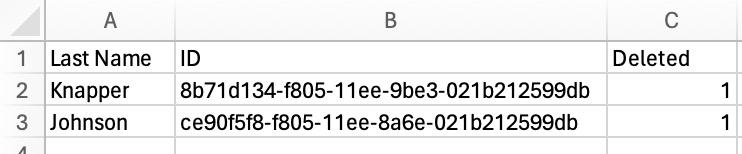
- Be sure to save the .csv file after all the changes are made.
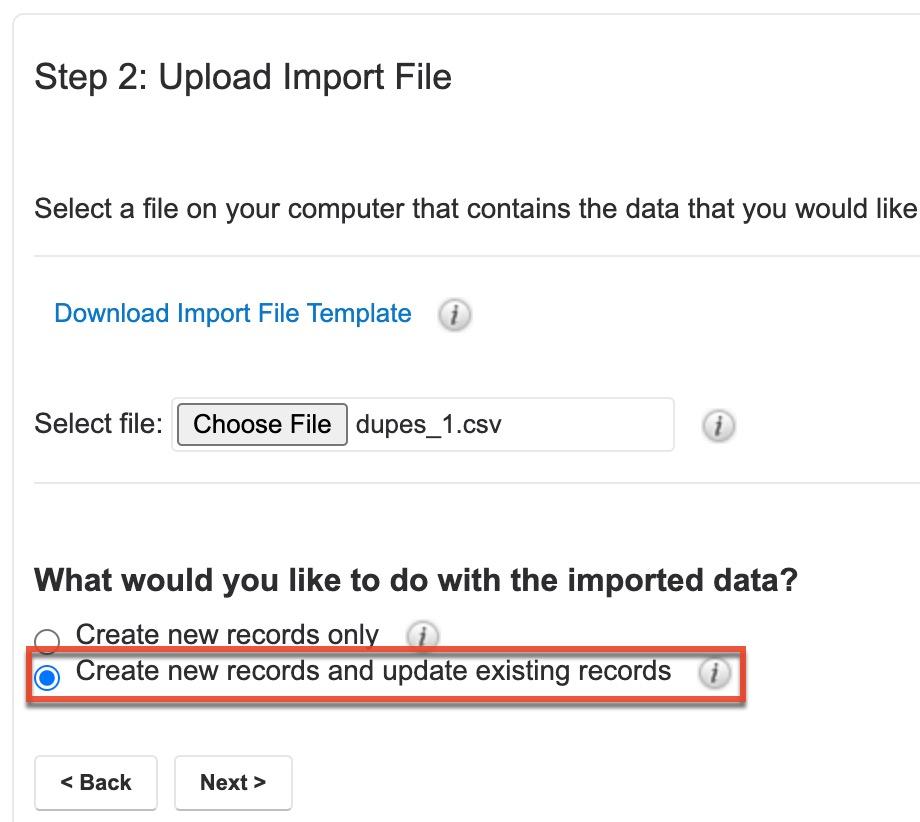
- Navigate back to the Leads module and choose "Import Leads".
- For "Import >> Step 1: Select Data Source", select "A file on my computer".
- For "Step 2: Upload Import File", select the modified .csv file and choose "Create new records and update existing records".
- For "Step 3: Confirm Import File Properties", click "Next".
- For "Step 4: Confirm Field Mappings", click "Next".
- For "Step 5: Check for Possible Duplicates", click "Import Now".
This will delete all of the lead records that have a matching name in the Contacts module. If, instead, you wish to only delete some of the leads that have a matching name in the Contacts module, in step 13 simply leave "Deleted" as "0" for the leads you do not want to delete.