Creating Mailing Labels from Sugar Records
Overview
Sugar's Doc Merge feature lets users quickly create labels from multiple records without leaving Sugar. Using simple templates that you upload into Sugar, you can easily merge record data with your formatted template and even include data from related records. The example use case in this article walks through creating mailing labels, but you can apply the steps to other use cases like extracting product information for part labels and more.
Using Doc Merge, you can extract the values of any of the following field types from Sugar to place in your labels: address, checkbox, currency, date, datetime, decimal, dropdown, email, encrypt, float, integer, multiselect, name, phone, radio, textarea, textfield.
Use Case
You have a seasonal promotion you want to send to a large number of your contacts for whom you do not have email addresses. To target this segment of your contacts, you want to send a mass mailing and need a quick method of generating mailing labels for these contacts. Follow the steps below to create a template for your labels and to merge it with these contact records.
Steps to Complete
The following sections walk through setting up a document template, uploading the template to Sugar, and merging the template with contact data using Sugar's Doc Merge functionality.
Create the Template
Start by creating a label template outside of Sugar as a DOCX file:
- In the Contacts module, determine the number of recipients for your mailing.
- In your preferred software application (e.g., Microsoft Word), create a DOCX file and insert a table that contains enough cells to accommodate your segmented number of contacts. Configure your table design to match the size of mailing labels you are using.
Note: Many label manufacturers will provide label templates for free from their website, or you can use Microsoft Word's label templates found under Mailings > Labels > Options to easily format your document for printing. For more information on the Word option, refer to the Create and Print Labels help article on Microsoft's website. - Save the DOCX file with an easily identifiable name (e.g., Promo_Mailing_Labels.docx).
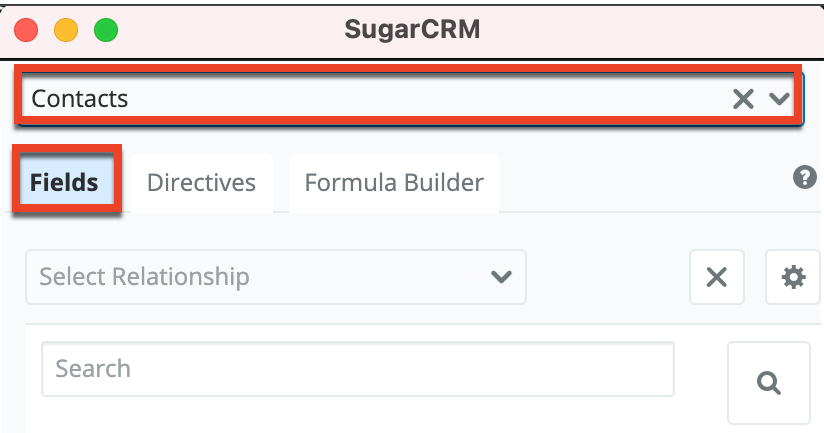
- Leaving the window with your DOCX file open, return to Sugar and click on the Doc Merge link in the footer to open the Doc Merge widget. Click on "Template Assistant" in the widget's header.
- On the Fields tab, select the Contacts module.
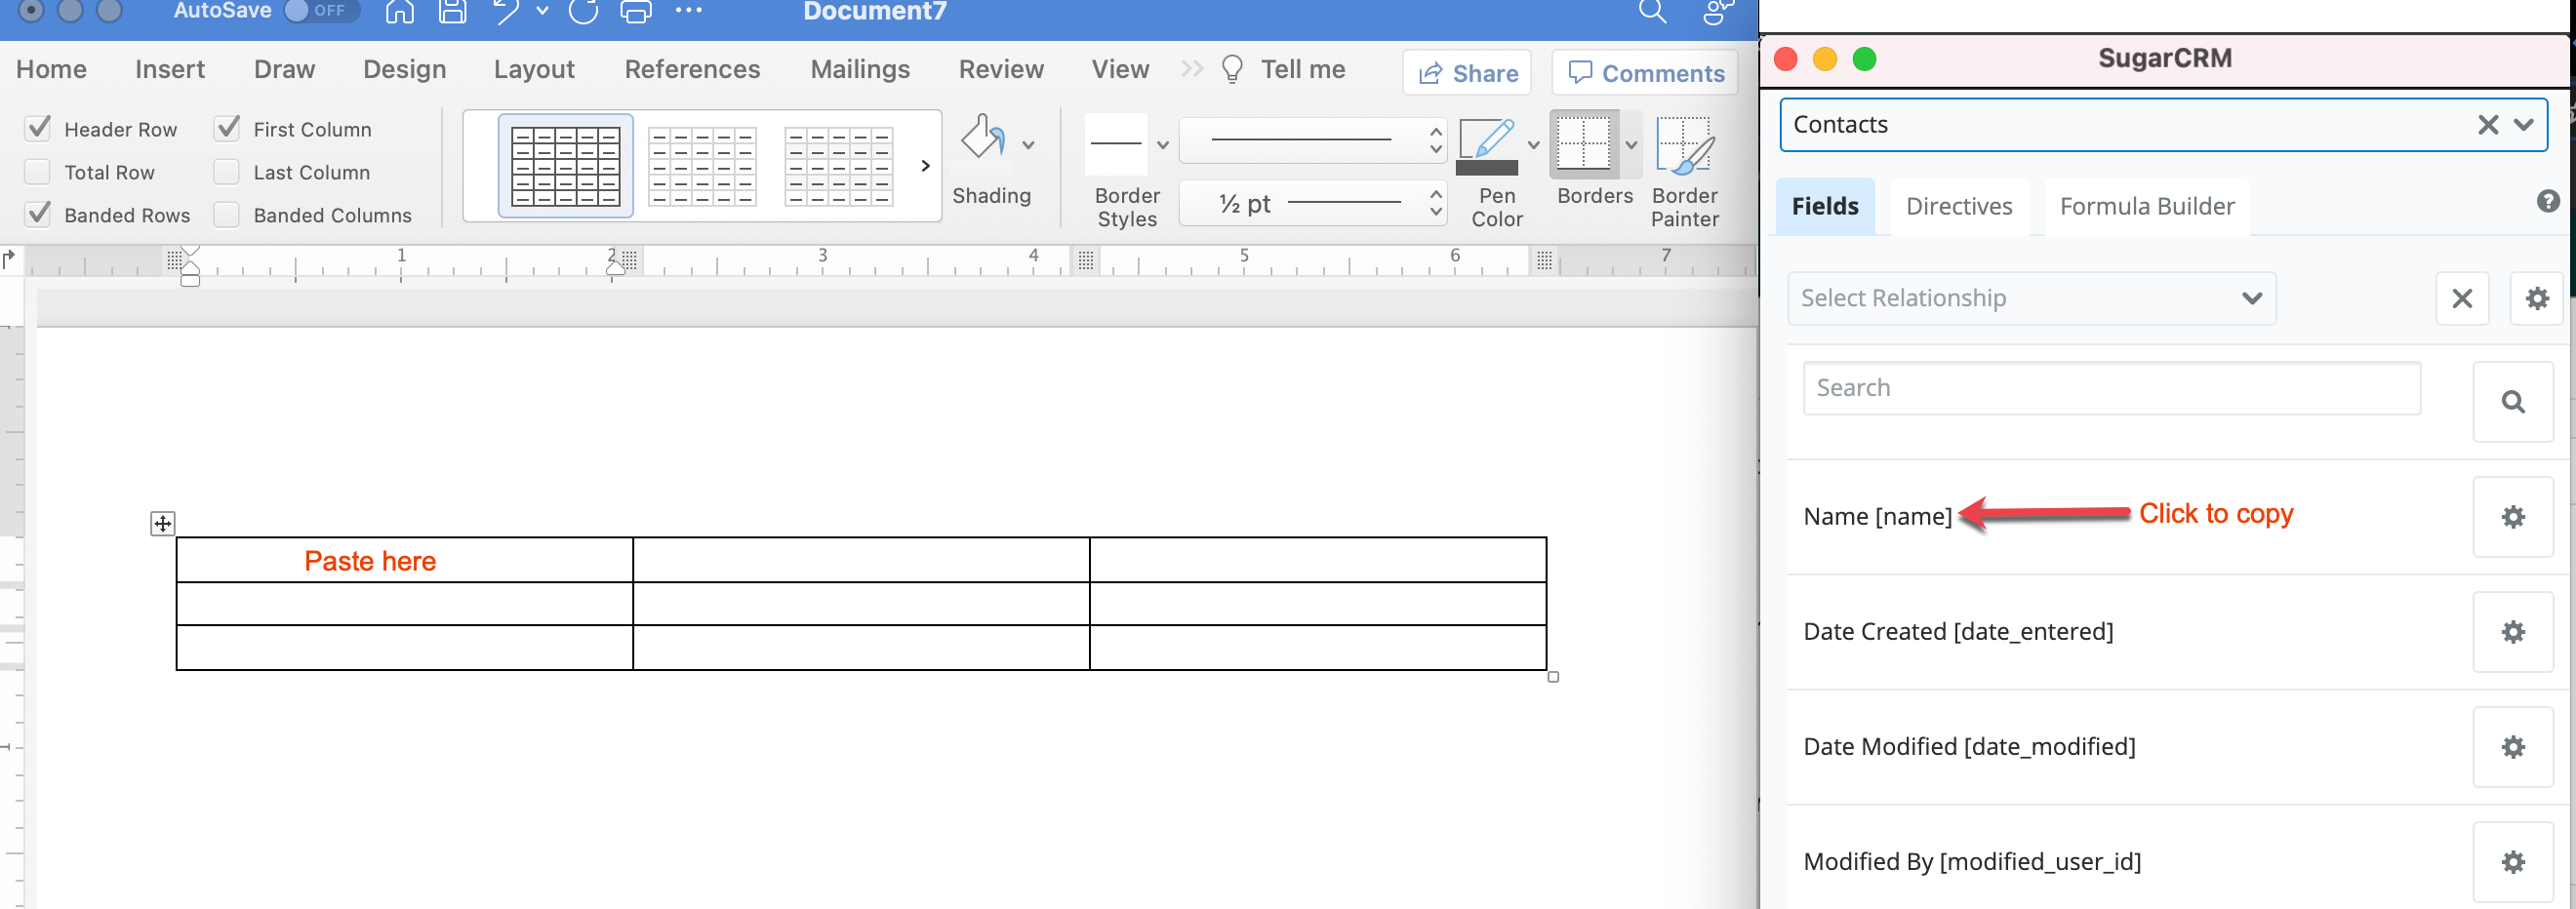
- One by one, click on the following fields to copy their merge codes and paste the codes into one cell in your document template's table: Name, Primary Address Street, Primary Address Street 2, Primary Address City, Primary Address State, Primary Address Postal Code.
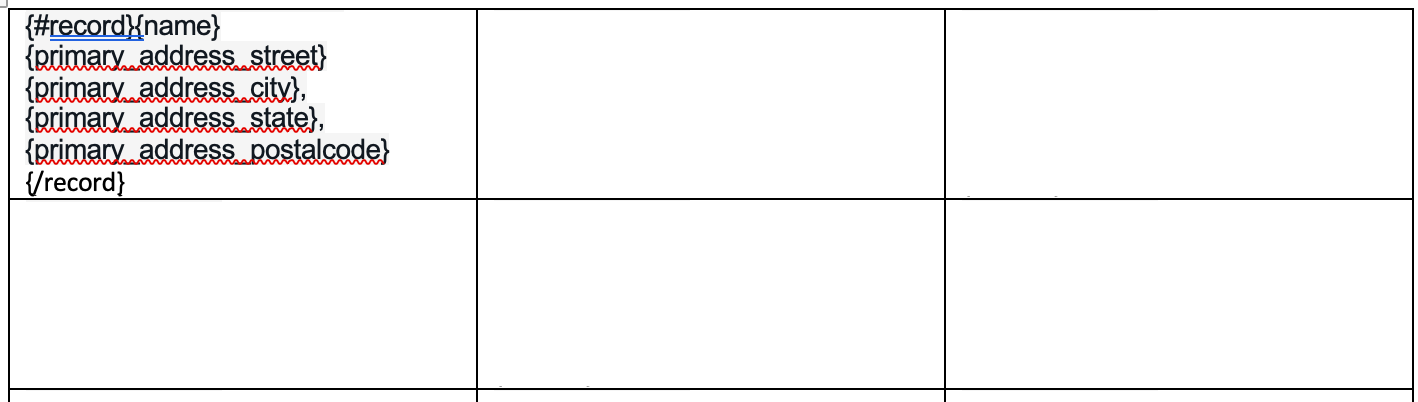
Note: In a real-world application, you will likely want to make the table's borders invisible so that they do not print onto the page of labels. We have left the borders visible for illustrative purposes in this tutorial. - Add a comma and a space character between the merge code for Primary Address City and Primary Address State so the label is formatted correctly.
- Add a {#record} tag to the beginning of the label, which is going to represent one record from Sugar.
- Add a {/record} tag to the end of the label to tell Sugar it has completed one merged record.
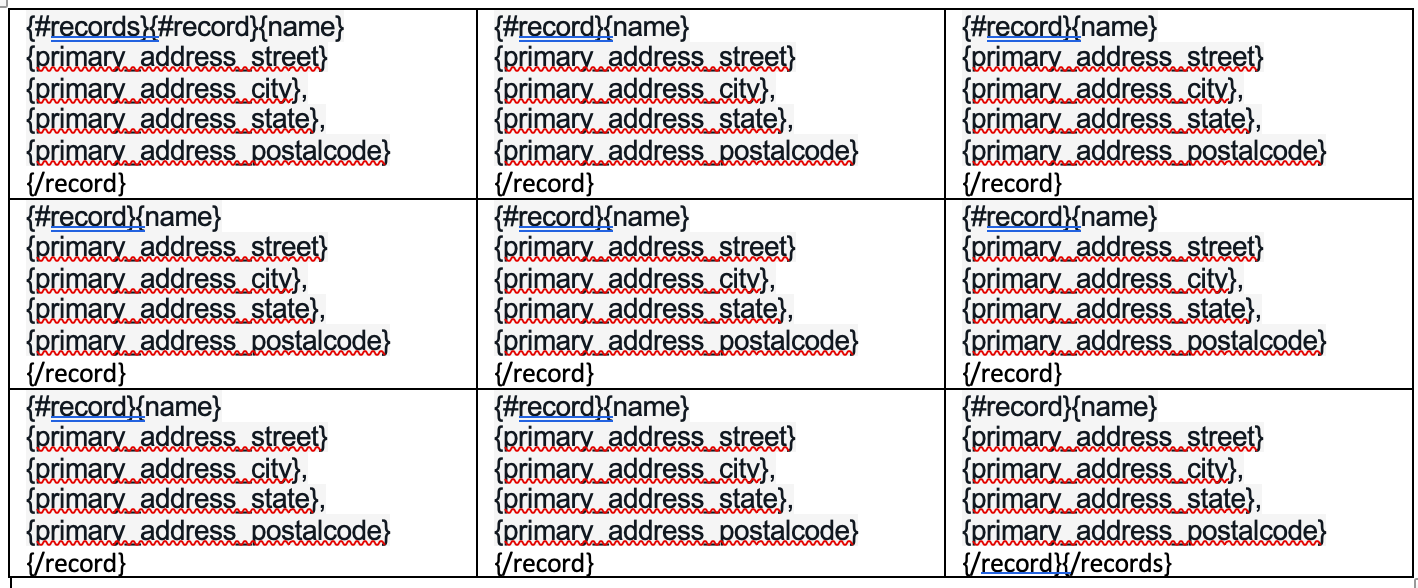
- Copy the contents of the first label into the remaining cells in the table.
- Add a {#records} tag to the beginning of the first label to identify the beginning of the set of records.
- Add a {/records} tag to the end of the last label to identify the end of the set of records.
Note: Conditionals (e.g., {if}, {else}) are not supported when making mailing labels.
Upload the Template
After creating the DOCX template, upload it to Sugar's Document Templates module, as described in the Doc Merge documentation, and be sure to enable the Label Merging option for the template record.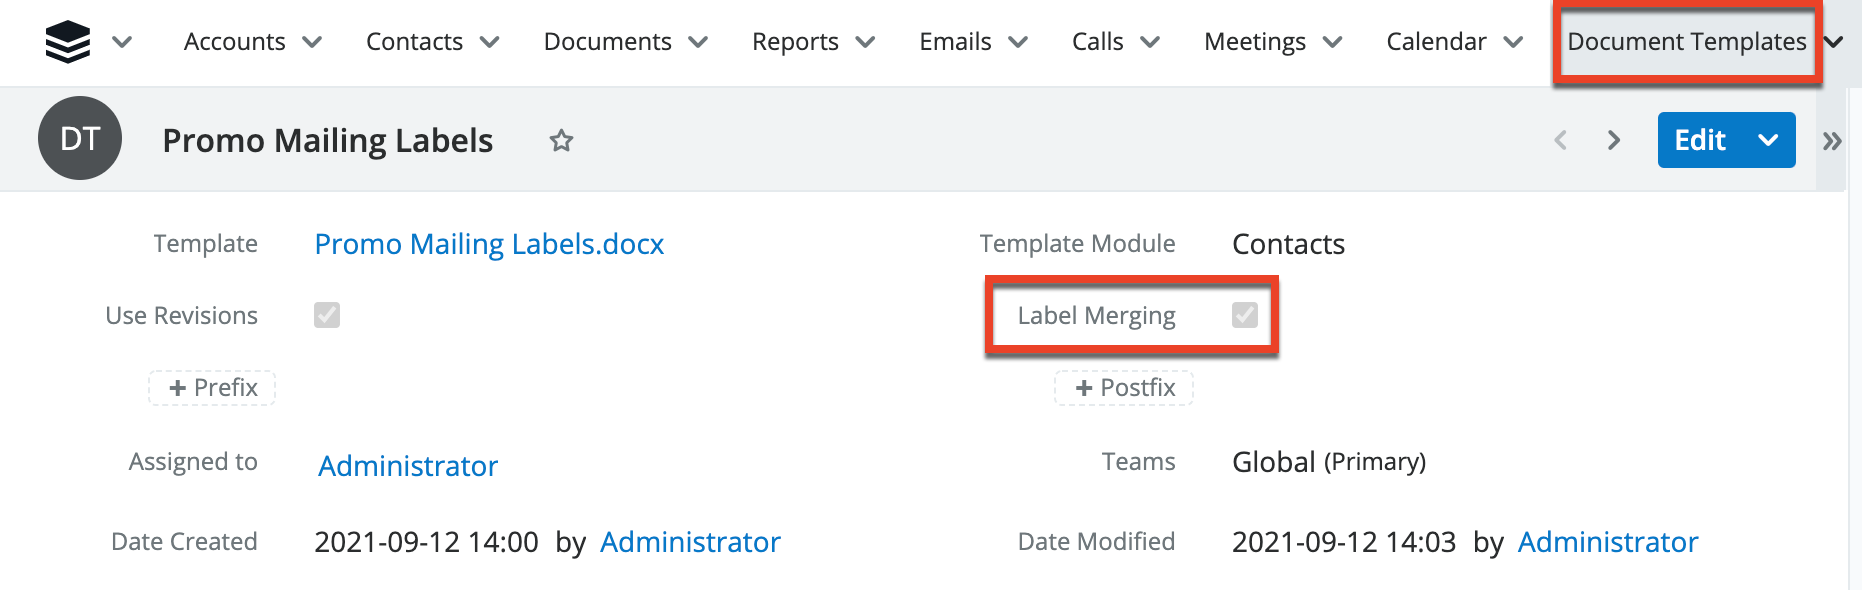
Merge Records with the Template
The final step is to merge the segmented records with the document template you created, as described below:
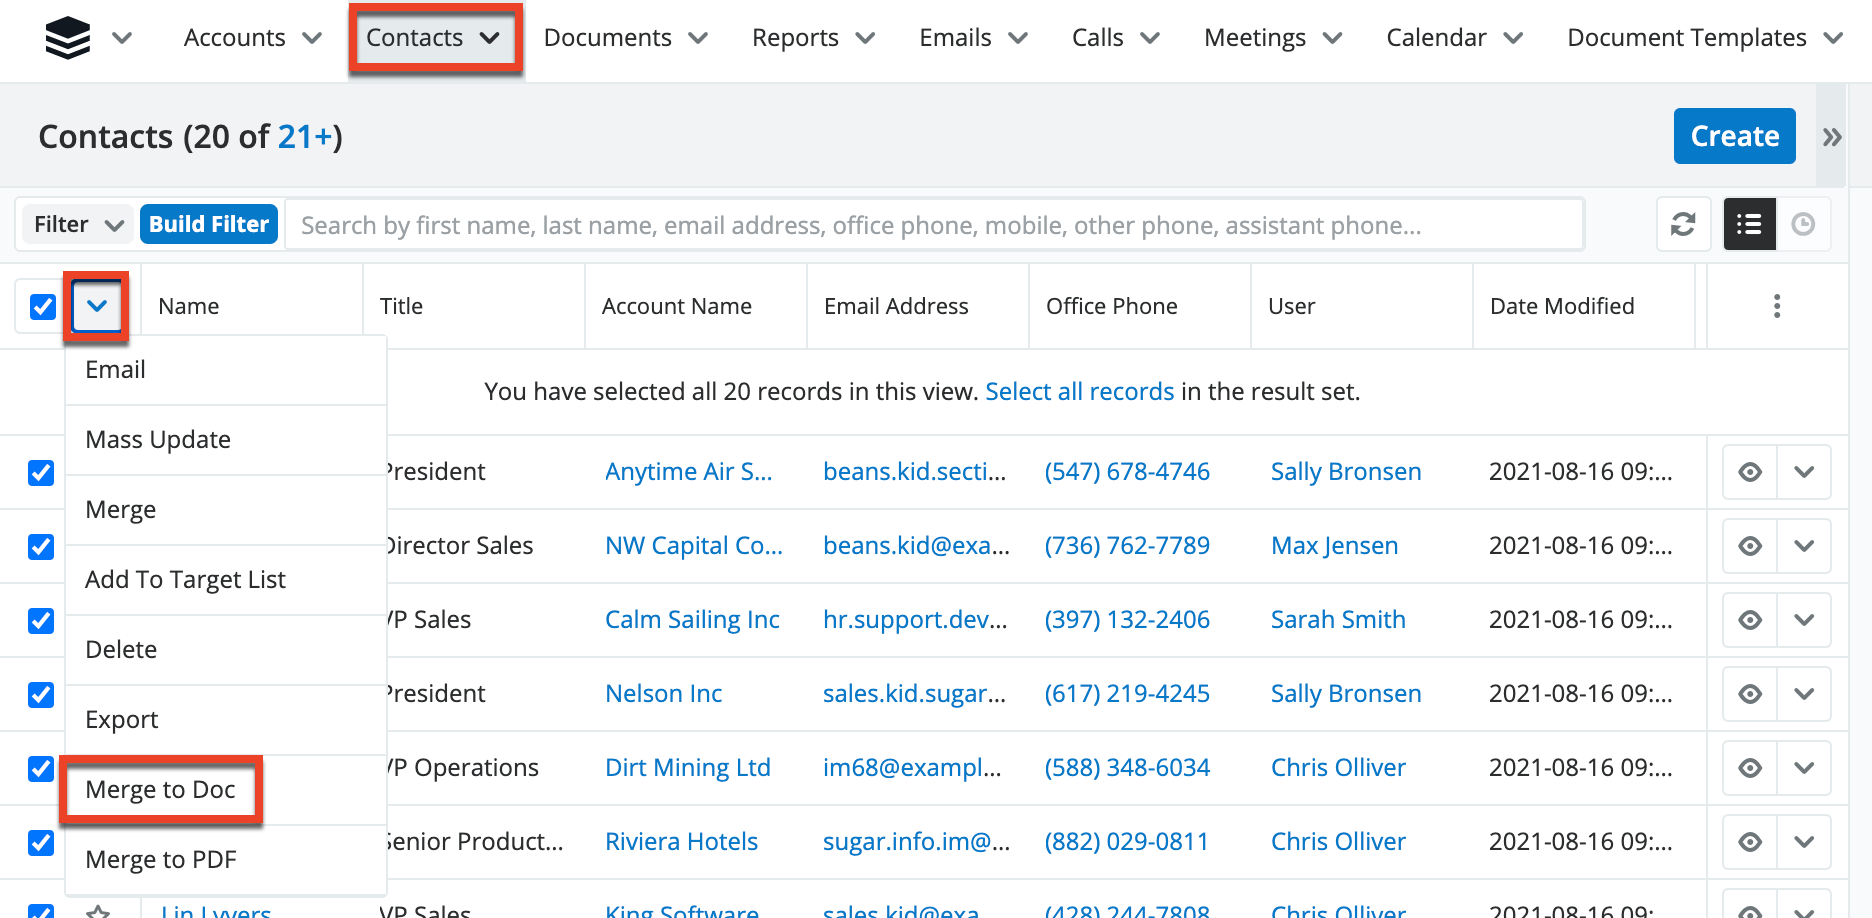
- Navigate to the Contacts module list view.
- Select the desired records, and then expand the Mass Actions menu.
- Select "Merge to Doc".
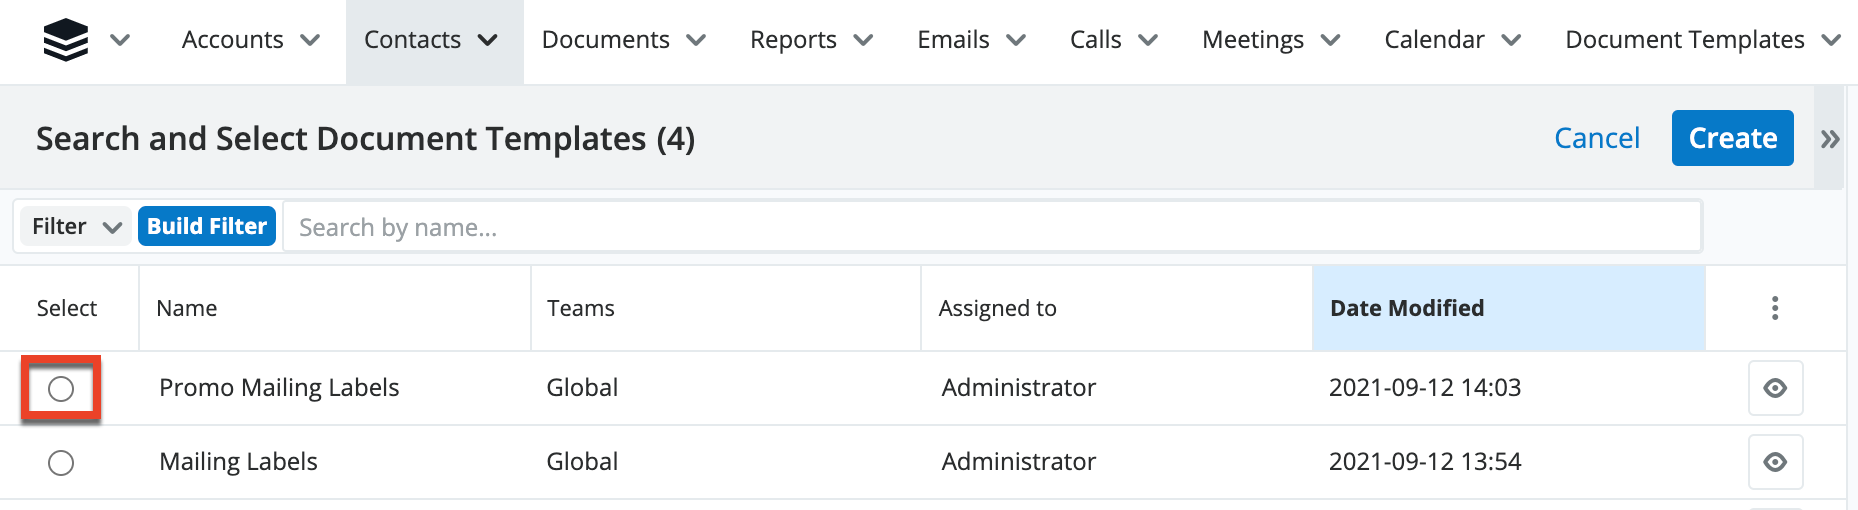
- In the search and select drawer that opens, select the document template you uploaded. The merge process begins immediately.
- Expand the Doc Merge widget and then click the file icon to access the merged document.
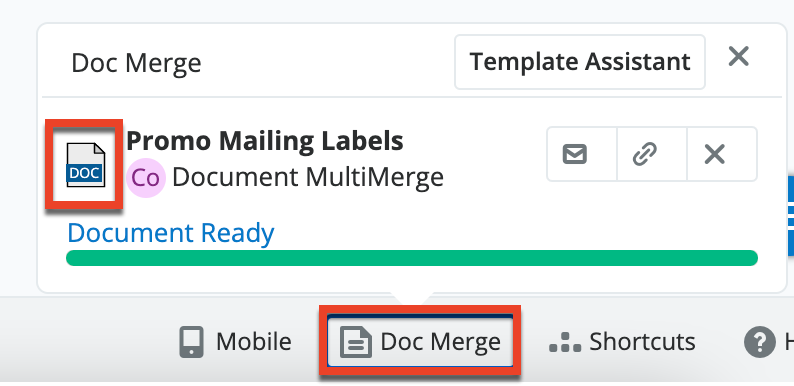
- Open the downloaded file and confirm that the field values from your selected records have successfully merged with the template to produce the label document.
