External Authentication
Overview
The authentication management capabilities in SugarIdentity allow admin users to set up LDAP, SAML, or OIDC authentication for single sign-on as well as configure SCIM for real-time data sync between the identity provider (e.g., Okta) and SugarIdentity. This guide covers the basics of configuring LDAP, SAML, or OIDC authentication in SugarIdentity in addition to generating the SCIM client values (e.g., Server URL) required to configure SCIM.
LDAP Settings
SugarIdentity can be configured to accept Lightweight Directory Access Protocol (LDAP) authentication if your organization has implemented LDAP or Active Directory authentication. When users in your system attempt to log in to Sugar, the application will authenticate their credentials against your LDAP directory or Active Directory. If authentication is successful, the user is granted access to Sugar. If the authentication is unsuccessful, SugarIdentity will then attempt to verify the provided credentials against its own database of valid usernames and passwords. When a tenant is configured to use LDAP authentication, the user email must be defined in the LDAP server.
Note: If the Active Directory authentication server is behind a corporate firewall, please ensure that the appropriate IP range is open on your firewall to allow communication with the Active Directory server. For more information on the IP addresses to add to your allowlist, refer to the Configuring Your SMTP Server to Work With SugarCloud article.
Use the following steps to configure LDAP authentication in SugarIdentity:
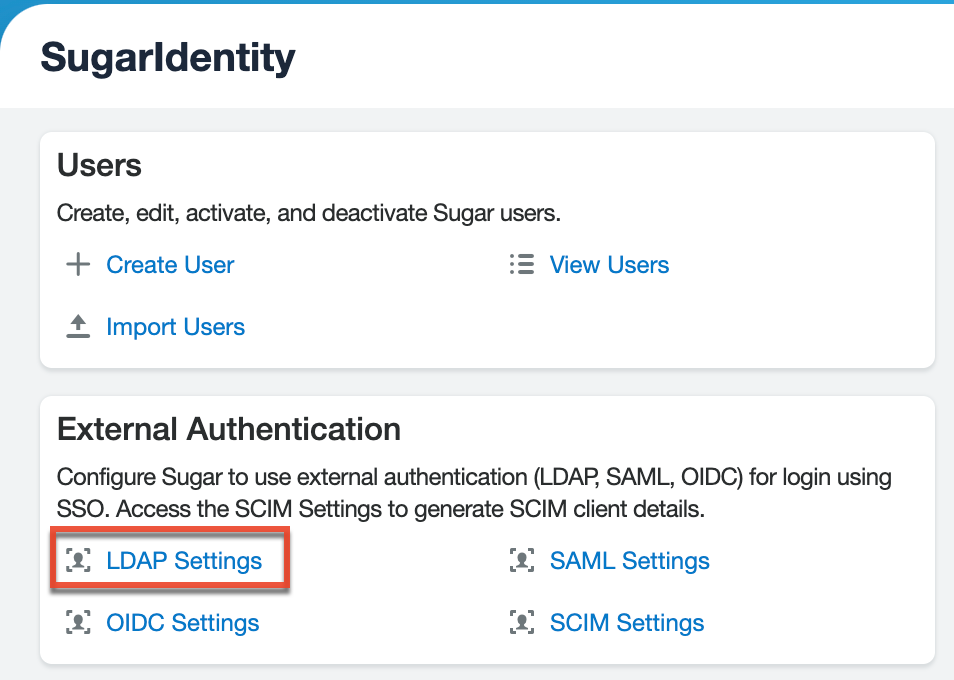
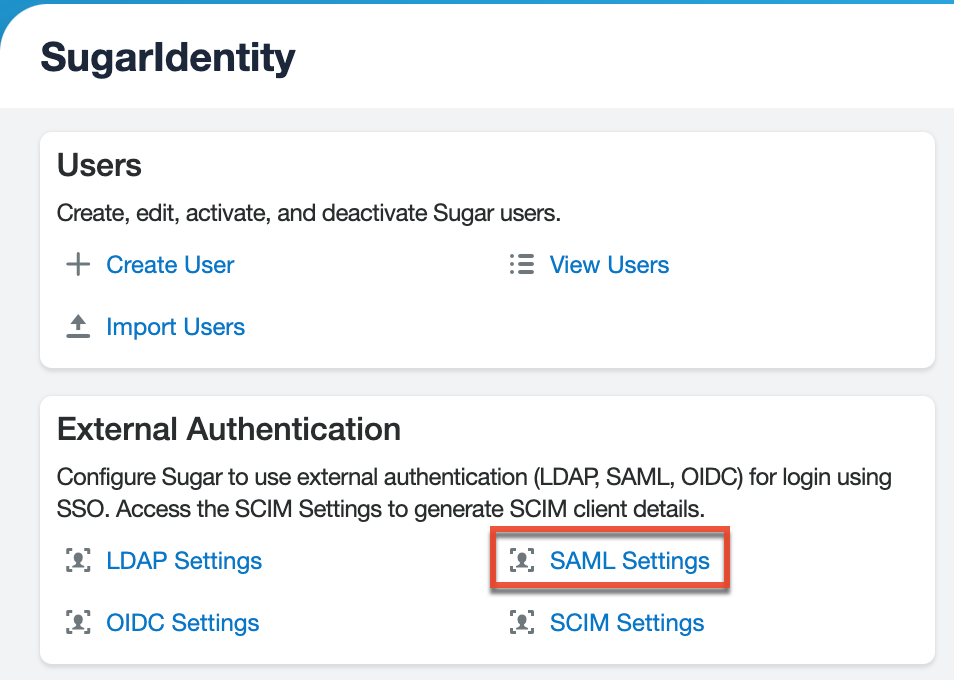
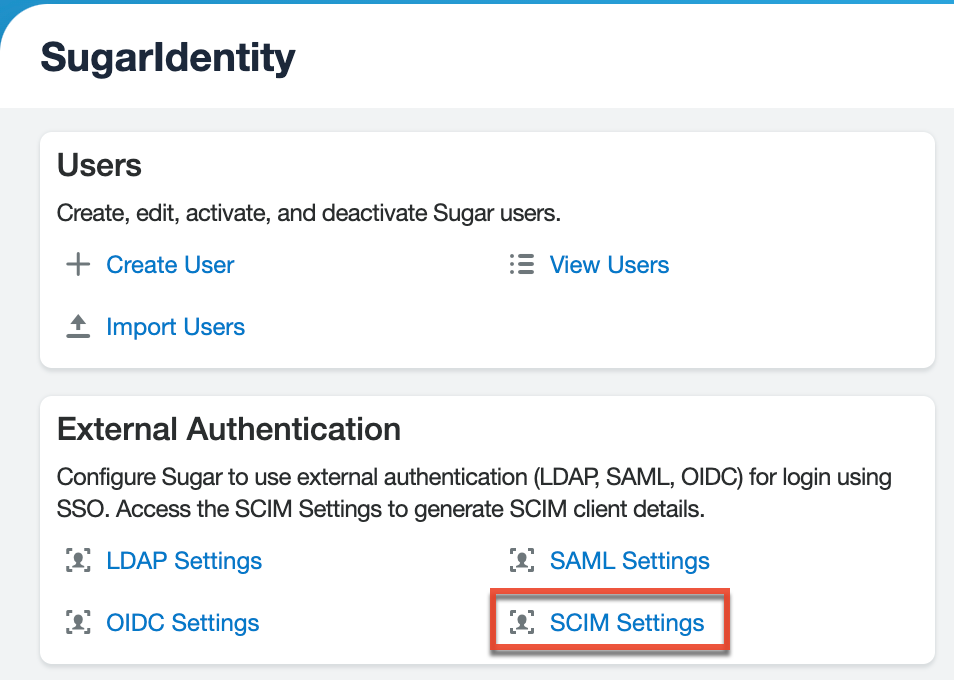
- Log in to Sugar and navigate to Admin > SugarIdentity.
Note: For Sugar versions 13.0 and lower, navigate to Admin > SugarCloud Settings. - Click "LDAP Settings" from the home page in SugarIdentity.
- Place a check in the Enable LDAP Authentication box to enable LDAP and reveal the LDAP configuration fields.
Note: Disable this checkbox if you would like to disable LDAP authentication.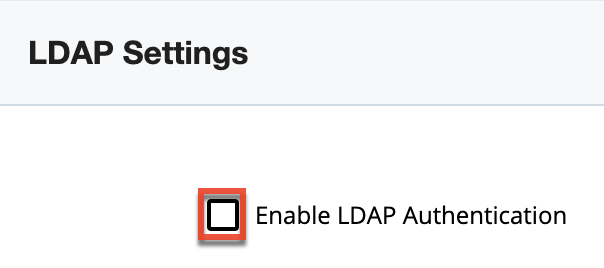
- Enter the appropriate values in the following fields, then click "Save" to commit the changes.
Field Description Suggested Values Encryption Select the appropriate option from the dropdown to use LDAPS, StartTLS, or no encryption when connecting to the LDAP server.
Select "LDAPS" or "StartTLS" if your LDAP server supports one of these encryption methods. For no encryption, select "none" (not recommended).
- Select "LDAPS" if the LDAP server supports it.
- Select "StartTLS" if the LDAP server supports it.
- Select "none" for no encryption.
Server Enter the FQDN of your Active Directory Server, which should be your Domain Controller.
MYSERVER.MYDOMAIN.com. Port Enter the default port number.
Please refer to the Configuring IP Addresses, Ports, and Domains article for port numbers.
User DN Enter the user DN name.
ou=people, dc=openldap, dc=com User Filter Enter any additional parameters to apply when authenticating users.
is_user_id=1 Bind Attribute Enter a case-sensitive value for the bind attribute.
For Active Directory, enter userPrincipalName.Login Attribute Enter a case-sensitive value for the login attribute.
For Active Directory, enter sAMAccountName.Authentication Place a check in this box to enable the Authentication User DN and Password fields.
Note: You must add a service account user (read-only access) to your Active Directory to authenticate via Sugar.Authentication User DN: Enter "username@MYSERVER.MYDOMAIN.com" or "domain\\userfirstname.userlastname".
Note: The latter username format requires double backslashes after the domain. Sugar will automatically remove one backslash upon Save.Password: Enter the corresponding Password.
Group Membership Enable this checkbox if you wish to specify that the user is a member of a specific group.
Group DN: Enter the group DN name.
- ou=groups
- dc=example
- dc=com
Group Name: Enter the group name.
- cn=sugarcrm
Group Attribute: The attribute of the group that will be used to filter against the User Attribute.
- MemberUid
User Attribute: A unique identifier used to check if the user is a member of the group.
- uid
Auto Create Users Enable this checkbox to automatically create a new Sugar user when an LDAP user logs in to Sugar for the first time.
Note: The user will count against the number of licensed user accounts for your Sugar instance.Typically, this checkbox remains disabled.
Once LDAP is configured, when creating new users in SugarIdentity, you will need to enter the user's username (e.g., john@example.com) defined in your LDAP server.
LDAP Attribute Mapping
By default, LDAP attributes map to the SugarIdentity user fields as described below. When an LDAP user is created in SugarIdentity or the LDAP attributes are modified, these changes will sync to SugarIdentity when the user logs in to Sugar. If you have configured SCIM for LDAP, the changes will automatically sync to SugarIdentity in real-time.
| LDAP Attributes | SugarIdentity User Fields |
| givenName | given_name |
| sn | family_name |
| telephoneNumber | phone_number |
| title | title |
| department | department |
| street | address.street_address |
| l | address.locality |
| st | address.region |
| postalCode | address.postal_code |
| c | address.country |
SAML Settings
SugarIdentity can be configured to accept Security Assertion Markup Language (SAML) for single sign-on (SSO) if it is implemented at your organization. Please note that single sign-on is not supported for Sugar Sell Essentials. When users in your system attempt to log in to Sugar, the application will authenticate them against SAML. If authentication is successful, the user is granted access to Sugar. If the authentication is unsuccessful, SugarIdentity will then attempt to verify the provided credentials against its own database of valid usernames and passwords.
Note: The Name ID claim (e.g., john@example.com) gets mapped by default to the SAML Username field in SugarIdentity.
To configure SAML authentication in SugarIdentity, you must first configure ADFS, AWS, Azure, Google, Okta, OneLogin, or Ping Identity to allow external authentication, then obtain the identity provider metadata file to import some key data (e.g., Login URL, Entity ID, X509 Certificate) as covered in the section below. Please note that you must create a new SAML application for SugarIdentity when configuring the identity provider. When configuring certain identity providers (e.g., Okta, Google), the Assertion Consumer Service URL must be entered. To obtain this information, click "SAML Settings" from the home page in SugarIdentity and locate the Assertion Consumer Service URL field, as shown in the image below.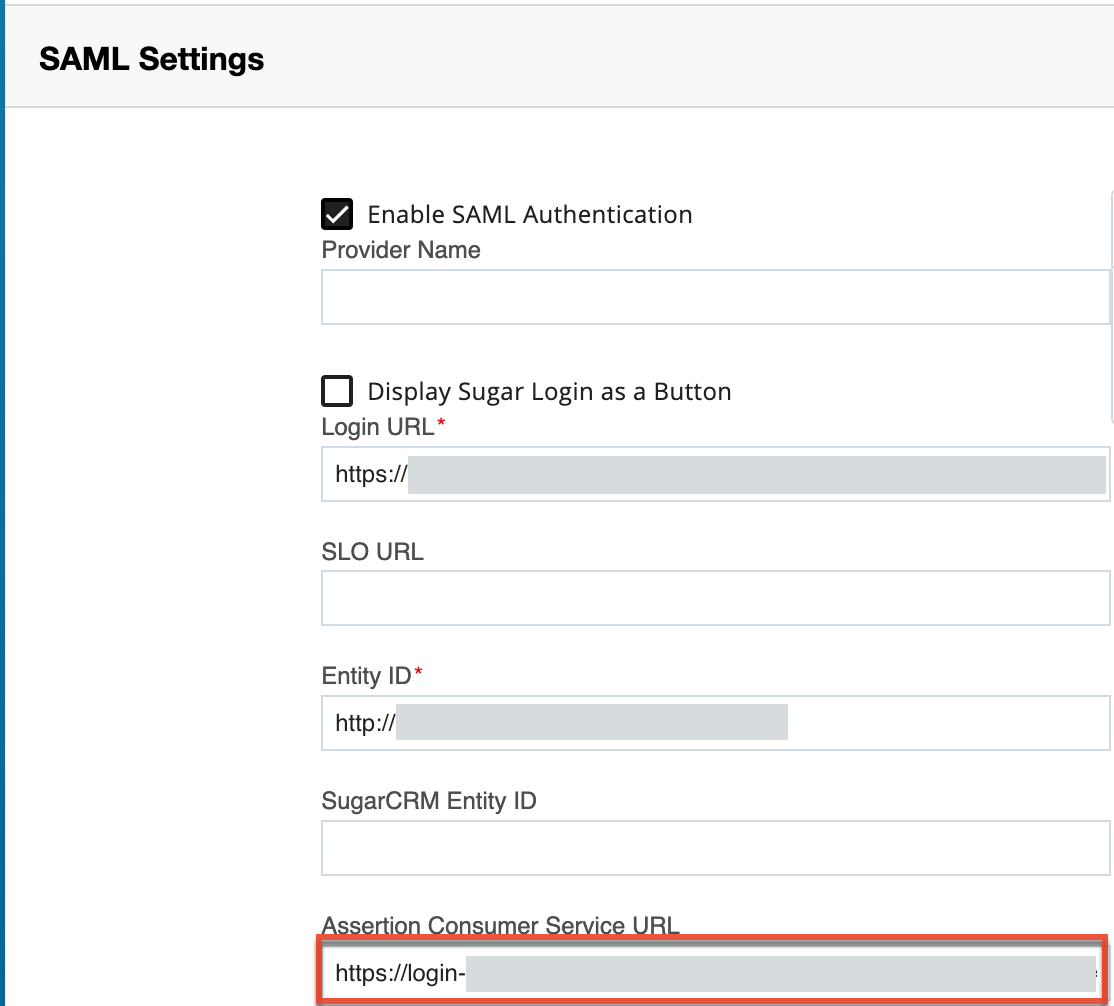
Importing IdP Metadata File
Once you have obtained the identity provider metadata file, use the following steps to import the file and configure SAML authentication:
- Log in to Sugar and navigate to Admin > SugarIdentity.
Note: For Sugar versions 13.0 and lower, navigate to Admin > SugarCloud Settings. - Click "SAML Settings" from the home page in SugarIdentity.
- Place a check in the Enable SAML Authentication box to enable SAML and reveal the SAML configuration fields.
- Click the "Import IdP metadata file" link in the Quick Links menu.
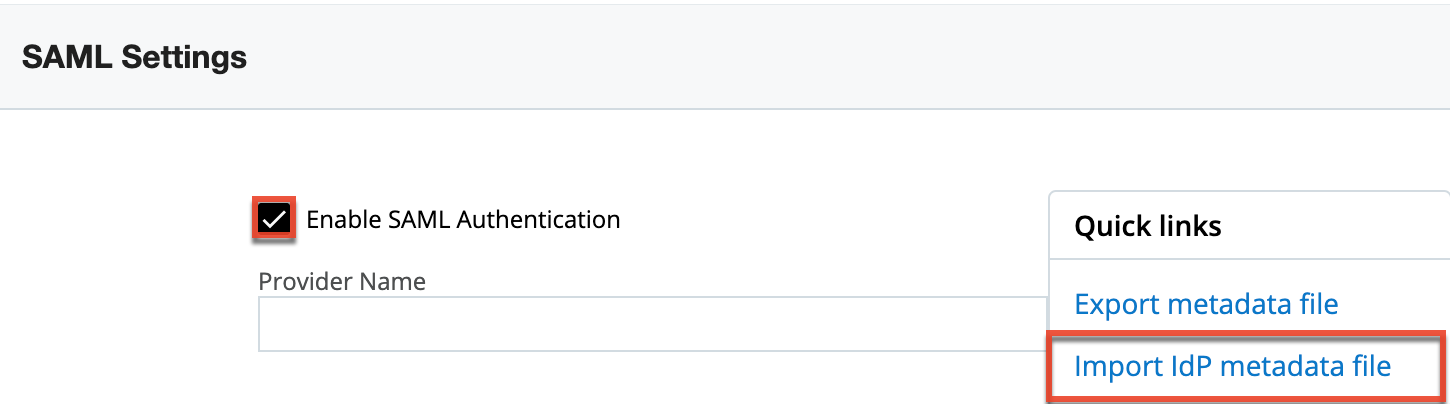
- Find and select the identity provider metadata file on your machine. The data (e.g., Login URL, Entity ID, X509 Certificate) it contains will instantly appear in the corresponding fields (e.g., Login URL) on the SAML Settings page in SugarIdentity.
- Optionally, complete additional fields on the SAML Settings form based on your needs, then click "Save" to preserve the settings.
Field Description Provider Name Enter a custom name that you wish to display in the login button on Sugar's login screen. The login button will display "Log in with [Provider Name]".
Note: If this field is left empty, then the login button will display "Log in with SAML" by default.Display Sugar Login as a Button Enable this checkbox to have the Sugar Login displayed as a button on the login screen where users can enter their Sugar credentials.
Note: By default, the Sugar Login displays as a text string on the login screen for users to click and enter their Sugar credentials.SLO URL Enter the single logout endpoint to which SugarIdentity will send logout requests. When SugarIdentity sends a logout request to the identity provider (e.g., Okta), it will extend that request and terminate active sessions for all other service providers that are sharing the session established via SAML.
Note: Single logout requests can be initiated from either the identity provider or SugarIdentity. This field will be auto-populated if single logout is enabled in Okta.SugarCRM Entity ID Enter any ID to define your company.
Note: When configuring Microsoft Azure, enter your Sugar instance URL (e.g., https://mysugarinstance.sugarondemand.com) in this field.Auto Create Users Enable this checkbox to automatically create a new Sugar user when a SAML user logs in to Sugar for the first time.
Note: The user will count against the number of licensed user accounts for your Sugar instance.Request Signing Private Key Add the Request Signing Private key to be used to sign the AuthN and Logout requests.
If using Okta with single logout enabled, you must complete this field to digitally sign the logout request.Note: The private key must be added to sign the logout request, logout response, and/or AuthN request.
Request Signing Certificate Add the Request Signing certificate containing the X.509 certificate to be used to sign the AuthN and Logout requests.
If using Okta with single logout enabled, you must complete this field to digitally sign the logout request.
Note: The certificate should match the private key.Request Signing Method Select the digital signing method for request and response to the identity provider. The recommended options are either "RSA-SHA256" or "RSA-SHA512".
Sign AuthN Request Enable this checkbox to sign the AuthN request using the private key and certificate.
Note: The "Request Signing Private Key", "Request Signing Certificate", and "Request Signing Method" fields must be completed to sign the AuthN request.Sign Logout Request Enable this checkbox to sign the logout request using the private key and certificate.
If using Okta with single logout enabled, you must enable this field to digitally sign the logout request.
If configuring SAML authentication for Ping Identity, this field must be enabled.
Note: The "Request Signing Private Key", "Request Signing Certificate", and "Request Signing Method" fields must be completed to sign the logout request.Sign Logout Response Enable this checkbox to sign the logout response using the private key and certificate.
This field must be enabled if configuring SAML authentication for Ping Identity.
Note: The "Request Signing Private Key", "Request Signing Certificate", and "Request Signing Method" fields must be completed to sign the logout response.
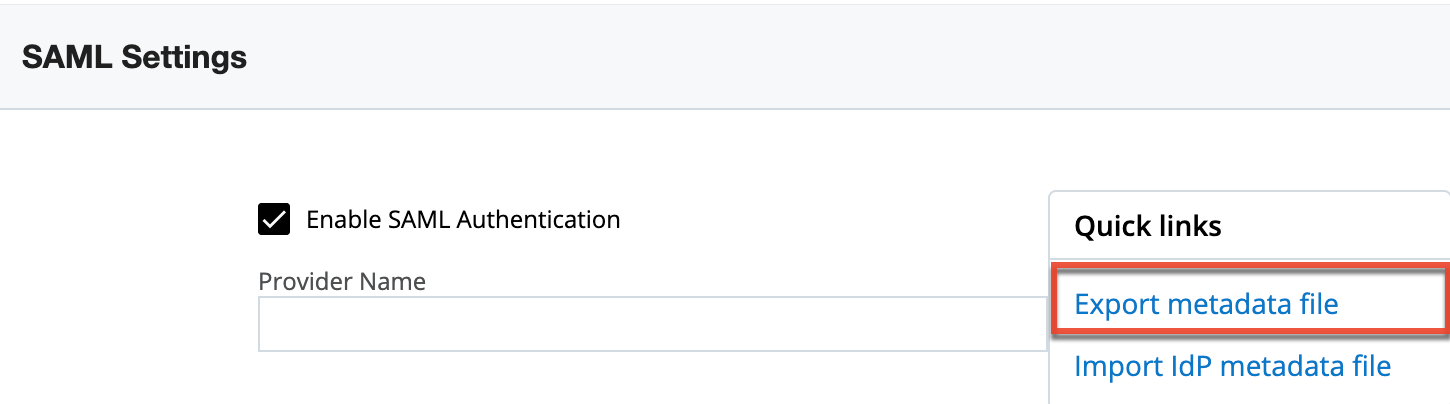
When using ADFS, AWS, or Azure, please refer to the Exporting Metadata File section below as you will need to export an XML metadata file to configure a new trust relationship between SugarIdentity and the identity provider (e.g., ADFS).
Exporting Metadata File
When using ADFS, AWS, or Azure, you will need to export the XML metadata file containing the SAML settings (e.g., Assertion Consumer Service URL), which you will need to configure a new trust relationship between SugarIdentity and the identity provider (e.g., ADFS) to allow communication between the two services. Simply click the "Export metadata file" link in the Quick Links menu to download the necessary file. Once you have the metadata file, follow the steps in one of the articles below to configure the new trust relationship between SugarIdentity and the identity provider:
- Configuring SSO With Active Directory's ADFS
- Configuring SSO With AWS Using SAML (step 1)
- Configuring SSO With Azure Using SAML
SAML Attribute Mapping
To have SAML attributes map to the SugarIdentity user fields, you will need to set up the attribute mapping in the identity provider (e.g., Okta) using the predefined SAML attribute values. For more information on setting up the attribute mapping, refer to the Configuring SAML Attribute Mapping for SugarIdentity article. Once the attribute mapping is configured, when a SAML user is created in the identity provider or the SAML attributes (e.g., email) are modified, these changes will sync to SugarIdentity when the user next logs in to Sugar. If you have configured SCIM for the identity provider (e.g., OneLogin), then the changes will automatically sync to SugarIdentity in real-time.
OIDC Settings
SugarIdentity can be configured to accept OpenID Connect (OIDC) for single sign-on if it is implemented at your organization. When users in your system attempt to log in to Sugar, the application will authenticate them against OIDC. If authentication is successful, the user is granted access to Sugar. If the authentication is unsuccessful, SugarIdentity will then attempt to verify the provided credentials against its own database of valid usernames and passwords.
To configure OIDC authentication in SugarIdentity, you must first obtain some key information (e.g., OIDC Server Authentication Endpoint, Client ID, Client Secret). The instructions for doing so with Auth0, Azure, Google, and Okta are covered in the following help articles. Once you have obtained the necessary information, refer to the following steps below to configure OIDC authentication.
- Configuring SSO With Auth0 Using OIDC
- Configuring SSO With Azure Using OIDC
- Configuring SSO With Google Using OIDC
- Configuring SSO With Okta Using OIDC
Use the following steps to configure OIDC authentication in SugarIdentity:
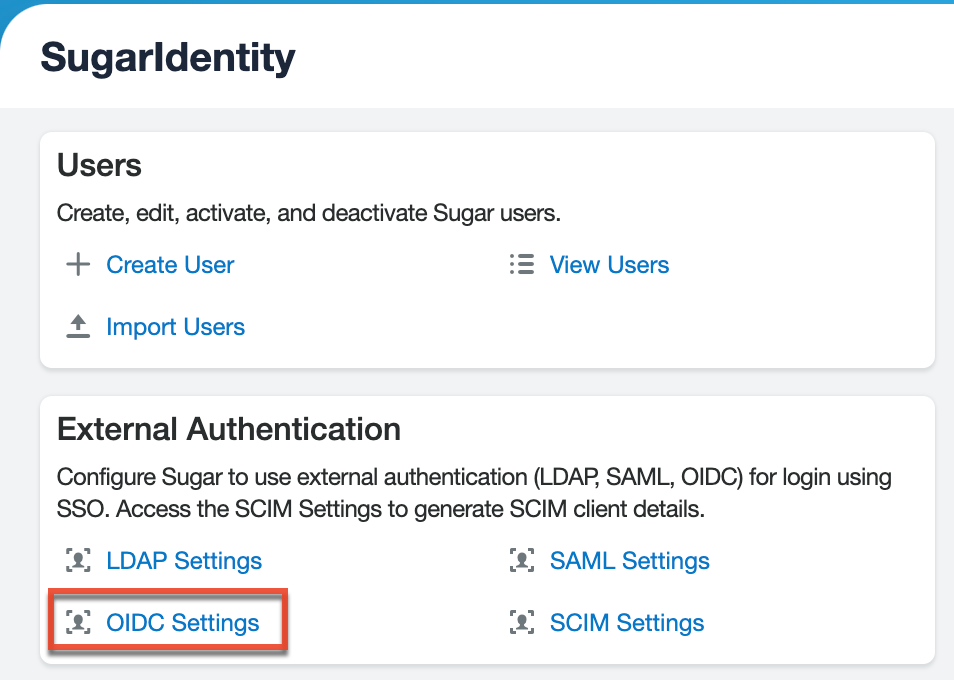
- Log in to Sugar and navigate to Admin > SugarIdentity.
Note: For Sugar versions 13.0 and lower, navigate to Admin > SugarCloud Settings. - Click "OIDC Settings" from the home page in SugarIdentity.
- Place a check in the Enable OIDC Authentication box to enable OIDC and reveal the OIDC configuration fields.
- Enter the appropriate values in the following fields, then click "Save" to commit the changes.
Field Description Provider Name Enter a custom name that you wish to display in the login button on Sugar's login screen. The login button will display "Log in with [Provider Name]".
Note: If this field is left empty, then the login button will display "Log in with OIDC" by default.Display Sugar Login as a Button Enable this checkbox to have the Sugar Login displayed as a button on the login screen where users can enter their Sugar credentials.
Note: By default, the Sugar Login displays as a text string on the login screen for users to click and enter their Sugar credentials.OIDC Server Authorization Endpoint Enter the authorization endpoint which is used by the Login Service to obtain authorization from the resource owner via user-agent redirection.
OIDC Server Token Endpoint Enter the token endpoint which is used by the Login Service to obtain an access token by presenting its authorization grant or refresh token. OIDC Server Userinfo Endpoint Enter the user info endpoint which is used to obtain the user information from the identity provider (e.g., Okta). ClientID Enter the Client ID obtained from the identity provider (e.g., Okta). Client Secret Enter the Client Secret obtained from the identity provider (e.g., Okta). Username Attribute Mapping Select which OIDC attribute (e.g., email) should be used for the username field in Sugar. This change will be applied to all users on the next login. Scopes Choose the scopes to use during OIDC authentication:
- OpenID: Used to obtain the ID token.
- Profile: Used to read the user's first and last name.
- Email: Used to read the user's email address.
- Address: Used to read the user's address.
- Phone: Used to read the user's phone number.
Note: The OpenID, Email, and Profile options are required for OIDC and must be selected.
Redirect URI This field is pre-populated by default. The value is required to be entered when configuring the identity provider (e.g., Okta) for OpenID Connect. Auto Create Users Enable this checkbox to automatically create a new Sugar user when a OIDC user logs in to Sugar for the first time.
Note: The user will count against the number of licensed user accounts for your Sugar instance.
Once OIDC authentication is configured, when creating new users in SugarIdentity, you will need to enter the user's OIDC username, which is a unique alphanumeric ID (e.g., User ID) that is defined in the identity provider (e.g., Okta). It is recommended that the Show Full Names option in Admin > System Settings be enabled in your SugarCRM instance to avoid having the alphanumeric IDs display in Sugar.
OIDC Attribute Mapping
By default, certain attributes (e.g., first name, last name) from the identity provider (e.g., Okta) will map to the SugarIdentity user fields once you configure the OIDC authentication. As shown in the table below, the "sub" OIDC attribute maps to the username field in SugarIdentity by default. But, administrators can change the username attribute mapping (e.g., email, preferred_username) in SugarIdentity via the OIDC Settings page to better suit their needs.
Please note that when a new user is created in the identity provider or the OIDC attributes are modified, these changes will sync to SugarIdentity when the user next logs in to Sugar. If you have configured SCIM for the identity provider (e.g., Okta), then the changes will automatically sync to SugarIdentity in real-time.
The following table outlines the general attribute mapping between OIDC and SugarIdentity. Please note that the default attribute mapping varies between the identity providers.
| OIDC Attributes | SugarIdentity User Fields |
| sub | Username |
| given_name | First Name |
| family_name | Last Name |
| phone_number | Work Phone |
| address.street_address | Address Street |
| address.locality | Address City |
| address.region | Address Region or State |
| address.postal_code | Address Postal Code |
| address.country | Address Country |
The table below outlines the default attribute mapping between the supported identity providers and SugarIdentity.
Note: The user's address, phone, title, and department attributes do not map between Auth0, Azure, Google and SugarIdentity. You will need to manually enter/update this information when creating the users in SugarIdentity or when these OIDC attributes are modified in the identity provider, if you wish to maintain consistent data.
| Identity Provider | Attributes Mapped to SugarIdentity |
| Auth0 |
First Name, Last Name, Email |
| Azure | First Name, Last Name, Email |
| First Name, Last Name, Email | |
| Okta |
First Name, Last Name, Email, Work Phone, Address |
SCIM Settings
SugarIdentity supports System for Cross-domain Identity Management (SCIM), which can be configured to allow user identity information (e.g., name, email, phone number) to automatically sync to SugarIdentity in real-time. Please note that the sync behavior will be different depending on whether you have SCIM configured or not as summarized in the table below:
| SCIM Configured | Sync Behavior |
| Yes | Data sync occurs in real-time. |
| No | Data sync occurs when the user next logs in to Sugar. |
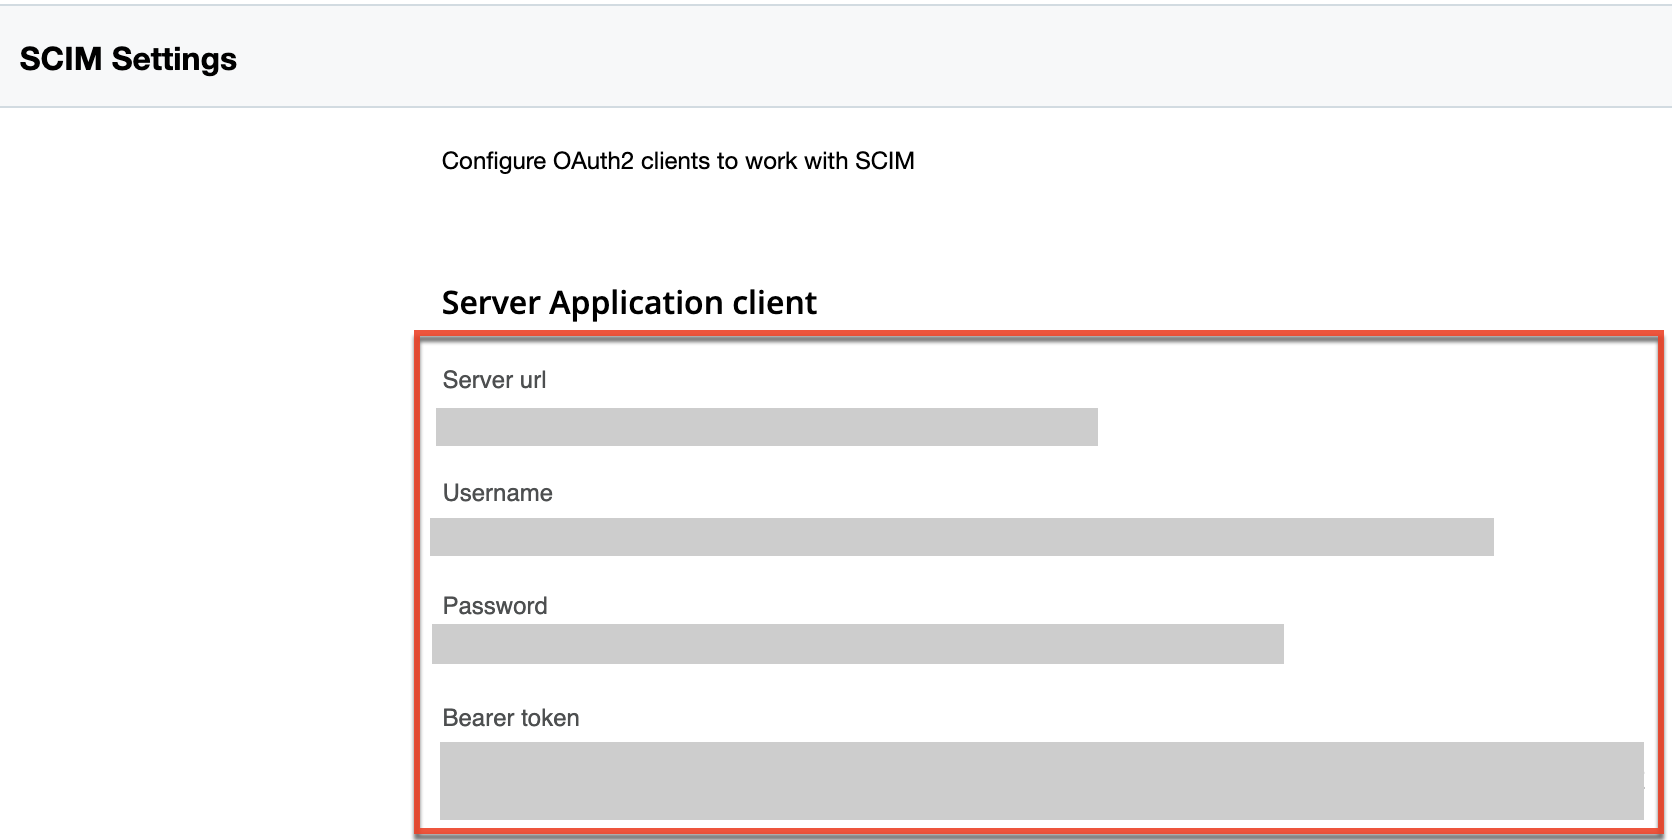
To configure SCIM, you must first obtain the required SCIM credentials (e.g., Server URL, Bearer Token) as follows:
- Click "SCIM Settings" on the home page in SugarIdentity.
- On the SCIM Settings page, click the Create Client button to generate the "Server URL", "Username", "Password", and "Bearer Token" values.
If your organization uses SAML and has already configured SAML authentication in SugarIdentity, then you can configure SCIM for real-time data sync. For more information on configuring SCIM when using SAML, refer to the Configuring SCIM for SugarIdentity WIth Okta or Configuring SCIM for SugarIdentity With OneLogin articles.
If your organization uses Microsoft Azure, you can configure SCIM without SAML authentication. For more information on configuring SCIM for Azure, refer to the Configuring SCIM for SugarIdentity With Azure article.
Please note that the SCIM credentials required for configuring SCIM will vary between identity providers (e.g., OneLogin, Okta). For example, when configuring SCIM for OneLogin, you will only need the "Server URL" and "Bearer Token" values.