SugarIdentity Guide
Overview
SugarIdentity provides a centralized location for customers to securely manage user identities and authentication, as well as access different applications and services in the SugarCRM ecosystem. SugarIdentity provides a federated identity solution based on industry standards and supports comprehensive single sign-on (SSO) for the Sugar application, Sugar Market, Sugar Connect, Sugar Discover, the SugarCRM mobile app, and the Sugar Plug-in for Microsoft Excel. For instances that use SugarIdentity, the administrator will access SugarIdentity to create and manage user records, manage password requirements and security settings (e.g., multi-factor authentication), as well as set up LDAP, SAML, or OIDC authentication for SSO.
Note: If you wish to use SugarIdentity for your on-site instance of Sugar, you can activate SugarIdentity via the activation portal.
Supported Regions
SugarIdentity is supported in the following regions:
- ap-southeast-1: Asia Pacific (Singapore)
- ap-southeast-2: Asia Pacific (Sydney)
- ca-central-1: Canada (Central)
- eu-central-1: Europe (Frankfurt)
- eu-west-2: Europe (London)
- us-west-2: US West (Oregon)
Prerequisites
The following prerequisites must be met to access and perform actions in SugarIdentity:
- Your Sugar instance must be SugarIdentity-enabled.
- You must be a Sugar administrator.
For information on supported platforms, refer to the SugarIdentity Supported Platforms page.
Determining if Your Instance Uses SugarIdentity
To check if your Sugar instance uses SugarIdentity, navigate to the Admin page (in SugarCRM) to see if the SugarIdentity link appears in the SugarCloud section. For Sugar versions 13.0 and lower, check to see if the SugarCloud Settings link appears in the Admin page. In addition, when editing a user record, a pop-up message will appear stating that you (i.e., Sugar admin) need to access SugarIdentity to make changes to read-only fields (e.g., First Name, Last Name, Title). For regular users, the message will indicate to contact the Sugar administrator to make changes to read-only fields.
Accessing SugarIdentity
For a SugarIdentity-enabled instance, you can access SugarIdentity by navigating to Admin > SugarIdentity. For Sugar versions 13.0 and lower, navigate to Admin > SugarCloud Settings. You will automatically be authenticated in SugarIdentity because you have an active Sugar session. Alternatively, you can navigate directly to SugarIdentity via your region-specific URL where you will need to enter your tenant ID (supplied by Sugar) and credentials to log in.
If your Sugar instance uses multi-factor authentication (MFA), you will need to use an authenticator app (e.g., Authy, Google Authenticator) and enter the 6-digit verification code generated from the app when logging in to SugarIdentity. Please note that logging in to SugarIdentity will automatically log you in to your SugarIdentity-enabled instance and vice versa since they both share the same login service.
Note: SugarIdentity only allows one active session at a time.
Setting Your Language
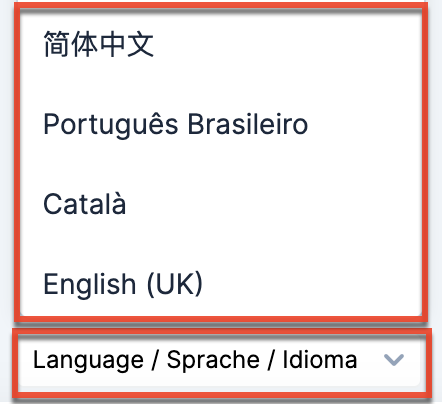
You have the option to choose the primary language you want displayed in SugarIdentity by clicking the Language link at the bottom of the SugarIdentity login screen. Select the desired language you wish to display from the Language dropdown list. Please note that administrators can also set the default language globally via Admin > Locale in the Sugar application. For more information on configuring the default language in Sugar, refer to the System documentation. If any languages are disabled in Sugar via Admin > Languages, they will not be available to select in the Language dropdown list in SugarIdentity.
The following languages are available for use in SugarIdentity:
| Albanian | Hungarian |
| Arabic | Italian |
| Brazilian Portuguese | Japanese |
| Bulgarian | Korean |
| Catalan | Latvian |
| Chinese (Simplified) | Lithuanian |
| Chinese (Traditional) | Norwegian |
| Croatian | Polish |
| Czech | Portuguese |
| Danish | Romanian |
| Dutch | Russian |
| English (UK) | Serbian |
| English (US) | Slovak |
| Estonian | Spanish |
| Finnish | Spanish (Latin) |
| French | Swedish |
| German | Thai |
| Greek | Turkish |
| Hebrew | Ukrainian |
Accessing Multiple SugarIdentity-Enabled Instances
Your organization may use multiple SugarIdentity-enabled instances, such as your Sugar production environment and sandbox environments, and you can log in and access these instances from within the same browser. Each SugarIdentity-enabled instance that you use is associated with a unique tenant ID that is used to authenticate in SugarIdentity. Please keep in mind that the number of tenants (e.g., Sugar production instances, sandbox instances) and user accounts that you access will determine how the login screen will appear when logging in to the SugarIdentity-enabled instance(s).
If your regular use of Sugar just consists of accessing a single tenant (e.g., ABC Company Production) and user account, the standard login screen will appear when logging in to Sugar. The standard login screen will also appear when accessing a single user account (e.g., Administrator) in multiple SugarIdentity-enabled instances. But in circumstances where you access multiple user accounts in the instance(s) (e.g., ABC Company Production, ABC Test Sandbox), the login screen will display an account selector similar to the image below and list the last ten users that you have logged in as for the current Sugar instance you are accessing. Each user will be identified by their username or first and last name (if using OIDC authentication) as well as the tenant name and tenant ID for the Sugar instance to which they belong. To access the user's account, simply click on the desired user's name (e.g., Max Jensen) on the screen. To log in to an unlisted user's account, click the "Show login form" link then enter the user's login credentials on the following screen.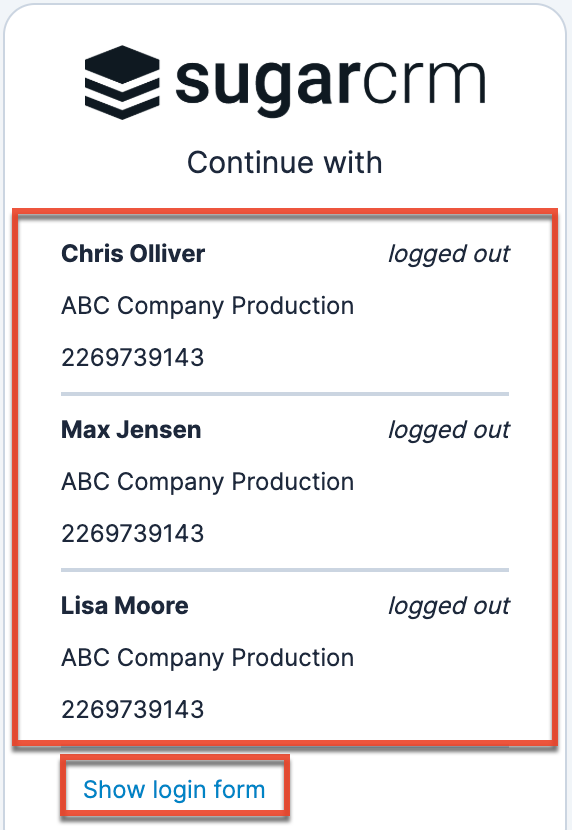
Please note that an account selector will also appear on the login screen when accessing SugarIdentity if you have logged into multiple user accounts across your Sugar instances. The account selector will display a list of the last ten users that you logged in as across the various instances. If you wish to log in to an unlisted tenant or admin user account, click the "Log into another tenant" link then enter the tenant ID followed by the user's login credentials to access SugarIdentity.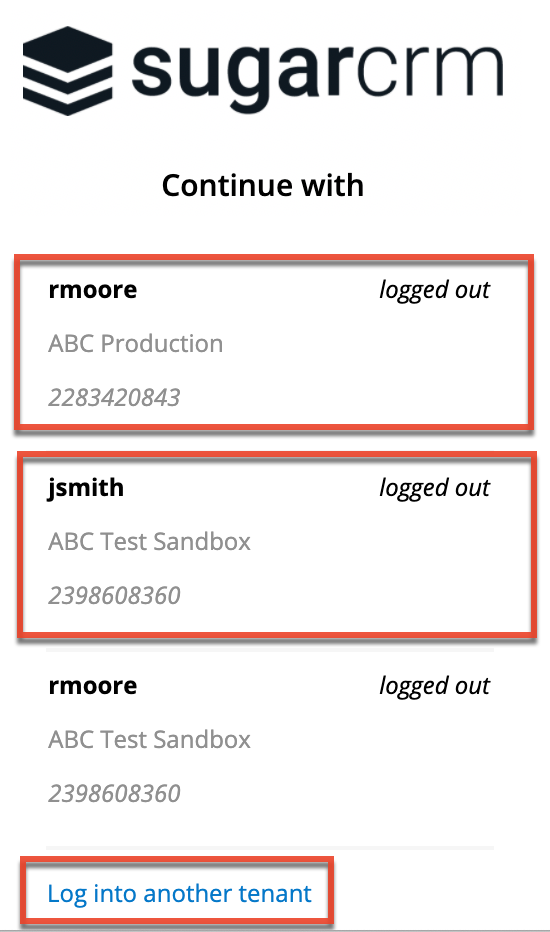
Navigation Bar
The navigation bar, spanning top to bottom on the left side of the screen, displays on all pages within SugarIdentity. The navigation bar allows you to access the Home page containing links to various options and settings, create user records via Quick Create, or access the Users module to view or create users.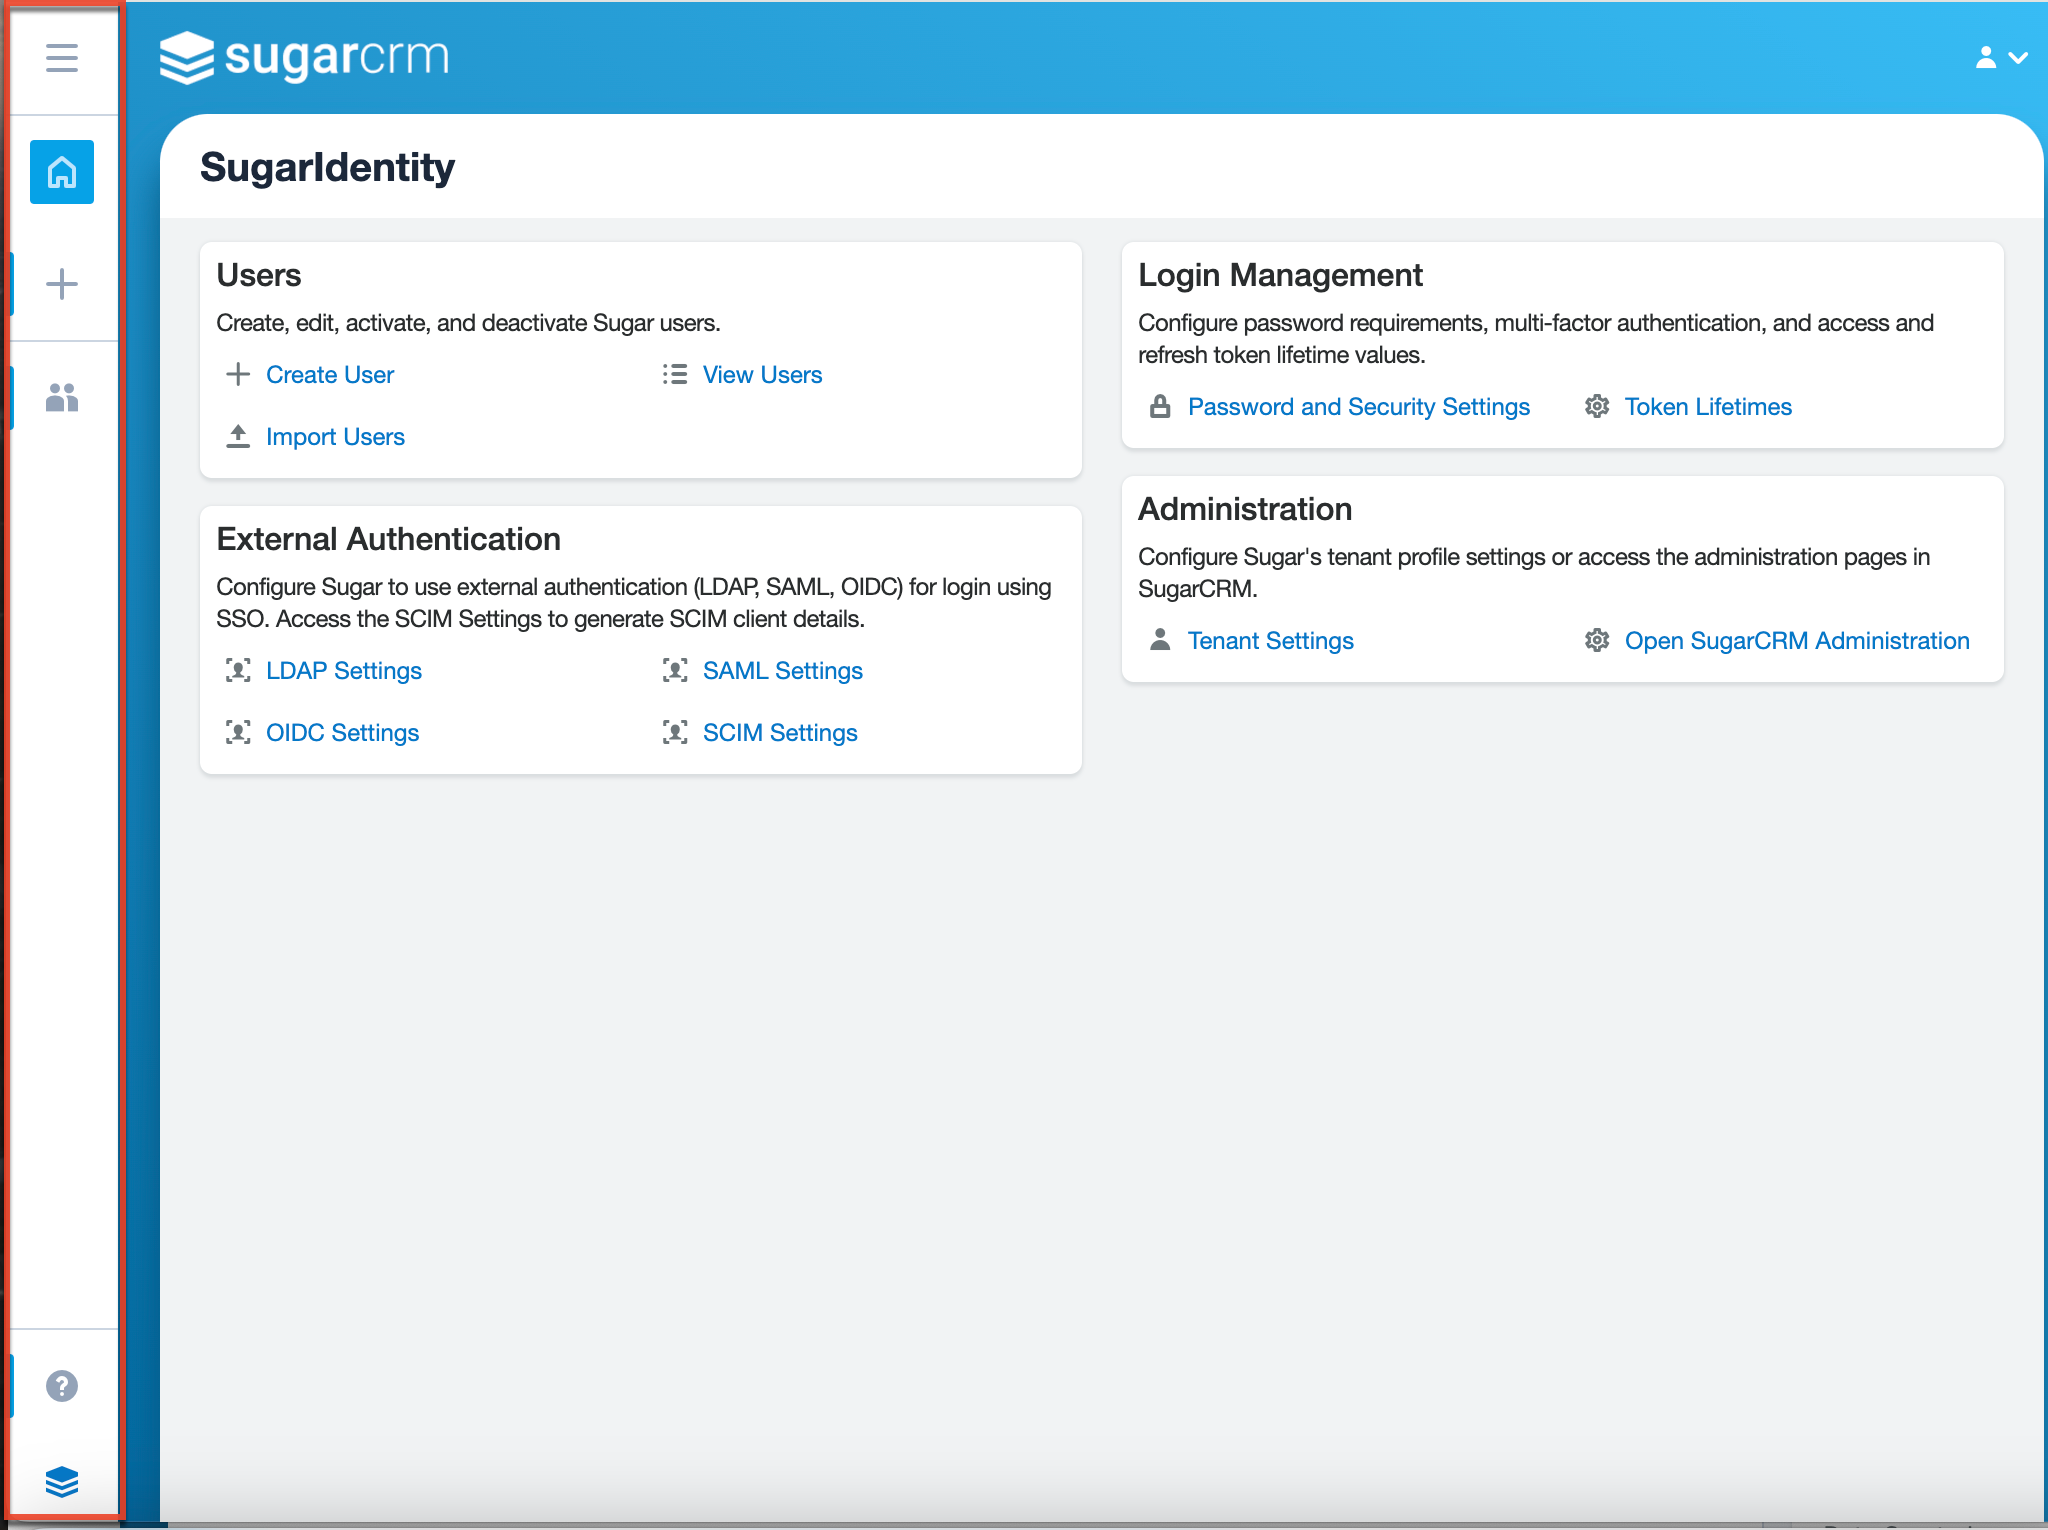
The default navigation bar consists of the following options from top to bottom:
| Navigation Bar Item | Description |
| Open Button | Click the Open button to view the navigation bar in the expanded state with the list of the available modules (e.g., Users). |
| Home | Click the Home tab to access the Home page containing links to various options (e.g., Create User) and settings (e.g., Password and Security Settings) to configure Sugar. |
| Quick Create | Click the Quick Create button to create a new user record from anywhere in SugarIdentity. |
| Module Tabs | The Users module tab displays in the navigation bar. Click the module tab to open its list view, or click the three-dots menu in the module tab to display the Actions menu. |
| Help |
Click the Help icon to quickly find information regarding your SugarCRM instance's version and associated Sugar licenses (e.g., Sugar Sell Advanced, Sugar Serve), as well as links to the SugarIdentity documentation and other helpful resources. |
| SugarCRM | Click the SugarCRM icon to navigate to SugarCRM.com. |
Open Button
Click the Open button to view the navigation bar in the expanded state displaying "Home", "Quick Create", and the list of the available modules (e.g., Users). Clicking a module tab or selecting an option from the module tab's three-dots menu will collapse the navigation bar. You can also collapse the navigation bar by clicking the "X" that appears above the Home tab.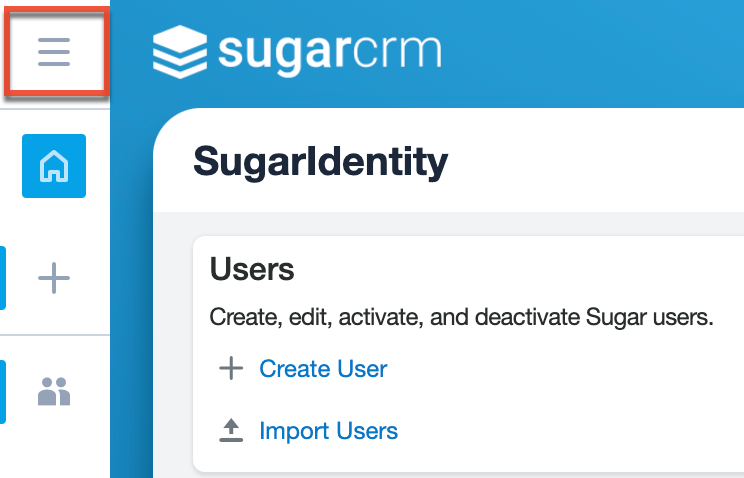
Home
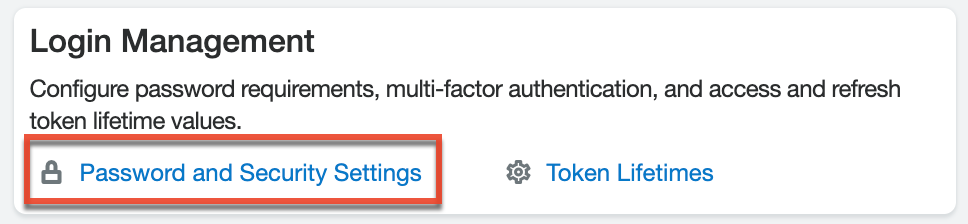
The home page is the hub of SugarIdentity containing links to view, create, and import your Sugar users, as well as configure and manage various system settings (e.g., Password and Security Settings) for your Sugar instance. Simply click the Home tab below the Open button on the navigation bar to access this page.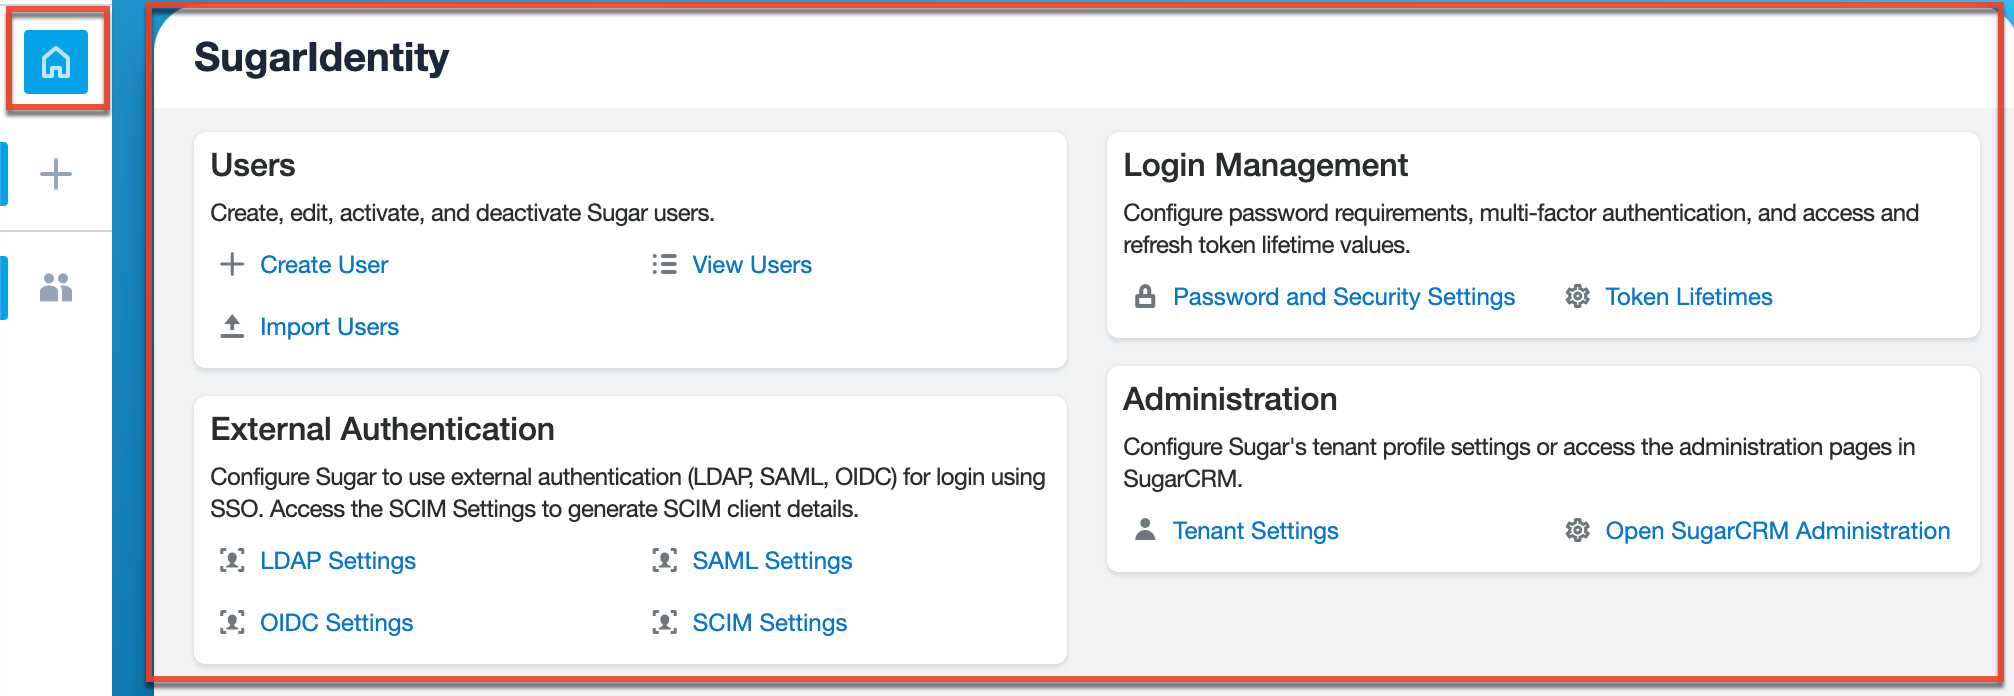
You can perform the following operations using the available options and settings in the home page:
| Home Page Item | Description |
| Create User | Create new Sugar users for your organization. |
| View Users | View the list of all user records in Sugar and some key user fields such as Name, User Name, Email, etc. |
| Import Users | Import and create multiple user records in Sugar using a .csv file. |
| Password and Security Settings | Configure password requirements and multi-factor authentication for your Sugar instance. |
| Token Lifetimes | Configure the access and refresh token lifetime values. |
| LDAP Settings | Configure your Sugar instance to use LDAP authentication for login using single sign-on. |
| SAML Settings | Configure your Sugar instance to use SAML authentication for login using single sign-on. |
| OIDC Settings | Configure your Sugar instance to use OIDC authentication for login using single sign-on. |
| SCIM Settings | Generate the SCIM client details when configuring SCIM. |
| Tenant Settings | View and configure the Sugar instance's tenant profile settings (e.g., tenant name, custom logo). |
| Open SugarCRM Administration | Navigate to your SugarCRM instance's Administration page. |
| Open Sugar Market Administration |
Navigate to your Sugar Market instance's Administration page. |
Quick Create
The Quick Create button allows you to easily create new user records from anywhere in SugarIdentity. Simply click the Quick Create button, and the Create User form will open for you to enter the user's details and create the new record. All required fields are marked with a red asterisk and must be completed prior to saving. Once the necessary information is entered, click "Save". If you do not wish to create the user record, simply click the Cancel button.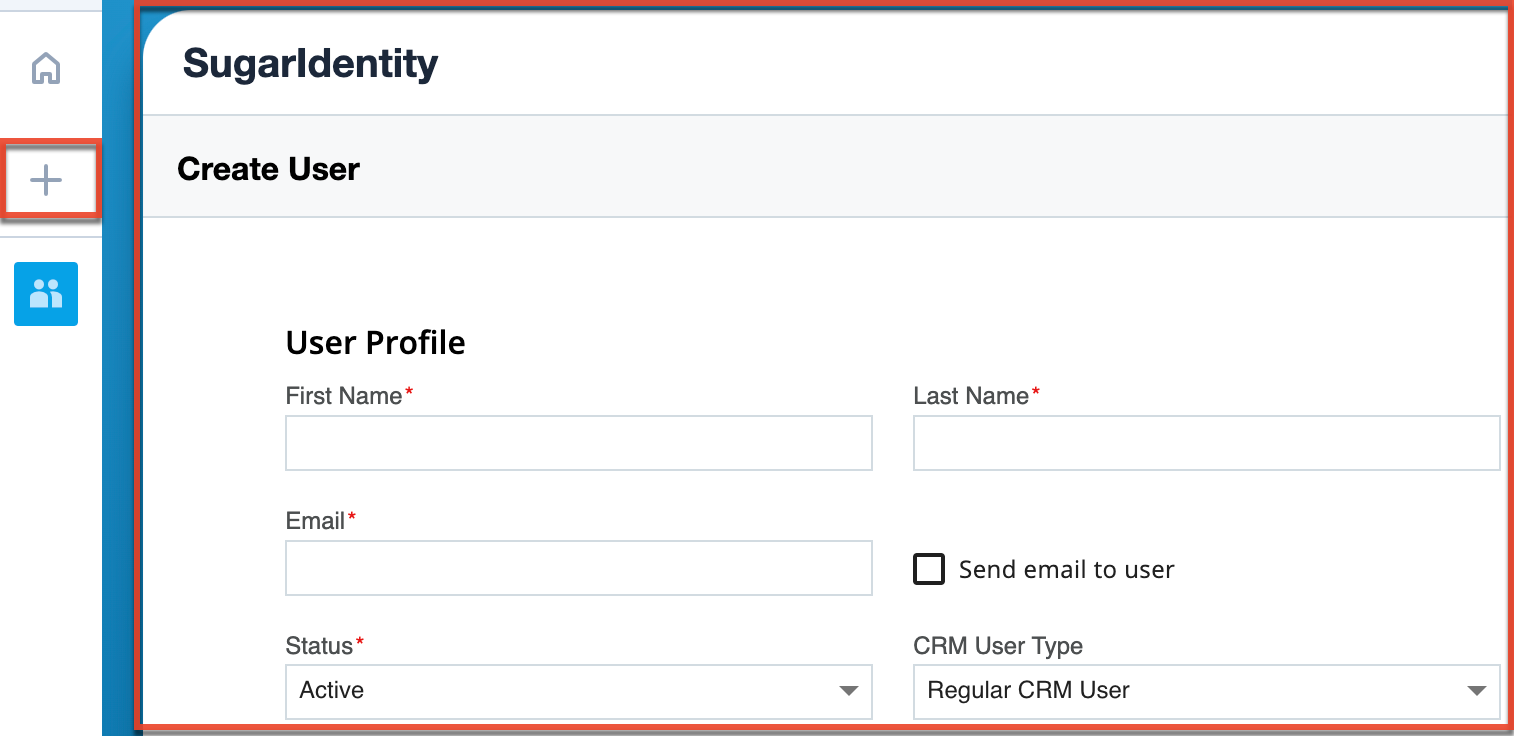
Module Tabs
The module tabs are located below the Quick Create button on the navigation bar. To access a specific module's list view, simply click the module's icon when the navigation bar is collapsed or the full module name (e.g., Users) when the navigation bar is opened. You can also click the three-dots menu in the module tab to display the Actions menu, which allows you to perform important actions (e.g., Create User) within the module.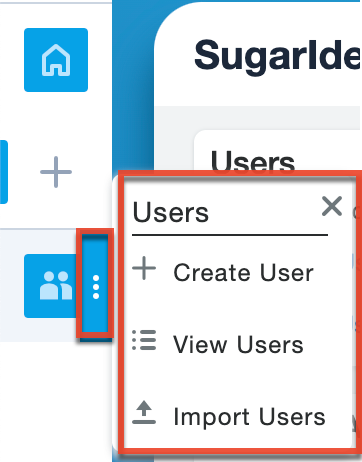
Help
Click the Help icon at the bottom of the navigation bar to quickly find information regarding the SugarCRM version and the Sugar licenses (e.g., Sugar Sell Advanced, Sugar Serve) associated with the particular Sugar instance you are accessing in SugarIdentity. The help pane also provides a link to the SugarIdentity documentation on the Sugar Support site containing links to the SugarIdentity user guides, release notes, and supported platforms page. In addition, the following learning resources are available in the help pane:
- Training & Certification: Navigate to the SugarU space in SugarClub, where you can enroll in online classes, engage with live training, and get Sugar-certified.
- SugarClub Community: Engage, learn, and explore with others around the world in the SugarClub online community. Level up your Sugar knowledge and share your expertise with other users, Sugar partners, and Sugar employees.
- Documentation & Support: Navigate to the Sugar Support Site, where you can access the case portal and official product documentation.
- SugarOutfitters Marketplace: Navigate to the SugarOutfitters site, the SugarCRM marketplace, where you can explore and find a vast selection of third-party solution add-ons that can add new capabilities to your Sugar instance.
Header
The header in SugarIdentity displays the logo and the User Menu.
| Header Item | Description |
| Logo | Click the logo on the upper left of the screen to access SugarIdentity's home page. |
| User Menu |
Click the grey profile icon on the upper right of the screen to open the user menu, which allows you to change your Sugar password, navigate to your SugarCRM instance's About page, and log out of SugarIdentity. |
Logo
You can click the logo on the top left of the header from any page in SugarIdentity to return to the home page.
User Menu
A grey profile icon appears on the upper right of SugarIdentity, and clicking it opens the user menu where you can change your Sugar password, navigate to your SugarCRM instance's About page, and log out of SugarIdentity as described in the following sections.
Changing Password
In addition to the Change Password option in Sugar, administrators also have the ability to change their password in SugarIdentity. Simply click the user menu on the upper right of the screen and select "Change Password". The Change Password screen will open and display the Old, New, and Confirm password fields, as well as your organization's configured password requirements (if any).
To change your Sugar password, simply enter your current password, new password, and confirmed password making sure to meet all the password requirements listed on the screen. Please note that the password requirements for Sugar can be configured in SugarIdentity by clicking the Password and Security Settings link from the home page. Administrators can set the minimum and maximum lengths required for the password, as well as indicate if any special characters are needed. Additional requirements such as upper case, lower case letters, and numbers can also be a part of the password requirements. Once you have entered the new password, click "Confirm" to preserve the change. A success message will appear once the password has been updated successfully; click "Continue" to log in and access your account. You will also receive an email notification confirming that your Sugar password has been changed.
About
Navigate to the About page in your SugarCRM instance to view your CRM instance's version and build number and your assigned Sugar licenses (e.g., Sugar Sell Advanced, Sugar Serve). You can also access links to different resources and view source code information.
Logging Out
When you are done working in SugarIdentity and wish to log out, click the user menu and select "Log Out". Please note that logging out of SugarIdentity will not log you out of the Sugar application. But logging out of the Sugar application will automatically log you out of SugarIdentity.
Tenant Settings
The Tenant Settings page displays key information specific to the SugarIdentity-enabled instance you are accessing in SugarIdentity, such as the SugarIdentity tenant ID, associated region, and the SugarCRM instance URL. You can also configure the Sugar instance's name that appears on the Sugar login screen. To access the Tenant Settings page, click the Tenant Settings link from the home page in SugarIdentity. As a best practice, if your organization uses multiple SugarIdentity-enabled instances (e.g., production, sandboxes), please update the tenant name (e.g., ABC Company (Production), ABC Company Test Sandbox) to be unique for each instance so that it is easier to differentiate them when viewing the login screen. This is especially helpful in identifying which instance a user belongs to when the account selector appears on the login screen. 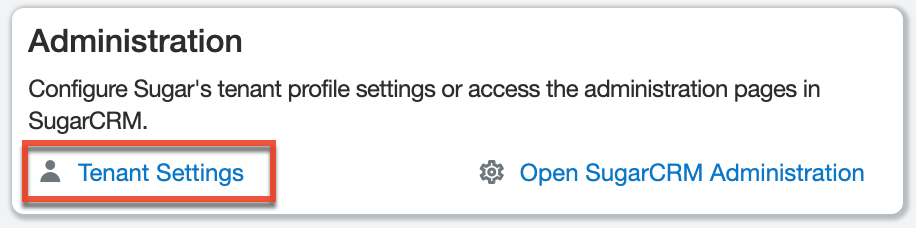
In addition, you can replace the SugarCRM logo on the login screen with your own image, such as your company's logo, to help better identify your Sugar instance. To configure a new logo, upload a PNG or JPG file (not to exceed 200 x 300 pixels) with the standard transparent background color to the Logo on Sugar Login Screen field, then click "Save". 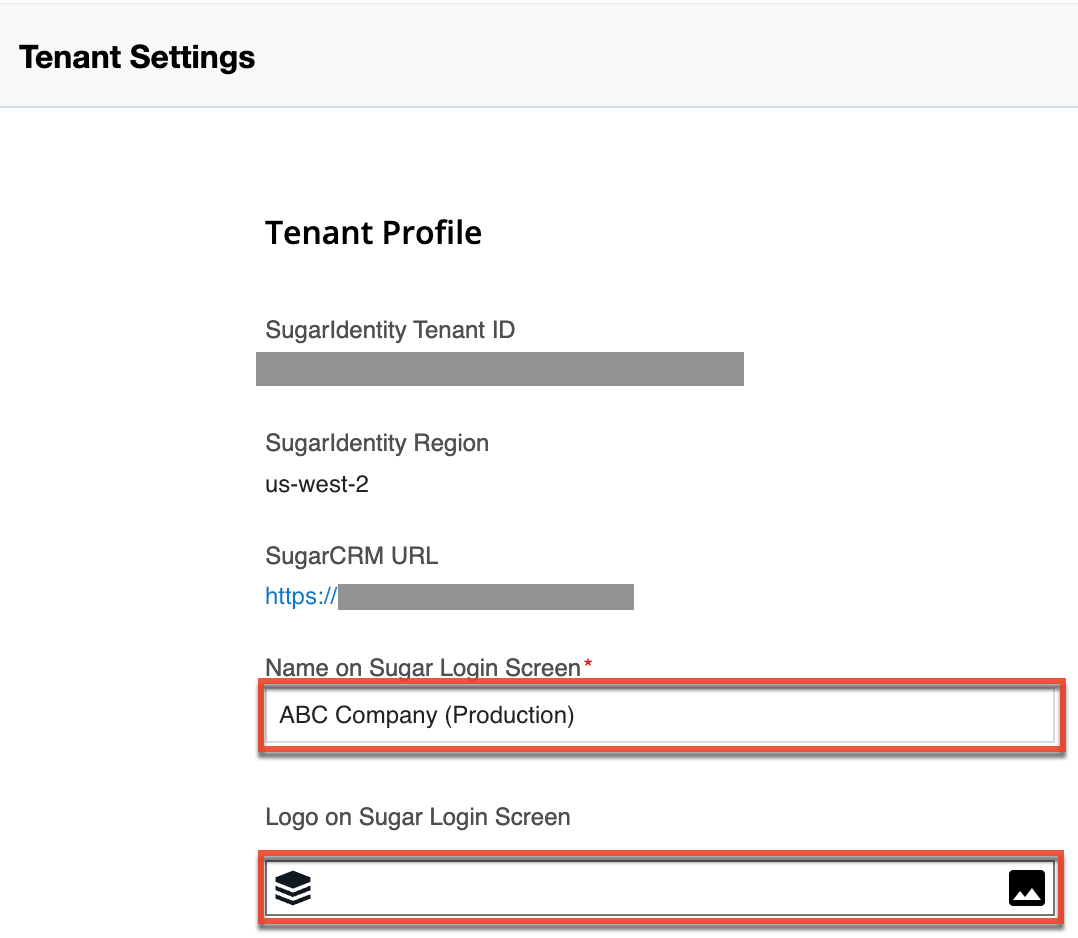
Configuring SugarIdentity User Management Role
System administrators can enable the SugarIdentity User Management role on the Tenant Settings page to grant regular, non-admin users access to SugarIdentity to allow them to modify certain user data (e.g., name, email address) and perform certain actions without giving them full system administrator access. This setting must be enabled first before assigning users to the role in SugarIdentity. Please note that the SugarIdentity User Management role is supported for Sugar versions 14.0.0 and higher.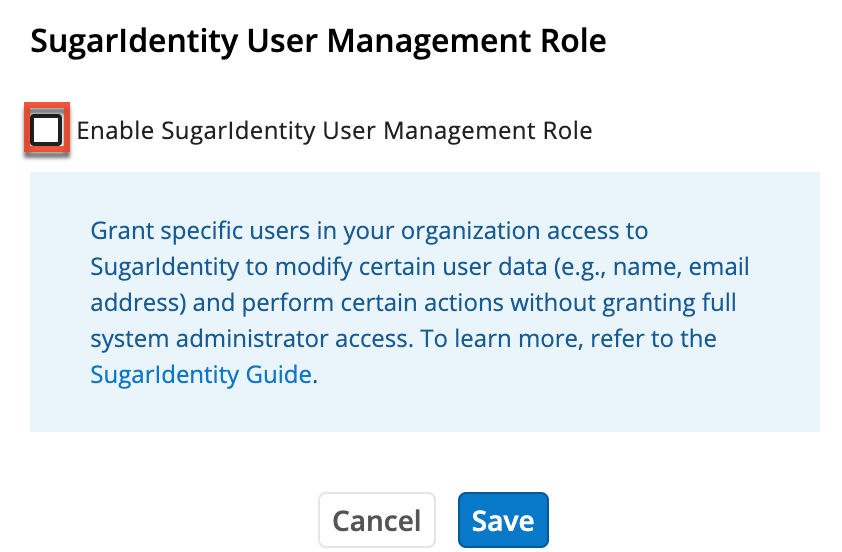
Once the user management setting is enabled, the following options will be available in SugarIdentity and Sugar:
- SugarIdentity: In the users record view (regular users only), the Enable User Management Role option will display allowing administrators to assign the role to certain users.
- Sugar: In Admin > Role Management, a system-generated role called "SugarIdentity User Management Role" will appear, which grants "Admin & Developer" access to Users, Teams, and Roles in Sugar as well as access to SugarIdentity.
When a user is assigned to the user management role in SugarIdentity, they will be automatically added to the SugarIdentity User Management role in Sugar, granting them access to SugarIdentity to manage certain user data. These "user managers" have limited access in SugarIdentity unlike "system administrators" who have full access to manage and modify all users and settings in SugarIdentity.
Note: The user must log out and back in to see the changes on their end once they have been assigned to the role.
Please keep in mind the following guidelines for users assigned to the user management role in SugarIdentity:
- Users assigned to the User Management role (i.e., user managers):
- Can only access the Users module and create regular users in Sugar.
- Can only edit data for regular (non-admin) users who are not assigned to the user management role.
- Can modify all user fields in the record view except the "CRM User Type" and "Enable User Management Role" fields.
- Cannot mass update the CRM User Type field as it is not available to update for user managers.
- Can only send password reset emails for regular users and user managers, but not system administrators.
- Can only reset multi-factor authentication for regular users who are not assigned to the user management role.
- Cannot delete any user records in Sugar.
- Cannot impersonate other users in their organization.
If you wish to disable the user management role for your instance, click the Enable SugarIdentity User Management Role checkbox to remove the checkmark and click "Save". Once disabled, the previously assigned users will no longer be able to access SugarIdentity. In addition, they will no longer have "Admin & Developer" access to Users, Teams, and Roles in Sugar unless they are assigned to a separate Sugar role giving them access. If you re-enable the SugarIdentity user management role in the future, you must reassign the role to the users again.
Enabling License Management in SugarIdentity
If your on-site SugarCRM instance is SugarIdentity-enabled, you can enable license management if you wish to manage your users' licenses in SugarIdentity instead of Sugar. Please note that license management must be enabled in SugarIdentity when SugarIdentity is enabled for a Sugar Market instance.
To activate license management, click "Enable License Management" on the home page in SugarIdentity. Then, click "Confirm" in the following dialog box to initiate the license management activation process.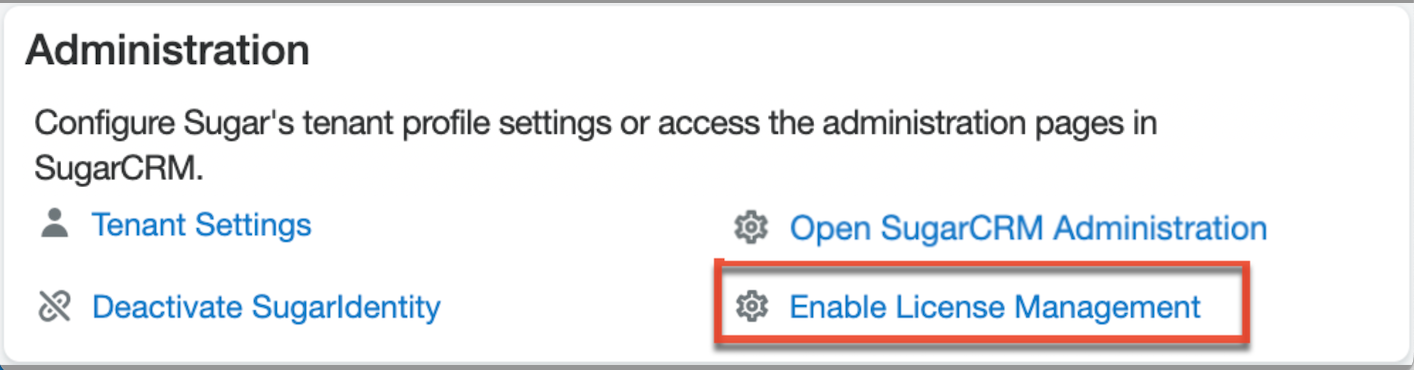
Once the activation process is complete, an email notification will be sent to your primary email address on file with the activation results. Going forward, the users' licenses will be managed from the Users module in SugarIdentity.
Password and Security Settings
The Password and Security Settings page allows administrators to configure the password requirements for user logins and enable or disable multi-factor authentication for their Sugar instances.
Configuring Local Passwords
Use the following steps to configure the password rules for user logins:
- Log in to Sugar and navigate to Admin > SugarIdentity.
Note: For Sugar versions 13.0 and lower, navigate to Admin > SugarCloud Settings. - Click the Password and Security Settings link on the home page in SugarIdentity.
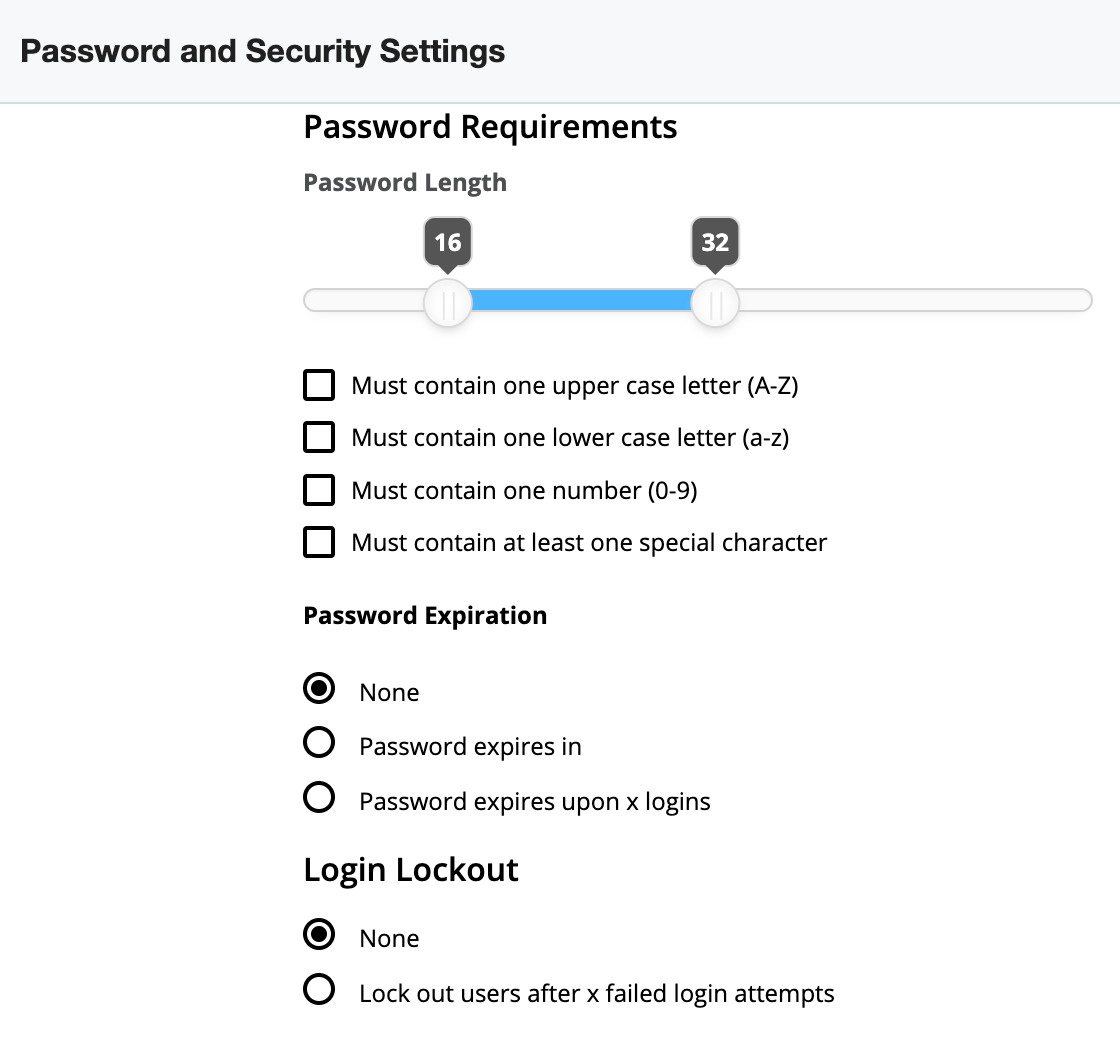
- Configure the password options (e.g., Password Length, Password Expiration) accordingly on the Password and Security Settings page.
- Click "Save" to preserve your changes and apply the configuration to Sugar.
Note: When users reset their Sugar password, the new password must conform with your configured password requirements, which will appear on the reset password screen. For more information on resetting user passwords, refer to the Getting Started documentation or the User Management guide.
Password Fields
The following password fields are available to configure:
- Password Length: Click and drag the sliders to indicate the minimum and the maximum number of characters allowed in a password.
- Must contain one upper case letter (A-Z): Enable this option to require at least one uppercase letter in every password.
- Must contain one lower case letter (a-z): Enable this option to require at least one lowercase letter in every password.
- Must contain one number (0-9): Enable this option to require at least one numerical character in every password.
- Must contain at least one special character: Enable this option to require at least one special character (e.g., #, &, *) in every password.
- Password Expiration: Select one of the following options to control how long users can utilize their passwords before being forced to choose a new one.
- None: Passwords will never expire and users will never be forced to choose a new one.
- Password expires in: Passwords will expire x days, weeks, or months after their last password was saved.
- Password expires upon x logins: Passwords will expire after the user has logged in using their current password x times.
- Login Lockout: Select one of the following options to control how many times a user may attempt to log in with incorrect credentials before they are prohibited from attempting to log in.
- None: Users will never be prevented from attempting to log in to Sugar due to invalid credentials.
- Lockout users after x failed login attempts: Users will be prevented from attempting to log in to Sugar after submitting invalid credentials x times in a row. You can also configure a timeframe in minutes, hours, or days to enable the login again.
Note: Users can reset their password to clear the lockout status and restore access to their account.
Configuring Multi-Factor Authentication
SugarIdentity supports multi-factor authentication (MFA), a security mechanism that provides an added layer of security when logging in to Sugar to prevent unauthorized users from gaining access to your users' accounts. Please note that MFA is not supported for the Sugar Sell Essentials license type. When using MFA, your users will be required to use an authenticator app (e.g., Authy, Google Authenticator, Microsoft Authenticator) when logging in to Sugar and enter a new 6-digit code generated from the app each time they log in to verify their identity. So, identity verification using an authenticator app will be a required step to access their Sugar account. Please note that you will also need to use an authenticator app when logging in directly to SugarIdentity.
Once MFA is enabled for your Sugar instance, the following Sugar products will also use MFA when logging in using SugarIdentity:
Use the following steps to enable MFA for your Sugar instance:
- Log in to Sugar and navigate to Admin > SugarIdentity.
Note: For Sugar versions 13.0 and lower, navigate to Admin > SugarCloud Settings. - Click the Password and Security Settings link on the home page in SugarIdentity.

- On the Password and Security Settings page, place a check in the Enable box under the Multi-Factor Authentication section, then click "Save".
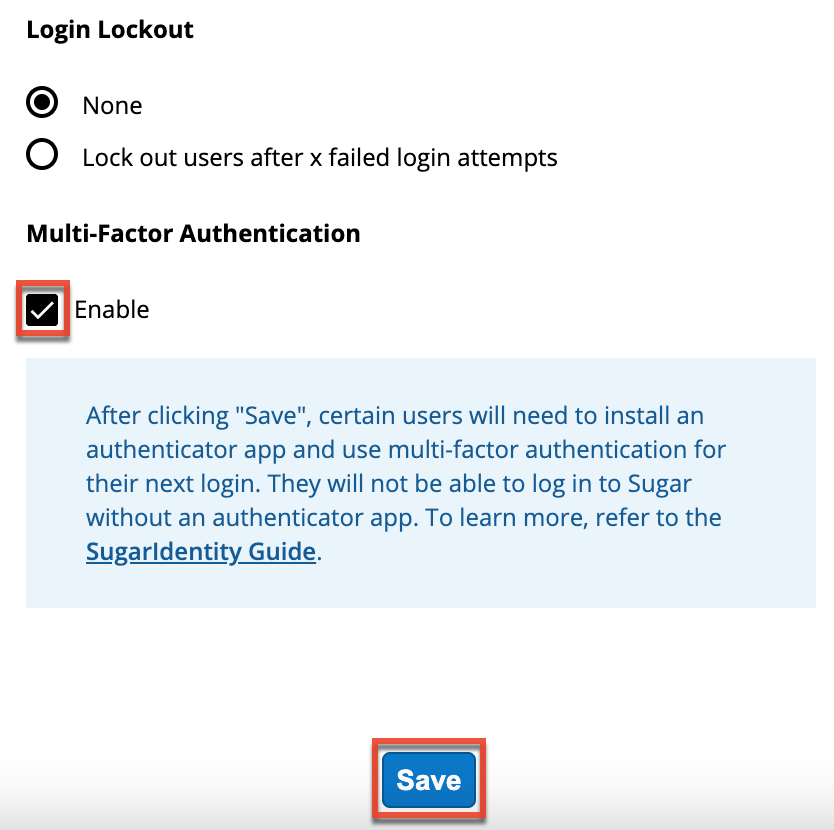
- A pop-up message will display asking for confirmation. Click "Confirm" to proceed.
Note: Multi-factor authentication only applies to users who log in using Sugar credentials or use LDAP authentication.
Once MFA is enabled for your instance, all users who log in using Sugar credentials or use LDAP authentication will need to install an authenticator app (e.g., Authy) on their mobile device and use MFA on their next log in. The first time they log in to Sugar after MFA has been enabled, they will be prompted to scan a QR code using the authenticator app to pair the app with Sugar. The authenticator app will then generate a 6-digit code which the user must enter during the login process to access their Sugar account. Going forward, users will be required to enter a new 6-digit code from their authenticator app each time they log in to Sugar. For more information on logging in to Sugar using MFA, refer to the Getting Started documentation.
If you wish to disable MFA for your instance, click the Enable checkbox to remove the checkmark and click "Save". Once disabled, the multi-factor authentication will be reset for all users, and an authenticator app will no longer be needed the next time they log in to Sugar. If MFA is enabled again later, users will need to re-authenticate using an authenticator app and scan the QR code to pair the app with their Sugar account.
Resetting Multi-Factor Authentication
If a user can no longer access their authenticator app because, for example, they lost their mobile device, administrators can reset the multi-factor authentication (MFA) for their account. Performing this action will reset MFA for the user, and they will be required to re-authenticate using an authenticator app the next time they log in to Sugar. Please note that users also have the ability to reset MFA for their account by using the Reset Multi-Factor Auth option in their Sugar account. For more information, refer to the Getting Started documentation.
Use the following steps to reset MFA for a user:
- Log in to Sugar and navigate to Admin > SugarIdentity.
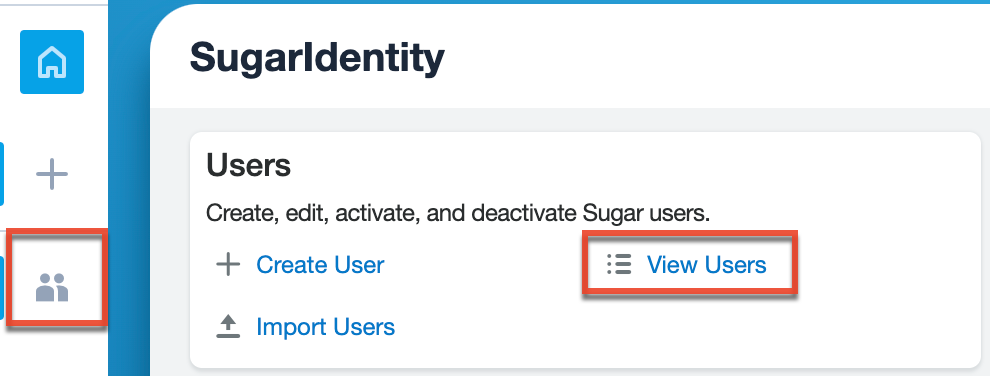
Note: For Sugar versions 13.0 and lower, navigate to Admin > SugarCloud Settings. - Click the Users module tab in the navigation bar or "View Users" on the home page to access the Users list view.
- In the Users list view, locate the desired user, and click the Record Actions menu to the far right of the record's row, then select "Reset Multi-Factor Authentication".

- A pop-up message will display asking for confirmation. Click "Confirm" to proceed.
Note: Administrators can also reset MFA for their own user account in SugarIdentity using the same steps above.
The next time the user logs in to Sugar, they will be required to scan the QR code to pair the authenticator app with their Sugar account.
Token Lifetime Settings
When a user logs in to Sugar, an access token and a refresh token are returned, which regulate the user's session timeouts in Sugar. By default, Sugar's access token lifetime is 60 minutes, and the refresh token lifetime is 20160 minutes (2 weeks). When an access token expires during an active user session, Sugar will renew the user's access and refresh tokens until the user's activity stops. If the user's activity stops, but they have Sugar open in a browser tab, Sugar will continue to pull for another access token until the refresh token expires. However, if the user closes their browser tab without logging out of their account, Sugar will stop renewing the user's access token at this point. If the user later opens Sugar in a new browser tab and the last refresh token is still valid, Sugar will then renew the access token using this refresh token, and the user will still be logged in.
To configure the Access Token Lifetime and Refresh Token Lifetime settings for your organization, click the Token Lifetimes link from the home page in SugarIdentity. You can update the token lifetime values by entering the whole number value (e.g., 90) in the desired field (e.g., Access Token Lifetime), keeping in mind the following guidelines:
- The access token lifetime must be less than the refresh token lifetime.
- The access token lifetime must be at least 5 minutes.
- The refresh token lifetime must not exceed 20160 minutes.
After entering your desired value, click "Save" to preserve your changes. Please keep in mind that the new access and refresh token lifetimes will not take effect until the user's current access token expires in their user session. Once expired, Sugar will then renew the user's access and refresh tokens using the new values configured in SugarIdentity.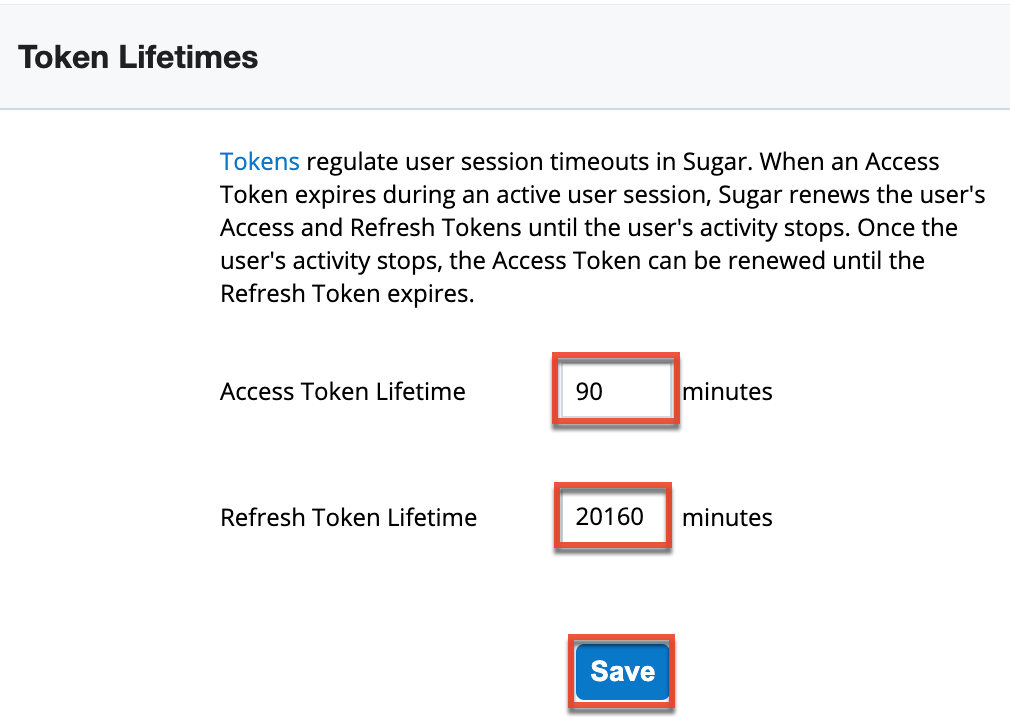
Note: If your instance of Sugar gets provisioned to use SugarIdentity and you use custom access and refresh token lifetimes, the custom token values will appear in "minutes" on the Token Lifetimes page. However, if your custom access token value is less than 5 minutes and/or your refresh token value is greater than 20160 minutes, the Token Lifetimes page will display the system default value(s), which Sugar will use instead of your invalid custom value(s).