Advanced Reports
Overview
Advanced reports allow users to create custom reports using a single or a combination of SQL statements to directly query your Sugar database. Although the Reports module may be used to create many kinds of reports, users with SQL knowledge may use advanced reports to craft direct database queries for more flexible and extensible reporting.
Advanced reports are a combination of three related modules:
- Custom Queries: Custom query records contain the SQL statement used to pull information from the database.
- Data Formats: Data format records describe how to format and display the results of the related custom query. Data formats may also be interrelated to create child/parent combinations of queries.
- Advanced Reports: Advanced report records serve as headers for the report and may display one or more data format. The advanced report record may also be scheduled to be automatically run and emailed to a user.
Note: You must be an administrator in order to create, edit, and delete custom queries, which are required for the full advanced report. Non-admin users can view advanced reports, custom queries, and data formats according to their team access. Admin users wishing to build advanced reports must first be familiar with SQL and Sugar's database structure in order to write the necessary custom queries.
Advanced Reports Module Tab
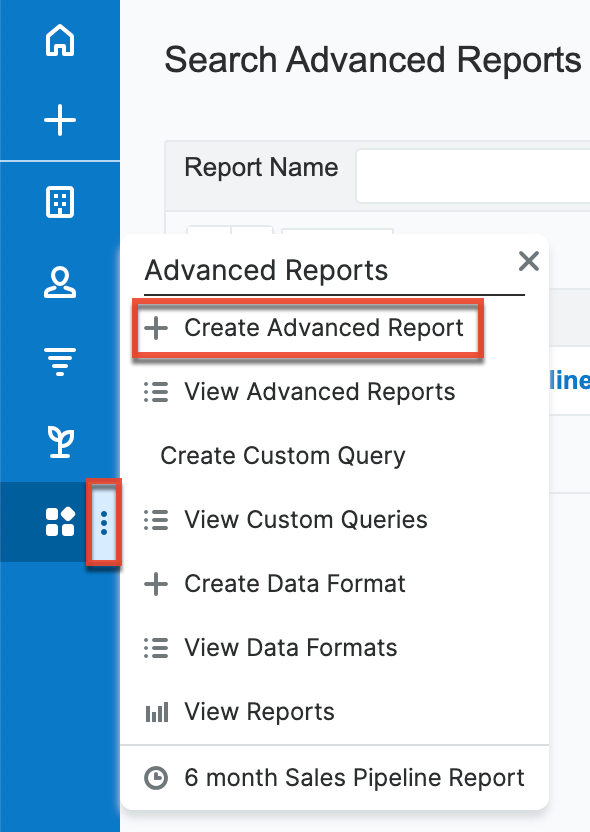
To access Advanced Reports, click the three-dots menu in the Reports module tab in the navigation bar and then select "Manage Advanced Reports". 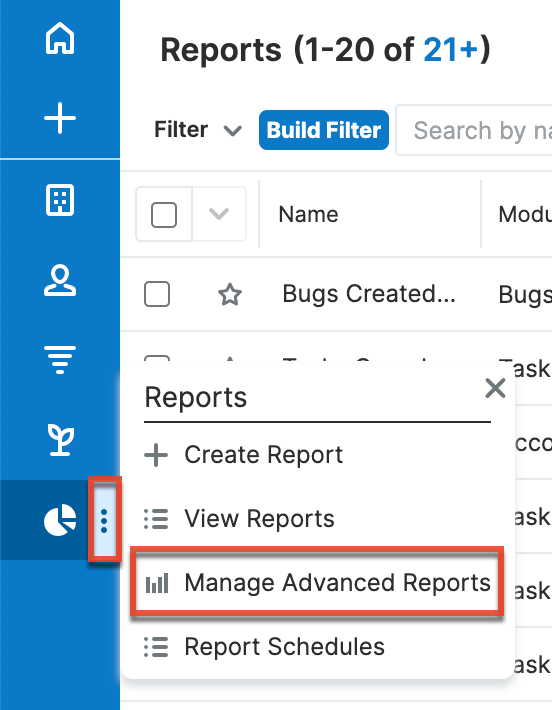
From within the Advanced Reports module, click the Advanced Reports module tab in the navigation bar to access the Advanced Reports list view. You may also click the three-dots menu in the Advanced Reports module tab to display the Actions and Recently Viewed menus. The Actions menu allows you to perform important operations within the module. The Recently Viewed menu displays the list of advanced reports you most recently viewed.
The Actions menu allows you to perform the following operations:
| Menu Item | Description |
| Create Advanced Report | Opens the edit view layout to create a new advanced report. |
| View Advanced Reports | Opens Advanced Reports list view to search and display advanced reports. |
| Create Custom Query | Opens the edit view layout to create a new custom query. |
| View Custom Queries | Opens Custom Queries list view to search and display custom queries. |
| Create Data Format | Opens the edit view layout to create a new data format. |
| View Data Formats | Opens Data Formats list view to search and display custom queries. |
| View Reports | Opens the Reports tab to create and view standard reports. |
Creating Advanced Reports
Since a single advanced report consists of records from three different modules, the following instructions will step through creating a record within each module and relating those records to generate a report. First, a custom query record will be created, then a data format, and finally an advanced report record. The fields specific to each module are described prior to each set of creation instructions.
Custom Query Fields
The Custom Query module contains a number of stock fields that come out-of-the-box with Sugar. The below definitions are suggested meanings for the fields, but the fields can be leveraged differently to best meet your organization's needs.
| Field | Description |
| Custom Query | The SQL select statement that will retrieve information from the database. |
| Description | A description or other information about the custom query. |
| Lock Query | Option to toggle editability of the Custom Query field. |
| Query Name | The name of the custom query. |
| Teams | The Sugar team(s) assigned to the custom query record. |
Creating Custom Query Records
Advanced reports enable you to create reports using complex SQL queries that cannot be expressed in standard reports. The SQL query is contained in a custom query record. Each custom query record can be related to multiple data format records which allows it to be reused in multiple reports.
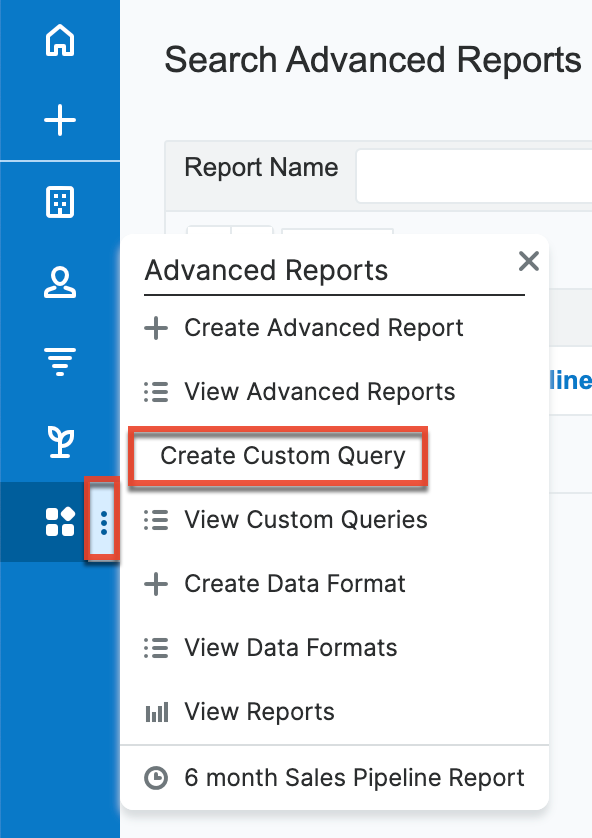
- Click the three-dots menu in the Advanced Reports module tab to open the Actions menu and select "Create Custom Query".
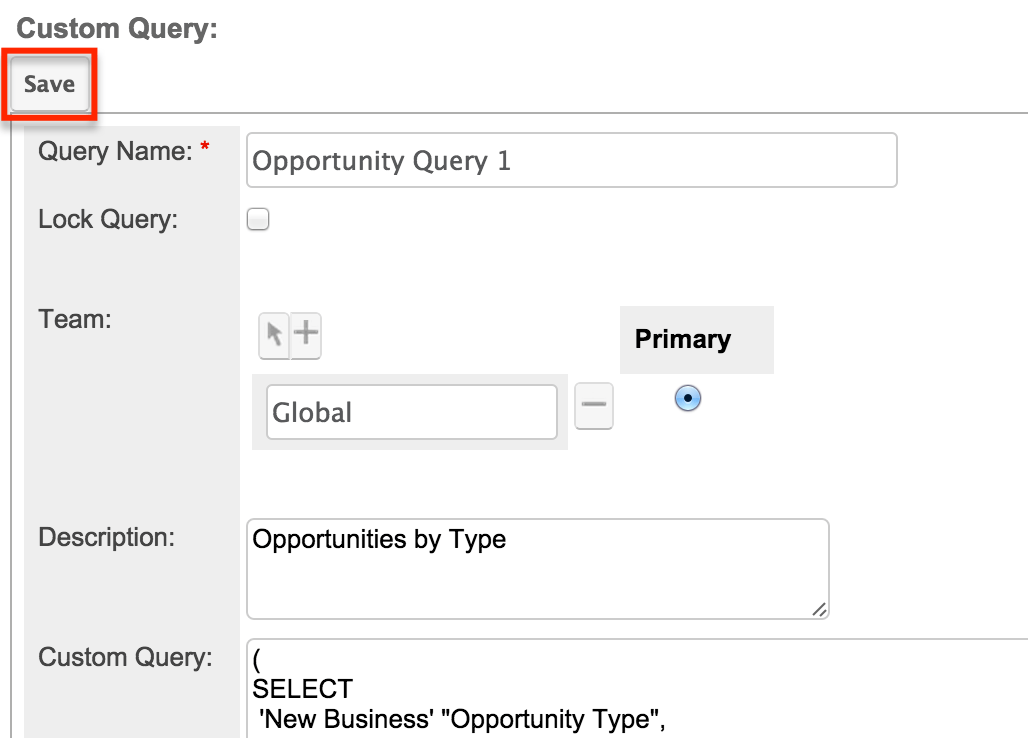
- Enter appropriate values for the fields in the edit view layout. All required fields will display a red asterisk and must be completed prior to saving. The SQL select statement you wish to run against the database should be input to the Custom Query field
- Click "Save".
After you click "Save", Sugar will determine whether the SQL statement provided in the Custom Query field is valid. If it is not, Sugar will display an error message and provide an opportunity for you to correct the SQL. The custom query record may not be saved unless the SQL statement is deemed valid by Sugar.
Data Format Fields
| Field | Description |
| Body Background Color | The color of the background of the data cells in the report display. |
| Body Text Color | The color of the text of the data in the report display. |
| Combine with Previous Data Format | Specifies whether space should appear between this table and the previous data format's table when a report includes multiple data formats. |
| Data Format Name | The name of the data format. |
| Description | A description or other information about the data format. |
| Exportable (CSV File Only) | Specifies whether this table is available to be exported as a CSV file. |
| Font Size | The size of the font in the report output. |
| Group with Previous Header | Specifies whether the column widths should match those of the previous data format's table when a report includes multiple data formats. |
| Header Background Color | The color of the header background in the report display. |
| Header Text Color | The color of the header text in the report display. |
| Parent Data Format | When setting up interlocked queries, the parent data format containing the parent query of your current, child query and data format. |
| Query Name | The custom query record which will be formatted by this data format. |
| Report Name | The related advanced report record; this value automatically populates once linked to an advanced report. |
| Sub/Child Query | When this data format is set as the parent format of a child record, the name of the child query will be automatically populated. |
| Show Header | Specifies whether a row including column names should appear above data rows in the report display. |
| Table Width % | The width of the table in the report display as a percentage or pixels. |
| Teams | The Sugar team(s) assigned to the data format record. |
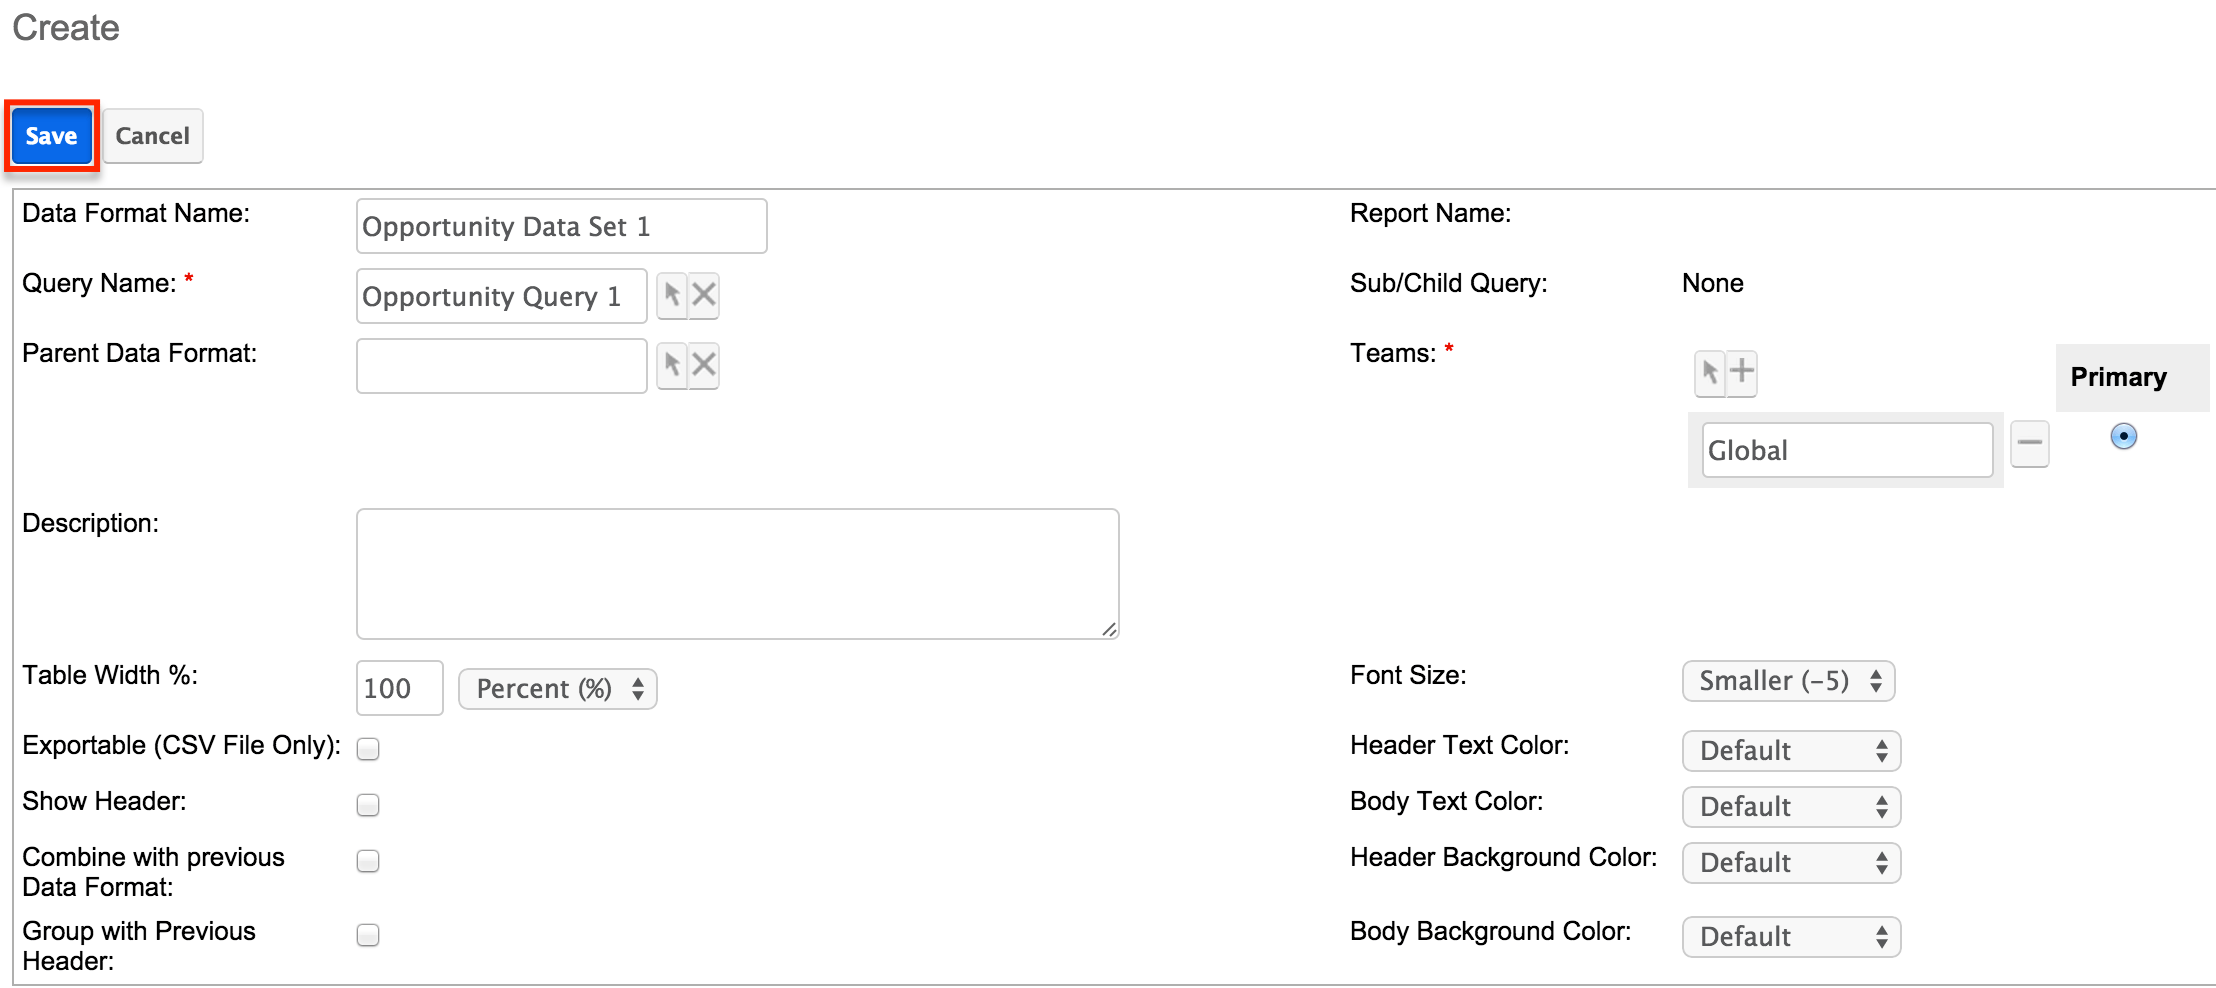
Creating Data Format Records
A data format specifies report formatting details such as the text font, text color, and the background color for a particular SQL query contained in a custom query record. You can reference other data formats within a data format. The query contained in the referenced data format is considered to be the sub-query or the child-query. When a data format references another data format, the data formats are interlocked. Interlocked reports are used to produce information from separate queries in a parent-child pattern. For more information, please refer to the Interlocked Reports section of this page.
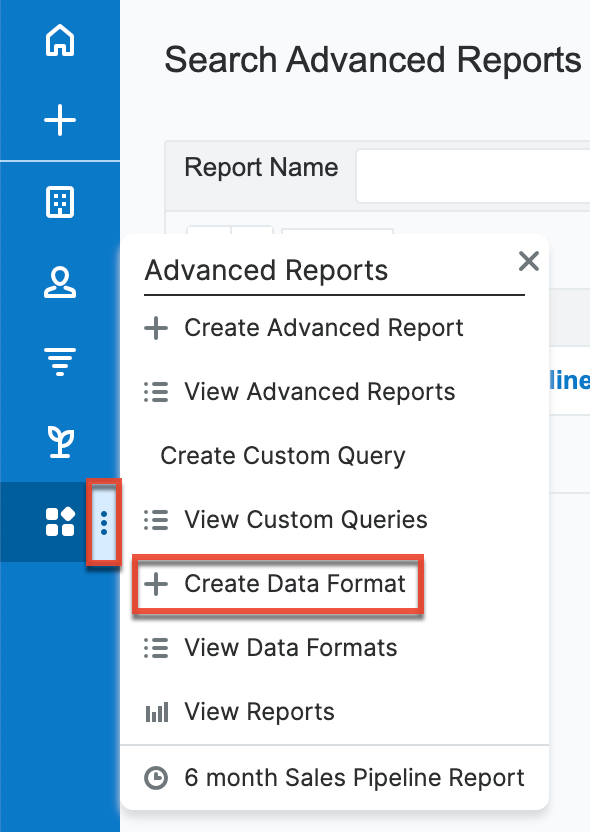
- Click the three-dots menu in the Advanced Reports module tab to open the Actions menu and select "Create Data Format".
- Enter appropriate values for the fields in the edit view layout. All required fields will display a red asterisk and must be completed prior to saving. For the Query Name field, type or select the custom query record created in the steps above.
- Click "Save".
Advanced Report Fields
The Advanced Reports module contains a number of stock fields that come out-of-the-box with Sugar. The below definitions are suggested meanings for the fields, but the fields can be leveraged differently to best meet your organization's needs.
| Field | Description |
| Description | A description or other information about the advanced report. |
| Report Alignment | The alignment of the advanced report text. |
| Report Name | The name of the advanced report. |
| Report Title | The title of the advanced report. |
| Teams | The Sugar team(s) assigned to the advanced report record. |
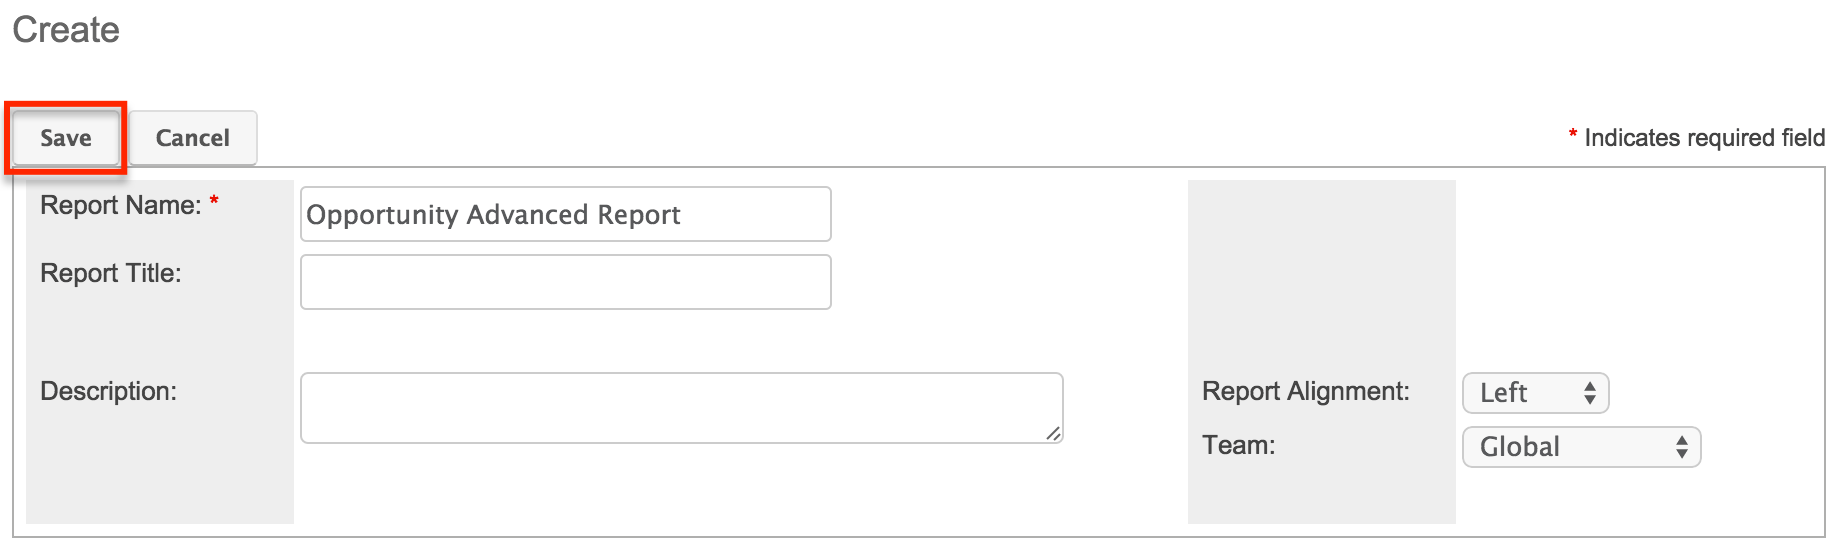
Creating Advanced Report Records
- Click the three-dots menu in the Advanced Reports module tab to open the Actions menu and select "Create Advanced Report".
- Enter appropriate values for the fields in the edit view layout. All required fields will display a red asterisk and must be completed prior to saving.
- Click "Save".
Relating the Advanced Report and Data Format Records
After creating all three types of records as described above, use the following steps to relate the advanced report record to one or more data format records:
- Click the Advanced Reports module tab to access the Advanced Reports list view.
- Search for the advanced report record created in the steps above and click the record's name to open it in detail view.
- Below the advanced report information, click the Select button.
- Find the data format record created in the steps above and click the record's name to link it to the advanced report.
Running Advanced Reports
Finally, click on "Run Report" and it will return a custom report populated with results from your custom query and displayed with your designated data format.
Aggregating Queries on a Single Report
A single advanced report record may relate to one or more data format records, each of which includes its own query. The bottom of an advanced report detail view displays a list of data formats included in the report. When multiple data formats are included on a single report, their individual tables will be stacked. Two data format fields, "Combine with previous Data Format" and "Group with Previous Header" will affect how multiple data formats are displayed on a single report.
The following actions are available on an advanced report detail view for manipulating its related data formats:
- Create New: Create a new data format record that will be automatically related to this advanced report
- Select: Select an existing data format record to relate to this advanced report; only data formats that are not already related to a report and do not have a parent data format will be available for selection.
- Up: Move a data format's table to a higher position in a report containing several data formats.
- Down: Move a data format's table to a lower position in a report containing several data formats.
- Edit: Open the data format in edit view in order to make changes
- Delete: Remove the data format from this report; the data format record will not be deleted
Note: A data format record can only belong to one advanced report. If you wish to use one custom query with several reports, you must create a separate data format record for each report - each of which may relate to the single custom query record. Also, data formats that have a parent data format (as displayed in the Parent Format field) are considered child data formats and may not be directly added to a report. Parent data formats which have child data formats are eligible to be included on a report.
Adding Multiple Data Formats to a Report
For our example, we will add two different data formats to a single report to show the 6-month sales pipeline. First, we want to show the total revenue for opportunities with expected close dates in the next 6 months. We divide the opportunity revenue between new business and existing business and also provide a sub-total of revenue for each month and revenue source (new/existing business). This first query is named "Query Opp Revenue by Business Type" and the first data format is named "Data Set Opp Revenue by Business Type". Data Set Opp Revenue by Business Type has the Query Name field set to "Query Opp Revenue by Business Type".
Second, we want to show the revenue expected for the next 6 months from each account, providing a greater level of detail of our revenue sources. This query lists each account and the revenue expected for opportunities related to those accounts with expected close dates in the coming 6 months and a summation column at the end. This second query is named "Query Opp Revenue by Account" and the second data format is named "Data Set Opp Revenue by Account". Data Set Opp Revenue by Account has the Query Name field set to "Query Opp Revenue by Account".
These two data formats on a single advanced report record produce the following result:
Interlocking Parent/Child Queries
Sugar allows you to interlock two queries in a parent/child relationship by relating two data format records. This allows for more complex report results that are displayed in a parent/child format mirroring the queries' relationship. Sugar will first run the parent query, then, for each row of the parent query, it will run the child query.
Use the following steps to interlock a pair of simple queries as an example:
- Create a custom query record called "All Users Query" with the following SQL statement:
Select id, user_name from users - Create a second custom query record called "Accounts By Users Query" with the following SQL statement:
Select name, assigned_user_id from accounts where assigned_user_id = '{sub}id{sub}' - Create a data format record called "All Users Format" with the Query Name field set to "All Users Query".
- Create a data format record called "Accounts By Users Format" with the Query Name field set to "Accounts By Users Query" and the Parent Data Format field set to "All Users Format".
- Create an advanced report record.
- From the advanced report's detail view, use the Select button to choose "All Users Format".
- Click the Run Report button.
The '{sub}id{sub}' is inserted to the child query to refer to the parent query's current result row. In this example, Sugar will generate a list of user names and id's. Below each user row, a list of accounts assigned to that particular user will appear. The child query is returning assigned_user_id to help make the functionality clear.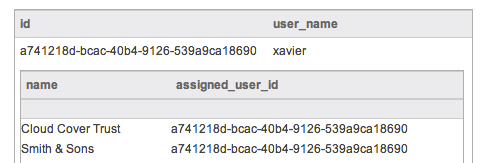
Please note that a child data format cannot be run from its own record nor added to an advanced report record. Only by running its parent data format or adding its parent data format to a report will the child query's results be displayed.
Note: Only two data formats may be interlocked at a time. Chains of three or more data format records will cause Sugar not to recognize the queries three or more levels deep.
Column-Level Formatting
Each data format includes formatting options such as color, size, etc which affect the entirety of the custom query's table and header. These options are available while editing the data format record and include these fields. In addition, each column of a query's table may be formatted individually using the options available on the detail view of a data format record. Please note, in order for these options to be available, the related custom query must be returning at least one row.
Formatting a Column's Header
Once you have created a data format record including choosing a custom query record that will return at least one row of data, a table will be displayed at the bottom of the data format record's detail view. The following options are available for formatting a particular column's header:
| Field | Description |
| Display Name | Replaces the text of the column's header which defaults to the column name specified in the custom query's SQL statement. |
| Display Type | The display type of this column's header text. |
| Font Size | The size of this column's header text. |
| Font Style | Specifies if the column's header text should be bolded or italicized. |
| Format Type | The displayed format (Month, Quarter, Year, etc.) of this column's header text. |
| Header Background Color | The background color of this column's header. |
| Header Text Color | The text color of this column's header. |
| Wrap Text | Specifies if long text in this column's header should wrap to multiple lines. |
The following steps will walk through modifying the header to display the desired column name rather than the field name shown by default:
- Navigate to the detail view of a data format record whose custom query is returning at least one row of data.
- Click the pencil icon above the table column you wish to format.
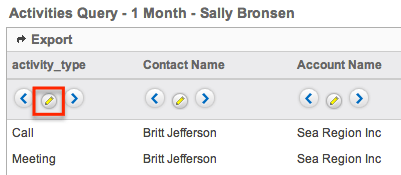
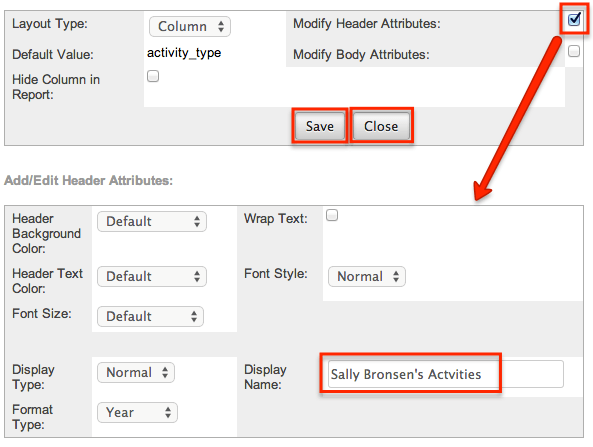
- Check the "Modify Header Attributes" checkbox in the pop-up window.
- Type "Sally Bronsen's Activities" in the Display Name field and make any other desired modifications.
- Click "Save" then "Close".
After closing the pop-up window, the table will refresh to show the changes you made to the column. For our example, the column name "activity_type" has been replaced with the text "Sally Bronsen's Activities".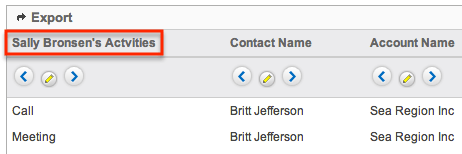
Formatting a Column's Body
Once you have created a data format record including choosing a custom query record that will return at least one row of data, a table will be displayed at the bottom of the data format record's detail view. The following options are available for formatting a particular column's data cells:
| Field | Description |
| Body Background Color | The background color of this column's data cells. |
| Body Text Color | The text color of this column's data cells. |
| Font Size | The size of this column's data cell text. |
| Font Style | Specifies if this column's data cell text should be bolded or italicized. |
| Format Type | Specifies if this column's data cell text should be formatted as plain text, currency, date, or datetime values. |
| Table Width | The width of this column's data cells and header as a percentage of the table width or as an absolute number of pixels. |
| Wrap Text | Specifies if long text in this column's data cells should wrap to multiple lines. |
The following steps will walk through modifying a column to display a column of datetime data as a simple date value as an example:
- Navigate to the detail view of a data format record whose custom query is returning at least one row of data.
- Click the pencil icon above the table column you wish to format.
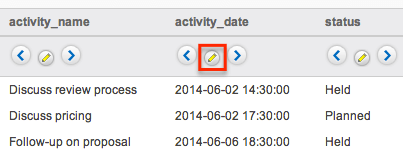
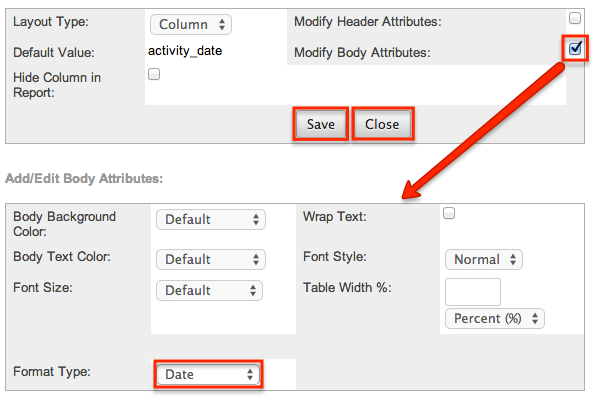
- Check the "Modify Body Attributes" checkbox in the pop-up window.
- Choose "Date" for the Format Type field and make any other desired modifications.
- Click "Save" then "Close".
After closing the pop-up window, the table will refresh to show the changes you made to the column. For our example, the column of database datetime values will now be displayed as simple date values.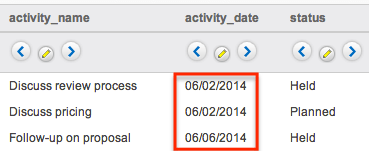
Hiding Columns
If an individual column should not be displayed in a report's output, the column may be marked as hidden on the data format record. This will prevent it from being displayed when running an advanced report which includes the data format.
Use the following steps to hide a column from a report's output:
- Navigate to the detail view of a data format record whose custom query is returning at least one row of data.
- Click the pencil icon above the table column you wish to format.
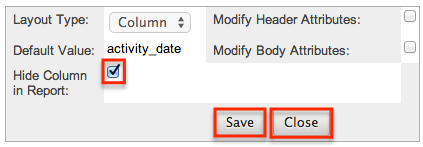
- Select the Hide Column in Report checkbox.
- Click "Save" then "Done".
Reordering Columns
The default column order of a table is determined by the SQL statement used in the custom query record. The column order can be changed at the data format record level when a different order is desired on the data format or in the final advanced report record.
Use the following steps to change the column order for a data format record:
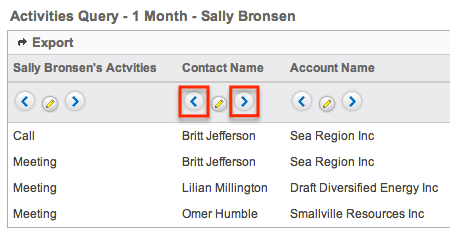
- Navigate to the detail view of a data format record whose custom query is returning at least one row of data.
- At the top of a column, click the right arrow to move the column one position right. Click the left arrow to move it one position left.
Scheduling Advanced Reports
Advanced reports can be scheduled to be emailed to users periodically based on specified date and time intervals. Please note that each individual user has to schedule the report in their Sugar account in order for the reports to be delivered to them. Sugar will run the advanced report at the specified interval based on the set time zone in user preferences and send the data output as a CSV file to the email address associated with your profile.
The outbound mail server for the system as well as the user's email settings must be configured properly in order for the reports to be delivered successfully. For more information on setting up the system email settings, please refer to the Email documentation in the Administration Guide. For more information on setting up your user preferences' email settings, please refer to the Getting Started documentation.
The Run Report Generation Scheduled Tasks scheduler in Sugar processes all scheduled advanced reports to be delivered to the user at the scheduled interval. By default, this report scheduler is set as "Inactive" for new Sugar installations. Administrators must check to make sure that the Run Report Generation Scheduled Tasks scheduler is active and the settings (e.g., interval) are configured properly. For example, if the scheduler is set to trigger once per day and a user schedules a report to be delivered every hour, the report will only be delivered once each day due to the set interval in the scheduler. The administrator must change the interval for the scheduler to run every 1 hour in order for the user's report to be processed and delivered per their scheduled interval. For more information on configuring schedulers, please refer to the Schedulers section of the System documentation.
Scheduling Via List View
Use the following steps to schedule an advanced report via the list view:
- Navigate to the Advanced Reports list view.
- Click "-- None --" in the Schedule Report column of the report you wish to schedule. If you wish to update an existing schedule, click the date shown in the Schedule Report column.

- In the pop-up window, enter the start date/time and select the time interval for report delivery. Check the Active checkbox then click "Update Schedule" to schedule your report.
- Please note that you must mark the Active box in order to activate the report schedule.

- Please note that you must mark the Active box in order to activate the report schedule.
Once the report is scheduled successfully, the date and time for the scheduled report will appear in the list view row for the specific advanced report.
Exporting Data Formats
Sugar's Export option allows users to download the data in individual data format tables as a .csv (comma-separated values) file. This may be useful when needing to use the report data with other software such as Microsoft Excel. In order for the tables belonging to an advanced report or data format record to be available for export, the data format record's "Exportable (CSV File Only)" field must be checked. Due to PHP memory limitations on the server, there may be occasions when the application times out while exporting a table with a large amount of data. If you encounter an error when performing this action, we recommend breaking up the queries in smaller batches. For more information on exporting records in Sugar, please refer to the Export documentation. Please note that your ability to export reports from Sugar may be restricted by a role. For more information on roles, please refer to the Role Management documentation in the Administration Guide. Check with your system administrator if you do not see the Export option.
Exporting Via Advanced Reports
Use the following steps to export a data format table from an advanced report:
- Open an advanced report record in detail view by selecting it from the Advanced Reports list view or the list of recently viewed reports in the actions menu.
- Click "Run Report" at the top of the detail view.
- Click "Export" above the desired table in order to start the download.
Note: If the "Export" link is not displayed, you must edit the data format record and check "Exportable (CSV File Only)".
Exporting Via Data Formats
Use the following steps to export a data format table from a data format record:
- Navigate to the detail view of a data format record whose custom query is returning at least one row of data.
- Click "Export" above the desired table in order to start the download.
Note: If the "Export" link is not displayed, you must edit the data format record and check "Exportable (CSV File Only)".