User Management
Overview
The User Management module provides administrators access to create, edit, activate, and deactivate the profiles of all the users in their Sugar instance. This module and underlying settings control each individual's login credentials as well as some personalized settings. During the installation process, Sugar creates one system administrator by default. The system administrator can log in and create additional users, in a variety of capacities, to be able to access Sugar and utilize all of the other CRM functionality. In combination with the role and team security, administrators can fully establish a profile for each user in Sugar.
Notice: For instances that use SugarIdentity, the administrator will need to access SugarIdentity to create and manage user records.
This documentation will cover the administration options which allow you to manage users in your system. For instructions concerning views and actions which are common across most Sugar modules, such as creating, editing, and deleting users, please refer to the Working With Sugar Modules section of this page.
User Types
There are four types of users in Sugar: Regular User, System Administrator, Group User, and Portal API User. Each user type has different functions in Sugar which will vary for each instance. Depending on an organization's use of Sugar, not all of these user types will be necessary. Only regular users and system administrators in an Active status count towards licensed user limits. The purpose of each user type is explained in the following sections.
Regular User
A regular user is the most common of the user types. A majority of employees of an organization will be regular users. This user can access most Sugar modules and perform most standard functions by default. Regular users are subject to be restricted in their abilities and what records they can access by an administrator using the Teams and Roles functionalities in Sugar.
Regular Users will appear in the Employees module. To create a Regular User, please review the Regular and Admin Users section of this page.
For SugarIdentity-enabled instances, the administrator can grant regular users "Admin & Developer" access to Users, Teams, and Roles in Sugar as well as access to SugarIdentity to manage certain user data (e.g., name, email address) and perform certain actions without having full system administrator access. For more information on configuring and assigning this role to users, refer to the SugarIdentity Guide.
System Administrator
System Administrator users, or "admins," have all of the abilities and functionality of a regular user, but also have administrative privileges as well. Admins can perform functions such as creating and editing users, editing system-wide settings, and have access to diagnostic and troubleshooting tools. In addition, admins can access all modules and records and are not subject to team or role restrictions, although they can be assigned roles to make use of role-based views. All instances of Sugar require at least one administrator, but it is also recommended to have more than one in case the original admin is unavailable or is no longer with the company.
System Administrators will appear in the Employees module. To create a System Administrator, please review the Regular and Admin Users section of this page.
Note: All administrators where the user status is active count as a licensed user.
Group User
A Group User is a bucket that is used for assigning records to a non-specific user (e.g., Sales, Support) in the organization. Unlike a Regular or System Administrator user, a Group user does not have access to log in to Sugar. Due to this, they do not have the same profile settings available, including the option to set a password. Since Group users cannot log in to Sugar, they do not count against an organization's license count.
Examples of uses for a Group user would be to assign all new leads to a group user named "Sales" or assign all newly-created support cases to "Support" before they are delegated to specific users (e.g., John Smith) in the organization.
Please note that Group users will not appear in the Employees module. For more information on how to create a Group user, please review the Group Users section of this page.
Portal API User
A Portal API User is similar to a Group User except that it is created specifically to communicate with the Sugar server using the Sugar Portal API functionality. It is intended only for use with Sugar Portal; the user with user name "SugarCustomerSupportPortalUser" is automatically enabled when the Sugar Portal is enabled via Admin > Sugar Portal. It must remain enabled in order for portal users to authenticate. This user can only be used to authenticate contact credentials against portal API methods and determine portal account permissions based on the Customer Self-Service Portal role. To create a Portal API user, please review the Portal API Users section of this page.
Portal API Users will not appear in the Employees module and are not counted in the user license agreement. More information about the Sugar Portal can be found in the Sugar Portal documentation. Sugar's API documentation can be found in the Web Services section of the Developer Guide.
Note: The Portal API user is not intended to be a free API user for external integrations and has very limited functionality through the API.
License Types
Users are given access to specific capabilities in the product by assigning them one or more licenses (e.g., Sugar Sell Premier, Sugar Serve) in the License Type field on the user record. See the License Management page for details on working with user licenses and license limits.
To compare which functionality each license type has access to, refer to the License Types Matrix page.
User Fields
The Users module contains a number of stock fields, which are included out-of-the-box with Sugar. The below definitions are suggested meanings for the fields, but many of the fields can be leveraged differently to best meet your organization's needs. System Administrators have the ability to alter, remove, or add fields in the User Profile tab via Admin > Studio, minus a few noted exceptions. For more information on adding or modifying fields, please refer to the Studio documentation.
For instances that use SugarIdentity, the following user fields are read-only and can only be edited in SugarIdentity:
- Username
- Status
- User Type
- First Name
- Last Name
- License Type
Note: For certain SugarIdentity-enabled instances, this field is only available to manage in SugarIdentity . - Title
- Department
- Work Phone
- Address Street
- Address City
- Address State
- Address Postal Code
- Address Country
- Primary Email Address
User Profile Tab Fields
The User Profile tab contains the contact information for the user and other important user-specific settings. The User fields are as follows:
| Field | Description |
| Address City | The city of the user's address. |
| Address Country | The country of the user's address. |
| Address Postal Code | The postal code of the user's address. |
| Address State | The state of the user's address. |
| Address Street | The street name and number of the user's address. |
| Avatar | Upload an image to this field to represent the user that will be shown on the Activity Stream and next to the user's name on the navigation bar. |
| Business Center Name | The business center this user belongs to. |
| Department | The department where this user works. |
| Description | A description or other information about this user. |
| Display Employee Record | Check this box if the user should have an employee record show in the Employees module. |
| The user's email addresses, where a primary address is selected to receive email notifications and if this should be a reply to address when using Sugar's outbound email (SMTP) functionality. Note: This field is not editable in Studio. |
|
| Email Client | When clicking on an email address in Sugar, this will determine if Sugar's email composer will open or if the user's primary email program on this computer (e.g., Microsoft Outlook, Apple Mail, etc.) will open. Note: This field is not editable in Studio. |
| Employee Status | The user's employment status in the organization (Active, Terminated, or Leave of Absence). Note: The Employee Status and Status fields are managed separately, so consider choosing a new employee status when the Status field changes. |
| Fax | The user's fax number. |
| First Name | The user's first name. |
| Home Phone | The user's home phone number. |
| IM Name | The user's instant message screen name. |
| IM Type | The user's instant message service type. |
| Last Name | The user's last name. |
| License Type | Determines what Sugar functionality the user may access. For more information, refer to the License Types section above. Note: For certain SugarIdentity-enabled instances, the License Type field is managed in SugarIdentity. |
| Mobile | The user's mobile phone number. |
| Other Phone | An additional phone number for the user. |
| Reports to | The user's manager. The user that this user reports to will become an implicit member of this user's Teams. The "Reports To" field is also leveraged by several features in Sugar. For more information, refer to the Understanding the Reports To Field section of this page. Note: This field is not editable in Studio. |
| SMTP Password | If an outgoing email server is defined in Admin > System Email Settings, the user's SMTP password can be input here to send mail through Sugar. Note: This field is not editable in Studio. |
| SMTP Username | If an outgoing email server is defined in Admin > System Email Settings, the user's SMTP user name can be input here to send mail through Sugar. Note: This field is not editable in Studio. |
| Status | Making a user inactive will make it so this user cannot log in to Sugar. This will also remove the user from taking a license seat, without having to delete the user. When making a user inactive, the admin is prompted to use the Reassign Records function. Note: The Employee Status and Status fields are managed separately, so consider choosing a new employee status when the Status field changes. |
| Title | The user's job title. |
| User Name | The user name will be what the user logs in to Sugar with on the login page. It will also show for other users when they view fields such as "Assigned to" and "Created By". This is the name that will define the specific user in Sugar and should be unique for every user. |
| User Type | Specifies what type of user this is which, a system administrator, regular user, etc as described in the User Types section above. Note: This field is not editable in Studio. |
| Work Phone | The user's work phone number. |
Understanding the Reports To Field
The Reports To field on the User record is used by various parts of Sugar to determine who a user's manager (i.e., supervisor) is. Some examples of how Sugar uses this relationship are described below:
- Workflow Management: Alerts and actions in Sugar's Workflows module allow you to send an alert to or assign a record to a user's manager. For example, you may wish to notify a user's manager when that user creates a new high-priority case. Refer to the Workflow Management documentation for more information.
- SugarBPM: Users' managers can be used in activity assignments, email recipients, and evaluations when designing a process definition. For example, you may wish to assign an approval activity to the manager of the owner of a quote before the quote is ready to be sent to the customer. Refer to the Process Definitions documentation for more information.
- Forecasts: Managers aggregate the forecast amounts of their reportees with their own forecast amounts to predict their total team's sales and work towards the team's quota. Refer to the Forecasts documentation for more details on how sales managers use forecasts.
- Teams: Managers are an implicit member of all of their reportees' teams, which gives them access to all of their reportees' records. Refer to the Team Management documentation for more details on implicit and explicit team membership.
- Organization Chart Dashlet: This dashlet visually outlines the hierarchy of Sugar users under the current user according to the Reports To field. The dashlet includes reportees that are one or two levels below them.
Note: Only administrators can edit the Reports To field.
Advanced Tab Fields
The Advanced tab in the user's profile includes settings to configure how Sugar will function for that specific user. The fields in the Advanced tab cannot be edited in Studio.
| Field | Description |
| 1000s Separator | Select a character to use as a 1000's separator, with an example showing in the "Example" box. |
| Create Revenue Line Items in Preferred Currency | Mark the checkbox to use your preferred currency when creating revenue line items based on a product catalog item, |
| Data Font Size | The default font size of the PDF body when generated by this user. |
| Date Format | How date fields will appear for the user, with the ability to control month, day, and year formatting. |
| Decimal Symbol | Select a character to use as a decimal symbol, with an example showing in the "Example" box. |
| Default Teams | A default team defines the team set when this user creates a record. Whenever this user creates a record, the team is set as the user's default team, similar to how the "Assigned To" field is set to be the created user. Note: Users can be assigned any number of default teams. |
| Email Reminder Time | This field sets the default value for the Email Reminder Time field on calls and meetings created by this user. |
| Export Delimiter | Character or characters used to delimit exported data by this user. |
| Field Name Placement | Choose whether field names are displayed above or beside field values in record view; by default, field names are displayed beside the field value. This option does not apply to the Record View dashlet. |
| First Day of Week | Which day of the week will show as the first day when the user views the Sugar legacy calendar. |
| Font for Footer | Select a font for the footer in PDF documents when generated by this user. Note: To export reports with Chinese characters, select "cid0ct" as the font for the footer. |
| Font for Header and Body | Select a font for the header and body of PDF documents when generated by this user. Note: To export reports with Chinese characters, select "cid0ct" as the font for the header and body. |
| iCal integration URL | URL in which someone can subscribe to the user's Sugar legacy calendar within iCal or other programs that support iCal integrations. |
| Import/Export Character Set | The default character set used for imports, exports, and vCard generation for this user. |
| LDAP Authentication Only |
When enabled, users will authenticate their credentials against your LDAP directory or Active Directory upon login. |
| Main Font Size | The default font size in the PDF header when generated by this user. |
| Name Display Format | How concatenated name fields will appear for the user, with the ability to control first name, last name, and salutation formatting. |
| Notify on Assignment | When this box is checked, the user will receive an email notification when a record is assigned to them by another user. Note: A system outbound mail account must be enabled in Admin > System Email Settings. |
| Popup Reminder Time |
This field sets the default value for the Popup Reminder Time field on calls and meetings created by this user. |
| Preferred Currency | Select the user's default currency to be used when creating new records. Additional currencies can be defined in Admin > Currencies. |
| Publish at my Location | Used to share free/busy information between Sugar legacy calendar and Microsoft Outlook calendar. |
| Publish Key | Alphanumeric code entered by the user to uniquely identify his or her legacy calendar and populate the iCal integration URL, Publish at my location site, and Search Location. |
| Search Location | Used to share free/busy information between Sugar legacy calendar and Microsoft Outlook calendar. |
| Select Modules for Navigation Bar | The order of the module navigation bar is defined by the order in the Display Modules column and modules listed in the Hide Modules column will not appear in the bar. |
| Show Full Names | When this box is checked, the user will see users' full names ("John Smith") instead of user names ("jsmith") when using Sugar. |
| Show Preferred Currency | Mark the checkbox to convert the base currency to user-preferred currency in list views and record views. Note: User-preferred currency is not used in the Quotes record view or for quoted line items. For more information, refer to the Quotes and Quoted Line Items documentation in the Application Guide. |
| System Significant Digits | Define how many digits will appear after the decimal point when the user views a currency field, with an example showing in the "Example" box. |
| Time Format | How time fields will appear for the user, with the ability to control hour, minute, and 12 versus 24-hour clock formatting. |
| Time Zone | The user's time zone will be automatically set to match their browser's time zone by default. This field is read-only. |
| User Wizard Prompt | Mark the checkbox to have users go through the New User Wizard upon their first login. |
Note: The Quotes and Revenue Line Items modules are not available for Sugar Serve users. For more information on license types and the functionality available for each type, refer to the License Types section.
Users Record View
The Users record view displays thorough user information including all user fields which are grouped by default into the User Profile, Advanced, and Access tabs. You can also view information from records related to the Users module as subpanels below the record view. For more detailed information about adding relationships, please refer to the Studio documentation. The record view can be reached by clicking a user record's link from anywhere in the application including from the Users list view.
Note: If your instance uses SugarIdentity, then you can also view the user's basic and employment-related information in SugarIdentity.
Administrators have the ability to change what fields are visible in the User Profile tab of the record view by configuring the field groupings via Admin > Studio. For more information on editing record view layouts, please refer to the Studio documentation.
Tabs
The record view for a user is broken up into multiple tabs to better organize the different fields available in the Users module. Some of the available tabs in the user's profile are "User Profile", "Advanced", and "Access". A Downloads tab is also available when viewing your own profile. For more information on viewing your personal user profile, please review the Getting Started documentation in the Application Guide.
User Profile
The User Profile tab displays information specific to the user such as the user's name, user type, employment status, contact information, etc. Administrators have the ability to configure the User Profile layout via Admin > Studio.
Note: For instances that use SugarIdentity, certain fields (e.g., First Name, Last Name, Title, Work Phone) in the user's profile are read-only and can only be edited in SugarIdentity.
Advanced
The Advanced tab shows information specific to the user's preferences in Sugar. Information such as the user settings, locale settings, PDF settings, etc. can be easily viewed under this tab. Please note that the layout of this tab cannot be edited in Studio. However, you can edit the information under the tab by clicking the Edit button on the user's record view.
Access
The Access tab summarizes the user's Team and Role settings so that it can easily be viewed in one place via the Access table. The Access table summarizes the set of permissions assigned to the user and allows you to view the type of access they have along with the actions (e.g., View, Edit, Delete, etc.) they can perform in Sugar. This table is very similar to what appears in Admin > Role Management, but this table is not editable in the Users module. The table will list the modules in rows on the far left with column headers representing the type of action (e.g., Delete, Edit, Export, etc.) users can perform in each module. For more information on role settings, please refer to the Roles documentation.
Note: Users with more than one role assigned will have the more restrictive role setting prevail on the Access table. For example, if one role allows the user to delete records in the Contacts module, but the other role does not allow record deletion, the user will not be able to delete records in the Contacts module.
Subpanels
All available subpanels are visible at the bottom of the Users record view. Subpanels can be added to the Users module by creating relationships via Admin > Studio. For more information on adding relationships, please refer to the Relationships documentation.
Roles
The Roles subpanel lists all of the roles assigned to the user along with the description of each role. Roles work in conjunction with teams to form a robust security model for non-admin users in Sugar. Roles control three different layers of access for users within Sugar: module, field, and action-level access. System administrators can easily assign or remove roles for the user via the Roles subpanel.
Teams
Teams consist of one or more users who are assigned to manage records in Sugar. The Teams subpanel lists all of the teams assigned to the user along with the description of each team. The defined permissions determine what records a user is and is not able to access. Teams are used in conjunction with roles to form a robust security model for non-admin users in Sugar. The Teams subpanel displays the list of teams a user is associated with, which determines what records the user has access to in Sugar. Please note that every record is assigned to at least one team, but can be assigned to multiple teams as well if different users need access to it. The default team(s) set in the User Settings section under the Advanced tab will automatically be assigned to new records created by the user. Users assigned to the record, as well as system administrators can access the record regardless of team membership. When a user is created in Sugar, they are automatically associated with the Global team (universal team) and a Private team (users own personal team) is created by default. System administrators can assign users to additional teams via Admin > User Management or Admin > Team Management as necessary. For more information on teams as well as creating and assigning teams, please refer to the Team Management documentation.
User Holidays Subpanel
Administrators can record the days that users will not be working so that the time off is considered when calculating project timelines in the Projects module. Users will be able to select the scheduled holiday(s) via the Project Holidays subpanel in Projects-related modules. For more information on creating and managing projects, please refer to the Projects documentation. Additionally, administrators can utilize User Holidays to determine user availability for record assignment in SugarBPM. 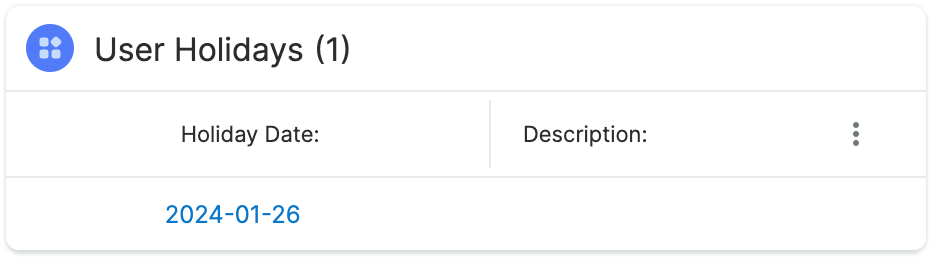
Shifts and Shift Exceptions Subpanels
The Shifts and Shifts Exceptions subpanels show the shifts and shift exceptions to which the user is related. Using the Shifts and the Shift Exceptions modules, administrators can define the working hours and the exceptions (e.g., time off, team event, etc) of their employees. This allows you to view the shifts and the exceptions to these shifts that a user has so that you can understand their work schedule and their availability to be round-robin assigned records in SugarBPM. See the Shifts and the SugarBPM documentation for more details.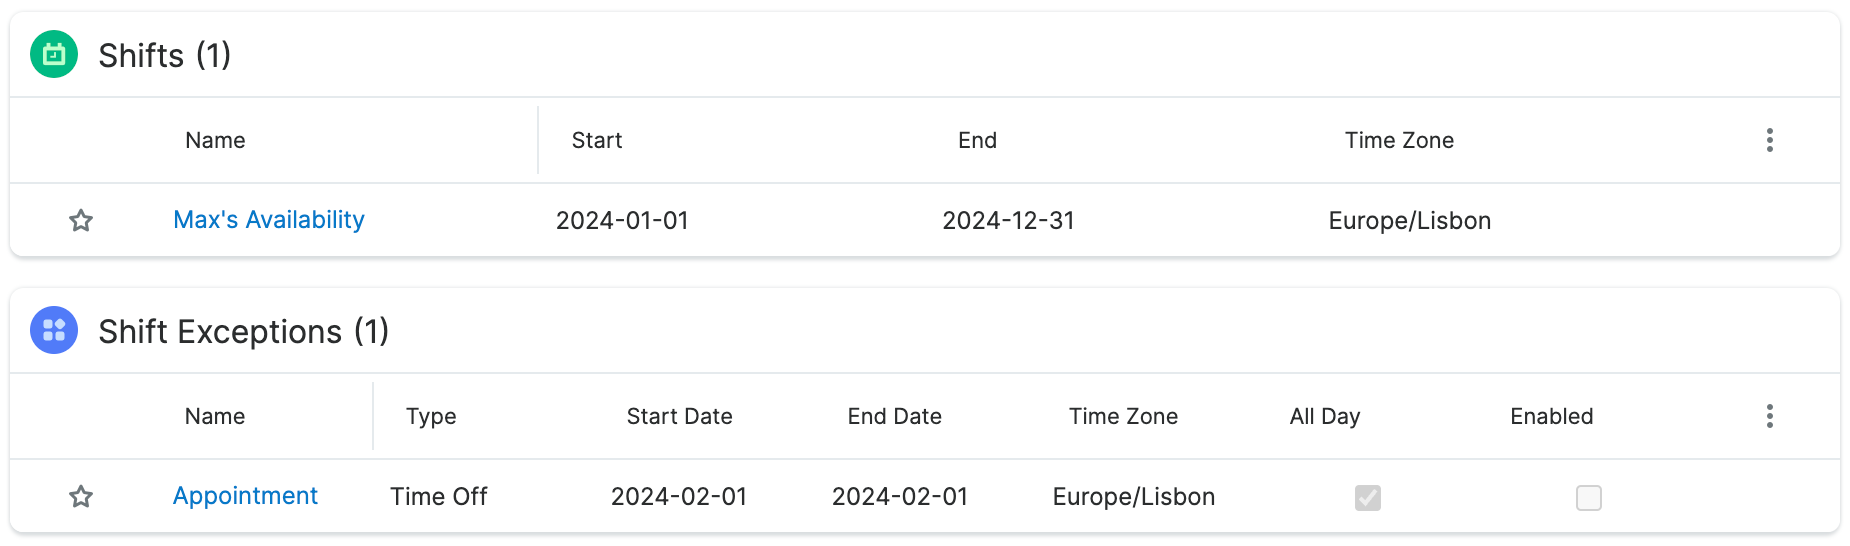
External Accounts
The External Accounts subpanel allows users to connect to external applications (e.g., Google, GoToMeeting, WebEx) from Sugar. Please note that you must have an existing account with the external application prior to connecting in Sugar.
Should you wish to prevent users from creating external accounts, you can disable the External Accounts module via a role assigned to those users. Doing so will remove the External Accounts subpanel from their User Profile. Please note the "Access Type" setting will not affect this module. For more information, refer to the Role Management documentation.
Note: While administrators can see the External Accounts subpanel, they cannot add external accounts for users. The user must be logged in and can add external accounts via their profile. For more information, refer to the Getting Started documentation.
Maps
The Maps subpanel allows you to quickly see which records are in close proximity to the user and generate driving directions between records. For more information, refer to the Sugar Maps documentation.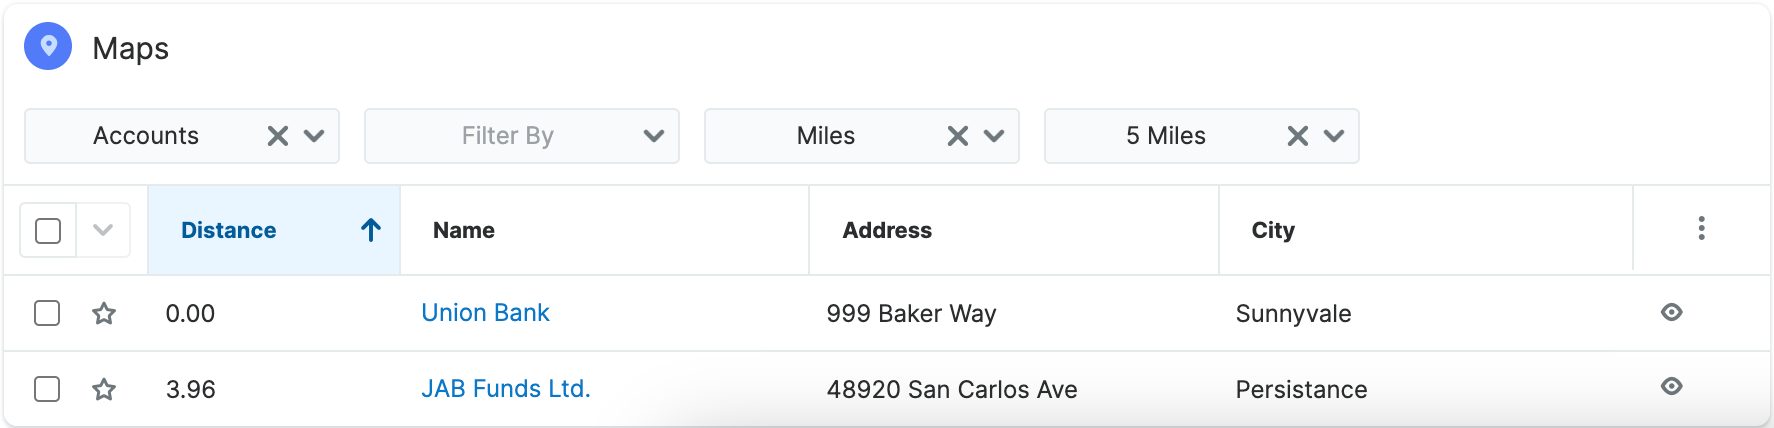
Creating Users
There are various methods for creating new users in Sugar. These are via the Users module, duplication, or import. Creating users is an imperative function in Sugar as it allows for other members of your organization to log in and work in Sugar. Please note that you will not be able to add more users of a particular license type than is allowed by your Sugar license. For more information on how Sugar's licensed user limits work, refer to the Understanding User Types, License Types, and Sugar Licenses article.
Notice: For SugarIdentity-enabled instances, the administrator will need to access SugarIdentity to create new users.
Creating via Module Tab
The most common method for creating users in Sugar is via the Users module. The record view layout opens when creating the user directly from the Users menu and includes all of the relevant fields to create a new user. The fields and options on the Create page will vary depending on the type of user you are creating.
Regular and Admin Users
Regular and Admin users are the most common users that will be created in a Sugar instance and contain the most detail and fields compared to the other user types. For more information about the use of Regular and Admin users, please review the Regular User and System Administrator sections of this page.
Notice: For instances that use SugarIdentity, the administrator will need to access SugarIdentity to create new users. For certain SugarIdentity-enabled instances, the users' license type (e.g., Sugar Serve) is managed in SugarIdentity, and the License Type field will be read-only in the Sugar application.
Use the following steps to create a new user:
- Navigate to Admin > User Management.
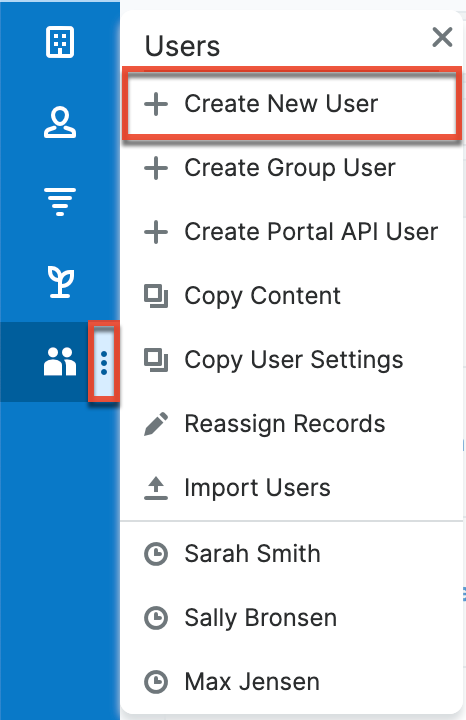
- Click the three-dots menu in the Users module tab to open the Actions menu and select "Create New User".
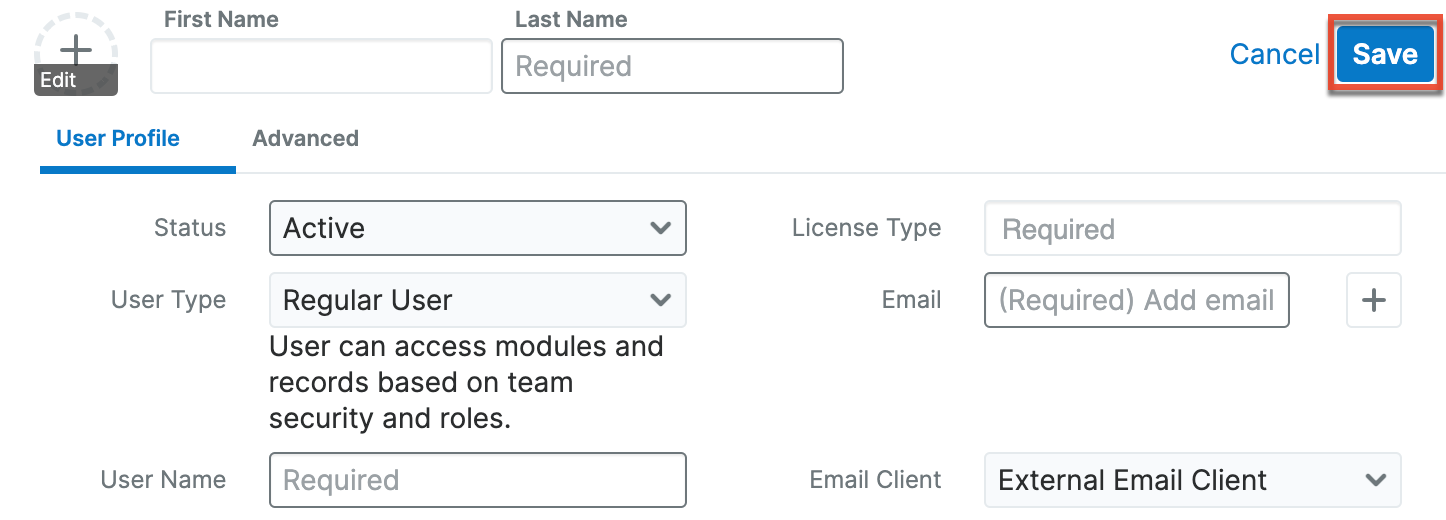
- Enter appropriate values for the fields in the record view layout. All required fields are marked with a red asterisk and must be completed prior to saving.
- Enter the following information under the User Profile tab:
- In "User Profile" enter a user name for this user which will define the specific user in Sugar and should be unique for every user. Sugar will default the user to being Active and a Regular User, which can be updated if the user is going to be an administrator.
- In "Employee Information", additional contact information and other specific information about the user can be added. This will include phone numbers, who the user reports to, their business center, and any description information.
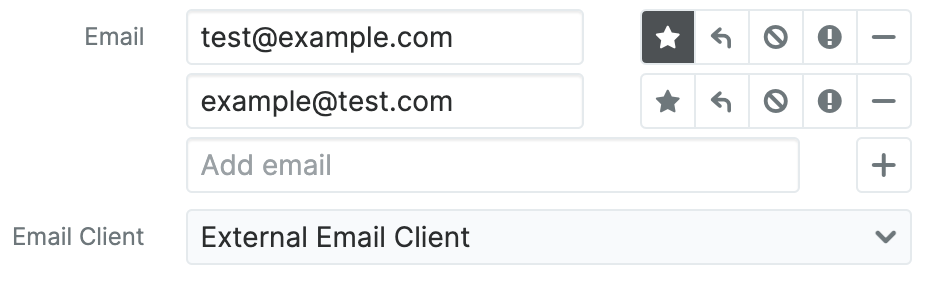
- In the Email field, the user's email address or addresses can be added. The email addresses can also be marked as "Primary", meaning that this will be the first email address that shows for the user, and "Reply-to", where automatic notifications from Sugar will be sent. In this section, the user's outbound email client will be selected to default to Sugar or an external program, such as Microsoft Outlook.
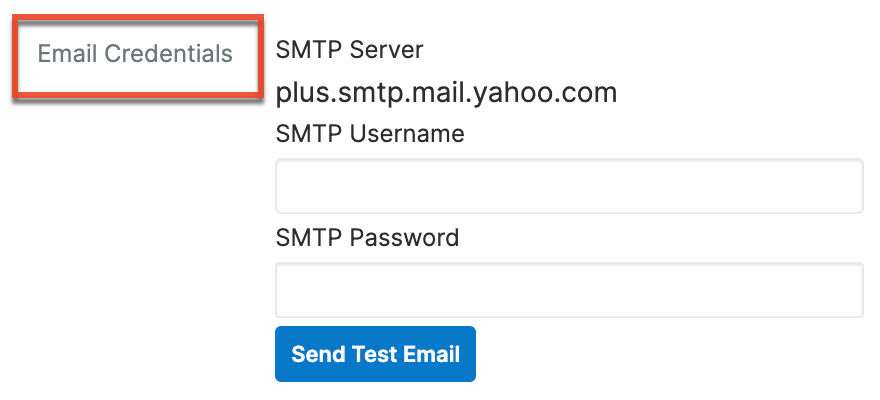
- If a mail server is configured in Admin > System Email Settings, additional options will display here for SMTP Username and SMTP Password. If the administrator has set up an OAuth2-based email account, there will be an Authorize button that will initiate a pop-up to authenticate the email account.
- The Advanced tab includes preference-type settings (User Settings, Layout Options, Locale Settings, PDF Settings, Calendar Options) for the user. These are all specific to the user's account and will not affect system-wide settings or other users. Options such as assignment notifications, date and time formats, time zone, preferred currency, etc. are available to configure under this tab. The available fields are listed in the User Fields table above.
- Enter the following information under the User Profile tab:
- After entering the necessary information click the Save button.
- Upon saving, a corresponding Employee record will be created for the user. Once the user is created, the administrator can assign Teams and Roles to the user.
- Once the user setup is complete, the administrator will need to provide the user name and primary email address and instruct the user to click the "Forgot Password" link on the login page. Please note this also requires the instance to have the Forgot Password Feature enabled in Password Management.
Group Users
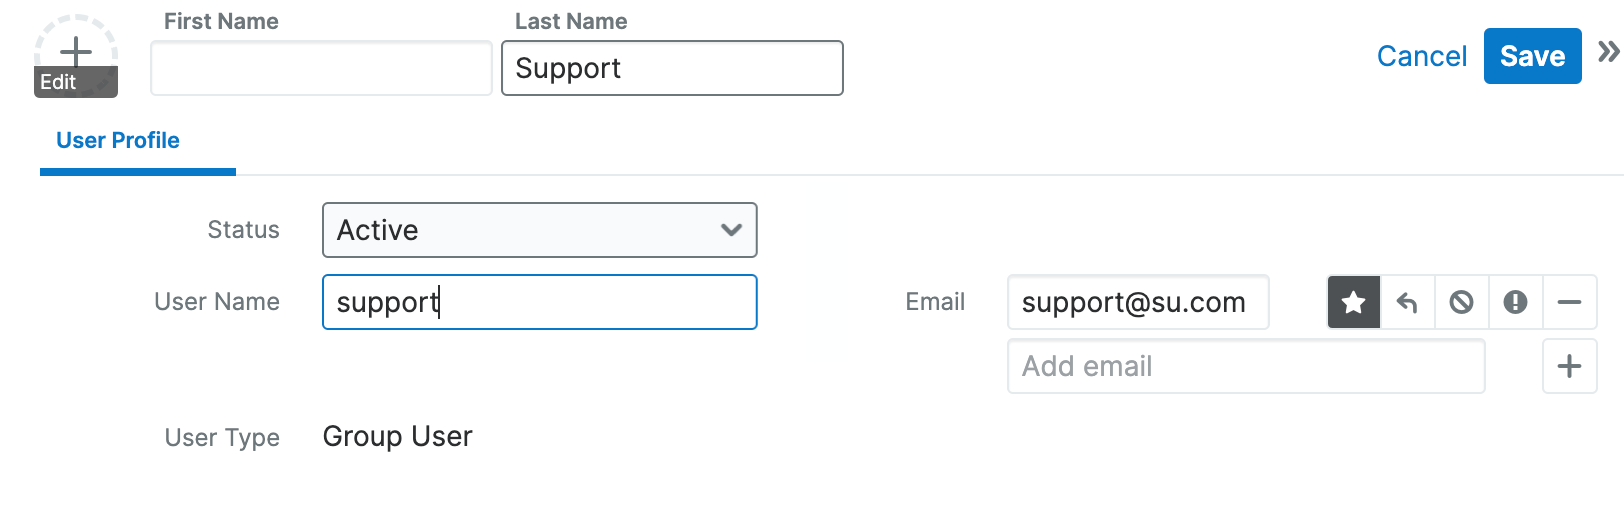
A Group user cannot log in to Sugar, but new and existing records can be assigned to the Group user. The Create page for the Group user consists of the User Name, Status, Name, User Type, and Email Address fields. For more information on how to use Group users in Sugar, please review the Group User section of this page.
Use the following steps to create a Group user:
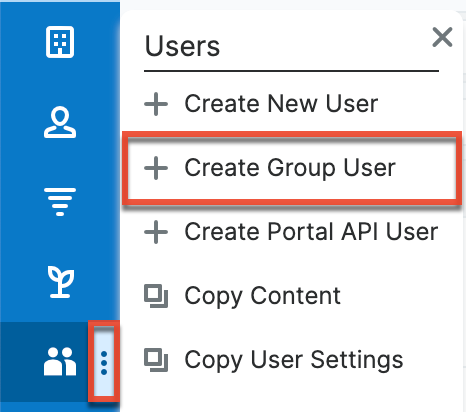
- Click the three-dots menu in the Users module tab to open the Actions menu and select "Create Group User".
- Enter a name and user name (e.g., Support) for this user.
- Enter an email address or addresses for the Group user. The group user's primary email address will be marked as "Primary" and you can also mark "Reply-to" if any automatic notifications from Sugar will be sent to this address.
Note: If your organization has a group inbox or alias for a team represented by the group inbox, the email address can be added here for all notifications to be sent to the entire team. - Click "Save" to create the user.
Portal API Users
A Portal API user cannot log into Sugar via the web interface, but the name and user name will appear for other users as they view records assigned to the group user or assign records to this user. The Portal API user creation screen only contains five fields. For more information on the use of the Portal API user, please review the Portal API User section of this page.
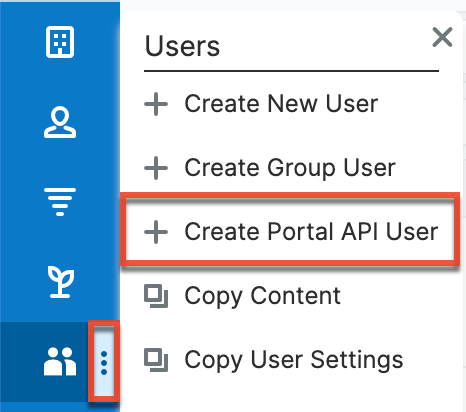
Use the following steps to create a Portal API user:
- Click the three-dots menu in the Users module tab to open the Actions menu and select "Create Portal API User".
- Enter a name and user name for the user.
- Enter an email address or addresses for the API user. The group user's primary email address will be marked as "Primary" and you can also mark "Reply-to" if any automatic notifications from Sugar will be sent to this address.
- Click "Save" to create the user.
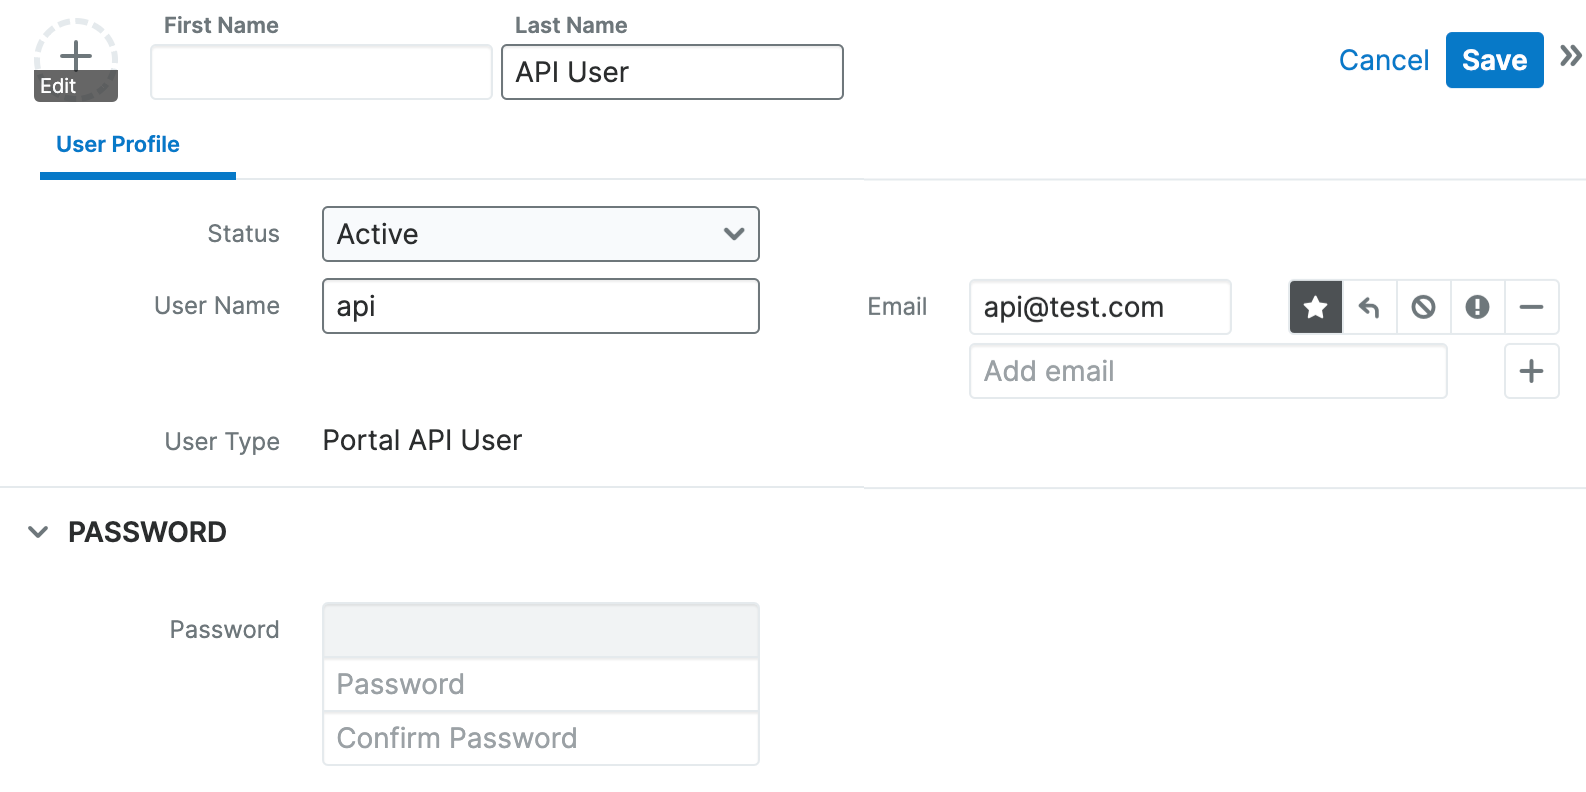
- Once the user setup is complete, the administrator will need to provide the user name and primary email address and instruct the user to click the "Forgot Password" link on the login page. Please note this also requires the instance to have the Forgot Password Feature enabled in Password Management.
Creating via Duplication
Often, administrators will find themselves in situations where multiple users must be created at once, whether it be when they are first setting up Sugar, a new group of employees is going to be using Sugar, etc. For situations such as these, one user can be configured and additional users can be quickly set up using the Copy option available in the user record view. When duplicating a user, all fields are populated from the original record to the duplicated one, except for the User Name field.
Note: The Copy option is not available for instances that use SugarIdentity.
Use the following steps to create a user by duplicating an existing user:
- Navigate to the record view of the user you would like to duplicate.
- Click the Actions menu and select "Copy".
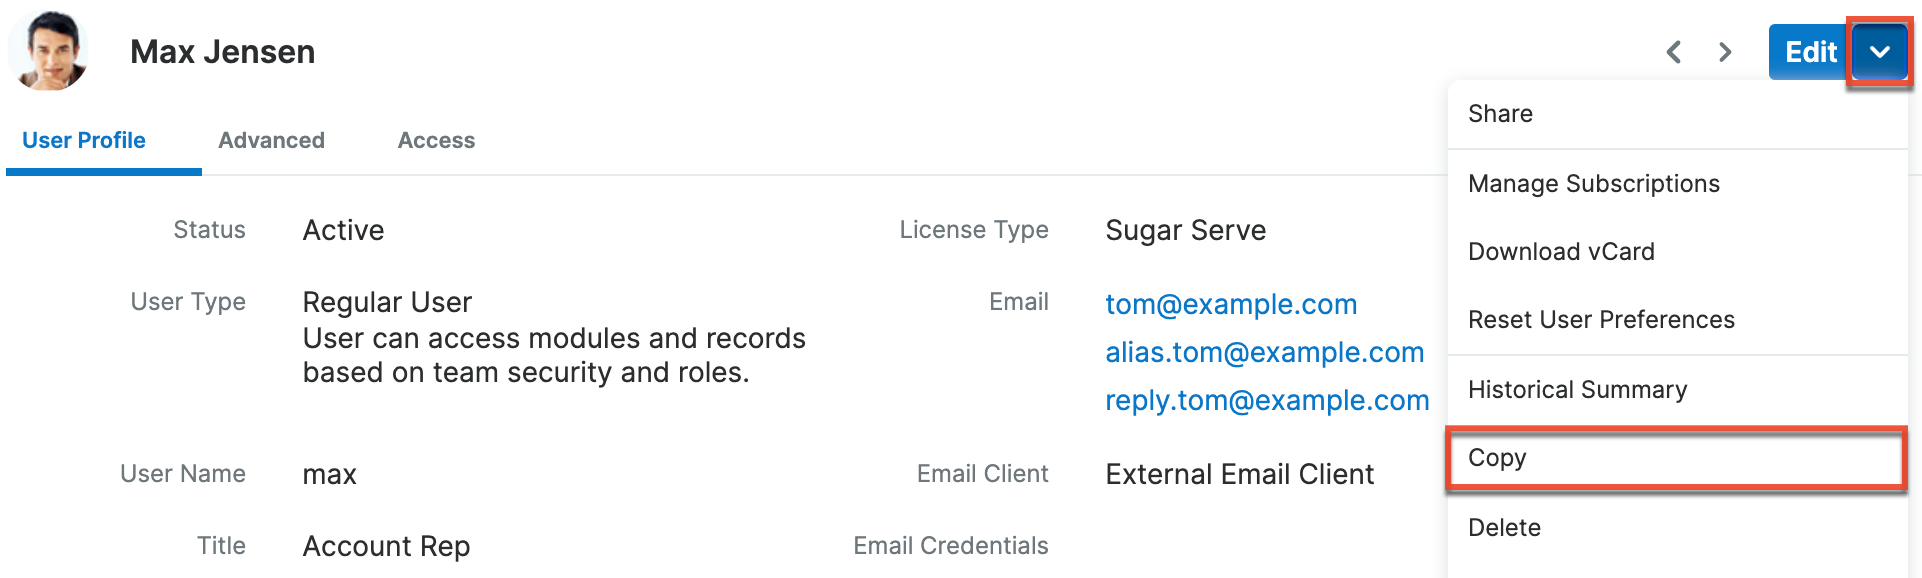
- The displayed record view is pre-populated with the original user's values, except for the user name.
- Populate the "User Name" for the new user and edit any other fields or preferences to be specific to the new user. Fill in any information for the new user that did not exist on the original user.
- Click "Save".
The new user is now created and available for use. This process is applicable to all user types.
Creating via Import
The import function in Sugar allows you to push multiple user records into Sugar using a comma (or another character) delimited file instead of creating them one-by-one. Use the following steps to import users via the Import Users option. For more information on importing records to Sugar, please refer to the Import documentation.
Note: For instances that use SugarIdentity, the import option can only be used to update existing user records. Administrators can access SugarIdentity to import a list of new users using a CSV file.
The following steps cover importing new user records as an example:
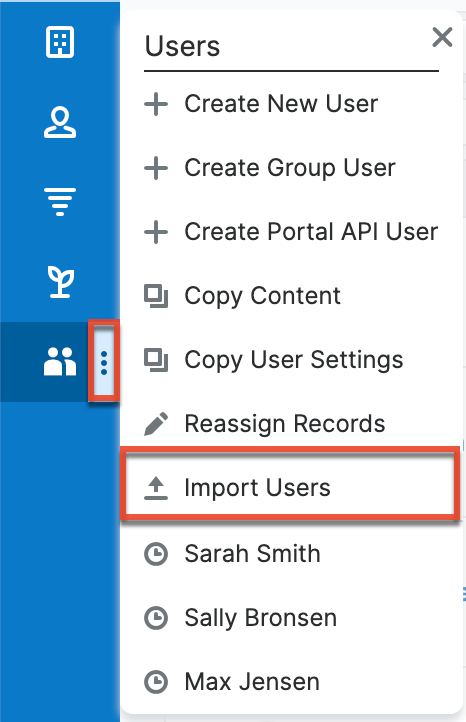
- Click the three-dots menu in the Users module tab to access the Actions menu and select "Import Users".
- In Step 1, select the source of the data you are importing. Click "Next".
- In Step 2, select the import file and choose "Create new records only". Click "Next".
- In Step 3, confirm the import file properties. Click "Next".
- In Step 4, confirm the field mappings for the import. Click "Next".
- In Step 5, configure any fields you would like to use for duplicate checking.
- In Step 6, view the import results.
- The Created Records tab will show all of the new user records.
- The Duplicates tab will show any records in the file that were detected as a duplicate and thus not imported from the duplicate check in Step 5 of the Import Wizard.
- The Errors tab will show records that were not imported due to errors detected during import.
Note: You can also update existing user records via import using a CSV file. For instances that do not use SugarIdentity, refer to the Import documentation for more information on updating existing records via import. For instances that use SugarIdentity, refer to the Importing Updates to Existing User Records section of this page for more information.
Copying User Preferences, Dashboards, and Filters to Other Users
Administrators can reduce the learning curve for new users by broadcasting the setup of an existing user to individual users or users on a given team or role via the Copy Content (preferences, dashboards, and filters) and Copy User Settings (locale settings) options in the Users menu.
Copying Content
Administrators can save time setting up users with the Copy Content tool, which copies select user preferences, dashboards, and filters from one user to other users, teams, or roles. Content can be copied to individual or multiple users, teams, or roles. Copying user preferences will overwrite the recipient users' existing preferences.
To copy content such as dashboards, filters, and user preferences from one user to other users, follow these steps:
- Navigate to the Users module via Admin > User Management.
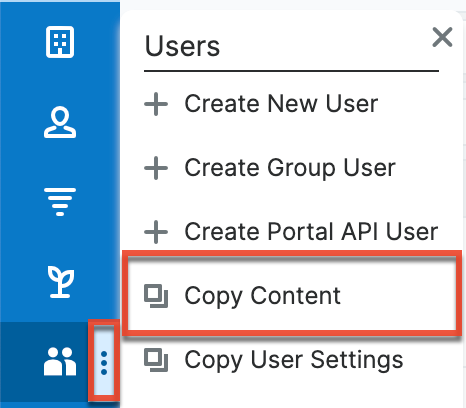
- Click the three-dots menu in the Users module tab to open the Actions menu and select "Copy Content".
- From the "Copy item" dropdown, select the type of content to be copied. Refer to the Content Types section for descriptions of each type of content.
- In the "From User" list, select the name of the user from which to copy the identified content.
- Click into any of the "To" fields to open a Search and Select drawer to locate the users, teams, or roles, to which the content should be copied.
- Click the Copy button at the top right-hand corner of the page. A confirmation message displays when the copy has been completed.
Note: When content is copied to user accounts, the users are not notified of the change.
Content Types
The following lists contain the types of content that can be copied from a user.
User Preferences
- Default Teams: The teams set as default teams in the source user's profile user settings.
- Favorite Reports: The reports identified as favorites.
- Navigation Bar Module Selection: The modules and the order in which they are displayed in the navigation bar as defined in the source user's layout options.
- Notify on Assignment: Copies the "Email on Assignment" option as defined in the source user's profile user settings.
- Reminder Options: Copies the reminders as defined in the source user's profile user settings.
- Scheduled Reporting: Copies the source user's scheduled report settings.
- Sugar Email Client: Copies the email client as defined in the source user's profile email settings.
Dashboards
- From Modules: Select this option to copy all of the source user's dashboards from a designated module.
- Existing Dashboards: Select this option to locate specific dashboards to copy from the source user.
Note: When a dashboard is selected as a favorite by the source user, it will be identified as a favorite in all user accounts to which the dashboard is copied.
Filters
- From Modules: Select this option to copy all of the source user's filters from a designated module.
- Existing Filters: Select this option to locate specific filters to copy from the source user.
Copying User Settings
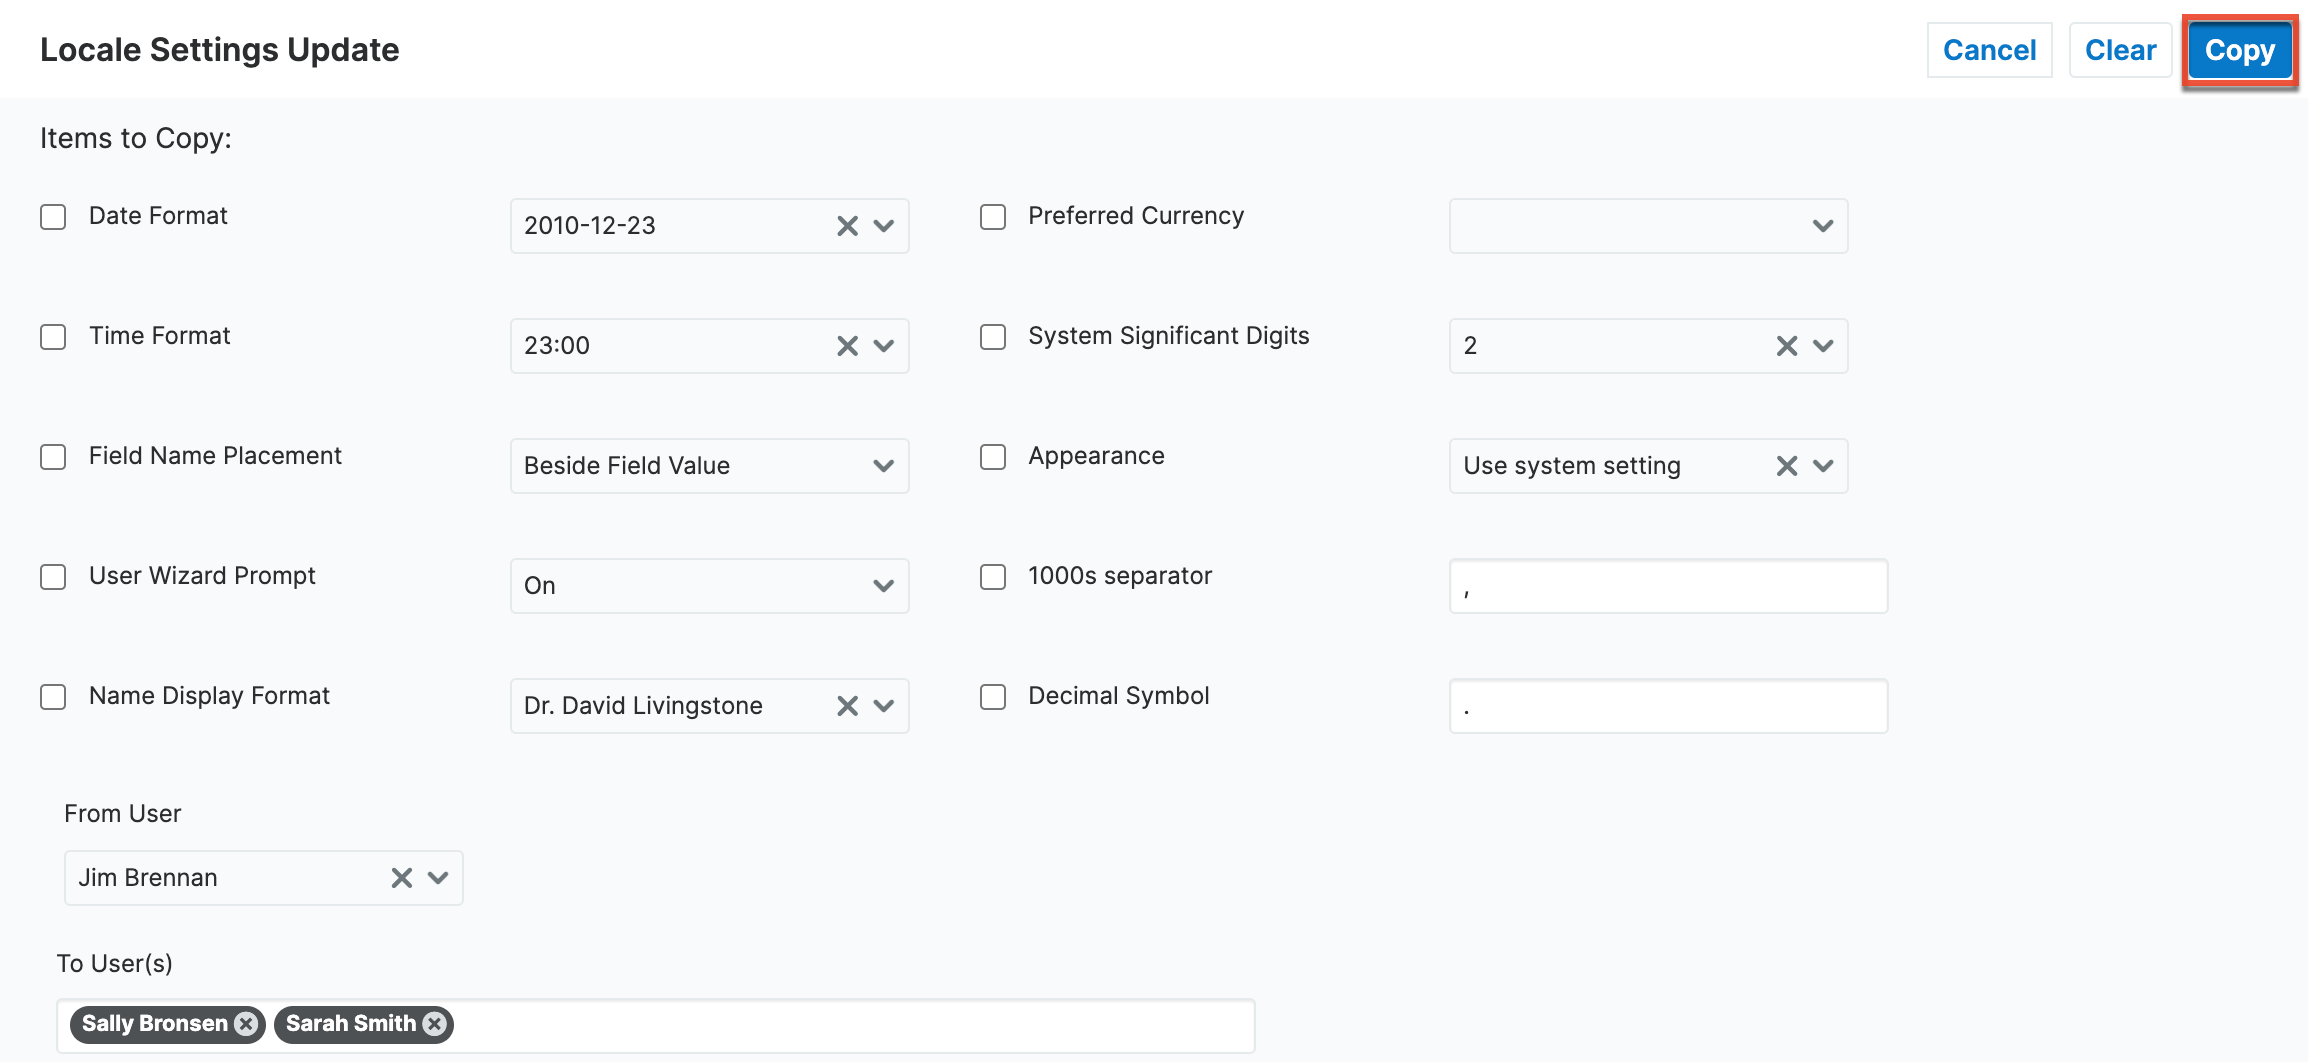
The Copy User Settings tool allows administrators to easily set the locale settings for individual users or users in a given team or role.
To copy user locale settings to other users, follow these steps:
- Navigate to the Users module via Admin > User Management.
- Click the three-dots menu in the Users module tab to open the Actions menu and select "Copy User Settings".

- Select the checkbox next to the settings to be copied. Refer to the Getting Started documentation in the Sugar Application Guide for more information on these settings.
- Click into any of the "To" fields to open a Search and Select drawer to locate the users, teams, or roles to whom the settings should be applied.
- Click the Copy button at the top right-hand corner of the page. A confirmation message displays when the assignment has been completed.
Importing Updates to Existing User Records
In addition to importing new user records via Sugar's Import Wizard, you can also import updates to existing user records in Sugar using a CSV file. Please note that the import process will vary between instances that use SugarIdentity and instances that do not use SugarIdentity.
For instances that do not use SugarIdentity, refer to the Import documentation for more information on updating existing records via import.
For instances that use SugarIdentity, use the following steps to update existing user records via import:
Note: Fields that are only editable in SugarIdentity cannot be updated via import in Sugar.
- Click the three-dots menu in the Users module tab to access the Actions menu and select "Import Users".
- In Step 1, select the import file and click "Next".
Note: To create new user records via import, click the SugarIdentity link to perform the import in SugarIdentity.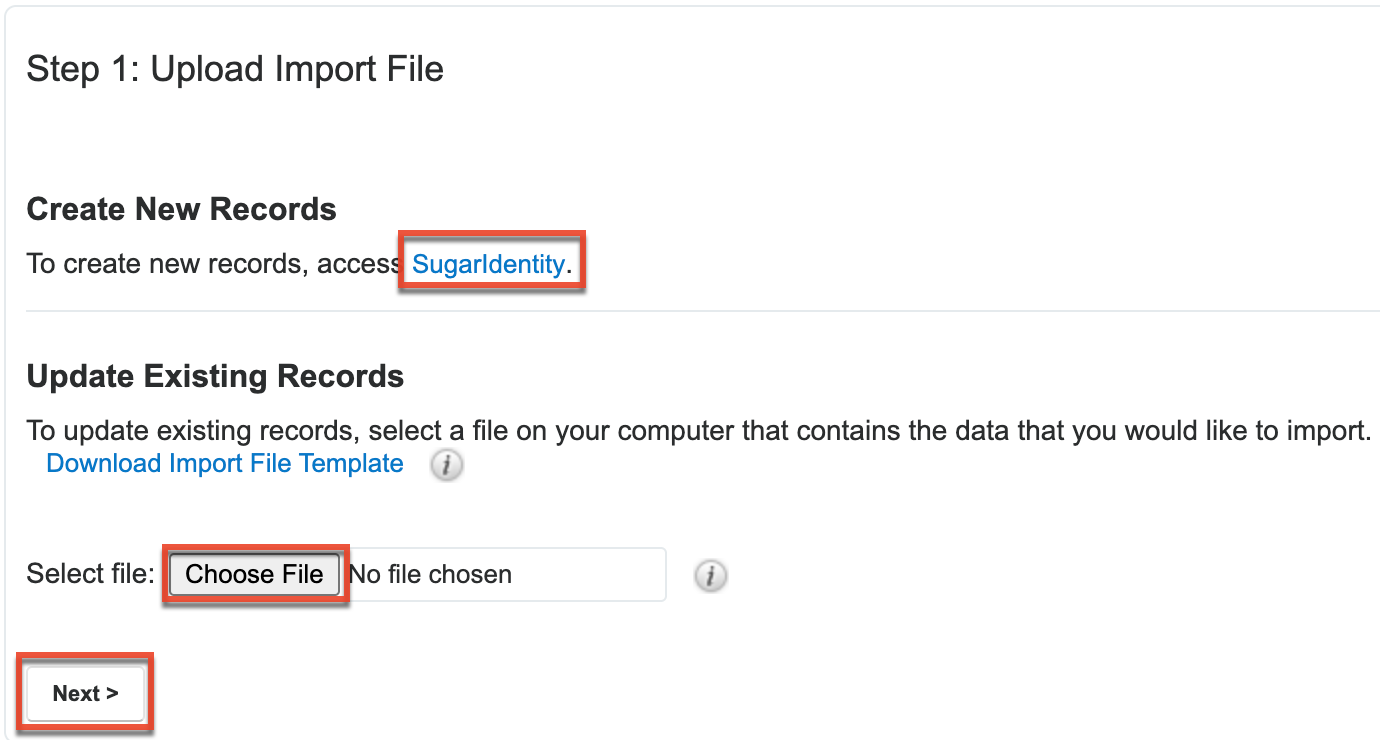
- In Step 2, confirm the import file properties. Click "Next".
Note: Configuring the import file properties (e.g., Name Display Format) for fields (e.g., First Name, Last Name) that are not editable in Sugar will not apply to the data in the import file. - In Step 3, confirm the field mappings for the import then click "Import Now".
Note: Fields that are only editable in SugarIdentity will not be available to map. - In Step 4, view the import results. The Errors tab will show records that were not imported due to errors detected during import.
Note: If the import file includes any changes to fields that are only editable in SugarIdentity, it will not get updated in the record.
Resetting User Preferences
As users make changes while navigating around Sugar, their preferences are stored in the Sugar database. This includes preferences such as sort orders on list view, previous searches on both basic and advanced searches, and settings in the Advanced tab of the user profile. Users can reset their preferences back to the default out-of-the-box settings, which will revert the user's changes made in Sugar. Please note that this action cannot be undone. If the user is currently logged in, the changes will not take effect until the user is logged out and then back in.
Note: Resetting a user's preferences is the only way to allow a user access to Sugar if they have been locked out using the Login Lockout feature in Password Management.
Use the following steps to reset a user's preferences:
- Navigate to Admin > User Management and select the user (e.g., Jim Brennan) from the list view.
- Select "Reset User Preferences" from the Actions menu.
- A pop-up box will appear confirming the reset. Click "Confirm" to proceed.
Resetting User Passwords
For instances without SugarIdentity, administrators can reset a user's password easily in Sugar. For SugarIdentity enabled instances, administrators can click the lock icon in the Users list view of SugarIdentity to send password reset emails to users. For more information, refer to the SugarIdentity Guide.
Note: The user needs to log out and then back in for the change to take effect.
Use the following steps to reset a user's password in Sugar:
- Navigate to Admin > User Management and select the user (e.g., Jim Brennan) from the list view.
- Select "Reset User Password" from the Actions menu.
- A pop-up box will appear confirming the reset. Click "Confirm" to proceed.
Following your confirmation, an email is sent to the user’s primary email address with a link to reset their password. Please note, you must configure your system email in order to reset a users password.
Impersonating Users
If your instance uses SugarIdentity, you have the ability to log in as other users in your organization using the "Impersonate (Log in as)" option in SugarIdentity. When impersonating a user in Sugar, you will be able to access and view the same modules and settings as the user's actual account without having to obtain their login credentials. For more information on impersonating a user, refer to the SugarIdentity Guide.
Deactivating Users
When a user is no longer a member of your organization, it is best practice to deactivate them instead of deleting them. This ensures that the user will no longer be able to log in to Sugar, but any historical information tied to the user will still be available. If your instance uses SugarIdentity, you will need to access SugarIdentity in order to deactivate a user from Sugar. While deactivating user records will not update any related records, the Reassign Records tool in Sugar can be used to reassign all of the user's records. You can also filter list views to show records that are assigned to or created/modified by inactive users by filtering the user list on the Status field and then mass updating the records to be assigned to an active user.
Note: Users that have been deactivated do not count towards your licensed user count.
Instances without SugarIdentity can use the following steps to deactivate a user in Sugar and reassign their records:
- Navigate to Admin > User Management and click the user you wish to deactivate.
- Edit the user record and change the Status field to "Inactive". Click "Save".
- A pop-up message will display asking if you would like to reassign all of the user's records. Click "Yes" if you wish to proceed.
-
You will then be presented with the Reassign Records tool. Follow the steps on this page to complete the deactivation. For more information, please review the Reassigning Records section.
- Once the reassignment is complete, the user will be deactivated and no longer able to log in to Sugar.
Deleting Users
If a user record is invalid or should no longer appear in your organization's Sugar instance, it may be deleted. Please note that deleting user records will not delete any related records and will only prevent the user from being selected (e.g., Assigned to). If your instance is SugarIdentity-enabled, you will need to access SugarIdentity to delete a user from Sugar. When a user is no longer a member of your organization, it is best to deactivate them by changing the Status field to "Inactive" instead of deleting them. This way, any historical information tied to the user will still be available, but the user will no longer be able to log in to Sugar.
Please note, when a user record is deleted, the corresponding employee record will also be deleted. After the user is deleted, any SugarBPM processes, legacy workflow definitions, or reports involving the user may need to be evaluated and updated. Deleting a user record cannot be undone.
Instances without SugarIdentity can use the following steps to delete a user and reassign their records:
- Navigate to Admin > User Management and click the user you wish to delete.
- Select "Delete" from the Actions Menu.
- A pop-up message will display asking for confirmation. Click "Confirm" to proceed.
- You will then be presented with the Reassign Records tool. Follow the steps on this page to complete the deletion. For more information, please review the Reassigning Records section.
- Once your reassignment is complete, the user will be deleted, and you can freely navigate around Sugar.
Reassigning Records
Reassign Records is a tool available in the Users module for administrators to change the Assigned To and Team fields for a specific user's records. This is best used when a user is changing departments, teams, or roles within the organization, or if the user is no longer an employee or using Sugar. The Reassign Records tool is automatically presented when deleting or deactivating a user in Sugar. Please note that reassigning records cannot be undone in Sugar.
Note: You can locate records assigned to Inactive users by filtering the module's list view.
Use the following steps to reassign records:
- Navigate to the Users module via Admin > User Management.
- Click the three-dots menu in the Users module tab to open the Actions menu and select "Reassign Records".
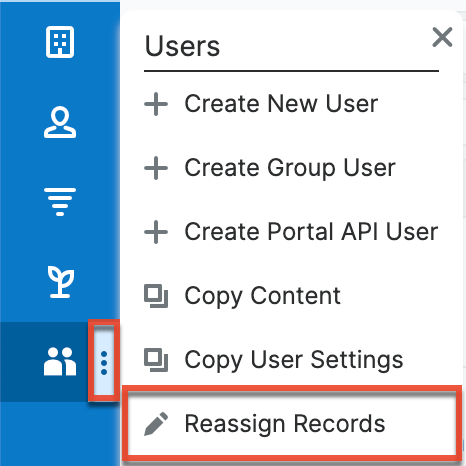
The Reassigning Records tool can also be accessed during the process of deleting or deactivating a user, where it is used to reassign a user's records before deleting or deactivating them. - Select the user to whom the records are already assigned in the From User field.
- Select the user to whom the records will be assigned to in the To User field.
Note: You can select the same user in both fields if you are just changing the team for all of the user's records. - Select which team(s) the records will be assigned to in the Set Teams to field.
- Select the module(s) you wish to include in the record reassignment. Multiple modules can be selected by holding down the Control key when using a PC or the Command key when using a Mac.
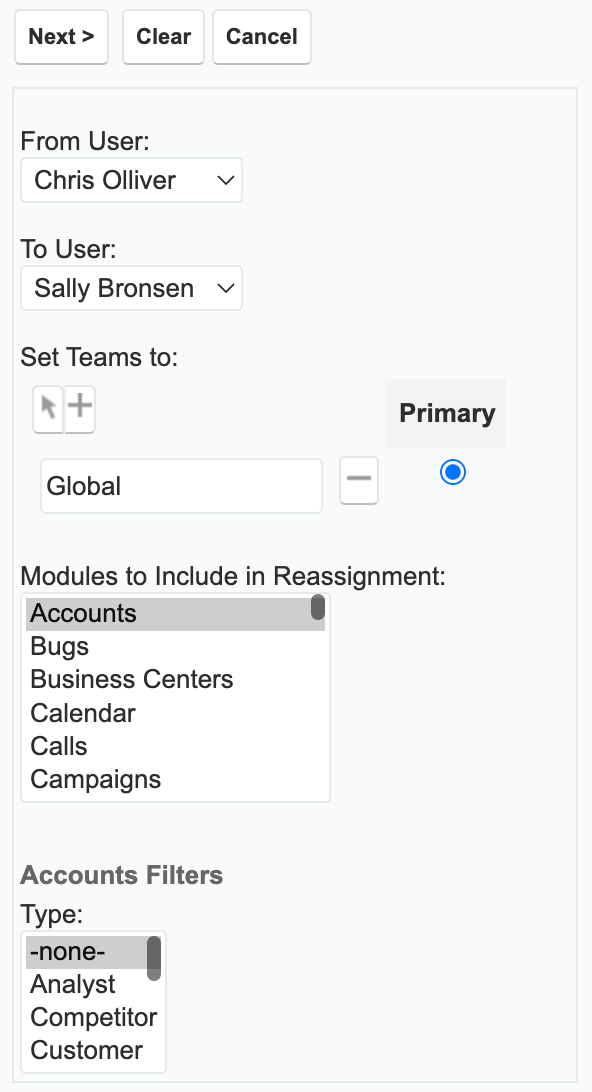
- Selecting certain modules will display specific filters (e.g., Type) which can be applied to the module. Use these filters if you do not want to include all records assigned to the user. The list of modules and their filter fields are as follows:
Module Filter Field Accounts Type Bugs Status Calls Status Cases Priority
StatusDashboards Default Dashboard Opportunities Sales Stage
TypeTasks Status - After selecting any filters, click "Next" to access the reassignment summary.
- If you would like to see a detailed list of the changes that were made, click "Verbose Output". This list will include a link to the changed records and a summary of changes that were made.
- If you would like the changes to show in the Change Log for the changed record, have any relevant workflows fire, or have assignment notifications sent out, please click the Include Workflow/Notifications/Audit checkbox.
Note: This process performs a large set of actions at once and may take a long amount of time to complete.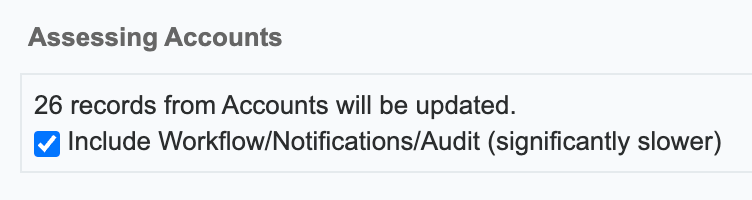
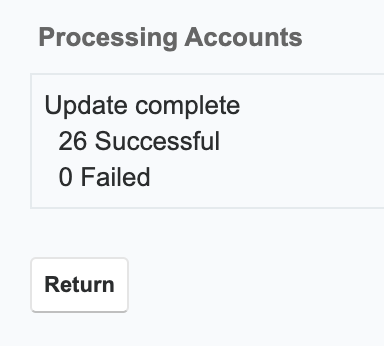
- Click "Next" to complete the reassignment.
- The final summary page will show how many records were affected and if any errors occurred during the reassignment. Click "Return" to return to the main screen of the Reassigning Records tool.
Note: Due to PHP memory limitations on the server, there may be occasions when the application times out while reassigning a large number of user records. If you encounter an error when performing this action, we recommend reassigning records in smaller batches via each module's mass update option.
vCards and Users
vCards are electronic business cards that are exchanged between applications such as email and web browsers. User records may be saved as vCards for use in other software.
Downloading a User's vCard
The following steps cover downloading a vCard and saving it as a contact in Microsoft Outlook as an example:
- Navigate to a users record view.
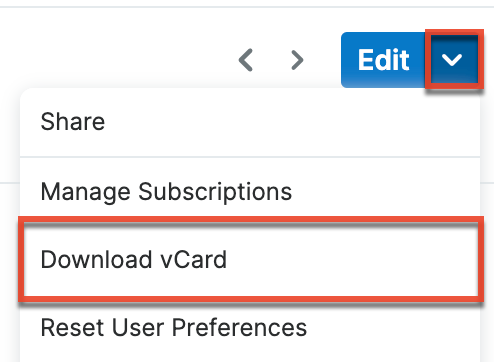
- Select "Download vCard" from the Actions menu to download the vCard file.
- Open the downloaded file in your mail or address book application. For this example, double clicking opens the vCard in Outlook.
- Make any necessary changes to the information, then click "Save & Close" to save this lead in Outlook.

Campaigns and Users
Sugar's Campaigns module, available to users with a Sugar Sell or Enterprise license type, can be used to send mass emails or a series of newsletter emails to Sugar accounts, contacts, leads, and targets. The results of each campaign are recorded to measure its impact. Records are not related directly to campaigns. Rather, each campaign is related to several target list records, and each target list is related to contacts, leads, users, and other recipients. Administrators can add users to target lists via the Mass Actions menu. Additionally, administrators and regular users can choose which Campaigns they subscribe to via the Manage Subscriptions option in the Record View Actions menu. For more information on Campaigns and Target Lists, refer to the Campaigns documentation.
Working With Sugar Modules
While the Users module has some features that only apply to users, it also uses the Sidecar user interface that most Sugar modules are based on. The following sections detail menus, views, and actions common to Sidecar modules and contain links to additional information within the page or links to the User Interface documentation.
User Menus
The Users module contains various options and functionality which are available via menus in the module tab, list view, and record view. The following sections present each menu and its options with links to more information about each option in the User Interface documentation or, for Users-specific functionality, within this page.
Module Tab Menus
Click the Users module tab in the navigation bar, shown after selecting User Management in the Admin page, to access the Users list view. You may also click the three-dots menu in the Users module tab to display the Actions, Recently Viewed, and Favorites menus. The Actions menu allows you to perform important operations within the module. The Recently Viewed menu displays the list of users you most recently viewed. The Favorites menu displays the list of users you most recently marked as favorites.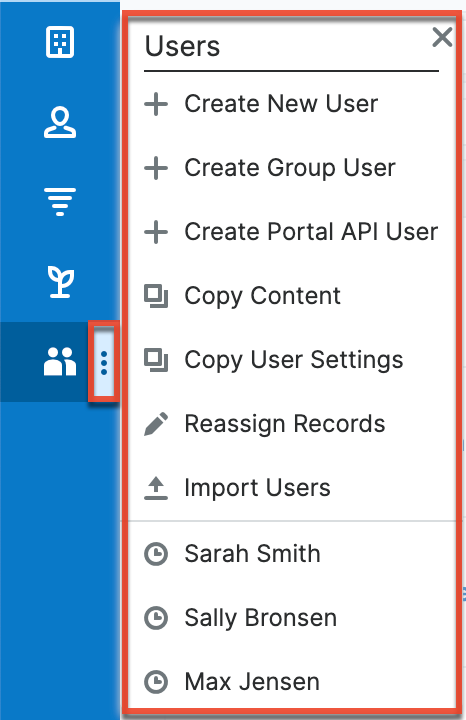
The options in the Actions menu allow you to perform the following types of action:
| Option | Description |
| Create New User | Opens the record view layout to create a new user. Note: For SugarIdentity-enabled instances, a new browser tab opens where admins can create a new user in SugarIdentity. |
| Create Group User | Opens the record view layout to create a new Group User. |
| Create Portal API User | Opens the record view layout to create a new Portal API User. |
| Copy Content | Copy user preferences and content from one user to individual users or all users in a team or role. |
| Copy User Settings | Copy the current user's locale settings to individual users or all users in a team or role. |
| Reassign Records | Opens the Reassign Records tool. |
| Import Users | Opens the import wizard to create or update users using external data. Note: For instances that use SugarIdentity, the import option can only be used to update existing user records. Administrators can access SugarIdentity to import a list of new users using a CSV file. |
For more information on module tab menus including reasons a module may not be included in the menu, see the User Interface documentation.
List View Menus
The Users list view displays all user records and allows for searching and filtering to locate specific users. You can view the basic details of each record within the field columns of the list view or click a user's name to open the record view. To access a module's list view, simply click the module's tab in the navigation bar.
List View Mass Actions Menu
The Mass Actions menu to the right of the checkbox option in the list header allows you to perform mass actions on all currently selected records. You can use the checkbox on each record's row to select individual user records or click the checkbox in the list header to select all records displayed on the current set of list view results.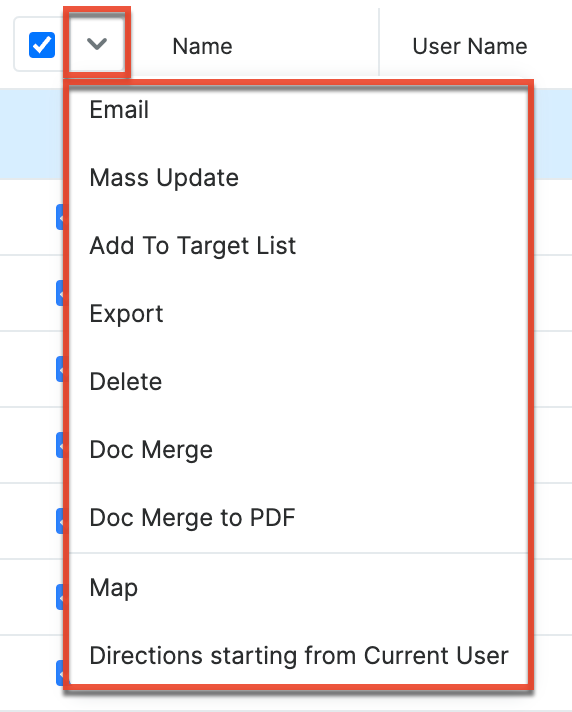
The Mass Actions menu allows you to perform the following operations:
| Menu Item | Description |
| Email one or more contacts at a time. | |
| Mass Update | Mass update one or more users at a time. |
| Add to Target List | Add one or more users to a target list. This option is only available to users with a Sugar Sell or Enterprise license type. |
| Export | Export one or more users to a CSV file. Note: Due to PHP memory limitations on the server, there may be occasions when the application times out while exporting a large number of user records. If you encounter an error when performing this action, we recommend selecting the records in smaller batches. |
| Delete | Delete one or more users at a time. |
| Doc Merge |
Select or create a DOCX template to merge record data into documents that will be accessible in the Doc Merge widget. |
| Doc Merge to PDF |
Select or create a DOCX, XLSX, or PPTX template to merge record data into PDF documents that will be accessible in the Doc Merge widget. |
| Map | For instances with Sugar Maps enabled, display this record or the selected records on a map. |
| Directions starting from Current User | For instances with Sugar Maps enabled, plot driving directions on a map from your address to this record or all selected records. |
List View Record Actions Menu
The Record Actions menu to the far right of each record's row allows you to perform actions on the individual user directly from the list view.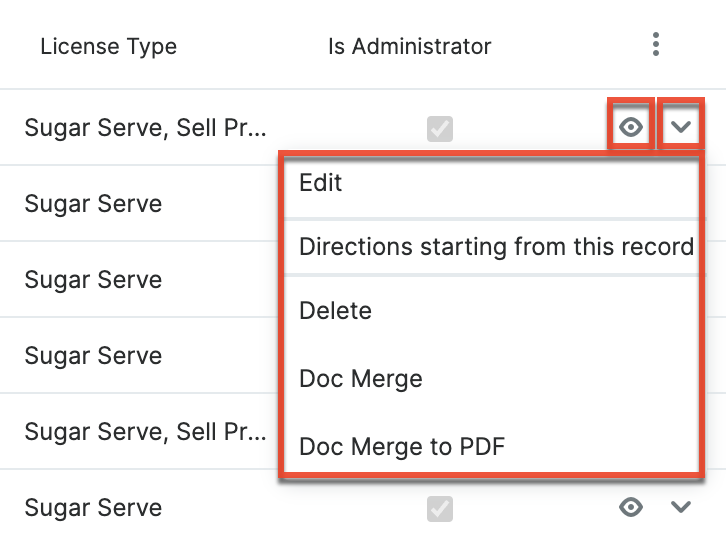
The options in the Record Actions menu allow you to perform the following operations:
| Menu Item | Description |
| Preview (Eye icon) | Preview this user in the intelligence pane. |
| Edit | Edit this user. |
| Directions starting from this record | For instances with Sugar Maps enabled, plot driving directions on a map from this record to another record or records. |
| Delete | Delete this user. This option is not available for SugarIdentity-enabled instances. |
| Doc Merge |
Select or create a DOCX, XLSX, or PPTX template to merge record data into documents that will be accessible in the Doc Merge widget. |
| Doc Merge to PDF |
Select or create a DOCX, XLSX, or PPTX template to merge record data into PDF documents that will be accessible in the Doc Merge widget. |
Record View Actions Menu
The User record view displays a single user in full detail including its relevant fields and subpanels of related records. To access a user's record view, simply click a hyperlinked user name from the Users list view, Users list view dashlet, or from report results. The record view's Actions menu appears on the top right of the page and allows you to perform various operations on the current record.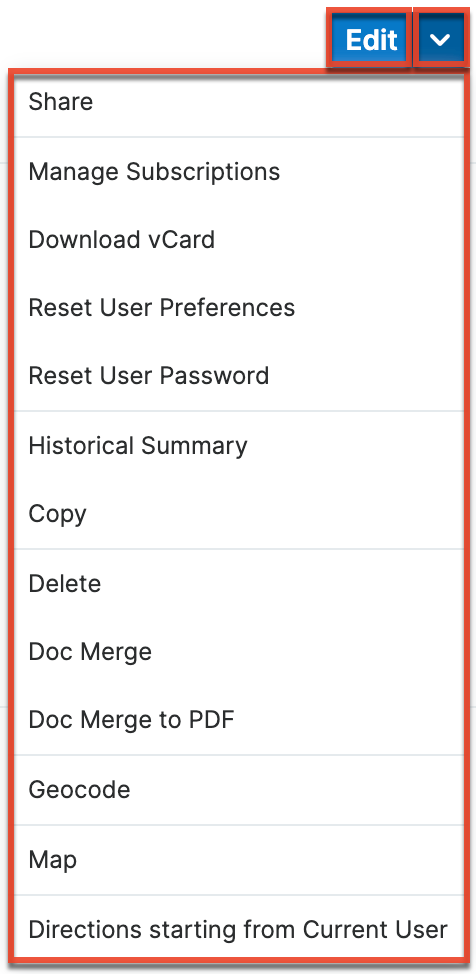
The Actions menu allows you to perform the following operations:
| Menu Item | Description |
| Edit | Edit this user. |
| Share | Share a link to this user via email. |
| Manage Subscriptions | Manage this user's newsletter campaign subscriptions. |
| Download vCard | Download a vCard from Sugar and transfer this user's information to another application (e.g., Outlook). |
| Reset User Preferences | Reset this user's preferences back to the default out-of-the-box settings. |
| Reset User Password | Send a password reset email to this user. Note: This option is not available for SugarIdentity enabled instances. For more information, refer to the SugarIdentity Guide. |
| Historical Summary | View a historical summary of activities (e.g., calls, meetings, etc.) related to this user. |
| Copy | Copy this user. |
| Delete | Delete this user. |
| Doc Merge |
Select or create a DOCX, XLSX, or PPTX template to merge record data into documents that will be accessible in the Doc Merge widget. |
| Doc Merge to PDF |
Select or create a DOCX, XLSX, or PPTX template to merge record data into PDF documents that will be accessible in the Doc Merge widget. |
| Geocode | For instances with Sugar Maps enabled, manually set this record's location on a map. |
| Map | For instances with Sugar Maps enabled, display this record or the selected records on a map. |
| Directions starting from Current User | For instances with Sugar Maps enabled, plot driving directions on a map from your address to this record or all selected records. |
Common Views and Actions
In the table below, the left column contains links to the User Interface page covering topics that are applicable to all Sidecar modules. The right column has links to sections of the current page that cover topics specific to users.
| General Instructions for Working With Sugar Modules | Users-Specific Instructions |
| Use the links below to navigate to the User Interface page which covers topics generic to many Sugar modules. | When User-specific help exists for each topic, use the links below to navigate to sections of the current page. |
| Creating Records | Creating Users Note: If your instance uses SugarIdentity, then you will need to access SugarIdentity to create new users. |
| Viewing Records | |
| Searching for Records | |
| List View | List View Mass Actions Menu List View Record Actions Menu |
| Record View | Record View Actions Menu |
| Intelligence Pane | |
| Editing Records | Note: If your instance uses SugarIdentity, then you will need to access SugarIdentity to update certain user fields. |
| Deleting Records | Deleting Users |
| Emailing Records | |
| Exporting Records | Note: Due to PHP memory limitations on the server, there may be occasions when the application times out while exporting a large number of user records. If you encounter an error when performing this action, we recommend selecting the records in smaller batches. |
| Recalculating Calculated Values | |
| Viewing Record Historical Summaries | |
| Sharing Records |