Relationships
Overview
Relationships define the links between different modules in Sugar and allow records between those modules to be related. Related records display in fields or subpanels on a module's record view (for Sidecar modules) or detail view (for Legacy modules) depending on the relationship type. When you create a new relationship between two modules, the system automatically creates the necessary subpanels, related fields, and metadata relationships. Relationships provide the added benefit in reports to allow access to a related record's fields in addition to the base module's fields.
The relationships section in Studio allows administrators to create new relationships between custom and stock modules as well as change some properties on existing relationships. To access the Relationships section in Studio, select "Relationships" from the Modules panel and the module's relationship tab will open in the main panel. 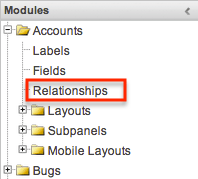
Relationship Types
Sugar contains a few different types of relationships you can create between modules. The relationship type will determine which fields or tables will be created in the database as well as what the interface will look like to the user when managing relationships for the affected records.
When you create a relationship between modules, the module you initiate the relationship from is considered the primary module and the module that you relate it to is the related module.
The following sections explain the relationship types available in Studio.
One-to-One Relationships
When records in the primary module and the related module are uniquely related to each other, you have a one-to-one relationship. In other words, each primary record will relate to only one related record and vice-versa.
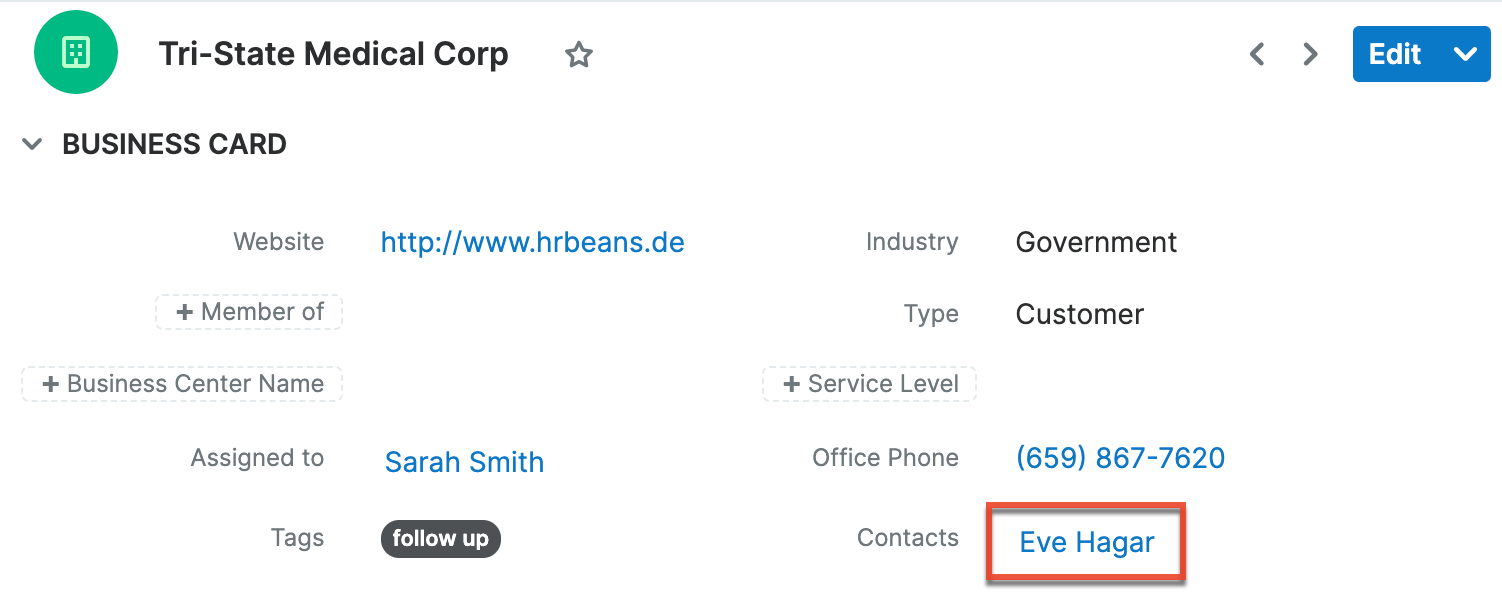
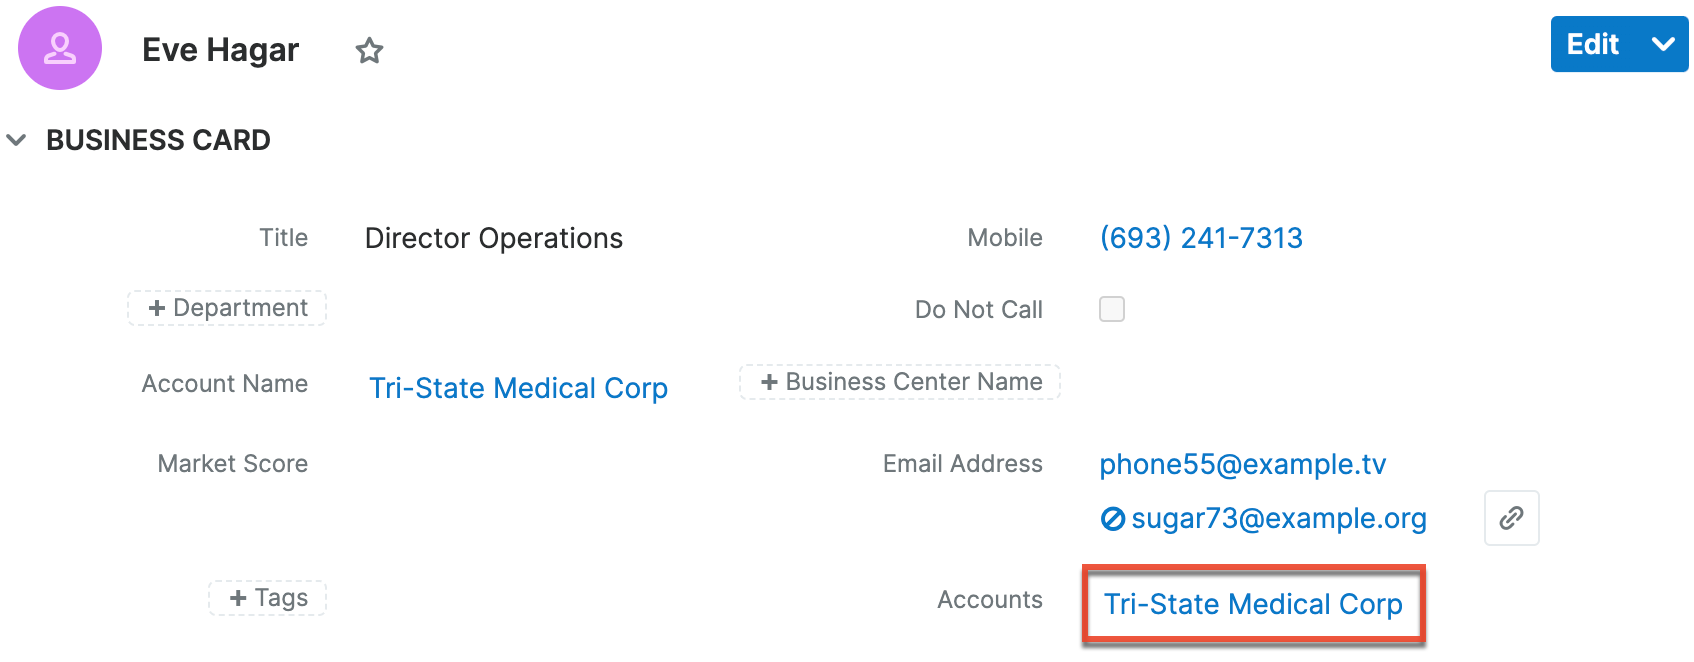
As an example, in a one-to-one relationship between Accounts and Contacts, an account can be associated with only one contact and a contact can be associated with only one account. The relationship will show as a field in each module's record view. For this two-way relationship, changing the related record from one module's record will also change the value in the other module's record.
- From the primary Accounts module:
- From the related Contacts module:
Note: You can alternatively create a one-way relationship between modules using relate fields. For more information regarding relate fields, refer to the Field Types documentation. For an explanation of the differences between relate fields and relationships, see the Introduction to Relationships and Relate Fields article.
One-to-Many and Many-to-One Relationships
In one-to-many relationships, one primary record may relate to many records in the related module, but the related module records will only be able to relate to one primary record. This is often referred to as a parent-child(ren) relationship.
Note: Only modules with subpanels available can be on the "Many" side of a relationship. For example, the Product Catalog module lacks a subpanel; therefore, Product Catalog can only be selected on the "One" side of a relationship.
As an example, in a one-to-many relationship between Accounts and Contacts, an account can be associated with many contacts, but each contact can be associated with only one account. The record view of the primary module will display a subpanel for the related module, and the record view of the related module will display a field containing a link to the related record.
A one-to-many relationship is the same as a many-to-one relationship except the primary and related modules are reversed.
- From the primary Accounts module:
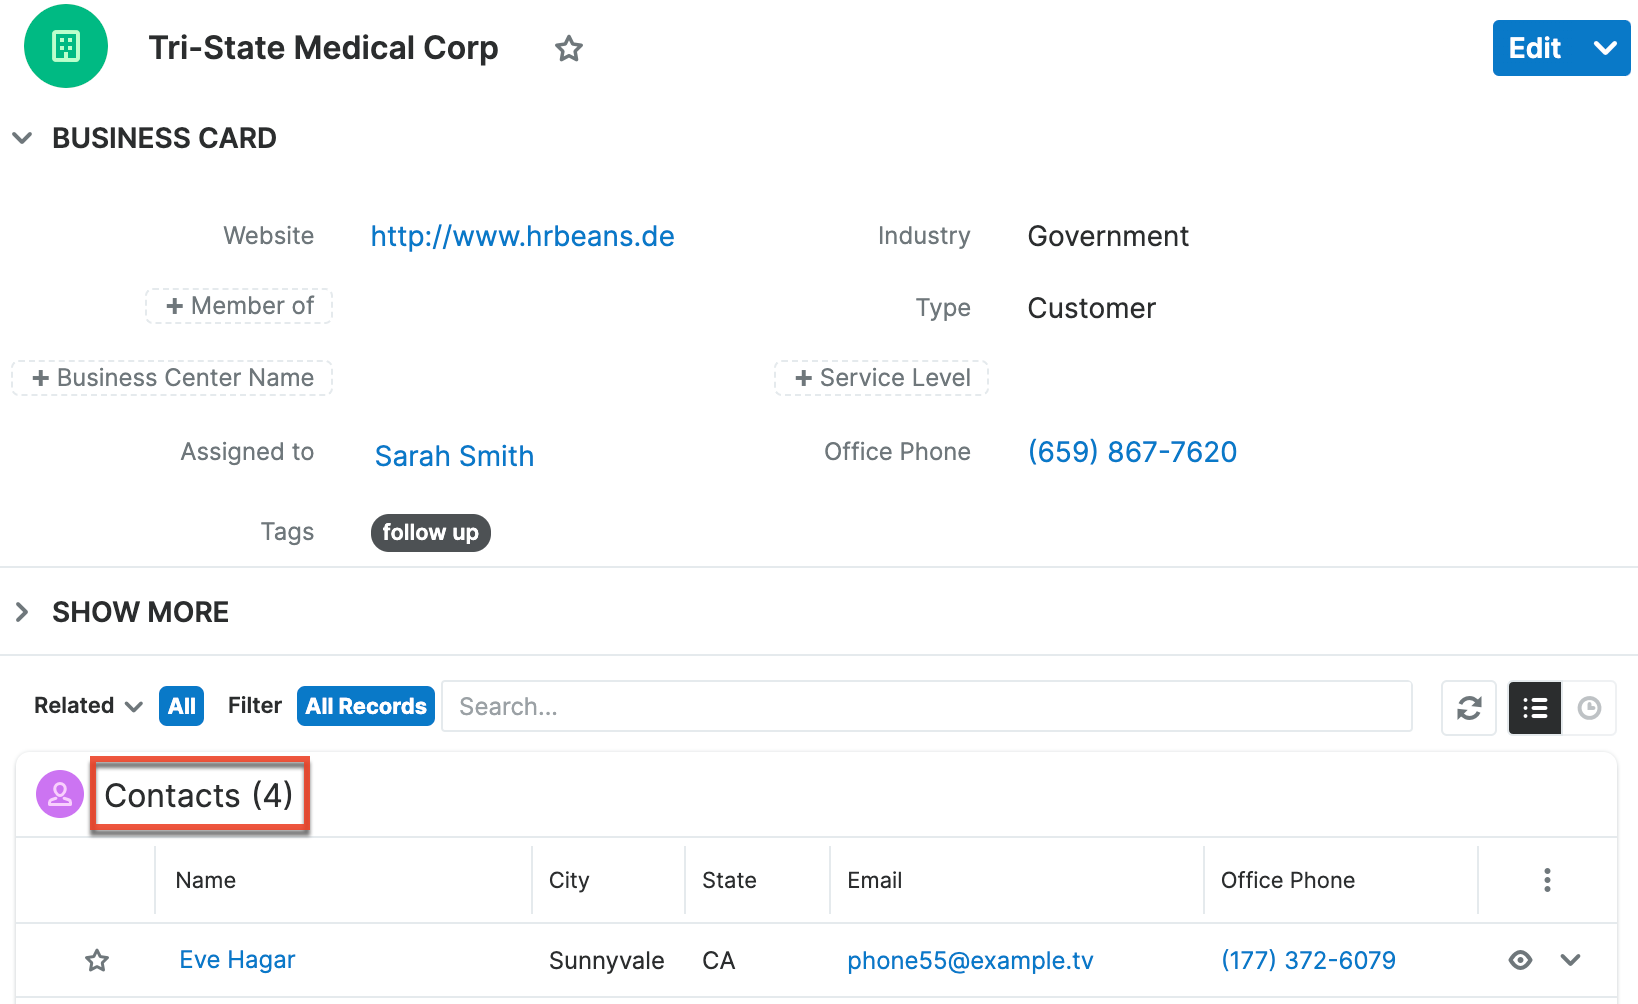
- From the related Contacts module:

You can also create a one-to-many relationship between a module and itself. For example, Sugar relates Accounts to Accounts in order to allow "Member Organization" sub-accounts within the primary "Member of" parent account.
Note: Adding a custom one-to-many relationship to "Activities" will add custom relationships to calls, meetings, messages, notes, tasks, and emails. This will also automatically add these subpanels to the record view.
Many-to-Many Relationships
In many-to-many relationships, many primary records may be related to many related records, often overlapping. For example, the contact Joe Smith may relate to many different Sugar campaign records, and each of those campaign records may relate to many contacts in addition to Joe Smith.
For a many-to-many relationship between Accounts and Contacts, an account could be associated with many contacts, and a contact, in turn, could be associated with many accounts. Both modules' record views would display a subpanel for the opposite module.
Note: Only modules with subpanels available can be on the "Many" side of a relationship. For example, the Product Catalog module lacks a subpanel; therefore, Product Catalog can only be selected on the "One" side of a relationship.
Creating Relationships
Use the following steps to create a new relationship via Studio:
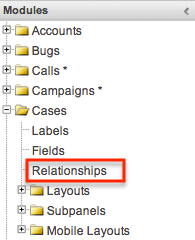
- Expand the tree under the desired module (e.g., Cases) in the Modules panel and select "Relationships".
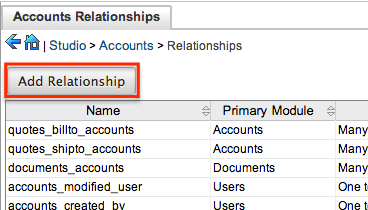
- In the main panel, click "Add Relationship".
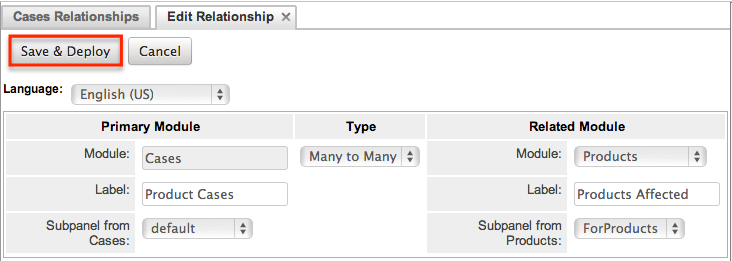
- Enter appropriate values for the following options:
Type: Select the type of relationship to create from the options in the Relationship Types section.
Module: The Primary module is set as the module to which you are adding the relationship. Select the related module from the dropdown list to the right. The Primary and Related module can be the same in order to create a parent-child relationship.
Label: Enter a label to reference the Primary module or Related module's subpanels for this relationship.- Note: This option is only available for the "Many" side of a relationship.
- Note: This option is only available for the "Many" side of a relationship.
- Once the necessary information is entered, click "Save & Deploy".
- The required fields and subpanels are instantly created and deployed to the appropriate modules.
Editing Relationships
Use the following steps to edit a relationship via Studio:
- Expand out the tree under the desired module (e.g., Cases) in the Modules panel and select "Relationships".

- In the main panel, select a relationship to edit.
- Sorting the column header will help in locating the relationship faster.
- Note: Relationships created via Studio will display an asterisk next to their names.
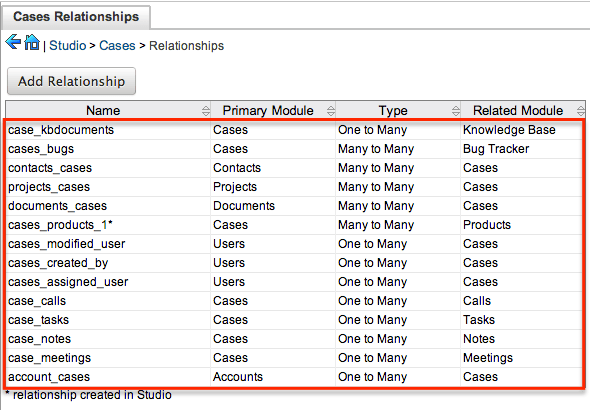
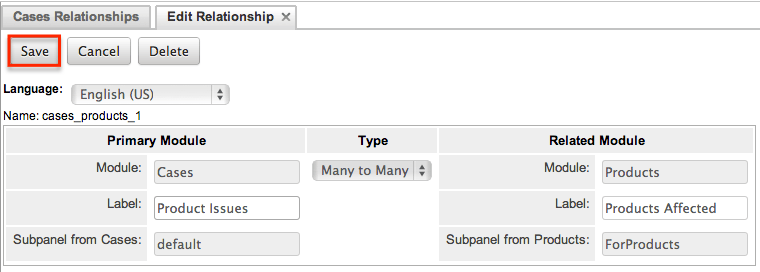
- The only editable field on a relationship is the Label field for naming the Primary or Related modules subpanels.
- Note: This option is only available for the "Many" side of a relationship.
- Once the necessary information for the Label field is entered, click "Save".
Deleting Relationships
Use the following steps to delete a relationship via Studio:
- Expand out the tree under the desired module (e.g., Cases) in the Modules panel and select "Relationships".

- In the main panel, select a relationship to delete.
- Sorting the column header will help in locating the relationship faster.
- Note: Relationships created via Studio will display an asterisk next to their names.

- Select "Delete" to remove the relationship.
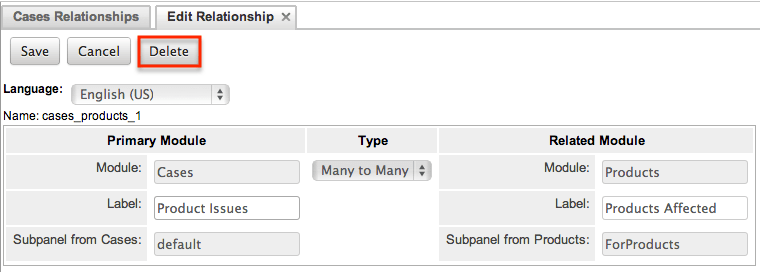
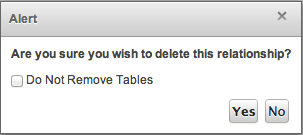
- A pop-up message will display asking for confirmation. Click "Yes" to proceed.
- Note: If you wish to retain the data and table structure that currently exists for the relationship, select the "Do Not Remove Tables" option. Leaving the "Do Not Remove Tables" unchecked will delete the relationship data and remove the tables for the relationship from the database.
- Before deleting a relationship please verify and resolve the following issues:
- Relationship must be removed from any report filters or displays
- Relationship must be removed from any workflows that filters or displays fields from the relationship
- Relationship must be removed from any Sugar Logic formulas referencing the relationship
