Projects
Overview
Sugar's Projects module is used to track a variety of tasks in order for a project manager to properly organize and complete a given project. Projects are tracked using both a project grid and a Gantt chart. Resources (e.g., contacts and users) can be allocated to the tasks of each project to help ensure your deadlines are met. Projects are also able to be associated to different accounts, contacts, opportunities, or other modules so that if a project is a direct result of one of these modules, such as the project being performed that was purchased through an opportunity, the relationship will show and alternate details be made available.
Note: This module is hidden by default. The administrator must enable it for your use.
Project Fields
The Projects module contains the following fields which enable users to create and properly organize projects.
| Field | Description |
| Assigned to | Enter the name of the user who has ownership of the project, which is assigned to you by default. |
| Date Created | The date the project record was created. |
| Date Modified | The date the project record was last modified. |
| Description | Enter a brief description of the project. |
| End Date | The date when the project will be completed. |
| Name | Enter a name for the project. |
| Priority | Select the importance of the project from the dropdown list, such as Low, Medium, or High. |
| Start Date | Click the Calendar icon and select the project start date. |
| Status | Select a value from the dropdown list such as Draft, In Review, or Published to show the approval status of the project. |
| Team | The Sugar team(s) assigned to the project. |
Projects Module Tab
Click the Projects module tab in the navigation bar to access the Projects list view. You may also click the three-dots menu in the Projects module tab to display the Actions and Recently Viewed menus. The Actions menu allows you to perform important actions within the module. The Recently Viewed menu displays the list of projects you last viewed in the module.
The Actions menu allows you to perform the following operations:
| Menu Item | Description |
| Create Project | Opens the edit view layout to create a new project. |
| Create Project Template | Opens the edit view layout to create a new project template. |
| View Project List | Opens the list view layout to search and display projects. |
| View Project Templates | Opens the list view layout to display project templates. |
| View Project Tasks | Opens the list view layout to search and display project tasks. |
| View My Projects Dashboard | Opens the Projects Dashboard. |
For more information on module tab menus including reasons a module may not be included in the menu, see the User Interface documentation.
Creating Projects
There are three methods for creating projects in Sugar including via the Projects module, quick create, and Project Templates. The full edit view layout opens when creating the project directly from the Projects menu as well as via the Quick Create menu and includes all of the relevant fields for your organization. You can quick create a project while viewing an existing record (e.g., Accounts) of another module and Sugar will automatically create a relationship between both records. For example, if you are viewing an account record (e.g., ABC Company) and create a new project via the Projects subpanel, the project record's Accounts subpanel will automatically populate with "ABC Company", thus creating the relationship. Please note that administrators can configure both the Edit View and Quick Create layouts via Admin > Studio. For more information on configuring layouts, please refer to the Studio documentation in the Administration Guide.
Creating via Projects Module
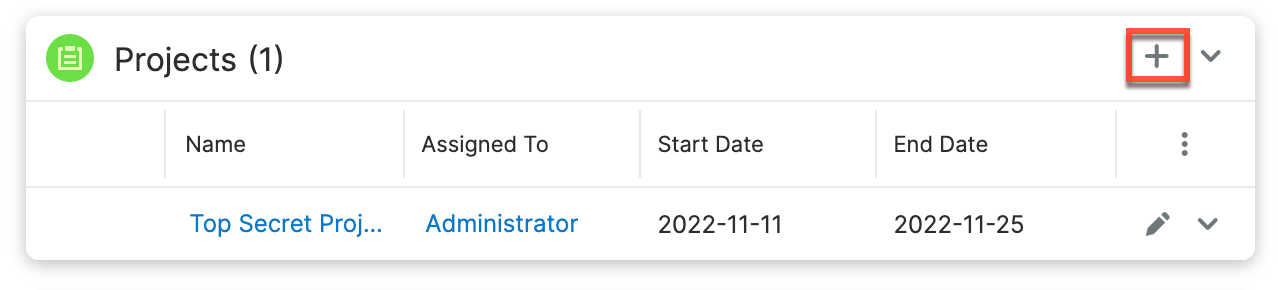
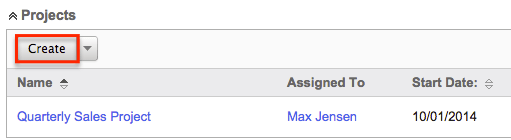
One of the most common methods of project creation is via the Create Project option in the Projects module tab. This opens up the edit view layout, which allows you to enter all the relevant information for the project.
Use the following steps to create a project via the Projects module:
- Click the three-dots menu on the Projects module and select "Create Project".
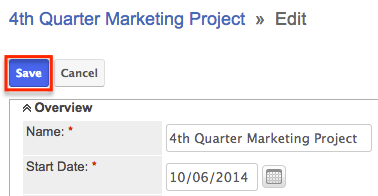
- Enter appropriate values for the fields in the edit view layout. All required fields are marked with a red asterisk and must be completed prior to saving.
- Once the necessary information is entered, click "Save".

Creating via Quick Create
The Quick Create menu allows you to easily create new records from anywhere in Sugar. Simply click the quick create button on the upper right of all Sugar pages to access the menu. You can also easily create new records from any Projects subpanel on related module records.
Use the following steps to create a project via Quick Create:
- Open the Quick Create menu on the upper right of any Sugar page and select "Create Project". You can also quick-create projects using the following methods:
- From Projects Subpanel (Sidecar modules):
-
From Projects Subpanel (Legacy modules):
- From Projects Subpanel (Sidecar modules):
- Enter appropriate values in the fields in the edit view layout. All required fields are marked with a red asterisk and must be completed prior to saving.
- If creating the project via the Projects subpanel in a Legacy module and additional fields are desired, click the Full Form button to use edit view instead.
- Once the necessary information is entered, click "Save".
Creating via Project Template
Project Templates are used when a similar project is going to be configured time and time again. See Project Templates for more information. After you have a template already created, you can use the template to create additional projects, by following these steps:
- Click the three-dots menu on the Projects module tab and select "View Project Templates".
- While on the Project Template list view, click the name of your template to open the template's detail view.
- Select "Save as Project" from the Actions menu.
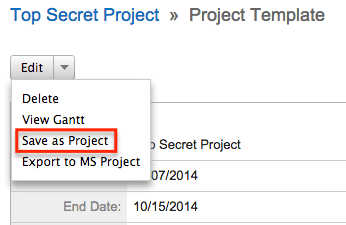
- Change the name of your new project as need be and click "Save as New Project", where you will be brought to the detail view of your new project.
Viewing Projects
There are various options available for viewing projects in Sugar including via Projects list view, Projects detail view, Projects Recently Viewed menu, the Project Dashboard, dashlets, and reports. Please note that you will only be able to see project records as allowed by your team membership, user access type, and assigned roles. For more information on teams and roles, please refer to the Teams and Roles documentation in the Administration Guide.
Viewing via List View
The Projects list view displays all project records meeting the current search criteria. To access the list view, simply click the Projects module tab. While list view shows key project fields, you can click the project's name to open the record in detail view. For more information on viewing projects via list view, please refer to the Projects List View section.
Viewing via Detail View
The Projects detail view displays thorough project information including all project fields followed by subpanels of the project's related records belonging to various modules. The detail view can be reached by clicking a project record's link from anywhere in the application including from the Projects list view. For more information on viewing projects via detail view, please refer to the Projects Detail View section.
Viewing via Recently Viewed
As you work, Sugar will keep track of which projects and project templates you have recently viewed. Click the three-dots menu on the Projects module tab to see a list of your most recently viewed projects and click each name to open the project in detail view.
Viewing via Project Dashboard
The Project Dashboard allows users to view upcoming and overdue project tasks, as well as any support cases related to projects the user is assigned to. It also allows an option for users to view any upcoming or overdue project tasks that are assigned to the user. The Project Dashboard can be reached by clicking the appropriate link in the Projects module tab.
The "My Projects Dashboard" panel shows four columns, showing projects that are assigned to you, any overdue project tasks where the Finish Date is in the past, any upcoming project tasks where the Start Date is within the next week, and any cases that are open related to the project.
The "My Project Tasks" panel shows two columns, showing any overdue project tasks assigned to you where the Start Date is in the past, and any upcoming project tasks assigned to you where the Finish Date is within the next week.
All record references, for projects, project tasks, or cases, on either panel, are clickable and will bring you to either the detail view for the specific record or the Gantt chart of the parent project.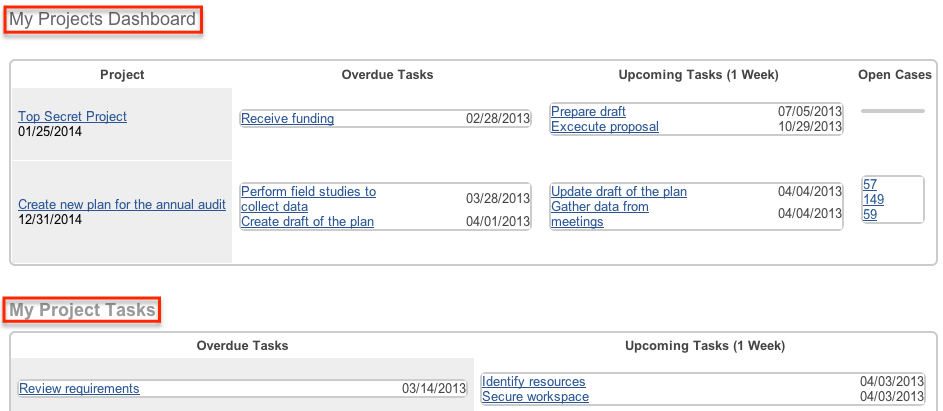
Viewing via Dashlets
Sugar Dashlets allow users to get a quick view of various records, activities, reports, etc. Dashlets may be added to a user's Home page or to the intelligence pane of any module. You can view account information in List View dashlets specific to the Projects module (e.g., My Projects dashlet). Clicking a project's name from any dashlet will open the Project record view. For more information on using dashlets and viewing account records via dashlets, please refer to the Intelligence Pane documentation.
Viewing via Reports
Users with access to the Reports module can build, run, and manage reports to gather key data regarding projects and their related records. In addition to only displaying desired fields and relationships, reports can also incorporate complex filters to only display specific subsets of your records. Once the report is run, you will be able to view the project record's detail view by clicking the project's name in the report results. Please note that you can only directly access project detail views with Rows and Columns-type and Summation with Details-type reports as Summation-type and Matrix-type reports do not include hyperlinks in their display columns. For more information on using reports, please refer to the Reports documentation.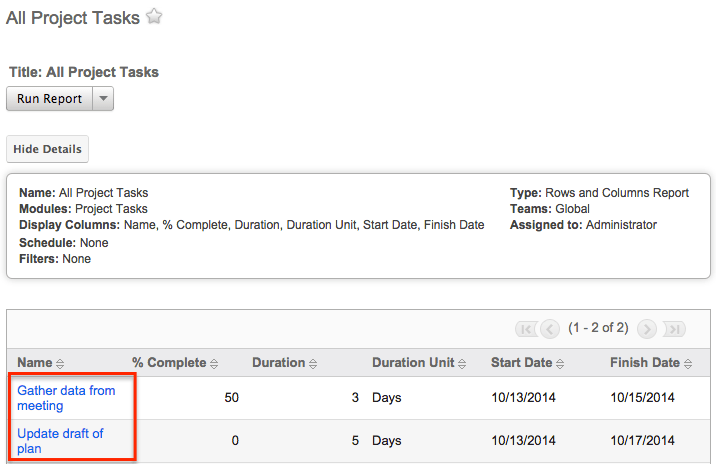
Please note that your ability to access reports may be restricted by a role. For more information on roles, please refer to the Roles documentation in the Administration Guide. Check with your system administrator if you cannot access the Reports module.
Searching Projects
The Projects list view includes a Basic and Advanced Search to help you locate records easily and effectively in a module-specific manner. Once the search is performed, the relevant results will be displayed in the Projects list view below. Global Search allows users to search for information across their entire Sugar database as opposed to restricting search within a specific module. Please note that Sugar automatically appends the wildcard character (%) to the end of your search phrase. This allows the system to retrieve all records that start with the keyword entered in the search. If you would like to broaden the search, you can use the wildcard at the beginning of your text as well (e.g., %services). This will pull up any record that has the word "services" in the name, regardless of how it starts or ends.
For more information on using the various search methods as well as how wildcards are used in the different methods, please refer to the Search documentation.
Note: Projects is hidden from Global Search by default. The administrator must enable it for your use.
Basic Search
Basic search offers a few, commonly used fields for a simplified search experience. From the Basic Search panel, you can click "Advanced Search" to access additional search functionality as needed.
The buttons and checkboxes available in the Basic Search panel have the following functions:
- Search: Click the Search button or press your Return/Enter key to perform the search.
- Clear: Click the Clear button to clear all criteria from the searchable fields.
- My Items: Select this box to return only records assigned to you.
- My Favorites: Select this box to return only your favorite records.

When you run a search, Sugar will return records matching all (as opposed to any) of the fields and checkboxes for which you have given a value. For example, if you select "My Items" and enter a project name, Sugar will only return projects with a matching name that are assigned to you. Once the search is complete, the relevant results will populate in the list view below the search panel. To see all projects to which you have access, simply click "Clear" and then "Search" to perform a blank search with no filters. Please note that you will only be able to see projects as allowed by your team membership, user access type, and assigned roles. For more information on teams and roles, please refer to the Teams and Roles documentation in the Administration Guide.
Administrators can configure what fields appear on the Projects Basic Search via Admin > Studio. For more information on editing layouts, please refer to the Studio documentation in the Administration Guide.
Advanced Search
Advanced Search offers a more in-depth search experience than Basic Search including additional fields, layout options, and saved search capability. From the Advanced search panel, you can click "Basic Search" for simplified searching.
The buttons, checkboxes, and dropdowns available in Advanced Search have the following functions:
- Search: Click the Search button or press your Return/Enter key to perform the search.
- Clear: Click the Clear button to clear all criteria from the searchable fields.
- Layout Options: Use the expandable Layout Options section to configure your list view. For more information, please refer to the Layout Options section of the Search documentation.
- Saved Searches: Save, recall, update, and delete searches that you use often. For more information, please refer to the Saved Search section of the Search documentation.

When you run a search, Sugar will return records matching all (as opposed to any) of the fields for which you have given a value. For example, if you select "My Items" and enter a project name to search, Sugar will only return projects with a matching name that are assigned to you. When searching by a multi-select or dropdown field (e.g., "Status"), however, Sugar will return records matching any of these selections. Once the search completes, the relevant results will populate in the list view below the search panel. To see all projects to which you have access, simply click "Clear" and then "Search" to perform a blank search with no filters. Please note that you will only be able to see projects as allowed by your team membership, user access type, and assigned roles. For more information on teams and roles, please refer to the Teams and Roles documentation in the Administration Guide.
Administrators can configure what fields appear on the Projects Advanced Search via Admin > Studio. For more information on editing layouts, please refer to the Studio documentation in the Administration Guide.
Global Search
Global Search allows users to search for information across their entire Sugar database as opposed to restricting search within a specific module. Beginning with version 6.5.0, Full-Text Search may be used with Global Search to search throughout nearly all fields and modules for an enhanced search experience. The Global Search bar is located on the top right-hand side of Sugar. You can click the magnifying glass icon or hit Return/Enter to perform your search once the text string is entered in the search box.
To use global search, you need to first enter the keyword into the search box. With Full-Text Search enabled, pop-up results will begin appearing once you input three or more characters. Clicking the magnifying glass icon or hitting your Return/Enter key will cause Sugar to return exact matches for your keyword rather than matches with words beginning with your keyword. When Full-Text Search is not enabled, results starting with your keyword will appear after clicking the magnifying glass icon or hitting your Return/Enter key. For more information on using and configuring Global Search, please refer to the Global Search section of the Search documentation.
Regular Sugar users can configure some aspects of global search such as what modules are displayed in the search results. For more information on configuring your Global Search, please refer to the Search documentation. Administrators can control additional elements of global search via Admin > Search and Admin > Studio. For more information on administrator configuration of Global Search, please refer to the Studio documentation as well as the Search section of the System documentation in the Administration Guide.
Projects List View
The Projects list view displays all projects meeting the current search criteria and to which your user has access. You can view the basic details of each project within the field columns. Please note that you will only be able to see projects as allowed by your team membership, user access type, and assigned roles. For more information on teams and roles, please refer to the Teams and Roles documentation in the Administration Guide.
You have the option to change what fields are displayed in list view by configuring your layout options in the Projects Advanced Search. For more information on configuring your list view, please refer to the Layout Options section of the Search documentation. Users with administrator or developer access also have the ability to change what fields are visible in the list view via Admin > Studio. For more information on editing layouts, please refer to the Studio documentation in the Administration Guide.
Pagination
List view displays the current search results broken into pages that you can scroll through rather than displaying potentially thousands of rows at once. To the right just below the search panel, you can see which records of the total results set are currently being displayed. The two single-arrow Next and Previous buttons can be used to scroll through the records page-by-page. The two double-arrow First Page and Last Page buttons allow you to skip to the beginning or the end of your current results.
By default, Sugar displays 20 records per list view page, but administrators can change the number of records displayed via Admin > System Settings. For more information on changing the number of displayed records, please refer to the System documentation in the Administration Guide.
Checkbox Selection
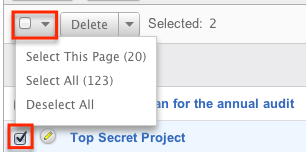
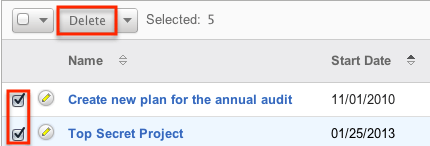
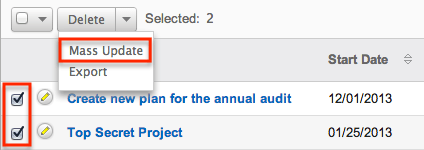
You can perform several actions on projects directly from the list view by first selecting the desired records. To select individual projects on the Projects list view, mark the checkbox on the left of each row. To select or deselect multiple projects on the list view, use the options in the checkbox dropdown menu:
- Select This Page: Selects all records shown on the current page of project results.
- Select All: Selects all records in the current search results across all pages of project results.
- Deselect All: Deselects all records that are currently selected.
Actions Menu
The Actions menu to the right of the checkbox dropdown allows you to perform various actions on the currently selected records.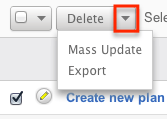
The options in the Actions menu allow you to perform the following operations:
| Menu Item | Description |
| Delete | Delete one or more projects at a time. |
| Mass Update | Mass update one or more projects at a time. |
| Export | Export one or more projects to a CSV file. |
Favorite Designation
Users have the option to mark project records as favorites via the list view as well as the detail view. This allows users to designate records that are important or will be viewed often so that they can easily be accessed via search or from the Projects module tab. In the Projects list view, the star on the left of each record's row is yellow once marked to indicate a favorite project. For more information on how to mark records as favorites, please refer to the Favoriting Projects section of this documentation.
More Information
Additional details for each project can be viewed by clicking the "i" icon to the far right of each list view row. This provides users with a quick view of additional project information in addition to what appears in the display column fields. The resulting pop-up window will show the Description field by default. The list of fields appearing here may only be configured through code-level customization.
Column Sorting
List view provides the ability to sort all of the current search results by a field column in either ascending or descending order. To sort by a field or switch the sort direction, click the column header noting that the fields which allow sorting will have a pair of arrows. The list view may be sorted by only one column at a time. You can also set a default order-by column using the layout options in Advanced Search. For more information on setting a default column sort, please refer to the Layout Options section of the Search documentation.
Projects Detail View
The Projects detail view displays thorough project information including all project fields, which are grouped by default into the Overview and Other panels. You can also view a project's related records (Activities, Opportunities, Cases, etc.), which appear in subpanels beneath the project fields. The detail view can be reached by clicking a project's link from anywhere in the application including from the Projects list view.
Please note that you will only be able to view a project record according to your team membership, user type, and role restrictions. For more information on teams and roles, please refer to the Teams and Roles documentation in the Administration Guide. Users with administrator or developer access have the ability to change the detail view by configuring the layout via Admin > Studio. For more information on editing layouts, please refer to the Studio documentation in the Administration Guide.
Actions Menu
The Actions menu on the top left of each project's detail view allows you to perform various actions on the current record. Administrator users can change the action items to be displayed as separate buttons instead of a dropdown menu via Admin > System Settings. For more information on configuring the actions menu, please refer to the System documentation in the Administration Guide.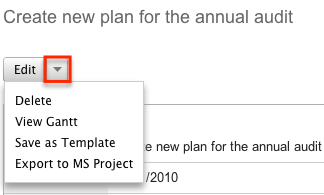
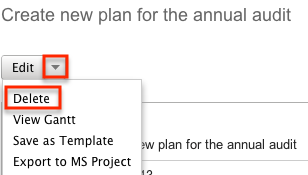
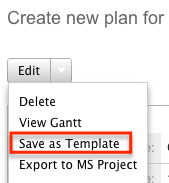
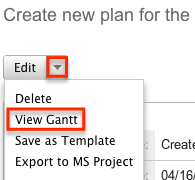
The options in the Actions menu allow you to perform the following operations:
| Menu Item | Description |
| Edit | Edit this project. |
| Delete | Delete this project. |
| View Gantt | View the project's Gantt chart. |
| Save As Template | Save this project as a template for future use. |
| Export To MS Project | Export this project to an MPX file for use with Microsoft Project. |
Favorite Designation
Users have the option to mark project records as a favorite via the detail view as well as the list view. This allows users to designate records that are important or will be viewed often as they can easily be accessed via search or from the Projects module tab. In the Projects detail view, the star on the right of the record's name is yellow once marked to indicate a favorite project. For more information on how to mark records as favorites, please refer to the Favoriting Projects section of this documentation.
Next or Previous Record
On the upper right of the Projects detail view, there are two buttons that allow you to page through each project in the Project list view's current search results. Clicking the Previous button displays the previous project of the current search results while clicking the Next button displays the next project of the current search results. The text in between shows which project result you are currently viewing within the total number of current results.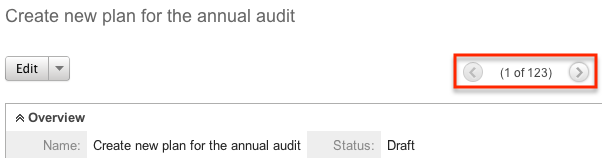
Subpanels
Beneath a project's fields are subpanels containing all of the users and contacts that are working on the project, the project's tasks that need to be done, any holidays or days off of the project so they will not be included in the date and time calculations, and related records from various modules.
Please note that administrators can prevent users from moving subpanels to different locations in the detail view. For more information on preventing rearranging of subpanels, please refer to the System documentation in the Administration Guide. Check with your system administrator if you are not able to rearrange your subpanels.
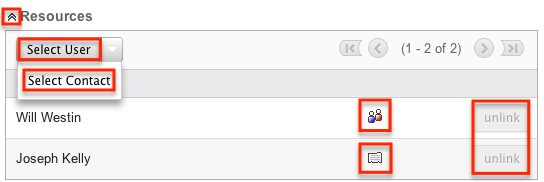
Resources Subpanel
The Resources subpanel is used to add specific Sugar users and contacts to the project. When these users and contacts are added to the project, they will be available to be added as resources on project tasks via the Gantt chart, meaning they are the responsible party for the task. For more information on project resources, please review the Project Resources section of this documentation.
The Resources subpanel allows the following operations to be performed:
- To view the details of a related user or contact, click the Users or Contacts icon in the subpanel to open it in detail view.
- To relate an existing user or contact to the project, choose the appropriate "Select" option from the subpanel's Action menu, then locate and select the desired record.
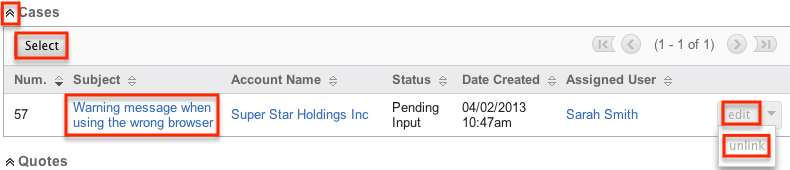
- To remove the resource from the project, click "Unlink" from the dropdown on the far right of the record's row. This removes the relationship but does not delete any actual records.
- To collapse or expand the subpanel, click the double arrow to the left of the subpanel's name.
- To move the subpanel to a new location on the detail view, drag and drop the subpanel's header.
Note: If you are not able to view this subpanel, the administrator may have disabled the Projects subpanel for your entire Sugar instance. Reach out to your Sugar administrator to have the subpanel displayed. For more information on displaying and hiding subpanels throughout Sugar, please refer to the Developer Tools documentation in the Administration Guide.
Project Tasks Subpanel
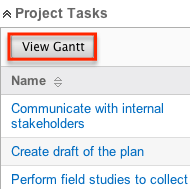
The Project Tasks supbanel lists all of the project's Project Tasks and basic details of each task. When a task is added to the project via the Gantt chart, the project task will appear on this subpanel. The Project Tasks subpanel allows the following operations to be performed:
- To view the details of a project task, click the record's name in the subpanel to open it in detail view.
- To add additional tasks to the project, click the "View Gantt" button from the subpanel's header and follow the information provided in Creating Project Tasks section of this documentation.
- To collapse or expand the subpanel, click the double arrow to the left of the subpanel's name.
- To move the subpanel to a new location on the detail view, drag and drop the subpanel's header.
Project Holidays Subpanel
The Project Holidays subpanel lists all of the resources' days that they will not be working. The subpanel includes columns showing the resource's name, the date of the holiday, and a description of the holiday. For more information on Project Holidays, please refer to the Project Holidays section of this documentation. The Project Holiday's subpanel allows the following operations to be performed:
- To add additional holidays to the project, click the "Create" button from the subpanel's header and fill in the necessary fields.
- To remove the holiday from the project, click "Unlink" from the dropdown on the far right of the record's row.
- To collapse or expand the subpanel, click the double arrow to the left of the subpanel's name.
- To move the subpanel to a new location on the detail view, drag and drop the subpanel's header.
Activities and History Subpanels
The Activities subpanel lists open or upcoming tasks, calls, and meetings that are related to the project. Once the activities have taken place or are completed, they will instead appear within the History subpanel. The History subpanel also includes notes and emails associated with the project. For more information on the history and activities subpanel, please refer to the User Interface documentation.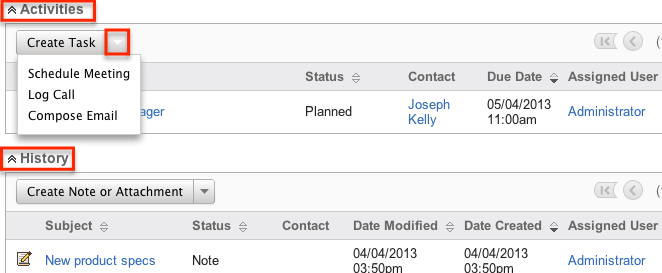
Related Record Subpanels
The most common type of subpanels displayed on a project's detail view contain the project's related records belonging to various modules. The relationship type determines whether a related record will be displayed in the field listing or in a subpanel. Out-of-the-box, the Projects module does not include any relationships to other modules that would cause a related record to be displayed in the field listing. However, for example, a project may be related to multiple cases. This means that the cases will be displayed in a subpanel beneath the fields listing.
Users with administrator or developer access have the ability to change the fields (e.g., Name, Assigned User, etc.) and labels of each subpanel by configuring the layout via Admin > Studio to provide visibility to the most important fields. For more information on modifying subpanels, please refer to the Studio documentation in the Administration Guide.
Related record subpanels allow the following operations to be performed. Please note that administrators in Sugar can change the subpanel's Action menu to be displayed as separate buttons instead of a dropdown via Admin > System Settings. For more information, please refer to the System documentation in the Administration Guide.
- To view the details of a related record, click the record's name in the subpanel to open it in record view (for Sidecar modules) or detail view (for Legacy modules).
- To relate an existing record to the project, choose "Select" from the subpanel's Action menu, then locate and select the desired record.
- To relate a new record to the project, choose the Create option (e.g., Create Task) from the subpanel's Action menu, then complete the record view layout and click "Save".
- To edit the project's related record, choose "Edit" on the far right of the record's row.
- To delete the project's relationship to a record, choose "Unlink" from the dropdown on the far right of the record's row. This removes the relationship, but does not delete the record itself.
- To collapse or expand the subpanel, click the double arrow to the left of the subpanel's name.
- To move the subpanel to a new location on the detail view, drag and drop the subpanel's header.
Editing Projects
Projects may be edited at any time to update or add information to the record. You can make changes to existing project records via the Projects edit view and quick create forms (for Legacy modules). Edit view is available within the Projects module and includes all of the Project fields you should need. To edit the Project Tasks related to this project, please refer to the Editing Project Tasks section of this documentation.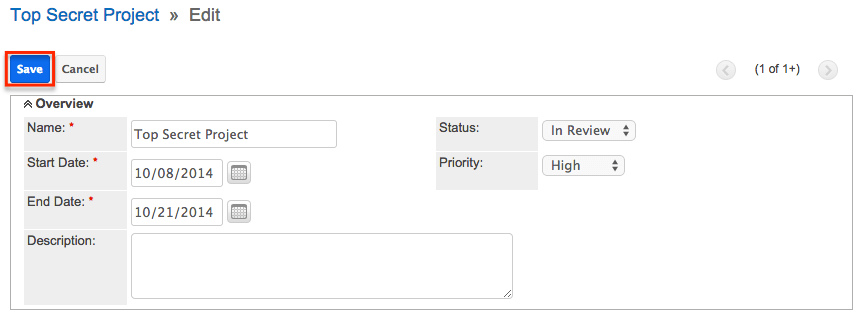
Quick create is available for editing projects from outside the Projects module and opens as a pop-up without navigating away from your current page. It generally contains fewer fields, but the Full Form button may be used to access the full edit view should you need to edit additional fields. Please note that the quick create form is only available when viewing Legacy module records (e.g., Quotes).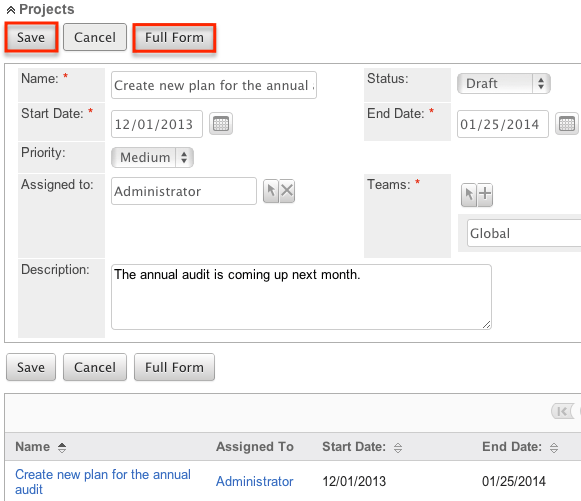
Please note that your ability to edit projects in Sugar may be restricted by a role. For more information on roles, please refer to the Role Management documentation in the Administration Guide. Check with your system administrator if you do not see the Edit options.
Administrators in Sugar may configure both the Projects edit view and quick create via Admin > Studio. For more information on configuring layouts, please refer to the Studio documentation in the Administration Guide.
Editing via Detail View
You can edit projects via the detail view by clicking the Edit button on the upper left of the page. Once the edit view layout is open, update the necessary fields, then click "Save" to preserve your changes.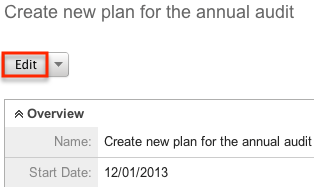
Editing via List View
You can edit projects via the list view by clicking the Pencil icon to the left of each project's name. Once the edit view layout is open, update the necessary fields, then click "Save" to preserve your changes.

Deleting Projects
If a project record is invalid or should no longer appear in your organization's Sugar instance, it may be deleted from either the Projects detail view or list view. Deleting via the detail view allows you to delete a single record while the list view allows for mass deleting multiple records at once. Deleting projects will not delete related records and will only remove the relationship, so you may wish to also delete any related records to avoid orphaned records if necessary.
Please note that your ability to delete projects may be restricted by a role. For more information on roles, please refer to the Role Management documentation in the Administration Guide. Check with your system administrator if you do not see the Delete options.
Deleting via Detail View
Use the following steps to delete a project via the detail view:
- Navigate to a project's detail view.
- Select "Delete" from the Actions menu.
-
A pop-up message will display asking for confirmation. Click "Ok" to proceed.
Mass Deleting via List View
Use the following steps to delete one or more projects via the list view:
- Navigate to the Projects list view by clicking the Projects module tab.
- Use the Basic or Advanced Search to find the project records you wish to delete.
- Select the desired project records individually or using the Checkbox Dropdown's options.
- Choose "Delete" from the Actions menu.
- A pop-up message will display asking for confirmation. Click "Ok" to proceed.
Due to PHP memory limitations on the server, there may be occasions when the application times out while deleting a large number of project records. If you encounter an error when performing this action, we recommend selecting the records in smaller batches.
Exporting Projects
Sugar's Export option allows users to download all fields for the selected projects to their computers as a .CSV (comma-separated values) file. This may be useful when needing to use Project data with other software such as Microsoft Excel. Due to PHP memory limitations on the server, there may be occasions when the application times out while exporting a large number of project records. If you encounter an error when performing this action, we recommend selecting the records in smaller batches.
Projects may be exported from the Projects list view by selecting "Export" from the Actions menu. Users with access to the Reports module also have the option of creating or accessing reports containing specifically chosen fields for projects and their related record(s). Please note that only Rows and Columns-type reports have the ability to be exported. For more information on exporting records in Sugar, please refer to the Export documentation.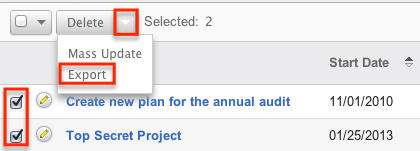
Please note that your ability to export projects from Sugar may be restricted by a role. For more information on roles, please refer to the Role Management documentation in the Administration Guide. Check with your system administrator if you do not see the Export option.
Exporting to Microsoft Project
Sugar includes the functionality to export projects not just in CSV format, but also in .MPX format. MPX is the standard format used by Microsoft Project. Upon exporting this file, you will be able to open the file in Microsoft Project, which allows people who are not Sugar users to be able to view this project information.
Note: MPX file format is not supported by MS Project 2013.
The following steps cover exporting a project to Microsoft Project:
- Navigate to a project's detail view.
- Select "Export to MS Project" from the Actions menu.
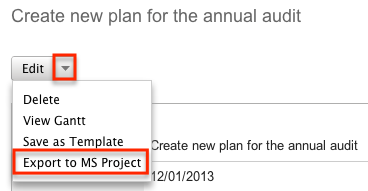
- Open the downloaded file in Microsoft Project.
Mass Updating Projects
Mass Updating allows users to make the same change to multiple projects at once from the Projects list view. Users with administrator or developer access can control which fields are available to change during mass update via Admin > Studio. Currently, only fields with the data type of date, datetime, dropdown, multiselect, and radio may be altered during a mass update. For more information on configuring mass update, please refer to the Studio documentation in the Administration Guide. Due to the PHP memory limitations on the server, there may be occasions when the application times out while mass updating a large number of project records. If you encounter an error when performing this action, we recommend selecting the records in smaller batches.
Please note that your ability to mass update projects may be restricted by a role. For more information on roles, please refer to the Role Management documentation in the Administration Guide. Check with your system administrator if you do not see the Mass Update option.
Use the following steps to mass update projects from the list view:
- Navigate to the Projects list view by clicking the Projects module tab.
- Use the list view's Basic or Advanced Search to find projects you wish to modify.
- Select the desired project individually or using the Checkbox Dropdown's options.
- Choose "Mass Update" from the Actions menu.
- Scroll to the Mass Update panel and set values for the fields you wish to alter.
Note: For the Teams field, use "Replace" to remove existing team assignments before adding those specified here. Use "Add" to add the teams specified here to any existing team assignments.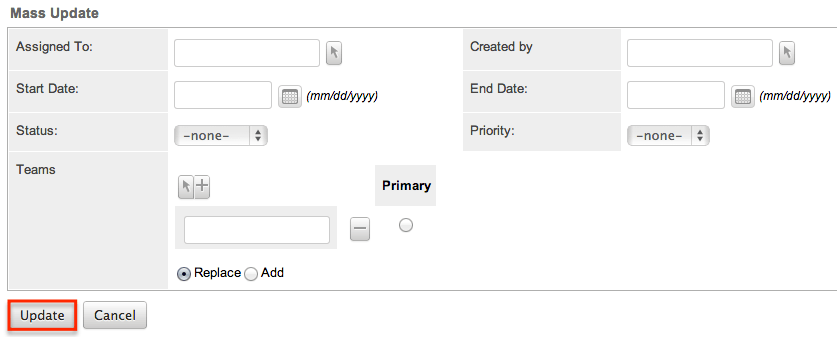
- Click "Update" to save the changes to all of the currently selected project.
Favoriting Projects
Each Sugar user has the option to designate their own favorite projects which are important or will be viewed often so that they can easily be accessed via search or from the Projects module tab. Once records are marked as favorites, use the My Favorites checkbox in the Projects Basic or Advanced Search to retrieve your favorites or select from your most recent favorites directly from the Projects module tab.
Favoriting via List View
Use the following steps to mark records as favorites via the Projects list view:
- Navigate to the Projects list view by clicking the Projects module tab.
- Use the Basic or Advanced Search to find the Project records you wish to mark as favorites.
- Mark the star icon on the left of each desired project's row.
- To remove the project as a favorite, click the star again to revert it to gray.
Favoriting via Detail View
Use the following steps to mark records as favorites via the Projects detail view:
- Navigate to a project's detail view.
- Click the star icon to the right of the project's name in the upper left of the detail view to designate it as a favorite.
- To remove the project as a favorite, click the star again to revert it to gray.
Favoriting via Subpanel
Use the following steps to mark project records as favorites via the subpanel in related modules:
- Navigate to a related module's record view (e.g., Contacts).
- Click the star icon to the left of the desired record's row in the Projects subpanel.
- To remove the project as a favorite, click the star again to revert it to gray.
Project Templates
Project Templates are used when a similar project is used multiple times. Project Templates will save you from recreating the project each time. Instead, the template can be used to create a new project which will have the same information from the detail view and the same Project Tasks. Templates can be reused as often as need be. They can be created using two different ways:
- The module tab's Action Menu
-
Replicating an existing project using the Detail View's Action Menu
Choosing this option will bring you to a screen to define a new name for the template so that it can be made unique before saving the template and being mixed with others.
When creating a project from a Project Template, the Project Tasks carry over from the template to the new project. In addition, all of the fields within the module carry over.
To see a list of all project templates, navigate to the Project Templates list view. To access the list view, simply click the three-dots menu over the Projects module tab and select "View Project Templates".
While list view shows key project template fields, you can click the project template's name to open the record in detail view. For more information on the Project Template's list view, please review the Projects List View section of this documentation.
To create a project from a template, please review the Creating via Project Template section of this documentation.
Project Resources
Project Resources are a list of users and contacts that can be assigned Project Tasks. On a project where you are the assigned user, you will see a subpanel on the Projects detail view called "Resources". The subpanel will provide options to Select User, Select Contact, or unlink an existing relationship. In addition any related user or contact resource will have a corresponding icon allowing you to view the user's detail view or contact's record view. For more information on viewing a contact's record view, please refer to the Viewing via Record View section of the User Interface documentation.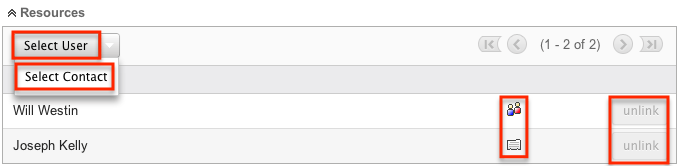
When a resource has been added to the project, the resource will show on the Gantt chart as an available option for Project Tasks to be assigned. For more information on the Gantt chart, please review the Project Tasks Gantt Chart section of this documentation.
Note: If you are not able to view project resources, the administrator may have disabled the Projects subpanel for your entire Sugar instance. Reach out to your Sugar administrator to have the subpanel displayed. For more information on displaying and hiding subpanels throughout Sugar, please refer to the Developer Tools documentation in the Administration Guide.
Project Resource Reports
From the Gantt chart, a resource report can be created showing a specific user's or contact's assigned tasks across all projects and the user or contact's workload for a given timeframe. 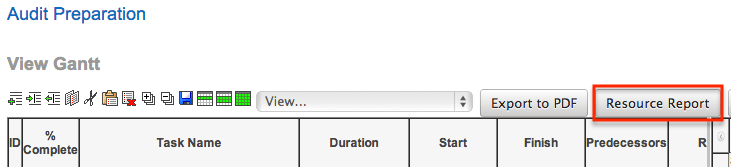
The report is filtered by each resource and filters for tasks starting or finishing after a date, and before another given date. This allows an overall view of the resource's time relative to all projects, not just one specific project.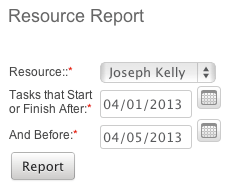
This report shows the following information:
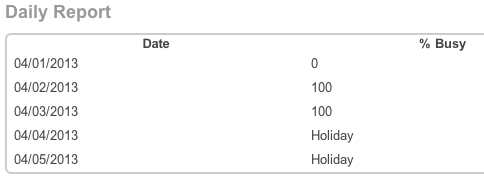
- Daily Report: This section shows a daily breakdown of all weekday dates for the report for the resource. The section also shows a "% Busy" section showing what percentage of an 8 hour day is being taken up for this resource by project tasks. If the resource has a Project Holiday scheduled, the % Busy will show as "Holiday".
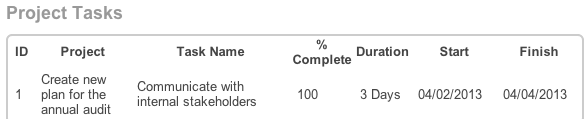
- Project Tasks: This section shows a list of all project tasks associated with the resource in the given timeframe. This includes tasks across all projects, not just the project from which the report was generated. This shows details for each task so that you can see each task assigned to the user, as well as the project that the task is for.
- Holidays: This section shows a list of all of the resource's project holidays for the given timeframe. This will show all holidays, regardless of which project they are associated.
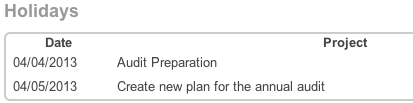
Project Holidays
The Project Holidays subpanel allows you to list any days that a user or contact resource will not be working on a given project. This links with the project tasks to ensure that timing of tasks is not affected by a resource taking a holiday. The holidays are marked for specific days for specific project resources. Project Holidays contain three fields:
| Field | Description |
| Description | A brief description or reason for the holiday. |
| Holiday Date | The holiday or vacation date for this resource on the project. |
| Resource Name | The user or contact taking the holiday, selected from a dependent dropdown list. |
Holidays created from this subpanel are specific to the project. Holiday records can be deleted and removed from the project by clicking "Unlink" on the corresponding line on the subpanel.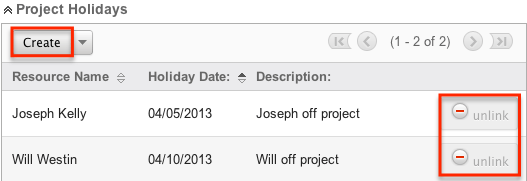
Project Tasks
Project Tasks are a list of each task that needs to be performed to complete the project. Project Tasks is a separate module than the Projects module, but it can only be accessed via Projects. Each task can be tracked and monitored via the Gantt chart. Each task can also be assigned a specific resource and is given a planned start and finish date allowing the timing to be tracked and planned.
Project Task Fields
The Project Tasks module contains the following fields, which enable users to properly organize and track each task.
| Field | Description |
| % Complete | A numerical value to indicate what percentage of the task has been completed. |
| Actual Duration | After the task is completed, enter a numerical value for the actual duration of the task. |
| Description | Found only in the edit and detail views, enter a brief description of the task and any necessary details. |
| Duration | Only editable from the Gantt chart, enter a numerical value to indicate how long it would take to complete the task which can be specified in days or in hours. Note: Changes to this field will affect the Finish Date as well. |
| Estimated Effort (hrs) | Found only in the edit and detail views, enter a numerical value for the estimated amount of work needed for this task. |
| Finish Date | Only editable from the Gantt chart, this field will populate based on the Start Date and Duration. Clicking on this field on the Gantt chart will produce a calendar popup to easily select a date. Note: Changes to this field will affect the Duration as well, and will be affected by changes to the Start Date and/or Duration fields. |
| Milestone | Mark tasks as milestones if they are an important and measureable landmark on the way to completing the project. Tasks can be marked with a checkbox on the edit view or by clicking the task ID to highlight the entire row and then right clicking in the Gantt chart. Milestone tasks will include an asterisk next to the task ID on the Gantt chart. |
| Order | The project task's detail view and edit view display an Order field. This field, which was used in the application prior to version 5.0, has been replaced by the Task ID field. If you are not using an order number, you can safely remove this field from the Project Task layouts in Studio. |
| Predecessors | If the completion of this task depends on the completion of other tasks, enter the Task ID in this column. This field must be edited and viewed from the Gantt chart. Note: Multiple tasks can be predecessors and the IDs can be separated by commas. |
| Priority | Choose a value of Low, Medium, or High for the task which can be edited and viewed from the edit and detail views. |
| Project | The name of the parent project that can be viewed from both the edit and detail views. This value cannot be edited. |
| Resource | Select the individual who is assigned to the task from the Resources dropdown list. |
| Start Date | Only editable from the Gantt chart, this field will automatically populate with today's date. Clicking on this field on the Gantt chart will produce a calendar popup to easily select a date. |
| Status | Found only in the edit and detail view, choose a value representing the current stage of the task. This field also shows on the Project Tasks subpanel. |
| Task ID | When viewing the Gantt chart, the tasks are ordered by Task ID. Task IDs cannot be directly edited from the Gantt chart or the edit and detail views. To move a task to a different section of the list, and therefore change its Task ID, click on the existing ID to highlight the row, then right click to "Cut" and then "Paste" it in the new location. |
| Task Name | Enter the name for the project task here. |
| Task Number | The project task's detail view and edit view display a Task Number field. This field, which was used in the application prior to 5.0, has been replaced by the Task ID field. If you are not using task number, you can safely remove this field from the Project Task layouts in Studio. |
| Teams | The Sugar team(s) assigned to the task. This is only viewable from the edit and detail view. |
| Utilization (%) | From the dropdown list, select the percentage of a day that the resource should dedicate their work hours towards the assigned task. This field is only found in the edit and detail views of the project task. Note: The value of this field is not reflected in the Resource Report. |
Project Tasks Module Tab
The Project Tasks module tab is located on the navigation bar at the top of the Project Task detail view, Project Task edit view, or Project Task list view. Click the tab to access the Project Task list view. You may also click the three-dots menu on the tab to display the Actions and Recently Viewed menus. The Actions menu allows you to perform important actions within the module. The Recently Viewed menu displays the list of project tasks you last viewed in the module.
The Actions menu allows you to perform the following operations:
| Menu Item | Description |
| Create Project | Opens the edit view layout to create a new project. |
| Project List | Opens the list view layout to search and display projects. |
| Project Tasks | Opens the list view layout to search and display project tasks. |
Creating Project Tasks
Project Tasks can only be created from the Gantt chart's project grid. The tasks are specific to each project, so they must be created directly from the project. When creating a Project Task from the grid, you will be able to put in basic information about the task. To add additional information later, please review the Editing Project Tasks section of this documentation.
Use the following steps to create a project task via the Projects module:
- Navigate to the detail view of the project where you would like to add tasks.
- From the detail view, select "View Gantt" from either the Project Tasks subpanel or the Action Menu.
- Add a row to the grid next to the Gantt chart. This can be done using the icon in the toolbar or by right clicking on the grid.
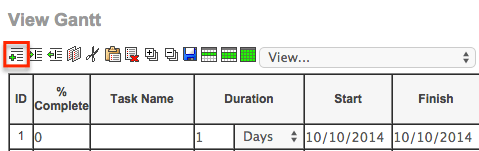
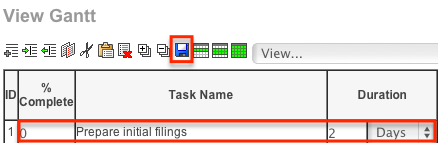
- Fill in the grid columns on the new row that you created. When complete, click the save icon the toolbar.
Viewing Project Tasks
There are various options available for viewing project tasks in Sugar including via the grid and Gantt chart, the My Projects Dashboard, Project Tasks list view, Project Tasks detail view, Project Tasks Recently Viewed menu, dashlets, and reports.
Viewing Project Tasks via Gantt Chart
The Projects module includes a grid and Gantt chart, which allows you to view all project tasks related to a specific project in one place. The grid, on the left of the screen, outlines each task with pertinent information regarding each project task. The Gantt chart, on the right, shows a timeline of each task and how they overlap. For more information on the Gantt chart, please review the Project Tasks Gantt Chart section of this documentation. 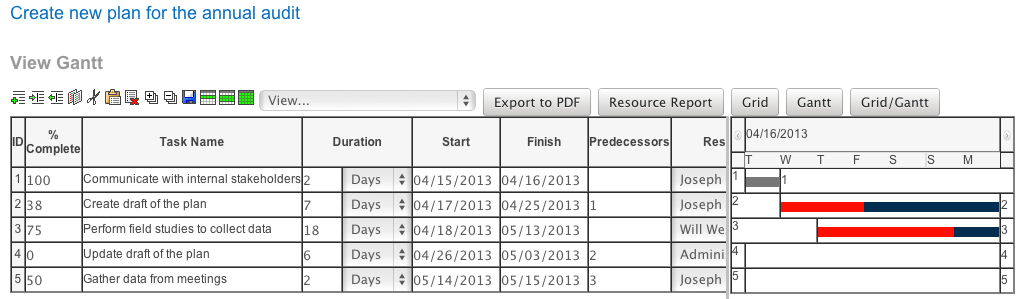
Viewing Project Tasks via My Projects Dashboard
The Project Dashboard allows for users to view any upcoming or overdue project tasks that are assigned to the user, or are related to any projects for which the user is the assigned user. The Project Dashboard can be reached by clicking the appropriate link in the Projects module tab.
The "My Projects Dashboard" panel shows four columns, showing projects that are assigned to you, any overdue project tasks where the Finish Date is in the past, any upcoming project tasks where the Start Date is within the next week, and any cases that are open related to the project.
The "My Project Tasks" panel shows two columns, showing any overdue project tasks assigned to you where the Start Date is in the past, any upcoming project tasks assigned to you where the Finish Date is within the next week.
Any project task link is clickable and will take you to the grid and Gantt chart for the given project. Next to the task name, Sugar also displays the Finish Date for the task.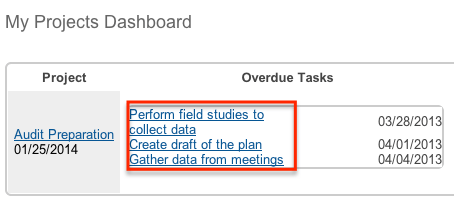
Viewing Project Tasks via List View
The Project Tasks list view displays all project records meeting the current search criteria. To access the list view, click the "View Project Tasks" option from the Projects module tab. While list view shows key project fields, you can click the project task's name to open the record in detail view. For more information on viewing project via list view, please refer to the Project Tasks List View section.
Viewing Project Tasks via Detail View
The Project Tasks detail view displays thorough project task information including all project task fields followed by subpanels of the project task's related records belonging to various modules. The detail view can be reached by clicking a project task record's link from anywhere in the application including from the Projects detail view. For more information on viewing project tasks via detail view, please refer to the Project Tasks Detail View section.
Viewing Project Tasks via Recently Viewed
As you work, Sugar will keep track of which project tasks you have recently viewed. Click the three-dots menu on the Project Tasks module tab to see a list of your most recently viewed project tasks and click each name to open the project task in detail view.
Viewing Project Tasks via Dashlets
Sugar Dashlets allow users to get a quick view of various records, activities, reports, etc. Dashlets may be added to a user's Home page or to the intelligence pane of any module. You can view project task information in List View dashlets specific to the Project Tasks module (e.g., My Project Tasks dashlet), as well as List View dashlets based on other modules such as "My Calls". Clicking a project task's name from any dashlet will open the Project Tasks detail view. For more information on using dashlets and viewing project task records via dashlets, please refer to the Intelligence Pane documentation.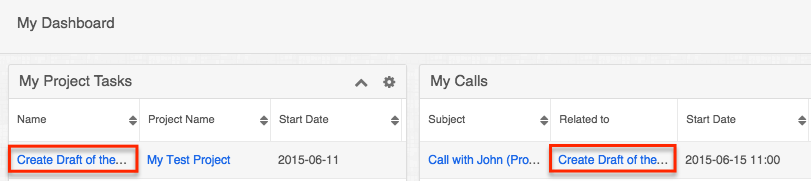
Viewing Project Tasks via Reports
Users with access to the Reports module can build, run, and manage reports to gather key data regarding projects and their related records. In addition to only displaying desired fields and relationships, reports can also incorporate complex filters to only display specific subsets of your records. Once the report is run, you will be able to view the project task record's detail view by clicking the project's name in the report results. Please note that you can only directly access project task detail views with Rows and Columns-type and Summation with Details-type reports as Summation-type and Matrix-type reports do not include hyperlinks in their display columns. For more information on using reports, please refer to the Reports documentation.
Please note that your ability to access reports may be restricted by a role. For more information on roles, please refer to the Role Management documentation in the Administration Guide. Check with your system administrator if you cannot access the Reports module.
Searching Project Tasks
The Project Tasks list view includes a Basic and Advanced Search to help you locate records easily and effectively in a module-specific manner. Once the search is performed, the relevant results will be displayed in the Project Tasks list view below. Global Search allows users to search for information across their entire Sugar database as opposed to restricting search within a specific module. Please note that Sugar automatically appends the wildcard character (%) to the end of your search phrase. This allows the system to retrieve all records that start with the keyword entered in the search. If you would like to broaden the search, you can use the wildcard at the beginning of your text as well (e.g., %services). This will pull up any record that has the word "create" in the name, regardless of how it starts or ends.
For more information on using the various search methods as well as how wildcards are used in the different methods, please refer to the Search documentation.
Note: Project Tasks is hidden from Global Search by default. The administrator must enable it for your use.
Project Tasks Basic Search
Basic search offers a few, commonly used fields for a simplified search experience. From the Basic Search panel, you can click "Advanced Search" to access additional search functionality as needed.
The buttons and checkboxes available in Basic Search panel have the following functions:
- Search: Click the Search button or press your Return/Enter key to perform the search.
- Clear: Click the Clear button to clear all criteria from the searchable fields.
- My Items: Select this box to return only records assigned to you.

When you run a search, Sugar will return records matching all (as opposed to any) of the fields and checkboxes for which you have given a value. For example, if you select "My Items" and enter a project task name, Sugar will only return project tasks with a matching name that are assigned to you. Once the search is complete, the relevant results will populate in the list view below the search panel. To see all project tasks to which you have access, simply click "Clear" and then "Search" to perform a blank search with no filters. Please note that you will only be able to see projects as allowed by your team membership, user access type, and assigned roles. For more information on teams and roles, please refer to the Teams and Roles documentation in the Administration Guide.
Administrators can configure what fields appear on the Project Tasks Basic Search via Admin > Studio. For more information on editing layouts, please refer to the Studio documentation in the Administration Guide.
Project Tasks Advanced Search
Advanced Search offers a more in-depth search experience than Basic Search including additional fields, layout options, and saved search capability. From the Advanced search panel, you can click "Basic Search" for simplified searching.
The buttons, checkboxes, and dropdowns available in Advanced Search have the following functions:
- Search: Click the Search button or press your Return/Enter key to perform the search.
- Clear: Click the Clear button to clear all criteria from the searchable fields.
- Layout Options: Use the expandable Layout Options section to configure your list view. For more information, please refer to the Layout Options section of the Search documentation.
- Saved Searches: Save, recall, update, and delete searches that you use often. For more information, please refer to the Saved Search section of the Search documentation.

When you run a search, Sugar will return records matching all (as opposed to any) of the fields for which you have given a value. For example, if you select a Project Name and enter in a project task name to search, Sugar will only return project tasks with a matching name that related to that specific project. When searching by a multiselect or dropdown field (e.g., "Assigned to"), however, Sugar will return records matching any of these selections. Once the search completes, the relevant results will populate in the list view below the search panel. To see all project tasks to which you have access, simply click "Clear" and then "Search" to perform a blank search with no filters. Please note that you will only be able to see project tasks as allowed by your team membership, user access type, and assigned roles. For more information on teams and roles, please refer to the Teams and Roles documentation in the Administration Guide.
Administrators can configure what fields appear on the Projects Advanced Search via Admin > Studio. For more information on editing layouts, please refer to the Studio documentation in the Administration Guide.
Project Tasks List View
The Project Tasks list view displays all project tasks meeting the current search criteria and to which your user has access. You can view the basic details of each project task within the field columns. Please note that you will only be able to see project tasks as allowed by your team membership, user access type, and assigned roles. For more information on teams and roles, please refer to the Teams and Roles documentation in the Administration Guide.
You have the option to change what fields are displayed in list view by configuring your layout options in the Project Tasks Advanced Search. For more information on configuring your list view, please refer to the Layout Options section of the Search documentation. Users with administrator or developer access also have the ability to change what fields are visible in the list view via Admin > Studio. For more information on editing layouts, please refer to the Studio documentation in the Administration Guide.
Project Tasks Pagination
List view displays the current search results broken into pages that you can scroll through rather than displaying potentially thousands of rows at once. To the right just below the search panel you can see which records of the total results set are currently being displayed. The two single-arrow Next and Previous buttons can be used to scroll through the records page-by-page. The two double-arrow First Page and Last Page buttons allow you to skip to the beginning or the end of your current results.
By default, Sugar displays 20 records per list view page, but administrators can change the number of records displayed via Admin > System Settings. For more information on changing the number of displayed records, please refer to the System documentation in the Administration Guide.
Project Tasks Checkbox Selection
You can perform several actions on project task records directly from the list view by first selecting the desired records. To select individual project tasks on the Project Tasks list view, mark the checkbox on the left of each row. To select or deselect multiple project tasks on the list view, use the options in the checkbox dropdown menu:
- Select This Page: Selects all records shown on the current page of project results.
- Select All: Selects all records in the current search results across all pages of project results.
- Deselect All: Deselects all records that are currently selected.

Project Tasks Actions Menu
The Actions menu to the right of the checkbox dropdown allows you to perform various actions on the currently selected records.
The options in the Actions menu allow you to perform the following operations:
| Menu Item | Description |
| Delete | Delete one or more project tasks at a time. |
| Mass Update | Mass update one or more project tasks at a time. |
| Export | Export one or more project tasks to a CSV file. |
Favorite Designation
Users have the option to mark project tasks records as favorites via the list view as well as the detail view. This allows users to designate records that are important or will be viewed often so that they can easily be accessed via search or from the Project Tasks module tab. In the Project Tasks list view, the star on the left of each record's row is yellow once marked to indicate a favorite record. For more information on how to mark records as favorites, please refer to the Favoriting Projects Tasks section of this documentation.
Project Tasks More Information
Additional details for each project task can be viewed by clicking the "i" icon to the far right of each list view row. This provides users a quick view of additional project task information in addition to what appears in the display column fields. The resulting pop-up window will show the Description field by default. The list of fields appearing here may only be configured through a code-level customization.
Project Tasks Column Sorting
List view provides the ability to sort all of the current search results by a field column in either ascending or descending order. To sort by a field or switch the sort direction, click the column header noting that the fields which allow sorting will have a pair of arrows. The list view may be sorted by only one column at a time. You can also set a default order-by column using the layout options in Advanced Search. For more information on setting a default column sort, please refer to the Layout Options section of the Search documentation.
Project Tasks Detail View
The Project Tasks detail view displays thorough project task information including all project task fields which are grouped by default into one panel. You can also view a project task's related records (Activities, History, etc.), which appear in subpanels beneath the project task fields. The detail view can be reached by clicking a project task's link from within Sugar including from the Project Tasks list view.
Please note that you will only be able to view a project task record according to your team membership, user type, and role restrictions. For more information on teams and roles, please refer to the Teams and Roles documentation in the Administration Guide. Users with administrator or developer access have the ability to change the detail view by configuring the layout via Admin > Studio. For more information on editing layouts, please refer to the Studio documentation in the Administration Guide.
Project Tasks Actions Menu
The Actions menu on the top left of each project's detail view allows you to perform two actions on the current record. Administrator users can change the action items to be displayed as separate buttons instead of a dropdown menu via Admin > System Settings. For more information on configuring the actions menu, please refer to the System documentation in the Administration Guide.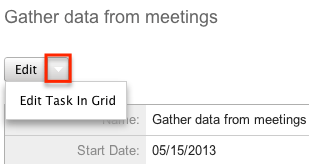
The options in the Actions menu allow you to perform the following operations:
| Menu Item | Description |
| Edit | Edit this project task. |
| Edit Task In Grid | View the project task's parent project's Grid and Gantt chart. |
Favorite Designation
Users have the option to mark project tasks records as a favorite via the detail view as well as the list view. This allows users to designate records that are important or will be viewed often as they can easily be accessed via search or from the Project Tasks module tab. In the Project Tasks detail view, the star on the right of the record's name is yellow once marked to indicate a favorite record. For more information on how to mark records as favorites, please refer to the Favoriting Projects Tasks section of this documentation.
Next or Previous Project Task Record
On the upper right of the Project task's detail view, there are two buttons that allow you to page through each project in the Project Task list view's current search results. Clicking the Previous button displays the previous project task of the current search results while clicking the Next button displays the next project task of the current search results. The text in between shows which project task result you are currently viewing within the total number of current results.
Project Tasks Subpanels
Beneath a project task's fields are subpanels containing containing related records from various modules, including different activities such as calls and meetings, as well as a history of notes and emails.
Please note that administrators can prevent users from moving subpanels to different locations in the detail view. For more information on preventing rearranging of subpanels, please refer to the System documentation in the Administration Guide. Check with your system administrator if you are not able to rearrange your subpanels.
Project Tasks Related Record Subpanels
The most common type of subpanels displayed on a project task's detail view contain the project task's related records belonging to various modules. The relationship type determines whether a related record will be displayed in the field listing or in a subpanel. Out-of-the-box, the Project tasks module does not include any relationships to other modules that would cause a related record to be displayed in the field listing. However, a project task may be related to multiple notes which means that the related notes will be displayed in a subpanel beneath the fields. Please note that the Project Tasks module displays the Activities and History subpanels by default. Administrators can create new relationships between various modules in Sugar to create additional subpanels. For more information on creating relationships, please refer to the Studio documentation in the Administration Guide.
Users with administrator or developer access have the ability to change the fields (e.g., Subject, Assigned User, etc.) and labels of each subpanel by configuring the layout via Admin > Studio to provide visibility to the most important fields. For more information on modifying subpanels, please refer to the Studio documentation in the Administration Guide.
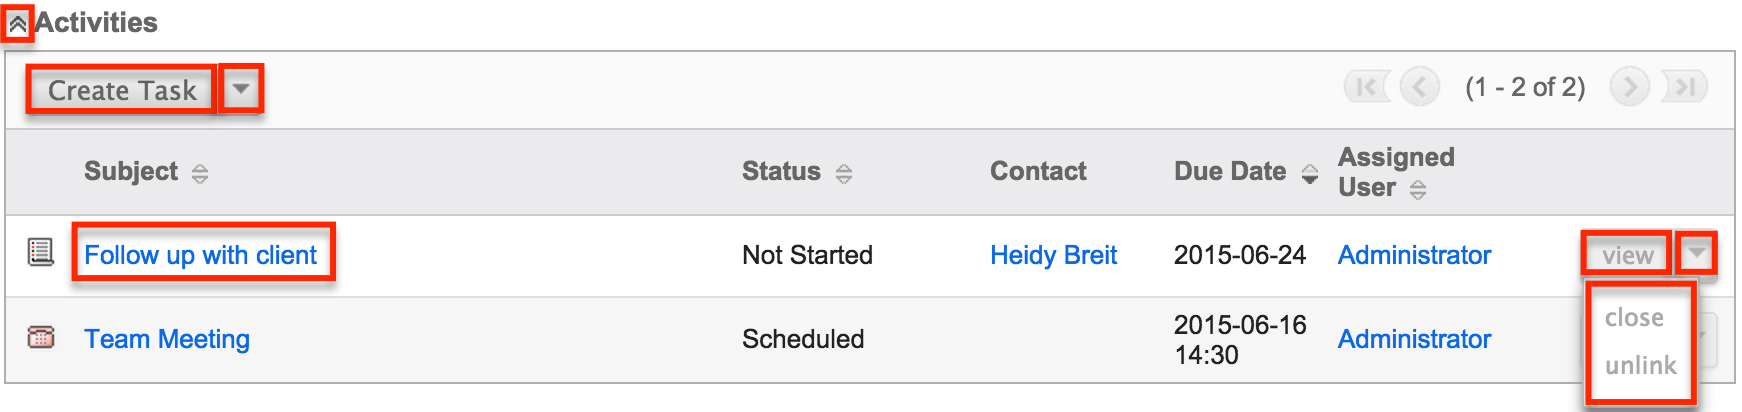
Related record subpanels allow the following operations to be performed. Please note that administrators in Sugar can change the subpanel's Action menu to be displayed as separate buttons instead of a dropdown via Admin > System Settings. For more information, please refer to the System documentation in the Administration Guide.
- To view the details of a related record, click the record's name in the subpanel or choose "View" from the Actions menu on the far right of the record's row to open it in record view.
- To relate a new record to the project task, choose the Create option (e.g., Create Task) from the subpanel's Action menu, then complete the record view layout and click "Save".
- To delete the project task's relationship to a record, choose "unlink" from the Actions menu on the far right of the record's row. This removes the relationship, but does not delete the record itself.
- To close an activity (e.g., Tasks) from the Activities subpanel, choose "close" from the Actions menu on the far right of the record's row. This moves the record to the History subpanel within the Project Tasks record.
- To collapse or expand the subpanel, click the double arrow to the left of the subpanel's name.
- To move the subpanel to a new location on the detail view, drag and drop the subpanel's header.
Please note that administrators can prevent users from moving subpanels to different locations in the detail view. For more information on preventing rearranging of subpanels, please refer to the System documentation in the Administration Guide. Check with your system administrator if you are not able to rearrange your subpanels.
Project Tasks Activities and History Subpanels
The Activities subpanel lists open or upcoming tasks, calls, and meetings that are related to the project task record. Once the activities have taken place or are completed, they will instead appear within the History subpanel. The History subpanel also includes notes and emails associated with the project task record. For more information on the history and activities subpanel, please refer to the User Interface documentation.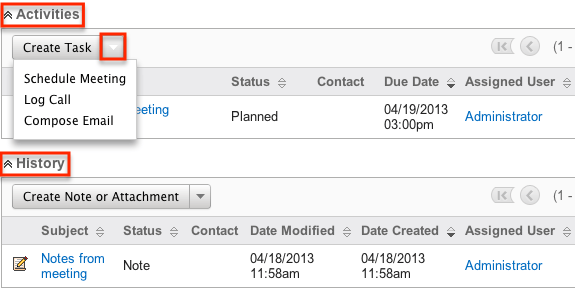
Project Tasks Gantt Chart
The Projects module includes a grid and Gantt chart to allow you to visualize, track, and easily make changes to your project tasks all in one place. This menu is accessible from each project's detail view through the Actions Menu or the Project Tasks subpanel. The page consists of a grid which shows each project task, as well as information on the timing, % complete, preceding tasks, and who is responsible for completing the task. Project tasks on the grid can be edited by clicking on the specific cell and making in-line changes. Whole rows can be selected by clicking the Task ID number in the ID column on the far left column. The Gantt chart shows a timeline of each task represents which tasks are being worked on at a given time.
Gantt Chart Toolbar
The Gantt Chart Toolbar allows you to make changes to both what tasks are showing on the grid, but also how they are displayed. The icons and menus perform the following actions, from left to right:
| Toolbar Option | Description |
| Add New Row | Adds a new row to the end of the task list, unless a row is selected, when the button will add the row above the selection. |
| Indent Row | When a row is selcted, this button will make it a subordinate function of the above row, causing any subordinate tasks to be grouped under the parent task. |
| Outdent Row | When a row is selcted and already indented, this button will move it out from being a subordinate function of the above row and making it its own task. |
| Copy Row | When a row is selected, the Copy button will allow the data in the row to be placed in another row while keeping the origional in tact. |
| Cut Row | When a row is selected, the Cut button will delete the entire row, but allow it to be pasted into another as an ensuing action. |
| Paste Row | Adds currently copied or cut row to the end of the task list, unless a row is selected, when the button will place the row above the selection. |
| Delete Row | When a row is selected, the Delete button will remove the entire row and delete the project task. |
| Expand All | This button will affect the entire grid by expanding all hidden rows created by indenting to show all rows on the grid. |
| Collapse All | This button will affect the entire grid by collapsing all visible indented rows on the grid. |
| Save | Saves all changes to the grid and updates the related project task records. |
| Week View | Changes the Gantt chart to show one week of events at a time. |
| 2 Week View | Changes the Gantt chart to show two weeks of events at a time. |
| Month View | Changes the Gantt chart to show one month of events at a time. |
| View... | Dropdown list to provide filters to change which project tasks are showing on the grid. |
| Export to PDF | Exports a PDF from Sugar containing the information shown in the task grid. |
| Resource Report | Opens the Resource Report popup. |
| Grid | Changes the view of the page to only show the task grid and releted toolbar buttons. |
| Gantt | Changes the view of the page to only show the Gantt chart and releted toolbar buttons. |
| Grid/Gantt | Changes the view of the page to show both the task grid and Gantt chart. |
Editing Project Tasks
Project Tasks may be edited at any time to update or add information to the record. You can make changes to existing project task records via the Gantt chart and Project Tasks edit view. Edit view is available within the Project Tasks module and includes all of the Project Task fields you should need.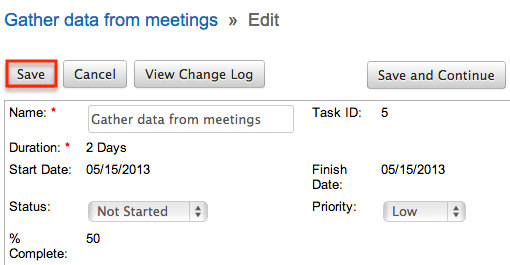
Please note that your ability to edit project tasks in Sugar may be restricted by a role. For more information on roles, please refer to the Role Management documentation in the Administration Guide. Check with your system administrator if you do not see the Edit options.
Administrators in Sugar may configure the Project Tasks edit view via Admin > Studio. For more information on configuring layouts, please refer to the Studio documentation in the Administration Guide.
Editing Project Tasks via Detail View
You can edit project tasks via the Detail View by clicking the Edit button on the upper left of the page. Once the edit view layout is open, update the necessary fields, then click "Save" to preserve your changes.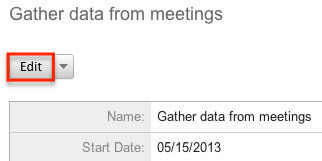
Editing Project Tasks via Gantt Chart
Project Tasks can be edited one at a time via the task grid and Gantt Chart. The Gantt chart can be accessed via the Projects detail view and Project Tasks detail view. Project Task fields can be edited by clicking on the field, either if it is empty or if it contains existing data, and edits can be made directly inline on the grid. Selecting the entire row can be done by clicking the ID number for the row of each project task. Multiple tasks can be selected by holding the Shift key on your keyboard while clicking.
The following fields can be edited from the task grid and Gantt chart:
- % Complete
- Task Name
- Duration
- Start
- Finish
- Predecessors
- Resource
- Actual Duration
Editing Project Tasks via List View
You can edit project tasks via the list view by clicking the Pencil icon to the left of each project task's name. Once the edit view layout is open, update the necessary fields, then click "Save" to preserve your changes.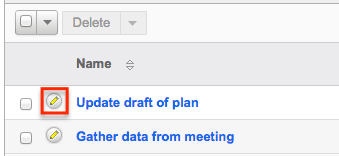
Deleting Project Tasks
If a project task is invalid or should no longer appear in your organization's Sugar instance, it may be deleted from either the project's Gantt chart or the Project Tasks list view. Deleting via the Gantt chart allows you to delete a single record while the list view allows for mass deleting multiple records at once. Deleting projects will not delete related records and will only remove the relationship, so you may wish to also delete any related records to avoid orphaned records if necessary.
Please note that your ability to delete project tasks may be restricted by a role. For more information on roles, please refer to the Role Management documentation in the Administration Guide. Check with your system administrator if you do not see the Delete options.
Deleting Project Tasks via Gantt Chart
Use the following steps to delete a project task via the Gantt chart:
- Navigate to the project's Gantt chart
- Select the project task's row by clicking on the ID number for the task

- Right click on the selected row and select the "Delete" option from the action menu, or click the "Delete" button from the Gantt toolbar
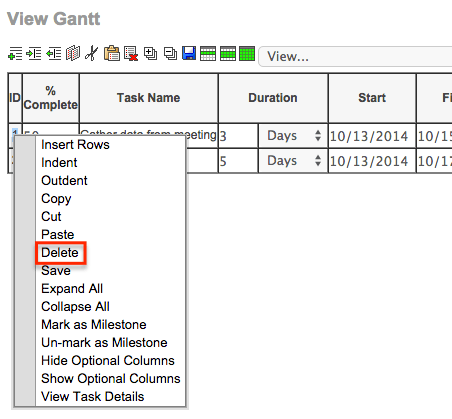
- Save the Gantt chart to confirm the change to the project.
Mass Deleting Project Tasks via List View
Use the following steps to delete one or more project tasks via the list view:
- Navigate to the Project Tasks list view by clicking the three-dots menu on the Projects module tab and selecting "View Project Tasks".
- Use the Basic or Advanced Search to find the project task records you wish to delete.
- Select the desired project tasks individually or using the checkbox dropdown's options.
- Choose "Delete" from the Actions menu.
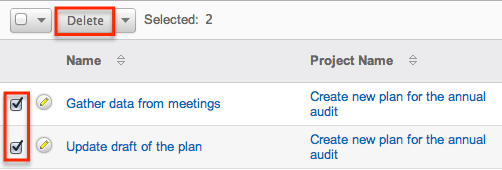
- A pop-up message will display asking for confirmation. Click "Ok" to proceed.
Due to PHP memory limitations on the server, there may be occasions when the application times out while deleting a large number of project task records. If you encounter an error when performing this action, we recommend selecting the records in smaller batches.
Exporting Project Tasks
Sugar's Export option allows users to download all fields for the selected project tasks to their computers as a .CSV (comma-separated values) file. This may be useful when needing to use Project data with other software such as Microsoft Excel. Due to PHP memory limitations on the server, there may be occasions when the application times out while exporting a large number of project tasks. If you encounter an error when performing this action, we recommend selecting the records in smaller batches.
Project tasks may be exported from the Project Tasks list view by selecting "Export" from the Actions menu. Users with access to the Reports module also have the option of creating or accessing reports containing specifically chosen fields for project tasks and their related record(s). Please note that only Rows and Columns-type reports have the ability to be exported. For more information on exporting records in Sugar, please refer to the Export documentation.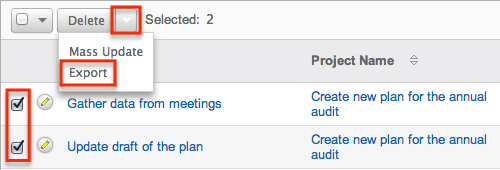
Please note that your ability to export projects from Sugar may be restricted by a role. For more information on roles, please refer to the Role Management documentation in the Administration Guide. Check with your system administrator if you do not see the Export option.
Mass Updating Project Tasks
Mass Updating allows users to make the same change to multiple project tasks at once from the Project Tasks list view. Users with administrator or developer access can control which fields are available to change during mass update via Admin > Studio. Currently, only fields with the data type of date, datetime, dropdown, multiselect, and radio may be altered during a mass update. For more information on configuring mass update, please refer to the Studio documentation in the Administration Guide. Due to the PHP memory limitations on the server, there may be occasions when the application times out while mass updating a large number of project tasks. If you encounter an error when performing this action, we recommend selecting the records in smaller batches.
Please note that your ability to mass update project tasks may be restricted by a role. For more information on roles, please refer to the Role Management documentation in the Administration Guide. Check with your system administrator if you do not see the Mass Update option.
Use the following steps to mass update projects from the list view:
- Navigate to the Project Tasks list view by clicking the three-dots menu on the Projects module tab and selecting "View Project Tasks".
- Use the list view's Basic or Advanced Search to find project tasks you wish to modify.
- Select the desired project tasks individually or using the checkbox dropdown's options.
- Choose "Mass Update" from the Actions menu.
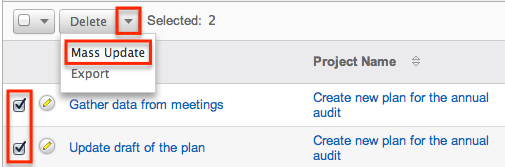
- Scroll to the Mass Update panel and set values for the fields you wish to alter.
Note: For the Teams field, use "Replace" to remove existing team assignments before adding those specified here. Use "Add" to add the teams specified here to any existing team assignments.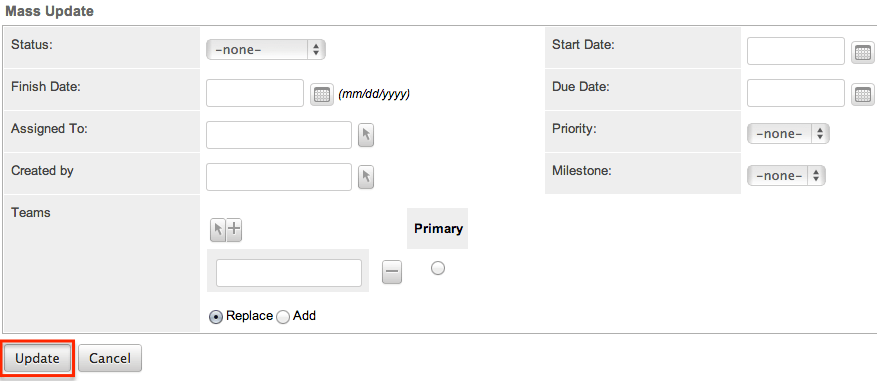
- Click "Update" to save the changes to all of the currently selected project tasks.
Favoriting Project Tasks
Each Sugar user has the option to designate their own favorite project tasks which are important or will be viewed often so that they can easily be accessed via search or from the Project Tasks module tab. Once records are marked as favorites, use the My Favorites checkbox in the Project Tasks Basic or Advanced Search to retrieve your favorites or select from your most recent favorites directly from the Project Tasks module tab.
Favoriting via List View
Use the following steps to mark records as favorites via the Project Tasks list view:
- Navigate to the Project Tasks list view by clicking "View Project Tasks" from the Projects module tab.
- Use the Basic or Advanced Search to find the Project Tasks records you wish to mark as favorites.
- Mark the star icon on the left of each desired record's row.
- To remove the record as a favorite, click the star again to revert it to gray.
Favoriting via Detail View
Use the following steps to mark records as favorites via the Project Tasks detail view:
- Navigate to a Project Task's detail view.
- Click the star icon to the right of the record's name in the upper left of the detail view to designate it as a favorite.
- To remove the record as a favorite, click the star again to revert it to gray.