Legacy Workflow Management
Overview
Notice: While the legacy functionality discussed on this page is still supported in the product, we recommend using the latest technology for the best user experience. Please refer to the SugarBPM documentation to learn more.
Sugar's Workflow functionality allows administrators to configure cause-and-effect type actions throughout Sugar and across multiple modules. Workflows can be used to update fields, send emails, or create records when certain conditions are met. Workflows are a great way to configure automated processes within Sugar so that users do not need to remember manual steps and instead can focus on their primary tasks and job responsibilities.
All workflow conditions are reached and checked for once a record is saved. Workflows can be configured to either start their process to perform the job the moment the save occurs, or they can be delayed for a given amount of time.
The following save events can trigger a workflow to fire:
- Manually saving a record
- Mass updating records
- Importing records
- Another workflow updating a record
- Reassigning Records via User Management
- Updating or creating a record via plug-ins
- Updating or creating a record via SugarCRM mobile applications
- Updating or creating a record via the portal
- Updating or creating a record via the Web Services
Workflows can be viewed and configured by any System Administrator User. In addition, regular users with a role that provides Developer access will be able to access workflows for the module they have the rights to. For more information on Roles, please review the Roles documentation.
Workflow Fields
The Workflow module contains seven fields that will retain both functional and organizational purposes in Workflows. These fields cannot be edited or added to because of their functional purposes in the workflow process.
| Field | Dropdown Options | Description |
| Applies To |
|
Choose if this workflow is going to fire on all saves, when a new record is created, or when an existing record is updated |
| Description | (Text Area Field, no character limit) | A description of this workflow and its purpose |
| Execution Occurs |
|
Whether the workflow effects will occur once a record is saved, or if they will be re-checked and occur after a defined amount of time |
| Name | (Text field, limit of 50 characters) | Identifying name of the workflow |
| Processing Order |
|
If your workflow is going to include both email alerts and workflow actions, select which of the two you would like to happen first |
| Status |
|
When set to Inactive, the workflow will not process |
| Target Module | (Module List) | A list of all modules in Sugar that are compatible with workflows. Choose which module the primary conditions will be triggered from |
Workflow Module Tab
Click the Workflow module tab in the navigation bar, shown after selecting Workflow Management in the Admin page, to access the Workflow list view. You may also click the three-dots menu in the Workflow module tab to display the Actions and Recently Viewed menus. The Actions menu allows you to perform important actions within the module. The Recently Viewed menu displays the list of workflow definitions you last viewed in the module.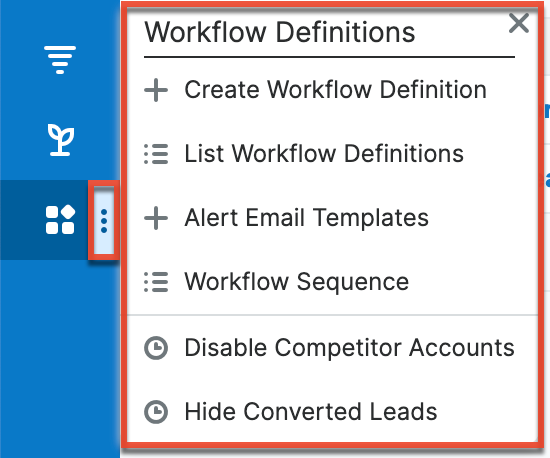
The Actions menu allows you to perform the following operations:
| Menu Item | Description |
| Create Workflow Definition | Opens the edit view layout to create a new workflow. |
| List Workflow Definitions | Opens the list view layout to search and display workflows. |
| Alert Email Templates | Opens the Alert Template menu to allow you to create, view, and edit existing alert email templates. |
| Workflow Sequence | Opens the Workflow Sequence menu to allow you to reorganize the processing order of your workflows for each module. |
Creating Workflows
Workflows are created by accessing the Admin menu, navigating to the Developer Tools section and then clicking on the link for Workflow Management.
Once on the Workflow Management module, you can create a new workflow or duplicate an existing one. The process of creating workflows contains four main sections. First, the workflow itself must be created. This creation process will include the name of the workflow, as well as the rest of the values for the fields listed in the Workflow Fields section of this documentation. After the workflow has been saved, the next step will be to configure the Workflow Conditions, which defines what will cause the workflow to happen, or its triggers. Finally, the Workflow Alerts and Workflow Actions must be configured. These define what the workflow will do to Sugar records or what emails will be sent out after triggered.
Creating Via Workflow Module
The most common method of workflow creation is via the Create Workflow Definition option in the Workflow Management module. This opens up the edit view layout which allows you to enter in all the relevant information for the workflow.
Use the following steps to create a workflow via the Workflow Management module:
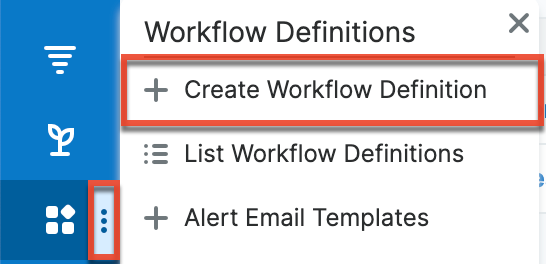
- Navigate to Admin > Workflow Management.
- Click the three-dots menu in the Workflow Definitions tab to open the Actions menu and select "Create Workflow Definition".
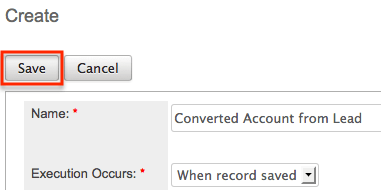
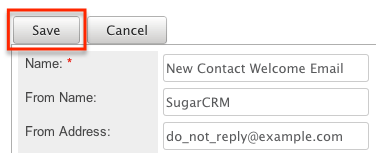
- Enter appropriate values for the fields in the edit view layout. All required fields are marked with a red asterisk and must be completed prior to saving.
- Once the necessary information is entered, click "Save".
-
Define the conditions of the workflow that will trigger the workflow to process as described in Creating Workflow Conditions.
-
Define what will happen when the workflow is processed as described in Creating Workflow Alerts and Creating Workflow Actions.
Creating Via Duplication
You can also create a new workflow definition by duplicating an existing workflow record. The duplicate option is useful if the workflow you are creating has similar information, conditions, and alerts and actions to an existing workflow as all of these are copied over during the duplication process.
Use the following steps to create a workflow definition by duplicating an existing record:
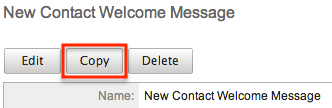
- Navigate to a workflow definition's detail view.
- Click the Actions menu and select "Copy".
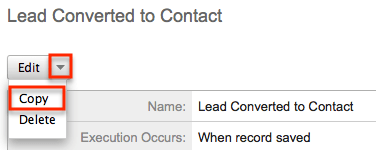
- The displayed edit view is pre-populated with the values of the original workflow. Update the necessary fields then click "Save".
Creating Workflow Conditions
Workflow conditions are an essential function when creating workflows. Workflow Conditions define the "cause" side of the workflow's cause and effect type functionality. At least one condition must exist for a workflow to trigger. If more than one conditions exist, they all must be fulfilled for the workflow to trigger.
Use the following steps to create a workflow condition:
- Navigate to the detail view of the workflow.
- Click "Create" on the Conditions subpanel to open a popup box with the different condition possibilities.
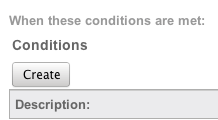
- Follow the prompts in the popup to create the different conditions, as described below. Once complete, click "Save" and the condition will be added to your workflow definition.
- Repeat this process as necessary to add additional conditions.
- After the condition has been created, it will appear in the conditions subpanel.
Note: The available conditions will vary depending on the execution type ("When record saved" or "After time elapses") you have chosen for the workflow.
Creating "After Time Elapsed" Workflow Conditions
Before creating workflows with time-elapsed conditions, please take note of the following:
- The system's Process Workflow Tasks scheduler must be enabled and running as often as possible for time-elapsed workflows to work. For more information, please refer to the Schedulers documentation.
- When a time-elapsed condition is used on a workflow definition, the Date Modified and Modified By fields will change on the records affected by the workflow's action(s). The Modified By user will be the admin user with ID = 1 (usually "Administrator") and the Date Modified will reflect the date and time that the action occurred in the system.
- The time intervals (e.g., 0 hours, 4 hours) available when setting up time-elapsed conditions can be configured via Admin > Dropdown Editor. For more information on configuring the time intervals, please refer to the Developer Tools documentation.
The "After time elapsed" workflow condition options are different for the first condition and subsequent conditions. This is to ensure that your time-based condition is recorded. After that, you can set additional conditions to filter the records from which the workflows will fire.
When used as the first condition of a workflow, the "After time elapsed" options are as follows:
- When a field in the target module changes to or from a specified value: You will be asked to specify a specific field within the module, and its value. Then, you will select the amount of time after the change that, after this threshold, the workflow will fire.
- Field does not change for a specified amount of time: You will be asked to specify a specific field within the module and a timeframe. After the field changes, if it does not change again in the given timeframe, the workflow will fire.
When used as subsequent conditions of a workflow, the "After time elapsed" options are the two mentioned above as well as two additional options:
- When a field in the target module contains a specified value: This condition is used to filter records that should or should not be included in the workflow. You will be asked to specify a field and the value of the field, and if you want to include records where the field is a specific value, or if it is not a specific value. These conditions will vary by which field is chosen.
- When the target module changes and a field in a related module contains a specified value: This condition is used to filter records based on their related records. You will be asked to specify which relationship you would like to the workflow to look at, and which field and value should or should not be used when triggering the workflow.
Creating "When Record Saves" Workflow Conditions
The "When record saves" workflow condition options are as follows:
- When a field in the target module changes to or from a specified value: This option can be used to specify both the new value of a specific field to trigger a workflow, and also what the previous value was. You will be asked to specify the specific field and the new value after save to use this condition. The previous value is not required.
- When the target module changes: This option will cause the workflow to trigger when any change to the record takes place.
- When a field on the target module changes: This option will cause the workflow to trigger when there is any change to a specific field, regardless of what the change is.
- When a field in the target module contains a specified value: This condition is used to filter records that should or should not be included in the workflow. You will be asked to specify a field and the value of the field, and if you want to include records where the field is a specific value, or if it is not a specific value. These conditions will vary by which field is chosen.
- When the target module changes and a field in a related module contains a specified value: This condition is used to filter records based on their related records. You will be asked to specify which relationship you would like to the workflow to look at, and which field and value should or should not be used when triggering the workflow.
Creating Workflow Alerts
Workflow alerts are one of the possible effects of workflow's cause-and-effect type functionality. These can be used with or without workflow actions. Workflow alerts, when triggered by the workflow condition, will cause an email to be sent to a specified recipient. These recipients include Sugar users or individuals related to the target module. To create a workflow alert, follow the following steps:
- Navigate to the detail view of the workflow.
- Click "Create" on the Alerts subpanel, which will bring you to the alert setup page.
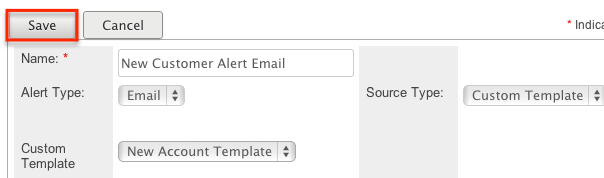
- You will be presented with the following fields to populate.
Field Description Name Choose a brief, descriptive name for this alert. Alert Type Defaults to "Email", which is the most common usage, but you can choose "Invite" if the alert is going to send an invitation for appointment-based modules. Source Type Choose "Normal message" to type a plain-text email message in the Alert Text field, or choose "Custom Template" to select and use a Workflow Alert Template. Alert Text Enter text that will be sent to the alert's recipients as a simple email message without formatting or variables.
Note: This field is shown only when the Source Type field contains "Normal message".Custom Template Select from your available Workflow Alert Templates for this alert's target module.
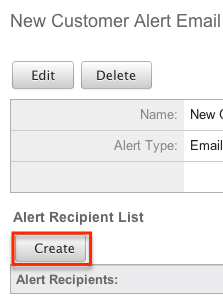
Note: This field is shown only when the Source Type field contains "Custom Template". - Enter necessary values for all fields and click Save.
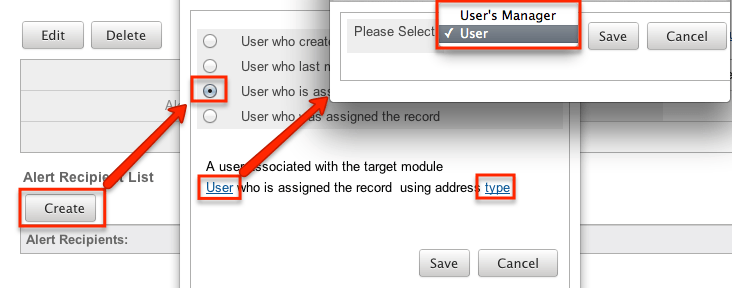
- On the next screen, click "Create" on the "Alert Recipient List" subpanel to choose your recipients.
 Note: The only options that will send to someone other than a Sugar user are "Recipient associated with the target module" and "Recipient associated with a related module".
 - Pick the recipients, select any blue hyperlink text to define any variables, such as who a specified user is, or if the recipient should be sent the email as a "To", "CC", or "BCC" recipient, and then click "Save" to continue.
- Repeat steps 5 and 6 as need be to add additional recipients for this workflow alert.
- Click the hyperlink for "Send alert to the following recipient" to make any changes, remove any errant recipients with the "Remove" button on the corresponding row, or the "Edit" button on the top left if you need to change any configurations. Once complete, click "Return to Workflow Definition".
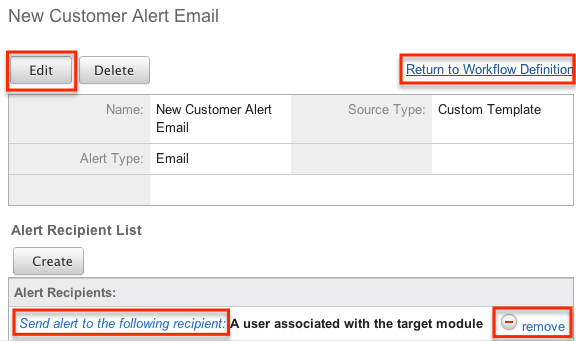
- After the alert has been created, it will appear in the Alert Subpanels.
Creating Workflow Actions
Workflow actions are one of the possible effects of workflow's cause and effect type functionality. These can be used with or without Workflow Alerts. Workflow actions, when triggered by the workflow condition, will cause either updates to existing records or creation of new records. To create a workflow action, follow the following steps:
- Navigate to the detail view of the workflow that you are working on
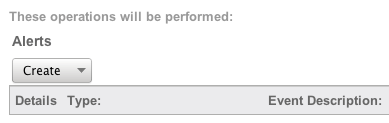
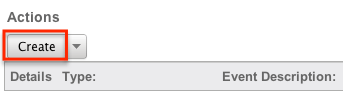
- Click "Create" on the Actions subpanel to open a popup box with the different action possibilities
-
Follow the prompts in the popup to create the different actions, as described in Workflow Actions. Once complete, click "Save" and the action will be added to your workflow definition.
-
Repeat this process as necessary to add additional actions.
-
After that action has been created, it will appear in the Actions Subpanel.
Workflow Action Types
There are four options for actions that are available. These options can make updates to the module your workflow is tied to, or a module related to this target module. The options can also create records in related modules or modules related to related modules. The options are as follows:
- Update fields in the target module: You will be given the option so select one or more fields within the target module of the workflow, and what the new value or values should be.
- Update fields in a related module: You will first be given the option to choose which related module to the target module you would like to update. After selecting the related module, you will select one or more fields within the related module to update, and what the new value or values should be.
- Create a record in a module associated with target module: You will be given the option to choose a related module to your target module. This action will create a new record in the related module, such as creating a new call related to an account, where Accounts is the target module. After selecting the module, you will be given the option to populate any or all fields with the related module. Any required fields will be marked with a red asterisk.
- Create a record associated with a module related to the target module: This action will take a record, or all records, related to your target module, and create a related record to this middle module. When creating these actions, you are asked to select the related module to your target module, and then select that module's related module where the new record is going to be created. For example, if your workflow's target module is Contacts, the following screenshot shows how a call will be created and related to the contact's related Opportunity.

On the next screen, after selecting your modules, you will select one or more fields within the related module to update, and what the new value or values should be. Clicking on the "Advanced Search" button at the bottom of this window will allow you to select if the workflow is specific for all related records (Opportunities), or if the related record should be filtered at all.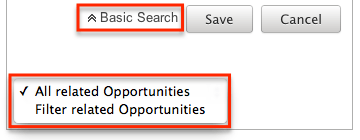
The "Advanced Search" function also contains special functions for specific field types:- Assigned User: Allows you to configure the action to set the assigned user to be either the actual user or the user's manager who either is currently assigned to the triggered record, the one who most recently updated it, the one who created it, or is the one saving the record.
- Team ID: Allows you to configure the action to set the team to be the default team of the user who triggered the workflow or, if it is updating a related record, to match the primary team of the triggered record.
- Dropdown Fields: Allows you to configure the action to sequentially move the dropdown option forward or backward in the order in which it appears in the dropdown list.
Viewing Workflows
There are various options available for viewing workflow records in Sugar including via Workflow Definitions list view, Workflow Definitions detail view, and the Workflow Definitions Last Viewed menu. Each method will provide varying degrees of detail and insight into the workflow.
Viewing Via List View
The Workflow Definitions list view displays all records meeting the current search criteria. To access the list view, simply click the Workflow Definitions module tab, which is made available by navigating to Admin > Workflow Management. While list view shows key workflow fields, you can click the workflow definition's name to open the record in detail view. For more information on viewing workflows via list view, please refer to the Workflows List View section of this documentation.
Viewing Via Detail View
The Workflow Definitions detail view displays thorough workflow information including all workflow fields followed by subpanels showing the Conditions, Alerts, and Actions that process the workflow. The detail view can be reached by clicking a workflow definition's link from the Workflow Definitions list view. For more information on viewing workflows via detail view, please refer to the Workflow Detail View section of this documentation.
Viewing Via Recently Viewed
As you work, Sugar will keep track of which workflows you have recently viewed. Click the three-dots menu in the Workflow module tab to see a list of your most recently viewed workflows and click each name to open the workflow definition in detail view. 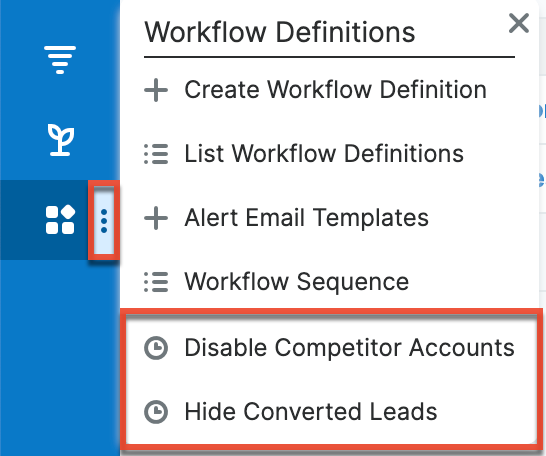
Searching Workflows
The Workflow Definitions list view includes a Basic and Advanced Search to help you locate records easily and effectively. Once the search is performed, the relevant results will be displayed in the Workflows list view below. Please note that Sugar automatically appends the wildcard character (%) to the end of your search phrase. This allows the system to retrieve all records that start with the keyword entered in the search. If you would like to broaden the search, you can use the wildcard at the beginning of your text as well (e.g., %created). This will pull up any workflow that has the word "created" in the name, regardless of how it starts or ends.
For more information on using the various search methods as well as how wildcards are used in the different methods, please refer to the Search documentation.
Basic Search
Basic search offers a simplified search experience allowing you to search for just the name of the workflow. From the Basic Search panel, you can click "Advanced Search" to access additional search functionality as needed.
The buttons and checkboxes available in Basic Search panel have the following functions:
- Search: Click the Search button or press your Return/Enter key to perform the search.
- Clear: Click the Clear button to clear criteria from the Name field.

When you run a search, Sugar will return records matching all (as opposed to any) of the fields for which you have given a value. Once the search is complete, the relevant results will populate in the list view beneath the search panel. To see all workflow definitions, simply click "Clear" and then "Search" to perform a blank search with no filters.
Advanced Search
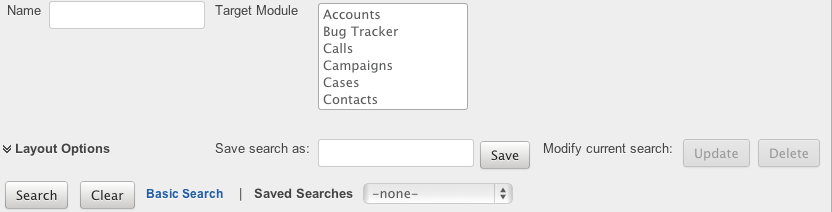
Advanced Search offers a more in-depth search experience than Basic Search including additional fields, layout options, and saved search capability. From the Advanced search panel, you can click "Basic Search" for simplified searching.
The buttons and dropdowns available in Advanced Search have the following functions:
- Search: Click the Search button or press your Return/Enter key to perform the search.
- Clear: Click the Clear button to clear all criteria from the searchable fields.
- Layout Options: Use the expandable Layout Options section to configure your list view. For more information, please refer to the Layout Options section of the Search documentation.
- Saved Searches: Save, recall, update, and delete searches which you use often. For more information, please refer to the Saved Search section of the Search documentation.
When you run a search, Sugar will return records matching all (as opposed to any) of the fields for which you have given a value. For example, if you select the Target Module as "Accounts" or "Contacts" and enter in the word "Created" for the Name search, Sugar will only return workflow definitions with a matching name from the Accounts or Contacts modules. Once the search completes, the relevant results will populate in the list view beneath the search panel. To see all workflow definitions, simply click "Clear" and then "Search" to perform a blank search with no filters.
Workflows List View
The Workflows list view displays all workflow definitions meeting the current search criteria. You can view the basic details of each workflow within the field columns. The list view also allows for records to be edited or deleted as need be.
Pagination
List view displays the current search results broken into pages that you can scroll through rather than displaying potentially thousands of rows at once. To the right just below the search panel you can see which records of the total results set are currently being displayed. The two single-arrow Next and Previous buttons can be used to scroll through the records page-by-page. The two double-arrow First Page and Last Page buttons allow you to skip to the beginning or the end of your current results.
By default, Sugar displays 20 records per list view page, but the number of records displayed can be changed via Admin > System Settings. For more information on changing the number of displayed records, please refer to the System documentation.

Checkbox Selection
You can delete workflow definitions directly from the list view by first selecting the desired records. To select individual workflows on the Workflow Definitions list view, mark the checkbox on the left of each row. To select or deselect multiple workflow definitions on the list view, use the options in the checkbox dropdown menu:
- Select This Page: Selects all records shown on the current page of workflow results.
- Select All: Selects all records in the current search results across all pages of workflow results.
- Deselect All: Deselects all records that are currently selected.

Column Sorting
List view provides the ability to sort all of the current search results by a field column in either ascending or descending order. To sort by a field or switch the sort direction, click the column header noting that the fields which allow sorting will have a pair of arrows. The list view may be sorted by only one column at a time. You can also set a default order-by column using the layout options in Advanced Search. For more information on setting a default column sort, please refer to the Layout Options section of the Search documentation.

Workflow Detail View
The Workflow Definition detail view displays thorough workflow information including all workflow fields. You will also see the Conditions, Alerts, and Actionssubpanels beneath the workflow fields. The detail view can be reached by clicking a workflow record's link from the Workflow Definitions list view or from the recently viewed menu.
Actions Menu
The Actions menu on the top left of each workflow definition's detail view allows you to perform various actions on the current record. The action items can be configured to be displayed as separate buttons instead of a dropdown menu via Admin > System Settings. For more information on configuring the actions menu, please refer to the System documentation in the Administration Guide. 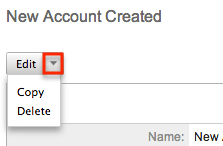
The Options in the Actions menu allow you to perform the following operations:
| Menu Item | Description |
| Edit | Edit this workflow definition. |
| Copy | Duplicate this workflow definition. |
| Delete | Delete this workflow definition. |
Next or Previous Record
On the upper right of the Workflow Definitions detail view, there are four buttons that allow you to page through each workflow in the Workflow Definition list view's current search results. Clicking the Previous button displays the previous workflow of the current search results while clicking the Next button displays the next workflow of the current search results. The two double-arrow First Page and Last Page buttons allow you to skip to the first or the last workflow of your current results. The text in between shows which workflow result you are currently viewing within the total number of current results.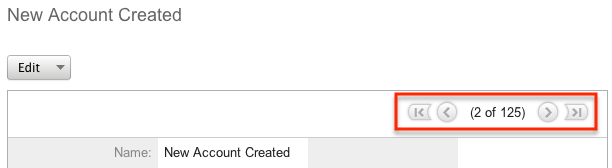
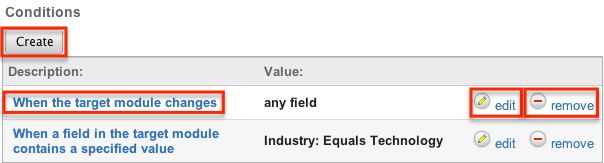
Conditions Subpanel
The Workflow Conditions subpanel allows you to create additional conditions for your workflow and also lets you view and modify the existing ones. The subpanel shows a Description and a Value for each condition. The Description is an automatically generated, brief explanation of the condition. The Value shows what field or fields are covered in the condition, if not expressly stated in the description. The Conditions subpanel allows the following operations to be performed.
- To view the details or edit a condition, either click the condition's description in the subpanel or click the edit button from the far right of the record's row to open the condition popup.
- To create a new workflow condition, choose "Create" from above the subpanel, then follow the steps supplied in the Creating Workflow Conditions section of this documentation.
- To delete a condition on this workflow, choose "Remove" from the far right of the record's row.
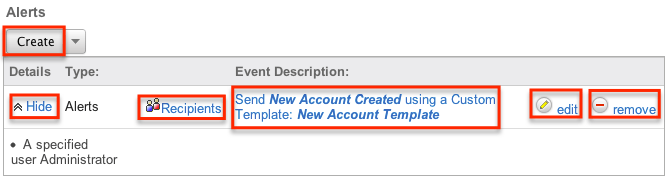
Alert Subpanels
The Workflow Alert subpanel allows you to create additional alerts for your workflow and also lets you view and modify the existing ones. The subpanel displays the "Detail"s, "Type", and "Event Description" for each condition. After an alert has been created, there is also a column for Recipients. The "Event Description" is automatically generated and provides a brief explanation of the alert with the name of the Alert record and what template (if applicable) is being sent to the recipients. The Alerts subpanel allows the following operations to be performed.
- To view or edit an alert, either click the alert's event description or click "Edit" on the far right of the row to open the alert's edit view.
- To view the recipients of the alert, click "Show" from the far left of the record's row. Click "Hide" to collapse the drawer highlighting the recipients
- To edit or add recipients of the workflow alert, click "Recipients". This button will also open the alert's detail view.
- To create a new workflow alert, choose "Create" from above the subpanel, then follow the steps supplied in the Creating Workflow Alerts section of this documentation.
- To delete an alert on this workflow, choose "Remove" from the far right of the record's row.
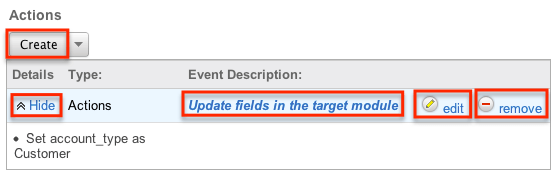
Actions Subpanel
The Workflow Actions subpanel allows you to create additional actions for your workflow and also lets you view and modify the existing ones. The subpanel shows a Details, Type and an Event Description for each condition. The Event Description is an automatically generated, brief explanation of the action that will be performed by the workflow. The Conditions subpanel allows the following operations to be performed.
- To view the details or edit a condition, either click the condition's description in the subpanel or click the edit button from the far right of the record's row to open the condition popup.
- To view the actions that will be performed, click "Show" from the far left of the record's row. Click "Hide" to collapse the drawer highlighting the actions.
- To create a new workflow action, choose "Create" from above the subpanel, then follow the steps supplied in the Creating Workflow Actions section of this documentation.
- To delete an action on this workflow, choose "Remove" from the far right of the record's row.
Editing Workflows
Workflows may be edited at any time to update or add information to the definition. You can make changes to existing workflow definitions via the Workflows edit view. Edit view is available within the Workflows module and includes all of the Workflow fields. It can be accessed either via the detail view or list view. Please note that Conditions, Alerts, and Actions are not edited through the Workflow edit view.
Note: After a workflow has been created, the fields "Execution Occurs" and "Target Module" cannot be edited
Editing Via Detail View
You can edit workflows via the detail view by clicking the Edit button on the upper left of the page. Once the edit view layout is open, update the necessary fields, then click "Save" to preserve the changes made.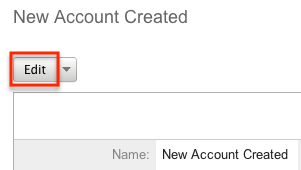
Editing Via List View
You can edit workflows via the list view by clicking the Pencil icon to the left of each workflow's name. The page will navigate to the edit view. Update the necessary fields, then click "Save" to preserve the changes. After saving, you will be brought to the detail view of the workflow.
Deleting Workflows
If a workflow definition is invalid or should no longer appear in your organization's Sugar instance, it may be deleted from either the Workflow Definition's detail view or list view. Deleting via the detail view allows you to delete a single record while the list view allows for mass deleting multiple records at once. Deleting the workflow definition will also remove the conditions, actions, and alerts to stop workflows from firing.
Deleting Via Detail View
Use the following steps to delete a workflow via the detail view:
- Navigate to a workflow definition's detail view.
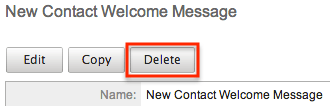
- Select "Delete" from the Actions menu.
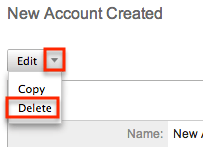
- A pop-up message will display asking for confirmation. Click "Ok" to proceed.
Mass Deleting Via List View
Use the following steps to delete one or more workflows via the list view:
- Navigate to the Workflow Definitions list view via Admin > Workflow Management.
- Use the Basic or Advanced Search to find the Workflow Definitions you wish to delete.
- Select the desired records individually or using the checkbox dropdown's options.
- Choose "Delete" from the Actions menu.
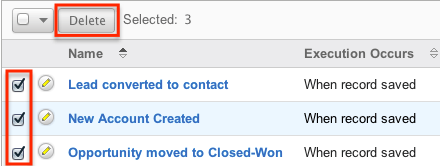
- A pop-up message will display asking for confirmation. Click "Ok" to proceed.
Due to PHP memory limitations on the server, there may be occasions when the application times out while deleting a large number of workflow definitions. If you encounter an error when performing this action, we recommend selecting the records in smaller batches.
Workflow Alert Templates
When sending a workflow alert, you have the option of sending either a "Normal Message" which will be just a simple, plain text alert, or utilizing a workflow template. Templates have the option to use full HTML editing, to include formatting changes, colors, variables to include data from fields in Sugar, and more.
Alert Template Fields
The Workflow Templates functionality contains several fields that will retain both functional and organizational purposes in Workflows. These fields cannot be edited or added to because of their functional purposes in the workflow process.
| Field | Description |
| Body | This is where you can design your email template using the WYSIWYG (What you See Is What You Get) editor. Click the "Alt Text" checkbox to edit the plain text version of this email. The entry into this box is what will actually be sent to the recipients of the email. |
| Description | A short explanation of the template and what it is used for. |
| Field List | Used to select which field from the given module will be inserted into the Variable Insert field to eventually be inserted into the template, which can be changed by updating the Related Module dropdown field. |
| From Address |
What sender's email address will be shown on the email when received by the recipient. Note: Mail servers have the functionality to override this setting meaning the email address will show as the one that actually sends this, defined in Admin > System Email Settings. Please review the Emails documentation for more information. |
| From Name | What sender's name will be shown on the email when received by the recipient. |
| Name | Identifying name of the template. |
| Related Module | List of modules related to the Target Module, which will change the Field List and, therefore, change the fields that can be used for variables in the email. |
| Subject | The subject line of the email which will show for the recipients. |
| Target Module | Selected when creating the template and a non-editable field, this will cause the template show when using the template for workflows made to the corresponding module. |
| Type | Will only show as workflow, but will vary when making other template types to include Email and Campaign. |
| Value Type | Select "New Value" or "Old Value" if the variable will be changing on the workflow to determine if the variable should include the value of the field before or after the record is saved. |
| Variable Insert | This field will build the variable for you based on the Target Module, Related Module, Field List, and Value Type fields. |
Creating Alert Templates
Alert Templates are created only via the Workflow module. Alert templates can be created either directly from the workflows module via the Alert Templates page, or via duplication. The Target Module is defined during the creation process, and then a full edit view layout opens including all fields that will be necessary to create the template.
Creating Alert Templates Via Workflows Module
The most common method of template creation is via the Alert Email Templates option in the Workflow Definitions module tab. This will open the edit view layout allowing you to configure the template to your specifications.
Use the following steps to create the template via Workflow Management:
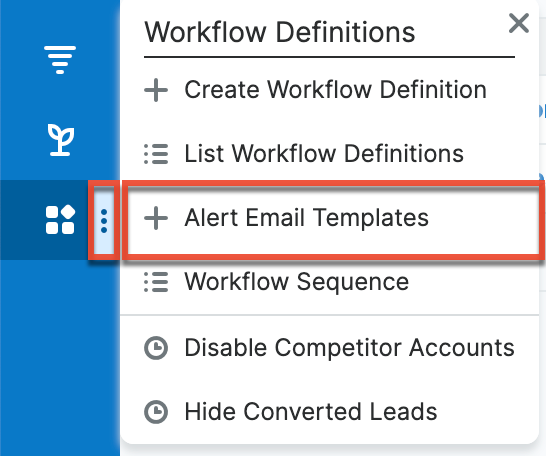
- Navigate to Admin > Workflow Management.
- Click the three-dots menu in the Workflow Definitions tab and select "Alert Email Templates".
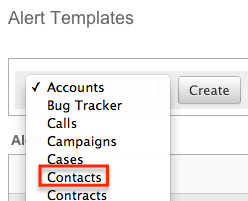
- Select the module you wish to create the alert template for then click "Create".
- Enter appropriate values for the following fields below. Required fields are marked with a red asterisk and must be completed prior to saving.
- Name: Enter a name for the email template.
- Type: Leave as "Workflow".
- From Name: The name that the email recipient will see as the sender.
- From Address: The email address that the email recipient will see as the sender.
Note: This may be overwritten by your mail server configured in Admin > System Email Settings. - Description: Enter a description or other information about the template.
- Related Module: To insert a field from a record related to the target module, select the related module.
- Subject: Enter the subject of the email that will be sent.
- Body: Enter the body of the emails that will be sent.
- Attachments: Click the "Choose File" button to open a file selection window from your browser and attach a file. Click the Sugar Document button to attach a file from the sugar database.
- Populate the template body that will be sent to the email recipients. Insert variables as necessary for your workflows.
- Using the TinyMCE functions, add simple formatting to your email's content. For more advanced customization you can click the HTML button in the top left to access and edit the generated HTML code. For more information on using TinyMCE, please refer to the User Interface documentation.
Note: If images or advanced CSS are required in your email template, it is highly recommended to host the images or CSS file on a publicly available hosting service and link to it in the email template. -
Once the necessary information is entered, click "Save" to preserve your changes to the email template.
Creating Alert Templates Via Duplication
You can also create a new template by duplicating an existing template. The duplicate option is useful if the template you are creating has similar information to an existing template.
Use the following steps to create a template by duplicating an existing template:
- Navigate to an existing template's detail view.
- Click the action option for "Copy".
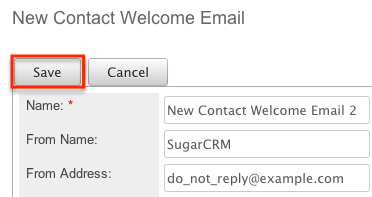
- The displayed edit view is pre-populated with the original template's values. Update the necessary fields then click "Save".
Inserting Variables
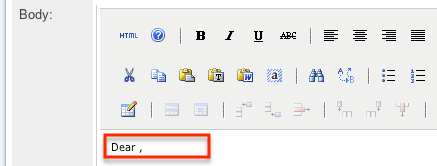
When constructing the subject and body of your email, Sugar allows you to insert variables, or placeholders, into the template that will be populated with the record's information for that variable. The variables allow you to insert data from fields within the record that triggered the workflow and its related records into your template. Use the following steps to insert a variable for the recipient's first name into the template:
- Click to place your cursor on the location in the subject or body where the recipient's first name should appear.
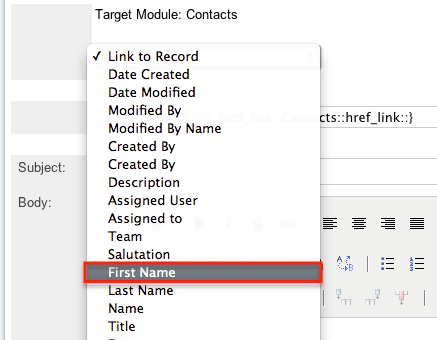
- Set the variable dropdown to the desired field from the workflow's target module. For our example, select "First Name".
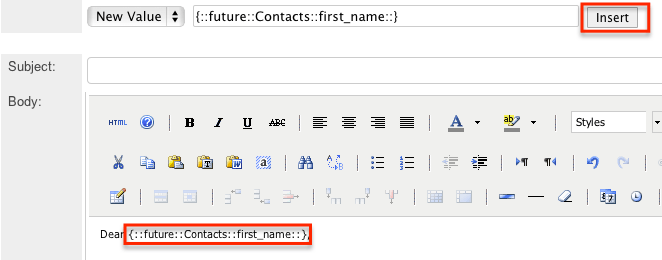
- Choose between "New Value" and "Old Value" in the value dropdown field. This will determine if the value of the given variable shown on the template will be the value of the field in question before or after the workflow fired. This functionality is especially helpful if you are showing a change between two values, such as an opportunity moving from new ("Old Value") to closed-won ("New Value"). "New Value" is the default option for this list.
- Click "Insert" to insert the generated variable name to your subject or body at your cursor's location.
Note: You can click "Alt Text" at the bottom of the page to have the plain text option send differently than the HTML text.
Viewing Alert Templates
There are various options available for viewing workflow templates in Sugar including via Workflow Templates list view, Workflow Templates detail view, and from the Emails module.
Viewing Alert Templates Via List View
The Workflow Templates list view displays all workflow templates and key fields about each template. To access the list view, simply navigate to the Workflow Management section of the Admin menu and select "Alert Email Templates" from the Workflow Definitions module tab. Use the Alert Templates list view for the following functions:
- To open the record in detail view, click the template's name.
- To re-sort the list view results one column at a time, click the column header, and the columns will sort alphabetically or chronologically.
- Use the arrows in the top right side of the list view navigate through the pages of your templates, or skip to the first or last page using the double arrow buttons.
- To delete a template, click "Remove" from the far right of the corresponding template's row.
Viewing Alert Templates Via Detail View
The Alert Templates detail view displays thorough alert template information including all template fields and a preview of the workflow template that recipients will see after it is sent. The detail view can be reached by clicking a template's link from the Alert Templates list view.
While viewing the detail view, the preview of the email template is shown as the last field option. You can also click the "Alt Text" checkbox to see how this email will look when the recipient views it as plain text.
Viewing Alert Templates Via Emails Module
The Emails module contains all of the email templates in Sugar. Alert Templates can be accessed via Emails, in addition to accessing via Workflow Management. To access alert templates via Emails, simply select the View Email Templates option from the Emails module tab. 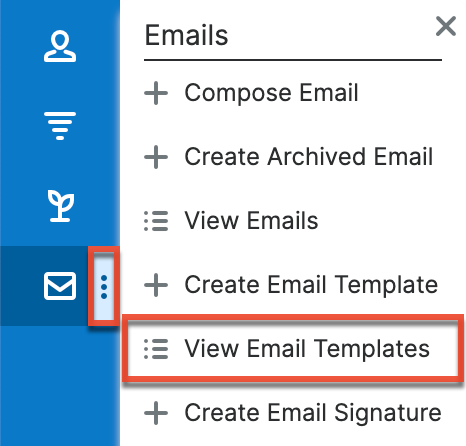
This will bring you to the Email Templates list view where you can select which template you would like to view. For more information on navigating the Emails module, please review the Emails module section of the Application Guide.
Editing Alert Templates
Alert Templates may be edited at any time to update or add information to the template. You can make changes to existing templates via the Alert Templates edit view. Edit view is accessible via the Alert Templates detail view. You can edit alert templates via the detail view by clicking the Edit button on the upper left of the page. Once the edit view layout is open, update the necessary fields, then click "Save" to preserve the changes made. 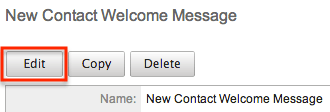
Deleting Alert Templates
If an alert template is invalid or should no longer appear in your organization's Sugar instance, it may be deleted from either the Alert Templates detail view or list view. Deleting alert templates will not delete any workflows using them. If a workflow is utilizing a template which you are deleting, it is recommended that the workflow be updated to include a new template on the alert.
To delete a template from the template's detail use the following steps:
- Navigate to the Alert Templates detail view.
- Click the Delete button.
- A pop-up message will display asking for confirmation. Click "Ok" to proceed.
To delete a template from the list view, use the following steps:
- Navigate to the Alert Templates list view.
- Select the "Remove" button on the row of the template you would like to delete.

- A pop-up message will display asking for confirmation. Click "Ok" to proceed.
Time Intervals for Time Elapsed Workflows
Time elapsed workflows trigger after a specified amount of time has passed from when the record was saved. Users with administrator or developer access have the ability to add new time intervals to the dropdown list ("tselect_type_dom") used for time elapsed workflows. The time interval dropdown list can be viewed and edited via Admin > Dropdown Editor. For more information on Dropdown Editor, please refer to the Developer Tools documentation.
By default, the time intervals are:
4 days5 days1 week2 weeks3 weeks| 0 hours | 3 days | 30 days |
| 4 hours | 60 days | |
| 8 hours | 90 days | |
| 12 hours | 120 days | |
| 1 day | 150 days | |
| 2 days | 180 days |
The following steps cover adding a 1 hour time interval to the dropdown list via Dropdown Editor as an example:
- Navigate to Admin > Dropdown Editor.
- Locate the tselect_type_dom dropdown list and click to view the details.
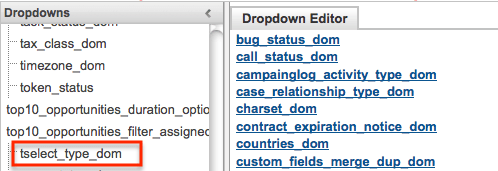
- Enter an item name (e.g., 3600) and display label (e.g., 1 hours) into the corresponding fields below the existing item list.
- Please note that the Item Name field must be in seconds equaling to the hours, days, weeks you wish to add.

- Click "Add" to add the new value to the dropdown list.
- Note: The value will be added to the end of the list, but you can drag and drop the item to the top of the list if you wish. For more information on how to reorder and position values in the dropdown list, please refer to the Developer Tools documentation.
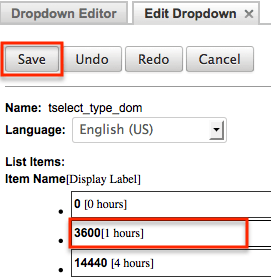
- Once the item has been added and placed in the correct position, click "Save" to preserve the change.
The newly added time interval will now appear in the corresponding dropdown list when creating the condition for a time elapsed workflow.
Workflow Sequence
When a record is saved within a module, Sugar will check all workflows for that module to see if they need to process and perform any actions or send any alerts. Sugar processes each of the workflows in sequential order, one after another. By default this order is determined as the order in which the workflow definitions were created; the oldest workflow fires first, moving up to the newest. This order, however, can be reorganized using the Workflow Sequence menu.
Workflow Sequence can be accessed through the following process:
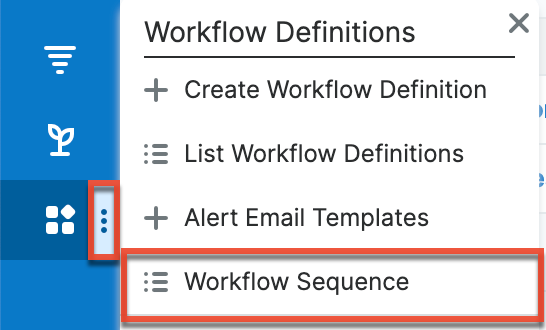
- Navigate to Admin > Workflow Management.
- On the Workflow Definitions module tab, select "Workflow Sequence".
- Select the module you would like to reorganize from the dropdown menu and click "Select".
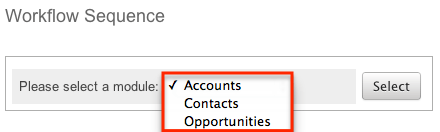
This process will produce a list view with all of the workflows for the particular selected module. The list view will show three columns containing details from the workflow fields, as well as a fourth column for "Process Order".
The Process Order column is used to reorganize the workflows into their correct processing order. The Up button will move the workflow up one rung in the process, whereas the Dn button will lower it in the sequence. The order of the workflow process for this module is determined on this menu, starting at the top and working its way down.