Campaigns
Overview
Sugar's Campaigns module can be used to create and manage email and non-email marketing and advertisement campaigns for your organization. Email-based campaigns can be used to send mass emails or a series of newsletter emails to individuals with whom you have an active or growing relationship. The results of each campaign are recorded to measure the success of your campaigns.
The Campaigns module is not available for Sugar Serve users. For more information on license types and the functionality available for each, refer to the License Types Matrix documentation.
Note: Email addresses that are marked as opted-out cannot receive campaign emails. For more information, refer to the Emails documentation.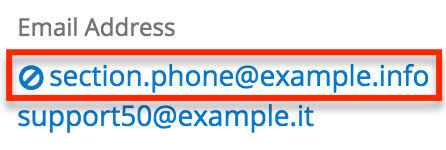
Campaign Fields
The Campaigns module contains a number of stock fields, which come out-of-the-box with Sugar. The below definitions are suggested meanings for the fields, but the fields can be leveraged to best meet your organization's needs. Users with administrator or developer access have the ability to alter, add, or remove fields via Admin > Studio. For more information on configuring fields, please refer to the Studio documentation in the Administration Guide.
| Field | Description |
| Actual Cost | The total cost of the campaign. |
| Assigned To | The Sugar user assigned to the campaign record. |
| Budget | The budgeted amount for the campaign's cost. |
| Currency | The currency of the campaign costs. |
| Description | A description or other information about the campaign. |
| Date Created | The date the campaign record was created. |
| Date Modified | The date the campaign record was last modified. |
| End Date | The date the campaign is expected to end. |
| Expected Cost | The expected cost of the campaign. |
| Expected Revenue | The expected revenue stemming from the campaign. |
| Frequency | For newsletter-type campaigns, the frequency the campaign is expected to be sent. |
| Impressions | The expected number of recipient views. |
| Integration Sync ID | The sync key field used by external integrations to identify Sugar records in the external application. See the Integrate REST API endpoints in the Developer Guide for more details on how to use this field. |
| Name | The name of the campaign record. |
| Objective | The objective or purpose of the campaign. |
| Start Date | The date the campaign is expected to start. |
| Status | The current status of the campaign.
Note: This field is manually set, not automatic. |
| Teams | The Sugar team(s) assigned to the campaign. |
| Type | The campaign's format or type (e.g., email, web). |
Campaigns Module Tab
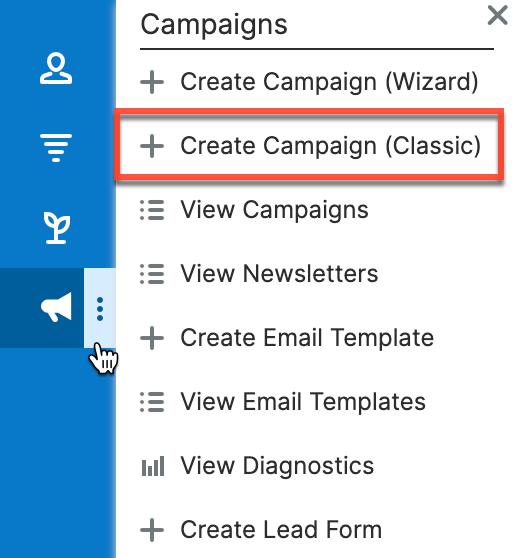
Click the Campaigns module tab in the navigation bar to access the Campaigns list view. Once the Campaigns tab is displayed on the navigation bar, you can click the three-dots menu within the tab to display the Actions, Recently Viewed, and Favorites menus. The Actions menu allows you to perform important actions within the module. The Recently Viewed menu displays the campaigns, target lists, and targets you last viewed in the module. The Favorites menu displays the list of campaigns you most recently marked as favorites in the module. 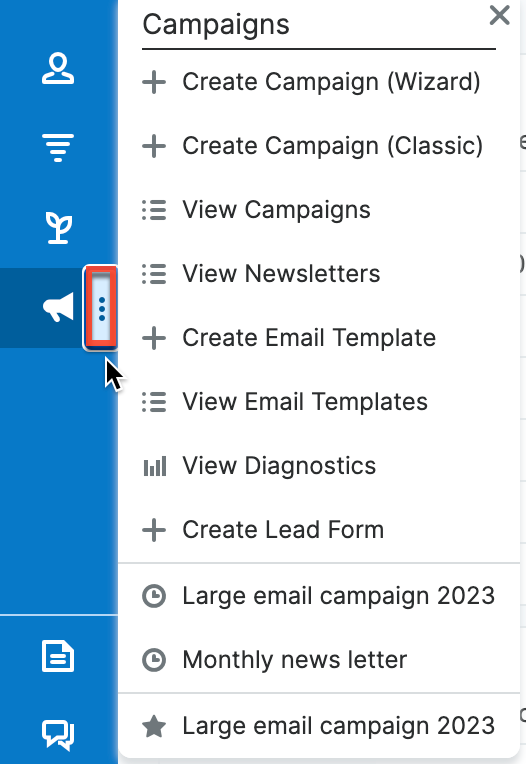
The options in the Actions menu allow you to perform the following operations:
| Menu Item | Description |
| Create Campaign (Wizard) | Opens the campaign wizard to create a new campaign. |
| Create Campaign (Classic) | Opens the edit view layout to create a new campaign. |
| View Campaigns | Opens the list view layout to search and display campaigns. |
| View Newsletters | Opens the list view layout to search and display newsletter-type campaigns. |
| Create Email Template | Opens the Email Templates edit view layout to create a new email template. |
| View Email Templates | Opens the Email Templates list view layout to search and display email templates. |
| View Diagnostics | Displays your system's configuration status for sending email-based campaigns. |
| Create Lead Form | Opens the Lead Form wizard to generate a web-to-lead form. |
For more information on module tab menus including reasons a module may not be included in the menu, see the User Interface documentation.
Prerequisites
There are several key components involved when executing an email or newsletter campaign in Sugar. Before sending out an email-based campaign, an administrator must make sure the following items are set up properly:
- Outbound Emails: Configure Sugar to send outbound emails via Admin > System Email Settings. For more information on configuring outbound email, please refer to the Email documentation in the Administration Guide.
- Campaign Batch Size: Specify the number of emails sent per batch via Admin > Campaign Email Settings. Due to some email providers throttling the number of emails allowed to be sent at one time, we recommend setting this to 200 and adjusting as necessary. For more information on configuring the campaign batch size, please refer to the Email documentation in the Administration Guide.
- Bounce Handling Account: Create the bounce-handling inbox for bounced campaign emails via Admin > Inbound Email. For more information on configuring the bounce handling account, please refer to the Email documentation in the Administration Guide.
- Campaigns Scheduler: Configure the scheduler job that automatically sends campaign emails via Admin > Schedulers > Run Nightly Mass Email Campaigns Scheduler. The frequency of this scheduler should be determined in conjunction with the campaign batch size to ensure you do not exceed sending limitations imposed by your email provider. For more information on configuring schedulers, please refer to the Schedulers documentation in the Administration Guide.
- Bounced Emails Scheduler: Configure the scheduler job to process the bounced campaign emails via Admin > Schedulers > Run Nightly Process Bounced Campaign Emails Scheduler. For more information on configuring schedulers, please refer to the Schedulers documentation in the Administration Guide.
Note: The Run Nightly Mass Email Campaigns and Run Nightly Processed Bounced Campaign Emails schedulers are configured by default to run every night on the hour from 2:00 AM to 6:00 AM for the time zone of the admin user (User Id = 1). For quicker processing of campaign information, we recommend changing both schedulers to run every 10 minutes throughout the day. Please note that if your email provider throttles the number of emails allowed to be sent in a given time period, you may need to reduce the frequency of sending.
Campaign Diagnostic Tool
The campaign diagnostic tool enables you to check if all pending administrative tasks have been completed before you attempt to launch the campaign. It is recommended that the Campaign Diagnostic tool be run prior to sending out campaigns to ensure any issues get resolved before the campaign emails need to be sent.
Use the following steps to run the campaign diagnostic tool:
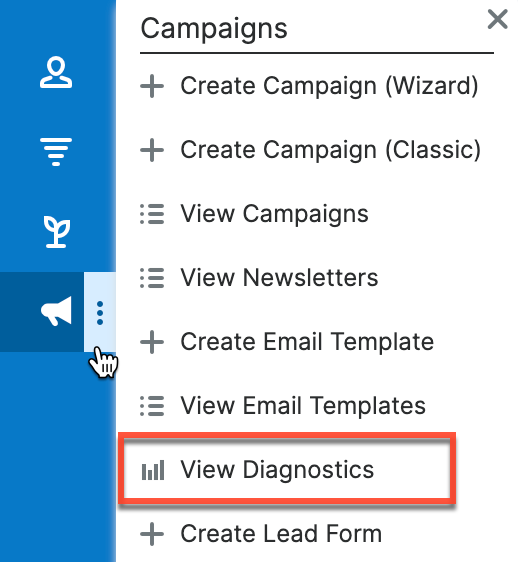
- Click the Actions menu in the Campaigns module tab and select "View Diagnostics".
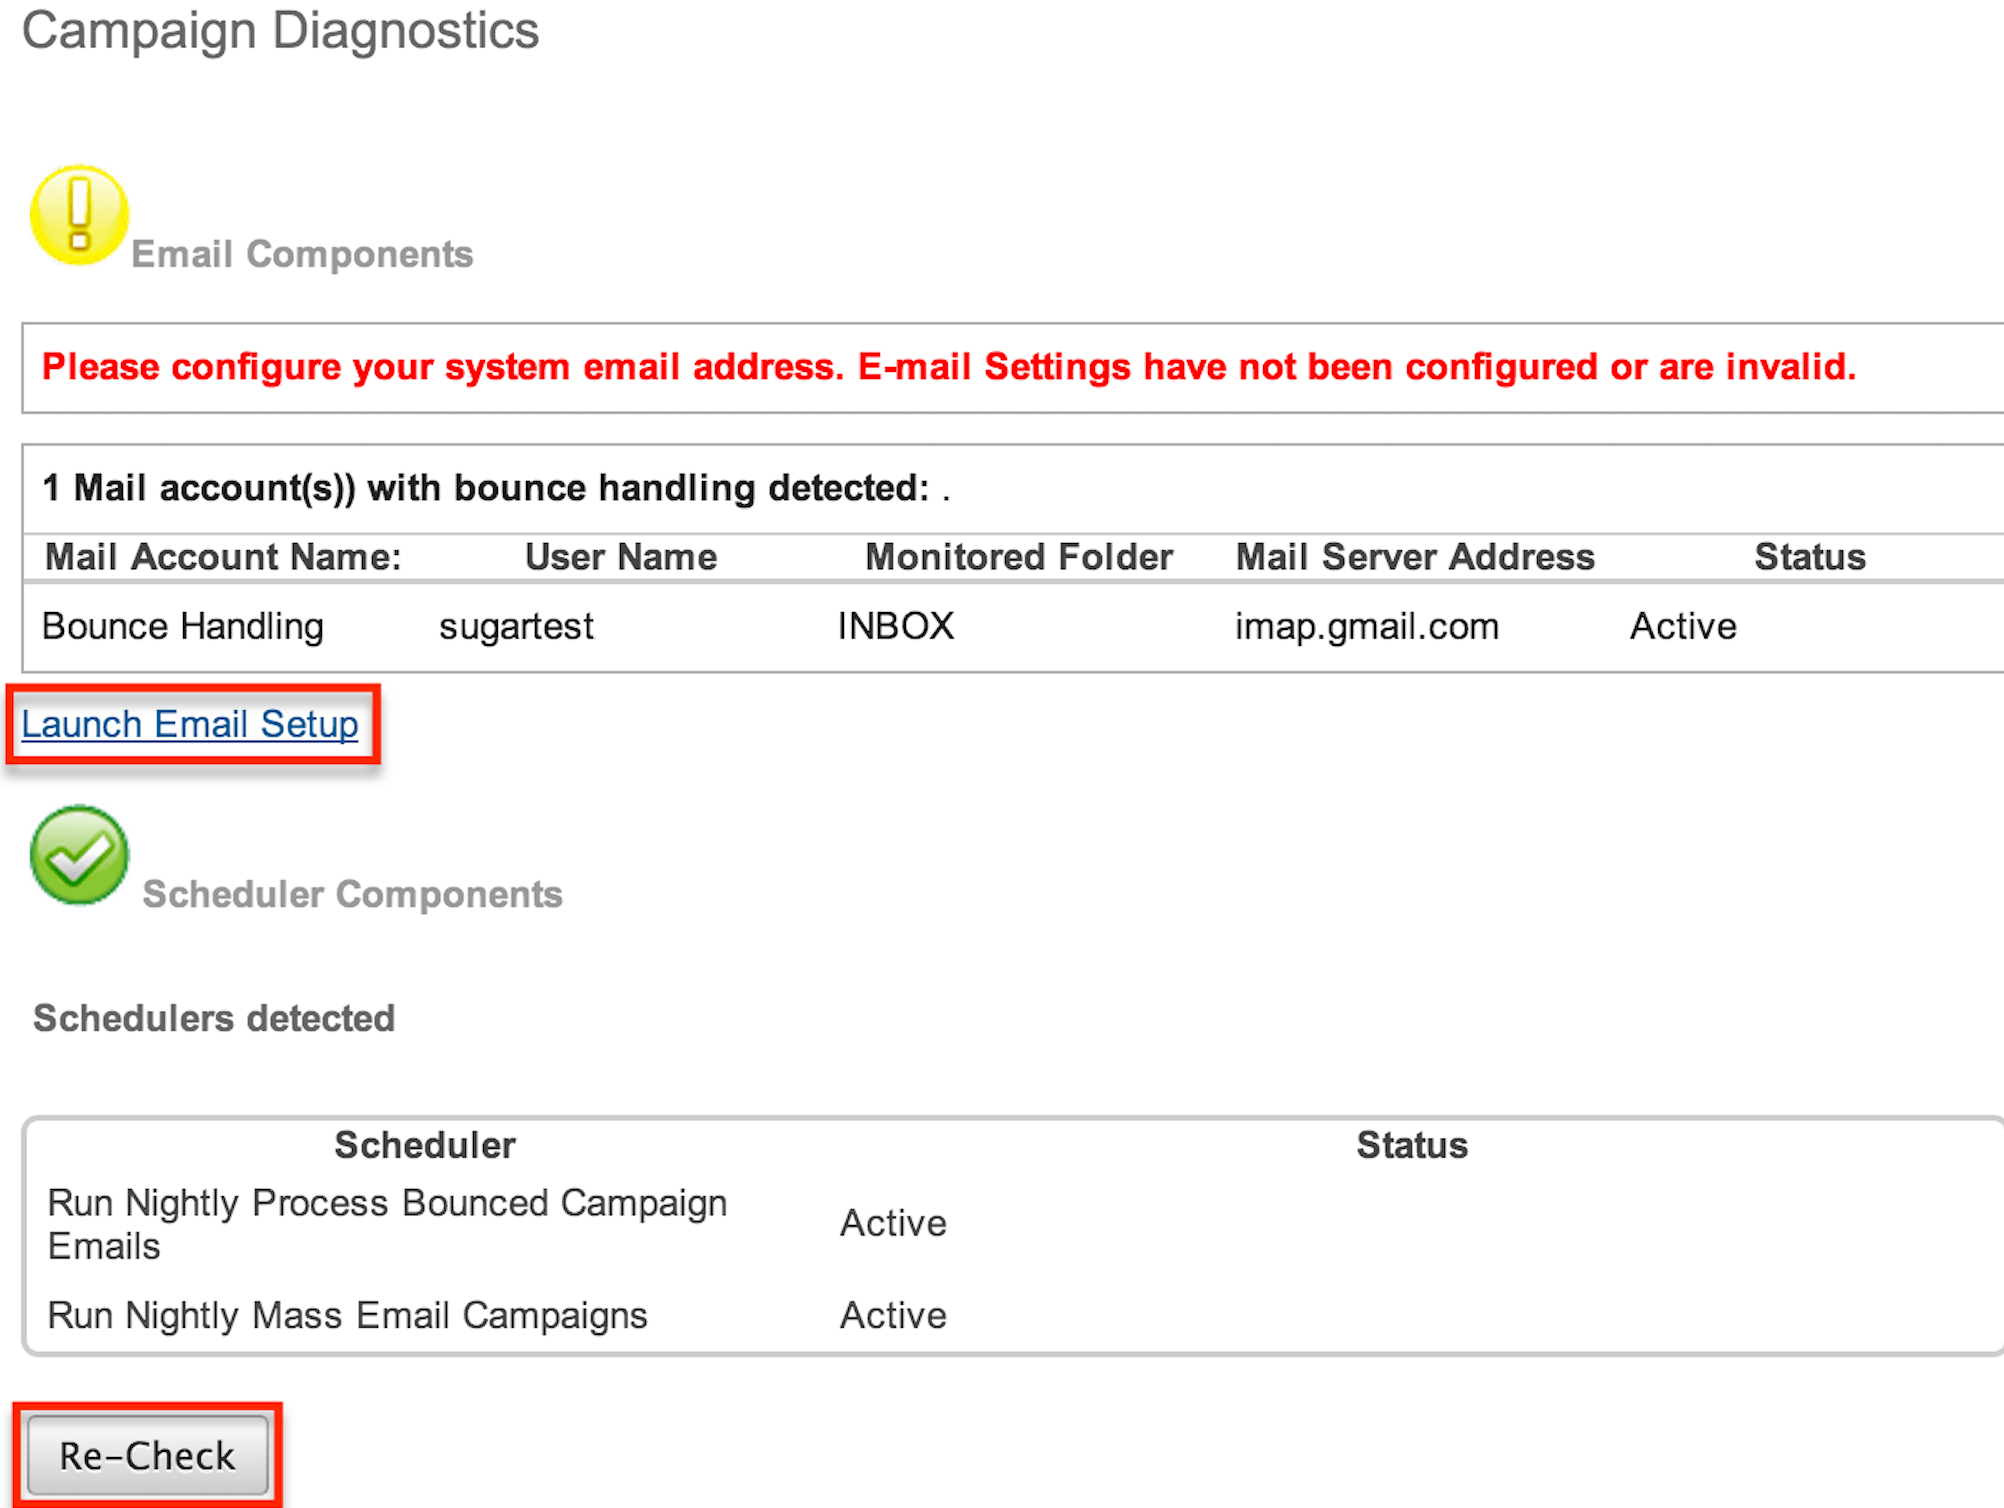
- Sugar will check your instance's email and scheduler configuration and display warnings if any additional configuration is necessary. Administrator users will also see links (e.g., Launch Email Setup) to appropriate sections of the Administration page to correct the issues.
- Note: If you are not an administrator user, please reach out to your system administrator to have the issues looked into and resolved accordingly. For more information on the required elements for campaigns, please refer to the Prerequisites section above.
- Note: If you are not an administrator user, please reach out to your system administrator to have the issues looked into and resolved accordingly. For more information on the required elements for campaigns, please refer to the Prerequisites section above.
- Once all necessary configurations have been completed, click the Re-Check button to re-run the campaign diagnostic tool.
Campaign Types
Sugar supports many different types of campaigns. The main types and their differences are as follows:
- Newsletter: A series of mass emails sent to a consistent or growing target list periodically or on a regular basis. Each newsletter is intended to be managed on a subscription basis and is normally targeted towards individuals with whom you have an existing relationship. The Frequency field is only available for campaigns with the type set to "Newsletter". Recipients opting out of newsletter-type campaigns are added to that campaign's unsubscription list but will still be able to receive other campaigns' emails.
- Email Campaign: A one-time or series of mass emails sent to a target list. Email campaigns are typically targeted towards a wide audience with the intention of lead generation. Recipients opting out of email-type campaigns have their email address marked as "opt-out" and are prevented from receiving any future campaign emails.
- Non-email based Campaign: A non-email mass marketing effort delivered via mail, web, radio, television, print, or telesales. These campaigns are not executed through Sugar, but you can create a campaign record and manually update send dates and results for record-keeping and to assess return on investment.
- Note: Non-email based campaigns will not display Tracker URLs and Email Marketing subpanels in the detail view.
Creating Campaigns
There are two primary methods for creating a campaign in Sugar: the Create Campaign (Classic) option and the Create Campaign (Wizard) option. When using the classic option, you will create the campaign record then add the target list and create tracker URLs as well as an email marketing record via the related subpanels below the campaign's detail. The classic option is recommended for simplicity and empowering users to make modifications to the campaign later. The campaign wizard option will walk you through getting the campaign created step-by-step. Each step of the campaign set-up process will guide users on the items (Tracker URLs, Target List, Marketing, etc.) that need to be completed.
Creating Via Classic Option
Creating a campaign using the classic method opens the Campaigns edit view where you may enter the basic campaign information. Use the following steps to create a campaign via the classic option:
- Click the Actions menu in the Campaigns module tab and select "Create Campaign (Classic)".
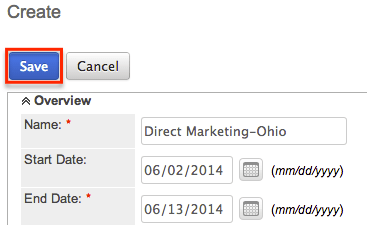
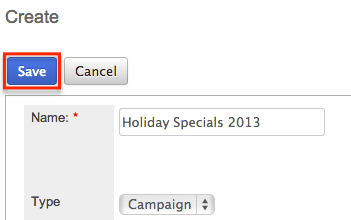
- Enter appropriate values for the fields in the edit view layout which will help identify the campaign. All required fields are marked with a red asterisk and must be completed prior to saving.
- Note: The status, start date, and end date entered on this screen are for your records only and will not control when the actual email campaign will be executed.
- Once the necessary information is entered, click "Save".
Once the campaign record is created, scroll to the related subpanels below the campaign's detail to add the target list and create the tracker URLs as well as an email marketing record.
Creating Via Duplication
You can also create a new campaign by duplicating an existing campaign record. The Copy option is useful if the campaign you are creating has similar information to an existing campaign. When duplicating a campaign, the campaign data, and the related target lists will copy over, but the original campaign's tracker URLs and Email Marketing records will not be related to the new campaign.
Use the following steps to create a campaign by duplicating an existing campaign record:
- Navigate to a campaign record's detail view.
- Click the Actions menu and select "Copy".
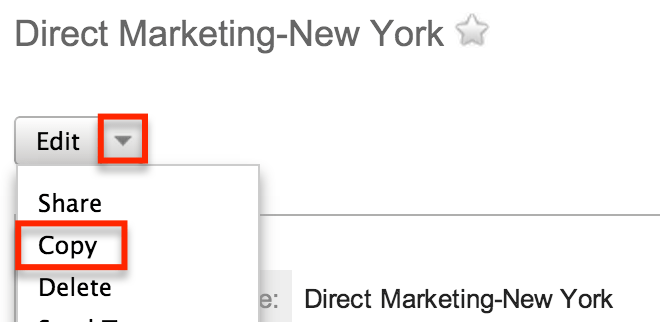
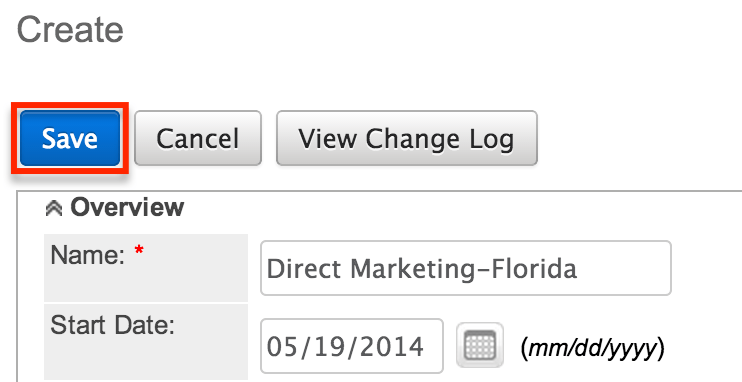
- The displayed edit view is pre-populated with the original campaign's values. Update the necessary fields, then click "Save".
Once the campaign record has been created, scroll to the related subpanels below the campaign's detail to add the target list and create the tracker URLs as well as an email marketing record.
Creating Target Lists
A target list consists of a collection of individuals or organizations you want to include or exclude in a mass marketing campaign. Target lists can contain any number and combination of contacts, leads, targets, users, and accounts. You have the option to associate existing target lists with your new campaign or to create new target lists during the campaign creation process.
The target list type determines some specific functionality within the campaign. The available target list types are "Default", "Seed", "Suppression List", and "Test". Default and Seed-type target lists will receive emails when campaigns are sent. Test-type target lists will receive emails when campaigns are tested.
Sugar will also create some target lists for you by default. For example, when selecting a campaign type of "Newsletter", Sugar automatically generates three target lists for the campaign: default-type "Subscription List", suppression by ID-type "Unsubscription List", and test-type "Test List". Please note that these three target list types are required for the Newsletter campaign. You may add additional target list types to the campaign as necessary. If you wish to remove the system-generated target list types (e.g., suppression by ID-type "Unsubscription List"), please keep in mind that you must replace it with the same target list type (e.g., Suppression List - By Id).
For more information about target lists, please refer to the Target Lists documentation.
Use the following steps to add an existing target list to your campaign via the Target List subpanel on the Campaigns detail view:
- Navigate to the Target List subpanel.
- Choose "Select" from the Actions menu.
- Note: Click the Create button if you wish to create a new target list for the campaign.
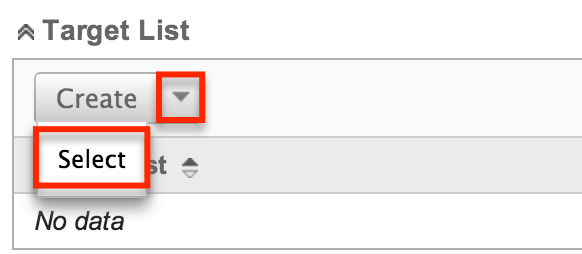
- Note: Click the Create button if you wish to create a new target list for the campaign.
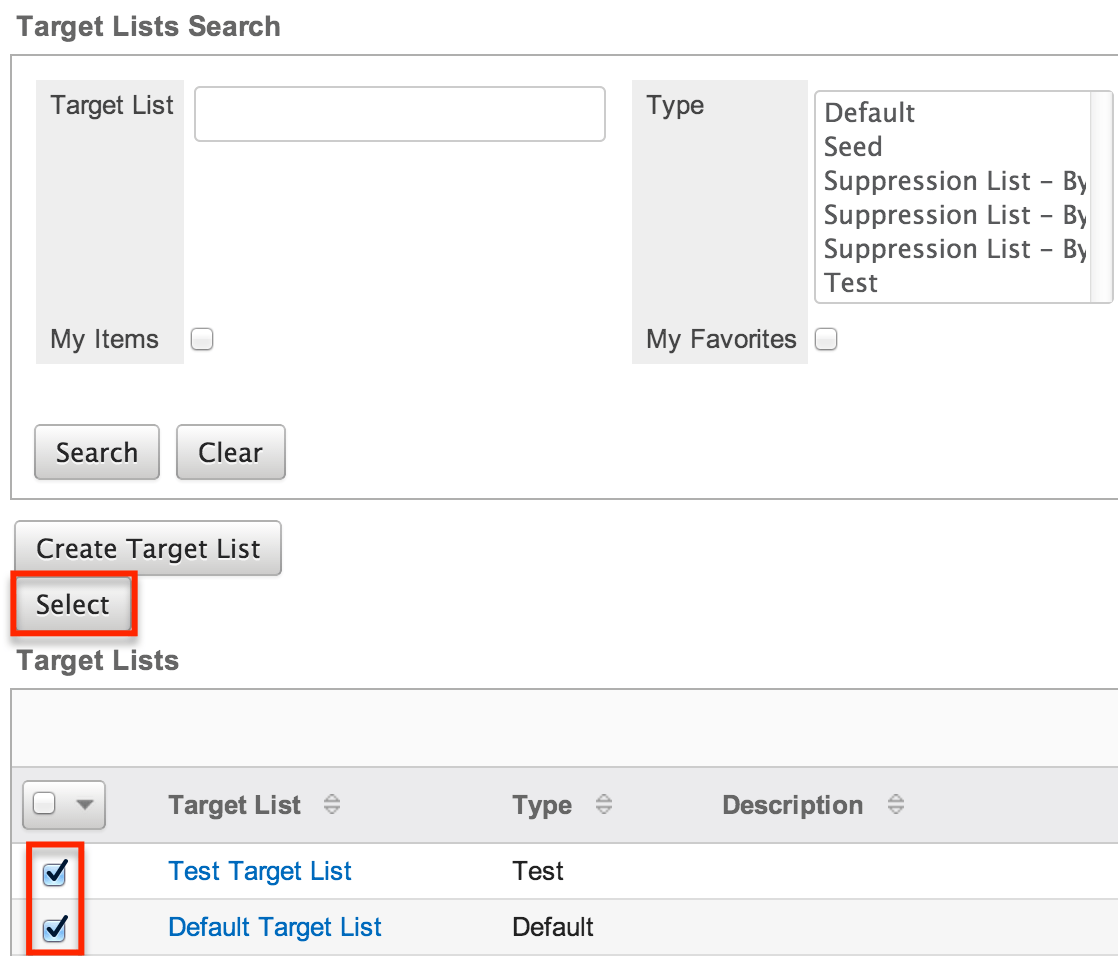
- Locate and select the name of the desired target list in the pop-up window. To add several target lists at once, mark the specific record's corresponding checkbox then click "Select".
Creating Tracker URLs
Tracker URLs are special links for your email template that you can insert in place of standard links to help you understand how your recipients are engaging with the campaign message. If you choose to create your links as tracker links, then Sugar will log your recipients' clicks by assigning each tracker link a unique key and routing the link through Sugar before loading the final URL in their browser. The click-through results are reportable and visible via the Campaign Status page for your email campaign.
Tracker URLs can redirect recipients to public URLs such as a page on your website, to a Sugar web-to-lead form, or to an opt-out page that suppresses the recipient's email address from future mailings from the current list in Sugar. Once you send a campaign that contains tracker URLs, you can see how many recipients clicked each link and who those recipients are via the Campaign Response Subpanel on the View Status page for the campaign.
The following sections explain how to create different types of tracker URLs (i.e., redirect and opt-out) and insert them into your email template.
Creating Redirect Tracker URLs
Tracker URLs pass clicks from the email message through your Sugar instance before arriving at their final destination. This allows the clicks to be tracked by your campaign, which provides visibility into how your recipients are responding to the campaign.
Redirect tracker URLs can appear as text or images in your campaign email and, when clicked, will steer your recipient to the URL of your choice: a page on your website, a targeted advertisement, or even a web-to-lead form where they can provide details that will be saved as a Sugar lead record. For more information on web-to-lead forms, please refer to the Web To Lead Forms documentation.
Use the following steps to create a redirect URL via your campaign's detail view:
- Navigate to the Tracker URLs subpanel.
- Click the Create button to create a new tracker URL.
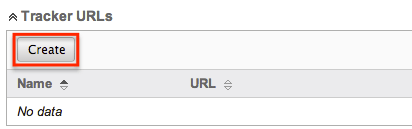
- Enter appropriate values in the fields on the page. All required fields are marked with a red asterisk and must be completed.
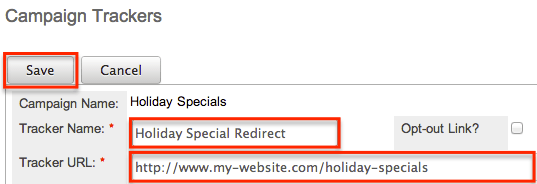
Tracker Name: Enter an internal name for the tracker URL.
Opt-out Link: Leave this box unchecked.
Tracker URL: Enter the destination URL where recipients will be directed after clicking the link in the email. - Click "Save" to create the tracker URL record.
You can now insert this tracker URL into the email template of your choice. For more information on adding redirect URL links to your template, please refer to the Inserting Tracker URLs section of this documentation.
Creating Opt-Out Tracker URLs
You can create an opt-out tracker URL to embed an Unsubscribe link in the campaign email which will allow the targets to opt-out of your campaign mailing list. Please note that you will need to manually add the opt-out link by inserting the tracker URL in the email template. If an opt-out link is not included in the email template, Sugar will add a default opt-out link to the bottom of your campaign email.
Please note that both the newsletter-type and email-type campaigns include opt-out links, but the behavior of each is different. For more information on how the opt-outs work for each campaign type, please refer to the Understanding Campaign Opt Outs article.
When a recipient clicks the opt-out link in the email, a new browser tab will open to confirm that the recipient has elected to opt-out of receiving campaign emails. Please note that administrators can modify the confirmation message that appears by changing the LBL_ELECTED_TO_OPTOUT label via Admin > Studio > Campaigns > Labels. For more information on modifying labels, please refer to the Studio documentation in the Administration Guide. Any recipients who have elected to opt-out of receiving campaign emails will be listed in the Opted Out subpanel of the Campaign Status page.
Use the following steps to create an opt-out link via your campaign's detail view:
- Navigate to the Tracker URLs subpanel.
- Click the Create button to create a new tracker URL.
- Enter appropriate values in the fields on the page. All required fields are marked with a red asterisk and must be completed.
- Tracker Name: Enter an internal name for the tracker URL.
- Opt-out Link: Mark the checkbox so that this link will be used to allow recipients to opt-out.
- Tracker URL: This is defaulted and disabled for opt-out links.
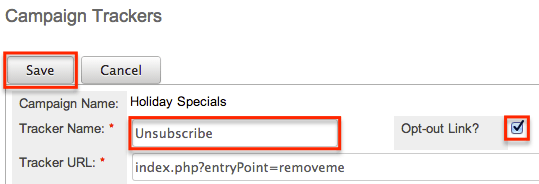
- Click "Save" to create the opt-out tracker URL record.
You can now insert this tracker URL into the email template of your choice. For more information on adding an opt-out link to your template, please refer to the Inserting Tracker URLs section of this documentation.
Creating Email Marketing Records
When you create an email campaign, you must also create an Email Marketing record that specifies the body of the message in the form of an email template, which bounce-handling account will catch automated replies from invalid email addresses, and which target lists will receive this particular mass email of your campaign.
When you are sending more than once from a single campaign, both newsletter-type and email-type campaigns will need a new Email Marketing for each subsequent send. For example, a monthly newsletter campaign will have 12 Email Marketing records created in a year, each one with a different email template with the same target lists. Or, to send an introductory email to all of your newest prospects every 3 months, this email-type campaign will have 4 Email Marketing records created in a year, each one using the same email template but different target lists. Sugar will not allow the same Email Marketing record to be sent to a recipient more than once.
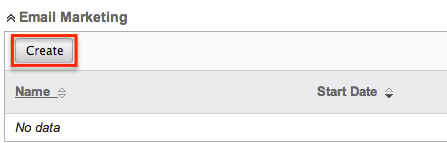
Use the following steps to create an Email Marketing record via your campaign's detail view:
- Click the Create button to create a new email marketing record.
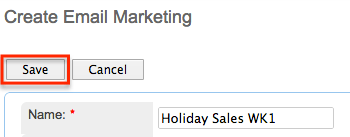
- Complete the fields as follows. All required fields are marked with a red asterisk and must be completed.
- Name: Enter an internal name for the email marketing record.
- Status: Select "Active" from the dropdown. Only active Email Marketing records may be sent.
- Start Date & Time: Enter a date and time when the emails need to begin sending. This start date and time must have passed before the campaign may be queued for delivery.
- Email Template: Select or create an email template. For more information on creating an email template, please refer to the Creating Email Templates section of this documentation.
- Send This Message To: Check this box to send this email to all target lists that are associated with this campaign or select individual target lists via the multiselect box below.
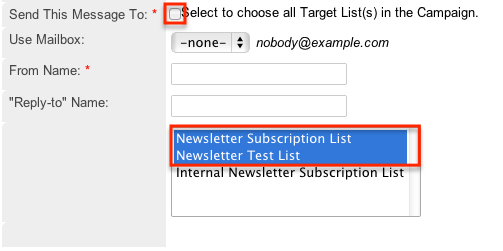
- Use Mailbox: Select the bounce handling account that will catch automated replies from invalid email addresses.
- From Name: This will automatically populate based on the selected bounce handling account. You can enter a different name that will appear as the email's From name.
- From Email Address: This will automatically populate based on the selected bounce handling account. You can override the field to enter a different email address that the campaign will be sent from. Please note that your system outbound email account may need to grant specific 'Send As' permissions if you wish to use a From email address that differs from the address set up in Admin > System Email Settings. If these permissions are not granted, emails may fail to send or the authenticated email account will be imposed in place of the address depending on your mail server settings. Also, if the From address entered is not configured as a bounce handling email address in Sugar, you will not see the results of the bounced emails in your campaign's Status page.
- "Reply-to" Name: This field will automatically populate if a Reply-to name is provided on the bounce handling account. You can override the Reply-to name to a different one so that any replies on the email campaign can be addressed to this name on the email.
- "Reply-to" Address: This field will automatically populate if a Reply-to address is provided on the bounce handling account. Please note that if any recipients reply back to the email campaign, it will be sent to this email address on the bounce handling account by default. You can override the Reply-to address for the campaign to a different one so that any replies can be sent to a specific email address where it can be better monitored.
- Click the Save button to complete the creation of the Email Marketing record.
Creating Email Templates
Email templates contain the design and content of the emails your campaign will send. Placeholder variables can be added to the template for field values like the target name so you can personalize the email to your recipients. Creating an email template through the Campaigns module rather than via the Emails module sets the template's type to "Campaign" and allows you to add redirect and opt-out tracker URLs.
Use the following steps to create an email template from the Email Marketing record:
- While creating or editing your campaign's Email Marketing record, click "Create" to the right of the Email Template dropdown.

- Enter the appropriate values for the fields in the pop-up window. The required field is marked with a red asterisk and must be completed.
- Name: Enter an internal name for the email template.
- Teams: Select the Sugar team(s) assigned to the email template.
- Type: This will automatically populate as "Campaign".
- Description: Enter a description or other information about the template.
- Insert Variable: Insert variables or placeholders into the template. For more information regarding inserting variables, please refer to the Inserting Variables section.
- Insert Tracker URL: Insert a tracker URL or opt-out link into the template. For more information regarding inserting tracker URLs, please refer to the Inserting Tracker URLs section.
- Subject: Enter the subject of the emails that will be sent.
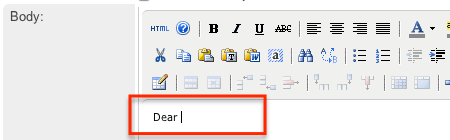
- Body: Enter the body of the emails that will be sent.
- Using the TinyMCE functions, add simple formatting to your email's content. For more advanced customization you can click the HTML button in the top left to access and edit the generated HTML code.
Note: Only inline CSS may be used in email templates. Inline CSS is a method of using CSS within your HTML content instead of storing it in an external CSS file. So, every HTML element must be styled using inline CSS by virtue of the "style=" declaration.
- Click "Save" to preserve your changes to the email template.
Inserting Variables
When constructing the subject and body of your email, Sugar allows you to insert variables, or placeholders, into the template that will be populated with the record's information for that variable.
Use the following steps to insert a variable for the recipient's first name into the template:
- Click to place your cursor on the location in the subject or body where the recipient's first name should appear.
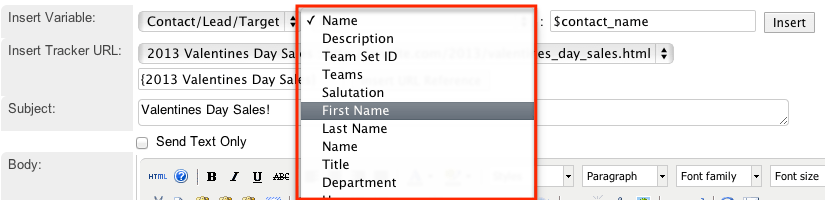
- In the Insert Variable row, the first dropdown defaults to "Contact/Lead/Target" which will allow you to insert fields from the associated person-type recipient's record.
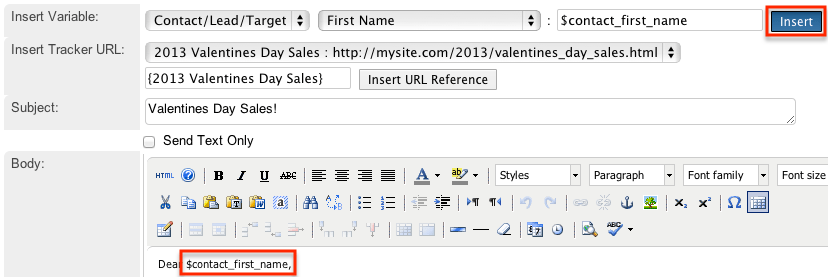
- Set the second dropdown to the desired field (e.g., First Name) from the modules selected in the first dropdown.
- Click the Insert button to insert the generated variable name to your subject or body at your cursor's location.
Inserting Tracker URLs
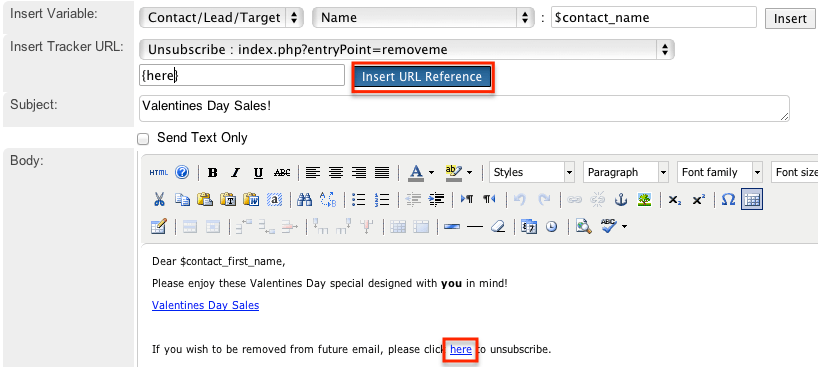
When constructing the body of your email, Sugar also allows you to insert redirect or opt-out tracker URLs.
Use the following steps to insert a tracker URL or opt-out link into the template.
- Click to place your cursor on the location in the body where the link should appear.
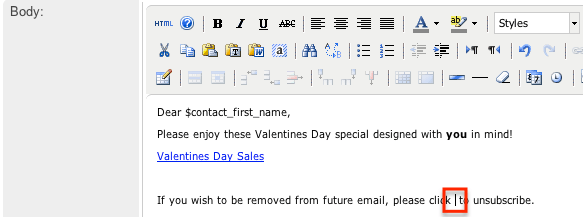
- Select the link you wish to add from the Insert Tracker URL dropdown.
- Note: For more information on creating tracker URLs, please refer to the Creating Tracker URLs section.

- Note: For more information on creating tracker URLs, please refer to the Creating Tracker URLs section.
- Type the text you wish to appear as a link between the curly brackets in the text box to the right of the dropdown.

- Click the Insert URL Reference button to place the link in the body of the email where your cursor is located.
After sending the email campaign, you can see how many people and who exactly clicked on which links in your email message via the campaign's View Status page.
Testing Campaigns
Before you launch an email or newsletter campaign, it is recommended that you perform tests to check how different email clients display the campaign message. A test-type target list must be selected under the Target Lists subpanel as well as in the Email Marketing record in order to test the campaign.
Note that in test mode, the system disables your suppression lists allowing the campaign message to be sent to targets on your suppression-type target lists. The system also disables checks for duplicate email addresses thereby allowing users to send a message multiple times to the same recipients.
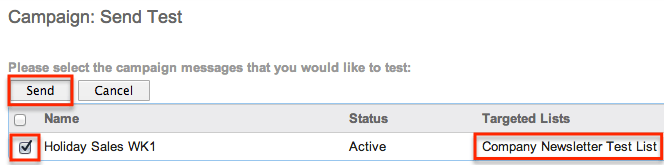
Use the following steps to test an email-based campaign:
- Navigate to a campaign record's detail view.
- Select "Send Test" from the Actions menu.

- Select the Email Marketing record and test target list combination that you would like to test and click "Send".
- Note: If an Email Marketing record does not have a test-type target list associated to it, then the Targeted Lists section will remain empty and no test emails will be sent.
- Note: If an Email Marketing record does not have a test-type target list associated to it, then the Targeted Lists section will remain empty and no test emails will be sent.
You can send the campaign to the test target list multiple times by clicking the Delete Test Entries button on the View Status page. You will need to do this after each test in order to delete the log entries on the campaign status and allow Sugar to send to the test list recipients again. Please note that sending to these recipients again will be prevented until the previous test's entries have been deleted. Also, please be sure that the test entries are all deleted once the campaign is ready to be sent so that the statistics from the test will not be included in the actual campaign's results.
Sending Campaigns
Once the Sugar email settings are configured and your campaign has been tested successfully, you are now ready to send the campaign. Upon sending a campaign, the emails are queued to be sent out at intervals. The administrator can configure how many emails are sent and when to send them. For more information on the relevant configurations, please refer to the Prerequisites section.
Use the following steps to send an email-based campaign:
- Navigate to a campaign record's detail view.
- Select "Send Emails" from the Actions menu.
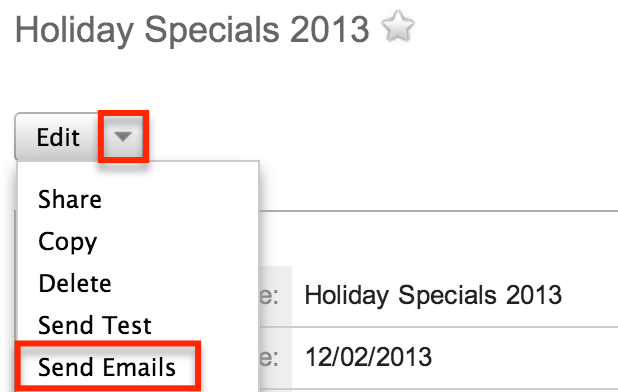
- Select the Email Marketing record and default target list that you would like to receive the email campaign then click "Send".
- Note: If the email marketing record does not have a default-type target list associated with it, then the Targeted Lists section will remain empty and no emails will be sent.
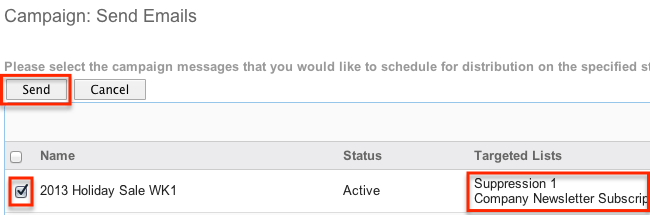
- Note: If the email marketing record does not have a default-type target list associated with it, then the Targeted Lists section will remain empty and no emails will be sent.
The specified start date and time on the email marketing record must have passed before the campaign will be queued for delivery. Once the emails enter the queue in Admin > Email Queue, the relevant scheduler will send the emails in set batches on an interval configured by an administrator. For more information on the email queue, please refer to the Email documentation in the Administration Guide. For more information on the schedulers used by the Campaigns module, please refer to the Prerequisites section.
Note: When a campaign is sent to a target list, deleting that target list or unlinking it from the campaign will not remove the recipients from the email queue, and the emails will be sent when the scheduler runs. Administrators can delete emails via the email queue before they are sent.
Viewing Campaign Status
After you launch a campaign, you can view its results on the Campaign Status page to gauge its impact and progress. The Campaign Status page includes several subpanels, which display information such as the recipients who viewed the message, the recipients who clicked a tracker URL in the email, how many leads and contacts were created from the campaign, etc. This enables you to evaluate the effectiveness of the campaign.
Use the following steps to view the Campaign Status page:
- Navigate to a campaign record's detail view.
- Click the View Status button on the upper right of the page.

Campaign Status Chart
This is a visual representation of the counts of your recipient's activities which are also detailed in the below subpanels. Use the dropdown to view a particular Email Marketing record's data or choose "--None--" to view the cumulative results of all of this campaign's sends.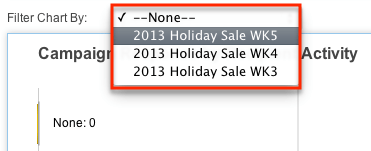
Message Queue Subpanel
The Message Queue subpanel shows the campaign emails waiting to be sent in the email queue. The emails will remain in the queue until the start time of the Email Marketing record has passed and the scheduler picks up and sends them in batches as specified in Admin > Campaign Email Settings. For more information on batch size, please refer to the Prerequisites section. For more information on monitoring this queue, please refer to the Email documentation of the Administration Guide. 
Campaign Response Subpanels
The success of a campaign can be determined by analyzing the response statistics. Knowing how many of your targets saw your email, clicked its links, and became leads or contacts, for example, can provide insight into your campaign strategy. 
The following subpanels measure different aspects of your recipient's responses to the campaign or a specific send of the campaign based on your selection in the Filter Chart By dropdown at the top of the page:
- Message Sent/Attempted: The list of campaign emails that were sent out to targets.
- Viewed Message: The list of targets who viewed the emails that were delivered. Sugar includes a very small, invisible image in each email. Each time the recipient downloads this image, Sugar records that they viewed the email.
- Click-thru Link: The list of targets who clicked on a redirect tracker URL in the email. This does not include opt-outs. For more information on redirect tracker URLs, please refer to the Creating Tracker URLs section.
- Leads Created: The list of leads who have been generated from a web-to-lead form assigned to this campaign record.
- Contacts Created: The list of contacts who have been converted from a lead generated from a web-to-lead form assigned to this campaign record.
- Bounced Messages, Invalid Email: The list of campaign emails that bounced back due to invalid email addresses.
- Bounced Messages, Other: The list of campaign emails that failed to send despite having valid email addresses. After six failed attempts, these messages will be removed from the queue.
- Opted Out: The list of targets who chose to opt-out of receiving campaign emails by clicking the opt-out link.
Note: Opt-out links for newsletter-type and email-type campaigns behave differently. When a target clicks an opt-out for a newsletter-type campaign, they are prevented from receiving future emails from that specific campaign by being added to the campaign's suppression-type list. When clicking an opt-out for an email-type campaign, they are prevented from receiving future emails from any campaign by having their email address marked as "Opted Out" on their Sugar record. For more information, refer to the Understanding Campaign Opt Outs article. - Suppressed by Email Address or domain: The list of email addresses that were not sent the campaign email because the email address was marked as opted out, belonged to a suppression list, or was an invalid address.
Note: If you do not see the campaign response subpanels, the administrator may have disabled the Campaign Log subpanels for your entire Sugar instance. Reach out to your Sugar administrator to have the Campaign Log subpanels displayed. For more information on displaying and hiding subpanels throughout Sugar, please refer to the Developer Tools documentation in the Administration Guide.
Campaign Results Subpanels
The last three subpanels on the Campaign Status page can be used to demonstrate the broader effects of the campaign by showing what new accounts, leads, and opportunities were generated as a result of the effort. 
- Accounts: The list of accounts that are related to this campaign record either through lead generation and then conversion or manually related through the Campaign field on the account's record view.
- Leads: The list of leads that are related to this campaign record either through lead generation or manually related through the Campaign field on the lead's record view.
- Opportunities: The list of opportunities that are related to this campaign record either through lead generation and then conversion or manually related through the Campaign field on the opportunity's record view.
Viewing Campaign ROI
For campaigns (Email and Newsletter) that are executed through Sugar, you can view the campaign's return on investment by clicking the View ROI button in the Campaigns detail view. The return on investment chart displays the actual revenue you earned through the campaign versus the estimated expected revenue. It also reflects the actual cost you incurred by executing the campaign versus the budget that you set for the campaign. The budget, actual cost, and expected revenue amount entered in the campaign overview screen are displayed as bars in the campaign return on investment chart. The actual revenue is calculated from the campaign's related opportunities that have a sales stage of "Closed Won".
Use the following steps to view a campaign's ROI:
- Navigate to a campaign record's detail view.
- Click the View ROI button on the upper right of the page.

Viewing Campaigns
There are various options available for viewing campaign records in Sugar including via Campaigns list view, Campaigns detail view, Campaigns Recently Viewed menu, dashlets, and reports. Please note that you will only be able to see campaign records as allowed by your team membership, user access type, and assigned roles. For more information on teams and roles, please refer to the Team Management and Role Management documentation in the Administration Guide.
Viewing Via List View
The Campaigns list view displays all campaign records meeting the current search criteria. To access the list view, simply click the Campaigns tab. While list view shows key campaign fields, you can click the campaign's name to open the record in detail view. For more information on viewing campaigns via list view, please refer to the Campaigns List View section.
Viewing Via Detail View
The Campaigns detail view displays thorough campaign information including all campaign fields followed by subpanels of the campaign's related records. The detail view can be reached by clicking a contact record's link from anywhere in the application including from the Campaigns list view. For more information on viewing campaigns via detail view, please refer to the Campaigns Detail View section.
Viewing Via Recently Viewed
As you work, Sugar will keep track of which campaigns you have recently viewed. Click the Actions menu in the Campaigns Module Tab to see a list of your most recently viewed campaigns and click each name to open the Campaigns detail view.
Viewing Via Dashlets
Sugar dashlets allow users to get a quick view of various records, reports, etc. Dashlets may be added to a user's Home page or to the intelligence pane for modules (e.g., Accounts) using the Sidecar user interface. You can view campaign information in List View dashlets specific to the Campaigns modules (e.g., My Campaigns dashlet), as well as List View dashlets based on other modules such as "My Contacts". Clicking a campaign's name from any dashlet will open the Campaigns detail view. For more information on using dashlets and viewing campaign records via dashlets, please refer to the Dashboards and Dashlets documentation.
Viewing Via Reports
Users with access to the Reports module have the option to build, generate, and manage various reports in Sugar. You can generate reports to gather key data regarding your campaigns plus information for related records. You also have the option to filter the report based on the campaign and related module(s) to only include records that is of importance. The display columns will only show data for fields (e.g., campaign name, type, related leads, etc.) that you choose specifically when creating the report. Once the report is run, you will be able to view the campaign record's detail view by clicking the campaign's name in the report results. Please note that you can only click into campaign records for Rows and Columns Report and Summation Report with Details Report type. The other two report types (Summation Report, Matrix Report) are summation reports and do not include display columns with hyperlinks (e.g., Campaign Name) to allow for navigating to campaign record detail views. For more information on viewing campaign records via the Reports module, please refer to the Reports documentation.
Searching Campaigns
The Campaigns list view includes a Basic and Advanced Search to help you find your records easily and effectively in a module-specific manner. Once the search is performed, the relevant search results will be displayed in the Campaigns list view below. Global Search allows users to search for information across their entire Sugar database as opposed to restricting search within a specific module. Please note that Sugar automatically appends the wildcard character (%) to the end of your search phrase. This allows the system to retrieve all records that start with the keyword entered in the search. If you would like to broaden the search, you can use the wildcard at the beginning of your text as well (e.g., %offer). This will pull up any record that has the word "offer" in the name, regardless of how it starts or ends.
For more information on using the various search methods as well as how wildcards are used in the different methods, please refer to the Search documentation.
Basic Search
Basic search offers a few, commonly used fields for a simplified search experience. From the Basic Search panel, you can click "Advanced Search" to access additional search functionality as needed.
The buttons and checkboxes available in the Basic Search panel have the following functions:
- Search: Click the Search button or hit Return/Enter key to perform the search.
- Clear: Click the Clear button to clear all criteria from the searchable fields.
- My Items: Select this box to return only records assigned to you.
- My Favorites: Select this box to return only records you have marked as favorites.

When you perform a search, Sugar will return records matching all (as opposed to any) of the fields and checkboxes for which you have given a value. For example, if you select "My Items" and enter a campaign's name, Sugar will only return campaign records with matching names that are assigned to you. Once the search is complete, the relevant results will populate in the list view below the search panel. To see all campaign records to which you have access, simply click "Clear" and then "Search" to perform a blank search with no filters.
Please note that you will only be able to see campaign records as allowed by your team membership, user access type, and assigned roles. For more information on teams and roles, please refer to the Team Management and Role Management documentation in the Administration Guide.
Administrators can configure what fields appear on the Campaigns Basic Search via Admin > Studio. For more information on editing layouts, please refer to the Studio documentation in the Administration Guide.
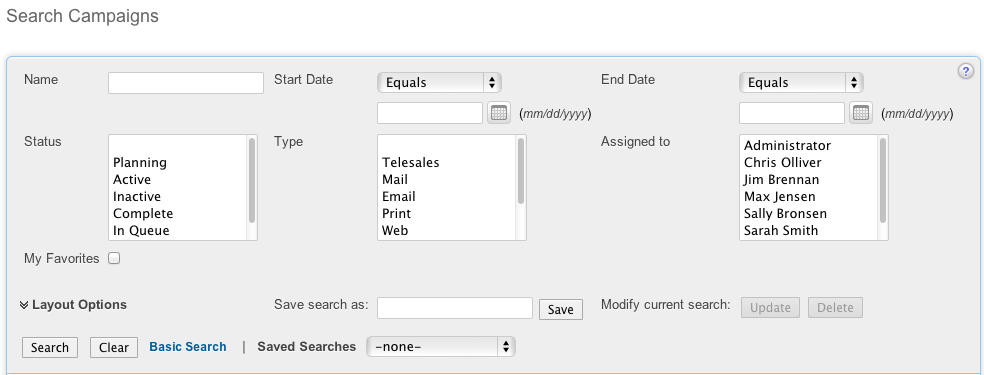
Advanced Search
Advanced search offers a more in-depth search experience than Basic Search including additional fields, layout options, and saved search capability. From the Advanced search panel, you can click "Basic Search" for simplified searching.
The buttons, checkboxes, and dropdowns available in Advanced Search have the following functions:
- Search: Click the Search button or press your Return/Enter key to perform the search.
- Clear: Click the Clear button to clear all criteria from the searchable fields.
- My Favorites: Select this box to return only records you have marked as favorites.
- Layout Options: Use the expandable Layout Options section to configure your list view. For more information, please refer to the Layout Options section of the Search documentation.
- Saved Searches: Save, recall, update, and delete searches that you use often. For more information, please refer to the Saved Search section of the Search documentation.
When you run a search, Sugar will return records matching all (as opposed to any) of the fields for which you have given a value. For example, if you select "My Favorites" and enter a campaign's name to search, Sugar will only return campaign records with a matching name that you have marked as favorites. When searching by a multiselect or dropdown field (e.g., "Assigned to"), however, Sugar will return records matching any of these selections. Once the search completes, the relevant results will populate in the list view below the search panel. To see all campaign records to which you have access, simply click "Clear" and then "Search" to perform a blank search with no filters.
Please note that you will only be able to see campaign records as allowed by your team membership, user access type, and assigned roles. For more information on teams and roles, please refer to the Team Management and Role Management documentation in the Administration Guide. Administrators can configure what fields appear on the Campaigns Advanced Search via Admin > Studio. For more information on editing layouts, please refer to the Studio documentation in the Administration Guide.
Global Search
Global Search allows users to search for information across their entire Sugar database as opposed to restricting search within a specific module. Full-Text Search may be used with Global Search to search throughout nearly all fields and modules for an enhanced search experience. The Global Search bar is located on the top right-hand side of Sugar. You can click the magnifying glass icon or hit Return/Enter to perform your search once the text string is entered in the search box.
To use global search, you need to first enter the keyword into the search box and the pop-up results will begin appearing once you enter in at least one character. Clicking the magnifying glass icon or hitting your Return/Enter key will cause Sugar to return exact matches for your keyword rather than matches with words beginning with your keyword.
For more information on using and configuring Global Search, please refer to the Global Search section of the Search documentation.
Regular Sugar users can configure some aspects of global search such as what modules are displayed in the search results by clicking the down arrow within the Search box then selecting the module(s) to include in the search. For more information on configuring your Global Search, please refer to the Search documentation.
Administrators can control additional elements of global search via Admin > Search and Admin > Studio. For more information on administrator configuration of Global Search, please refer to the Field Options section of the Studio documentation as well as the Search section of the System documentation in the Administration Guide.
Campaigns List View
The Campaigns list view displays all campaign records meeting the current search criteria to which your user has access. You can view the basic details of each campaign within the field columns. Please note that you will only be able to see campaign records as allowed by your team membership, user access type, and assigned roles.
For more information on teams and roles, please refer to the Team Management and Role Management documentation in the Administration Guide. You have the option to change what fields are displayed in list view by configuring your layout options in the Campaigns Advanced Search.
For more information on configuring your list view, please refer to the Layout Options section of the Search documentation. Users with administrator or developer access also have the ability to change what fields are visible in the list view via Admin > Studio. For more information on editing list view layouts, please refer to the Studio documentation in the Administration Guide.
Pagination
List view displays the current search results broken into pages that you can scroll through rather than displaying potentially thousands of rows at once. To the right just below the search panel, you can see which records of the total results set are currently being displayed. The two single-arrow Next and Previous buttons can be used to scroll through the records page-by-page. The two double-arrow First Page and Last Page buttons allow you to skip to the beginning or the end of your current results.
By default, Sugar displays 20 records per list view page, but administrators can change the number of records displayed via Admin > System Settings. For more information on changing the number of displayed records, please refer to the System documentation in the Administration Guide. 
Checkbox Selection
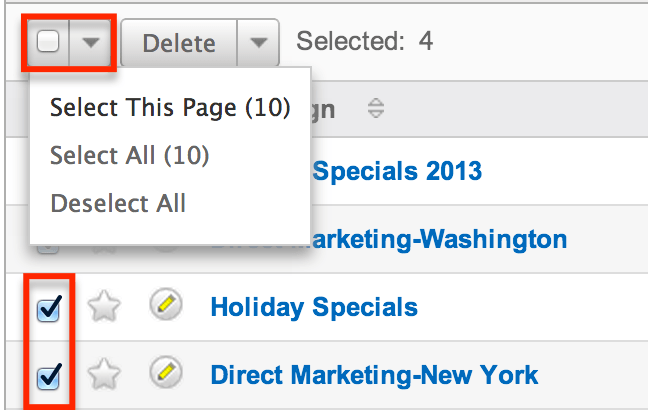
You can perform several actions on campaign records directly from the list view by first selecting the desired records. To select individual campaign records on the Campaigns list view, mark the checkbox on the left of each row. To select or deselect multiple campaign records on the list view, use the options in the checkbox dropdown menu:
- Select This Page: Selects all records shown on the current page of campaign results.
- Select All: Selects all records in the current search results across all pages of campaign results.
- Deselect All: Deselects all records that are currently selected.
Actions Menu
The Actions menu to the right of the checkbox dropdown allows you to perform various actions on the currently selected records.
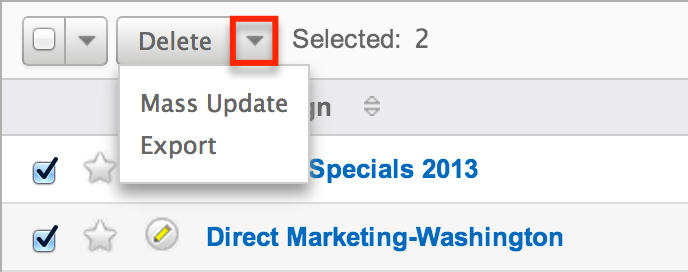
The options in the actions menu allow you to perform the following operations:
| Menu Item | Description |
| Delete |
Delete one or more campaigns at a time. |
| Mass Update |
Mass update one or more campaigns at a time. |
| Export |
Export one or more campaigns to a CSV file. |
Favorite Designation
Users have the option to mark campaign records as favorites via the list view as well as the detail view. This allows users to designate records that are important or will be viewed often as they can easily be accessed via search or from the Campaigns module tab. In the Campaigns list view, the star on the left of each campaign's row is yellow once marked to indicate a favorite campaign. For more information on marking records as favorites, please refer to the Favoriting Campaigns section of this documentation. 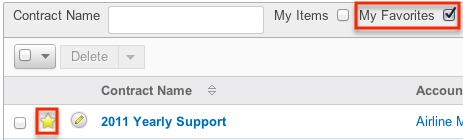
Campaign Status
Each campaign's status page may be accessed directly from the list view by clicking the Chart icon on the right of each list view row. For more information on the campaign status page, please refer to the Campaign Status section of this documentation. 
Campaign Wizard
The Campaign Wizard may be directly accessed from the list view by clicking the Wand icon on the right far right of each list view row. For more information regarding the Campaign Wizard, please refer to the Using the Campaign Wizard section of this documentation. 
More Information
Additional details for each campaign can be viewed by clicking the "i" to the far right of each list view row. This provides users a quick view of additional campaign information in addition to what appears in the display column fields. The resulting pop-up window will show the Start Date, Description, and Objective fields by default. The list of fields appearing here may only be configured through a code-level customization.
Column Sorting
List view provides the ability to sort all of the current search results by a field column in either ascending or descending order. To sort by a field or switch the sort direction, click the column header noting that the fields which allow sorting will have a pair of arrows. The list view may be sorted by only one column at a time. You can also set a default order-by column using the layout options in Advanced Search. For more information on setting a default column sort, please refer to the Layout Options section of the Search documentation.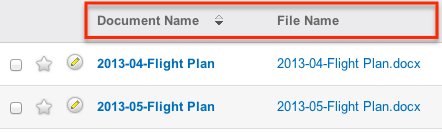
Campaigns Detail View
The Campaigns detail view displays thorough campaign information including all campaign fields which are grouped by default into the Overview and Other panels. You can also view a campaign's related records which appear in subpanels beneath the campaign fields. The detail view can be reached by clicking a campaign record's link from anywhere in the application including from the Campaigns list view.
Please note that you will only be able to view a campaign record according to your team membership, user type, and role restrictions. For more information on teams and roles, please refer to the Team Management and Role Management documentation in the Administration Guide. Users with administrator or developer access have the ability to change the detail view by configuring the layout via Admin > Studio. For more information on editing layouts, please refer to the Studio documentation in the Administration Guide.
Actions Menu
The actions menu on the top left of each campaign's detail view allows you to perform various actions on the current record. Administrator users can change the action items to be displayed as separate buttons instead of a dropdown menu via Admin > System Settings. For more information on configuring the actions menu, please refer to the System documentation in the Administration Guide.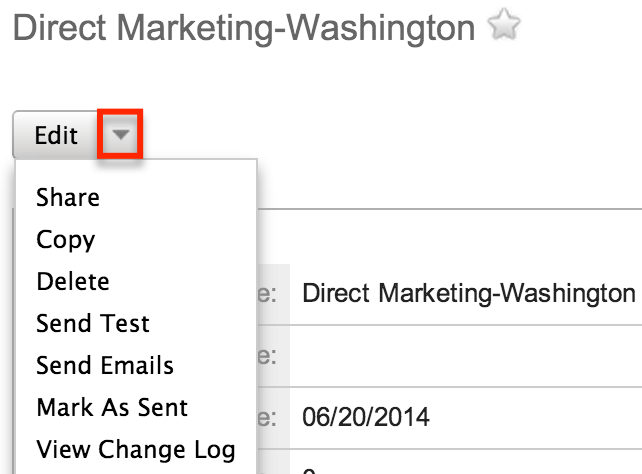
The options in the actions menu allow you to perform the following operations:
| Menu Item | Description |
| Edit | Edit this campaign. |
| Share | Share a link to this campaign via email. |
| Copy | Duplicate this campaign. |
| Delete | Delete this campaign. |
| Send Test | Send test emails for this campaign. |
| Send Emails | Send all emails for this campaign. |
| Mark As Sent | Mark a non-email campaign as being sent. |
| View Change Log | View a record of changes to this campaign. |
Favorite Designation
Users have the option to mark campaign records as a favorite via the detail view as well as the list view. This allows users to group records that are important or will be viewed often as they can easily be accessed via search or from the Campaigns module tab. In the Campaigns detail view, the star on the right of the campaign's name is yellow once marked to indicate a favorite campaign. For more information on marking records as favorites, please refer to the Favoriting Via Detail View section of this documentation.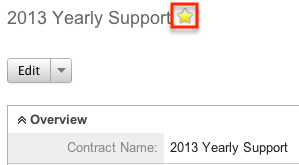
Next or Previous Record
On the upper right of the Campaigns detail view, there are two buttons that allow you to page through each campaign in the Campaigns list view's current search results. Clicking the Previous button displays the previous campaign of the current search results while clicking the Next button displays the next campaign of the current search results. The text in between shows which campaign result you are currently viewing within the total number of current results.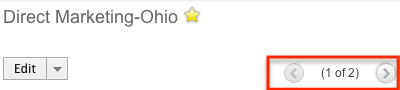
Related Record Subpanels
Every campaign record's detail view will display subpanels that list related records from other modules. Users with administrator or developer access have the ability to change the fields (e.g., Name, Assigned User, etc.) and labels of each subpanel by configuring the layout via Admin > Studio to provide visibility to the most important fields. For more information on modifying subpanels, please refer to the Studio documentation in the Administration Guide.
Related record subpanels allow the following operations to be performed. Please note that administrators in Sugar can change the subpanel's Action menu to be displayed as separate buttons instead of a dropdown via Admin > System Settings. For more information, please refer to the System documentation in the Administration Guide.
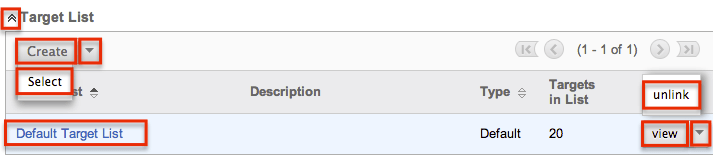
- To view the details of a related record, click the record's name in the subpanel to open it in detail view.
- To relate an existing record to the campaign, choose "Select" from the subpanel's Action menu, then locate and select the desired record.
- To relate a new record to the campaign, click "Create" on the upper left of the subpanel, then complete the Record View layout and click "Save".
- To edit the campaign's related record, click either the record's name or the View button to the far right of the record's row to open the record view and edit as necessary.
- To delete the campaign's relationship to a record, choose "Unlink" from the Actions menu on the far right of the record's row. This removes the relationship but does not delete the record itself.
- To collapse or expand the subpanel, click the double arrow to the left of the subpanel's name.
- To move the subpanel to a new location on the detail view, drag and drop the subpanel's header.
Please note that administrators can prevent users from moving subpanels to different locations in the detail view. For more information on preventing rearranging of subpanels, please refer to the System documentation in the Administration Guide. Check with your system administrator if you are not able to rearrange your subpanels.
Editing Campaigns
Campaigns may be edited at any time to update or add information to the record. You can make changes to existing campaign records via the Campaigns edit view. Edit view is available within the Campaigns module and includes all of the Campaign fields you should need. 
Please note that your ability to edit campaigns in Sugar may be restricted by a role. For more information on roles, please refer to the Role Management documentation. Check with your system administrator if you do not see the Edit options.
Administrators in Sugar may configure the Campaigns edit view via Admin > Studio. For more information on configuring these layouts, please refer to the Studio documentation in the Administration Guide.
Editing Via Detail View
You can edit campaigns via the detail view by clicking the Edit button on the upper left of the page. Once the edit view layout is open, update the necessary field, then click "Save" to preserve your changes.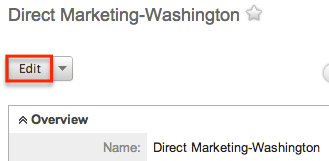
Editing Via List View
You can edit campaigns via the list view by clicking the pencil icon to the left of each campaign's name. The edit view layout will open and you can update the necessary fields then click "Save" to preserve your changes.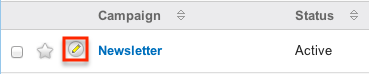
Deleting Campaigns
If a campaign record is invalid or should no longer appear in your organization's Sugar instance, it may be deleted from either the Campaigns detail view or list view. Deleting via the detail view allows you to delete a single record while the list view allows for mass deleting multiple records at once. Deleting campaign records will not delete the related records and will only remove the relationship, so you may wish to also delete any related records to avoid orphaned records.
Please note that your ability to delete campaigns may be restricted by a role.
For more information on roles, please refer to the Role Management documentation in the Administration Guide. Check with your system administrator if you do not see the Delete options.
Deleting Via Detail View
Use the following steps to delete a campaign record via the detail view:
- Navigate to a campaign record's detail view.
- Select "Delete" from the Actions menu.
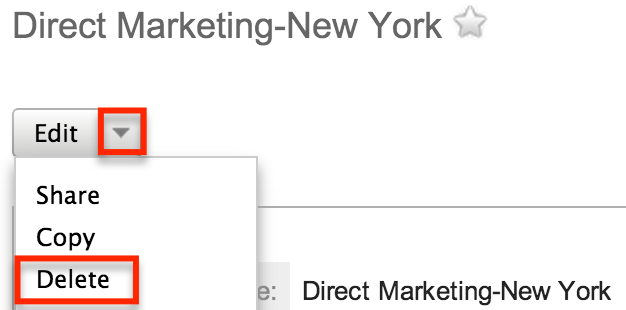
- A pop-up message will display asking for confirmation. Click "Ok" to proceed.
Mass Deleting Via List View
Use the following steps to delete one or more campaign records via the list view:
- Navigate to the Campaigns list view by clicking the Campaigns module tab.
- Use the Basic or Advanced Search to find the campaign records you wish to delete.
- Select the desired campaign records individually or using the checkbox dropdown's options.
- Choose "Delete" from the Actions menu.
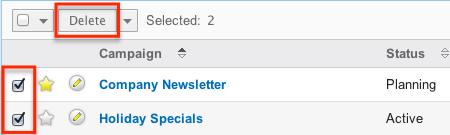
- A pop-up message will display asking for confirmation. Click "Ok" to proceed.
Exporting Campaigns
Sugar's Export option allows users to download all fields for the selected campaigns to their computers as a CSV (comma-separated values) file. This may be useful when needing to use campaign data with other software such as Microsoft Excel. Due to PHP memory limitations on the server, there may be occasions when the application times out while exporting a large number of campaign records. If you encounter an error when performing this action, we recommend selecting the records in smaller batches.
Campaigns may be exported from the Campaigns list view by selecting "Export" from the Actions menu. Users with access to the Reports module also have the option of creating or accessing reports containing specifically chosen fields for campaigns and their related record(s). Please note that only Rows and Columns-type reports have the ability to be exported. For more information on exporting records in Sugar, please refer to the Export documentation.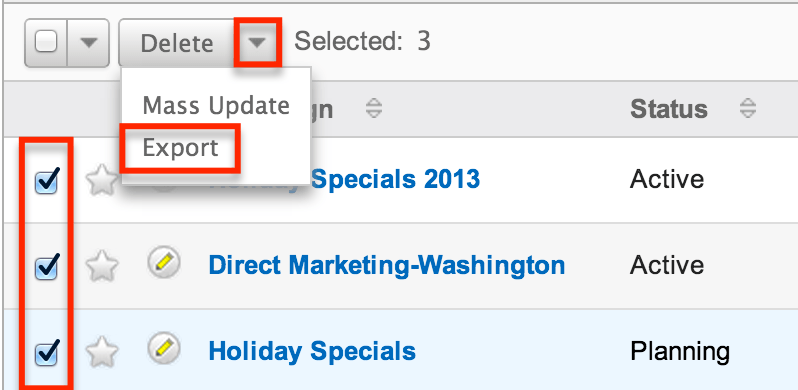
Please note that your ability to export campaigns from Sugar may be restricted by a role. For more information on roles, please refer to the Role Management documentation in the Administration Guide. Check with your system administrator if you do not see the Export option.
Mass Updating Campaigns
Mass Updating allows users to make the same change to multiple campaign records at once from the Campaigns list view. Users with administrator or developer access can control which fields are available to change during mass update via Admin > Studio. Currently, only fields with the data type of date, datetime, dropdown, multiselect, and radio may be altered during a mass update. For more information on configuring mass update, please refer to the Studio documentation in the Administration Guide. Due to the PHP memory limitations on the server, there may be occasions when the application times out while mass updating a large number of campaign records. If you encounter an error when performing this action, we recommend selecting the records in smaller batches.
Please note that your ability to mass update campaigns may be restricted by a role. For more information on roles, please refer to the Role Management documentation in the Administration Guide. Check with your system administrator if you do not see the Mass Update option.
Use the following steps to mass update campaign records from the list view:
- Navigate to the Campaigns list view by clicking the Campaigns module tab.
- Use the list view's Basic or Advanced Search to find campaigns you wish to modify.
- Select the desired campaigns individually or using the checkbox dropdown's options.
- Choose "Mass Update" from the Actions menu.
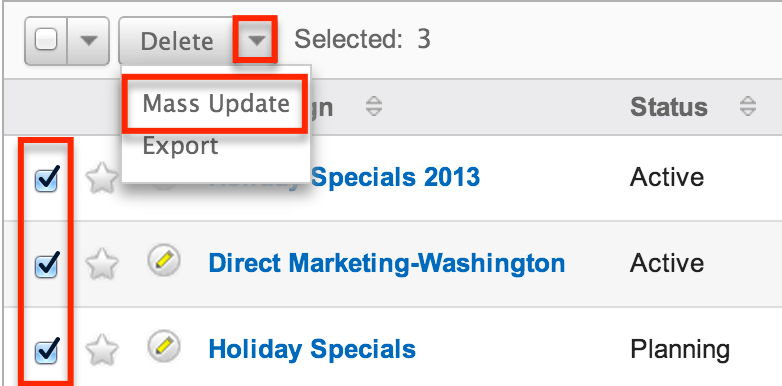
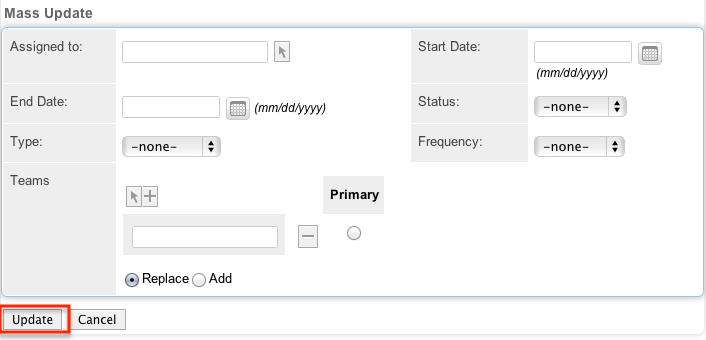
- Scroll to the Mass Update panel and set values for the fields you wish to alter.
- Note: For the Teams field, use "Replace" to remove existing team assignments before adding those specified here. Use "Add" to add the teams specified here to any existing team assignments.
- Note: For the Teams field, use "Replace" to remove existing team assignments before adding those specified here. Use "Add" to add the teams specified here to any existing team assignments.
- Click "Update" to save the changes to all of the currently selected campaign records.
Favoriting Campaigns
Each Sugar user has the option to designate their own favorite campaigns which are important or will be viewed often. Favorite records can then be easily be accessed via search or from the Campaigns module tab. Once records are marked as favorites, use the My Favorites checkbox in the Campaigns Basic or Advanced Search to retrieve your favorites or select from your most recent favorites directly from the Campaigns module tab.
Favoriting Via List View
Use the following steps to mark records as favorites via the Campaigns list view:
- Navigate to the Campaigns list view by clicking the Campaigns module tab.
- Use the Basic or Advanced Search to find the campaign records you wish to mark as favorites.
- Click the star icon on the left of each desired campaign's row.
- To remove the campaign as a favorite, click the star again to revert it to white.

Favoriting Via Detail View
Use the following steps to mark records as favorites via the Campaigns detail view:
- Navigate to a campaign record's detail view.
- Click the star icon to the right of the campaign's name in the upper left of the detail view to designate it as a favorite.
- To remove the campaign as a favorite, click the star again to revert it to white.
Sharing Campaigns
Individual Campaign records can be shared with other users in your organization by sending an email with the record's link directly from the detail view. In the campaign's detail view, select "Share" from the Actions menu which will open a Compose Email window including the URL of the campaign record. Enter the recipient(s) email address in the To field then click "Send".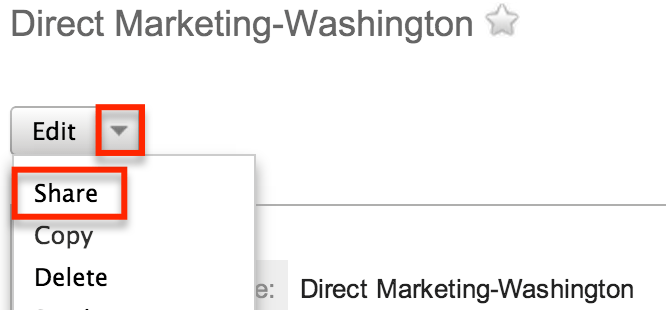
Users can simply click the link in the email to access the campaign record in Sugar. Please note that the user must be logged in to Sugar in order to access the record. Users will only be able to view the shared record as allowed by their team membership, user access type, and assigned roles. For more information on teams and roles, please refer to the Team Management and Role Management documentation in the Administration Guide.
Marking Campaigns As Sent
When launching a non-email campaign such as a telesales or mail campaign, Sugar will need to be told that the campaign has been sent since the sending is performed outside of the application. Once you mark the campaign as "sent," the Campaigns subpanel on the detail view of each member of the campaign's target populates with a row indicating an activity of "Message Sent" to indicate that the campaign material was sent to that individual. The Campaign's status page will then display these recipients in the Message Sent/Attempted subpanel. For more information on the Campaigns status page, please refer to the Viewing Campaign Status section of this documentation.
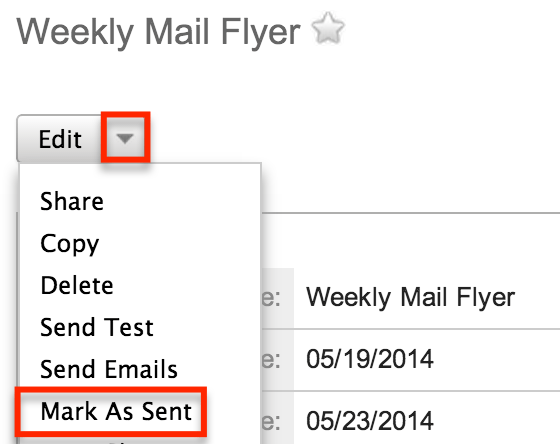
Use the following steps to mark a campaign as sent via the Campaigns detail view:
- Navigate to a campaign record's detail view.
- Select "Mark As Sent" from the Actions menu.
Viewing Campaign Change Logs
Changes made to each campaign record are tracked over time, and users are able to view the history of changes via the change log in each campaign's detail view. To view the change log, navigate to a campaign in detail view and select "View Change Log" from the Actions menu. Please note that only fields marked as "Audit" in Admin > Studio will be displayed in the change log. For more information on designating for audit, please refer to the Studio documentation in the Administration Guide.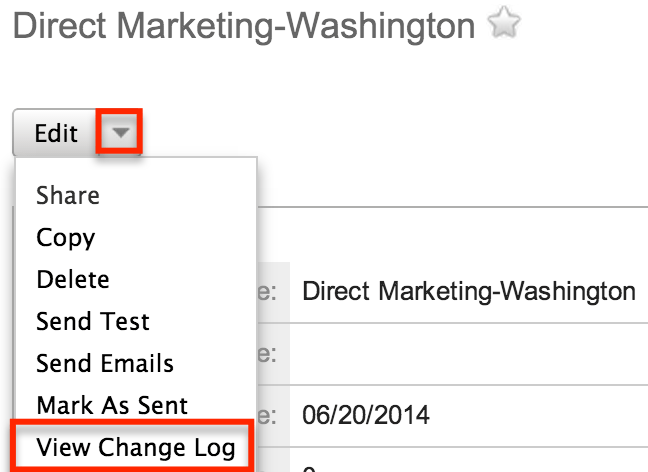
Using the Campaign Wizard
You can use the Campaign Wizard to guide you through the process of creating a campaign, however, it is recommended to create and modify campaigns using the classic interface instead. For instructions on creating and editing campaign records using the classic interface, please refer to the Creating Campaigns and Editing Campaigns sections of this documentation.