Layouts
Overview
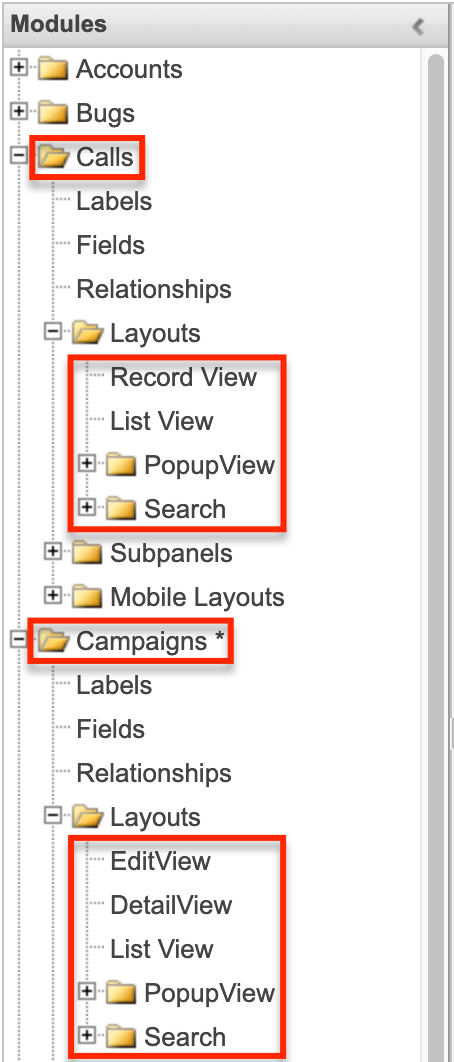
The layouts in Studio are used to represent the various views (e.g., record view, list view, edit view, etc.) in Sugar. Users with administrator or developer access have the ability to configure these layouts via Admin > Studio. Please note that the layouts available to configure will vary based on whether the module uses the Sidecar or Legacy user interface. All modules using the Legacy user interface will display an asterisk (*) to the right of the module's name in Studio. The available layouts for the selected module will appear once you open up the Layouts option.
Layout Types
Sugar comes with different types of layouts to represent different sections of Sugar. Please note that not all layouts are available in every module. Mobile Layouts are not described here since they are managed in a separate location. Please refer to the Mobile Layouts page for more information.
The following layout options are available in Sugar:
- Convert Lead: The Convert Lead layout can be configured to mark modules as required for lead conversion, add or remove modules from the convert lead layout, etc. Please note that the Convert Lead layout is only available for the Leads module. For more information on modifying the Convert Lead layout, please refer to the Editing Convert Lead Layout section below.
- Record View (for Sidecar modules): Record view is used to modify, create, or view the current record's details within a specified module. This layout is specific to modules using the Sidecar user interface and controls the layout for viewing, creating, and editing a record, as well as the quick-create layout and the fields displayed when the record is viewed via the preview pane.
- Record View Dashlet (for Sidecar modules): The Record View dashlet displays the record view of a module within a tab of the dashlet. This layout is used to configure the fields displayed in the tab. Note that this layout can be configured in Studio for all supported Sidecar modules as well as any custom modules.
- Edit View (for Legacy modules): Edit view layout is used to modify or create records in the specified module.
- Detail View (for Legacy modules): Detail view layout is used to view the current data for a record within the specified module.
- List View: List view layout is used to view multiple records within the specified module. The list view is also used for displaying the results from module search (for Sidecar modules), as well as Basic or Advanced search (for Legacy modules).
- Preview View: Preview view is used to display a read-only snapshot of records in the specified module.
- Quick Create (for Legacy modules): Quick Create layout is used in Sugar to quickly view and modify records within a specified module without having to navigate away from the current page. For example, logging a call from the Quotes detail view will open up the call's quick create form.
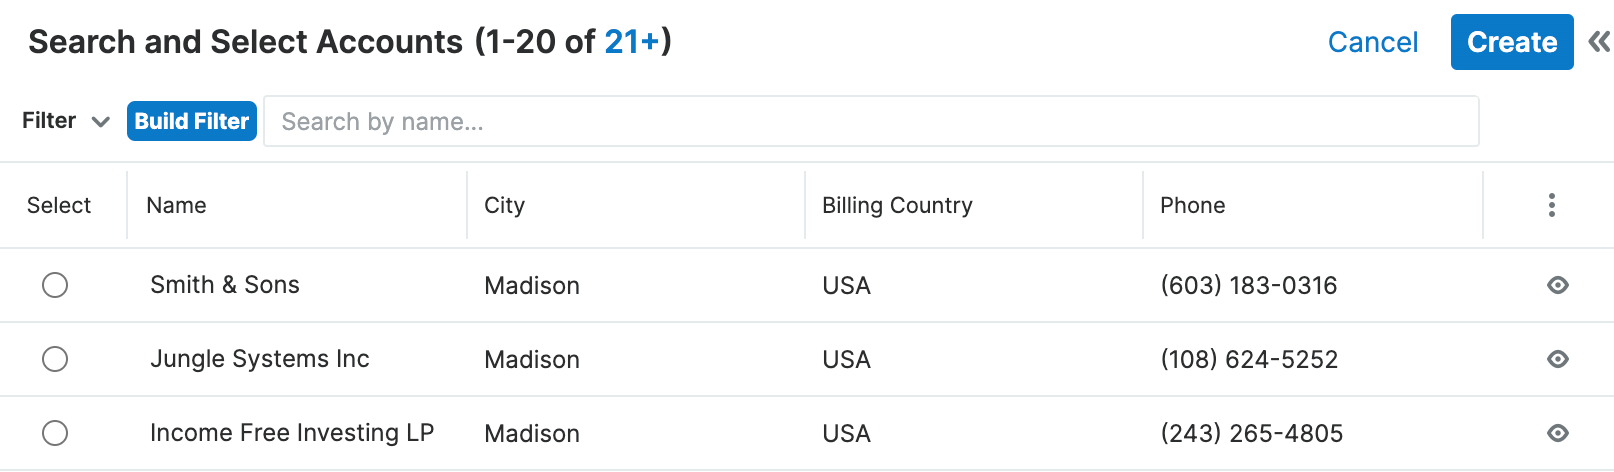
- Popup List View: Pop-up list view layout is used to view a list of records in a pop-up window (i.e., a Search and Select drawer) when selecting one or more records to relate to a current record. For example, if you want to edit the Accounts list view when you click "Search and Select..." in the Account Name field on a contact record, you would edit the Accounts pop-up list view layout.
- Popup Search (for Legacy modules): Pop-up search layout allows users to search for records in the pop-up window to relate to a current record and appears above the pop-up list view in the same window. Legacy modules (e.g., Quotes) use this layout for pop-up searching while Sidecar modules (e.g., Accounts) use the Search layout's configuration.

- Search: Search layout is used to allow users to search for records from a module's list view via module search (for Sidecar modules) or Basic and Advanced search (for Legacy modules). This layout is also used by Sidecar modules on the pop-up search and select. In addition, changes made to the Search layout for Sidecar modules affect the list of available fields to filter for the module's list view dashlet (e.g., My Contacts) since it is controlled by the same layout.
Note: Encrypt fields cannot be added to Search layouts.
Layout Options
Administrators have the ability to configure the various layouts (e.g., record view, list view, etc.) available via Studio. The following are some of the options available to administrators when configuring layouts in Studio. Record views may be configured to display differently based on the viewing user's role.
Panels
Every field on a layout is contained within a panel, which can be organized to contain groups of similar or related fields to assist in organization. Modules using the Legacy user interface will have fields grouped by default into the Overview and Other panels while modules using the Sidecar user interface will have the Business Card and Show More panels. You can change the panel header titles by clicking the Pencil icon to the right of the panel name.
Note: You can have the panel collapsed by default on the Record View, Edit View, or Detail View by marking the Collapse? checkbox to the far right of the panel header.
Record View layout (for Sidecar modules): 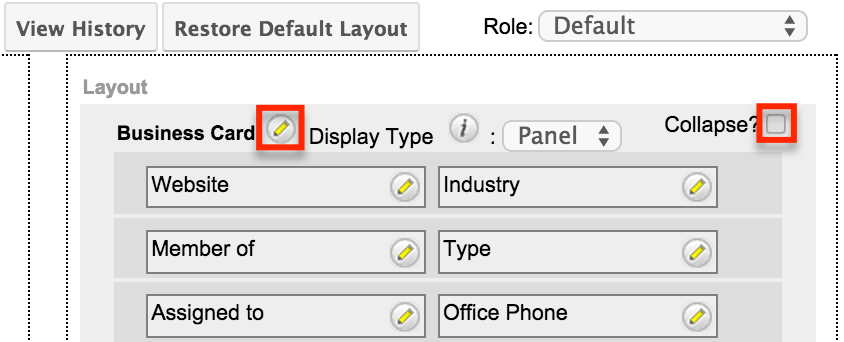
Edit View layout (for Legacy modules): 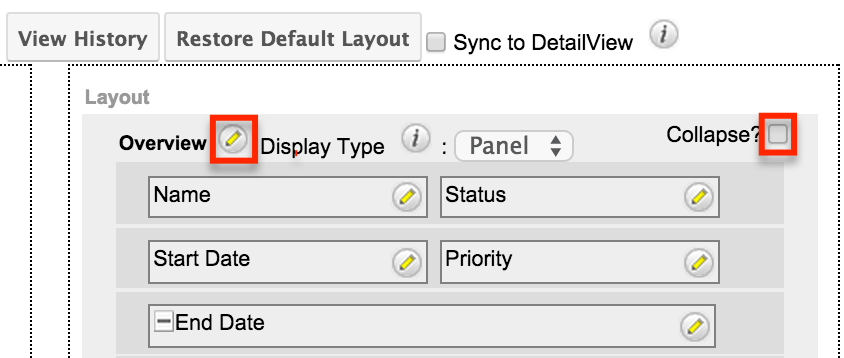
Tabs
Each of the panels (Business Card, Overview, etc.) may optionally be displayed as tabs in the layout. You can also nest panels within other panels defined as tabs. For example, if you set the Business Card panel as a "Tab" and leave "Show More" as a panel in the Record View layout, the Show More panel will appear within the Business Card tab. 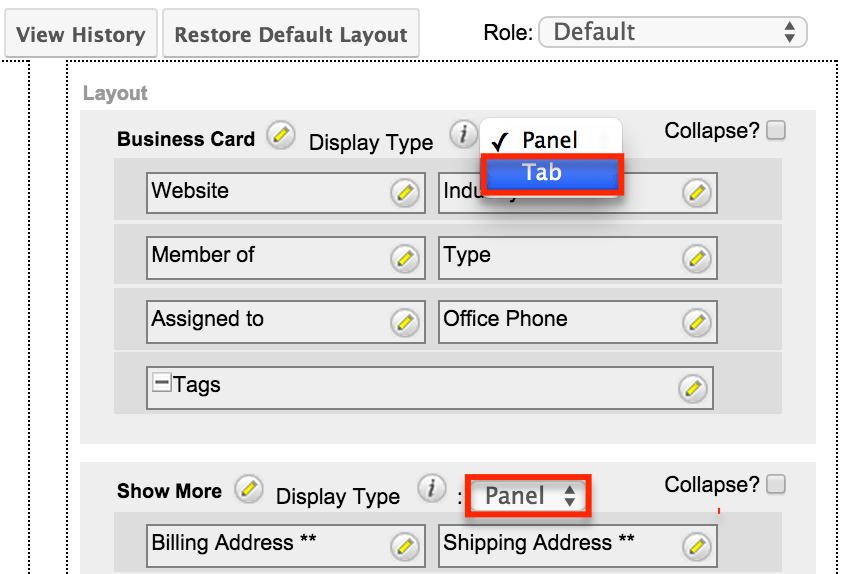
Every panel listed under a Tab display type will be a panel within the tab until the next Tab display type panel is reached. So if you add a new panel below "Show More" and set both the Business Card and Show More panel as "Tabs", then the newly added panel will appear within the Show More tab.
Restoring Layouts
Sugar keeps a history of the changes made to each layout. You can preview and restore historical layouts via "View History". For more information on viewing the history of layouts, please refer to the Viewing Layout History section of this documentation.
It is also possible to restore the layouts back to the default out-of-the-box layout. For more information on how to reset a layout to default, please refer to the Restoring Customized Layout to the System Default Layout section in this documentation.
Note: When using role or dropdown specific record view layouts, please refer to the Restoring Customized Layout to the Base Layout section for more information.
Sync And Copy (Legacy Modules)
Sugar provides administrators with the ability to sync and copy certain layouts to assist in configuring layouts. Often it makes sense for a module's edit view and detail view layouts to be identical. Instead of having to duplicate any changes made to one layout, administrators can configure the detail view layout to be synced to the edit view layout.
To sync the layouts, select the Sync to DetailView checkbox on the upper right of the EditView layout and click "Save & Deploy". 
The current detail view layout will be replaced with the current edit view layout. At this point, changes cannot be made to the DetailView layout in Studio, but any changes made to the EditView layout will automatically be synced to the DetailView layout when saved.
As an alternative to syncing the layouts, administrators can copy the layout from the EditView to the DetailView or QuickCreate layouts. This is especially useful if you want the layouts to be similar, but different. Make any necessary changes to the EditView layout, then navigate to either the DetailView or QuickCreate layout. Select "Copy from EditView" to replace the current layout with details from the EditView layout. Once copied, you can continue to edit the DetailView layout. 
Note: The copy feature is a one-time copy of the layouts. Any future changes to the EditView layout will not be reflected on the DetailView layout without performing the copy again.
Editing Layouts
You can add, remove, hide, and reorder the fields for the available layouts in the module by selecting the specific layout under the Modules panel to edit. Please note that the List View, PopupView, and Search layouts have columns where you can designate fields users can and cannot see.
Record views may be configured to display differently based on the viewing user's role or based on a dropdown field's selected value. For more information see the Creating Role-Based Record View Layouts and Creating Dropdown-Field-Based Record View Layouts sections of this page.
Note: Fields that are restricted to specific license types (e.g., Sugar Sell or Sugar Serve) can only be added to layouts by a user with the appropriate license type. If the field is already on a layout, users without the appropriate license type can remove it from the layout, but cannot re-add it. In addition, if a user does not have license access to a specific field, the field value is replaced with a pill containing the text "License Required". See the User Management documentation for an outline of what each license type includes.
Editing Record View Layout
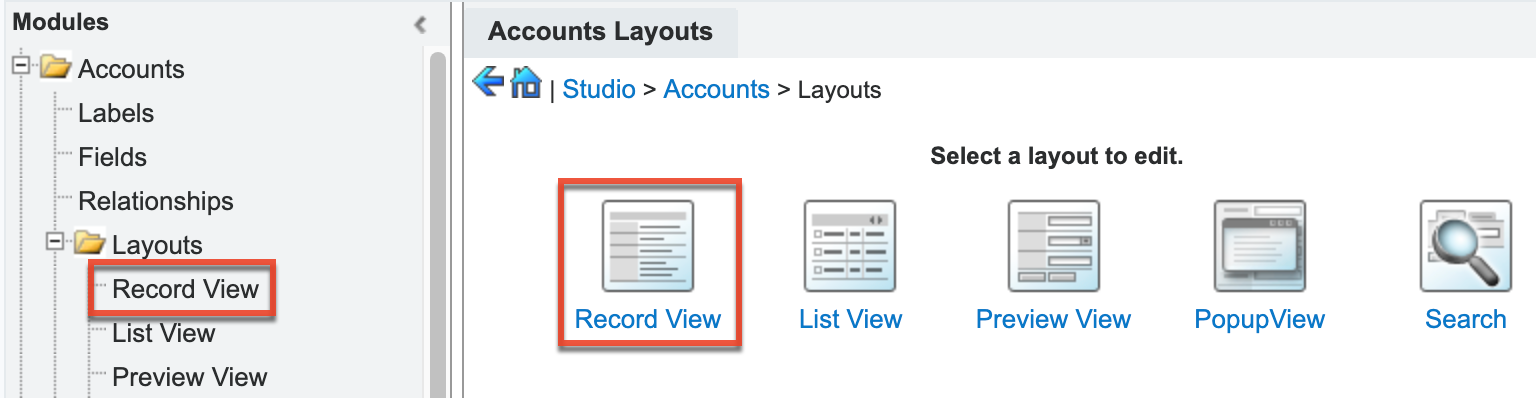
The following steps cover editing the Record View layout for the Accounts module as an example:
- Navigate to Studio > Accounts > Layouts > Record View either by clicking the tiles or by expanding the navigation tree in the lefthand panel.
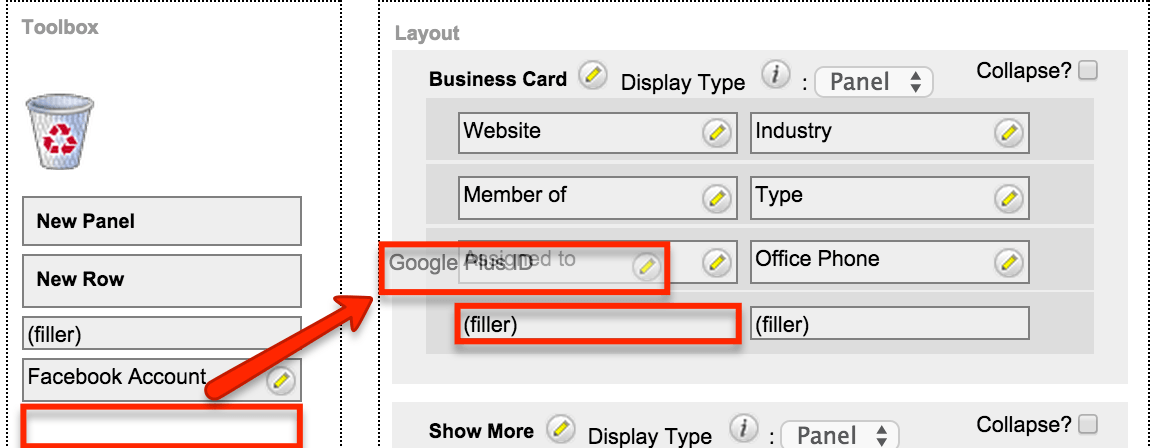
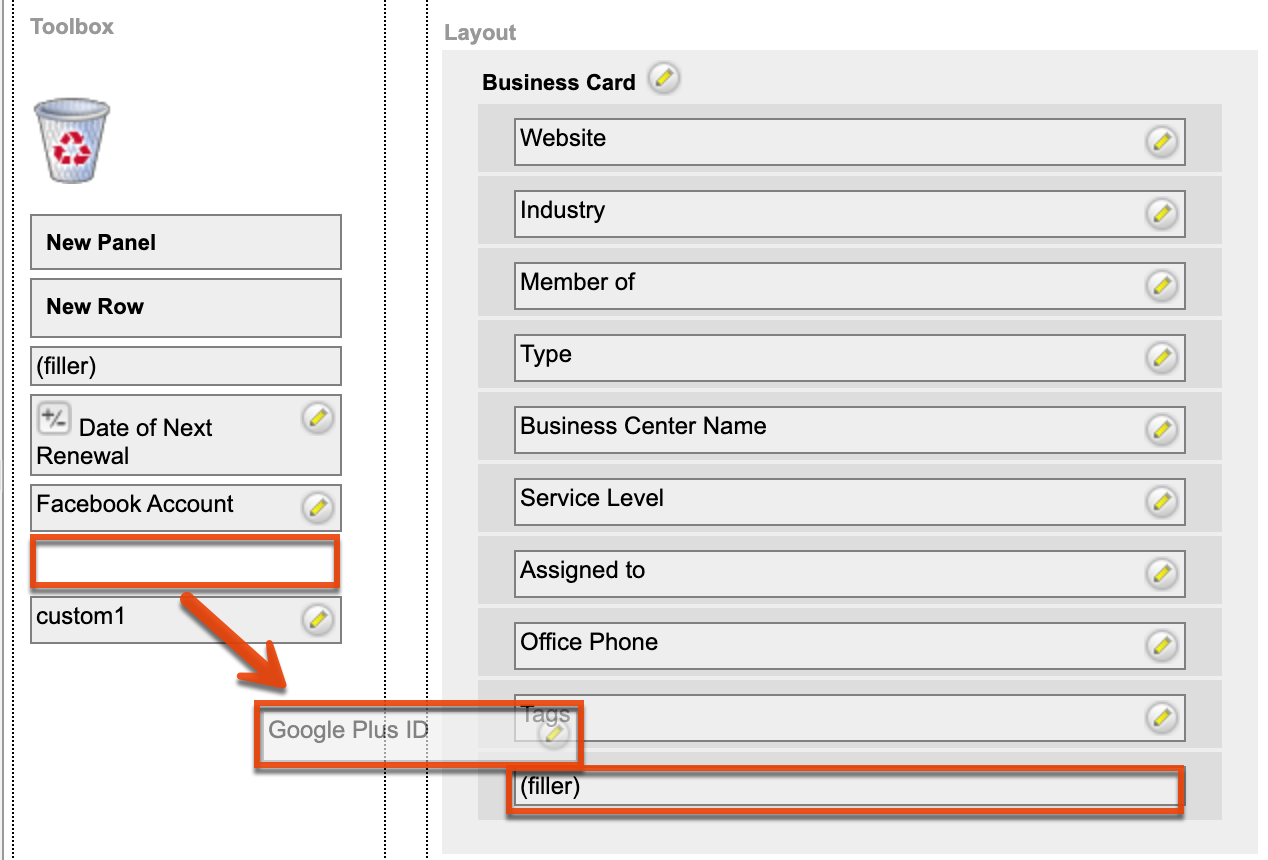
- To add a field to the Record View layout, drag the field from the list of fields in the Toolbox to your desired "(filler)" location on the layout. You can also drag a field to a location on the layout that already has a field in place; the newly added field and the existing field on the layout will swap places.
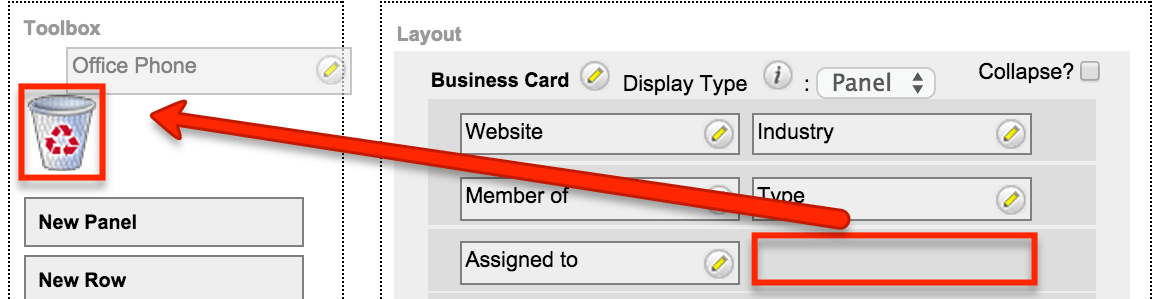
- To remove a field from the layout, drag and drop the field from the layout to the trash bin in the toolbox to remove the field from the layout. You may remove an entire row in the layout using the same method.
- To expand or minimize the field column in the layout, click the Plus icon (+) to stretch the field over two columns or click the Minus icon (-) to fit the field into one column. Some fields with content that can become long (e.g., Comment Log) are better suited to being displayed across two columns.
Note: The layout will display a "(filler)" if there is no field in that location.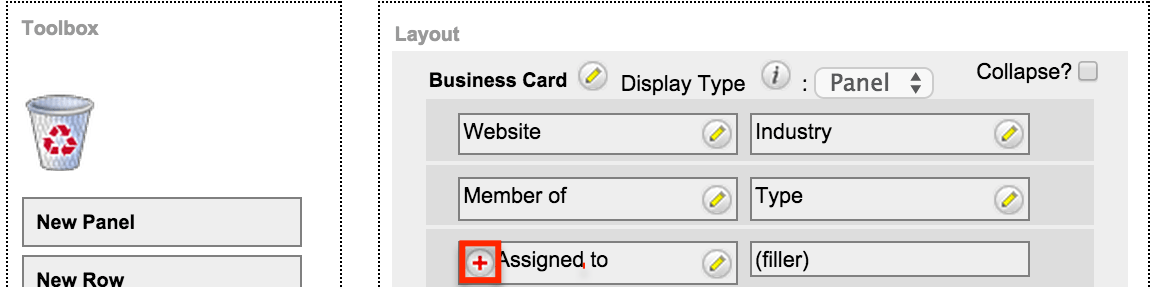
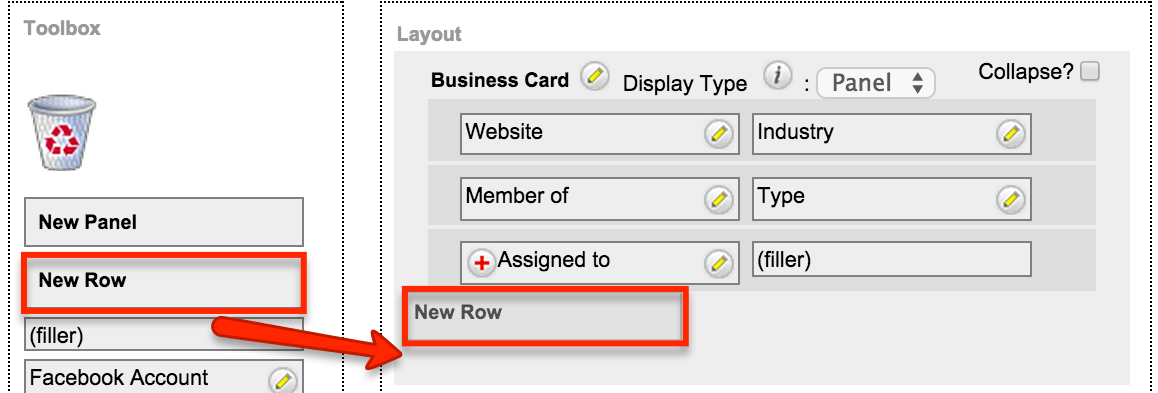
- To add a new row, drag the "New Row" item in the Toolbox to the layout to allow additional fields or blank spaces to be added.
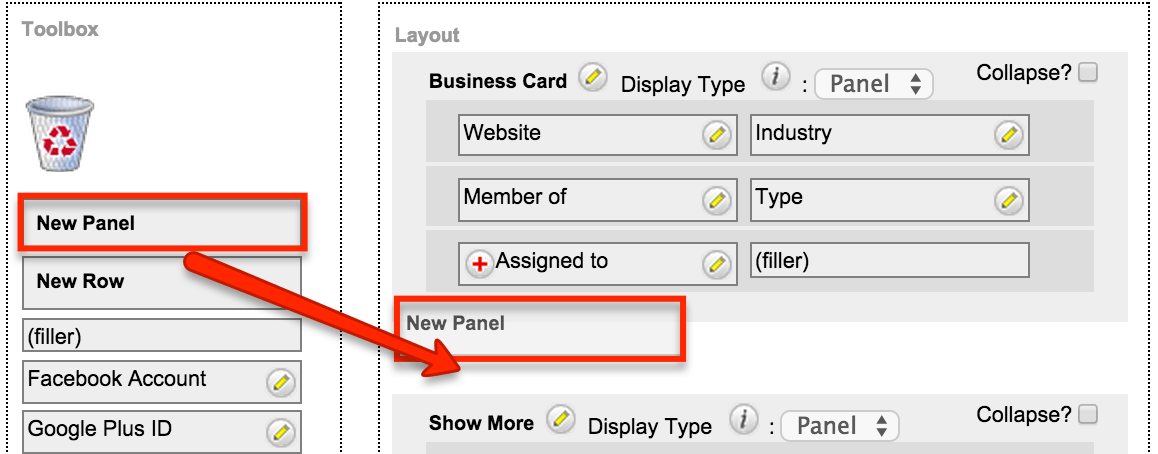
- To add a new panel, drag the "New Panel" item in the Toolbox to the layout to group different sets of fields together in the Record View layout.
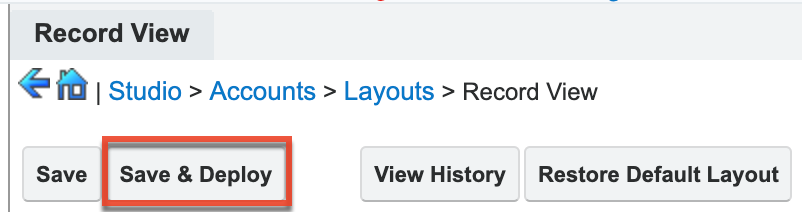
- Once the layout is finalized, click "Save & Deploy" to preserve your changes and deploy immediately. You can click "Save" to preserve the changes made but not deploy them to Sugar's user interface.
Note: It is recommended that dependent fields be placed below and/or to the right of the independent field to preserve the correct display of fields on the layout.
Creating Standard Record View Layouts
The Layout Determined By dropdown is set to Standard Layout by default and is the record view that all users see. The availability and organization of fields may be altered to provide only the relevant fields according to your business practices. You may manipulate the layout as described in the Editing Record View Layout section above. All users will see the customizations made to the Standard Layout upon clicking "Save and Deploy". 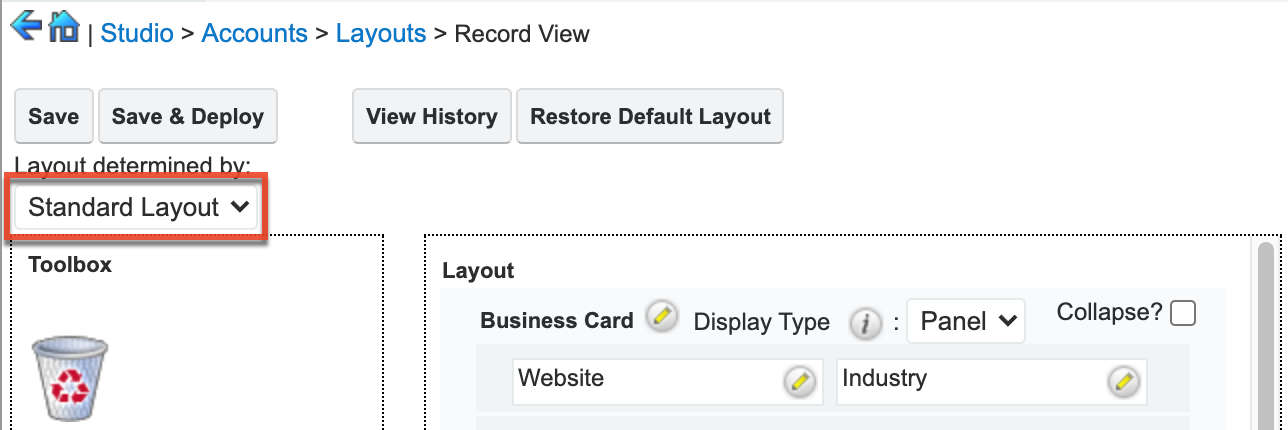
Creating Base Layouts
When creating role or dropdown-based layouts, you can choose to customize the Base Layout. You may manipulate the layout as described in the Editing Record View Layout section above. After clicking "Save & Deploy", changes made to the Base Layout will be applied to all non-customized role or dropdown field layouts.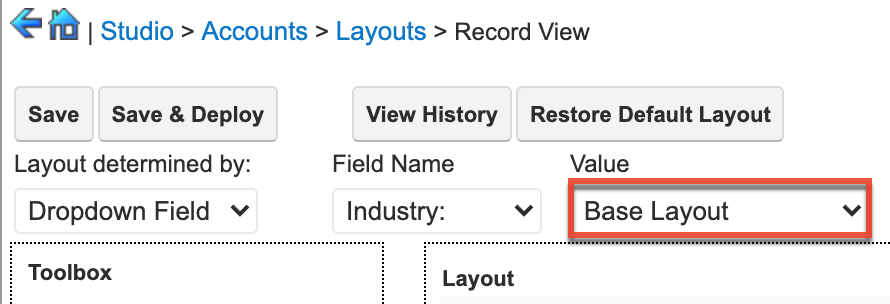
Creating Role-Based Record View Layouts
Record Views can be configured to display customized layouts based on the viewing user's role. The availability and organization of fields may be altered to provide only the relevant fields for each user's role according to your business practices. When configuring layouts for role-based views, the Role dropdown appearing on the top contains all existing roles in the Sugar application as well as a "Base Layout" option. By default, none of the Sugar roles have customized views, so changes made to the Base Layout will automatically be copied to the other role-views upon save. This means that as long as no role-views are customized here, all users will see the record view layout matching the Base Layout.
Note that it is recommended to assign each user to a maximum of one role. Users belonging to multiple roles that each have customized role-views may experience unexpected behavior when using record views. In addition, although assigning roles to administrators has no effect on their access to the system, it can be used for the purpose of role-based views. For example, you may want an admin to see a different view than other users. For more information about roles, please refer to the Role Management documentation.
Role-based customizations to record views are included when exporting customizations from Studio. For more information, please refer to the Exporting Role-Based and Dropdown-Field-Based Customizations section of the Studio documentation and the Module Loader documentation.
Follow the steps below to create a role-based record view for a module (e.g., Accounts).
- Navigate to Admin > Studio > Accounts > Layouts > Record View.
- Select "Role" from the "Layout Determined By" dropdown.
- Select a role from the Role dropdown.
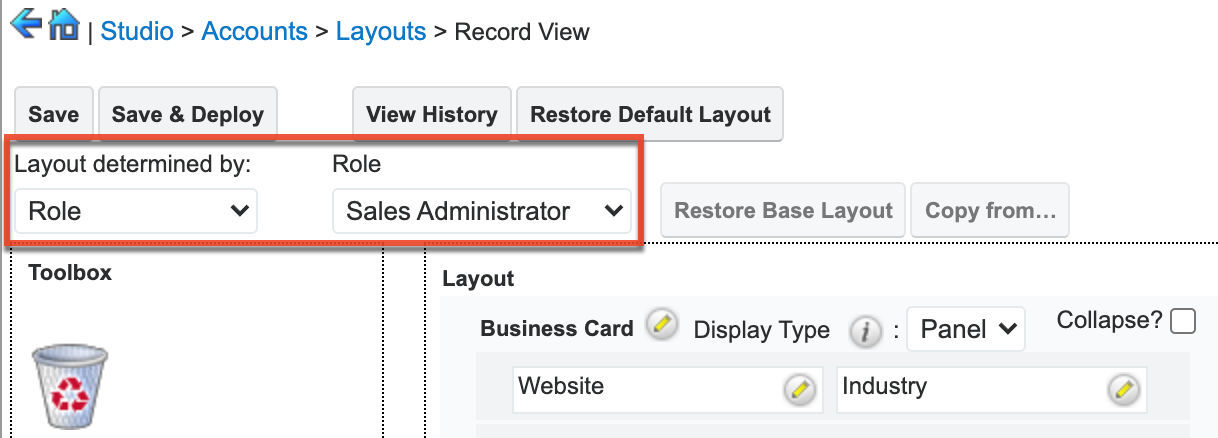
When viewing a Sugar role's role-view (e.g., Sales Administrator), you have the option to add, remove, and rearrange fields and panels. You may manipulate the layout as described in the Editing Record View Layout section of this page. The inclusion and location of fields will be specific to the role-view you are customizing. However, changes made to a field's display label from any of the role-views will update that field's display label on all role-views.
Once you have saved a modification to a role-view, it is considered customized and will display an asterisk (*) next to the role's name in the Role dropdown. Adding, removing, and rearranging fields or panels on the Base Layout will no longer have any effect on customized views.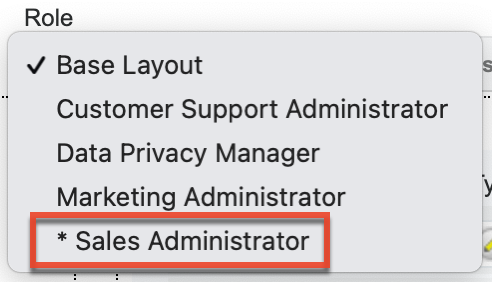
Note: Role-based views are not available for Legacy modules' detail views or any other Sidecar layouts besides the record view. The Sidecar module must be available for editing in Studio for you to be able to create role-based record views.
Creating Dropdown-Field-Based Record View Layouts
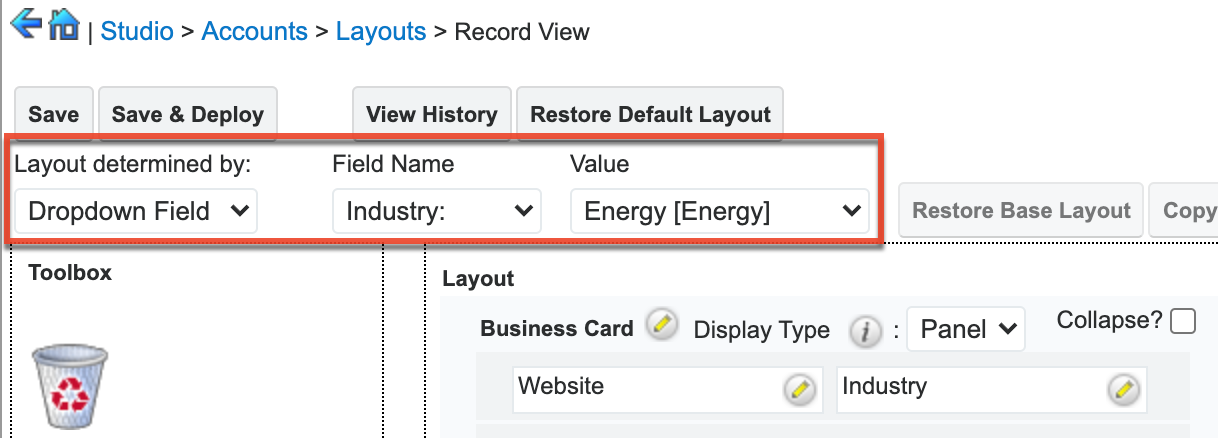
Record views can be configured to display customized layouts based on the value selected in a given dropdown field on the record. The availability and organization of fields may be altered to provide only the relevant fields for the dropdown field's value according to your business practices. For example, you may want to collect different data points about an account that is in the Energy industry than you would for an account in the Education industry; dropdown-based layouts let you swap the fields that are visible when a user sets an account to Industry = "Energy" vs. when they set Industry = "Education".
When editing a particular module's record view, the Field Name dropdown contains all available dropdown fields for the module, and the Value dropdown field contains the values for the corresponding field. By default, none of the dropdown fields' values have customized views, so changes made to the Base Layout will automatically be copied to the other views upon save. This means that, as long as no dropdown views are customized here, all users will continue to see the record view layout matching the Base Layout.
Dropdown-field-based customizations to record views are included when exporting customizations from Studio. For more information, please refer to the Exporting Role and Dropdown Field-Based Customizations documentation and the Module Loader documentation.
Follow the steps below to allow certain dropdown field values to use a modified record view for a module (e.g., Accounts).
- Navigate to Admin > Studio > Accounts > Layouts > Record View.
- Select "Dropdown Field" from the Layout Determined By dropdown.
- Select a field from the Field Name dropdown.
- Select the field's value from the Value dropdown
When viewing a Sugar dropdown field's value (e.g., "Energy" from the Industry dropdown field in the Accounts module), you have the option to add, remove, and rearrange fields and panels. You may manipulate the layout as described in the Editing Record View Layout section above. The inclusion and location of fields will be specific to the view for the dropdown field's value you are customizing. However, changes made to a field's Display Type (e.g., Panel) from any of the views will update that field's Display Type on all views.
Once you have saved a modification to a dropdown-field-based record view, it is considered customized and will display an asterisk (*) next to the field value in the Value dropdown. Adding, removing, and rearranging fields or panels on the Base Layout view will no longer have any effect on customized views.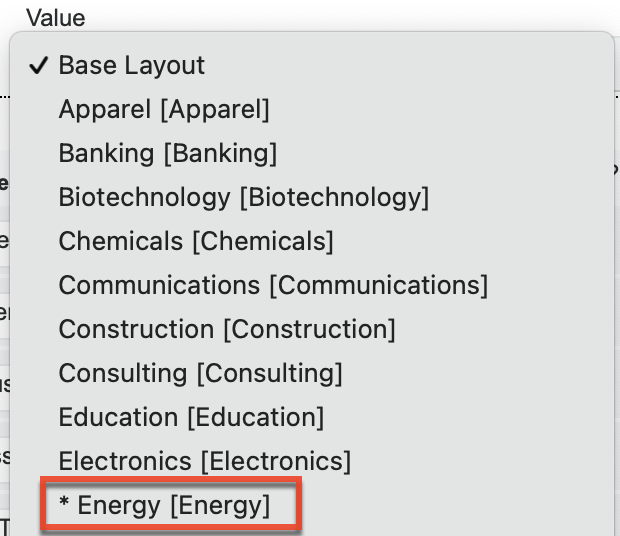
Note: Dropdown-field-based views are not available for Legacy modules' detail views or any other Sidecar layouts besides the record view. The Sidecar module must be available for editing in Studio for you to be able to create dropdown-field-based record views.
Copying From a Customized Record View Layout
Customized layouts may be copied to another role or dropdown field layout, but not to the Base Layout.
- Select the layout to alter in either the Role or Value dropdown field.
- Click "Copy from..." and select the customized layout to duplicate. The "Copy from..." button will only appear when a customized layout is available to be copied.
- Click "Copy" and then "Save" or "Save & Deploy".
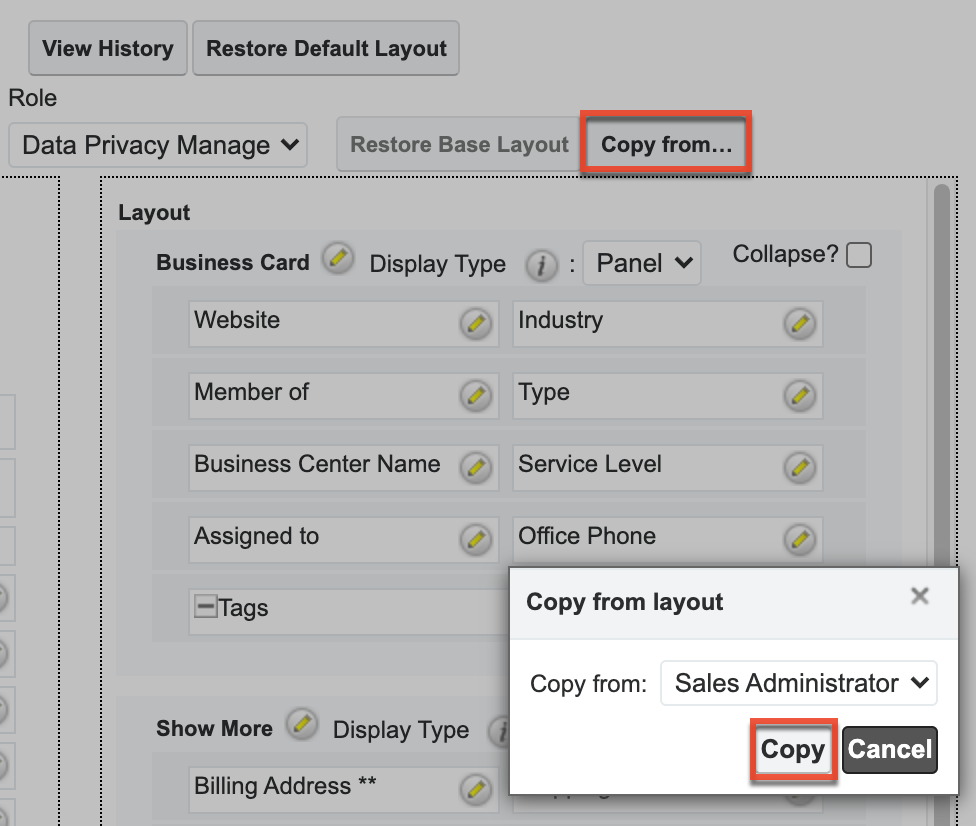
This will update the current layout to match the copied layout, and the current layout will now be considered customized and display an asterisk (*) next to the layout's name in the Role or Value dropdown.
Restoring Customized Layout to the Base Layout
The Restore Base Layout button may be used to bring a customized view back to the base layout.
- Select the customized layout in either the Role or Value dropdown field.
- Click "Restore Base Layout" and then "Save" or "Save & Deploy".

This will re-establish the link between the selected layout and the base layout so that changes to the base layout will once again be automatically applied to the selected layout. This will also remove the asterisk from the selected layout's name in the Role or Value dropdown since it is no longer considered customized.
Restoring Customized Layout to the System Default Layout
The Restore Default Layout button can also be used to bring a customized layout back to Sugar's out-of-the-box record view layout.
- Select "Standard Layout" from the Layout Determined by dropdown or "Base Layout" in either the Role or Value dropdown field.
- Click "Restore Default Layout" and "Save & Deploy".

This will remove any Studio changes to the layout so that it once again matches the system's stock layout. All other, non-customized role or dropdown field layouts will also be updated to match.
Editing List View Layout
The List View layout has columns where you can define the fields that users can and cannot see. The List View layout also controls the list of available fields for the module's list view dashlet (e.g., My Contacts). Once the appropriate configurations are made in Studio, the deployed changes will be reflected in the Columns field of the corresponding module dashlet's Configuration Options page. Keep in mind that the module dashlet will not automatically reflect the Studio changes and users must edit the dashlet to view the changes, add new fields to the layout, etc.
To configure the List View layout, move the displayed fields among the Default, Available, and Hidden columns: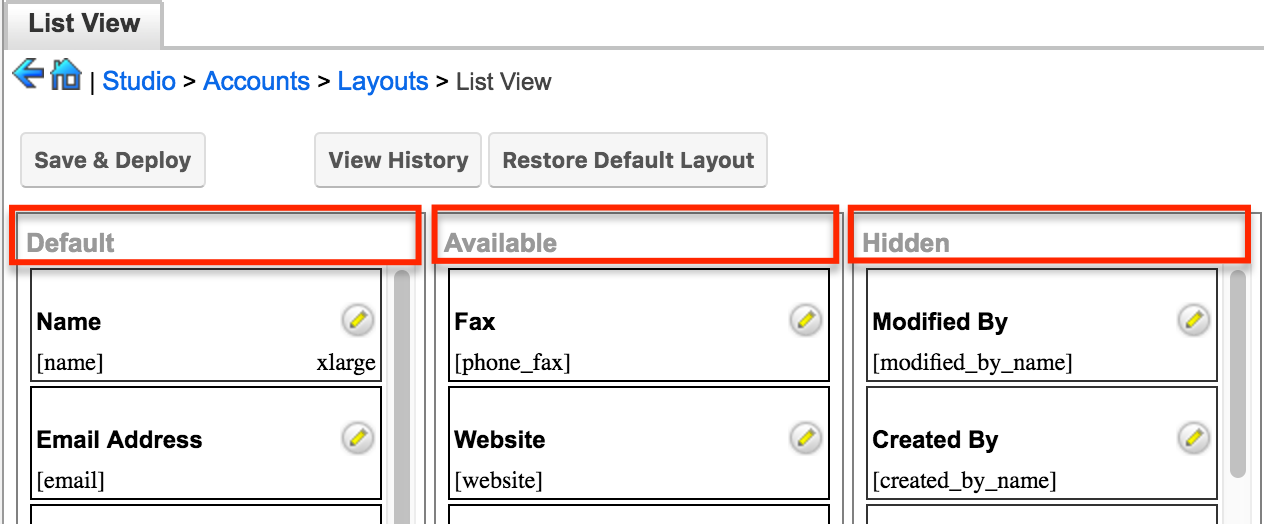
- Default: Drag fields into the Default column to display them on the default List view layout. The top-to-bottom order of fields corresponds with the left-to-right presentation of columns on the list view (or right-to-left for users viewing an RTL language). For example, the topmost field in the default column will be shown in the leftmost column of the list view.
- Available: Drag fields into the Available column to make them available for users to personalize their view of the layout without making them part of the default layout. Users will be able to click the Column Selection icon to see the list of available fields. For more information on working with columns in the list view, please refer to the User Interface documentation.
Note: Not all list-type layouts have an Available fields section. - Hidden: Drag fields into the Hidden column to hide them from users in the list view. Hidden fields will be unavailable in list view regardless of a user's team or role settings, but they may still be available to users in other places such as in reports or the record view.
Note: To enable fields as filters in a Sidecar module's list view and list view dashlet (e.g., the "My Contacts" dashlet), please refer to the Editing Search Layout section.
The following steps cover editing the List View layout as an example:
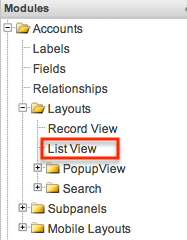
- Expand "Layouts" from the Modules panel under the Accounts module and select "List View".
- To add a field to the List View layout, drag and drop the fields from the Hidden column to the Default column. The fields in the Default column will be available to add as display columns in the corresponding module dashlet (e.g., My Accounts).
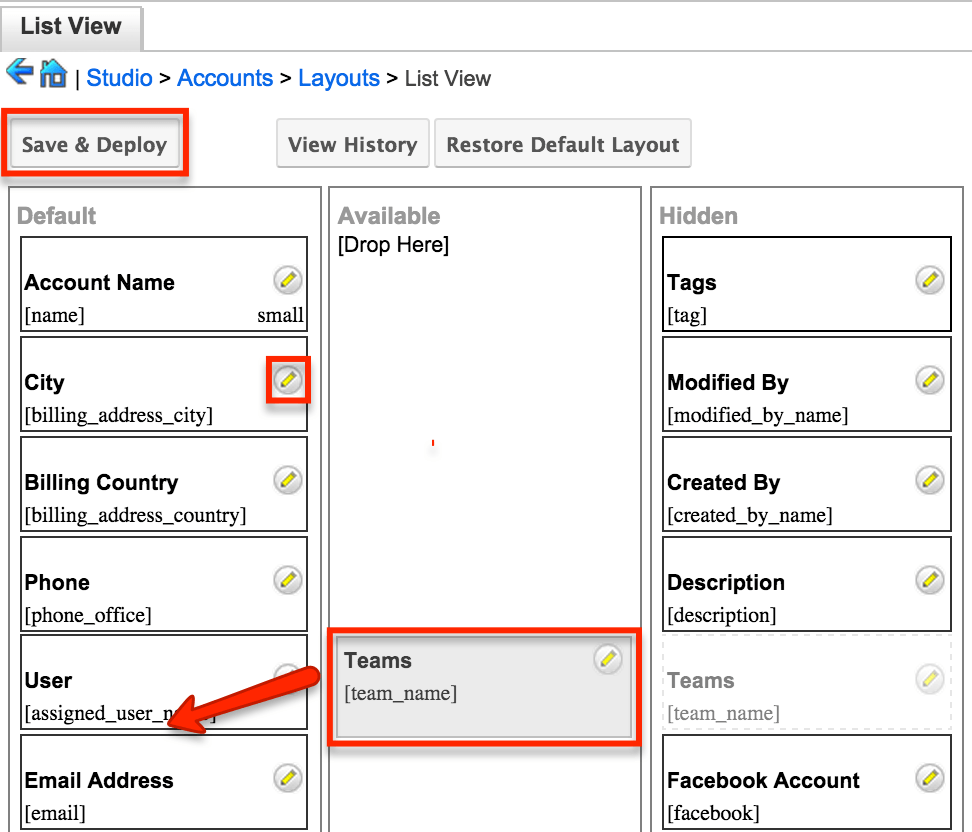
- To remove a field from the layout, drag and drop the field from the Default column to the Hidden column.
- To change the left-to-right order of the fields displayed on the list view, drag and drop fields up or down within the Default list. The order of fields designated for the List View layout also affects the order for the list of available fields in the corresponding module dashlet (e.g., My Accounts).
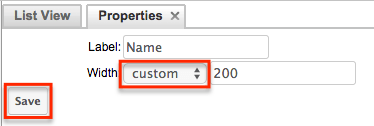
- Optionally, modify the label and width for the field. Click the Pencil icon next to each field, enter the new label or select the width (e.g., small, medium, large), then click "Save". Changes to a field's label will affect all List View layouts for this module. For more information on setting column widths, please refer to the List View Column Widths section.
- Click "Save & Deploy" to preserve your changes and deploy immediately.
List View Column Widths
Administrators can easily set the column widths for specific fields when configuring the List View layout. You can choose from a pre-defined list of width sizes (e.g., small, medium, large) that are available out-of-the-box with Sugar or enter a custom width value. The custom width value should be entered in pixels (e.g., 200) for Sidecar modules. Legacy modules should be entered as a percentage (e.g., 40) of the total width of the list view that should be dedicated to the column.
The following table describes the available column width sizes for fields in Sugar's list-view layouts. The Approximate Characters column indicates the maximum number of characters the column will display before indicating overflow with an ellipsis. For example, a column size with an Approximate Characters value of 4 would display "University of Miami" as "Univ...". This number is an approximation due to the various widths of characters in the alphabet (e.g., a "w" character occupies more horizontal space than an "i" character). Users may expand the default column width manually or hover over the ellipses to reveal the field's entire contents.
| Name | Width | Approximate Characters |
| xxsmall | 20px | 1 |
| xsmall | 40px | 2 |
| small | 68px | 8 |
| medium | 128px | 15 |
| large | 180px | 30 |
| xlarge | 280px | 50 |
| xxlarge | 460px | 85 |
Note: For currency fields, Sugar enforces a minimum 141px column width. Therefore, only the "large" setting and above will apply and custom values must be defined as 141 or wider.
Editing Search Layout
The Search layout controls which fields are available as filters in a module's list view, list view dashlet, or the Renewal or Service Console's module tab's list view. You edit the Search layout using the same method as the List View layout, but using only the Default and Hidden columns. Fields placed in the Default column will be available as filters for users in the module's list view and list view dashlet; fields placed in the Hidden column will not. For more information on dragging and dropping fields between the Default and Hidden columns, please refer to the Editing List View Layout section of this page.
Note: After an administrator edits the Search layout for a module in Studio, users must edit or re-create their list view dashlets to see the deployed changes to their available filters or columns.
Editing Record View Dashlet Layout
The Record View dashlet layout can be configured in Studio for all supported Sidecar modules as well as any custom modules. You edit the Record View dashlet layout using the same method as the Record View layout. The only exception is that the Comment Log field cannot be added to the dashlet's layout. However, the Comment Log dashlet can be used instead to view the Comment Log on a dashboard.
Editing Preview View Layout
The Preview View layout may be configured to display differently based on the viewing user's role or based on a dropdown field's selected value. For more information see the Creating Role-Based Record View Layouts and Creating Dropdown-Field-Based Record View Layouts sections of this page. The following steps cover editing the Preview View layout for the Accounts module as an example:
- Expand "Layouts" from the Modules panel under the Accounts module and select "Preview View". The Preview View layout will display in the main panel to the right.
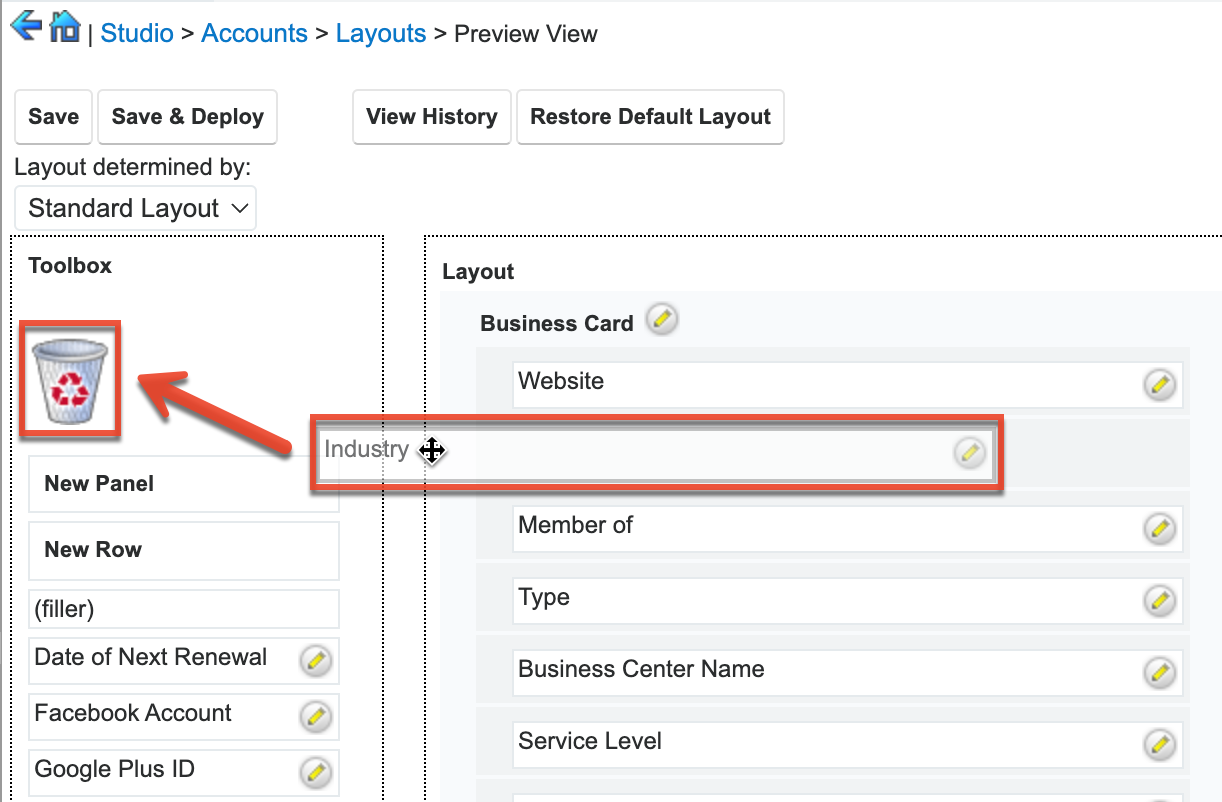
- To add a field to the Preview View layout, drag the field from the list of fields in the Toolbox to the desired "(filler)" location on the layout. You can also drag a field to a location on the layout that already has a field in place; the newly added field and the existing field on the layout will swap places.
- To remove a field from the layout, drag and drop the field from the layout to the trash bin in the toolbox to remove the field from the layout. You may remove an entire row in the layout using the same method.
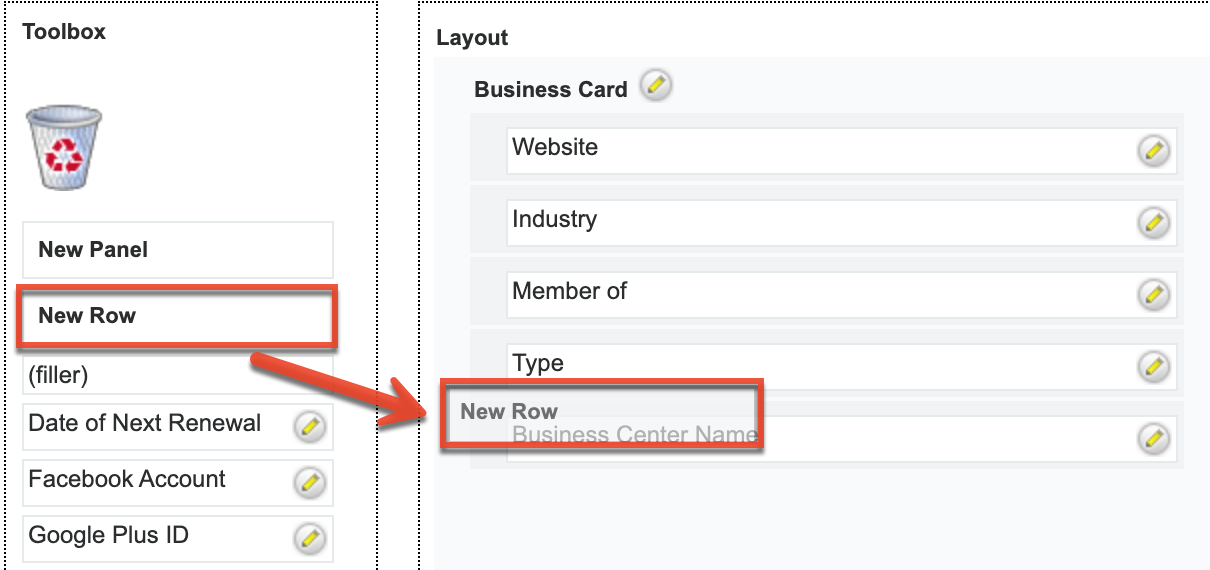
- To add a new row, drag the "New Row" item in the Toolbox to the layout to allow additional fields or blank spaces to be added.
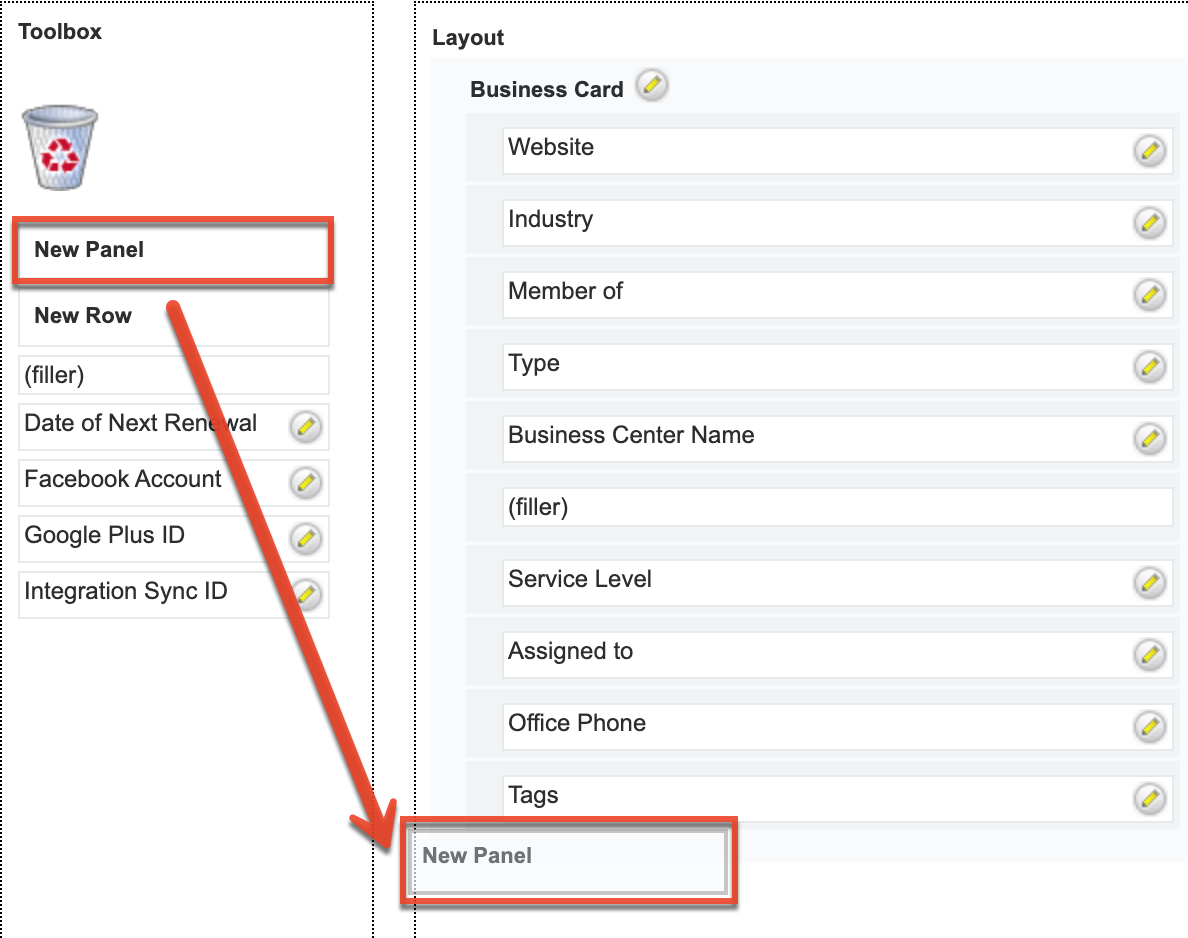
- To add a new panel, drag the "New Panel" item in the Toolbox to the layout to group different sets of fields together in the Record View layout.
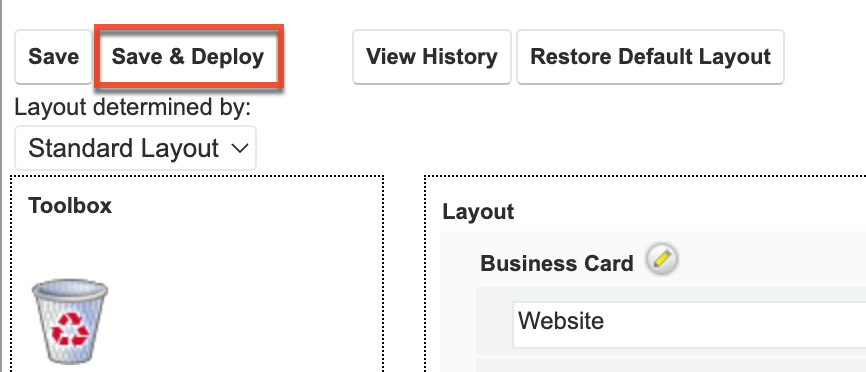
- Once the layout is finalized, click "Save & Deploy" to preserve your changes and deploy immediately. Click "Save" to preserve the changes made but not deploy to Sugar's user interface.
Editing Convert Lead Layout
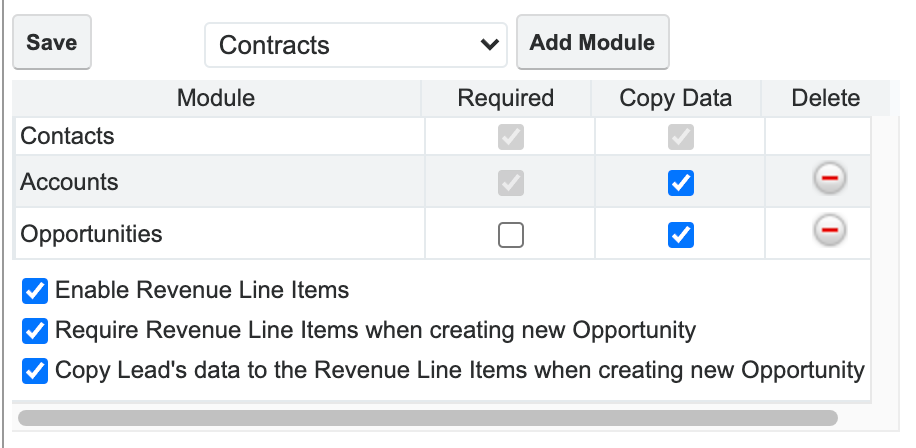
The Convert Lead layout in Sugar is structured differently from the other layouts as it is specific to the lead conversion page for the Leads module. Administrators can configure which modules are available to convert, mark modules as required, add modules to the Convert Lead page, etc. 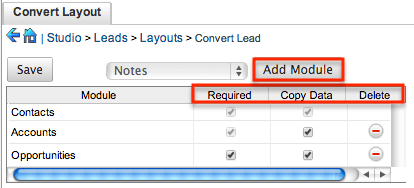
The following settings are available when configuring the Convert Lead layout:
- Required: Makes the module required during lead conversion. Required modules must be created or selected on the Convert Lead page in order for the lead to be converted and saved.
- Copy Data: Copies data from the Leads fields (stock and custom) to fields with the same name in the newly created record for the module. The field name and type must match between both modules (e.g., Leads and Accounts) for the data to copy over.
- Delete: Removes the module from the Convert Lead layout.
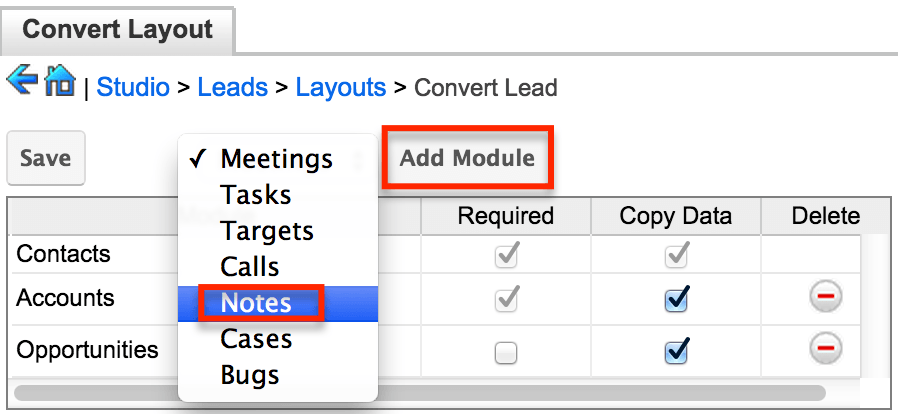
The following steps cover adding the Notes module to the Convert Lead layout:
- Select the Notes module from the dropdown list above the convert lead table then click "Add Module".
- The Notes module will appear in the convert lead table and you can configure the settings as necessary. Click "Save" to preserve your changes.
Note: Modules added to the Convert Lead layout can be re-arranged by dragging and dropping the row (e.g., Notes) within the table. The Contacts, Accounts, and Opportunities modules cannot be re-arranged on the layout.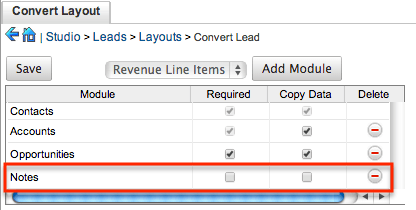
Viewing Layout History
Layouts, subpanels, and mobile layouts in Studio keep a history of the last ten changes made to the specific layout. To view the history for any of these layouts, simply select "View History" from the Record View layout for Sidecar modules, or other view layout for Legacy modules in Admin > Studio.
The following steps cover viewing the layout history for the Record View layout as an example:
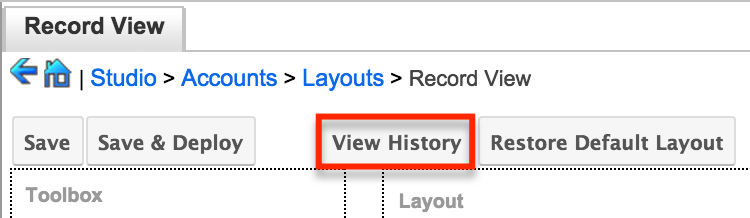
- Navigate to the Record View layout in Admin > Studio.
- Click the View History button on the upper left of the layout editor.
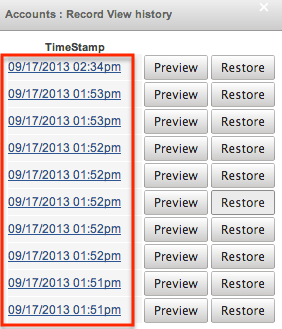
- The History dialog box will appear showing the timestamps of the last ten saves to the selected layout.
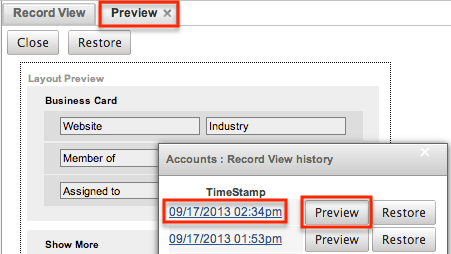
- Click the timestamp or Preview button and a preview of the modified layout will appear in a new tab of the main layout panel.
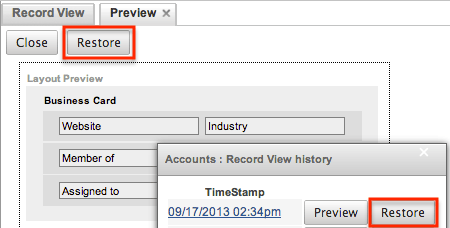
- To restore a specific layout per the history, click the Restore button within the Preview layout or from the History dialog box.
The chosen Record View layout will load into the editor where you can make the desired changes to the layout. Click "Save" to preserve your changes or "Save & Deploy" to preserve your changes and deploy immediately.