Interactions
Overview
Interactions are a distinct record type linked to either a prospect or customer, representing an engagement with a contact, such as a call or meeting. An interaction record includes the date and time of the engagement as well as key details and insights.
Interactions help you plan your day and prepare for each engagement. After an interaction is completed, you can quickly capture how it went and what to do next, keeping you organized and your opportunities moving forward.
This guide covers:
Creating Interactions
You can create interactions from the My interactions page or from a customer or prospect record. The options available and steps to create an interaction depend on:
- Where the interaction is created in sales-i
- Whether you are scheduling a future interaction or logging a past interaction
- The type of interaction being created
There are four different interaction types. Some types can only be created from the My interactions page.
| Interaction Type | Description | Can be created from... |
| New interaction | Create a new interaction associated with a specific customer or prospect | The My interactions page and customer or prospect records |
| New personal interaction | Create an interaction that is not associated with a customer or prospect | The My interactions page |
| Generate prospect interactions | Bulk create a series of future interactions for a specific day, associated with prospects based on factors like their location, associated opportunity value, and last time contacted | The My interactions page |
| Generate customer interactions | Bulk create a series of future interactions for a specific day, associated with customers based on factors like their location, associated opportunity value, and last time contacted | The My interactions page |
Scheduling a Future Interaction
Scheduling your interactions ahead of time is key to keeping your day organized and making the most of your engagements. Follow these steps to schedule an interaction for the future:
- If you are creating your interaction from the My interactions page, click "Add interaction" and select "New interaction". If you are creating your interaction from a customer or contact record, click "Add Interaction".

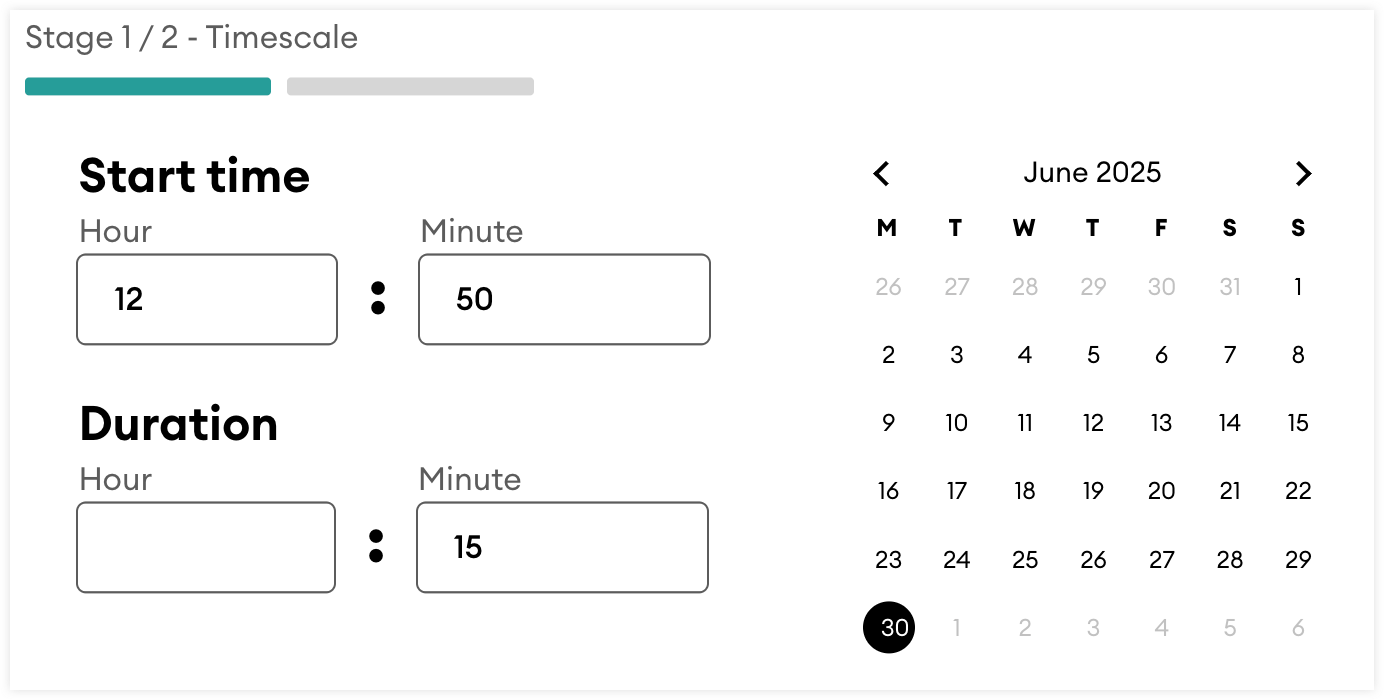
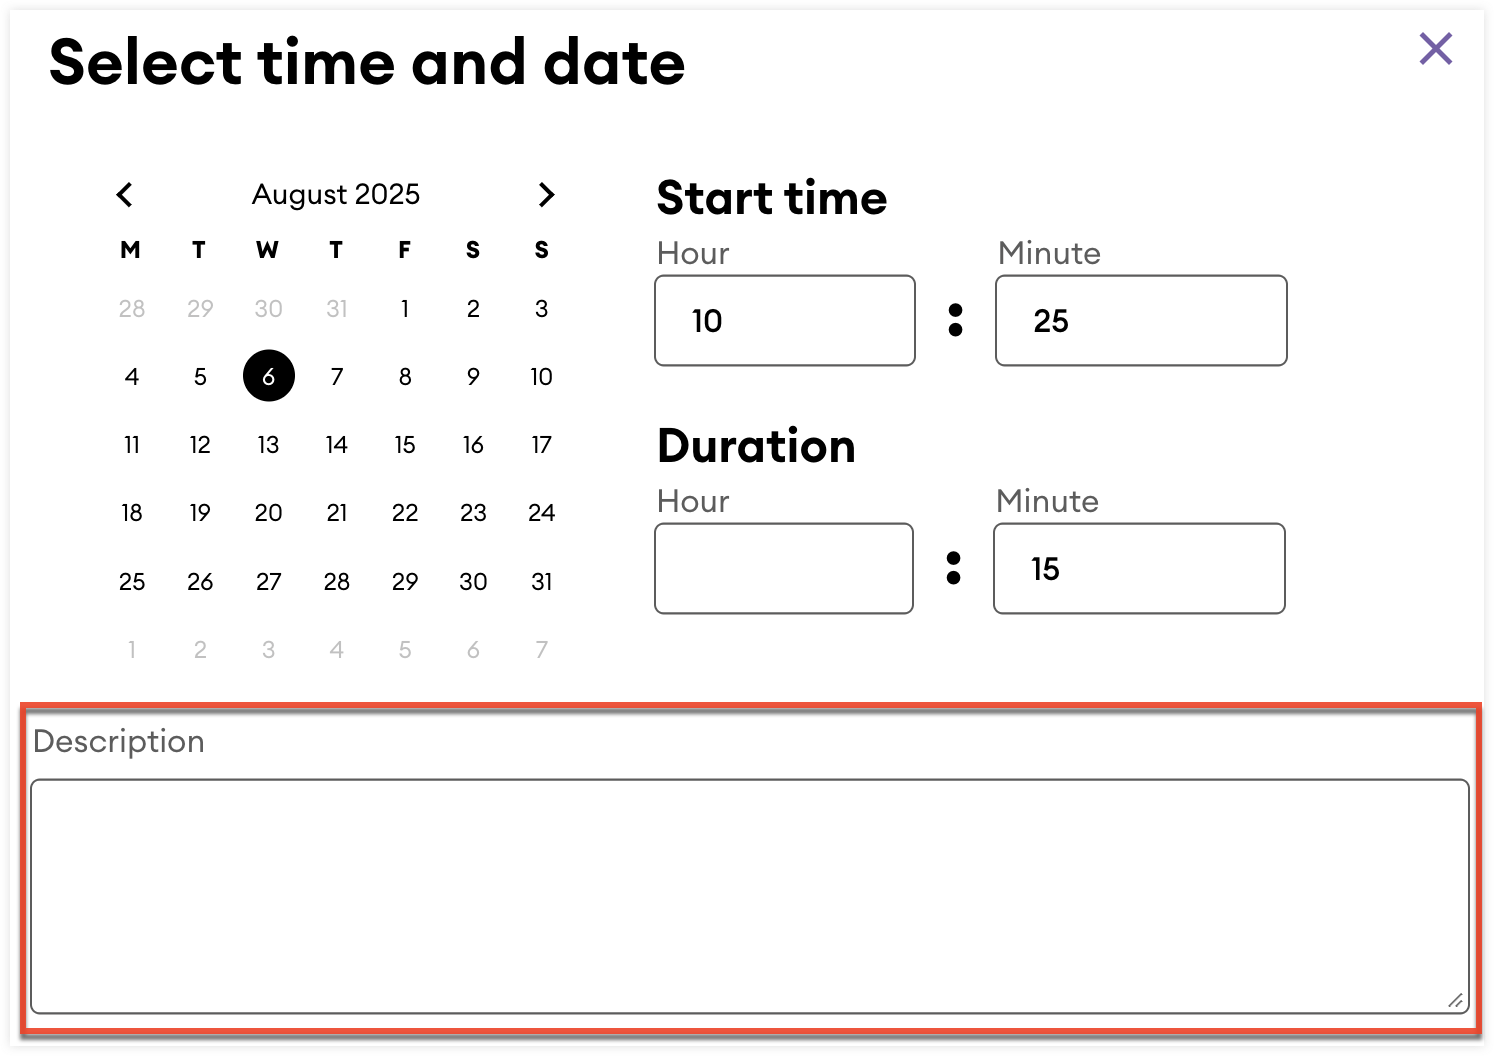
- From the Timescale stage, use the calendar widget and Start time and Duration fields to schedule when the interaction will occur.
- Click "Continue".
- From the Customer/Prospect stage:
- If you are creating the interaction from the My interactions page, you will need to select either the Customer or Prospect tab depending on which record type the contact you are planning on engaging with is associated with.
- If you are creating the interaction from a customer or prospect record, the associated record will be selected automatically.
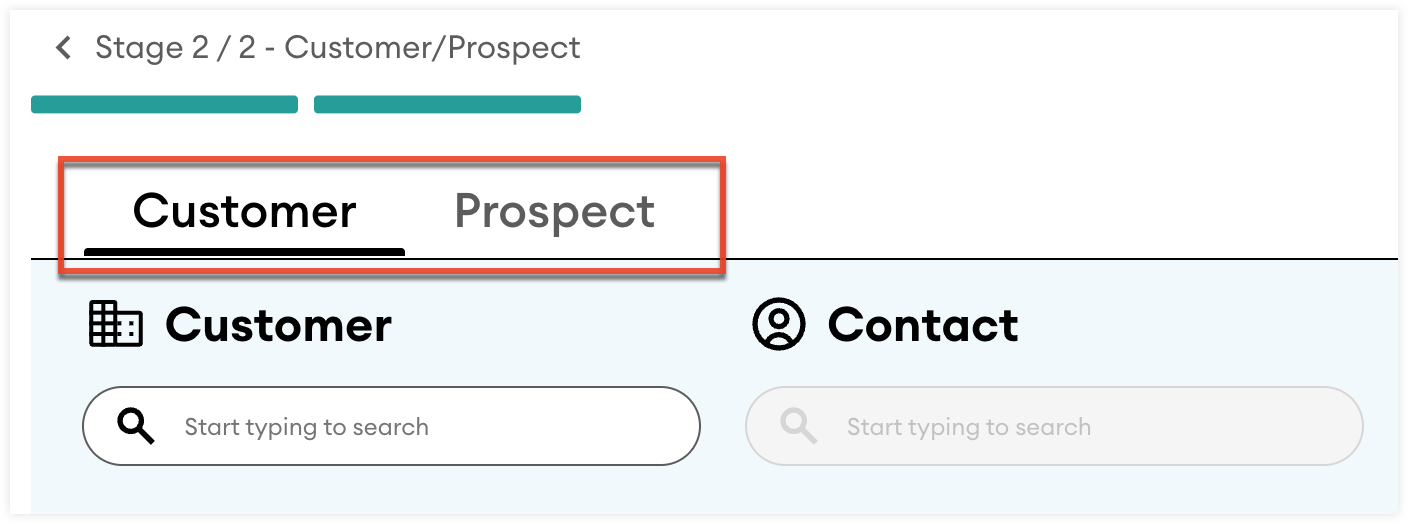
- Use the search fields to select the customer or prospect and the associated contact you are engaging with. If the customer or prospect has a default contact set, they will be selected automatically.
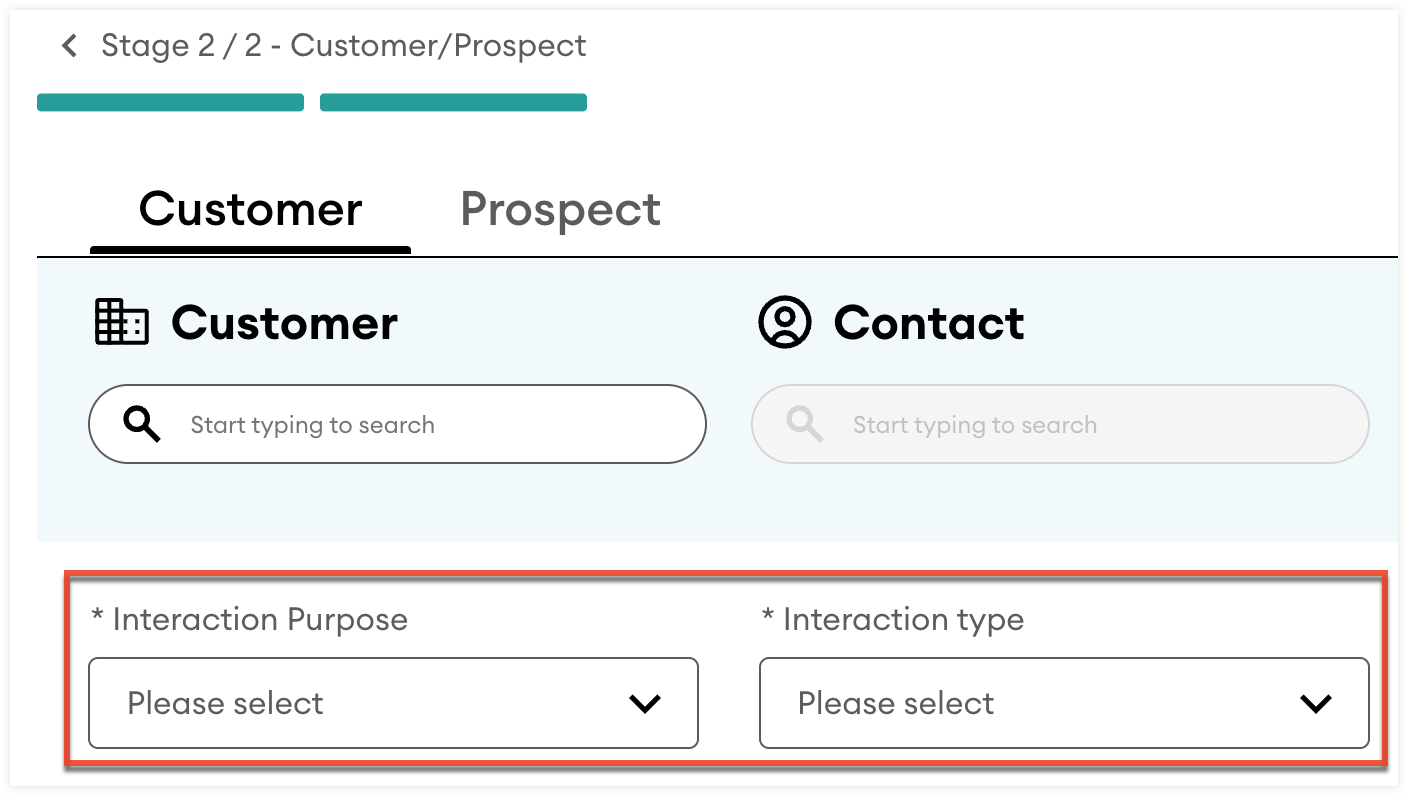
- Use the Interaction Purpose and Interaction type fields to specify the purpose and type of interaction.
- Optionally:
- Use the Interaction note field to add additional details.
- Use the Assignee field to change who the interaction is assigned to. By default, it is set to the user creating the interaction.
- Click the Add a follow up button to create a follow-up interaction.
- Do not use the:
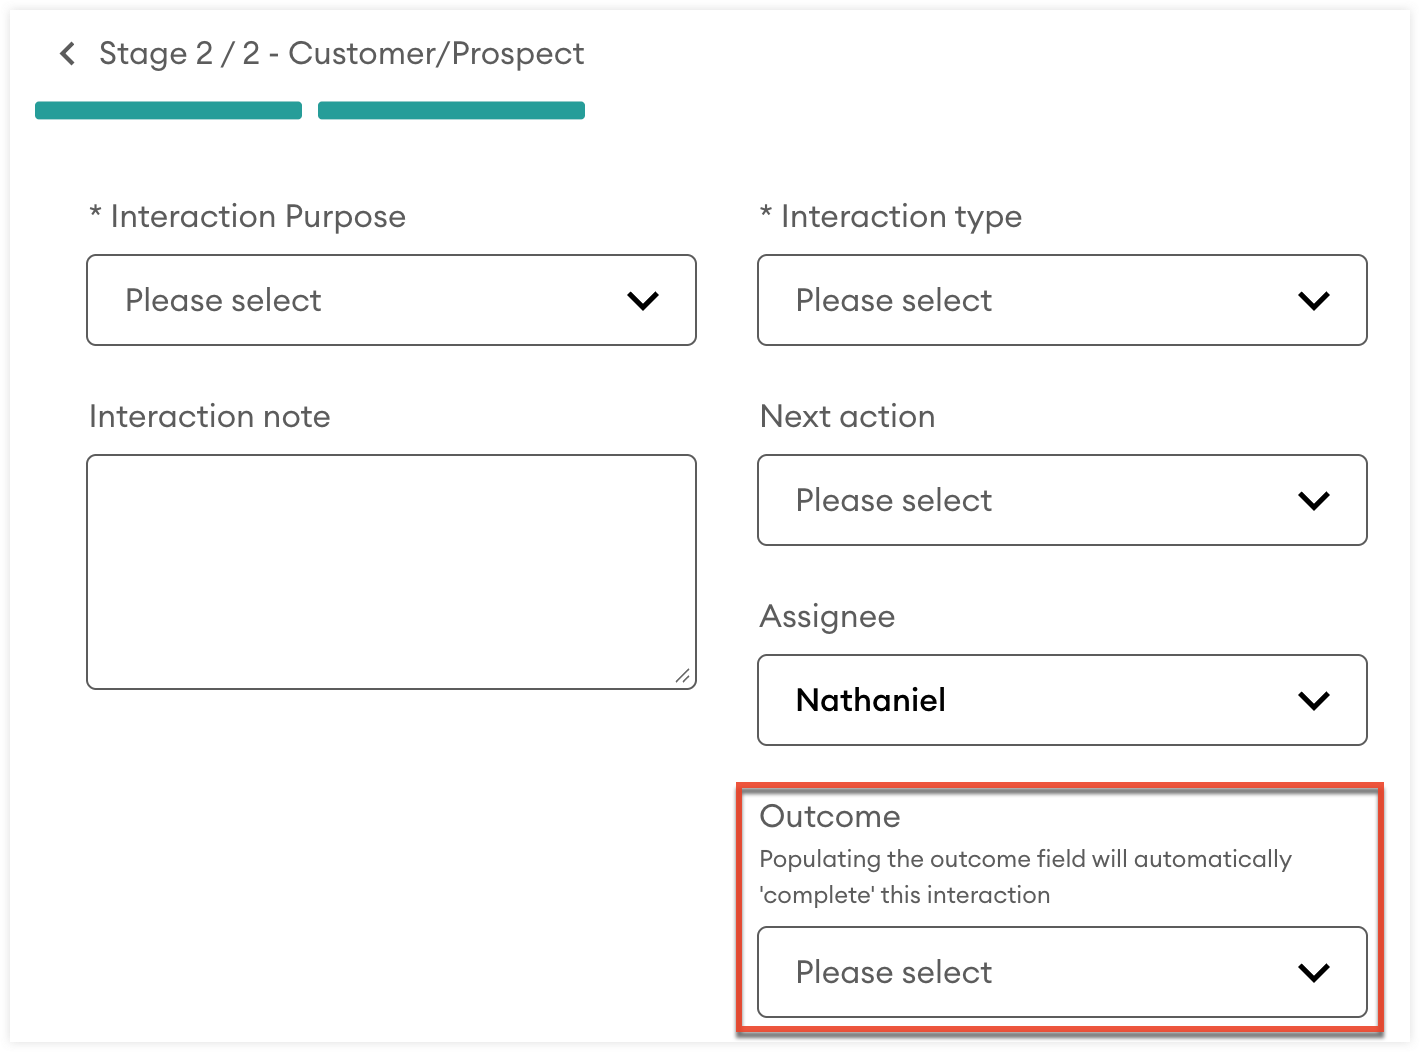
- Next action field: this will be filled in after the interaction is completed as you typically do not know your next action until the interaction has occurred.
- Outcome field: setting an outcome will complete the interaction you are attempting to schedule for the future.
- Once all required fields are completed, click "Add interaction" to create the interaction.
Logging a Past Interaction
Logging past interactions helps maintain a clear history of your engagements and helps you track needed follow-ups and next actions. Follow these steps to log an interaction that has already happened:
- If you are creating your interaction from the My interactions page, click "Add interaction" and select "New interaction". If you are creating your interaction from a customer or contact record, click "Add interaction".
- From the Timescale stage, use the calendar widget and Start time and Duration fields to set when the interaction will occur.
- Click "Continue".
- From the Customer/Prospect stage:
- If you are creating the interaction from the My interactions page, you will need to select either the Customer or Prospect tab depending on which record type the contact you are planning on engaging with is associated with.
- If you are creating the interaction from a customer or prospect record, the associated record will be selected automatically.
- Use the search fields to select the customer or prospect and the associated contact you are engaging with. If the customer or prospect has a default contact set, they will be selected automatically.
- Use the Interaction Purpose and Interaction type fields to specify the purpose and type of interaction.
- Use the Outcome field to specify the result of the interaction.
- Optionally:
- Use the Interaction note field to add additional details.
- Use the Next action field to associate a follow-up action with this interaction.
- Use the Assignee field to change who the interaction is assigned to. By default, it is set to the user creating the interaction.
- Click the Add a follow up button to create a follow-up interaction.
- Once all required fields are completed, click "Add interaction" to create the interaction.
Creating a Personal Interaction
Personal interactions are a quick way to leave yourself a note for a specific date and time. These interactions are not associated with a prospect or customer. Follow these steps to create a personal interaction:
- From the My interactions page, click the Add interaction button.
- Select "New personal interaction".
- Use the calendar widget to select the date of the interaction.
- Enter your note in the Description field.
- Click "Continue" to create the personal interaction.
Generating Prospect or Customer Interactions
Generating prospect or customer interactions allows you to bulk create a series of future interactions for a specific day. You can configure how many interactions are created and which prospects and customers are associated with the interactions based on their location, associated opportunity value, and last time contacted.
This helps you quickly set up a day of planned engagements with targeted groups of customers and prospects. For example, you could create a series of interactions targeting customers that have not been contacted in over a year. Follow these steps to generate prospect or customer interactions:
- From the My interactions page, click the Add interaction button.
- Select "Generate prospect interactions" or "Generate customer interactions".
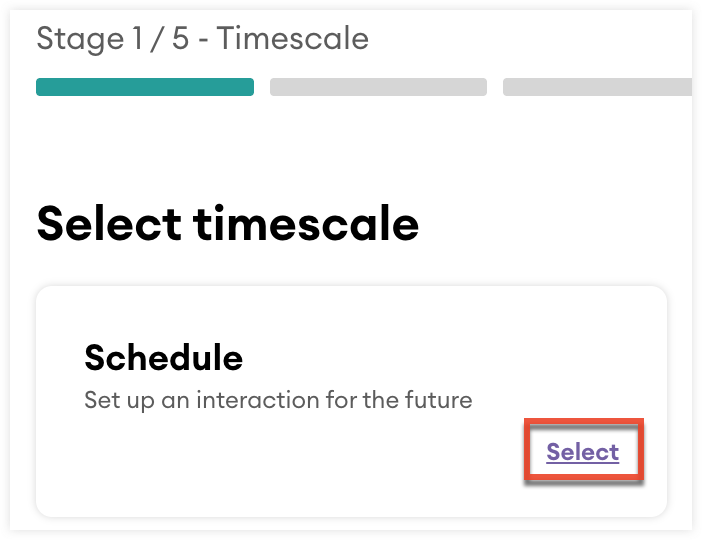
- From the Timescale stage, click "Select" from within the Schedule card.
- Use the calendar widget to select what day you would like to generate the future interactions on and use the Start time fields to set when the first interaction in the series will occur.
- Click "Continue".
- From the Settings stage, configure the following fields:
- Allocate to: Select who the interactions will be assigned to.
- Interaction type: Specify the type of interaction.
- Number of interactions: Set how many interactions will be created for the select date.
- Interaction duration: Set how long each interaction will last.
- Time between interactions: Set the amount of time between each interaction.

- Optionally, use the "Exclude prospects contacted within" or "Exclude contacts contacted within" field to exclude generated interactions associated with records that have been contacted in the select timeframe.
- Once all required fields are completed, click "Continue".
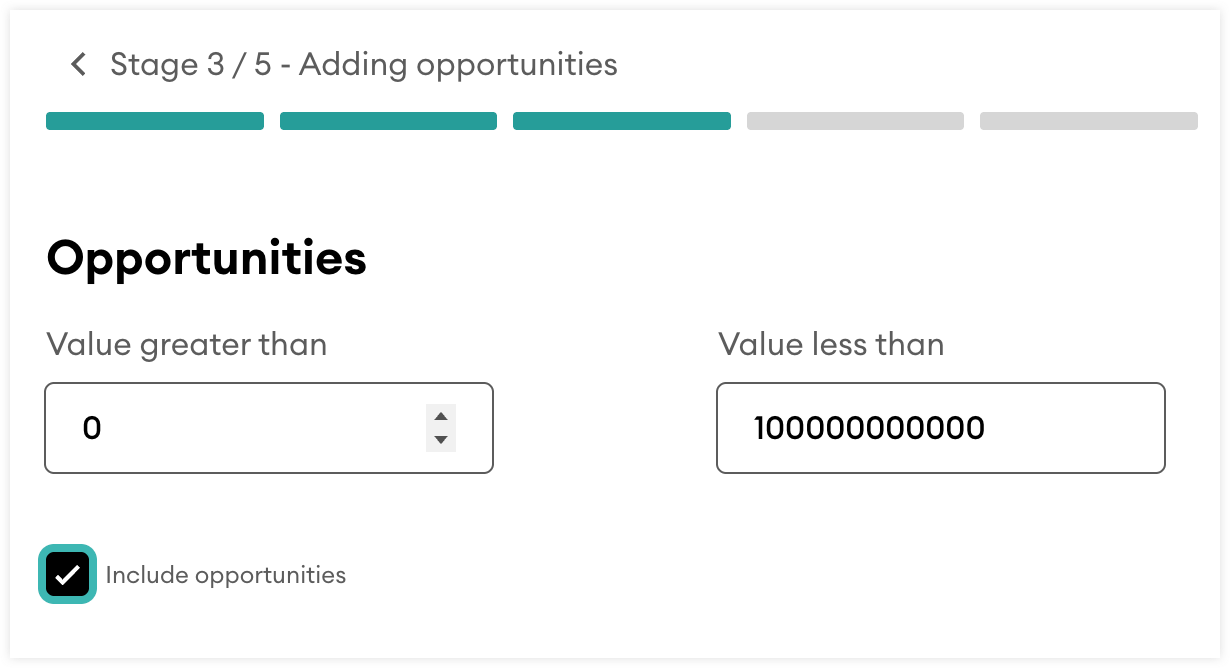
- Optionally, from the Adding opportunities stage, using the "Value greater than" or "Value less than" fields to exclude generated interactions associated with records that do not have an associated opportunity within the set value range. If you do not want to exclude records based on associated opportunity value, uncheck the Include opportunities checkbox field.
- Click "Continue".
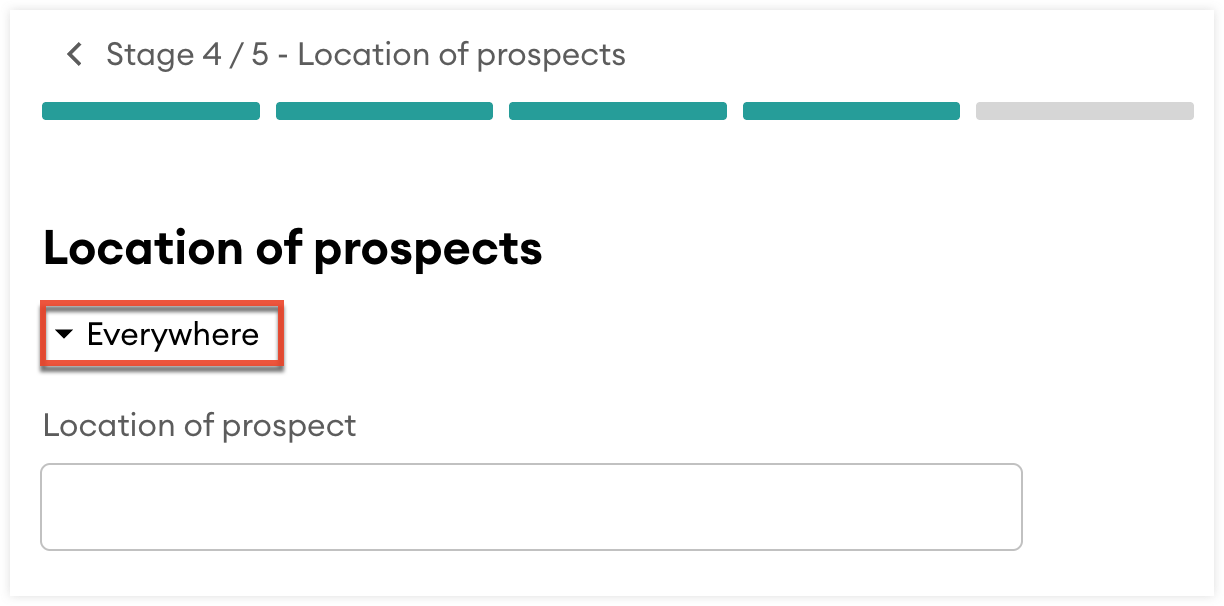
- Optionally, from the "Location of prospects" or "Location of contacts" stage, select the dropdown to only include records from a specific zip/postcode or town/city. Once you have selected an option, use the "Location of prospect" or "Location of customer field" to set a specific Zip/postcode or Town/city respectively. If you do not want to exclude any records based on their location, set the dropdown to "Everywhere".
- Click "Continue".
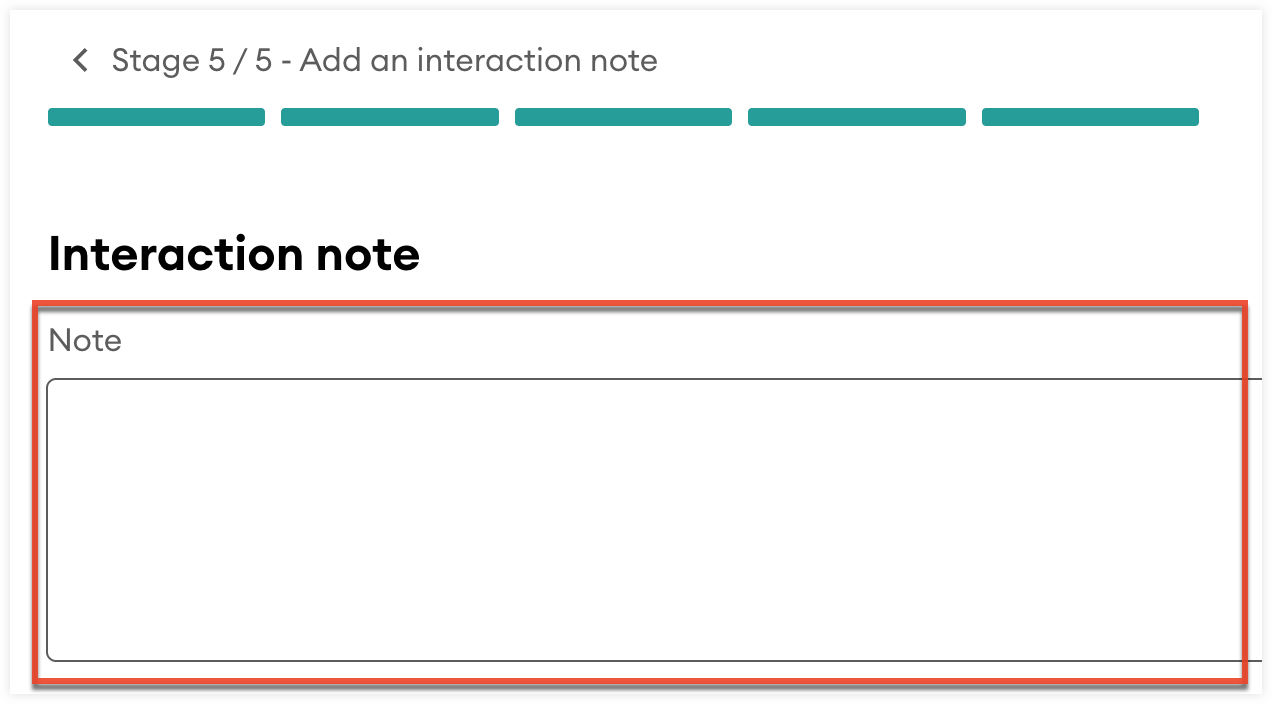
- Optionally, from the Add an interaction note stage, use the Note field to add additional details for the generated interactions.
- Click "Generate interactions" to create the series of interactions. A confirmation message will appear confirming how many interactions have been created. If no interactions can be created, an error message will appear and you can return to previous stages to adjust the criteria.
Viewing and Managing Interactions
Once an interaction record is created, it is displayed in key areas across sales-i, making it easy to stay on top of your upcoming engagements and manage existing interactions. Where your interactions are displayed is dependent on when they occur and their status:
| Interaction occurs... | Interaction's status | Interaction is displayed on... |
| Today | Open | The My Interactions page and the {X} interactions today card on the home dashboard |
| In the future | Open | The My interactions page |
| In the past | Missed | The My interactions page |
| In the past or future | Completed | The My interactions page and the Interactions history tab in the associated contact and customer record |
My Interactions Page
From the My interactions page, you can view all of your interactions. To navigate to the My interactions page, click “CRM” from the top navigation bar and then click “Interactions”.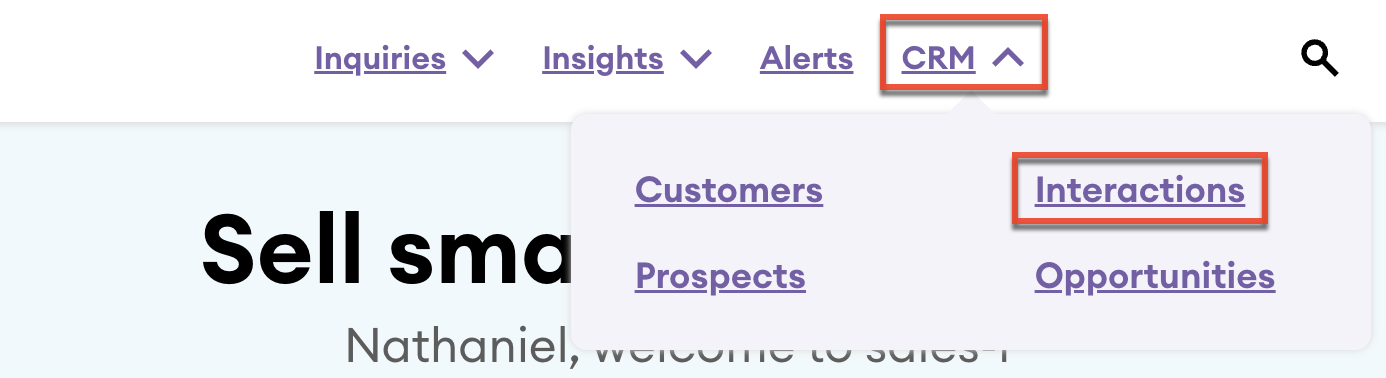
By default, the My interactions page will display all of your upcoming interactions for today. You can control how and what interactions are displayed by selecting a specific date range, filtering by status, and switching between a calendar or list view.
| User Interface | Description |
 |
Use the status tabs to filter interactions within the selected date range based on their status:
The number in parentheses next to each status indicates how many interactions of that type occur in the month of the selected date range. |
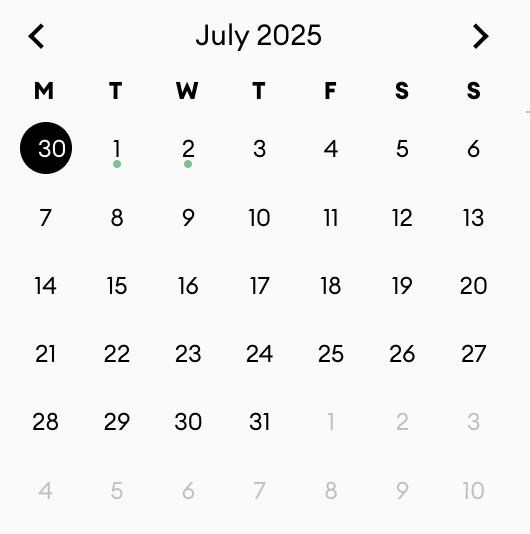 |
Use the calendar widget to display the interactions occurring on a specific date. Colored dots are displayed under days with interactions:
|
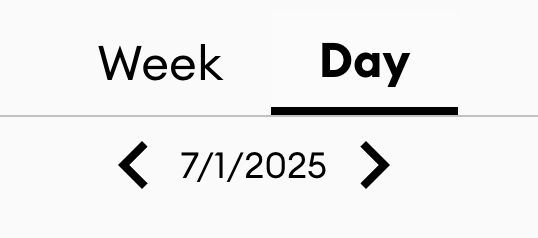 |
Use the range tabs to display interactions either from the specific day selected in the calendar widget or from the entire week that includes the selected day. The selected date range is displayed below the tabs. Use the left and right arrows to navigate to the previous or next day or week, based on the selected range. When the Missed or Completed status tab is selected, interactions can only be displayed by day. |
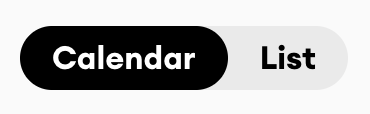 |
Use the view type toggle to display your interactions in either a calendar or list format. When the Missed or Completed status tab is selected, interactions can only be displayed in the list view format. |
Interactions on the Home Dashboard
From your home dashboard, you can quickly review all of your interactions for the day and insights into your next customer interaction. Your upcoming interactions for the day will be displayed in the "{X} interactions today" card of your home dashboard. Each interaction displays the name of the associated prospect or customer and contact, and the time the interaction is scheduled for.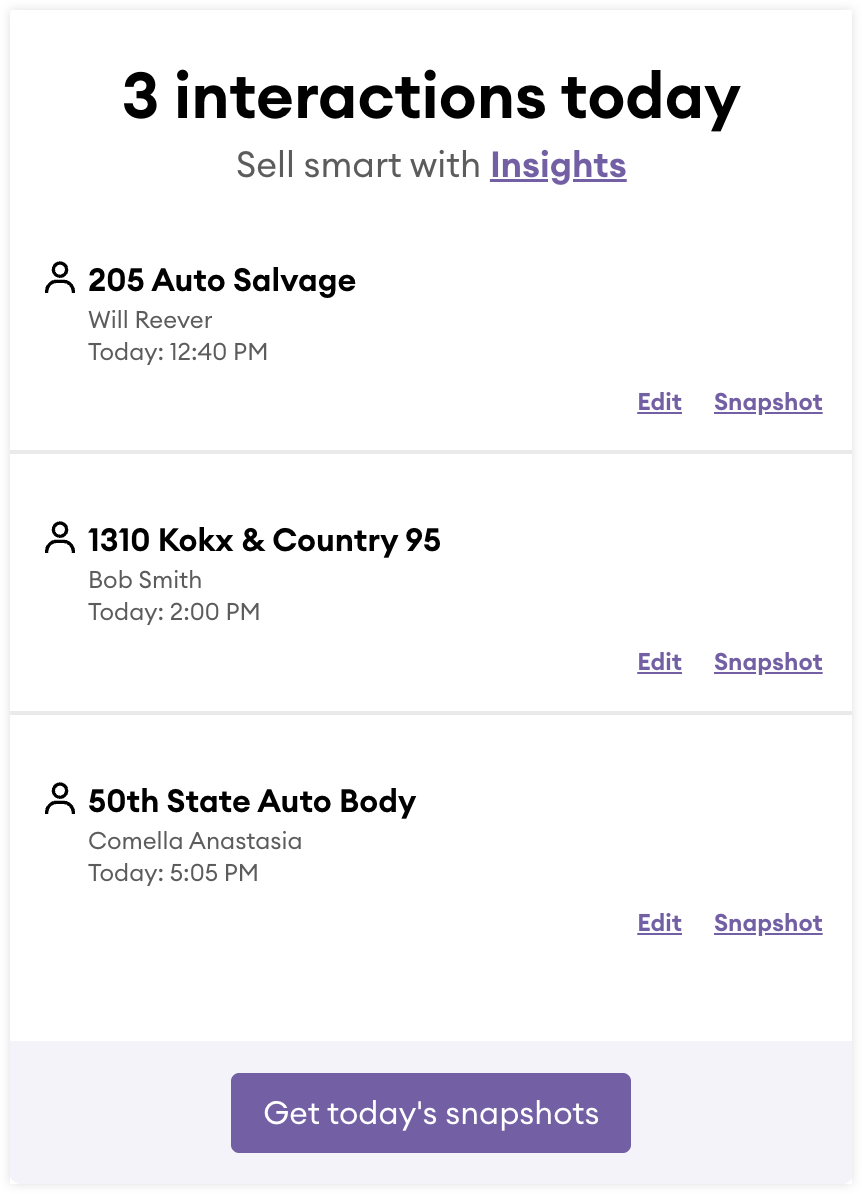
From the "{X} interactions today" card:
- Click an interaction to open the interaction record.
- Use the Edit link to make changes to the interaction.
- For interactions associated with a customer, use the Snapshot link to generate a snapshot.
- Click the Get today’s snapshots button at the bottom of the card to cycle through the snapshots of all of customer associated interactions for the day.
If your next upcoming interaction is associated with a customer, the Purchase Analysis report for that customer will be displayed in the "Your next interaction" card. This report helps you understand what products the customer is buying, so you can apply those insights when you engage with the customer.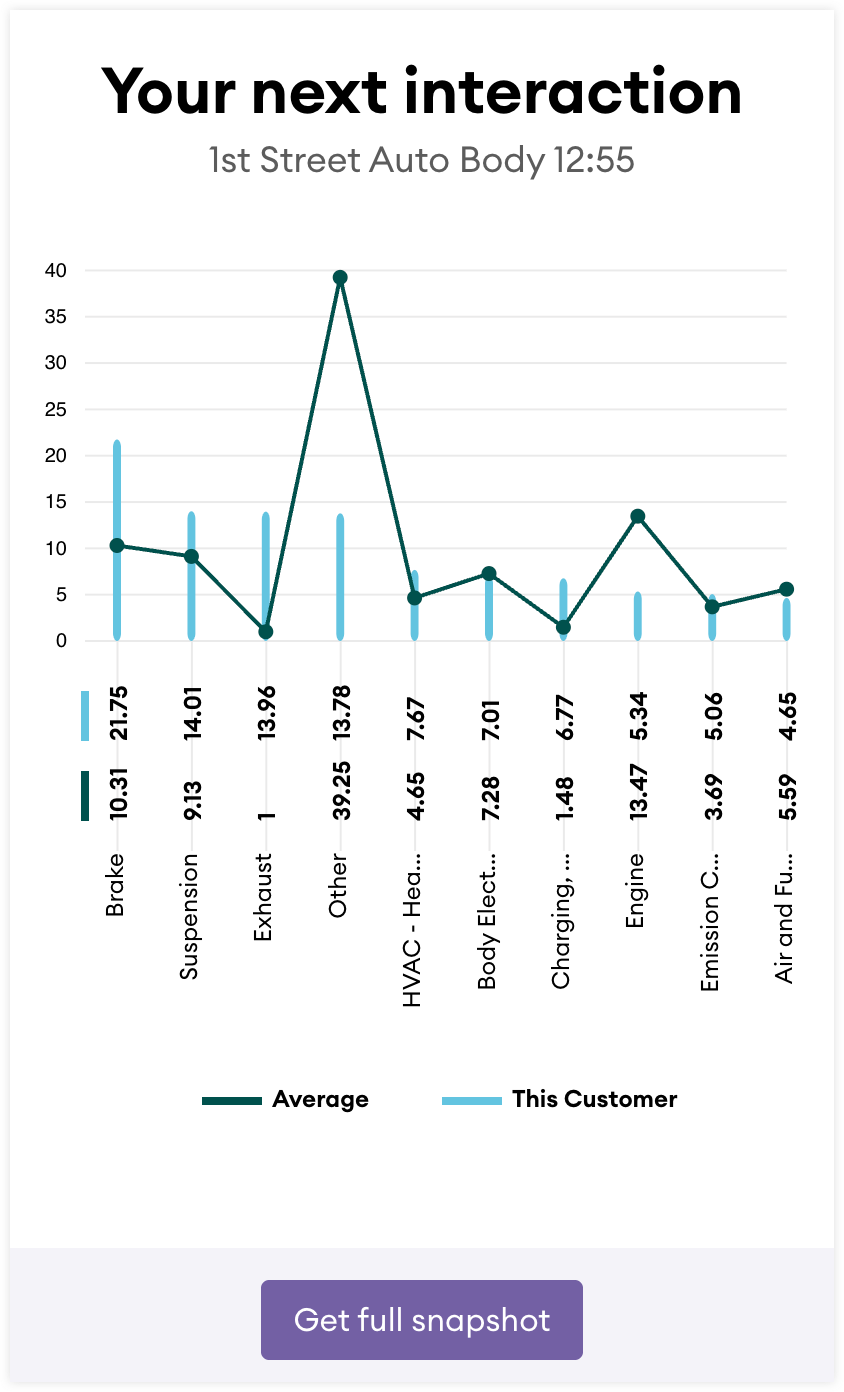
From this card, you can click "Get full snapshot" to open the Snapshot page for the customer.
Prospect and Customer Interaction History
Completed interactions are logged on the associated prospect and contact record in the Interactions history tab.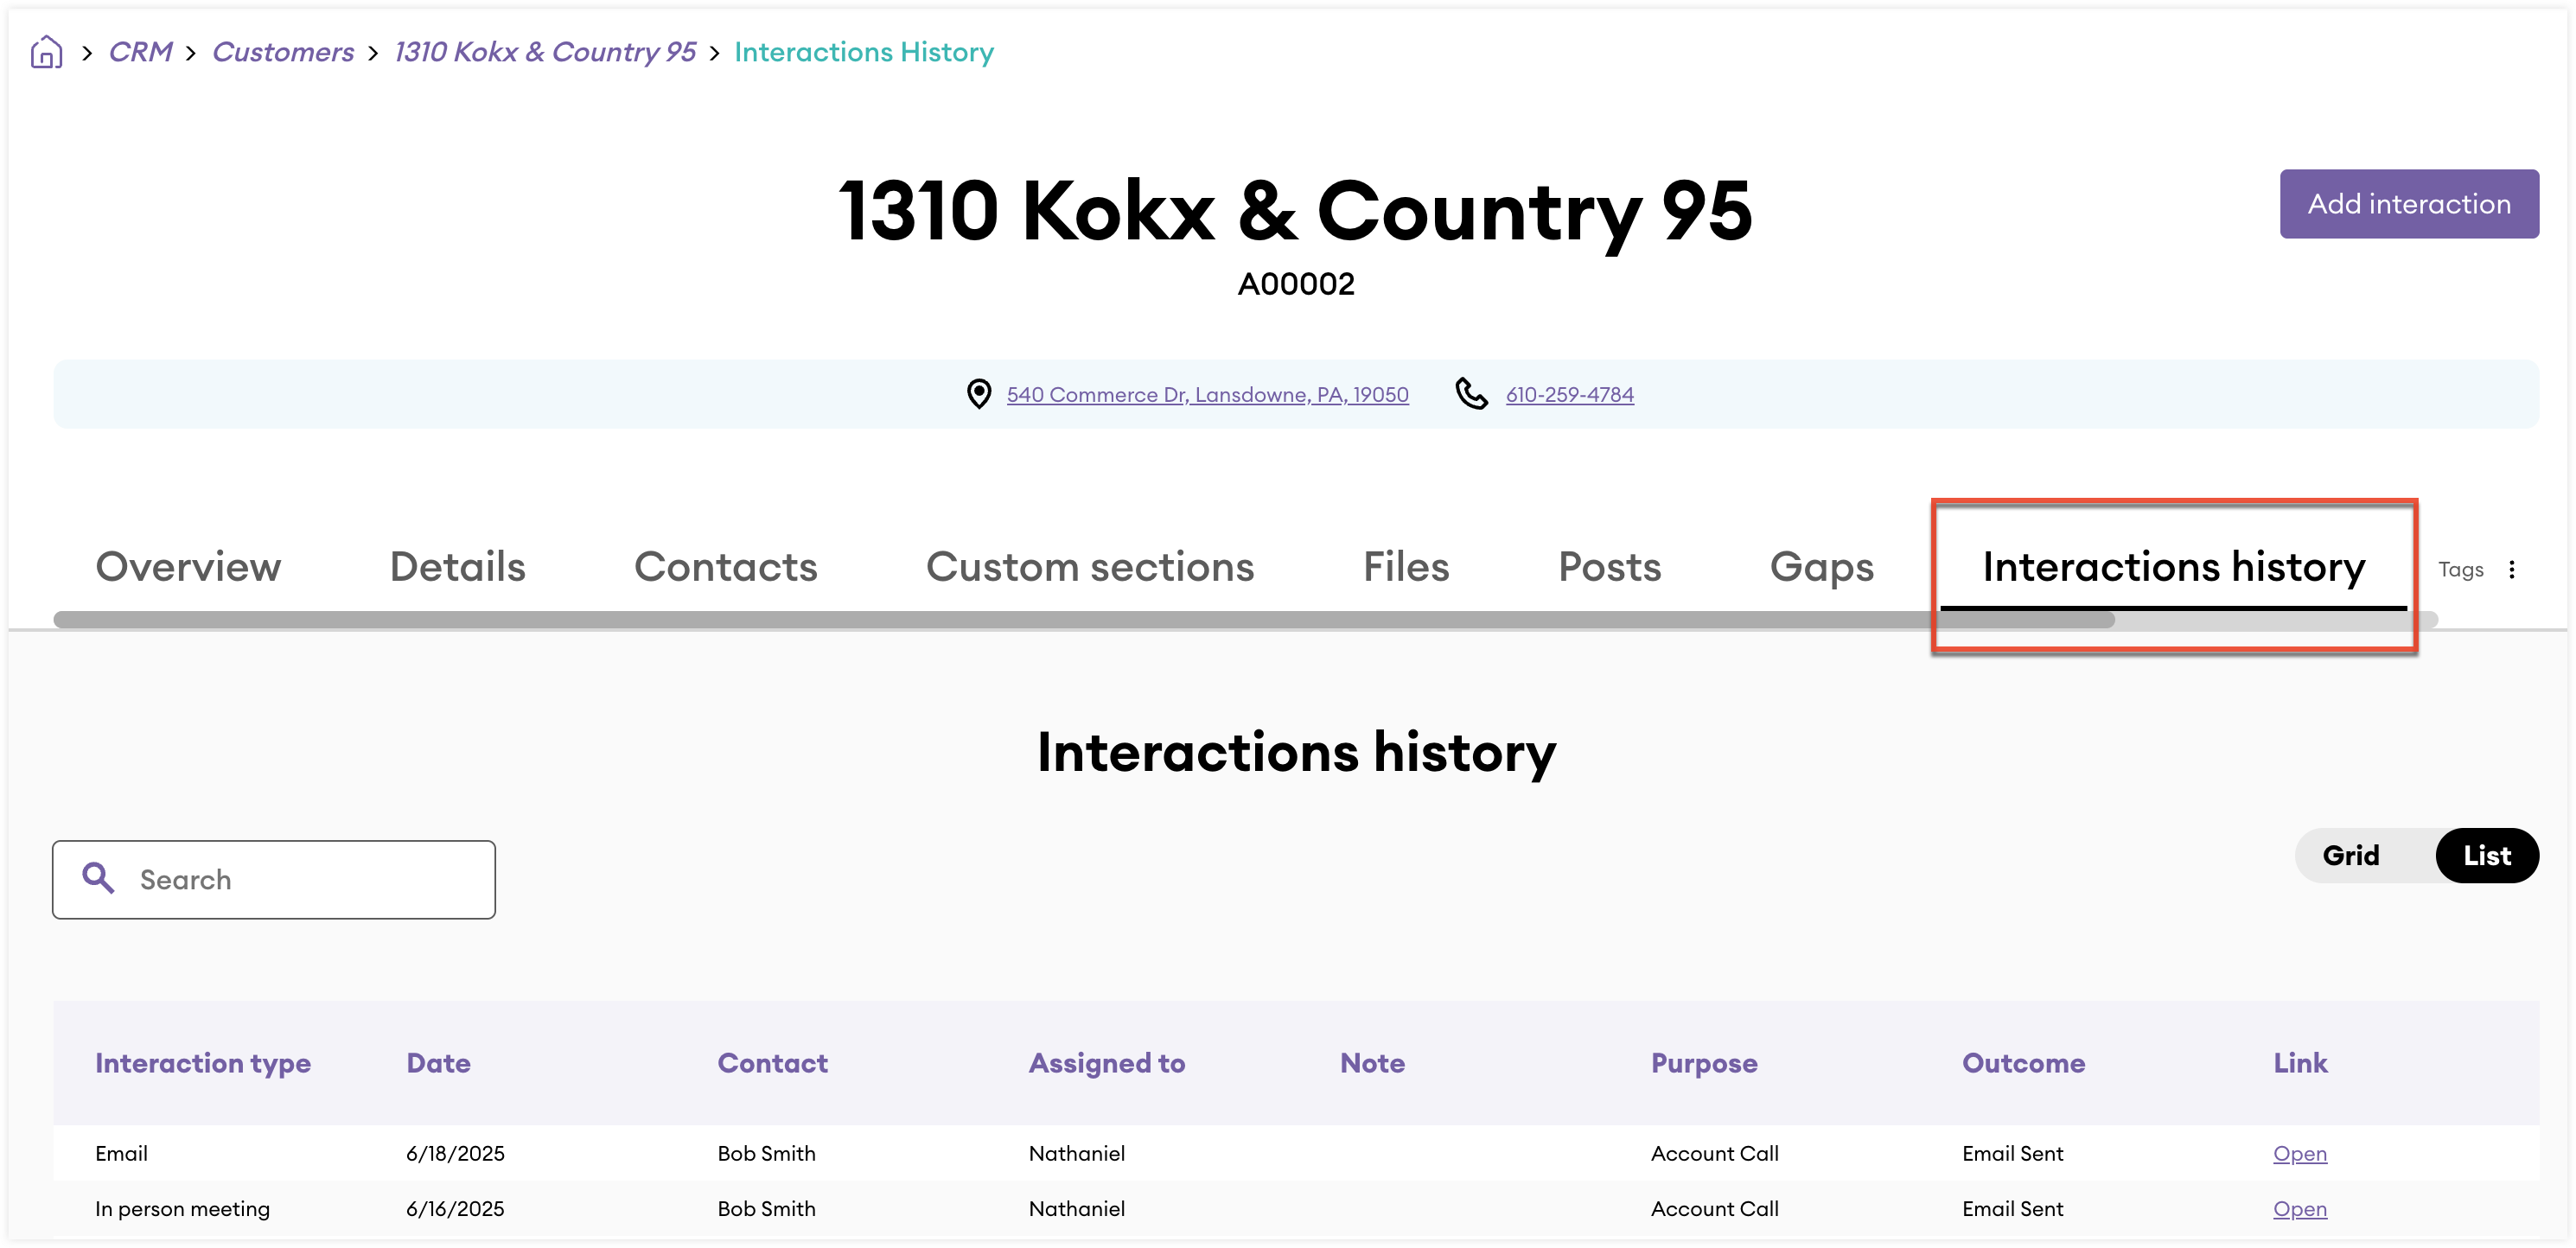
From the Interactions history tab:
- Use the search field to search for a specific interaction.
- Use the Grid/List toggle to display completed interactions in either a grid or list view.
- In either view, click the Open link to open the interaction record.
Interaction Record
From the interaction record view, you can drill into associated records, edit interaction details, and more.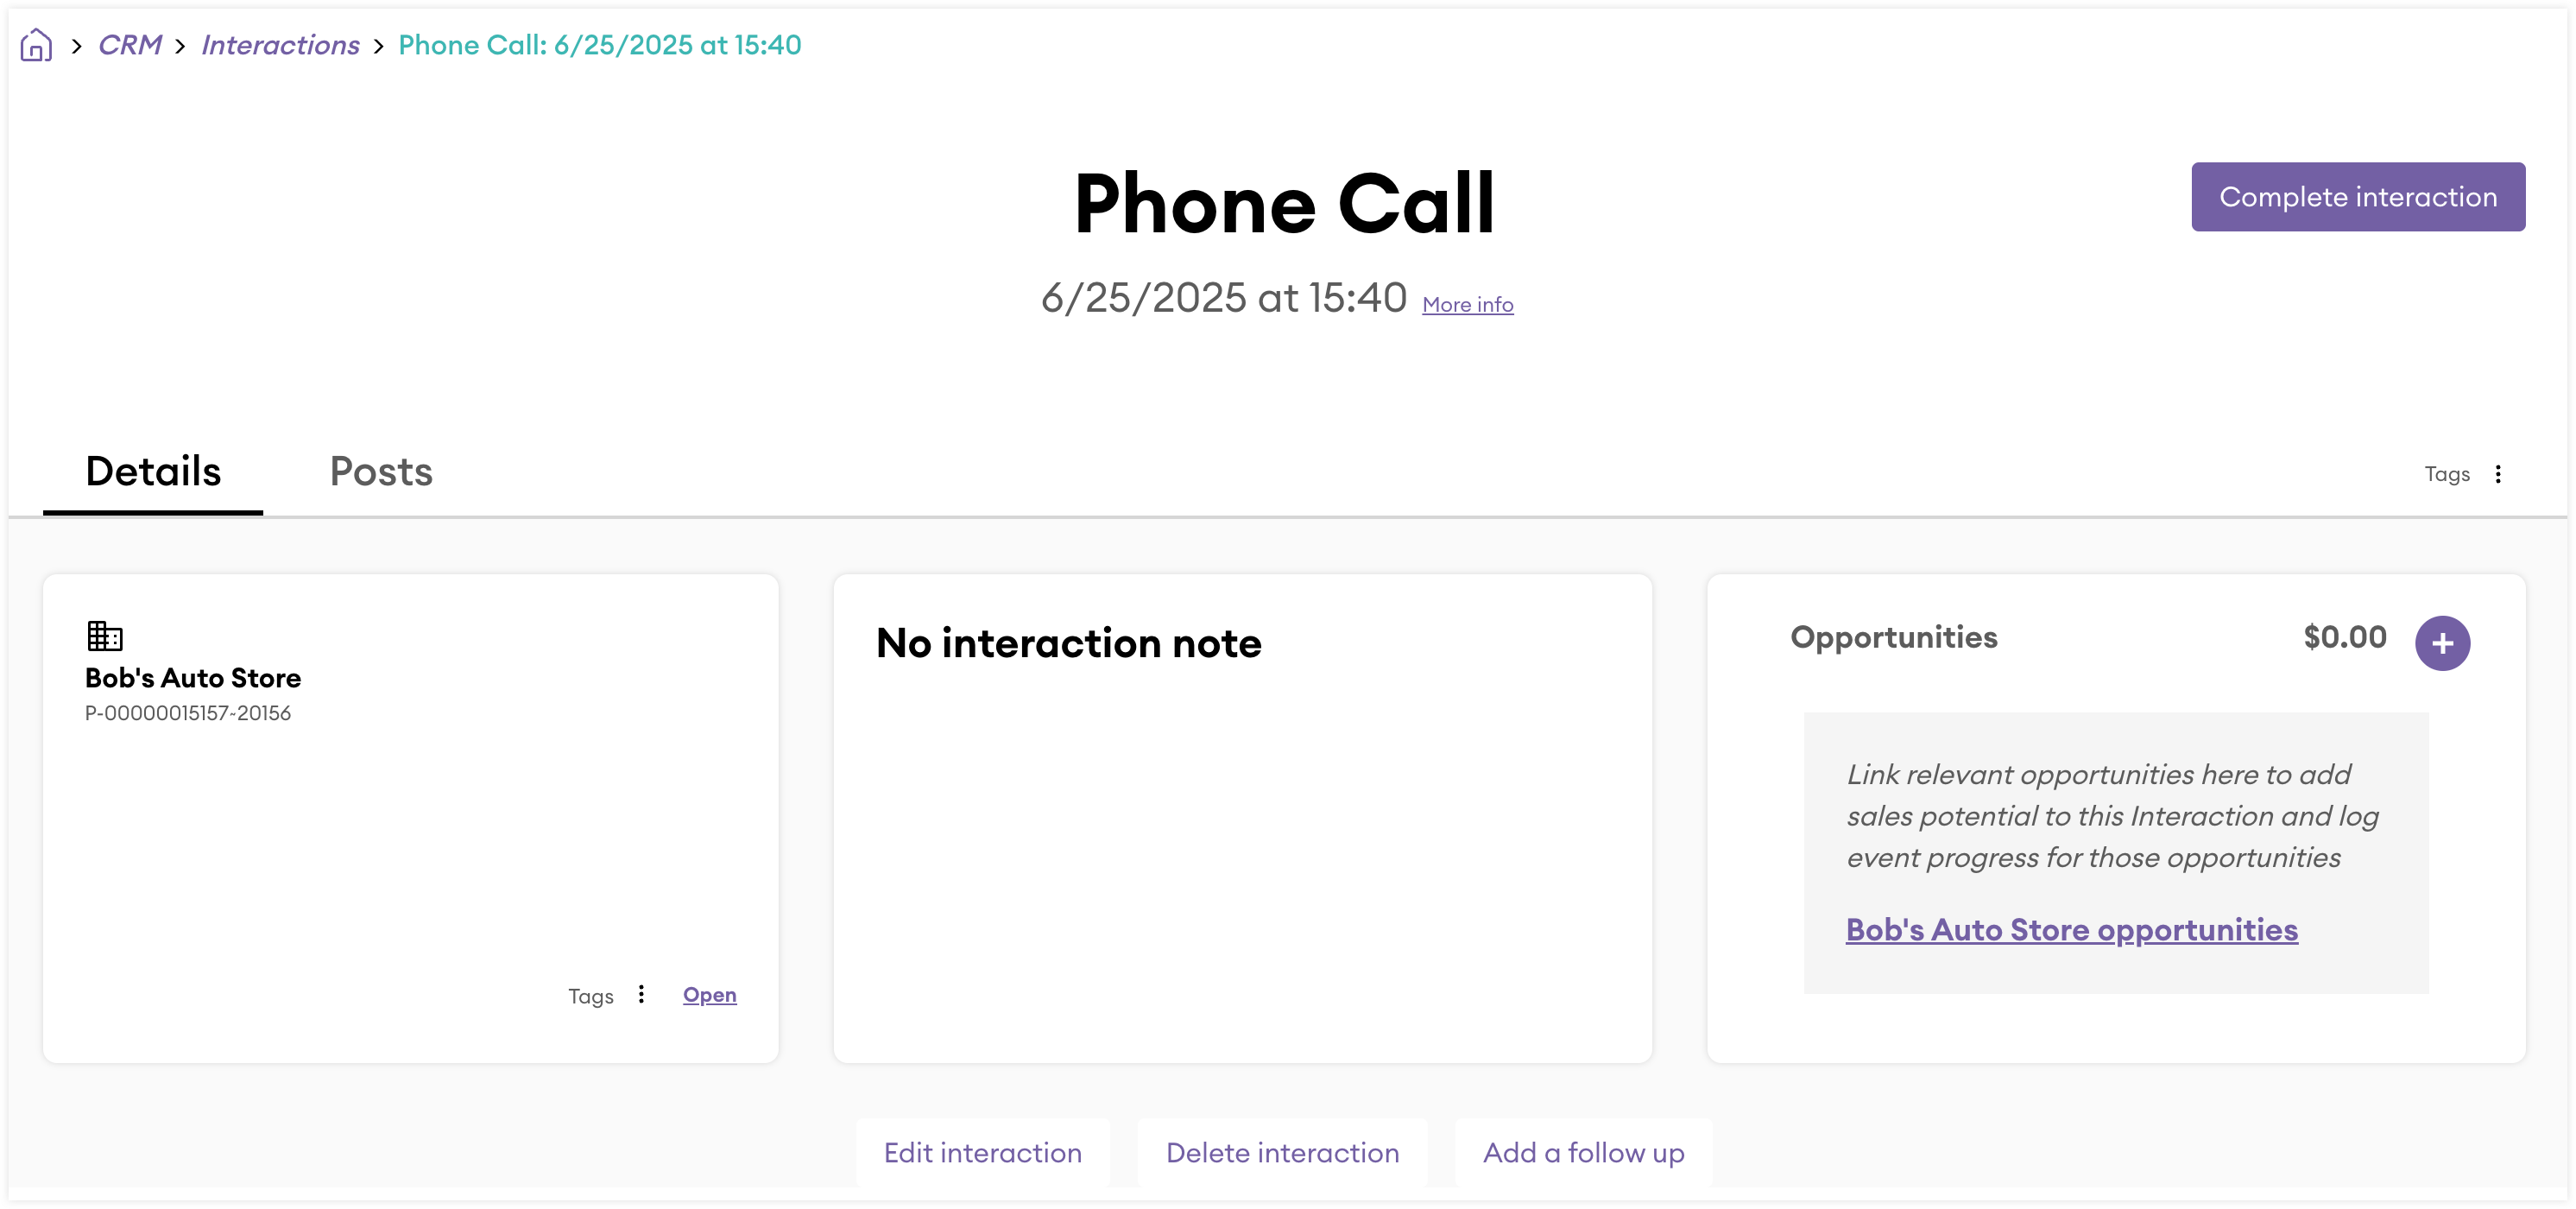
From the Recommendation record view Details tab:
- Click the Complete interaction button to complete the interaction.
- Following the date and time of the interaction, click the More info link to display who is assigned to the interaction.
- Click the three-dots icon next to Tags to add an associated tag.
- From the associated prospect or contact card, click the Open link to open the respective record.
- From the Opportunities card, click the + icon in the Opportunities card to create and associate a new opportunity.
- From the Opportunities card, click the {prospect/customer name} opportunities link to update existing associated opportunities.
- Use the Edit interaction button to edit the interaction. Interactions that have been completed cannot be edited.
- Use the delete interaction button to delete the record.
- Use the Add a follow up button to add a follow up interaction.
- If it is a customer interaction, click the Open customer snapshot button to generate a snapshot for the customer associated with the interaction.
From the Recommendation record view Posts tab:
- Use the Add post button to create a post associated with the interaction.
Completing Interactions
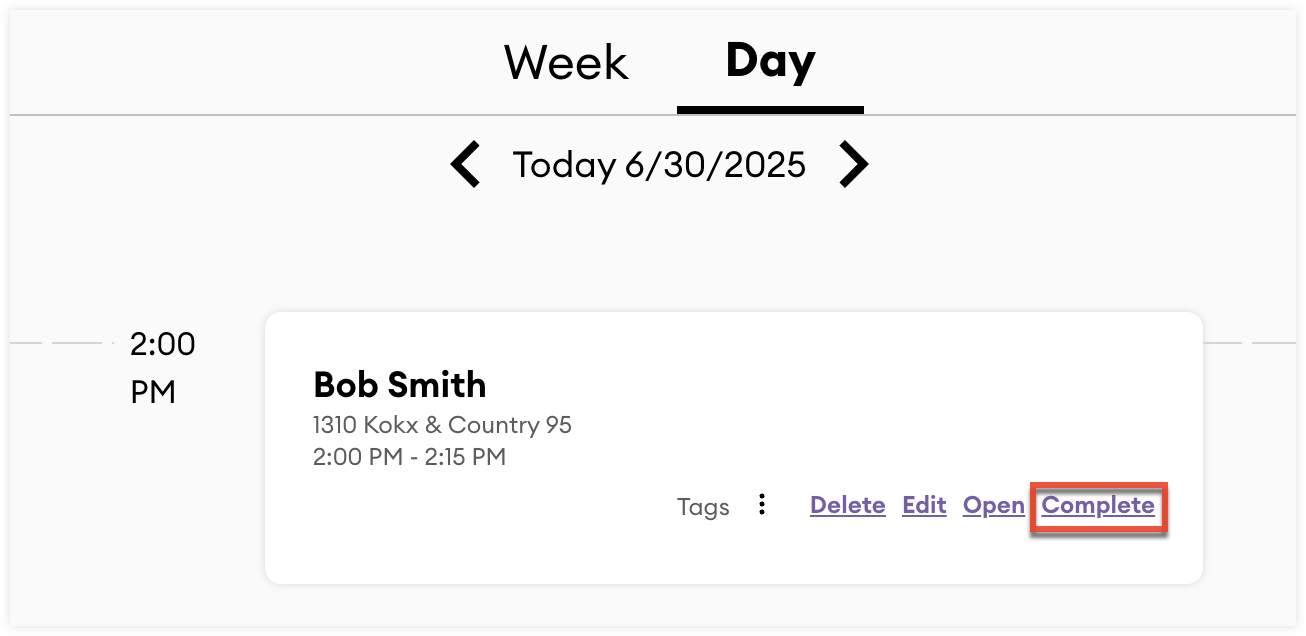
Once you complete a customer engagement, you can work to complete the associated interaction from either the My interactions page or the interaction’s record. Please note, completing an interaction cannot be undone, and some interaction details can no longer be edited after it is completed. Follow these steps to complete an interaction:
- If you are completing the interaction from the My interactions page, locate the interaction and click the Complete link. If you are completing the interaction from the interaction record, open the record and click the Complete interaction button.
- From the Interaction outcome stage, use the Interaction outcome field to specify the result of the engagement.
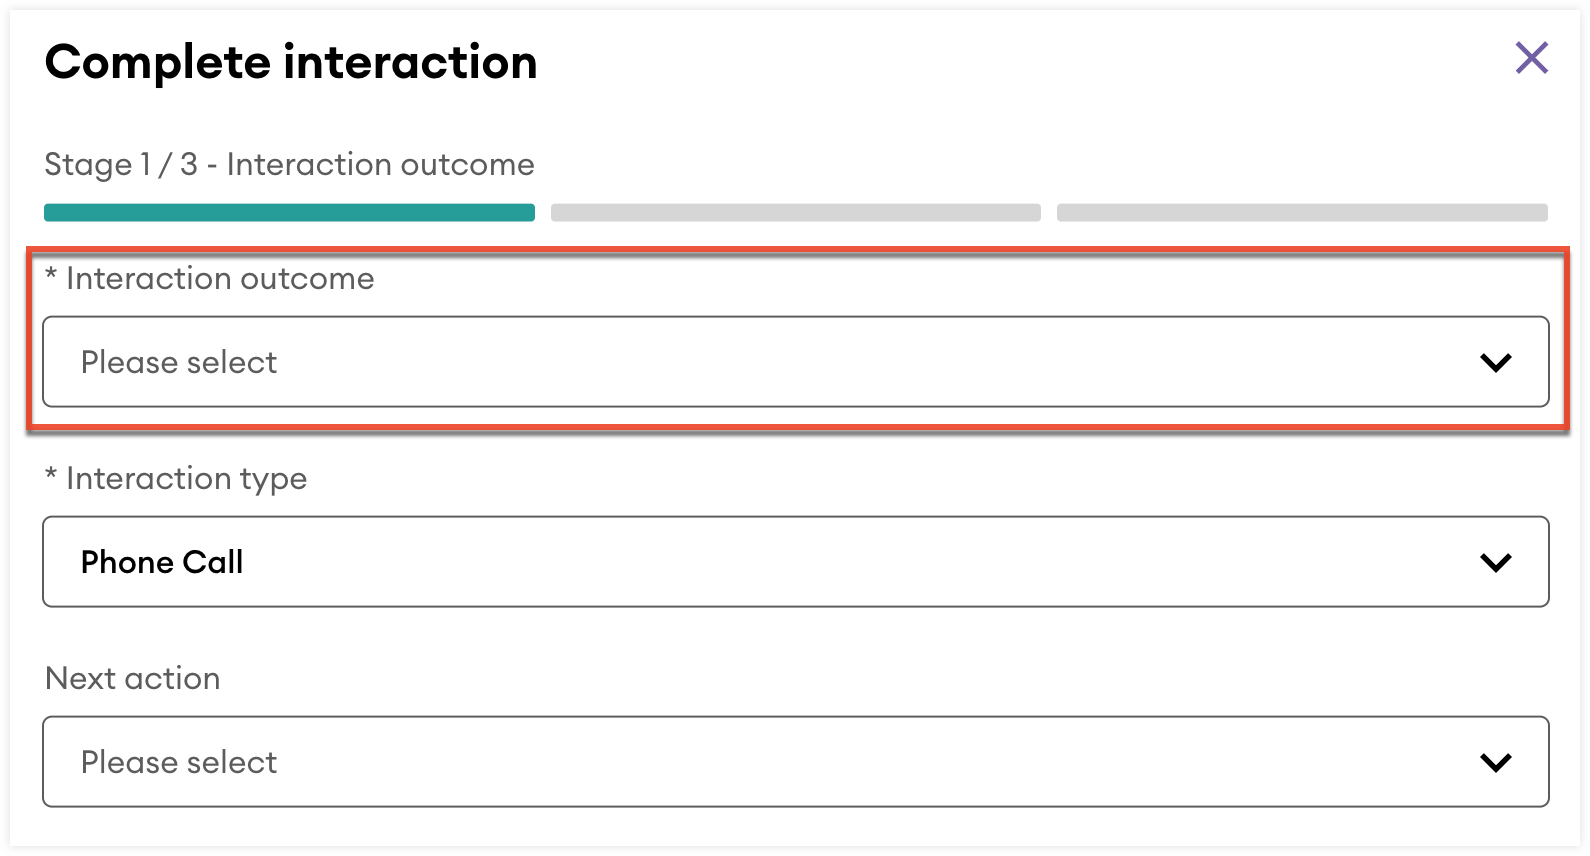
- Optionally:
- Use the Interaction type field if the type changed, for example if the customer could no longer meet in person but was available for a call.
- Use the Next Action field to associate a follow-up action with this interaction.
- Use the Add a follow up button to create a follow-up interaction.
- Click "Continue".
- From the Opportunities stage, you can link and update existing associated opportunities to this interaction by clicking the {prospect/customer name} opportunities link or create and associate a new opportunity by clicking the Add new opportunity link.
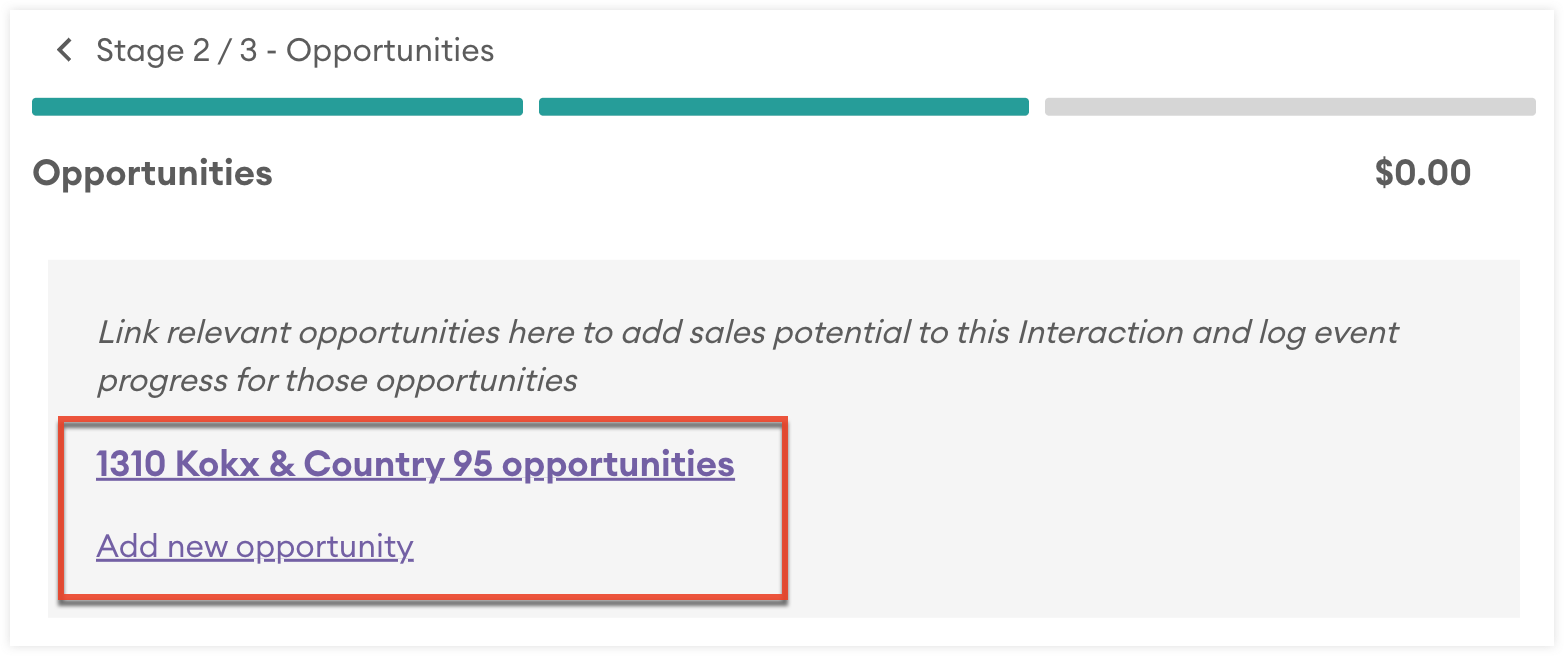
- Click "Continue".
- Optionally, from the Update notes stage, use the Interaction note field to update the existing interaction notes.
- Click "Complete" to complete the interaction.