How to produce a login report
Overview
This guide will show you how to produce a report displaying how many times users have logged-in to sales-i over a set period of time. Please note: This task can only be completed by Power Users
Desktop
Download a PDF version
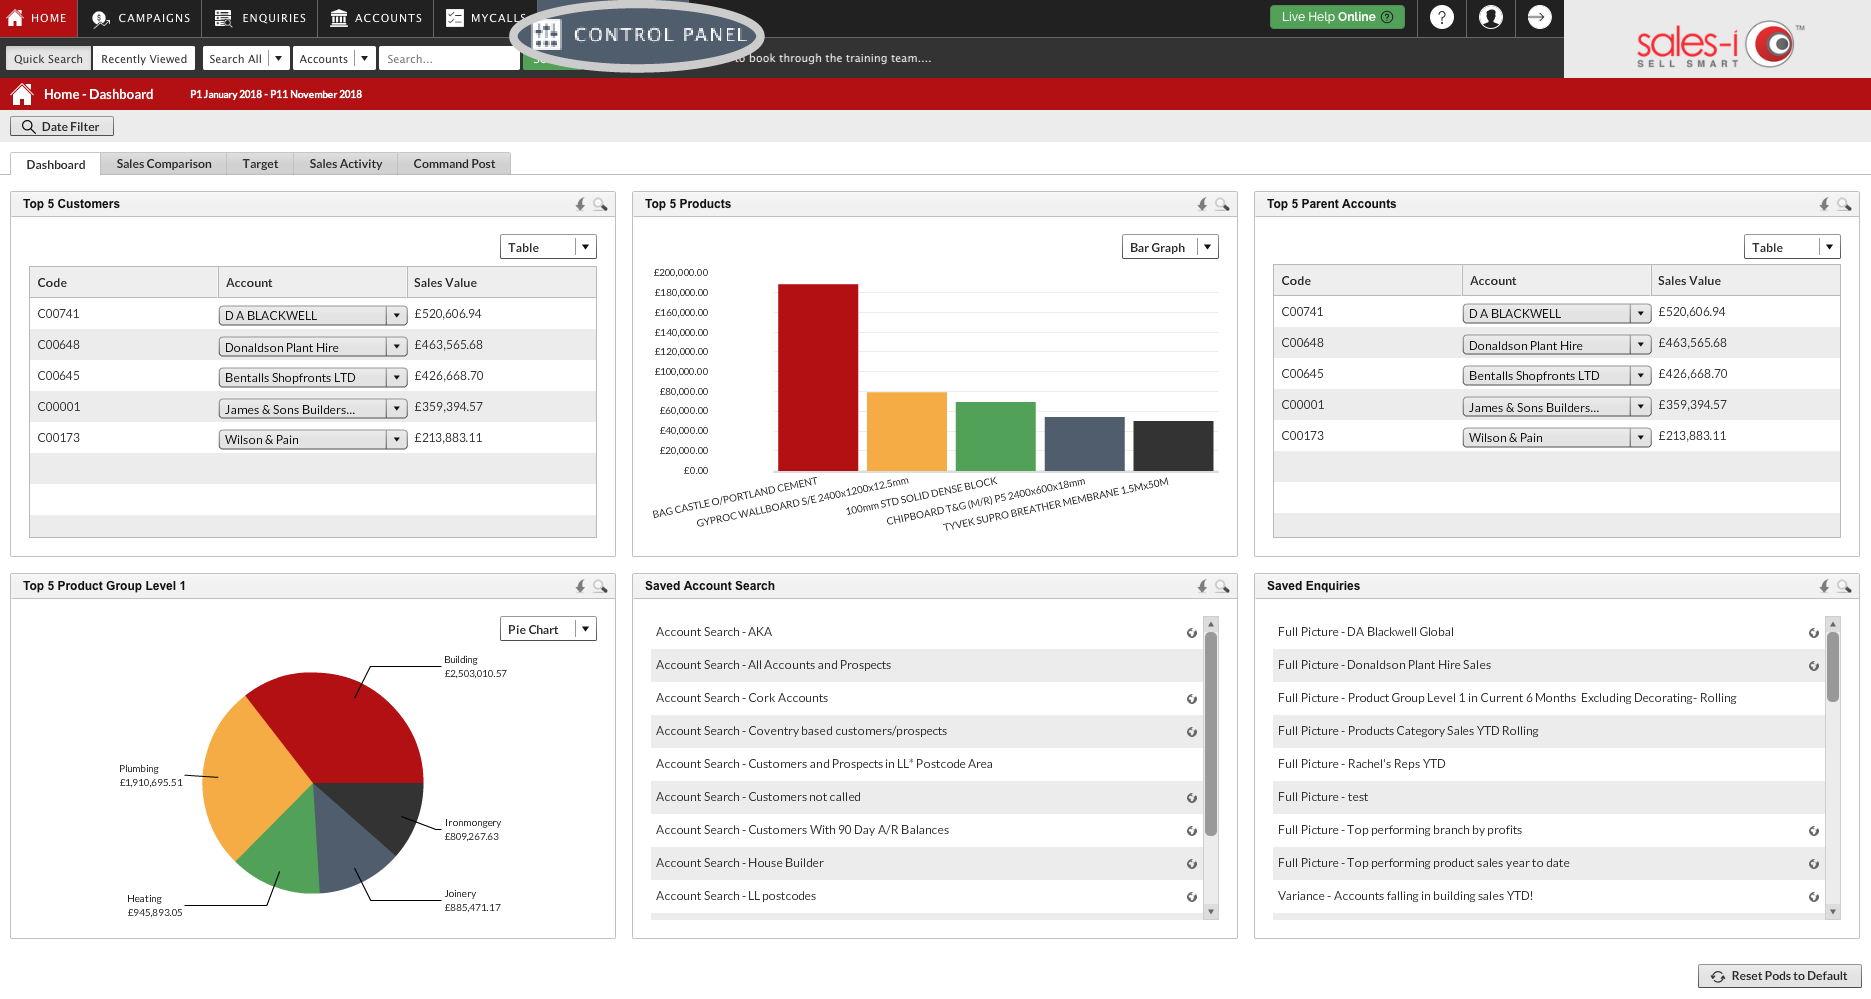
Step 1: Click Control Panel
From the black navigation bar at the top of the screen, click Control Panel.
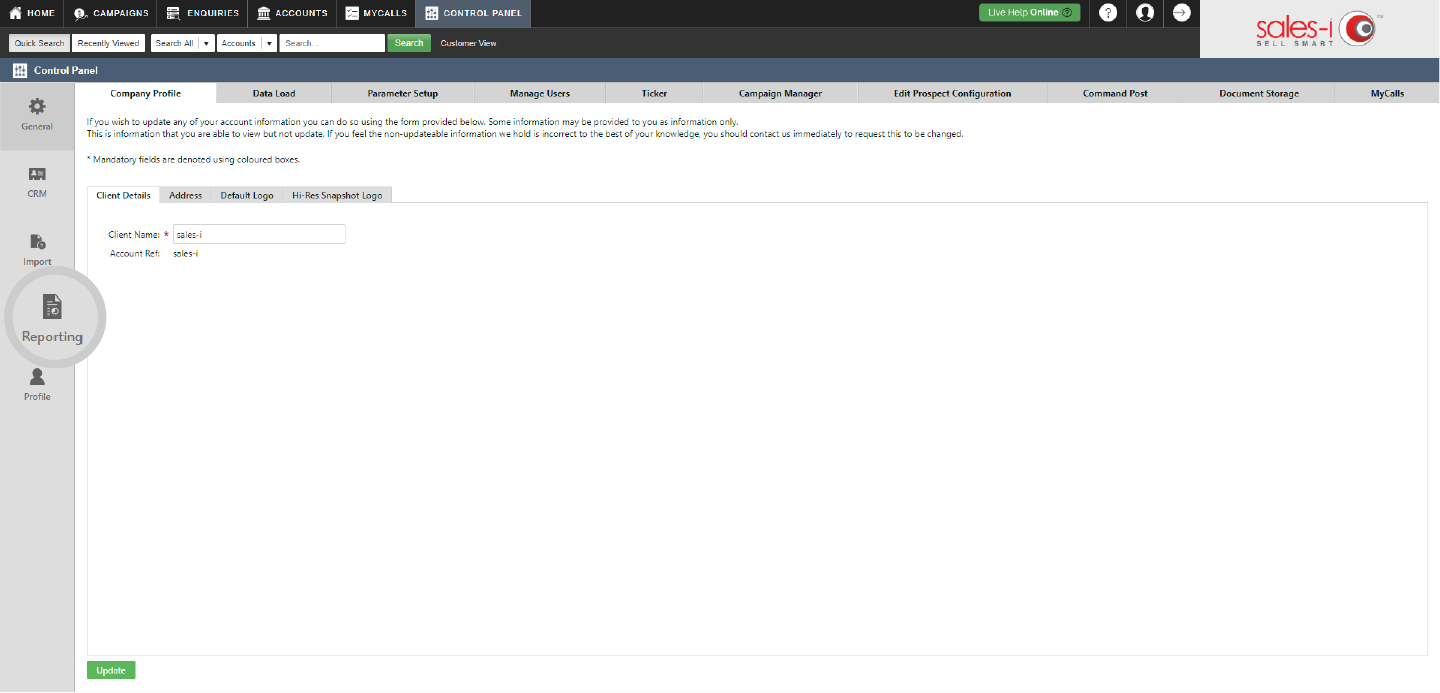
Step 2: Click Reporting
Select Reporting from the options on the left hand side.
Step 3: Click General
Next, select the General tab from the options in the middle of the screen.
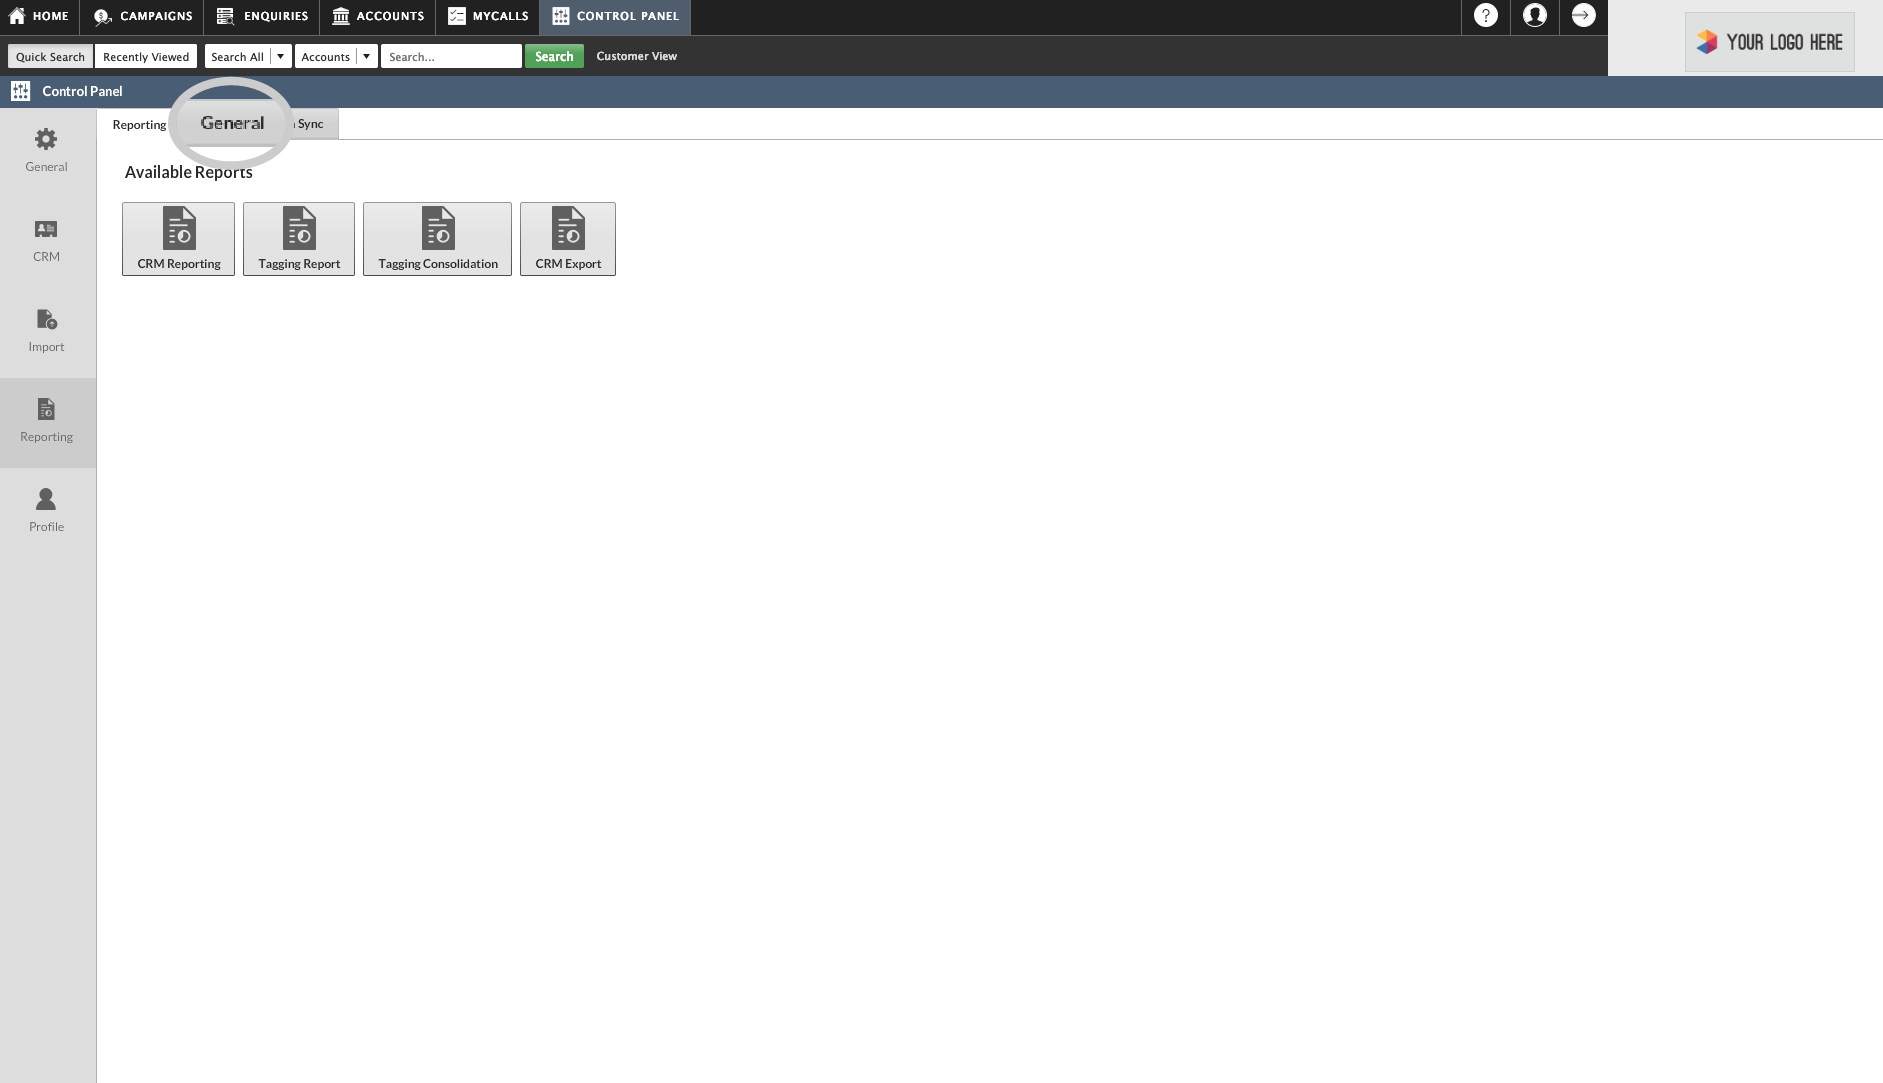
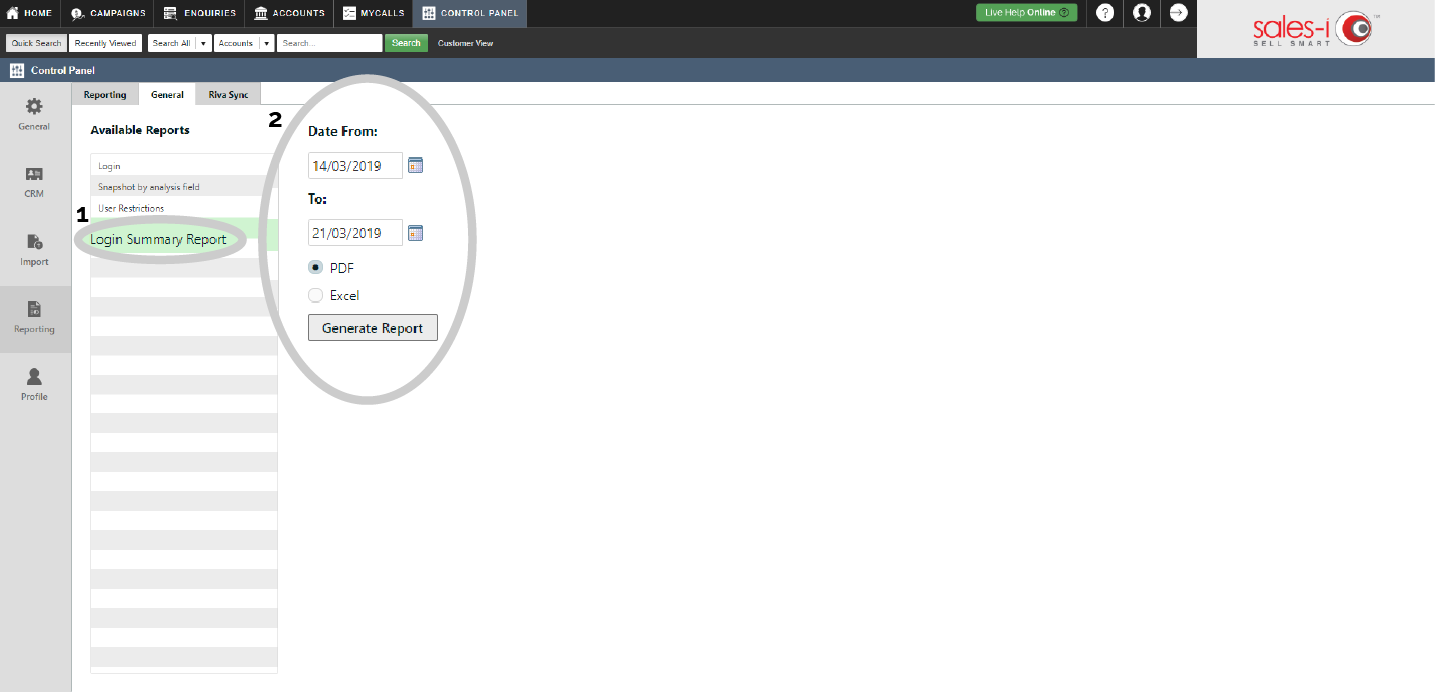
Step 4: Click Login Summary Report
Select the Login Summary Report option so it highlights green.
Now select the dates you wish to check between by altering the Date From: and To: felds
Finally select whether you wish to download the report as a PDF or in an editable Excel format.
Finally, click Generate Report.
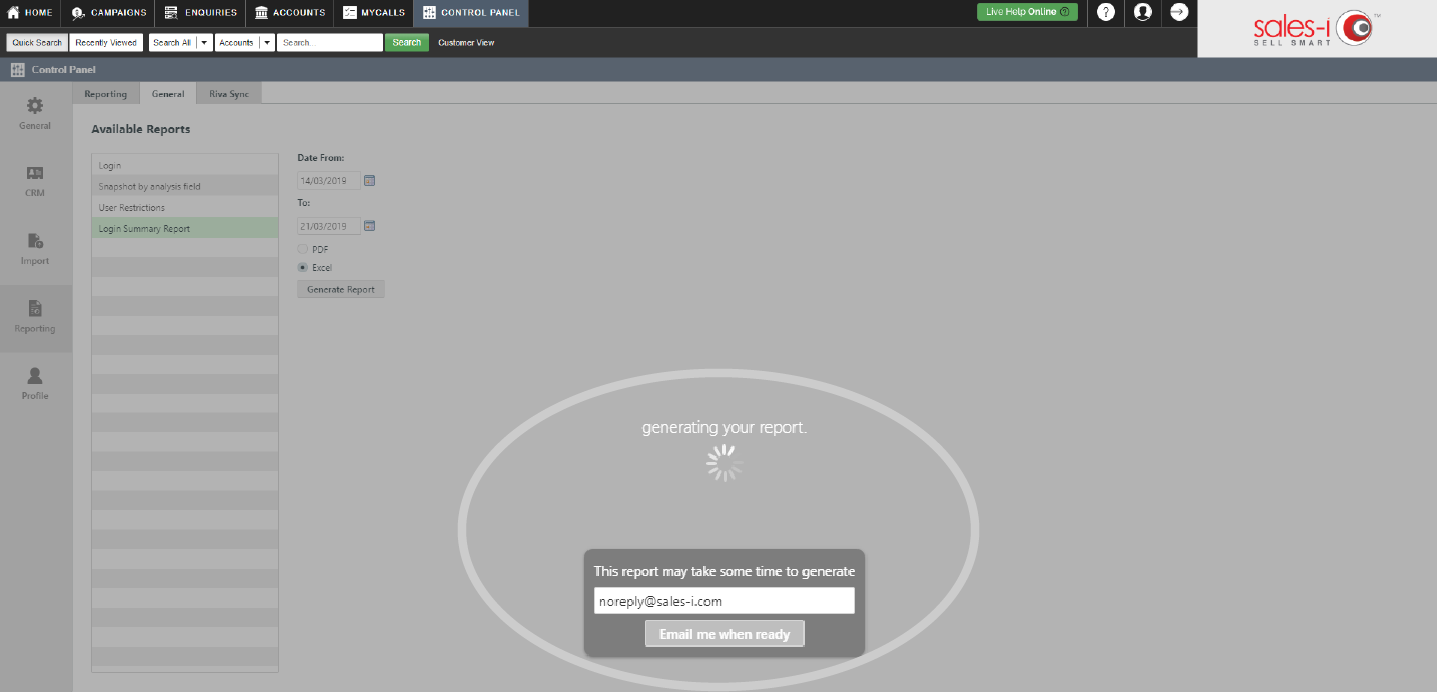
Step 5: Email if required
Your report is now being generated. This can take some time.
You can choose to receive an email notifying you once the report is ready by clicking the Email me when ready button.
Please note: You can change the email address by typing into the white text box.
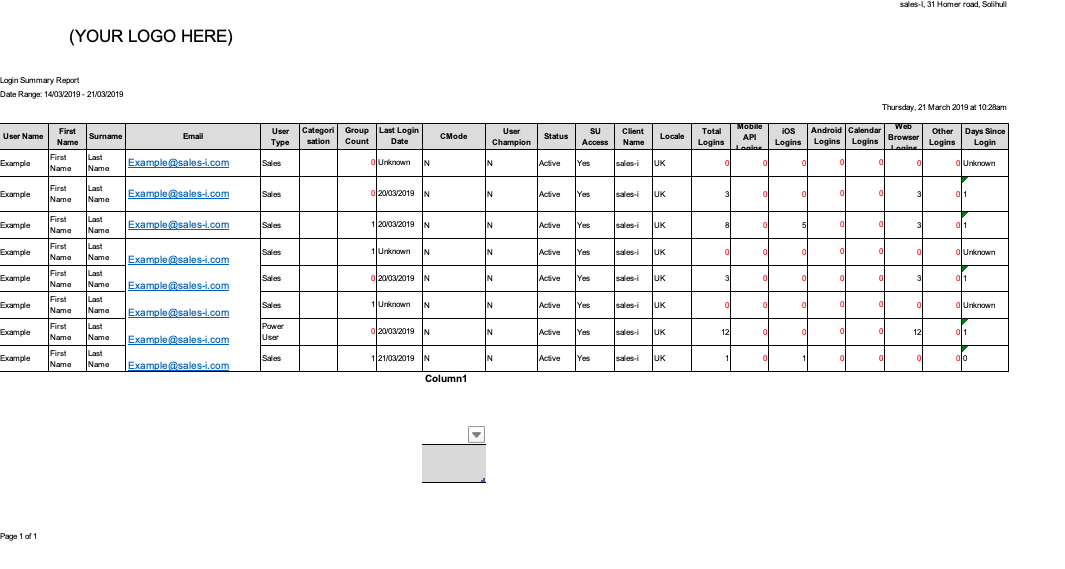
Step 6: Opening your report
Once your report is ready, a new window will open*, with a link to the file in the bottom left hand corner, click on the file name to open it up.
You will now be able to see among other things, the total logins for each user, the logins by device type and the amount of days since the users last login.
*Please note: If a new window does not open after step 5, it could be because your browser is blocking pop ups.
To unblock pop ups, you should see either a small window icon or a jigsaw puzzle piece in the right hand side of the URL bar which when clicked will ask if you want to allow pop ups.
Click this to allow the file to be sent through to you.