How to see which customers have not bought anything from you
Overview
This guide will show you how to create a campaign that will enable you to quickly identify what customers have not made a purchase with you over the last 6 months.
Please Note: Only Power Users can create Campaigns, but they can be set up to be viewable by other users as well.
Desktop
Download a PDF version
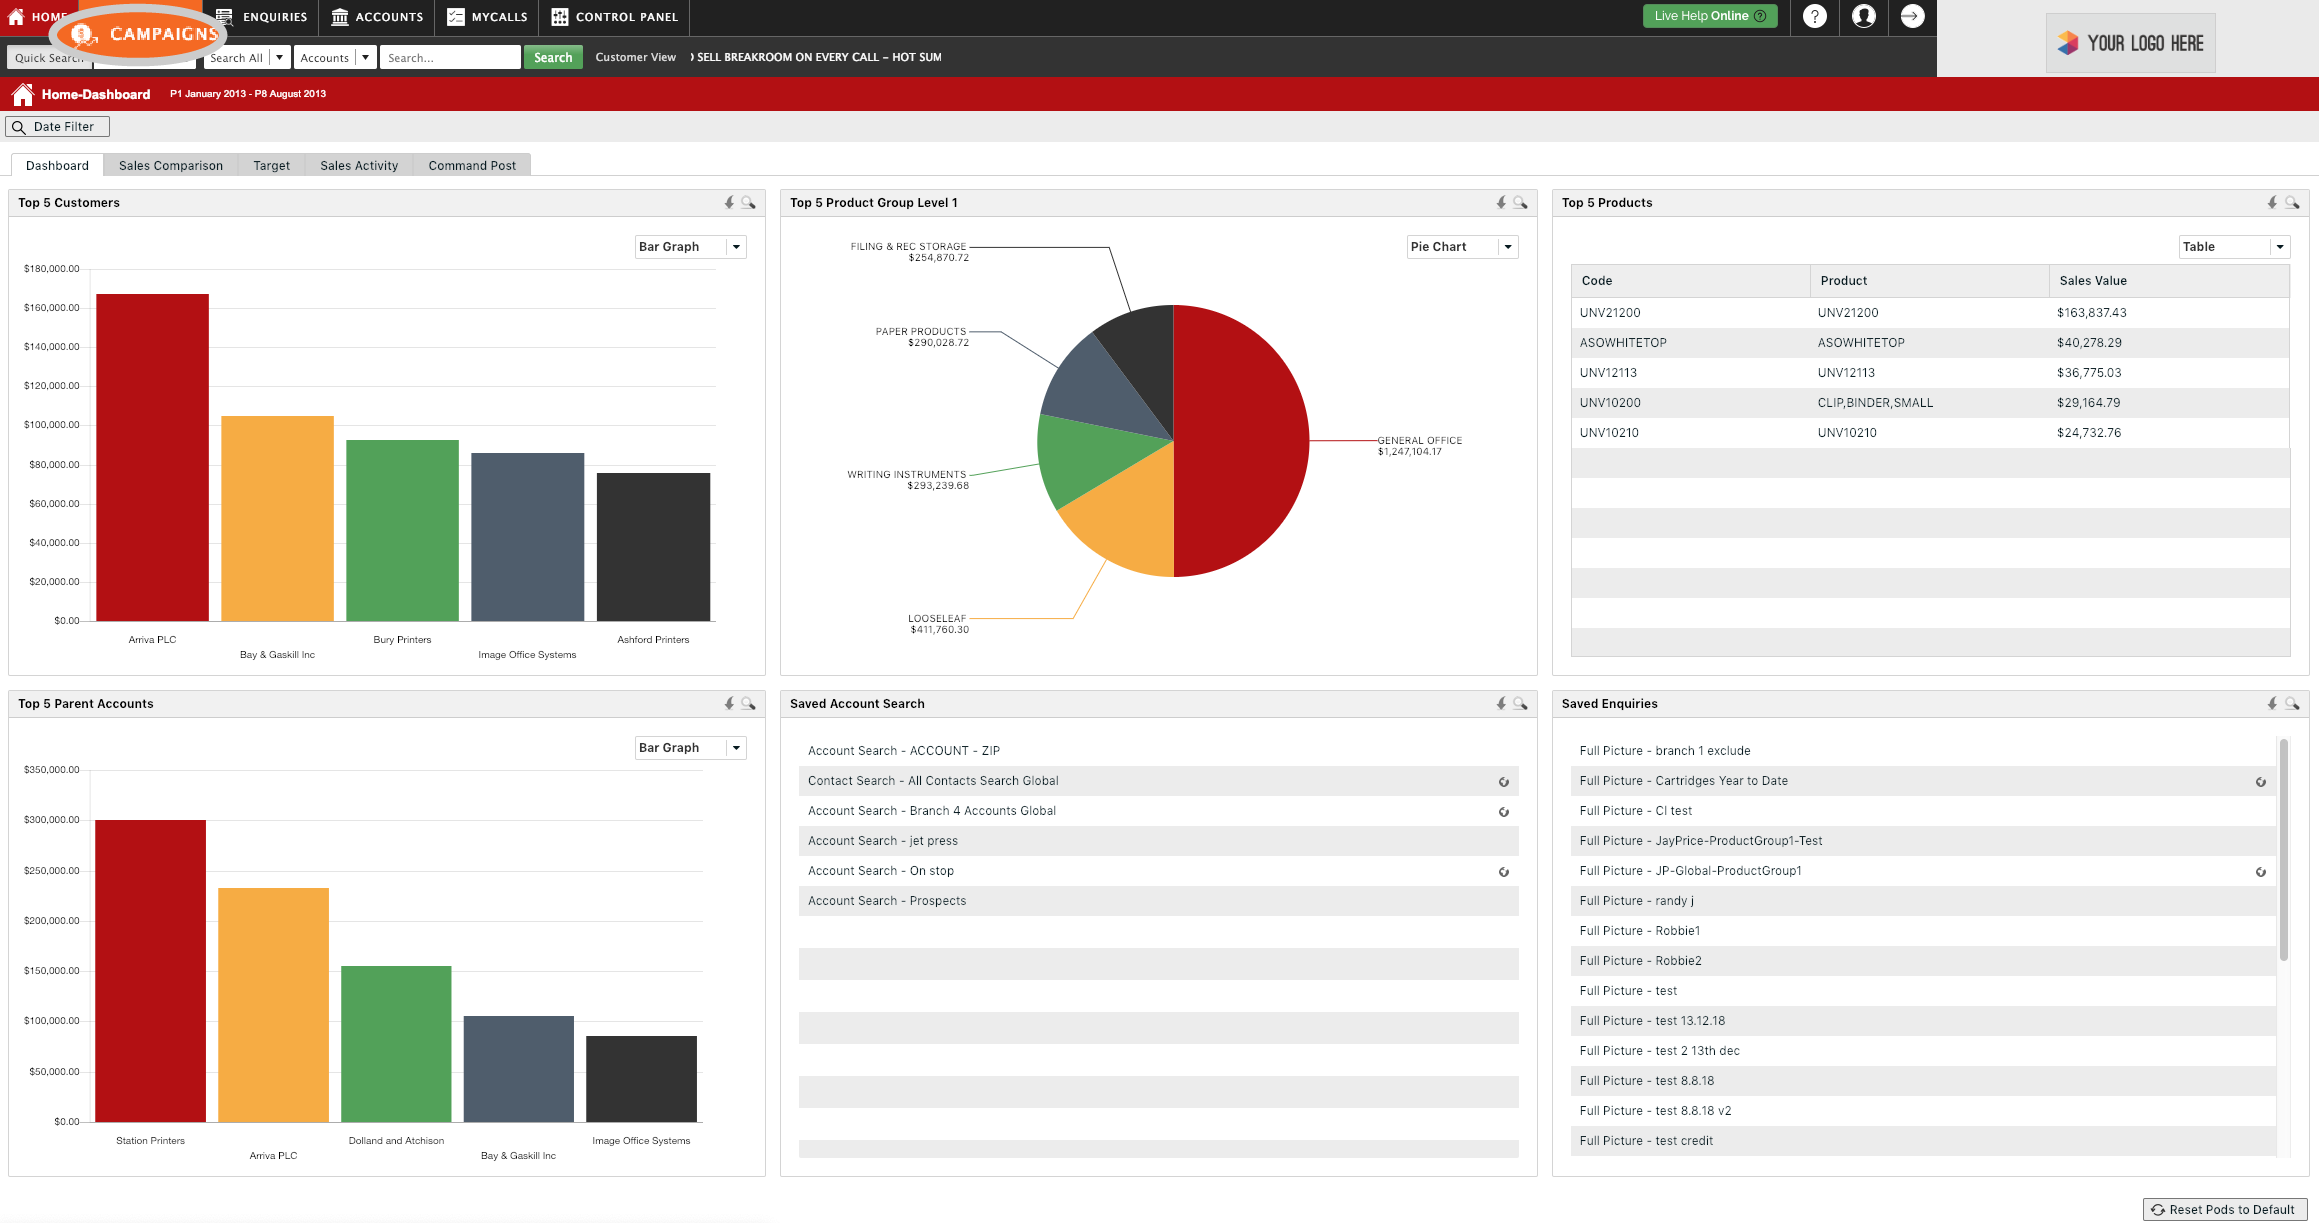
Step 1: Click Campaigns
Click Campaigns from the menu at the top of the screen.
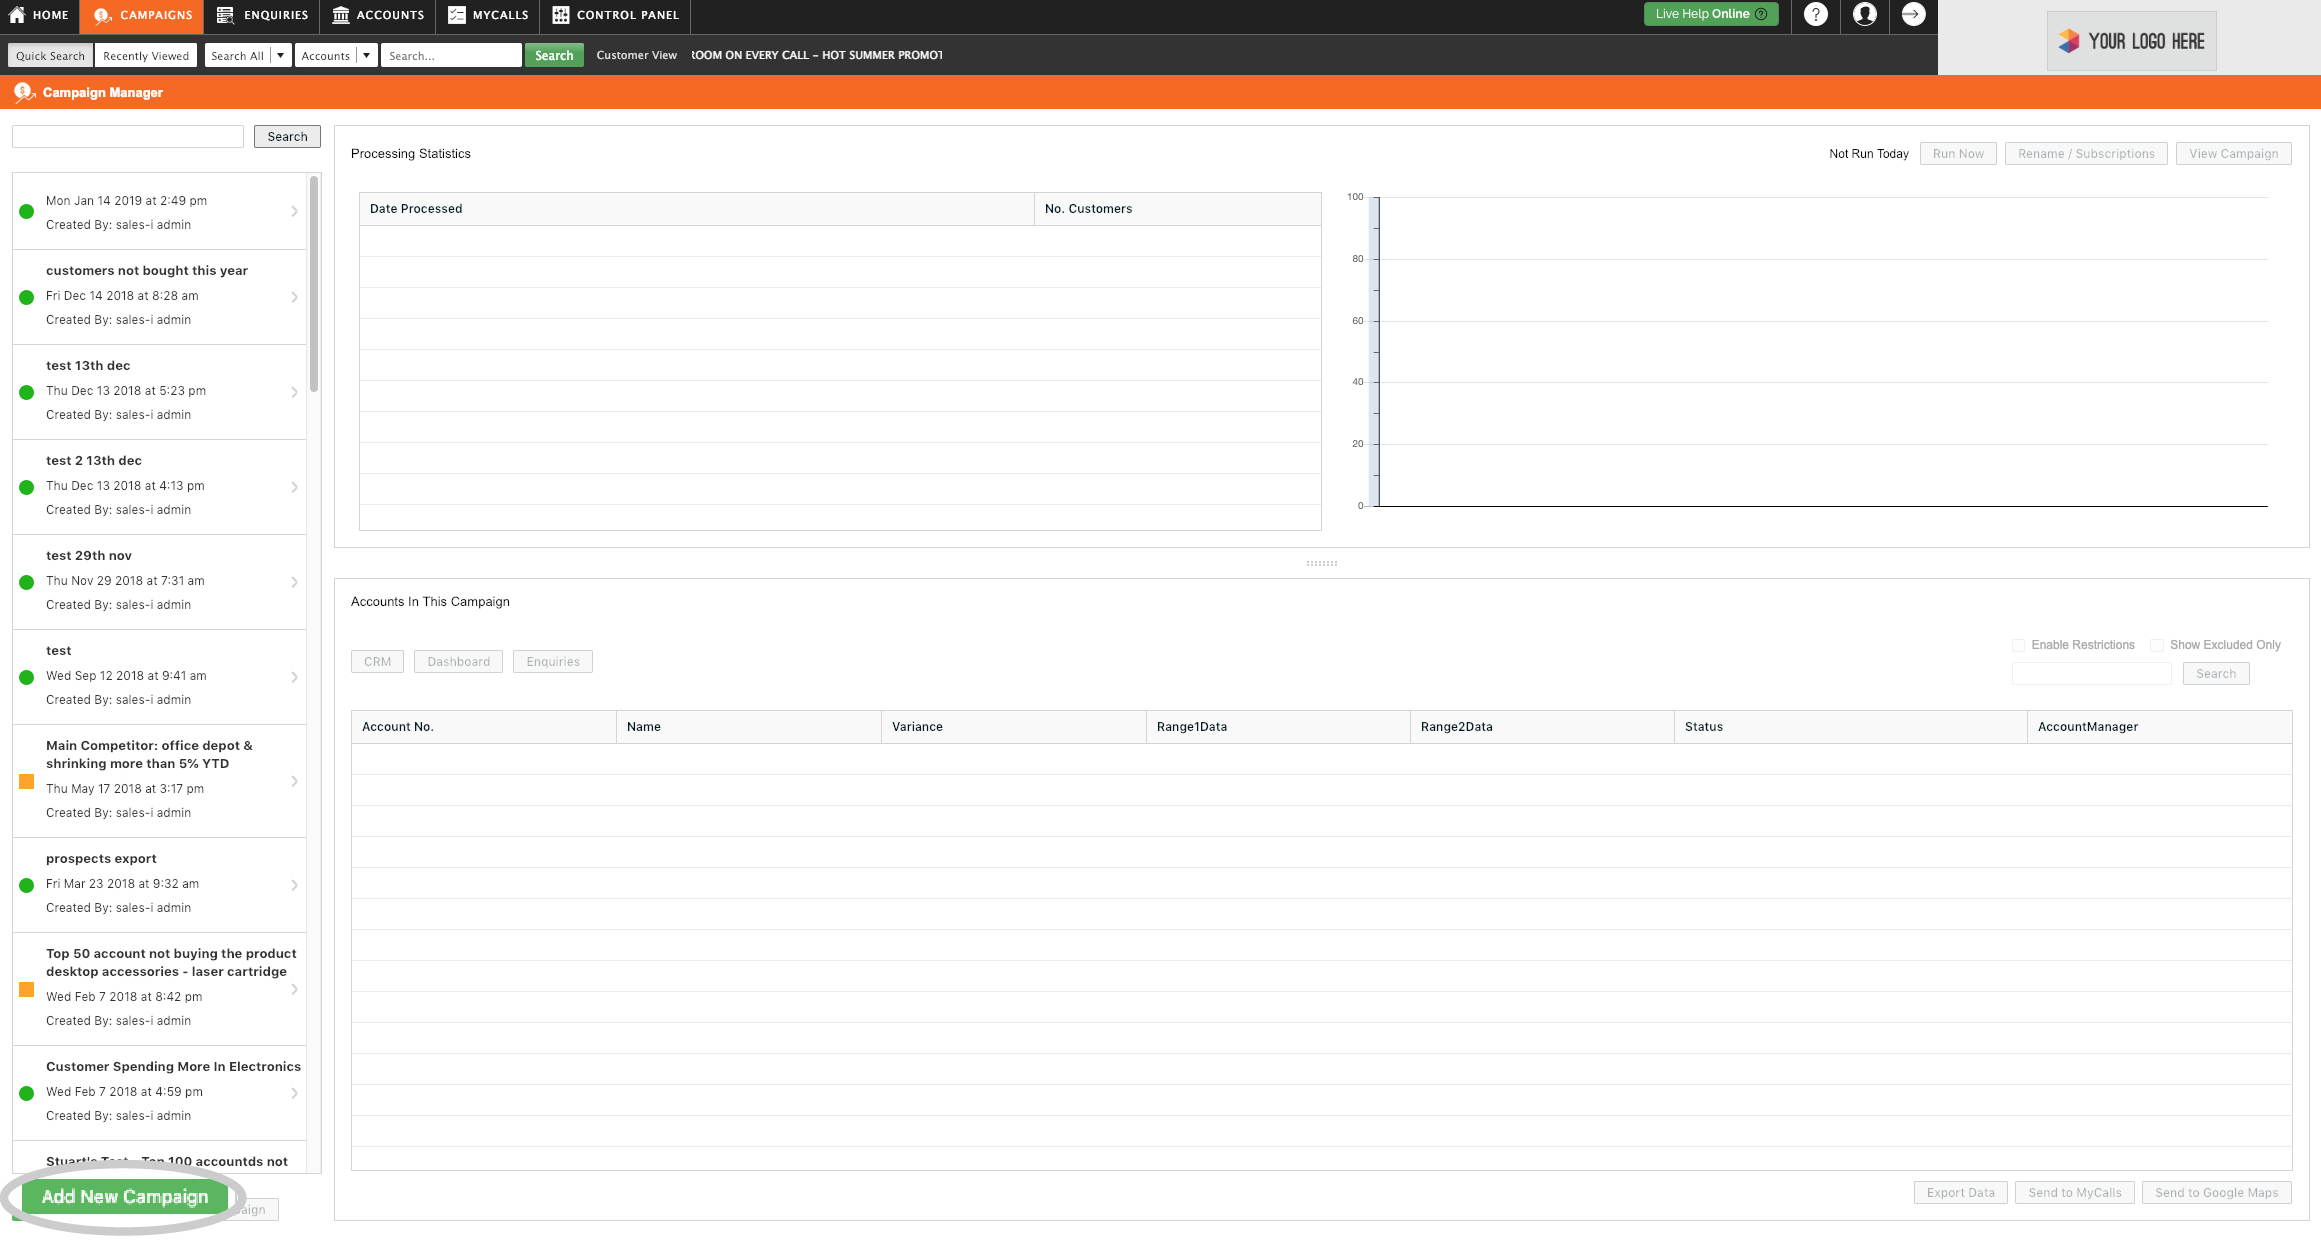
Step 2: Click Add New Campaign
Click the green Add New Campaign (in the bottom left of the screen).
Step 3: Drag Not Bought
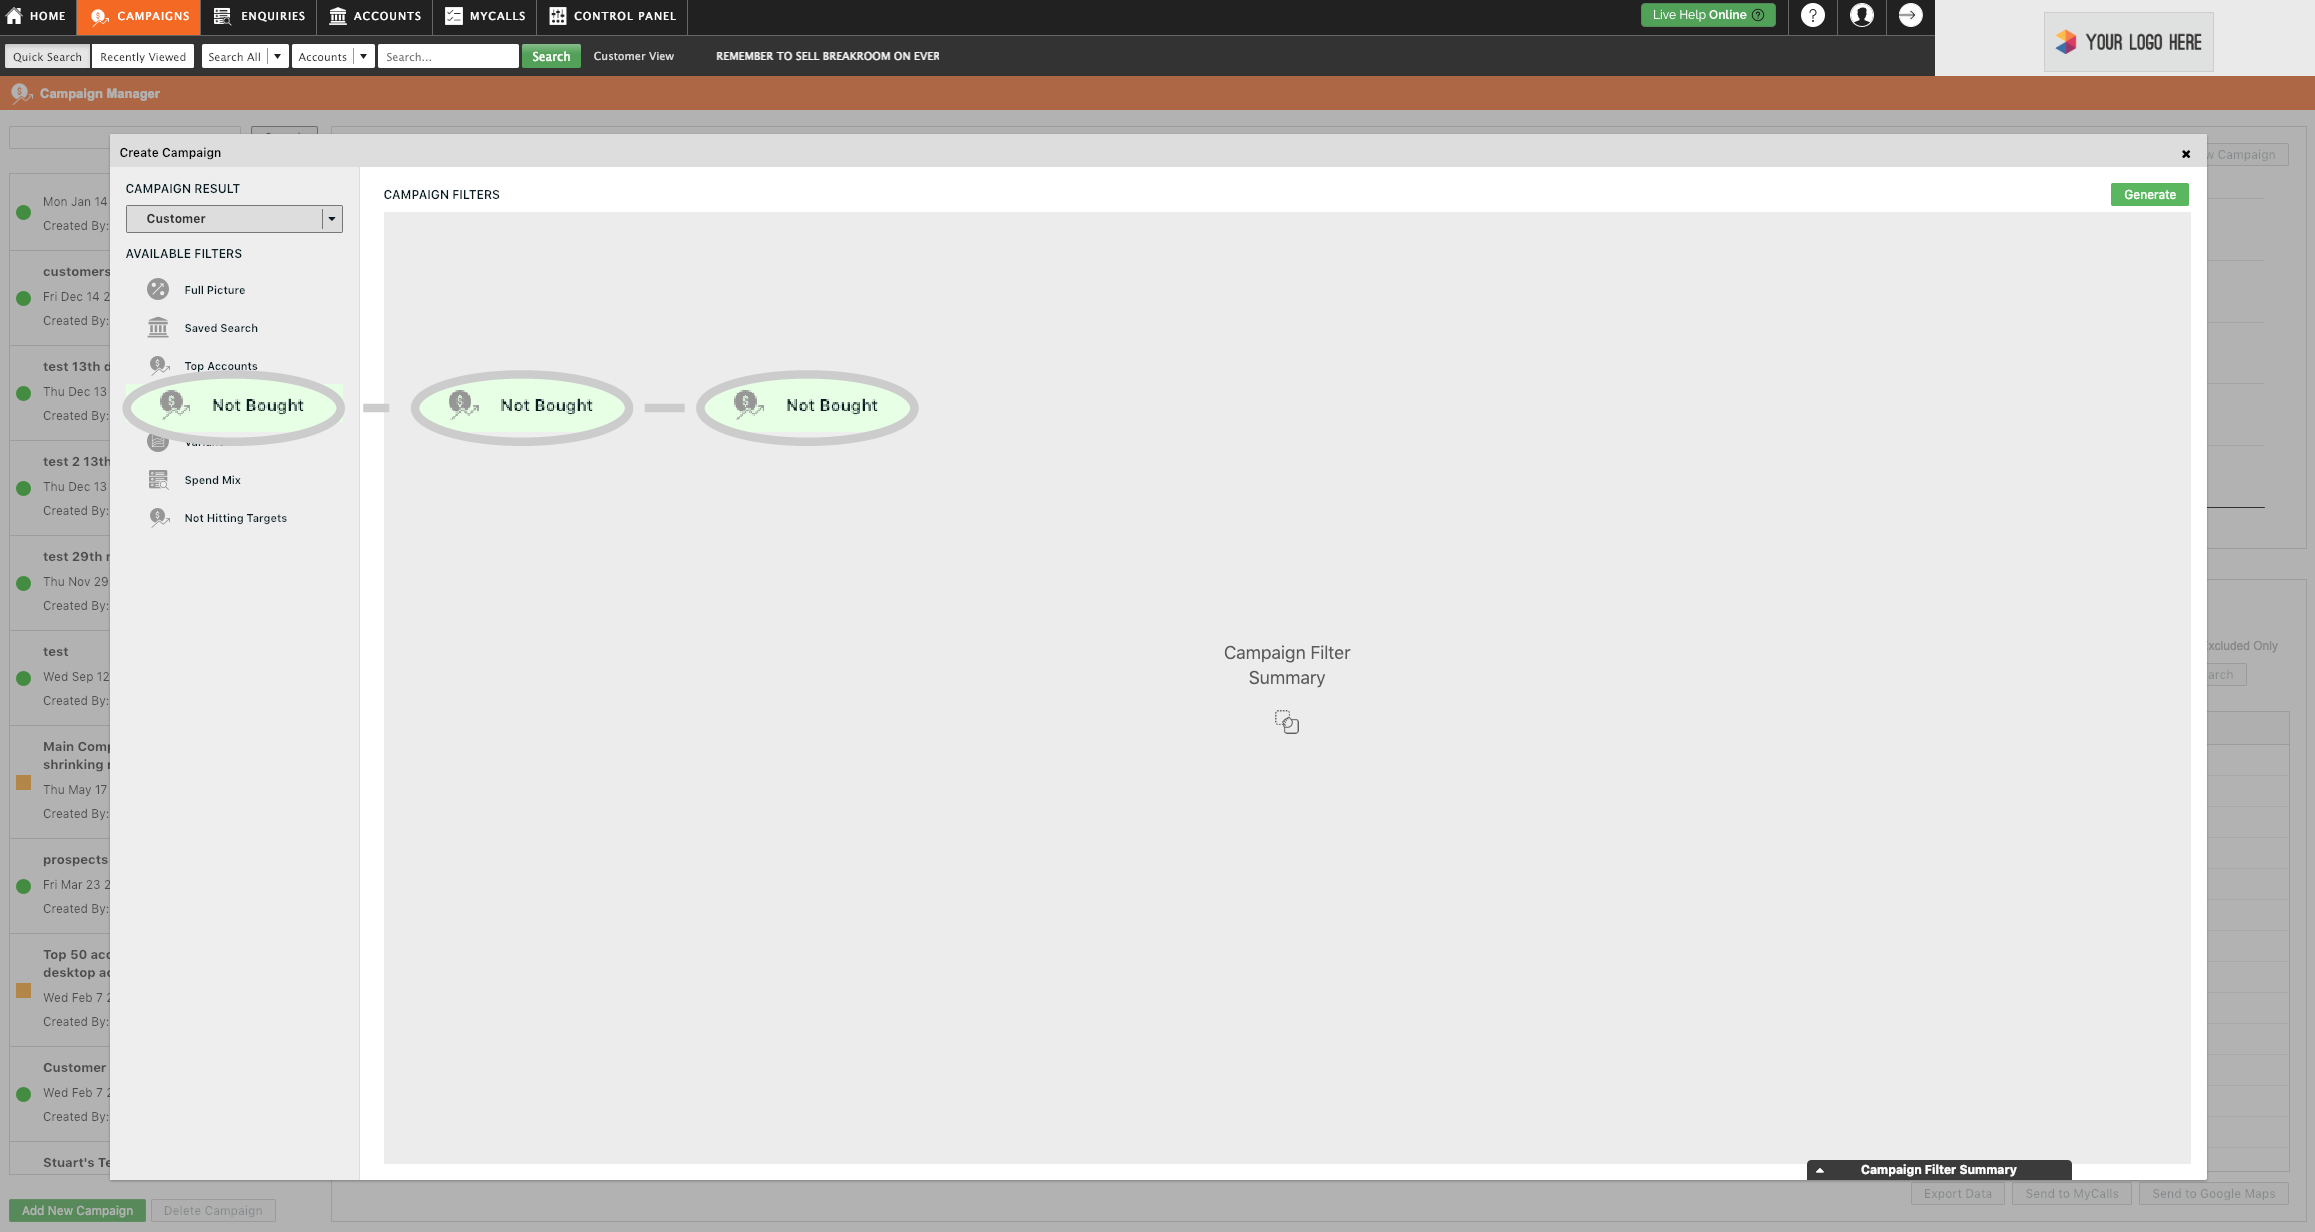
Leave the Campaign Result set as Customer.
Then, click on the Not Bought filter and drag it into the center of the Campaign Filters window.
Step 4: Options
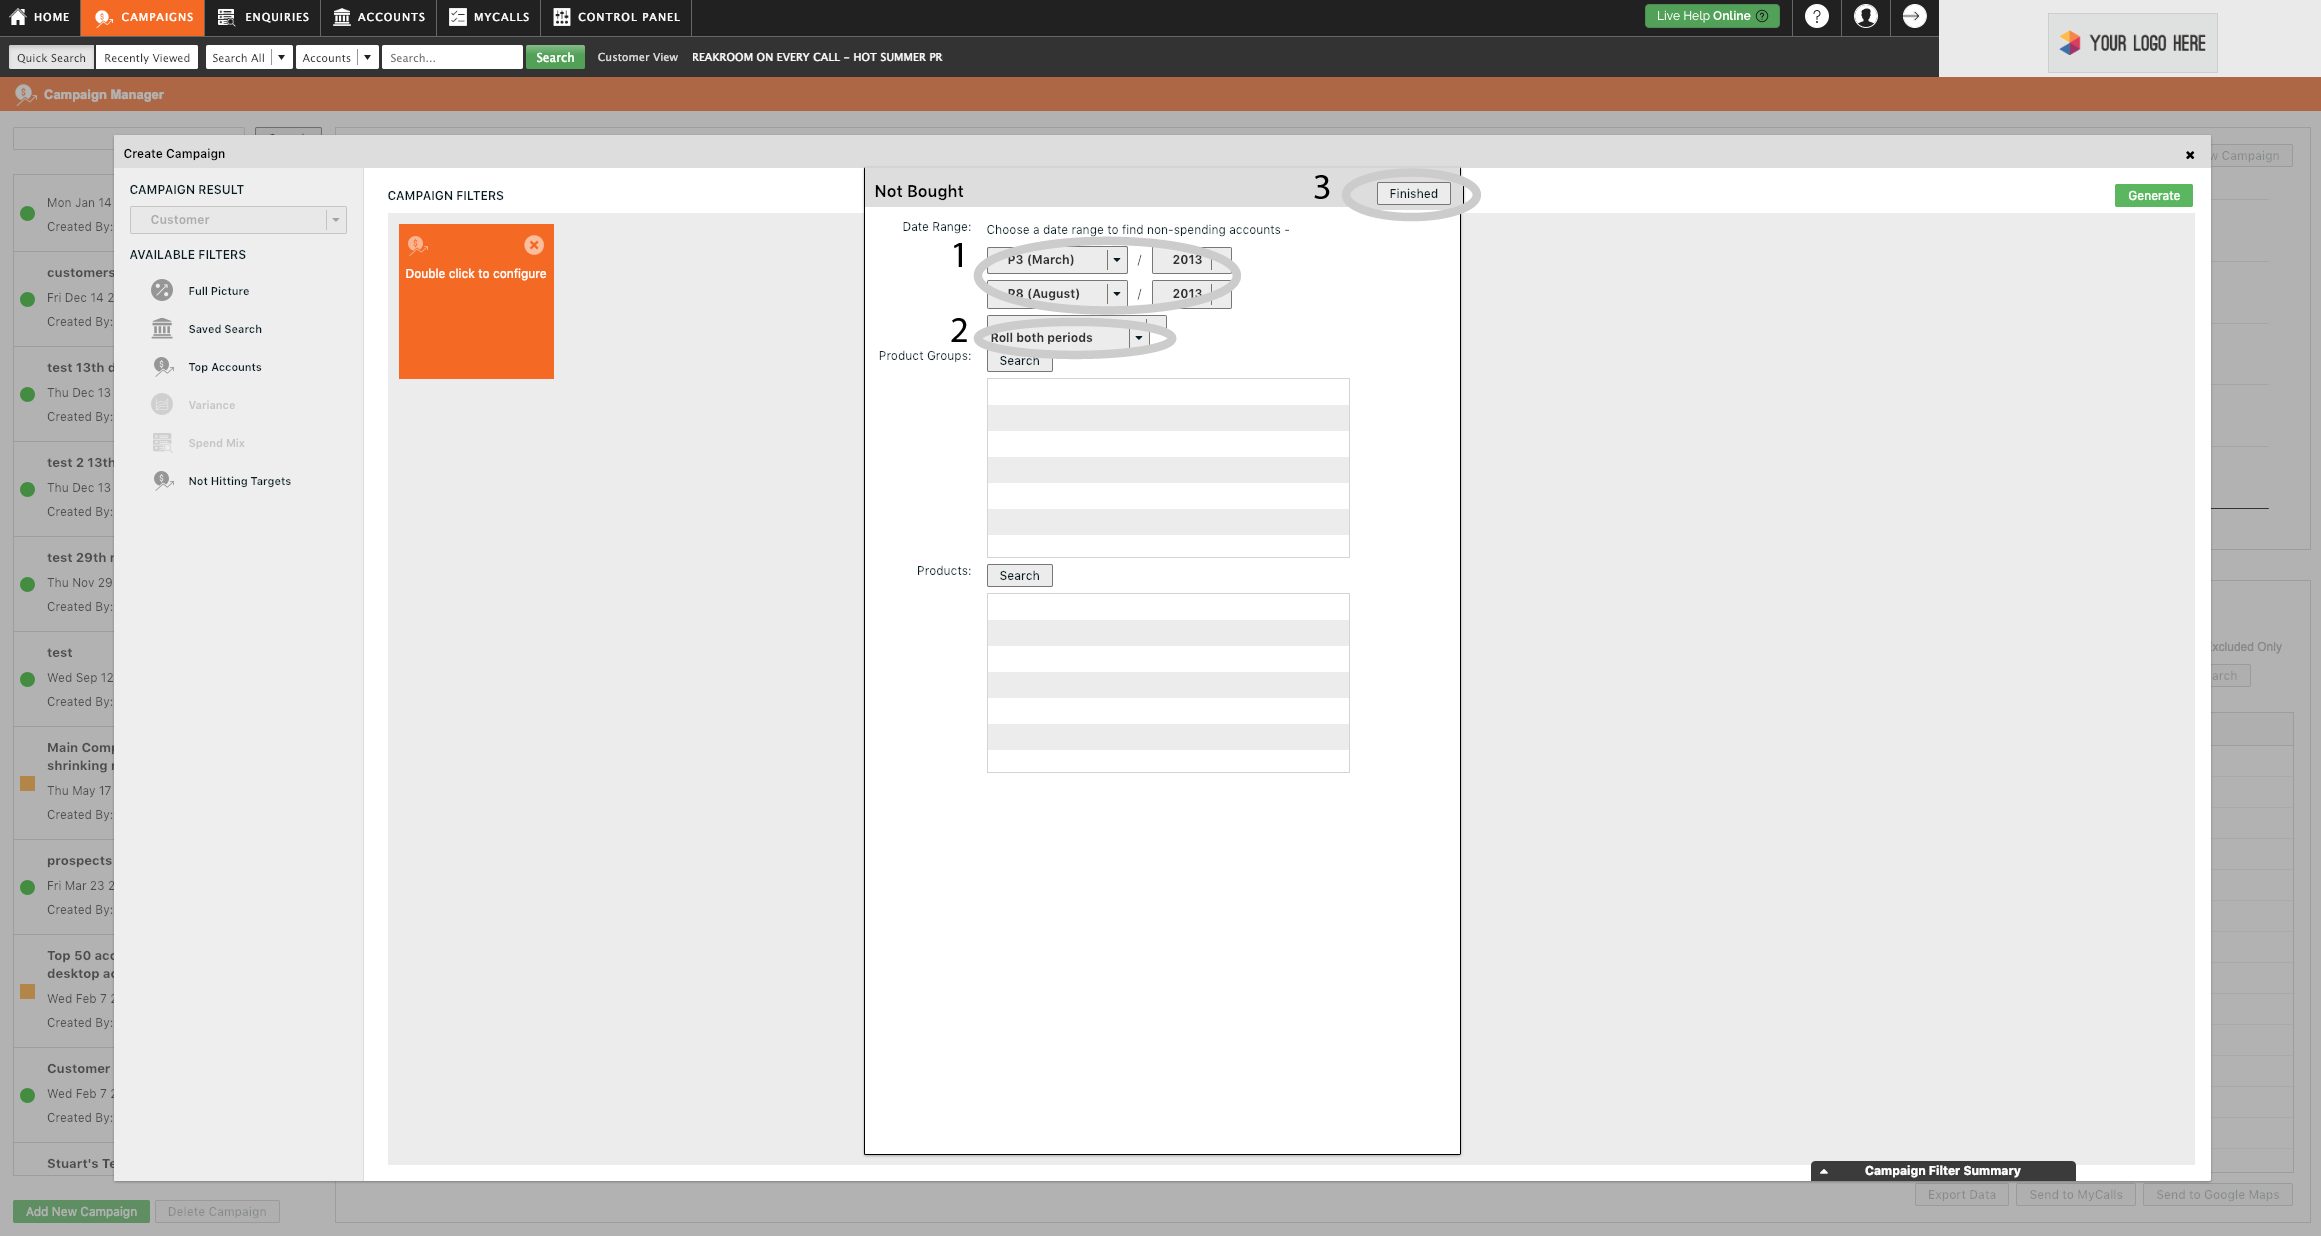
A smaller window will now appear. Here you can set more specific parameters for the filter.
Firstly: Select the dates you wish to check between. (We will select the last 6 months).
Then, select Roll both periods. Doing this means that regardless if you look at this campaign next month or in 4 months times, both start and end dates will have 'rolled' so that you always only see the last 6 complete months of data.
You can also choose to see who has not bought only certain Product Groups or Products. For this example, we will leave this untouched so we are searching to see who has not bought any products, whatsoever.
Finally, click Finished.
Step 5: Click Generate
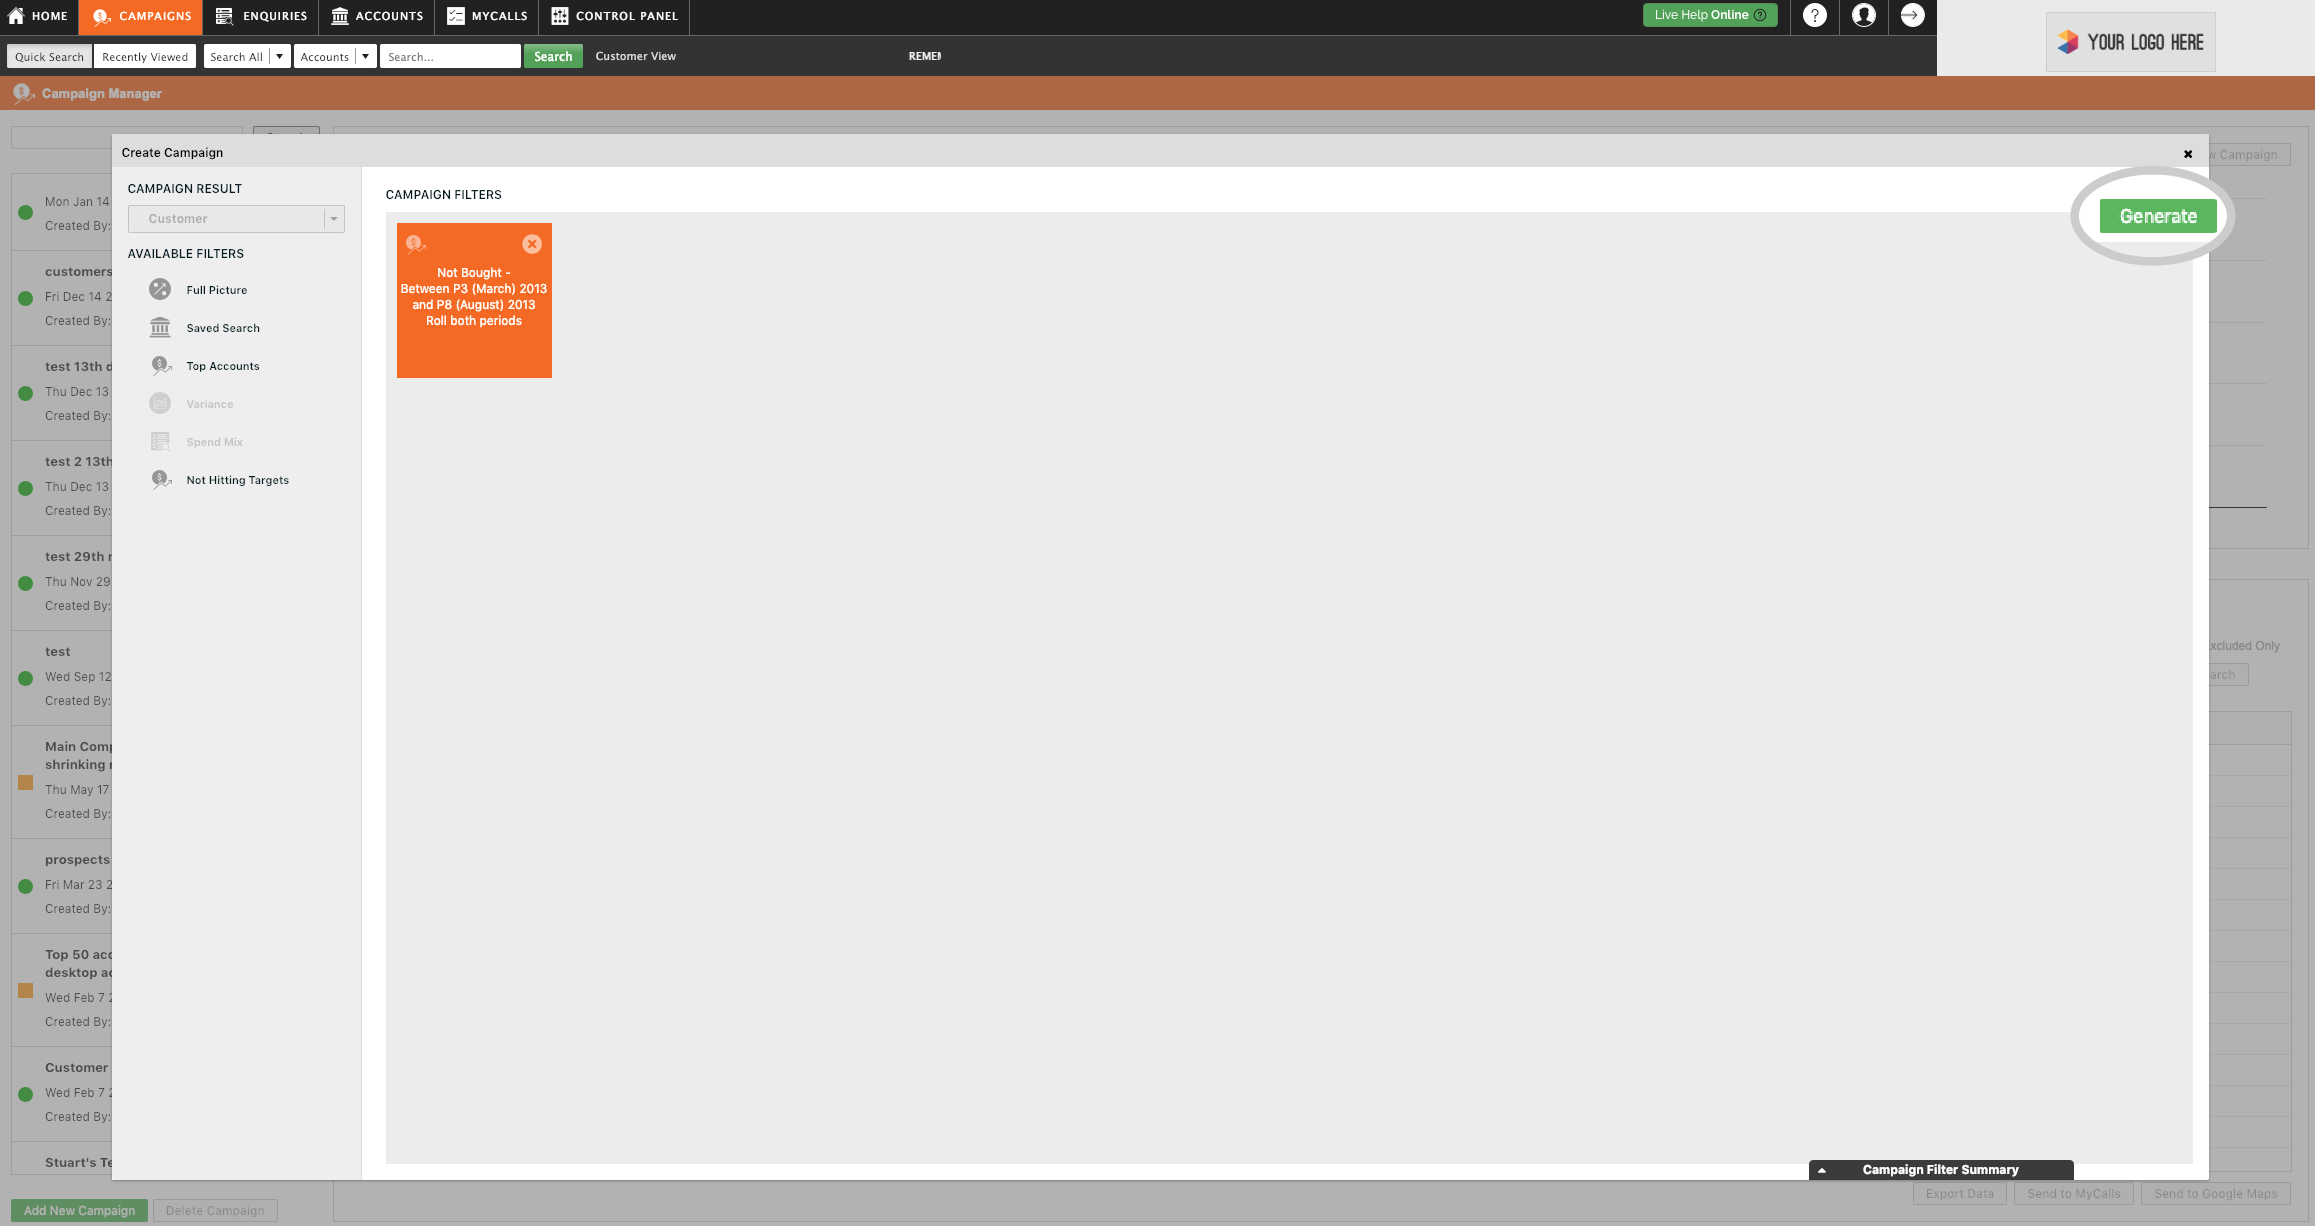
sales-i will take you back to the Campaign Filters window. You can see details of your selected filters in orange.
Since this is the only filter we need for our purposes, we can go ahead and click the green Generate button, (top right hand corner).
Step 6: Click Yes.
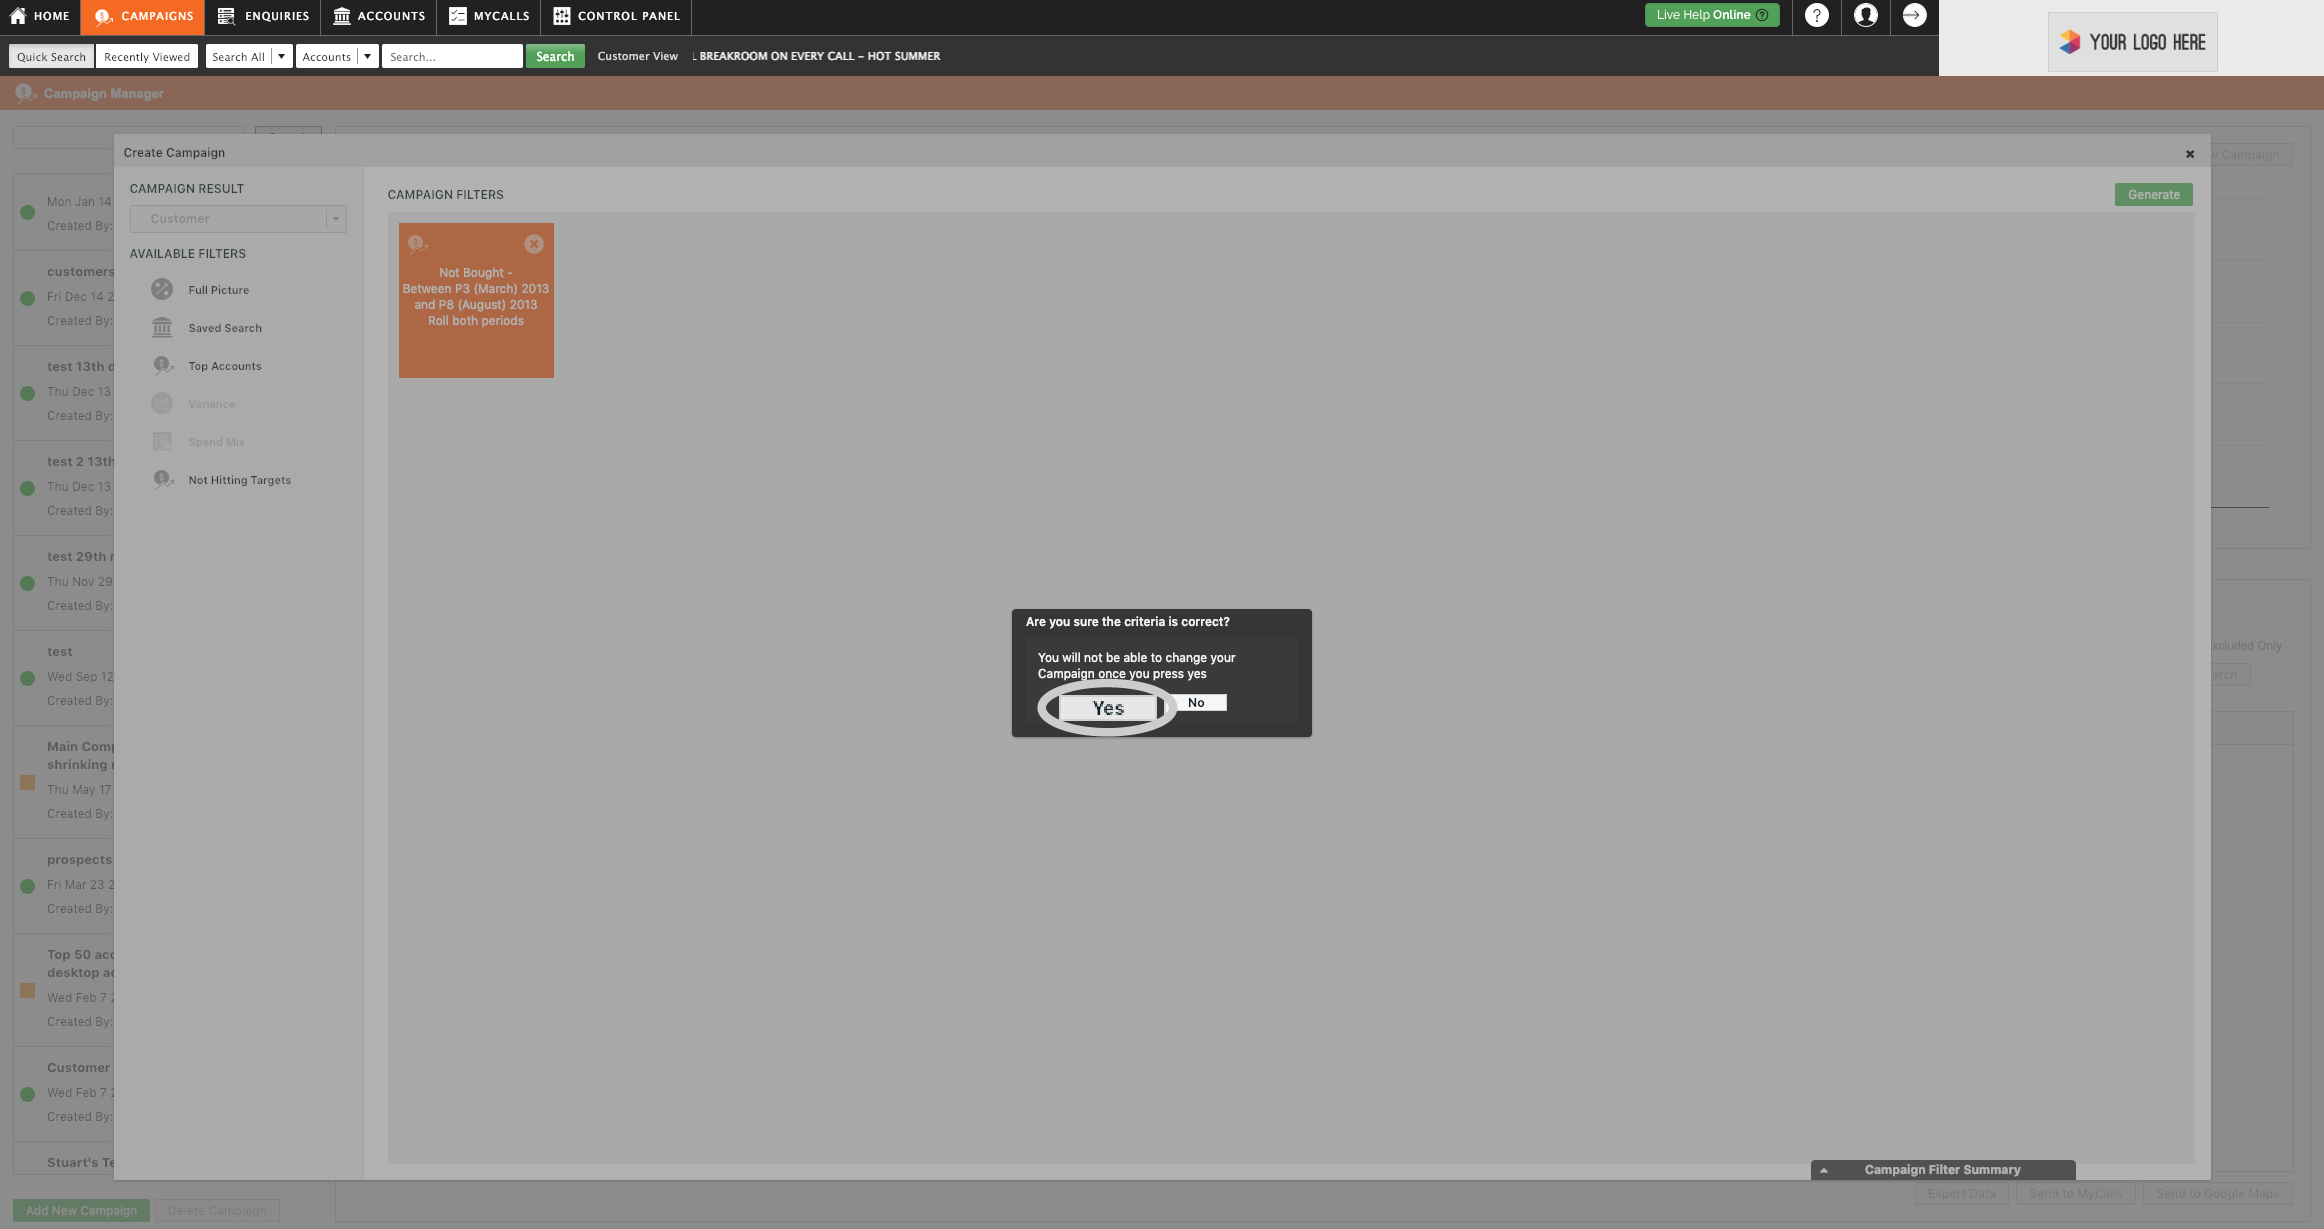
You will now see a message in a pop-up window informing you that you will not be able to change your Campaign once you press yes.
Since we are sure we set up the campaign filters the way we need,
we can go ahead and click Yes.
Step 7: Name and share access
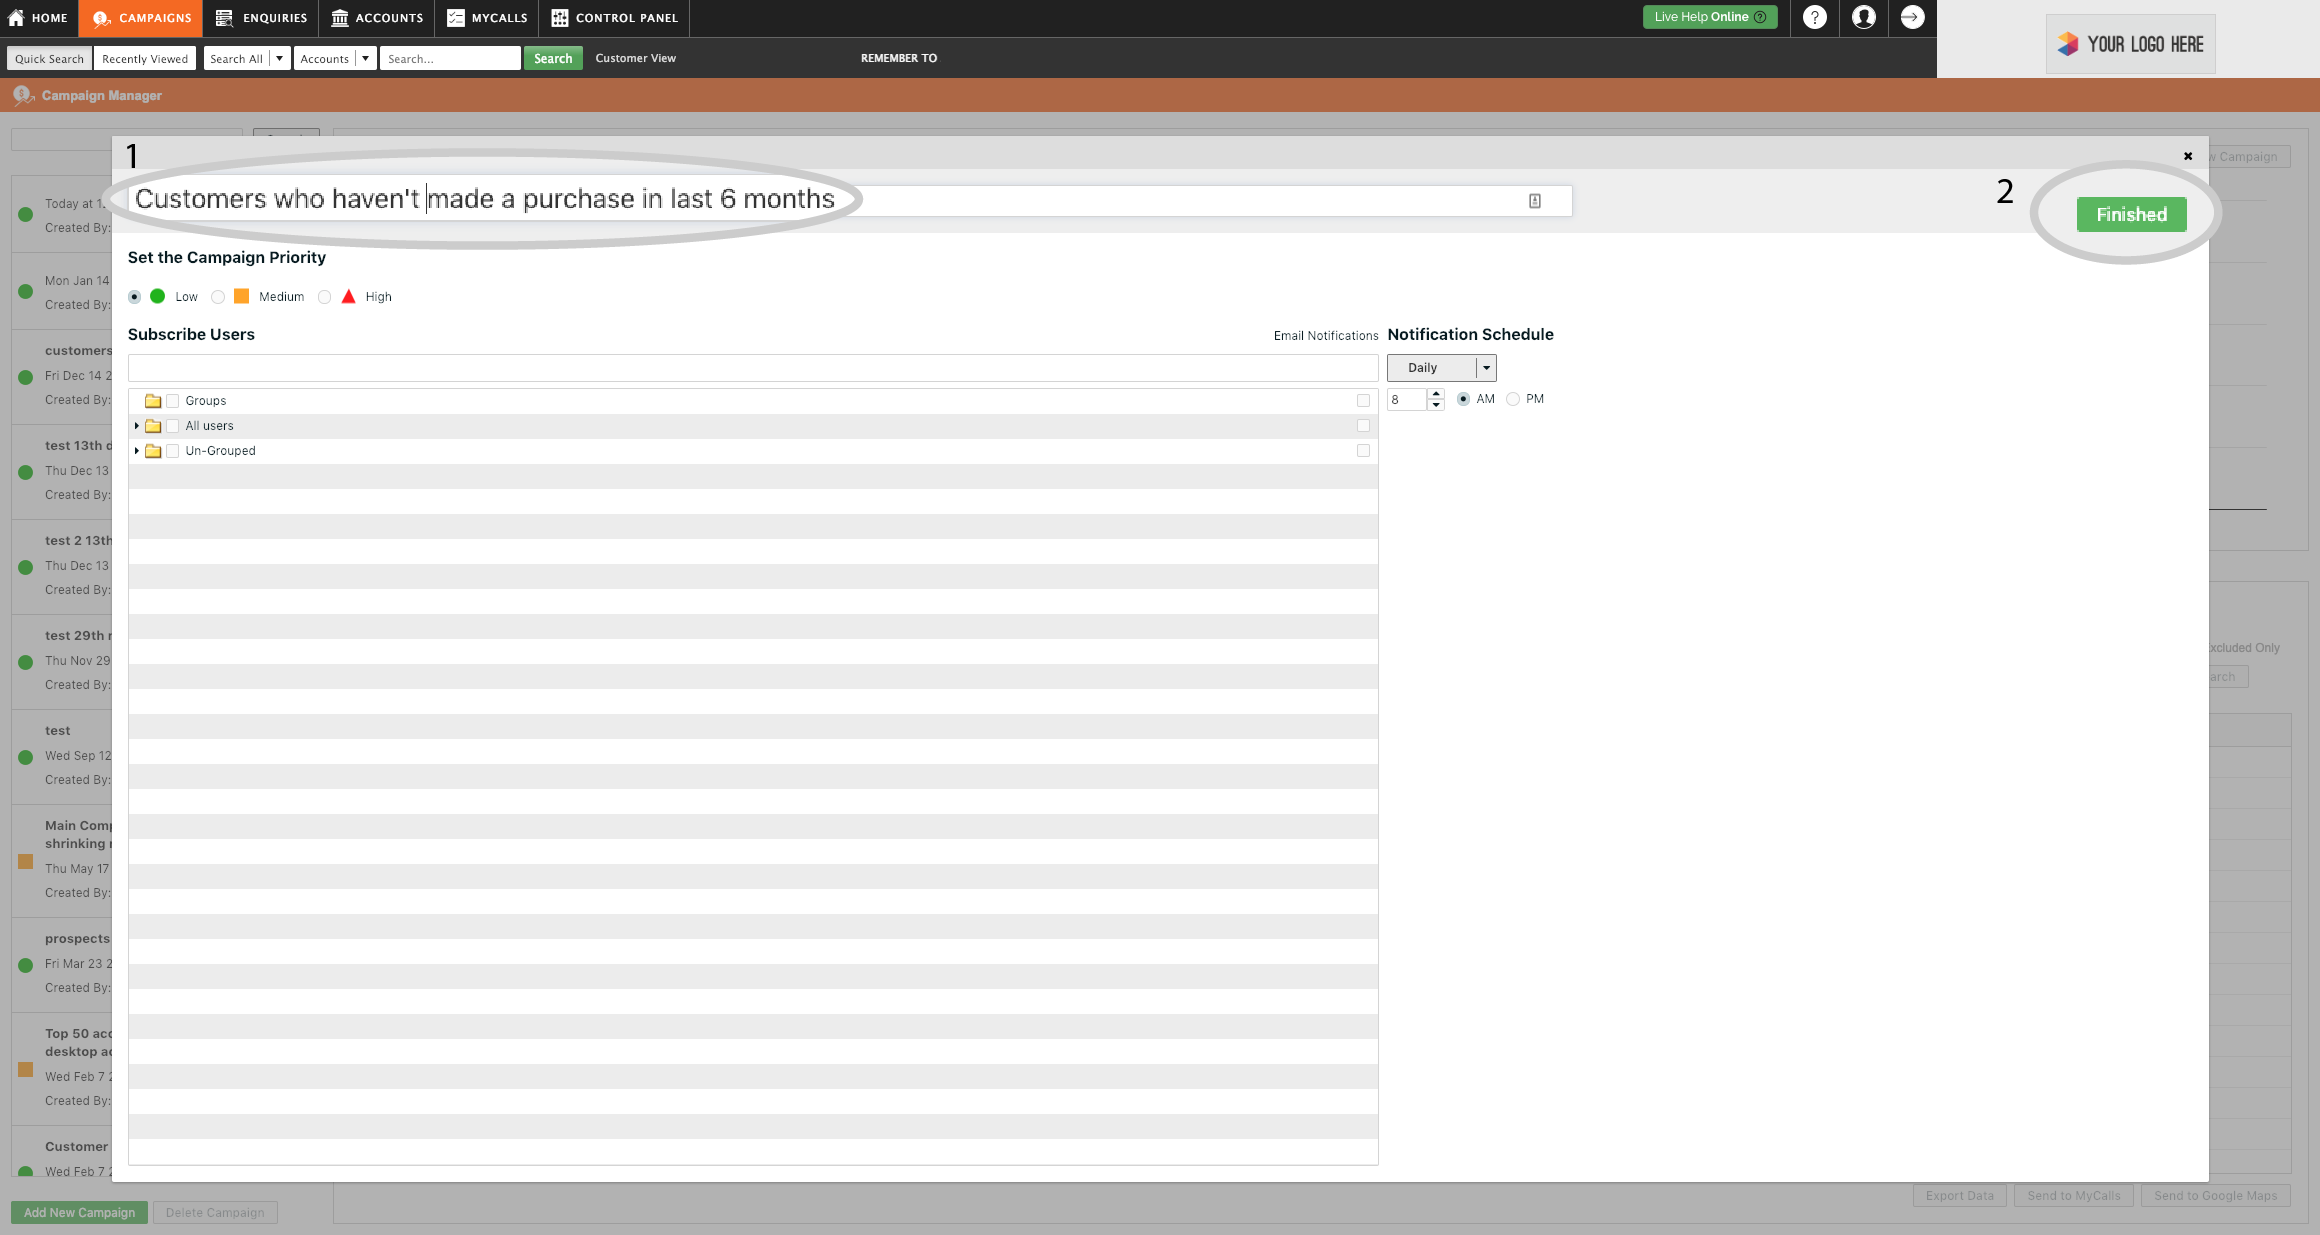
You now need to enter a name for this enquiry. For example: 'Customers who haven't made a purchase in the last 6 months.'
Using the traffic light system, give your campaign a colour of priority.
Next, select the users you wish to access the campaign results. Using the grey arrow next to All Users folder, will open up the list of users.
Select the box next to All Users if you wish to allow everybody to access the campaign*
*If used, Groups will assign access to the users included in the relevant group(s).
Finally, select the green Finished button in the upper right corner of the current window.
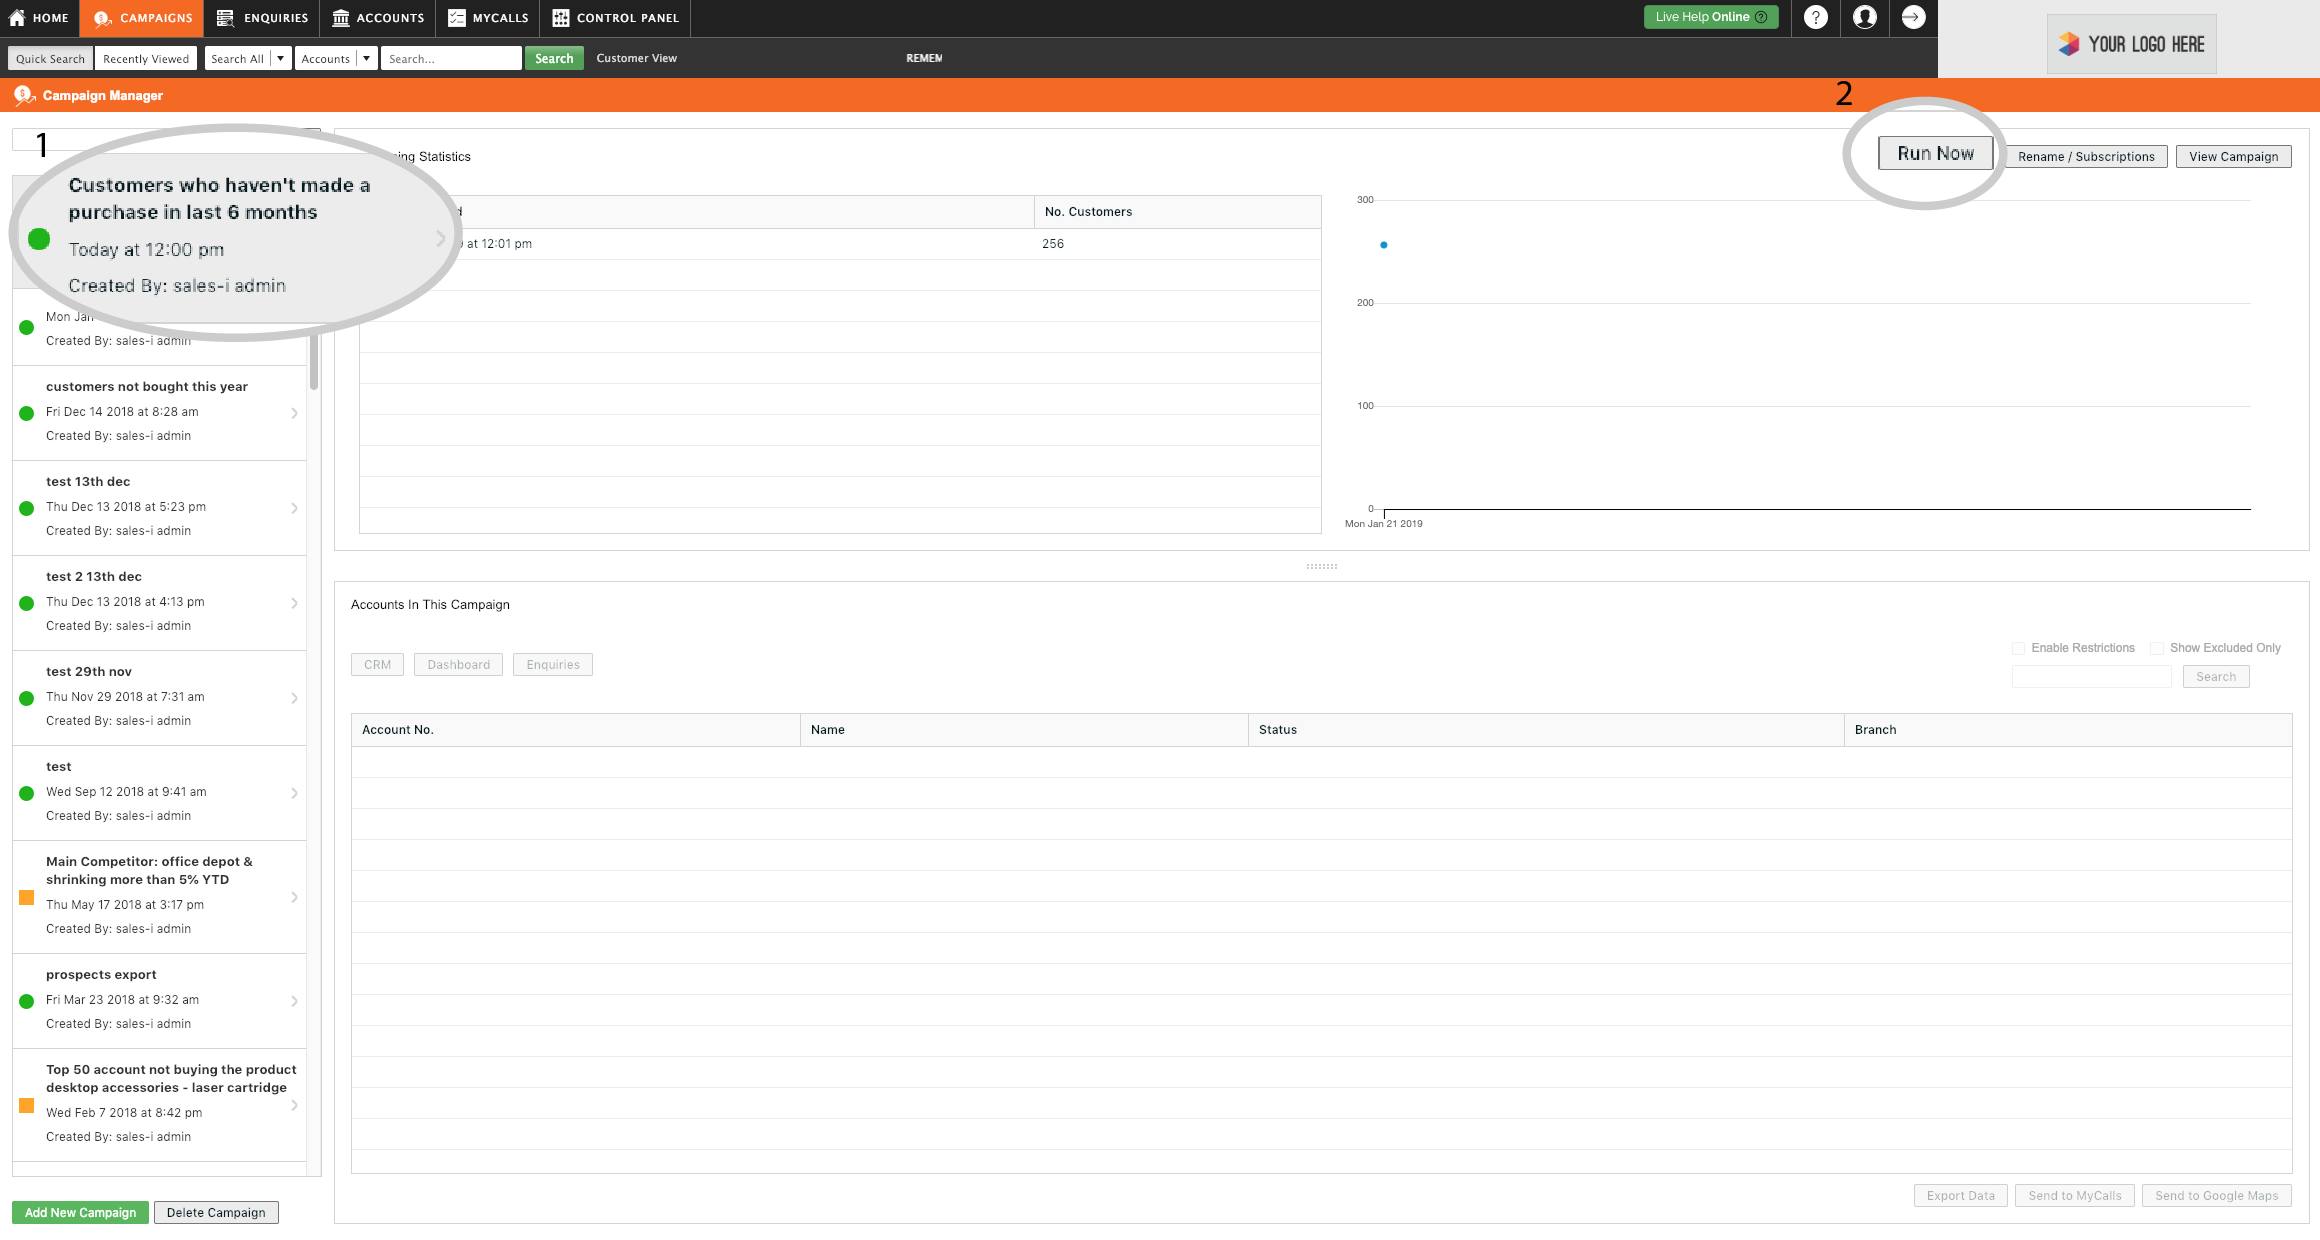
Step 8: Click on title and Run Now
To view the results of this campaign, click on its title in the menu on the left.
Then, click Run Now in the upper right corner.
Step 9: Click on result in Data Processed box
A spinning gear icon will appear to the left of the campaign’s name to indicate the Campaign is running and results are being calculated.
Campaigns can take a few minutes to run.
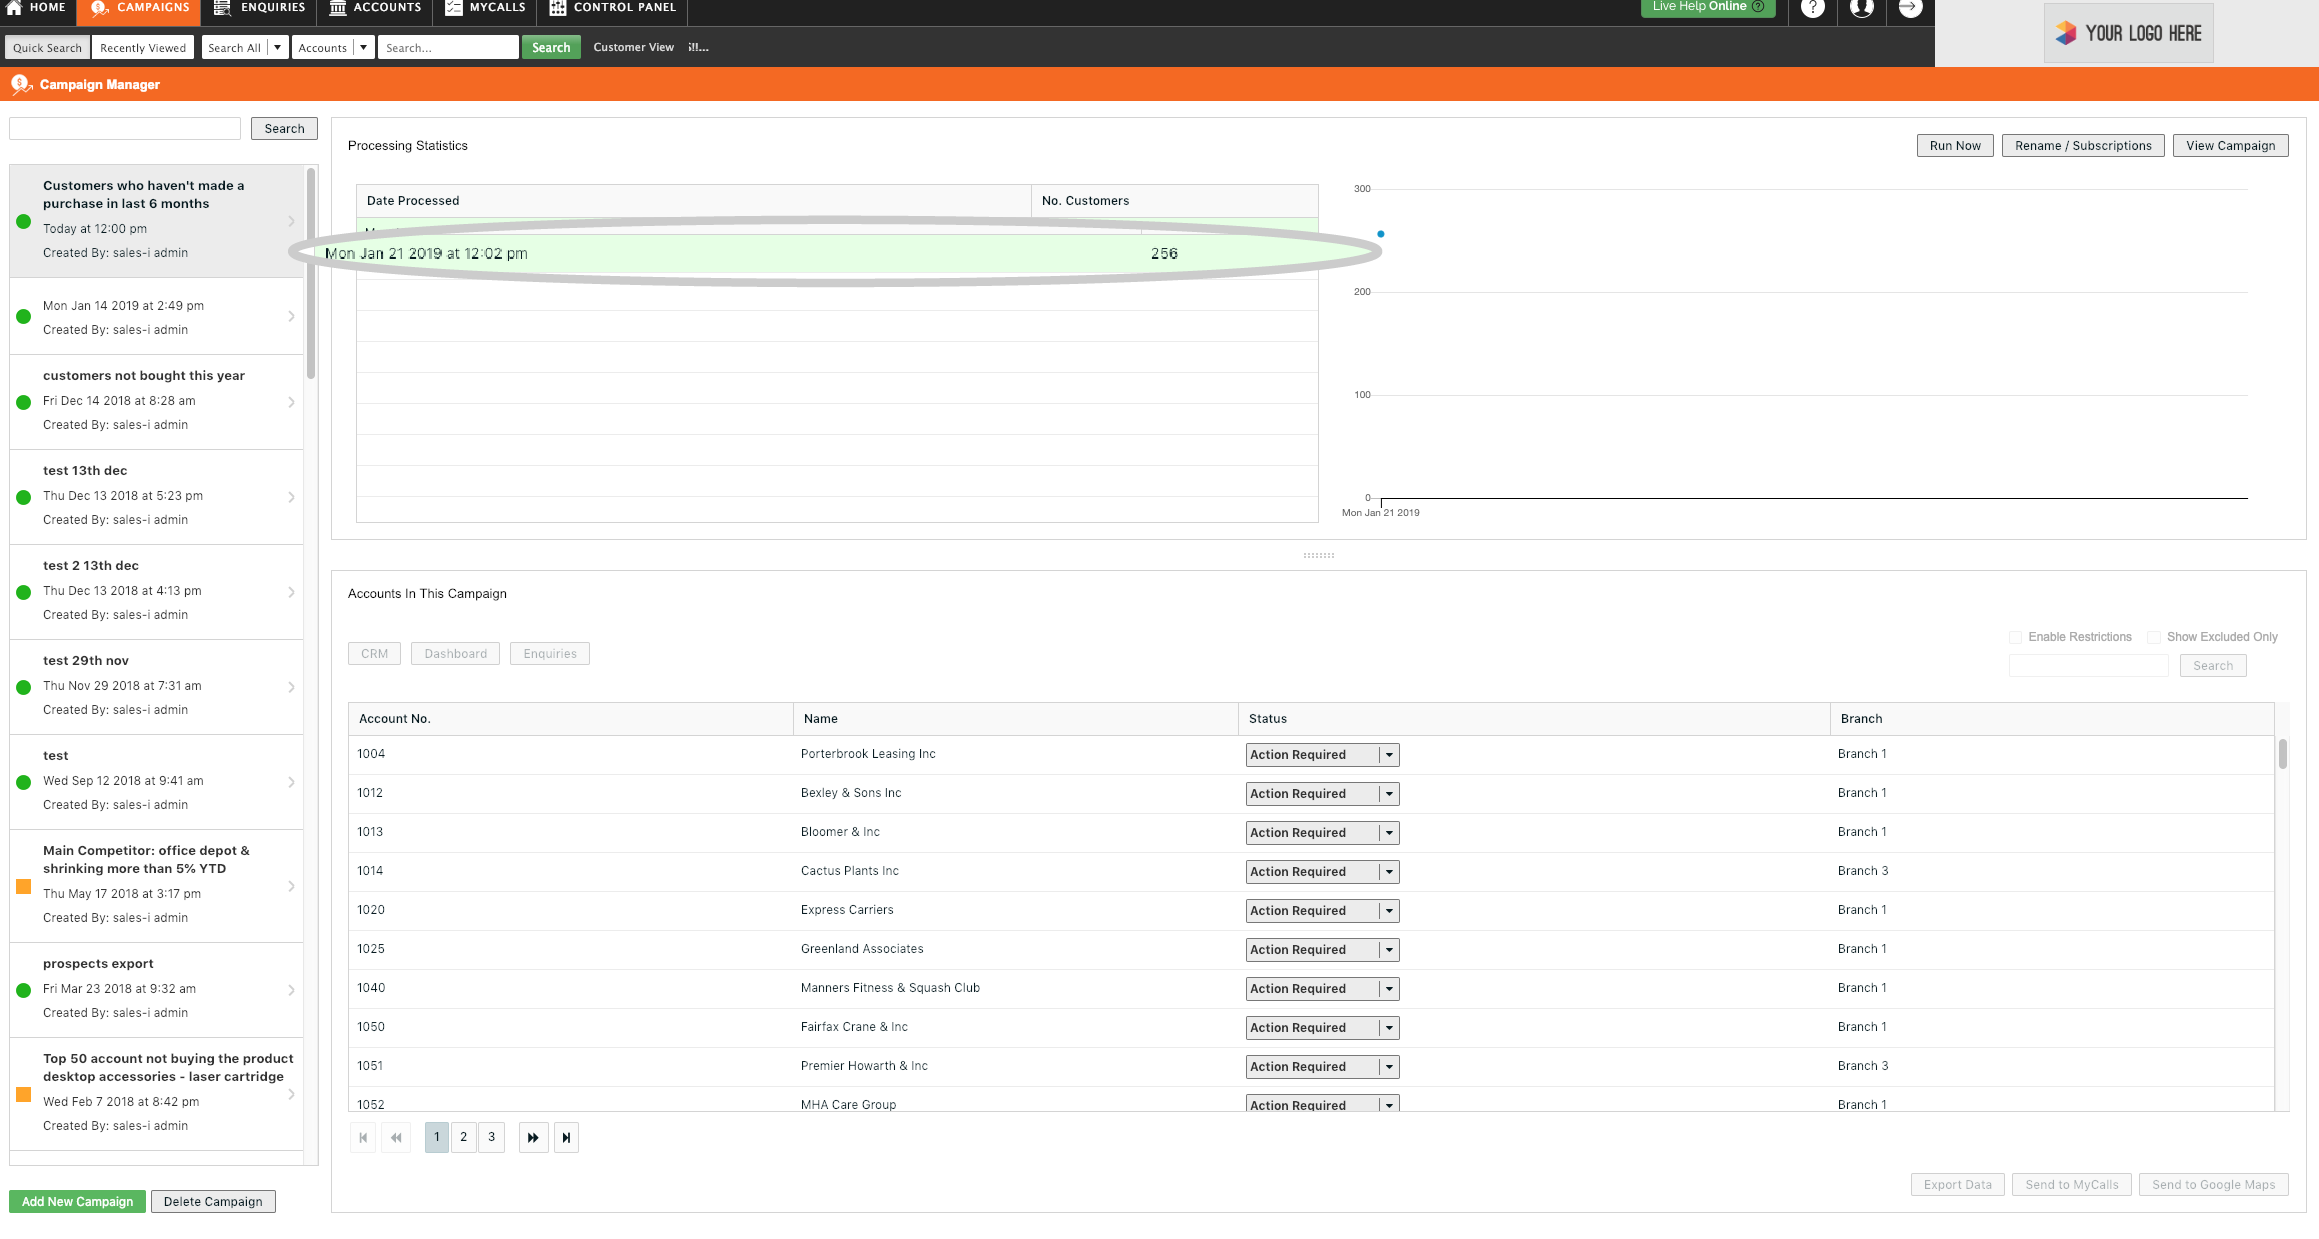
Once complete an update will appear in the Date Processed box. Click on it.
Step 10: Result options
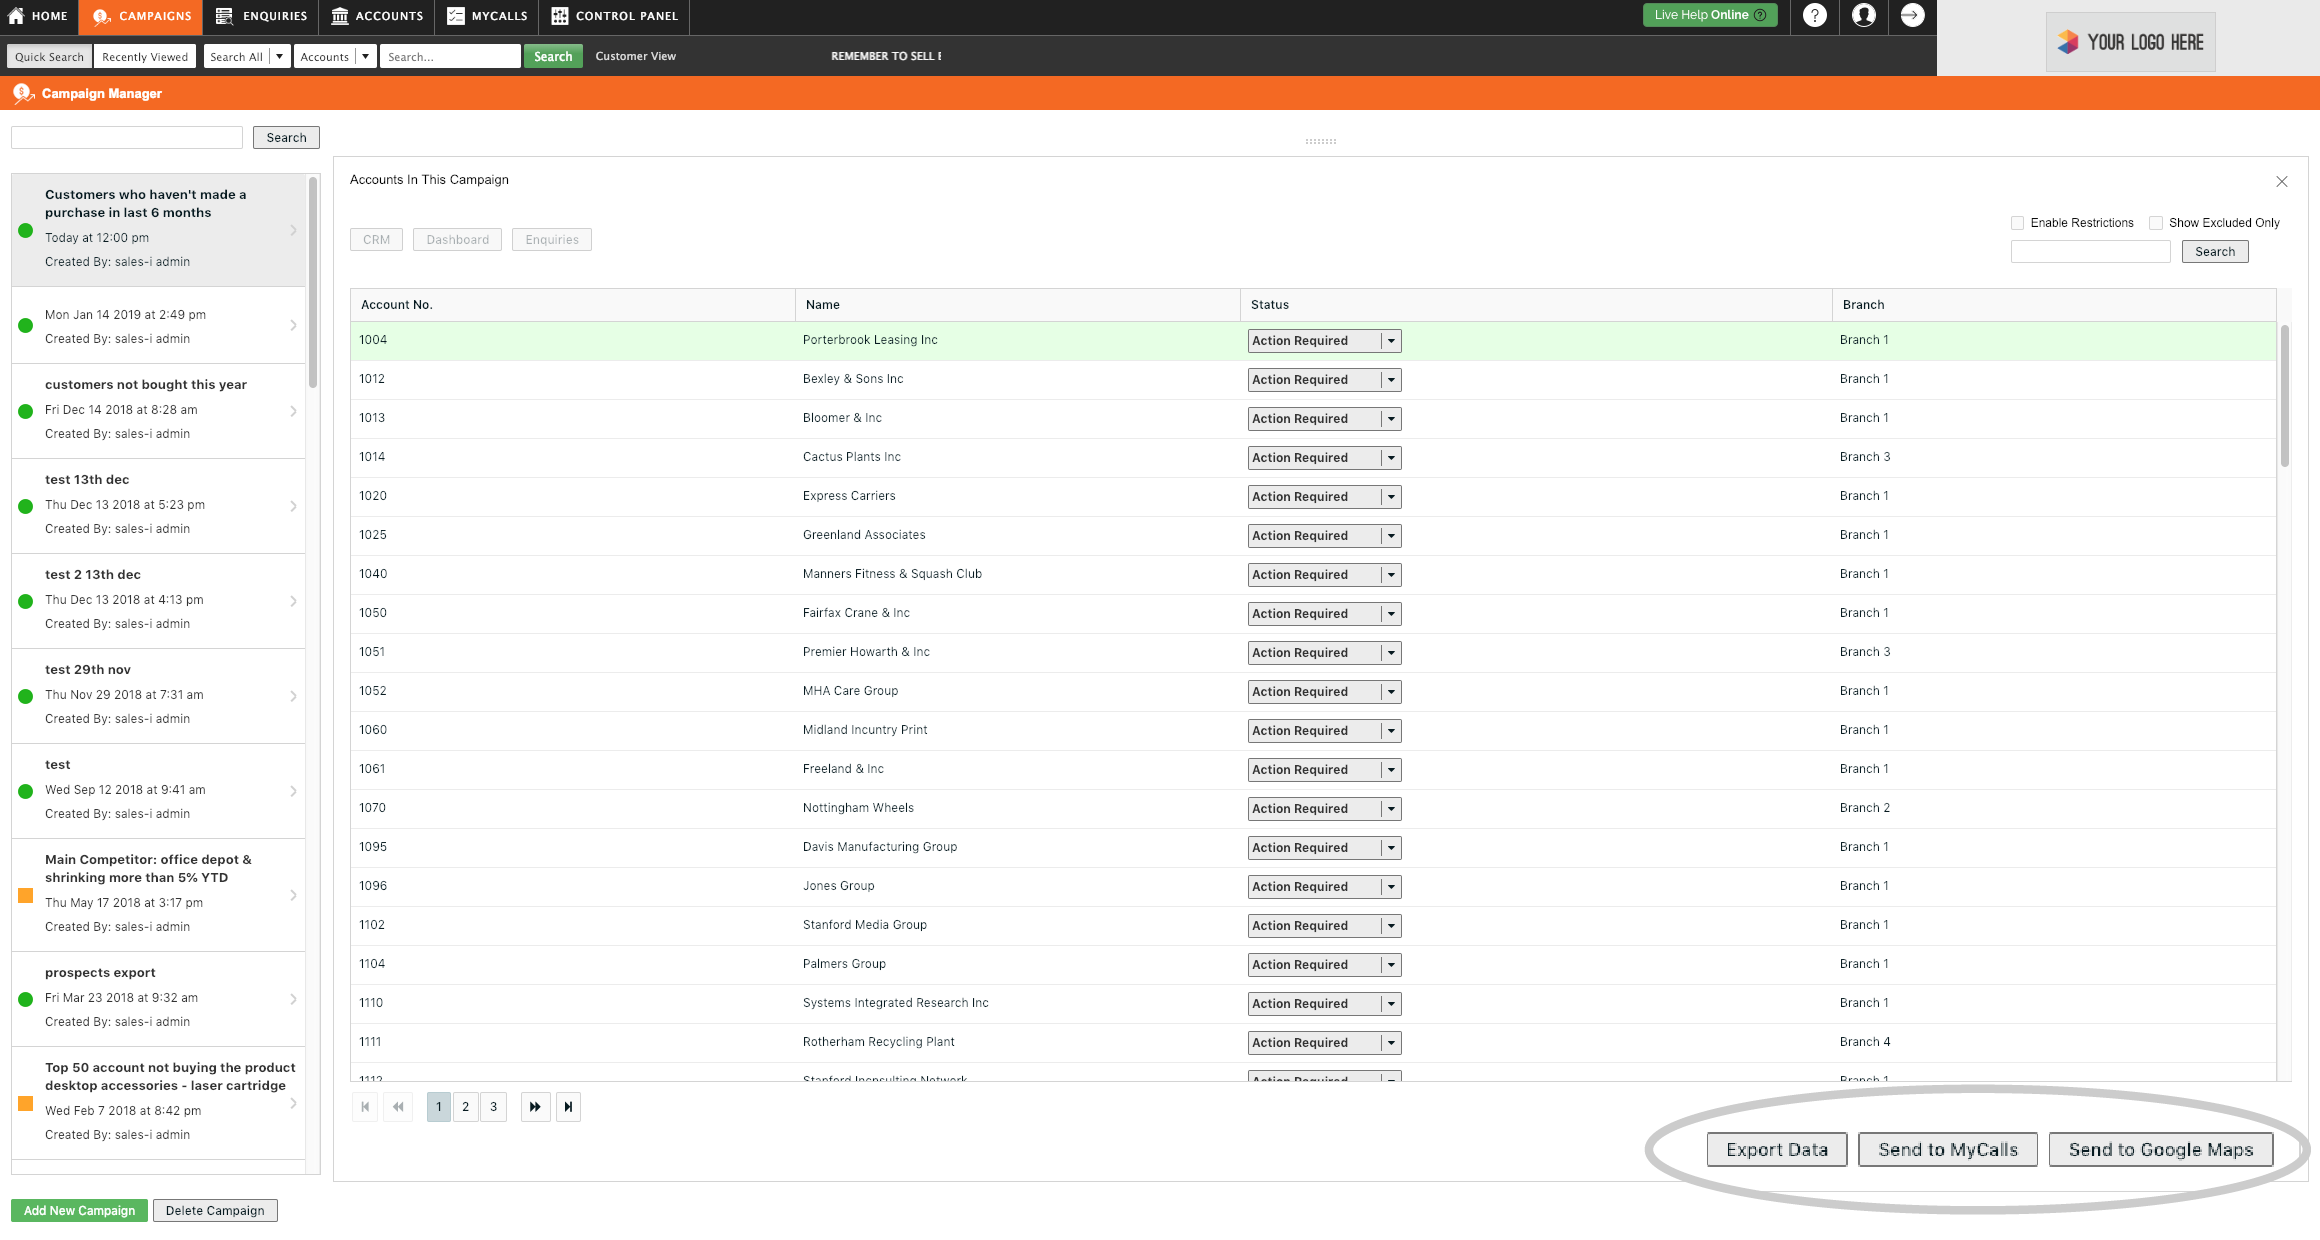
You will now see your results. In this case, a list of accounts who have not bought anything in the last 6 months.
You can use the options at the bottom right of the screen to either:
Export Data: Export this list to Excel.
Send to MyCalls: Send it to your diary, so you can call them at specified times. or
Send to Google Maps, so you can the accounts plotted on a map and see if you can plan visits, to start the sales rolling in.
