How to use the Map feature
Overview
The Maps feature allows you to view the location(s) of your interactions on a map, based on your planned diary using the MyCalls section of sales-i.
Apple
Download a PDF version
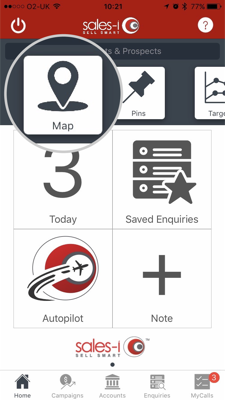
Step 1: Press the MAP icon
Once logged into sales-i, on the home screen, touch the MAP icon in the top left corner
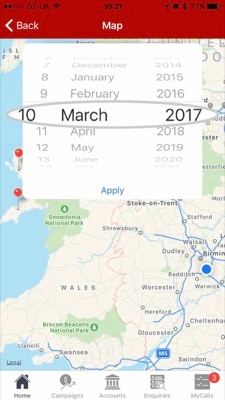
Step 2: Select a date
Select the date you wish to view the upcoming interactions from the scroll selector.
(Please note the interactions must be present in your MyCalls diary.)
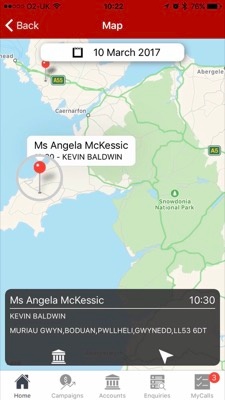
Step 3: Touch a pin
Touch onto a Pin to see the further information on this planned interaction.
Step 4: Touch Accounts icon
Touch the Accounts icon to view the accounts section for the chosen interaction.
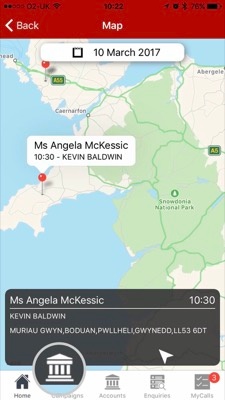
Step 5: Touch the Journey icon
Press the Journey icon to view an estimated travel time and distance from your current location to the selected destination.
*Please note, you must have the location settings enabled on your iOS device to utilise this function.
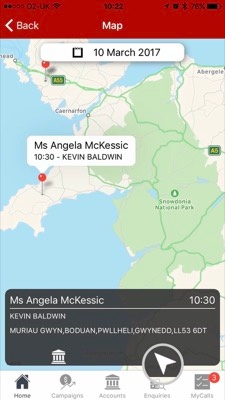
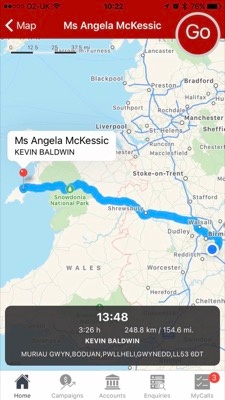
Step 6: Press the Go button
On this screen you can use the Go button to use this information within the default mapping functionality of your iOS device to navigate to the destination point.
*Please note, this will take you out of sales-i app and into the default mapping app of your iOS device.
Android
Download a PDF version
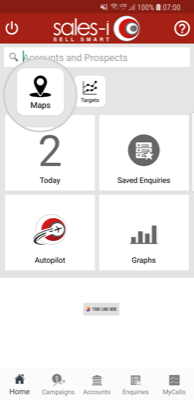
Step 1: Press the MAP icon
From the home screen, tap the Map icon in the top left corner.
Step 2: Map plotting
If you have calls already in your diary for today, they will automatically plot to the Map. If this is the case skip to Step 4.
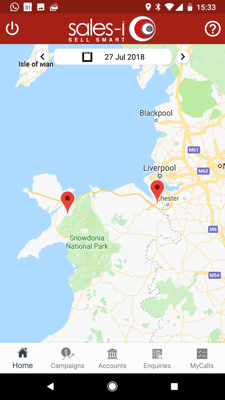
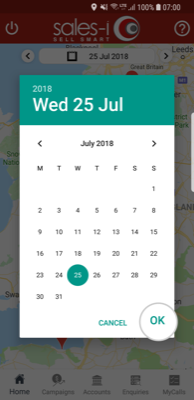
Step 3: Select a date
If you have no calls in your diary for today or you would like to view your calls for a different day, Select the date you wish to view the upcoming interactions from the date selector. Please note: The interactions must be present in your MyCalls diary. Once you have selected your choosen date click OK.
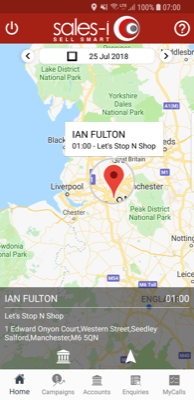
Step 4: Touch a pin
Touch onto a Location Pin to see further information on this planned interaction.
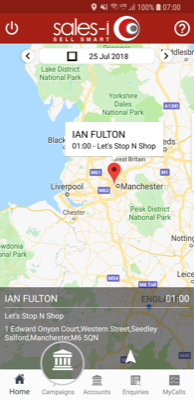
Step 5: Press the Accounts icon
Touch the Accounts icon to view the accounts section for the chosen interaction.
Step 6: Press the Journey icon
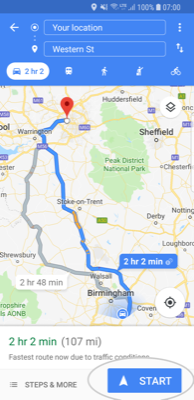
Press the Journey icon, this will open your default navigation app on your android device (e.g. Google Maps) to view an estimated travel time and distance from your current location to the selected destination. *Please note: You must have location settings enabled on your Android device to use this function.
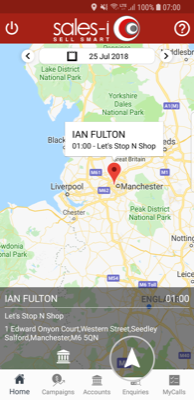
Step 7: Tap Start
On this screen you can tap START to begin navigation to the destination point. Please note this applies to Google Maps. Instructions may differ for other navigation apps.
