Sugar Connect Portal User Guide
Overview
The Sugar Connect Portal is a website that is available to all Sugar Connect users as a supplement to the sidebar and is used to set up key features for the sidebar and access the online meeting scheduler.
This guide will cover the following Sugar Connect functionality for Office 365 and Google Workspace (formerly G Suite) users:
In addition, administrators can manage Sugar Connect users in the portal. For more information on user management, refer to the Sugar Connect Administration and Deployment Guide.
Logging In
The section below outlines the steps to log in to your Sugar Connect Portal.
- You can open the Sugar Connect Portal from the Sidebar or navigate directly to the Sugar Connect Portal.
- In order to log into the correct tenant, ask your administrator in which region your Sugar Connect tenant is hosted:
- If your email address is associated with multiple organizations, you may be prompted to select one prior to logging in.
- If using the G-suite extension, you must Sign in with Google and if you are using the Office 365 Add-in, you must sign in with Microsoft. If prompted, log in with your professional email account (i.e., not a personal email account created by you) and continue following the instructions in the window. You must click "Allow" to grant permission for the connector to access your data when prompted. If your email address is associated with multiple organizations (tenants), you may be prompted to select one prior to logging in.
Note: For enhanced security, it is recommended that users enable multi-factor authentication in their Google or Microsoft accounts.
Accessing the Sugar Connect Portal
After you have installed Sugar Connect in your email client, the Sugar Connect Portal can be accessed by clicking "Open Sugar Connect Portal" from the sidebar's Settings menu. The portal will open in your default web browser.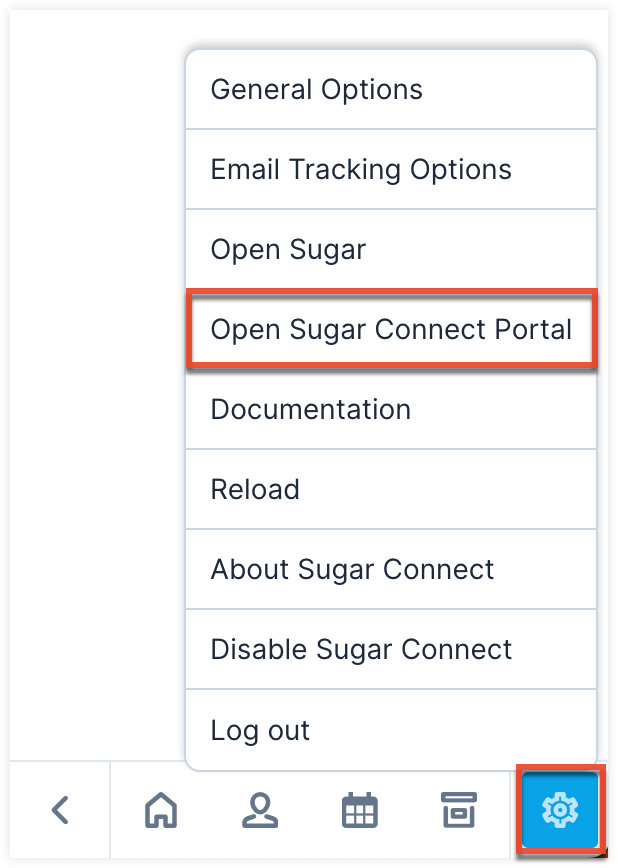
Alternatively, admins and users may navigate directly to the Sugar Connect Portal following the steps in Logging In. If your email address is associated with multiple tenants, you may be prompted to select one prior to logging in.
Navigation Bar
The Sugar Connect Portal displays a navigation bar spanning top to bottom on the left of the screen. The navigation bar allows you to access the various areas of the Sugar Connect Portal.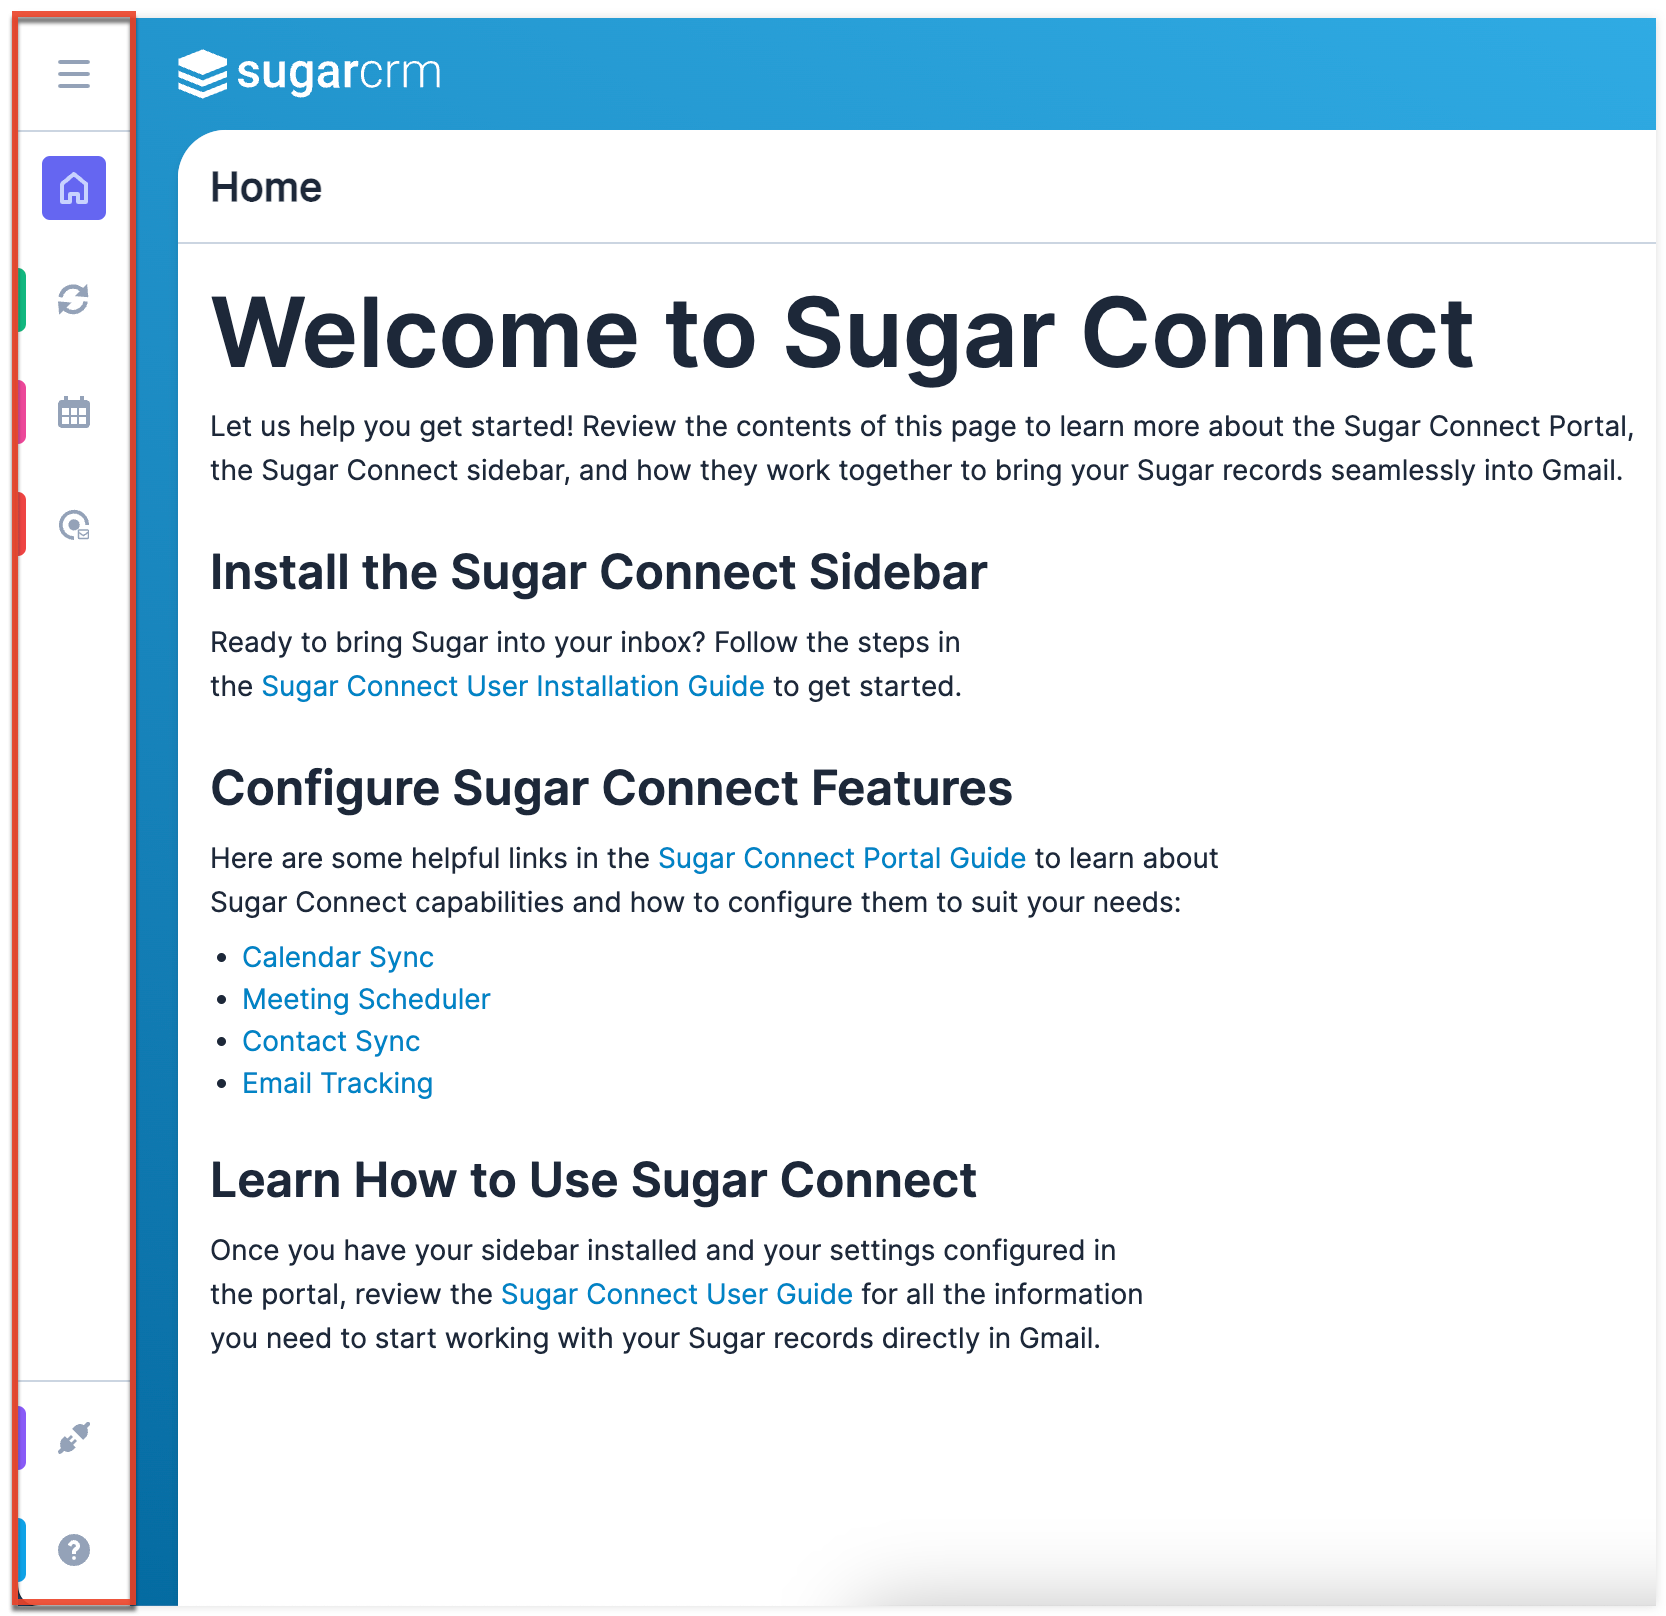
The navigation bar consists of the following options from top to bottom:
| Navigation Bar Item | Description |
| Open Button | Click the Open button to view the expanded navigation bar which displays each tab's name along with the icon. Collapse the navigation bar by clicking the Open button again. |
| Home | Click the Home tab to view the landing page containing helpful links for getting started with Sugar Connect. |
| Synchronization | Click the Synchronization tab to view and edit your Calendar and Contact sync settings. |
| Scheduler | Click the Scheduler tab to view and edit your Sugar Connect Meeting Scheduler settings. |
| Email Tracking | Click the Email Tracking tab to view and edit your Email Tracking settings. |
| Integrations | Click the Integrations tab to ensure that your Sugar Instance, username, and email address are properly configured. |
| Help |
Click the Help icon to quickly find information regarding your Sugar Connect version a link to the Sugar Connect documentation. The following additional learning resources are available in the help pane:
|
Note: Sugar Connect administrators have additional tabs that are covered in the Sugar Connect Deployment and Administration Guide.
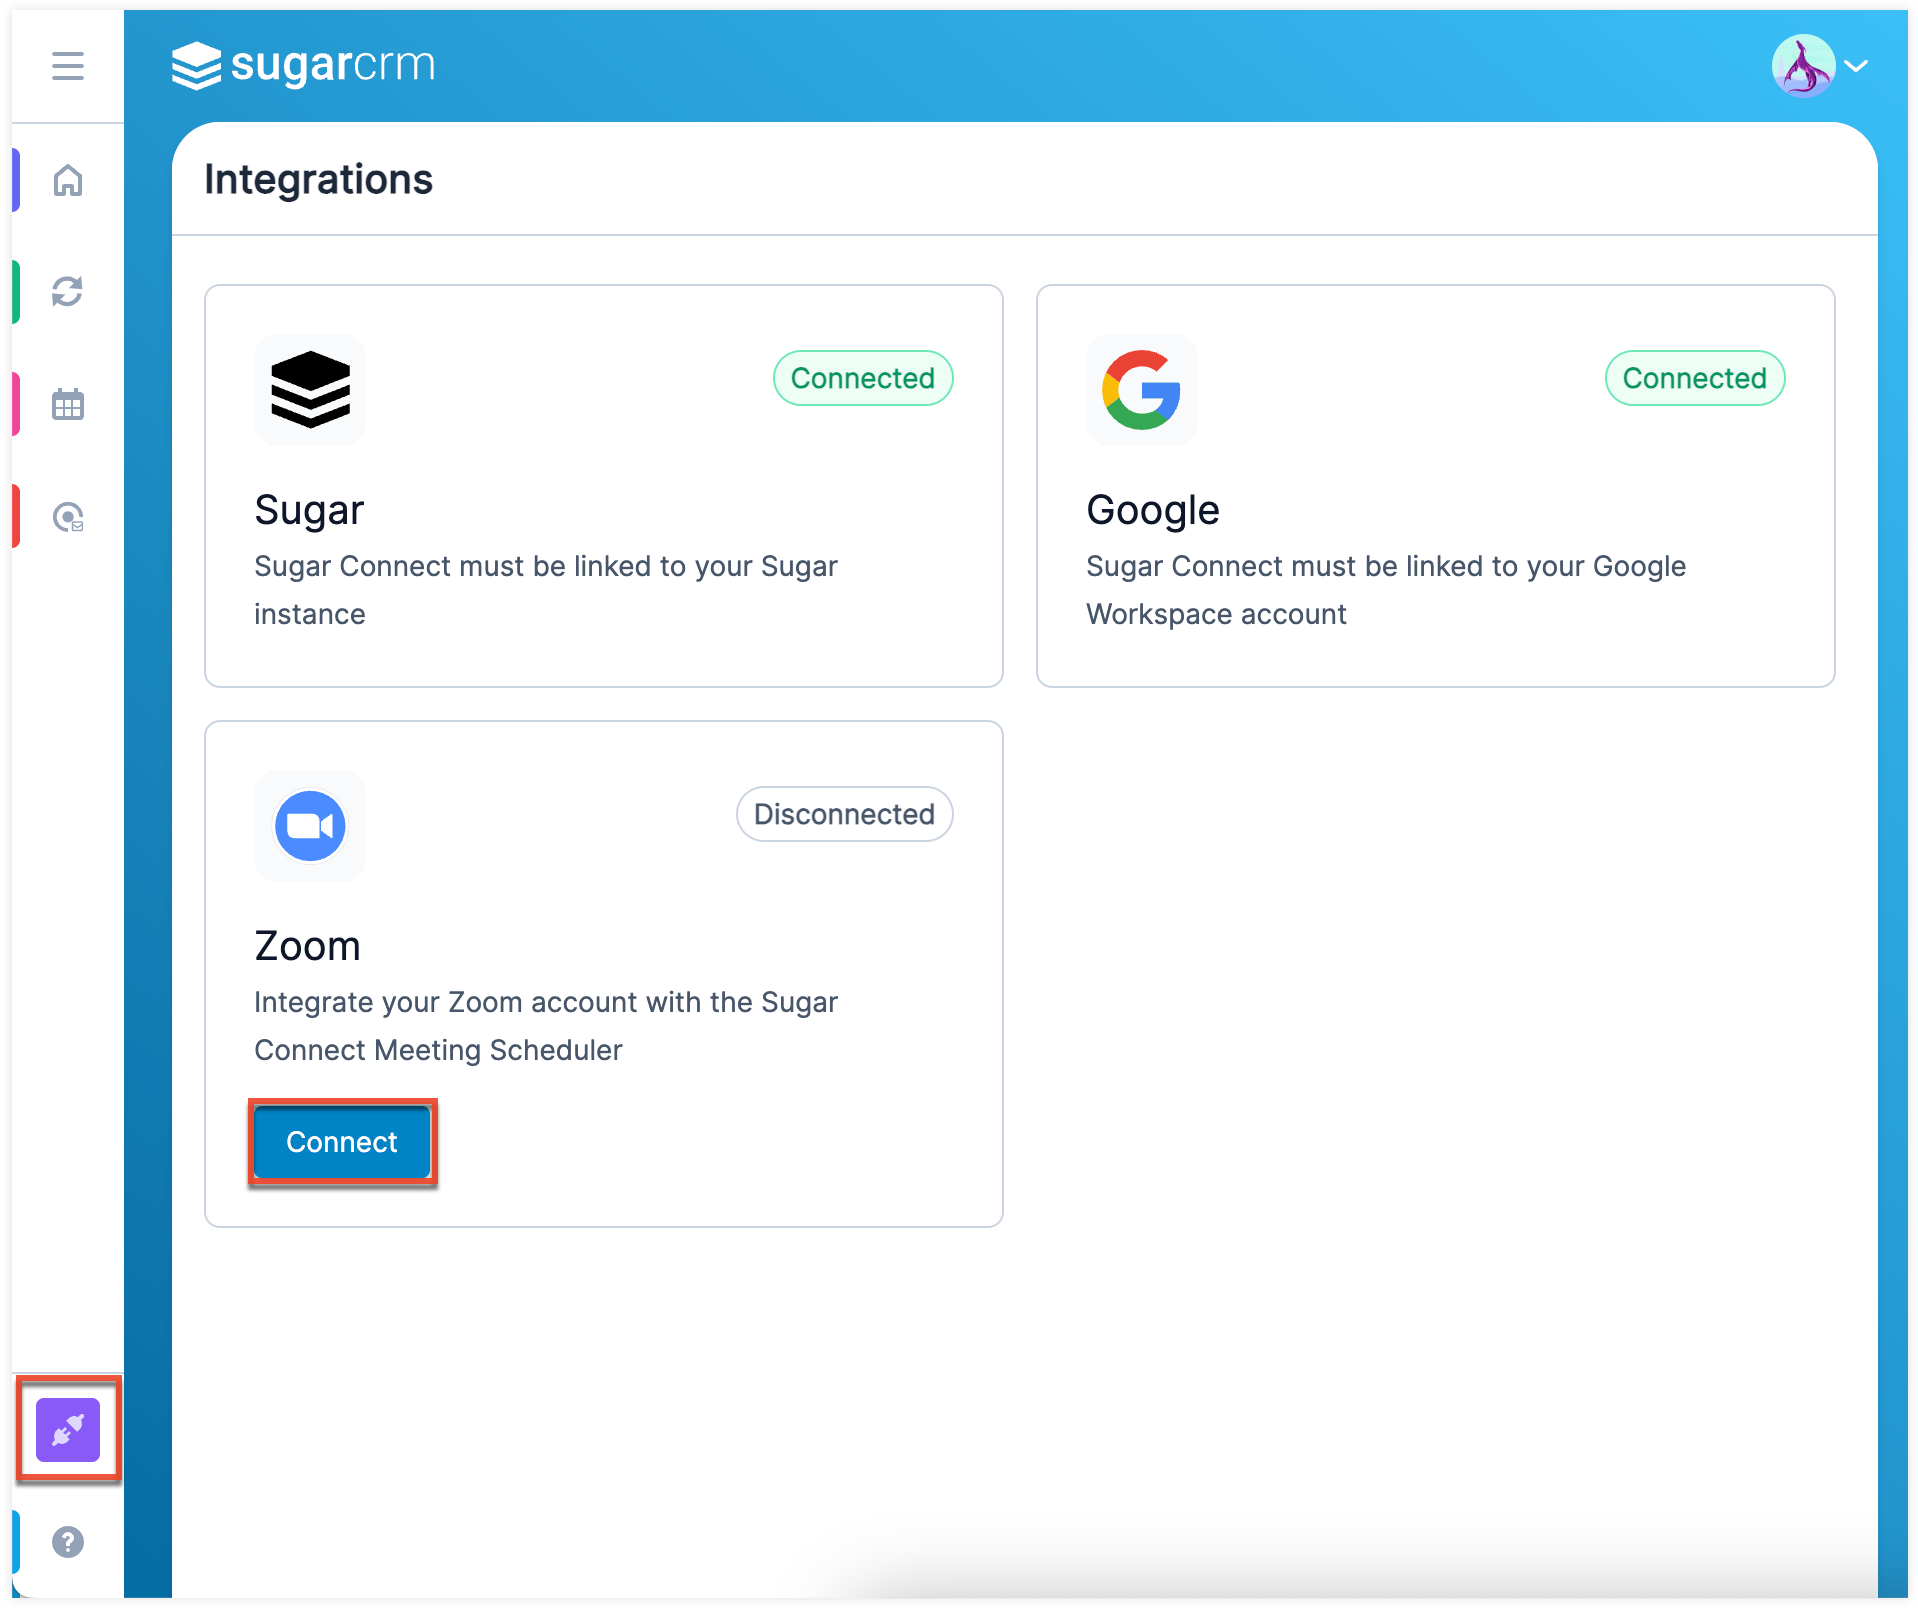
Integrations
The first place you should visit upon your first login to the portal is the Integrations tab, located at the bottom of your navigation bar, to ensure that your Sugar instance, username, and email address are properly configured. If you are not able to connect to Sugar or Google/Office365, you must contact your Sugar Connect admin user to set up the Server URL before you can authenticate your username and password.
To connect or disconnect an integration, follow these steps:
- Locate the appropriate tile (e.g., Sugar).
- Expand it by clicking anywhere inside the tile.
- To connect, click the Connect button.
- To disconnect an integration, click the Revoke button. Disconnecting an integration means that you will not be able to use the features provided when connected.
When the integration is connected, you can expand the tile and click the Revoke button to remove access. For the Zoom integration, you can also prolong your access from expiring, notice the date of expiration in the screenshot below, by clicking the Refresh Credentials button. The Google, Office 365, and Zoom integrations work together with the Sugar Connect Meeting Scheduler to create unique meeting links for scheduled meetings. For detailed steps, refer to the Sugar Connect Meeting Scheduler section of this documentation.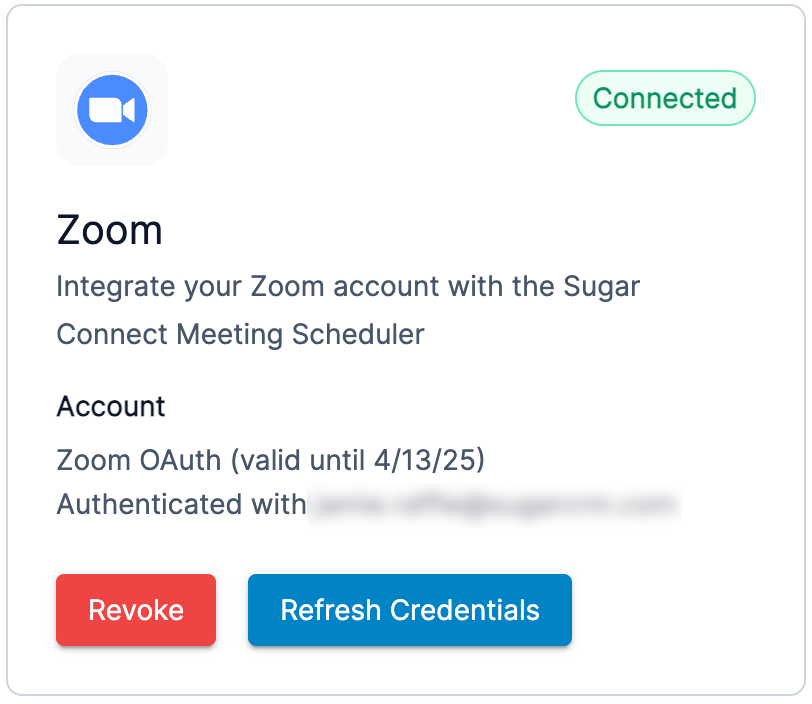
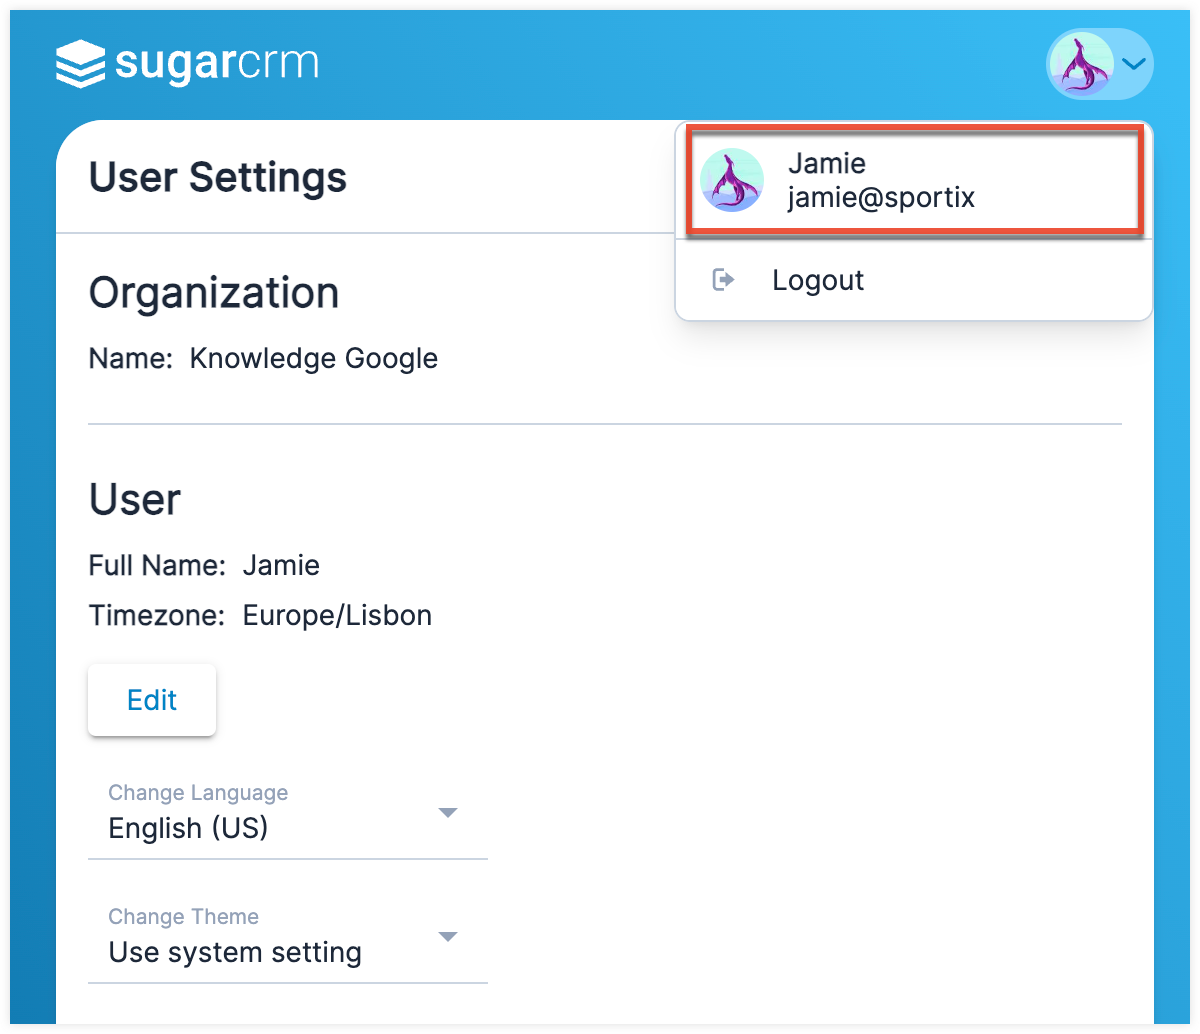
User Settings
User Settings can be accessed by clicking your user avatar in the top right of the page. The User Settings page displays the name of your organization, name, timezone, and language, and theme (e.g., Dark). All but the organization name can be updated from this page. Please note that the language selected in the Sugar Connect Portal will update the language in your Sugar Connect sidebar for both Google Workspace and Office 365.
Calendar Sync
If you want to use Sugar Connect to sync events between your Outlook or Google calendar and Sugar, you must first set up Calendar Sync in the Sugar Connect Portal. Refer to the following three sections to learn more:
- Sync Rules for Calendar Events: Explains the expected behavior of your synced calendar events.
- Calendar Sync Settings: Explains each sync setting in detail.
- Enabling Calendar Sync: Explains how to enable calendar sync.
Note: Sugar Connect administrators are able to set the calendar sync settings for their tenant. For more information, please refer to the Calendar Sync Settings section in the Sugar Connect Deployment and Administration Guide.
Sync Rules for Calendar Events
The sections below outline the rules that apply to the sync process for calendar events (i.e., meetings, calls, and tasks).
Initial Sync Rules
The initial sync for calendar events is a one-way sync from Sugar to your external calendar (i.e., Outlook or Google Workspace).
- Only the calendar events that are assigned to you in Sugar will be synced to your external calendar.
- All scheduled events with a start date set within the past 7 days and into the future will be included, subject to additional rules and settings.
- No existing events in your Gmail or Outlook calendar will sync to Sugar initially. To sync these events, they need to be modified after the initial sync is complete. If you do not wish to make changes to meeting fields that may prompt an update to be sent to meeting participants (e.g., meeting description), you can still modify the event in the following ways:
- In Gmail you can change the meeting’s color.
- In Outlook you can add a category to the meeting.
General Sync Rules
Subsequent calendar sync is a one-way or two-way sync (depending on your sync settings described in the Enabling Calendar Sync section below) and occurs once every 15-20 minutes.
- The following describes what events will or will not sync:
- Only the calendar events that are assigned to you in Sugar will be synced to your external calendar.
- Calendar events that were created by you in the external calendar you select (e.g., Primary Calendar), and subject to the additional rules and settings, will be synced to Sugar.
- Calendar events for which you are a guest but are not the assigned user or owner will sync to Sugar from your external calendar if all the following criteria are met:
- The owner of the meeting is a contact or lead in Sugar.
- The owner of the meeting is not a user in your Sugar instance.
- You have accepted (or marked as tentative) the event invitation.
- You have the Sync non-organized events setting enabled.
- The following describes what event details will or will not sync:
- Calendar events created by you in the external calendar will sync meeting participants into Sugar only if the guest exists as a contact, lead, or user.
- Meeting details, including guests, of events marked as private in your external calendar will not sync to Sugar.
- Acceptance statuses will sync to Sugar.
- In the case of a conflict between corresponding synced events:
- When the events are modified separately in the Sugar calendar and the external calendar, all details from the event that was modified more recently will be synced.
- When events were modified at the same time, the external calendar event's changes will win over changes made in Sugar.
- In the case of all-day events created in the external calendar:
- The all-day event status can only be added/removed in the external calendar.
- All-day events are synced to Sugar beginning with a start time of 00:00 and end time of 23:59 and will display in the time zone and time format configured in the user profile in Sugar.
- If the event's start or end time is modified in Sugar by either making the event start earlier or end later than the external calendar event, especially when taking into account translated timezones, the change in Sugar may cause the external calendar event to take place a day earlier or span multiple days.
Google Workspace Sync Rules
If you are syncing with Google Workspace, take note of the following rules:
- For one-way or two way syncs, there are no time limits for the events that will sync between the Sugar and Google calendars. Any newly created or updated event can be expected to sync, subject to the general rules above and the sync settings enabled in your sync profile.
- Sugar calls, meetings, and tasks will become calendar events in Google Calendar.
- The guests associated with Sugar meetings and calls will sync to Google Calendar.
Office 365 Sync Rules
If you are syncing with Office 365, take note of the following rules:
- For one-way or two way syncs:
- There are no time limits for the events that will sync from the Sugar to the Outlook calendar. Any newly created or updated events in the Sugar calendar can be expected to sync to the Outlook calendar, subject to the general rules above and the sync settings enabled in your sync profile.
- The events in the Outlook calendar with a start date set within the past 29 days and up to ten years into the future will sync to the Sugar Calendar. Any newly created or updated event in the Outlook calendar with a start date in this range can be expected to sync to the Sugar calendar, subject to the general rules above and the sync settings enabled in your sync profile.
- In Legacy Outlook, Sugar calls and tasks will become appointments and Sugar meetings will become meetings.
- When the Sync Guests setting is enabled:
- The guests associated with Sugar meetings and calls:
- will sync to Outlook when the start date is on or after the current date.
- will not sync to Outlook if the start date is in the past when the record is created.
- The guests associated with Sugar meetings and calls:
- When the Sync Guests setting is disabled while Two-way synchronization is enabled:
- Guests associated with Sugar meetings and calls will not sync to Outlook.
- Updates to Sugar meeting and call fields that have a corresponding Outlook field (e.g., Start Date) will sync to Outlook.
- When guests exist on an Outlook event, regardless of the Sync Guests setting, meeting invitations or update notifications are sent automatically by Outlook to all meeting attendees following the synchronization of Sugar calls or meetings to the Outlook calendar. This behavior cannot be disabled by Sugar Connect.
- Private events in your Outlook calendar can be synced optionally.
- Outlook does not support more than 999 occurrences of recurring meetings.
Calendar Sync Settings
In the Sugar Connect Portal under Synchronization, you can find the Calendar Synchronization settings available to you that determine what event details will sync between your external calendar and Sugar.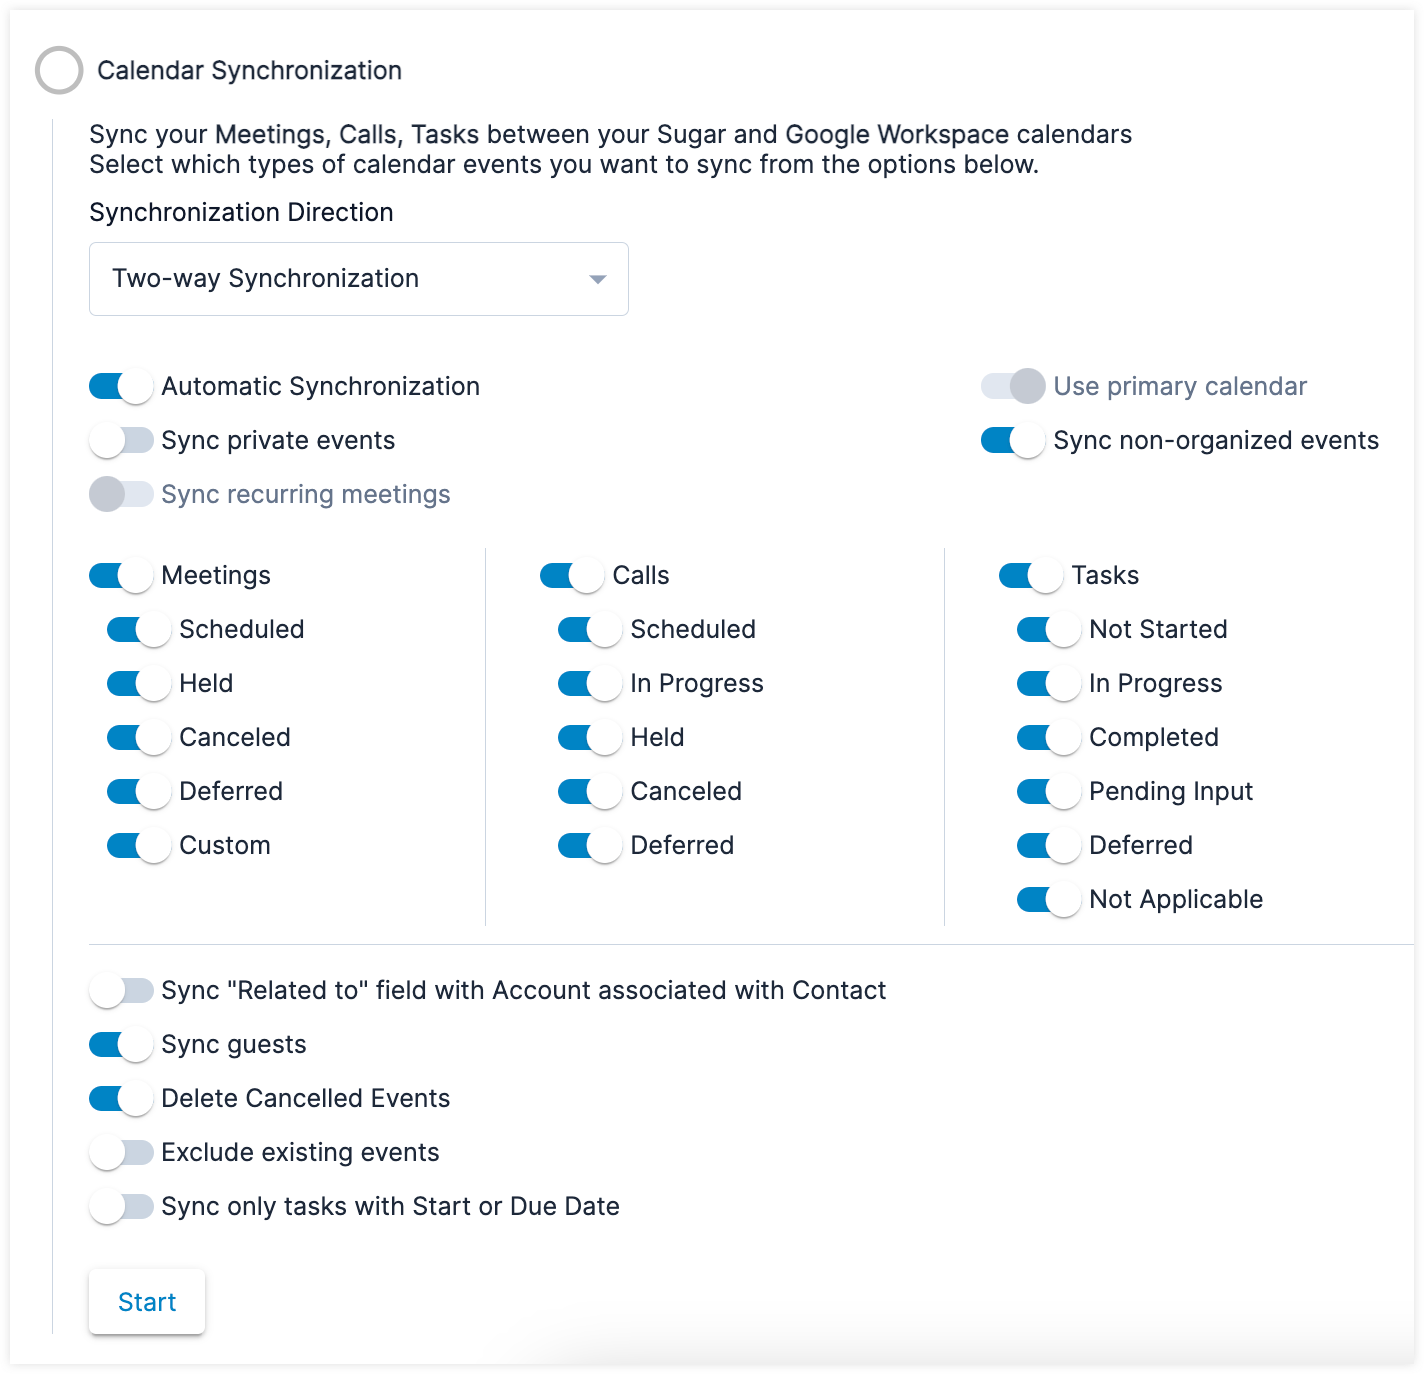
Note: The above options will be hidden once you start your sync. To update these options you must pause and then re-start your calendar sync.
The following table describes the Calendar Synchronization settings:
| Setting | Description |
|
Synchronization Direction |
Two-way Synchronization: Events will sync both to and from your Google or Outlook calendar and your Sugar calendar. One-way Synchronization to Sugar: Events will only sync one way, from your Google or Outlook calendar to your Sugar calendar. One-way Synchronization from Sugar: Events will only sync one way, from your Sugar calendar to your Google or Outlook calendar. |
|
Automatic Synchronization |
When enabled, all events, pending additional settings, will sync automatically between your Google/Outlook and Sugar calendars. When disabled, only events manually selected in the Sugar Connect sidebar will sync. |
|
Two-way synchronization1 |
When two-way sync is enabled, events will sync both to and from your Google or Outlook calendar and your Sugar calendar. When disabled, events will only sync one way, from your Google or Outlook calendar to your Sugar calendar. |
| Use Primary Calendar1,3 | By default, "Use primary calendar" is selected so the connector will sync events to and from your main Google or Outlook calendar. You can disable this option if you want Sugar Connect to create a new custom calendar in your client labeled "Sugar" and only events in the "Sugar" calendar will sync with your Sugar instance. Note: Overriding the default (selected) behavior will result in the need to create duplicates of calendar events that are created from or accepted in your external calendar in order for them to sync with Sugar. |
| Sync private events1 |
Select this option to sync meetings marked as private from your calendar to Sugar. Private meetings sync to Sugar with only their date and time, and the subject “Private event,” without any additional details or guests. If your sync profile is configured not to sync private events, any meeting changed to private in your external calendar will be removed from Sugar during the next sync cycle, even if it was previously synced. |
| Sync non-organized events1 | When enabled, events organized by a contact or lead in Sugar who is not also a Sugar user and where you have accepted the event invitation, will sync to your Sugar calendar. Note: The Use Primary Calendar setting must be enabled for this setting to be available. |
| Sync recurring meetings | When enabled, recurring meetings sync bidirectionally between your external calendar and Sugar. This functionality is available for Sugar versions 14.2 and higher. |
| Meetings1,2,3 | For two-way sync, select which Sugar meetings you want to sync based on the meeting status. Note: In order to enable sync, meetings must be enabled with at least one status set to sync. |
| Calls1,2,3 | For two-way sync, select which Sugar calls you want to sync based on the call status. |
| Tasks1,2,3 | For two-way sync, select which Sugar tasks you want to sync based on the task status. |
| Sync "Related to" field with Account associated with Contact1 | When enabled, the "Related to" field on the meeting in Sugar will be populated by the account associated with the contacts attending the meeting. Attendees who are CRM users or leads are not considered. If meeting attendees are associated with more than one account, this field will not be populated. This field is populated only when calendar sync first creates the event, and it is not changed if the event is updated. |
| Sync guests1,3 | When enabled, guests will sync from Sugar to your external calendar. |
| Delete Canceled Events1 | When enabled, Sugar events are deleted when canceled in your external calendar. When disabled, Sugar events are updated with a "Canceled" status. |
| Exclude Existing Events1 | When enabled, only events created from the current date forward will be synchronized. Existing events (i.e., events that were created in the past relative to the initial synchronization date) will not be included. |
| Sync only tasks with Start or Due Date1,3 | When enabled, only the Sugar tasks that have a Start Date or Due Date will sync to the external calendar. |
1 This option may be disabled when your Sugar Connect admin has set the sync method for your tenant.
2 Custom statuses added in Studio for meetings, calls, or tasks may take up to 60 minutes to appear in the list of available statuses under "Calendar Synchronization".
3 This option is only available when two-way sync is enabled.
Enabling Calendar Sync
Follow these steps to enable calendar sync via Sugar Connect:
- Open the Sugar Connect sidebar in Gmail or Outlook and launch the Sugar Connect Portal.
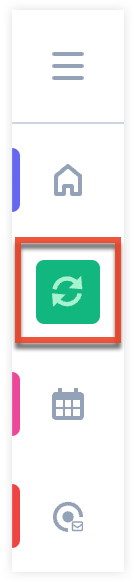
- Click on the Synchronization tab in the navigation bar:
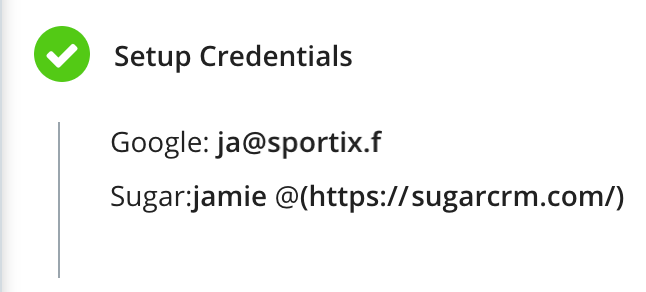
- Under "Setup Credentials" ensure that your email address, Sugar username, and Sugar URL are correct, or click "Configure" if they have not been set up.
- Under "Calendar Synchronization" you may choose to adjust the sync settings as described in the Calendar Sync Settings section above.
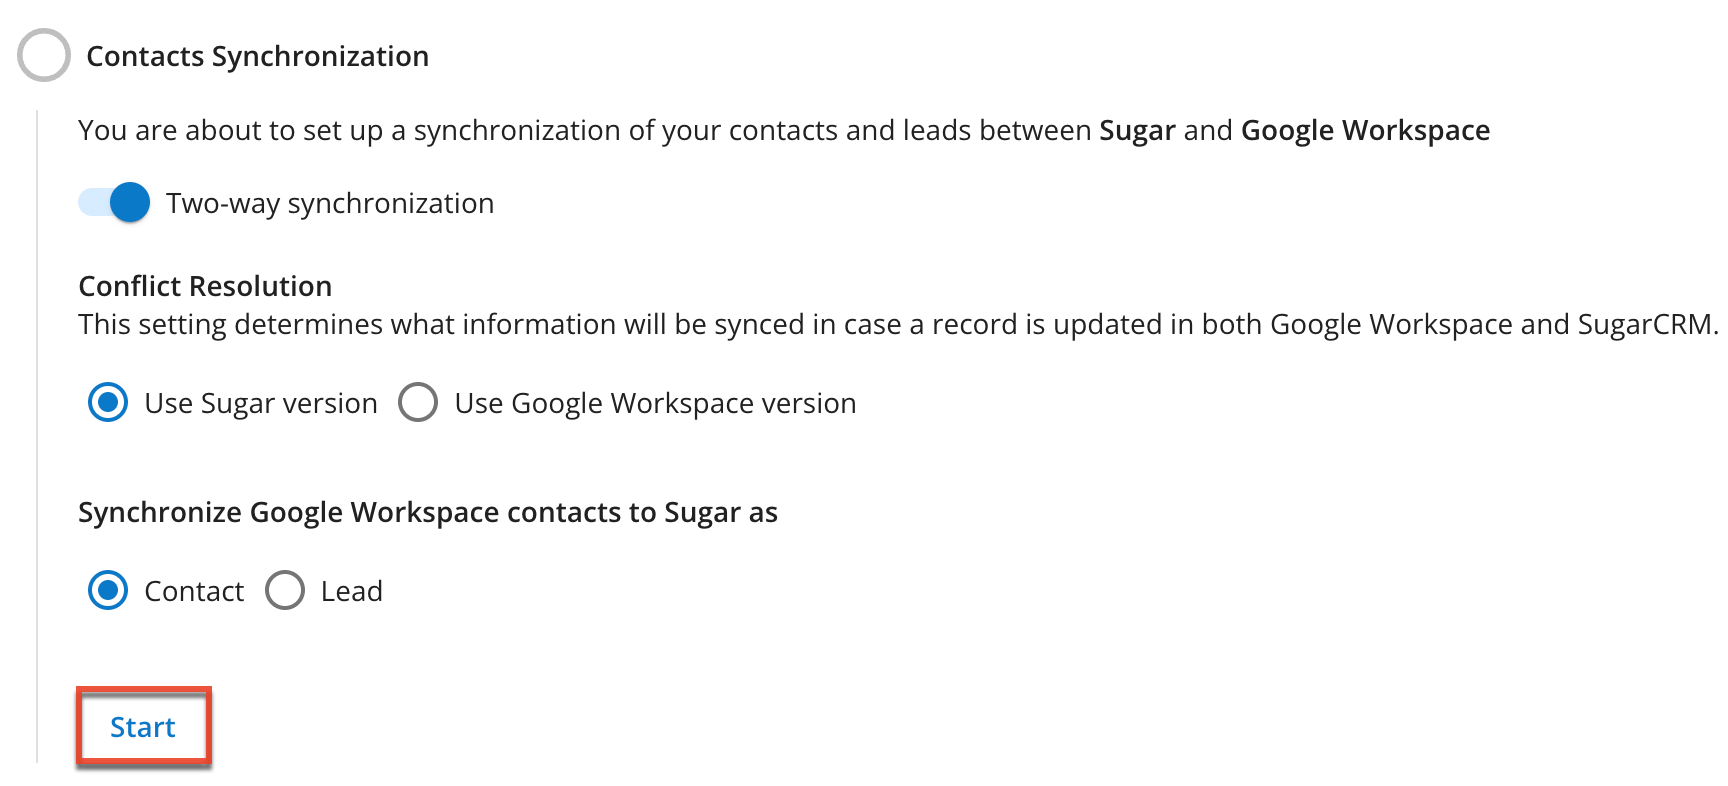
- Click on "Start" to begin your calendar sync.
Note: Google Workspace users must consent to Google Calendar access in order to use calendar synchronization.
Editing Calendar Sync
If you want to edit your calendar sync settings, you must first launch the Sugar Connect Portal and click on "Synchronization". Click "Pause" under the Calendar Synchronization section to make changes.
If you want to reset the entire sync, click "Reset". Resetting the entire sync is necessary if you want to change the "Use primary calendar" option or if you want to initiate the Initial Sync Rules.
If you do not want to reset the entire sync, once you have paused the sync you can edit all settings except for the "Use primary calendar" option. Once you have made your edits, click "Continue" to resume the sync. The new sync settings take effect for all events that are edited or created after clicking "Continue". Previously-synced events will not be removed from your calendar when you click "Continue", and events that were not synced before the pause will not be triggered to sync by clicking "Continue". Updated events will be synced according to the new settings. For example, if you previously chose not to sync held meetings, then pause your sync and choose to sync held meetings, any meetings that were previously marked as Held will not be synced. Any meetings that are marked as Held or otherwise modified after this point in time will sync because they have been updated. If you would like to sync all meetings that were previously marked as Held, you will have to reset the entire sync.
Working With Your Synced Events
For information on how to work with synced events once you have completed the calendar sync, please refer to the Sugar Connect User Guide.
Contact Sync
If you want to use Sugar Connect to sync your contacts between Sugar and Outlook or Google, you must first set up Contact Sync in the Sugar Connect Portal. The next two sections explain important rules for syncing your leads and contacts and how to set up the sync once you are ready.
Note: Sugar Connect administrators are able to set the contact sync settings for their tenant. For more information, please refer to the Contact Sync Settings section in the Sugar Connect Deployment and Administration Guide.
Sync Rules for Leads and Contacts
Take note of the following requirements before syncing your contacts between Sugar and your Outlook or Google address book via Sugar Connect.
- You must have access to the Leads module in Sugar for your leads to sync to your external address book.
- You must have access to the Contacts module in Sugar for your contacts to sync to your external address book.
The following rules apply to the sync process for leads and contacts to your external address book:
- Syncing Records
- Sugar Connect's Contact Sync is either a one-way push from Sugar to your external address book, or it is a two-way sync between Sugar and your external address book.
- Only leads and contacts that are assigned to you will sync to your external address book by default.
- Leads and contacts that are not assigned to you can be marked to sync to your external address book within the sidebar after the sync is enabled.
- The Contact Sync time interval is set to once every 15-20 minutes.
- Custom fields in Sugar will not sync to the external address book.
- If the first name, last name, and one of the email addresses listed for a contact in your external address book match that of a Sugar contact or lead record:
- When a lead or contact is created in Sugar and/or assigned to you, a new contact will not be created in the external address book, preventing duplicate records.
- When a record is updated in either system, the Conflict Resolution setting will determine which information is kept but may cause data loss if you update the source that is not used for conflict resolution.
- The following Sugar fields are included in the sync for both leads and contacts:
-
First Name, Last Name, Title, Salutation, Account Name, Description, Email, Primary Address, Alternative Address, and Phone
-
| Record Action | One-Way Sync | Two-Way Sync |
| Creating Records | Creating new Sugar contacts can only be done via the Sugar Connect sidebar or directly in Sugar. | You can create new Sugar contacts by adding contacts to your external address book. |
| Editing Records | The changes made to leads and contacts in your Sugar instance will sync over to your external address book. | The changes made to leads and contacts in Sugar and to contacts in your external address book will sync. |
| Deleting Records | If you delete a synced contact from your address book but not from Sugar, the contact will not re-appear in your address book after the next automatic sync update. To restore deleted contacts, click "Pause", then "Reset", and follow the steps below to re-enable the sync. | If you delete a synced contact from either your address book or Sugar but not from the other one, the contact will not re-appear in the location it was deleted after the next automatic sync update. To restore deleted contacts, click "Pause", then "Reset", and follow the steps below to re-enable the sync. |
Enabling Contact Sync
Sugar Connect's Contact Sync feature syncs leads and contacts that are assigned to you from Sugar to your external address book, and optionally from your external address book to Sugar, using Sugar Connect's server-side sync capabilities. Leads and contacts not assigned to you can be marked to sync from within the Sugar Connect sidebar. You must set up Contact Sync using your Sugar credentials in the Sugar Connect Portal.
Note: Please be sure to read the Sync Rules for Leads and Contacts to fully understand the sync behavior.
Follow these steps to enable Contact Sync:
- Open the Sugar Connect sidebar in Gmail or Outlook and launch the Sugar Connect Portal.
- Click on the Synchronization tab in the navigation bar:
- Under "Setup Credentials" ensure that your email address, Sugar username, and Sugar URL are correct, or click "Configure" if they have not been set up.
- Under "Contacts Synchronization", choose whether to use one-way or two-way synchronization. If you choose two-way synchronization, you may choose to adjust the following settings:
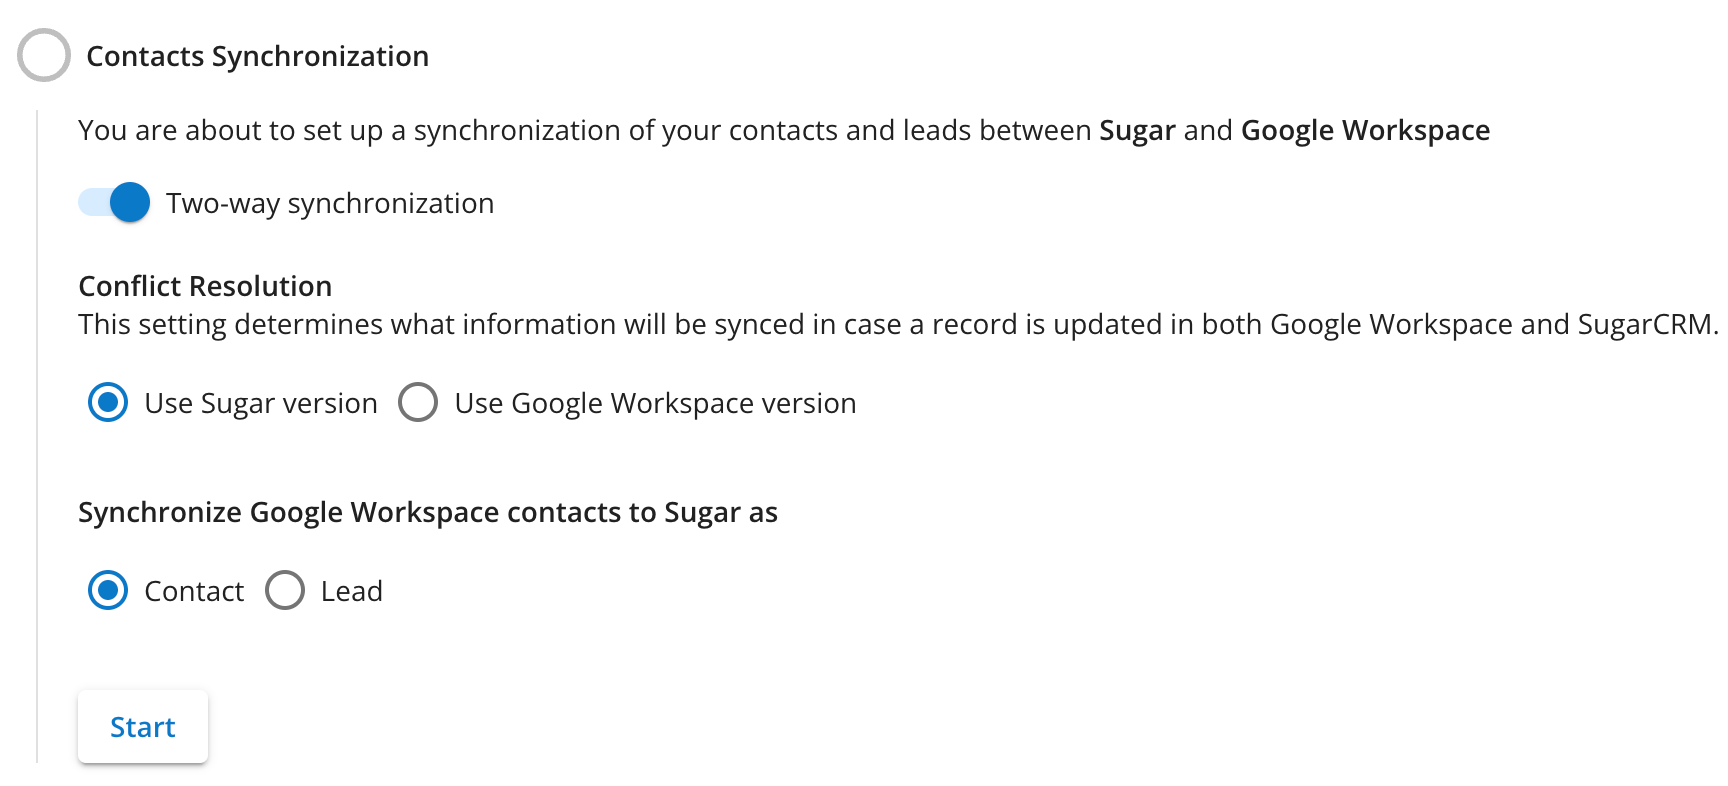
- Conflict Resolution: This option determines what information will be synced in case a record is updated in both your external address book and Sugar. If a record is deleted from either the external calendar or Sugar, it will be removed from both systems. Deleting a record takes precedence over any other updates regardless of the conflict resolution setting.
Note: This option may be disabled when your Sugar Connect admin has set the sync method for your tenant. - Synchronize Office 365/Google Workspace contacts to Sugar as: This option determines whether contacts in your external address book are added to Sugar as contacts or leads.
Note: This option may be disabled when your Sugar Connect admin has set the sync method for your tenant.
- Conflict Resolution: This option determines what information will be synced in case a record is updated in both your external address book and Sugar. If a record is deleted from either the external calendar or Sugar, it will be removed from both systems. Deleting a record takes precedence over any other updates regardless of the conflict resolution setting.
- Click on "Start" to begin the sync of your leads and contacts between Sugar and your external address book.
Note: Google Workspace users must consent to Google Contacts access in order to use contact synchronization.
Once the sync is complete, the time of the last and next sync occurrences are shown. You have the option to pause upcoming syncs at any time via the Pause button. Simply click on "Resume" when you are ready to start syncing contacts again or optionally, click "Reset" to stop syncing contacts and delete your sync profile.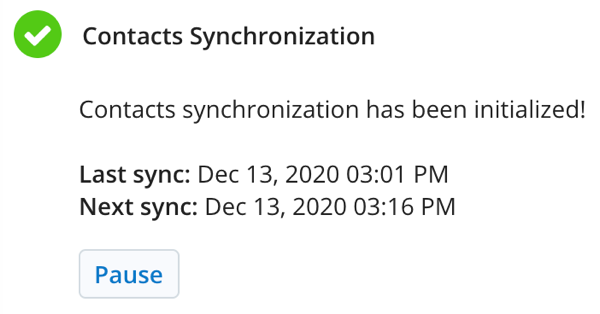
Working With Your Synced Records
For information on how to view leads and contacts synced from Sugar to your address book and how to sync a lead or contact record not assigned to you, please refer to the Sugar Connect User Guide.
Sugar Connect Meeting Scheduler
Sugar Connect's built-in scheduling system gives you a professional and convenient way to schedule meetings with prospects, customers, and anyone with whom you want to set up a meeting. Simply provide the meeting invitee with a link to a custom landing page or specific event type, which syncs with your primary or Sugar calendar and preferred business hours, and the invitee can choose a time slot that works for them.
Note: For the best user experience, please enable calendar sync before using the Sugar Connect Meeting Scheduler.
To access the scheduler, navigate to the Sugar Connect Portal and click on the Scheduler tab in the navigation bar. You will see your list of landing pages, event types, and your weekly availability. Refer to the following sections for steps to create, share, and book new meetings using the Sugar Connect Meeting Scheduler.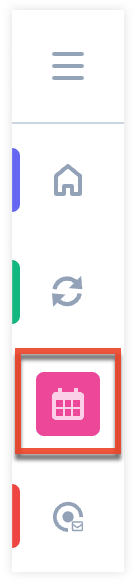
Scheduler Weekly Hours
If you have a relatively consistent schedule each week and know your availability, you can set these days and hours in the Weekly Hours section of the Sugar Connect Scheduler. Refer to the section below to set your weekly availability.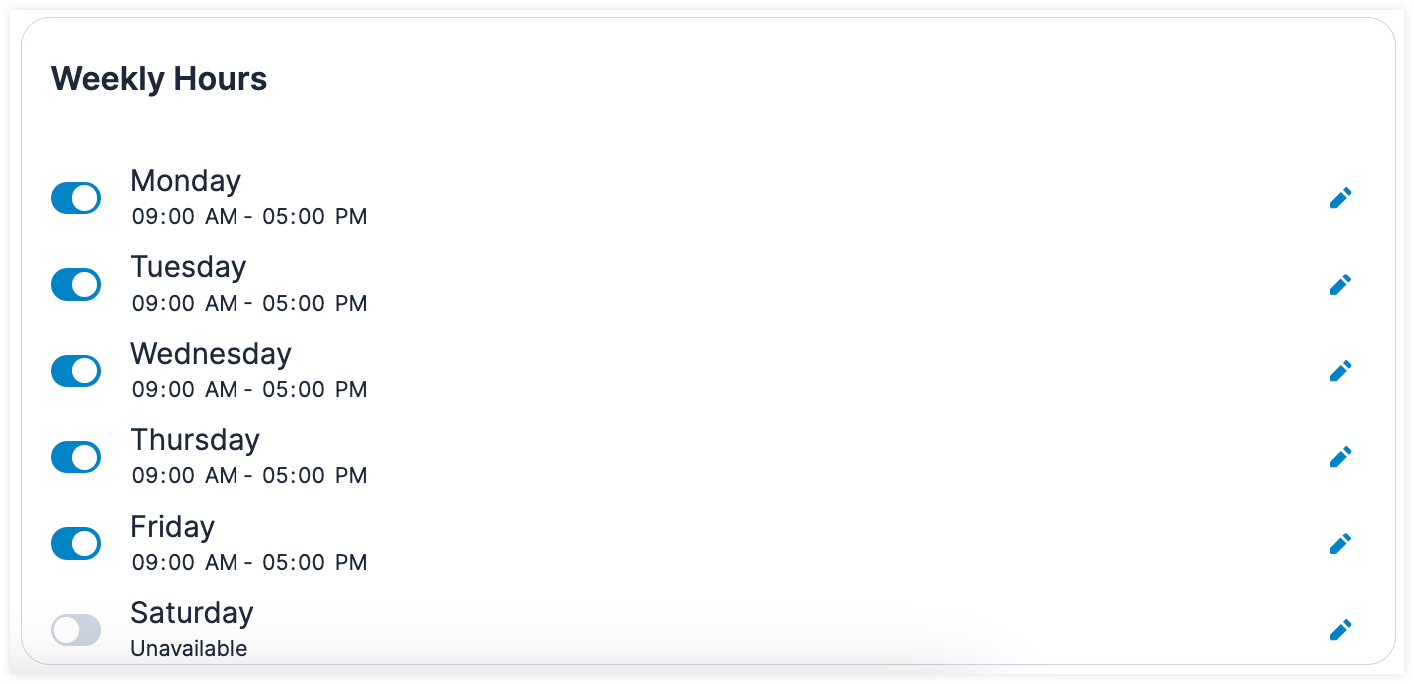
Setting Weekly Hours
The scheduler's weekly days and hours default to Monday-Friday from 9:00 AM-5:00 PM. Clicking the Pencil icon in the Weekly Hours section allows you to configure the days and times you are available for meetings. The days and times you set here drive what is shown when adding event types.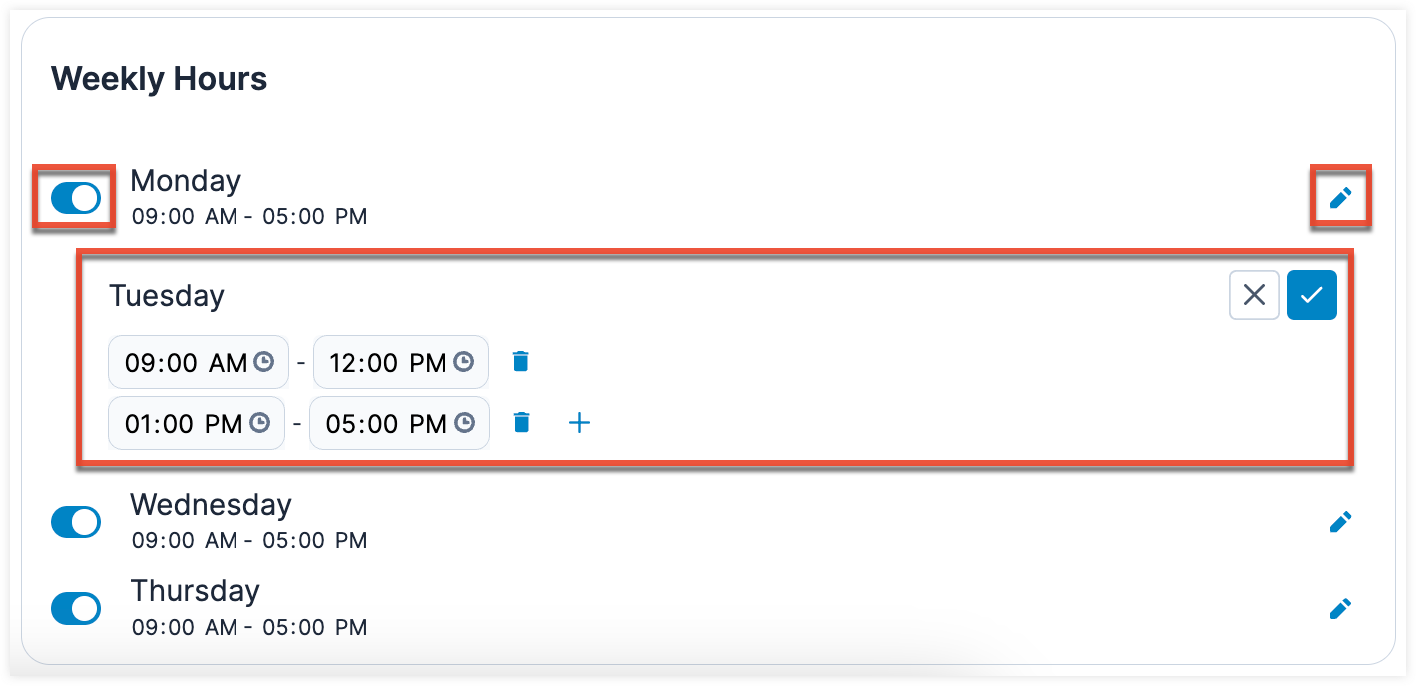
The following options are available when setting your weekly hours:
Enable/Disable Days: Click the toggle button to enable or disable the days of the week you are available for meetings.
Edit Availability: Click the Pencil icon to open the hours for that day and edit your availability.
Add Interval: Click Plus icon to enable the Time Start and Time End fields for days currently set to Unavailable. Additionally, you can add subsequent windows of time to your day to accommodate lunch breaks, recurring meetings, etc.
Delete Interval: Click the Trash icon to remove an interval of time from your day. Removing all intervals will set the time to "Unavailable"
Save: Click the checkmark button for each day you edit after you have completed all desired.
Cancel: Click the X button to discard any changes for the day you were editing.
Scheduler Event Types
The scheduler comes pre-loaded with three default event types, which represent standard 15-, 30-, and 60-minute meetings. You may also choose to create new event types for common meeting durations or for a specific date/time/duration use case. The available event types are displayed in the Sugar Connect Portal's Scheduler page and are also the building blocks of your landing pages. At any time, you can share and re-share the scheduler links for the enabled events in your scheduler account. 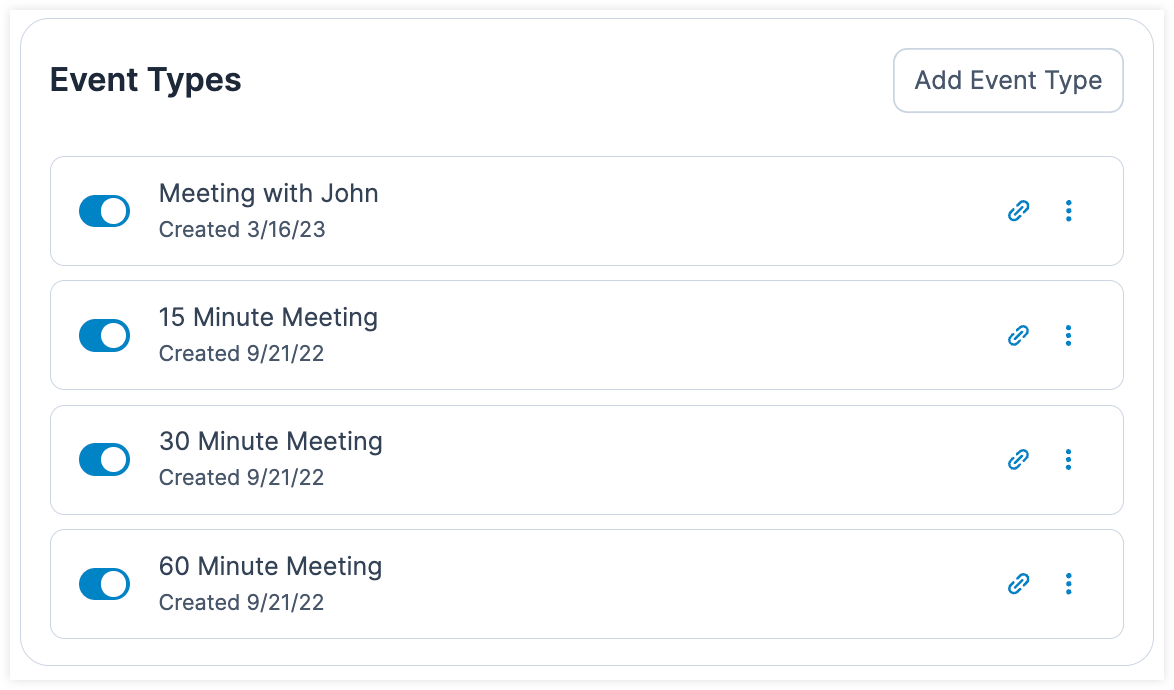
Please refer to the Event Type Actions section for information on the actions available from the Event Types list view.
Adding Event Types
If there is a specific meeting window or duration that you would like to set up, simply create a new event type by clicking on "Add Event Type". For example, if you want to meet with John for 30 minutes next week on Monday or Tuesday morning, you can create a new 30-minute event type called "Meet with John", limit the number of days in the future to 7, and set your availability for that event to only the morning hours of Monday and Tuesday. Please note, if you have set your weekly availability, the days/times will default to your settings for each newly added event type. For more information on configuring the individual event type's settings, refer to the Event Type Fields section below.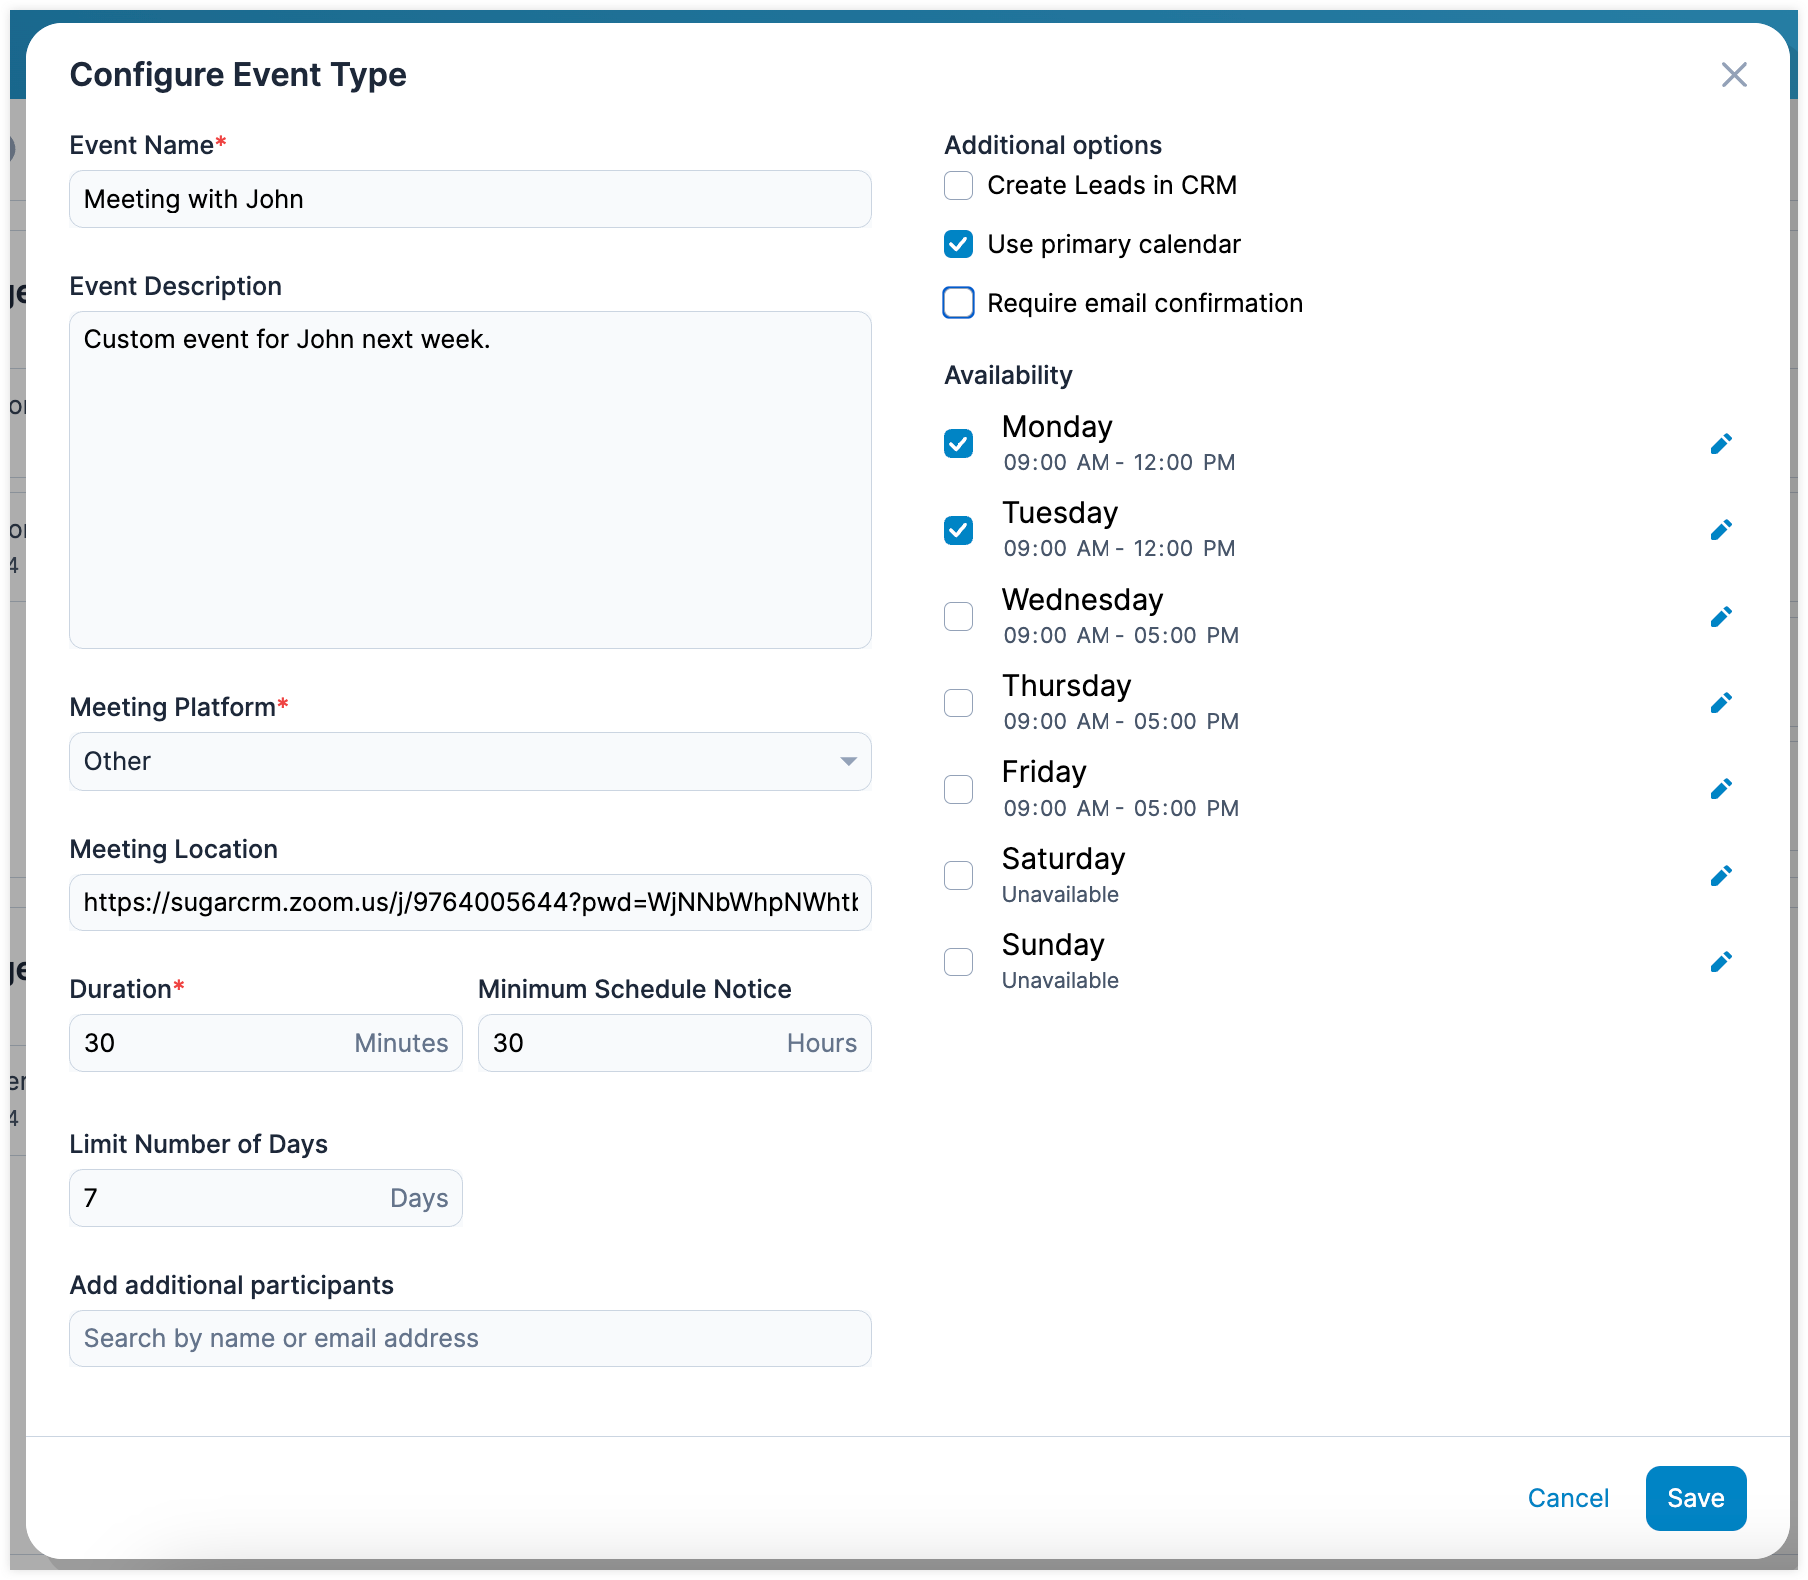
When you share the scheduler link with John, he will be able to select a 30-minute time slot from these available times, minus any times that are already blocked off from your synced calendar.
Event Type Fields
When creating a new Event Type, the Event Type form contains the following fields:
| Field | Description |
| Event Name | A short name that will help you recognize the event in list view, is displayed when you share the scheduler link, and serves as the event subject. |
| Event Description | A longer explanation that displays under the name in list view and serves as the body of the meeting invitation. Note: Because the person scheduling the event with you will see the event description after the meeting has been confirmed, it could contain a video conferencing link (e.g., Zoom) if desired. |
| Meeting Platform | The means of communication available for the meeting participants. Depending on your available options, multiple may be selected. For Gmail users with access to Google Meet, Outlook users with access to Microsoft Teams, or any users with a Zoom account, presenting these options to your invitee prompts an automatic generation of a unique meeting link after the meeting scheduling process is completed by the invitee. |
| Meeting Location | The physical or virtual location of the meeting. This meeting location will be used for every meeting scheduled via configured event type. In instances where "MS Teams" is selected in the Meeting Platform field, the location field should be left blank. Note: If you use an online meeting link (e.g., Zoom personal meeting room, Skype), the same meeting link will be used for every meeting. |
| Duration (minutes) | The length of time in minutes to be reserved. |
| Minimum Schedule Notice (hours) | The number of hours in advance that the meeting must be booked. |
| Limit Number of Days | The maximum number of available days into the future the meeting may be booked. Note: Only days with availability are counted. For example, if you set Limit Number of Days to 3, Minimum Schedule Notice to 24 hours, and are unavailable on Wednesday, a user that uses the scheduler link on Monday will see options for Tuesday, Thursday, and Friday. |
| Add additional participants |
Search for active Sugar Connect users in your tenant to add to the meeting. When additional participants are added, the event link only displays times when the event creator and additional participants are available. |
| Create Leads in CRM | Enable this option to have Sugar Connect create a new lead record in Sugar when a meeting invitee books with an email address that is not already found in Sugar. Note: You must have access to Sugar's Leads module and role permission to create leads in Sugar for this option to work as expected. |
| Use primary calendar | Enable or disable the option to have the meeting appear in your primary calendar instead of your Sugar calendar. Note: The Sugar calendar, created by Sugar Connect, exists in your external email client (i.e., Outlook or Gmail). Enabling/disabling the use of primary calendar for meeting scheduler is controlled seperately from the configuration options you have selected for your Calendar Sync. |
| Require email confirmation | Enabled: The person requesting the meeting must confirm the meeting request via an email sent to them, before the meeting is added to the calendars. Disabled: The person requesting the meeting must check the "I'm not a robot" checkbox on the booking details screen, as a way of thwarting spam meetings and automatically confirming the meeting. |
| Availability |
Set the available days and hours of the day for the invitee to choose from. Any existing events on your synced calendar will be automatically deducted from the available hours. Additional options are available per day: Enable/Disable: Toggle availability for the day Edit: For enabled days, edit the hours of the day to be available Add interval: Set one or more windows of time to be available within a day |
Event Type Actions
The Event Types list view allows the following actions for each event type: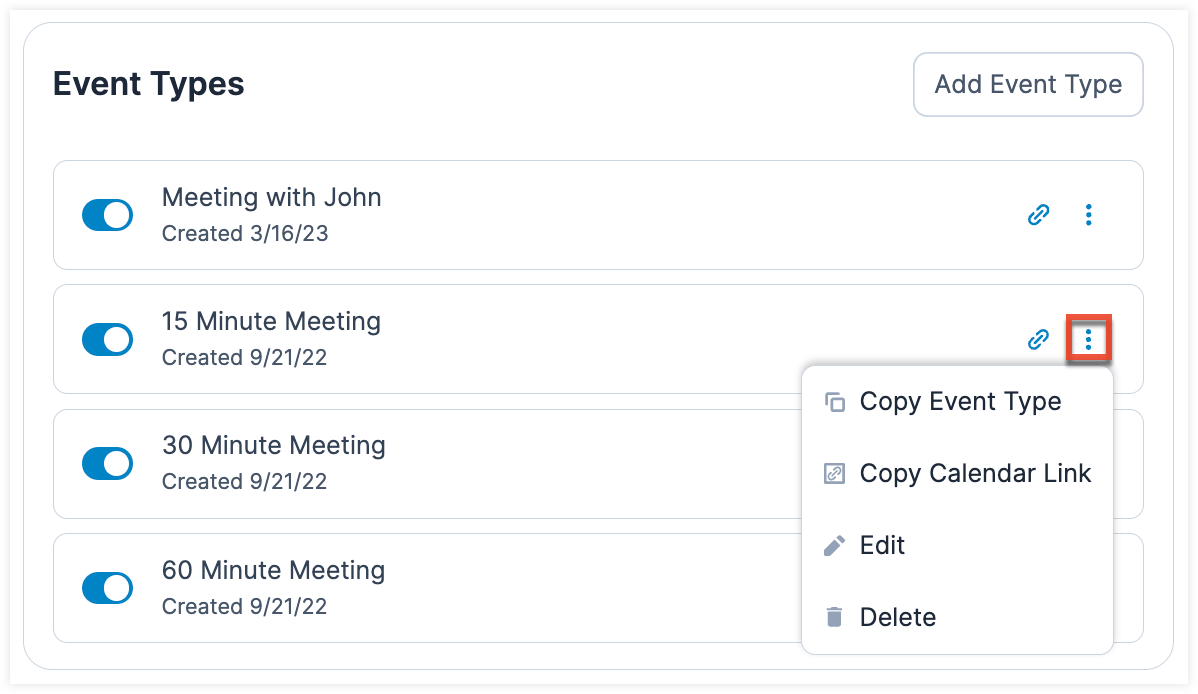
| Action | Icon | Description |
| Open Calendar Link |  |
Open the custom scheduler page for this event type. |
| Copy Event Type |  |
Create a copy of the event type to edit as needed. |
| Copy Calendar Link |  |
Copy the shareable scheduler page link to share with an invitee. |
| Edit |  |
Edit the event type's settings (see Event Type Fields). |
| Delete |  |
Delete this event type and disable its scheduler page. |
| Disable/Enable |  |
Disable the scheduler page for this event type without deleting the event type. When enabled, the event type's status indicator is blue; when disabled, the status indicator is gray. |
Scheduler Landing Pages
Landing pages offer you the ability to present multiple event types so people can choose what works best for them, while also respecting your schedule. You can create multiple landing pages that contain events specific to your needs or roles or those of the people you share the landing page with. For example, a landing page for a person in a sales role could contain a set of meeting options (i.e., event types) for a product demonstration of various lengths (e.g., 15, 30, and 60 minutes) and each meeting option would include your colleague, a pre-sales engineer, who is required to be involved in product demos. Sending your prospect a link to this landing page allows them to choose the meeting that is right for their needs and takes into account both your and your colleague's availability. The following sections explain more about custom landing pages.
Creating a Landing Page
Navigate to the Sugar Connect Meeting Scheduler page in the Sugar Connect Portal and click the Add Landing Page button. In the dialog box, fill out the required fields and select from the available event types. A landing page must have at least one event selected. Preview your landing page to see how it will appear and click Save once you are finished.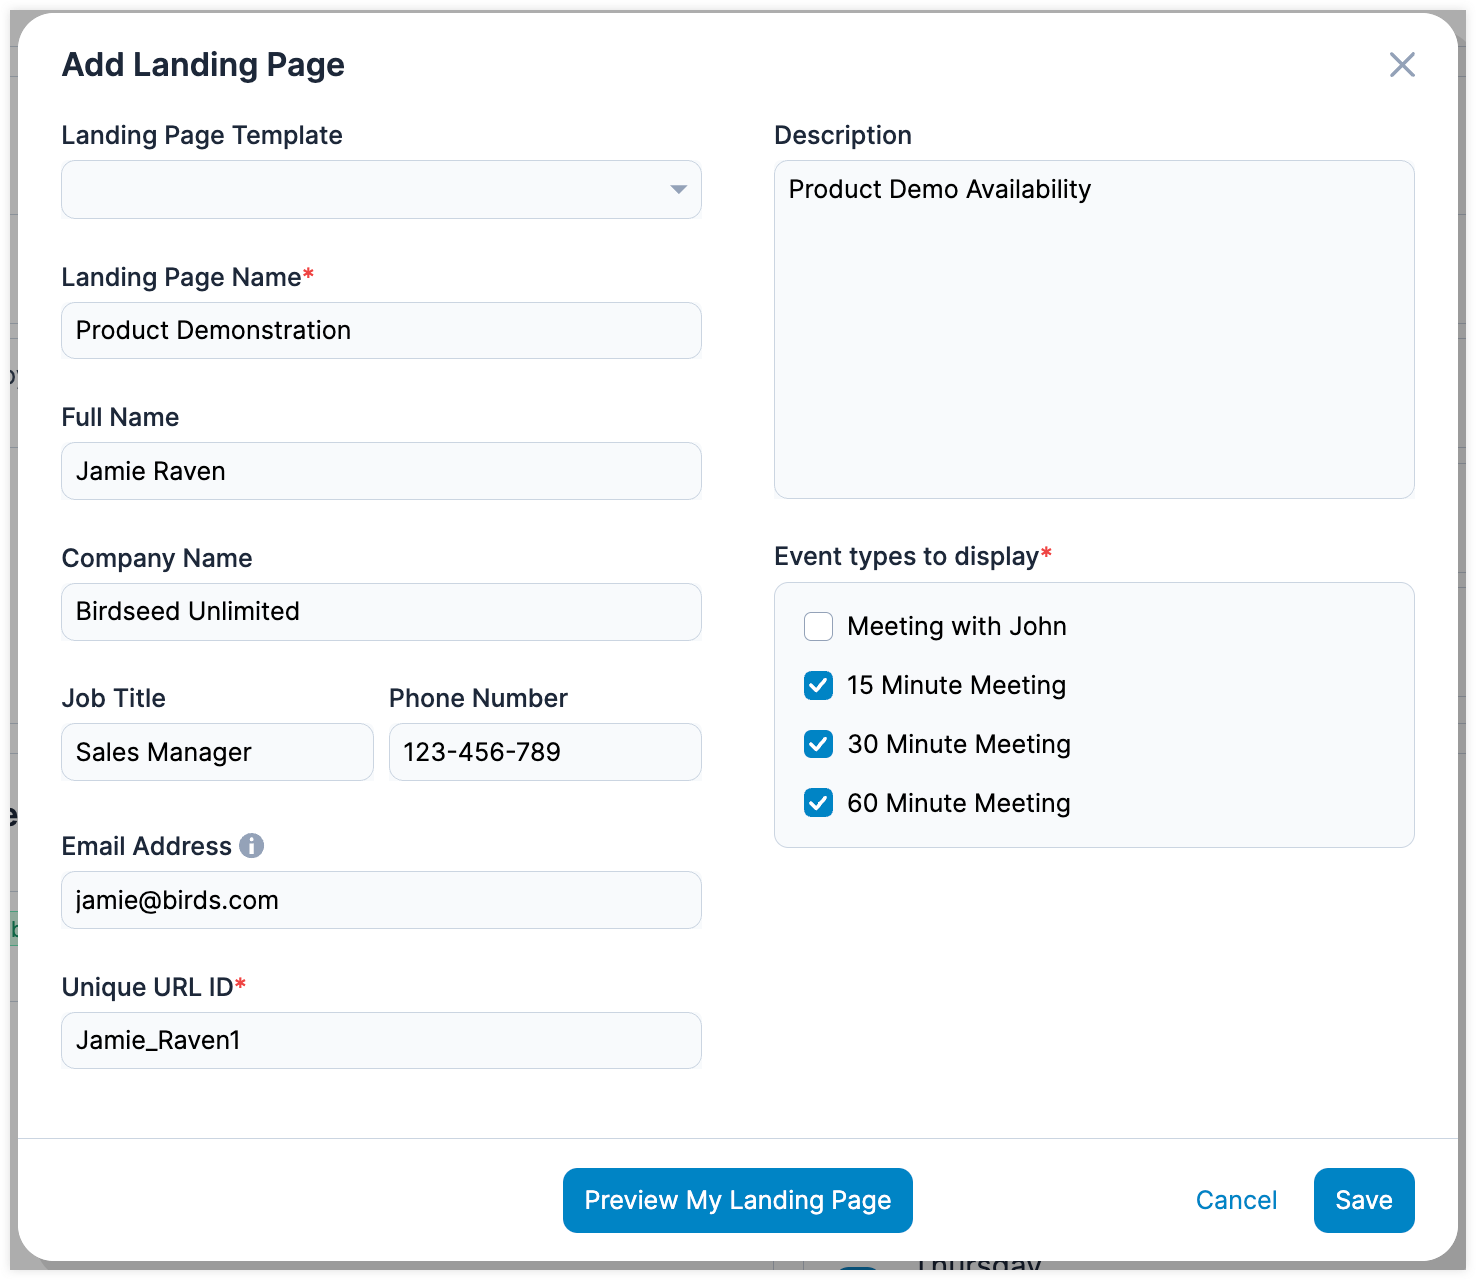
Landing Page Fields
When creating a landing page, the form contains the following fields:
| Field | Description |
| Landing Page Template | Choose a template to apply to your landing page. |
| Landing Page Name | A short name that will help you recognize the landing page in list view. |
| Full Name | Your name as you would like it displayed on the landing page. |
| Company Name | Your company name as you would like it displayed on the landing page. |
| Job Title | Your job title as you would like it displayed on the landing page. |
| Phone Number | Your phone number as you would like it displayed on the landing page. |
|
Email Address |
Your company name as you would like it displayed on the landing page. |
|
Unique URL ID |
The ending of the landing page URL you will share. The text entered here will be preceded with your tenant name and will look similar to: "https://tenantname.connect.sugarapps.com/scheduler/#/!/meet/uniqueurlid" |
|
Description |
The description to be displayed on the landing page. |
|
Event Types to Display |
A list of the event types you have created where you can select the ones that will be available on the landing page. |
Landing Page Actions
The Landing Page list view allows the following actions for each landing page: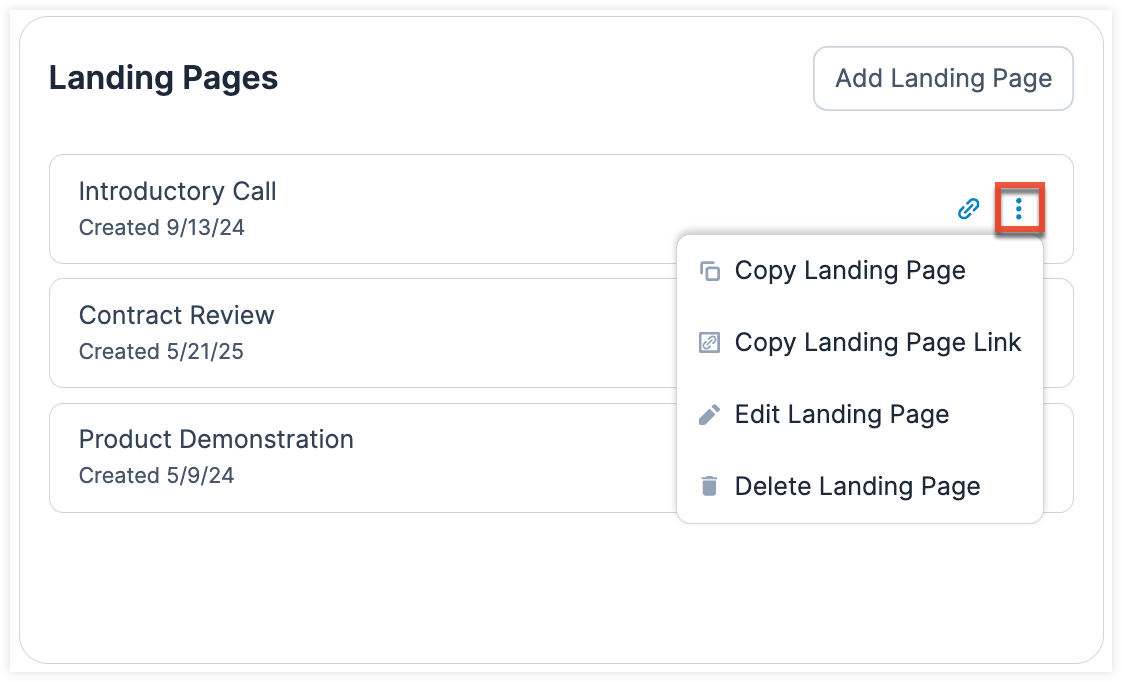
| Action | Icon | Description |
| Open Landing Page | |
Open the landing page in a new browser tab. |
| Copy Landing Page | |
Create a copy of the landing page to edit as needed. |
| Copy Landing Page Link | |
Copy the shareable landing page link to share with an invitee. |
| Edit | |
Edit the landing page's settings (see Landing Page Fields). |
| Delete | |
Delete this landing page. |
Creating a Landing Page Template
Navigate to the Sugar Connect Meeting Scheduler page in the Sugar Connect Portal and click the Add Template button to create a custom template to apply to your meeting scheduler landing pages. Creating landing page templates allows you to customize the look and feel of each landing page to better align with your company's theme or personal preferences. From the template design page, you can upload a logo and banner, change the background colors, customize the font, and more. The following sections explain in detail the available options for customizing a landing page template. Be sure to click "Save" at the top right of the page after making your selections.
Layout Switcher
The layout switcher is located at the top of the template customization screen. Clicking the different icons allows you to see what the template will look like on a desktop, tablet, or mobile phone.
Template Properties
The template properties section has one available field for regular users and three for Sugar Connect administrators:
- Template Name: Give your template a unique name that can easily be identified when managing your landing pages.
- Make this template public: Available for Sugar Connect administrators, enable this field to make the template available to other Sugar Connect users in your tenant.
- Make this template the default: Available for Sugar Connect administrators, enable this field to make the template the default one selected when managing landing pages.
Branding
The branding section has three available fields:
- Font: Select a font from the dropdown field to apply to all text on the landing page.
- Logo: Upload a desired logo to appear in the top left of the landing page. It's recommended to use a .png file that is at least 250 x 50 pixels with a maximum size of 3 Mb.
- Banner: Upload a desired banner to appear along the top of the landing page. It's recommended to use a .png file that is at least 970 x 75 pixels with a maximum size of 3 Mb.
Details
The details section has five available fields:
- Full Name: Controls the appearance of your name.
- Company Name: Controls the appearance of the company name.
- Information: Controls the appearance of your job title, phone number, email address, and landing page description.
- Background Color: Controls the background color of the panel containing your picture, name, company and information.
- Link Color: Controls the color of the phone number and email address links.
Events
The events section has eight available fields:
- Header Text: Controls the appearance of the event header text (i.e., Select Appointment).
- Event Title: Controls the appearance of the event titles.
- Description: Controls the appearance of the event descriptions.
- Button Text: Type the text you want to appear in the button.
- Button Text Color: Controls the color of the button text.
- Button Corners: Select the appearance of the button corners.
- Button Size: Select the size of the buttons.
Landing Page Template Actions
The Landing Page Template list view allows the following actions for each landing page template:
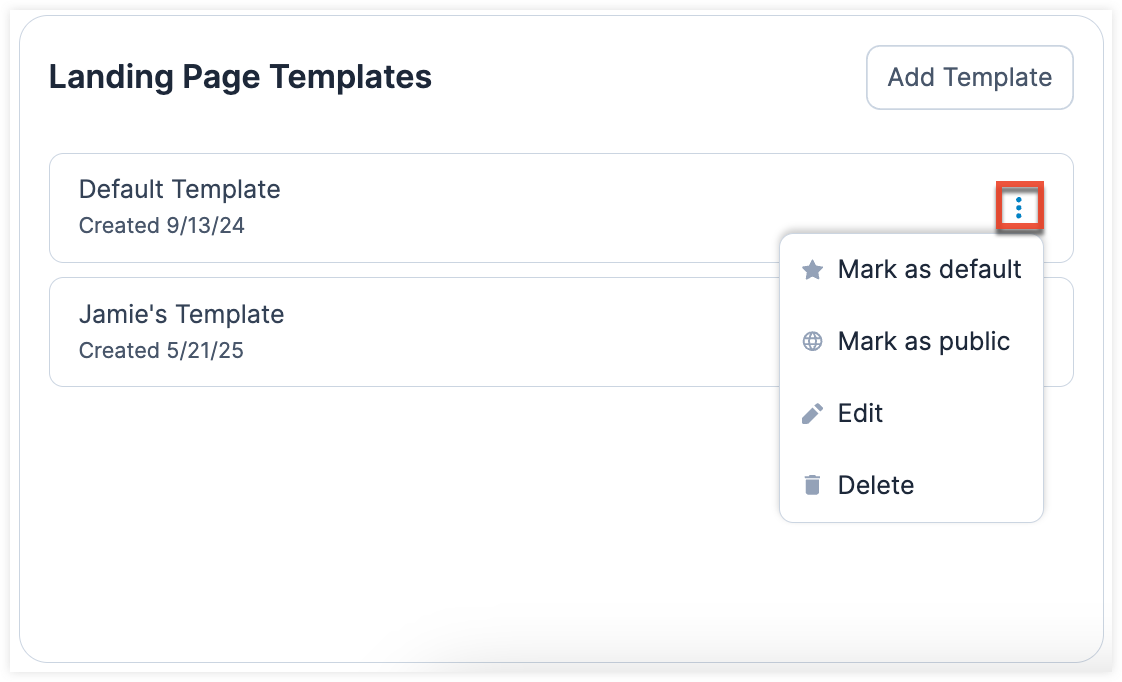
| Action | Icon | Description |
| Mark as default |  |
Set the template as the default used when creating a new landing page. |
| Mark as public |  |
Available for admin users, create templates for your Sugar Connect users to choose from when creating their landing pages. |
| Edit | |
Edit the template's settings (see Creating a Landing Page Template). |
| Delete | |
Delete this template. |
Sharing a Scheduler Link
Allow prospects, partners, customers, and coworkers to easily schedule meetings on your calendar simply by sharing a link with them. Send them a link for a specific event type or share a custom landing page, where they can choose from several event types to suit their needs. Click on the Copy Landing Page icon or the Copy Calendar Link icon next to the relevant landing page or event type in the Sugar Connect Portal as shown in the above sections. The URL will be stored in your clipboard and you can paste it into an email message, chat client, marketing page, etc.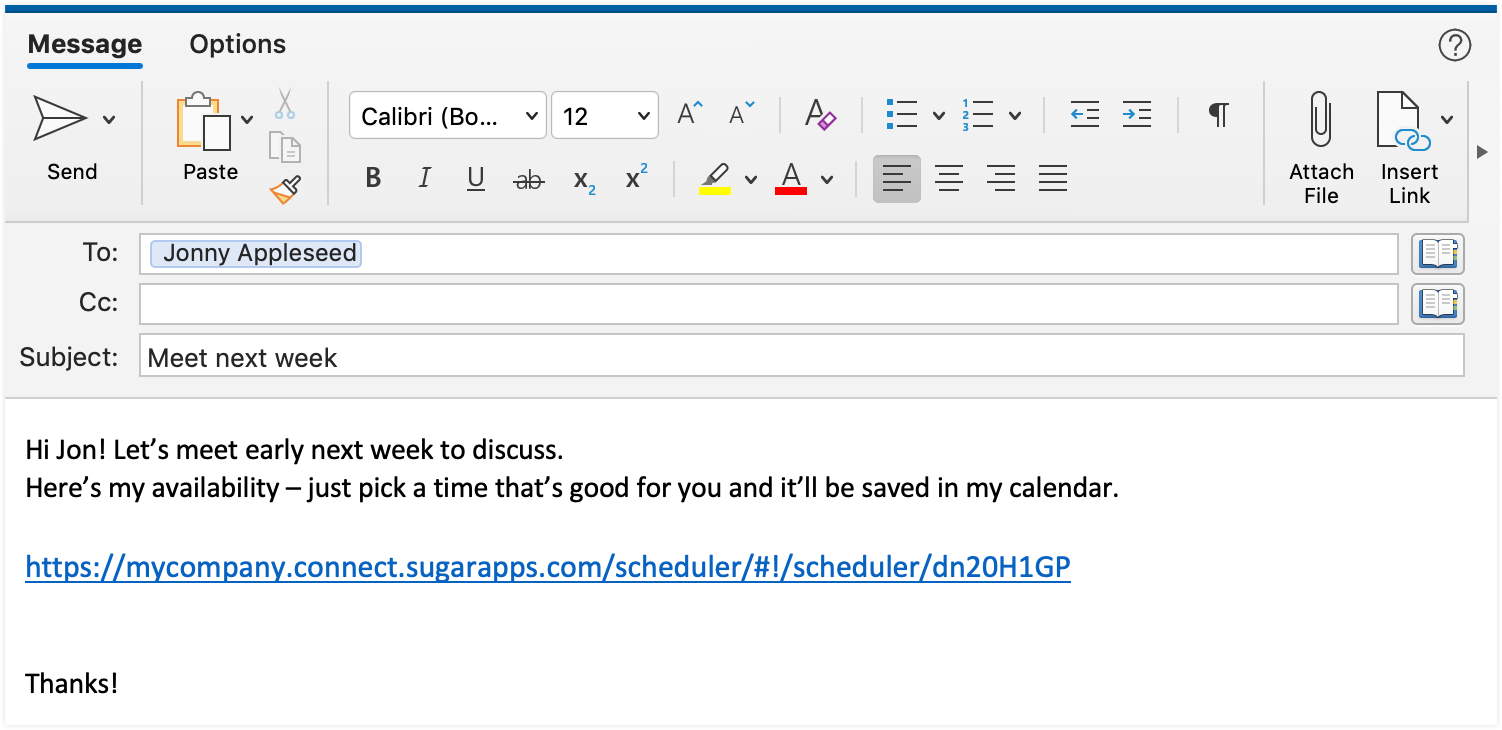
When the recipient clicks on your link, they will see your availability according to your synced calendar and preferred meeting times for the selected event type. The options available to the invitee are explained in the Booking a Meeting section of this page.
Booking a Meeting
After you have shared a scheduler link, the invitee will click on the link and come to the landing page or to the specific calendar event/ There, they can book the meeting time and date that works best for them. The following images show examples of the pages they see.
Meeting Scheduler Landing Page
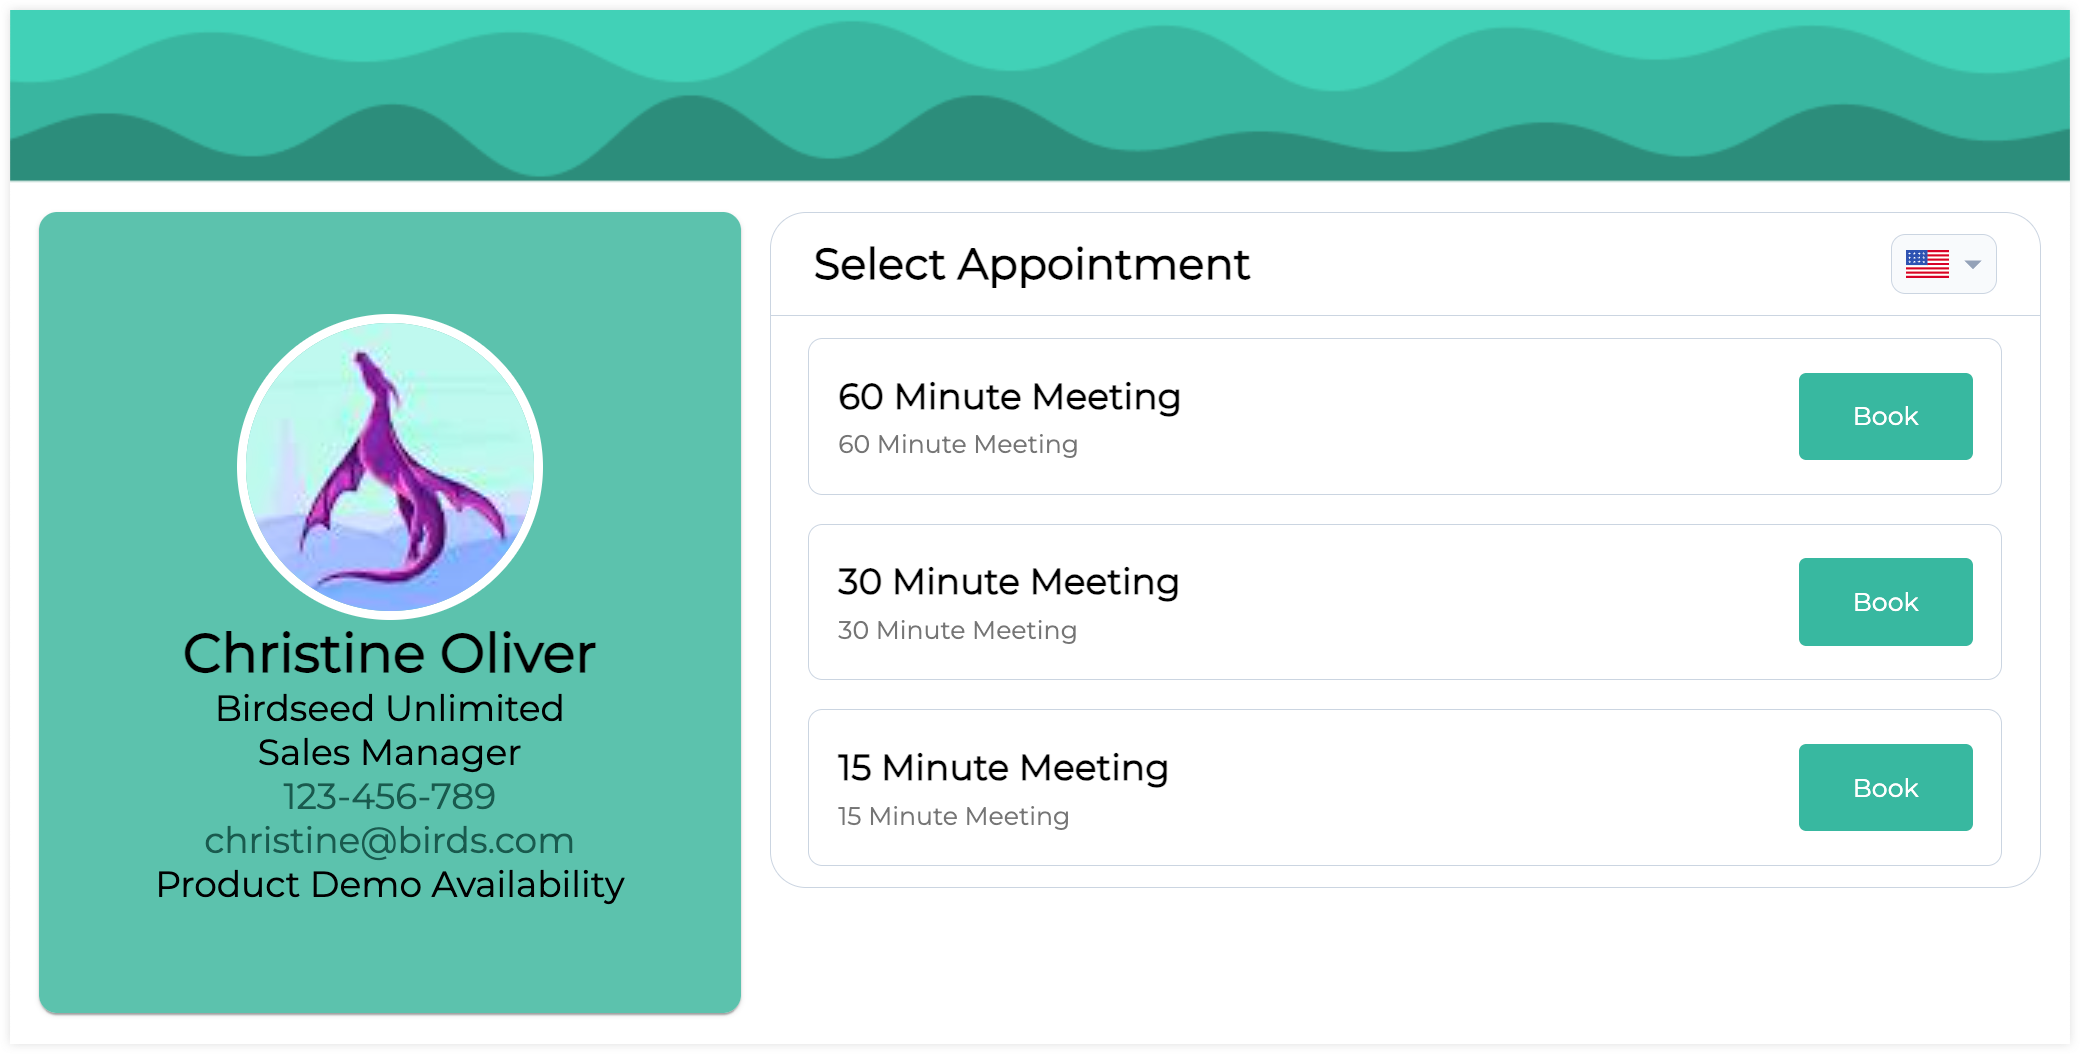
Meeting Scheduler Event Page
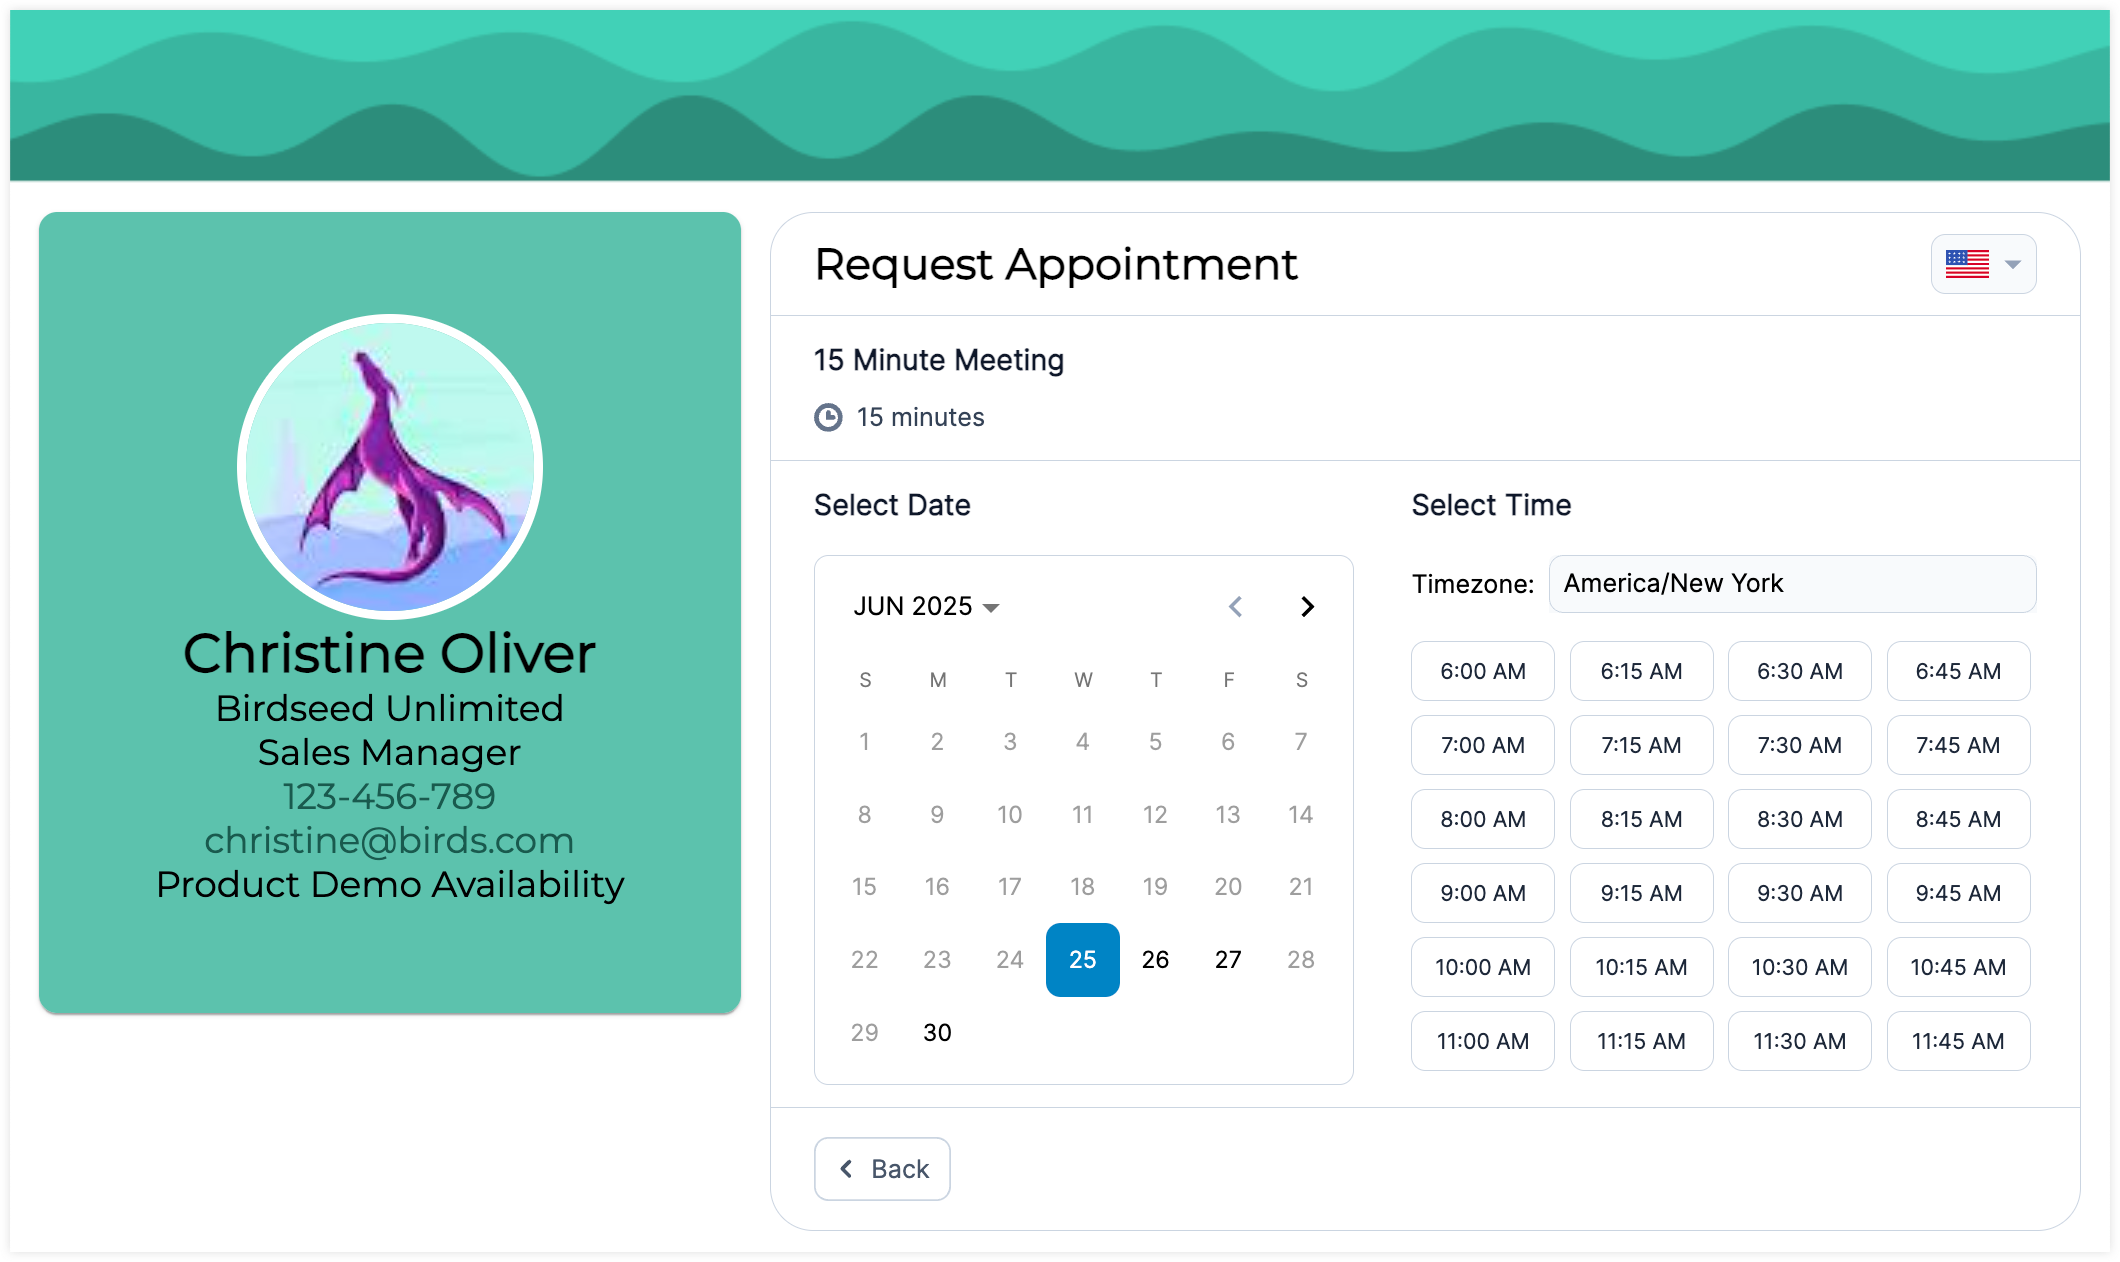
Note: They will not see the landing page graphics if you only share a direct event link.
Whether an event type is selected from a landing page, or accessed directly, they will see the "Request Appointment" section pictured above. The invitee can use the calendar on the left to pick an available day and the available times are automatically updated on the right side. The timezone field above the available times allows the invitee to convert the available times to their own locale. They should click on the day and time they prefer and proceed to the next step.
Booking Details
The invitee will then be prompted to enter their name, email address, and phone number. When applicable, they can select the meeting platform they prefer (e.g., Zoom). They can also add details to the Appointment Description field for the Sugar Connect user to view when the meeting is scheduled. Lastly, if the Require email confirmation setting is disabled, the invitee must click the "I'm not a robot" checkbox. If the setting is enabled, after clicking finish they will need to confirm the meeting details before it can be officially scheduled.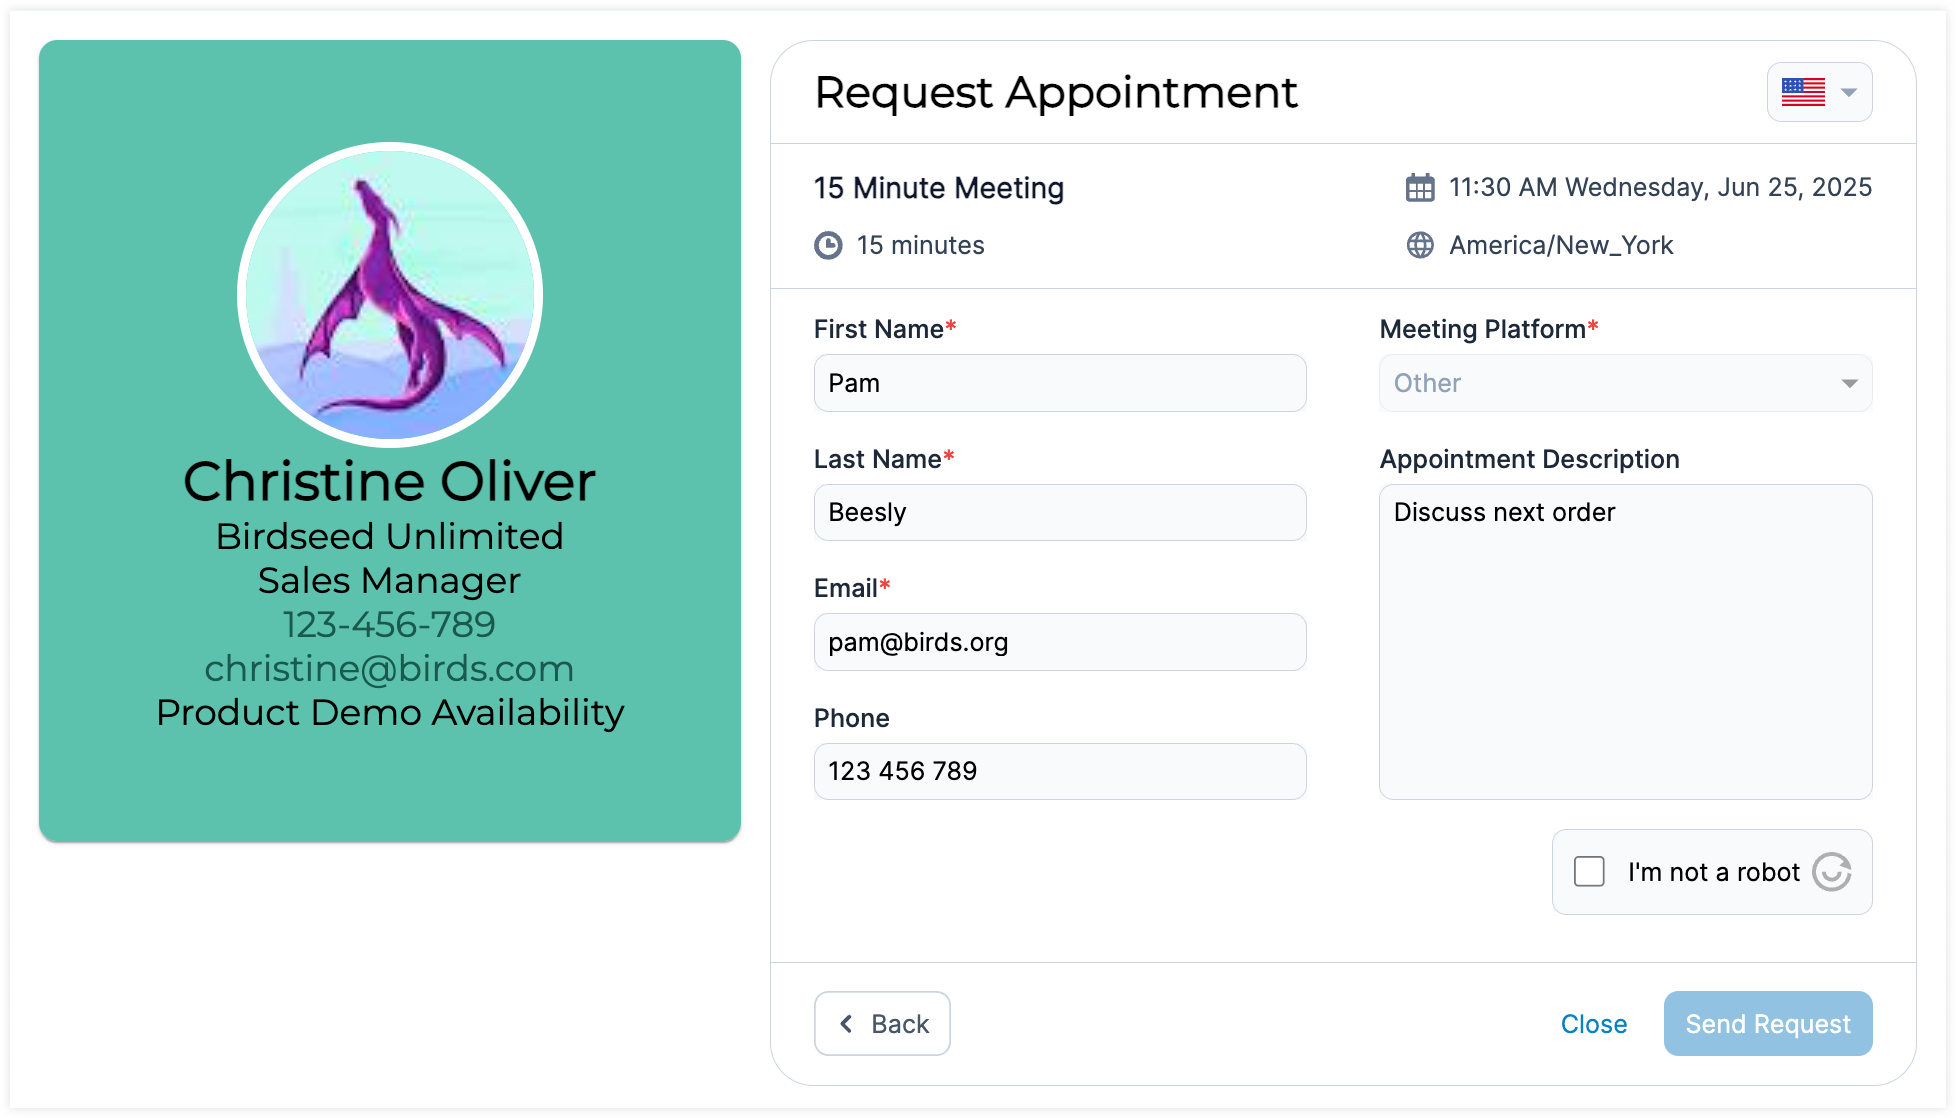
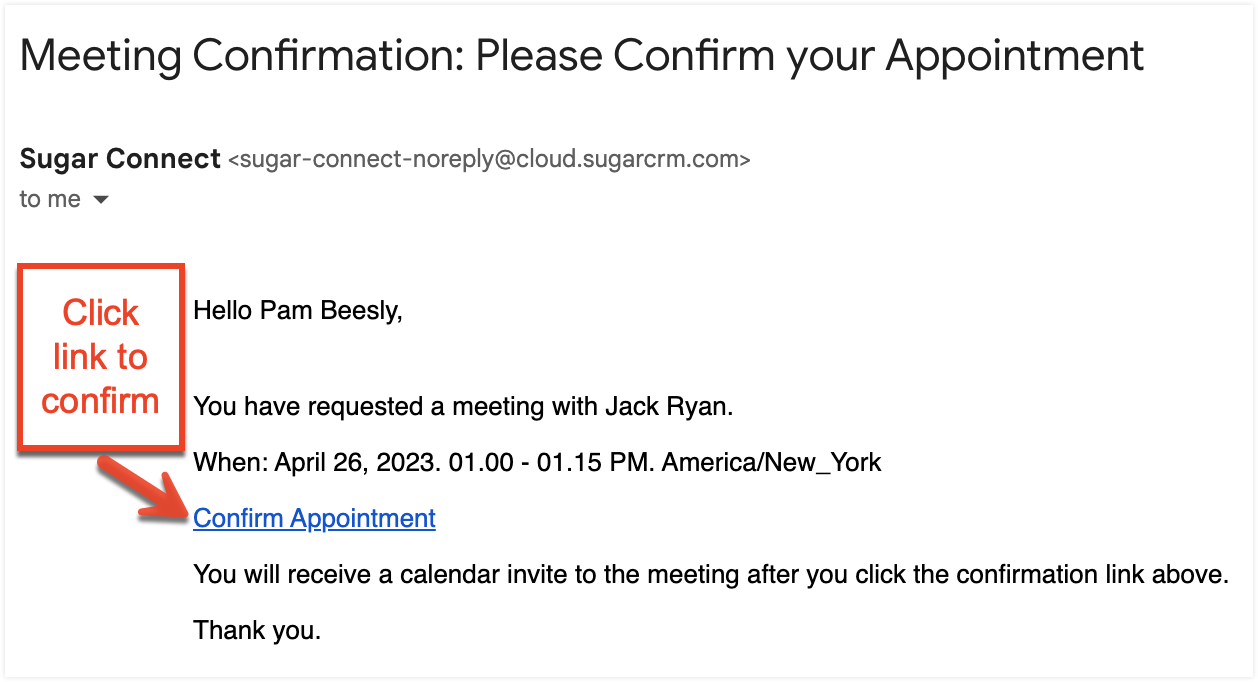
Meeting Confirmation
On save, the invitee will see a screen with the meeting's details and will receive an email with the subject "Meeting Confirmation: Please Confirm your Appointment".
Note: The invitee must click the link in the confirmation email in order to successfully schedule the meeting.
Note: The meeting will only be scheduled when the link is clicked and the below screen is shown, confirming success.
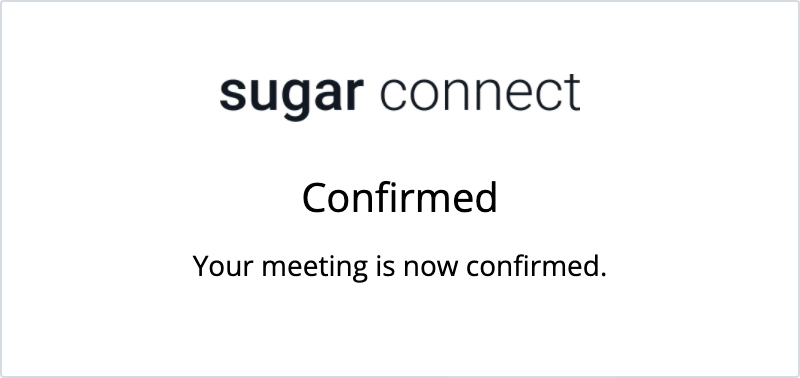
The meeting details will then be sent to you in an automated email notification from sugar-connect-noreply@cloud.sugarcrm.com with a subject line starting with "Booked meeting:". 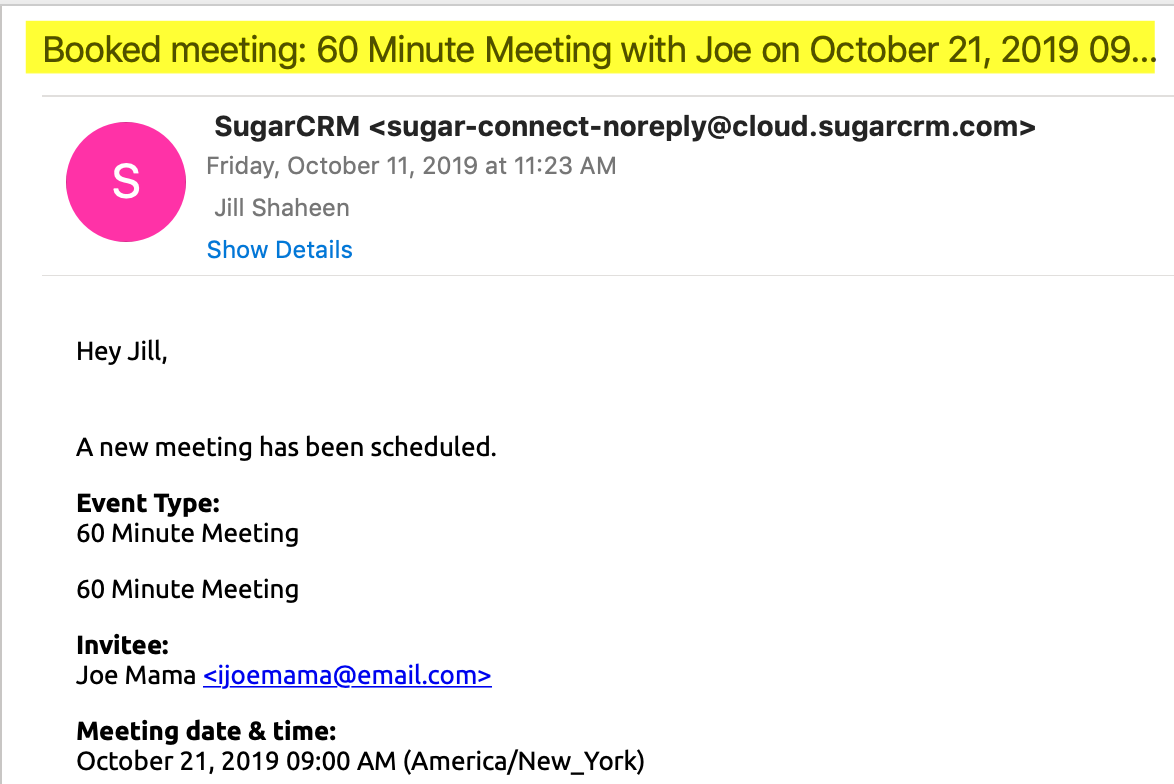
In addition, Sugar Connect will add the meeting to your calendar with a status of "Busy" and will send a formal calendar invitation to the invitee who can then accept the meeting request to add it to their own calendar. If you opted to present Google Meet, Microsoft Teams, or Zoom as a meeting platform, the location field in the meeting will contain a unique meeting link. 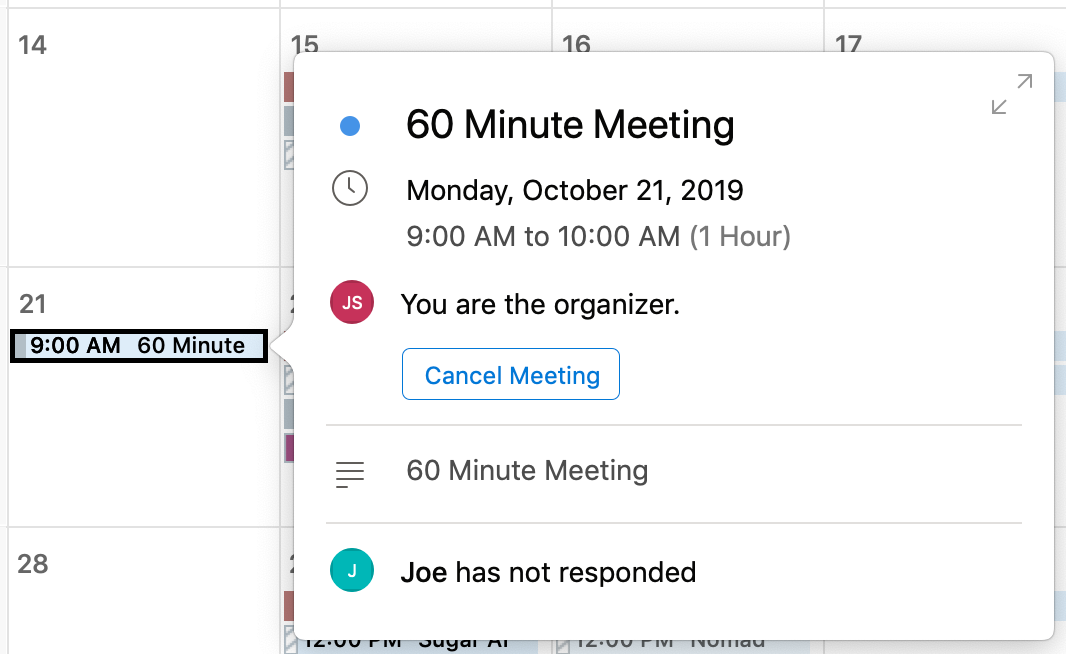
Email Tracking
Sugar Connect offers you the ability to track emails sent from your Google Workspace or Office 365 account to prospects, customers, and anyone with whom you want to track interactions. Email Tracking will show if and when a recipient has opened your email, clicked any links you provided, and replied. Those activities will be tracked for a 60-day period beginning when the email is sent. After that time, the email will no longer be tracking those activities. If you have set up any email templates, the same metrics can be tracked and viewed in a summary per template.
To enable or disable email tracking for Sugar Connect, please refer to the instructions in the Sugar Connect User Guide.
Note: Sugar Connect administrators are able to set the Email Tracking default settings. For more information, please refer to the Email Tracking section in the Sugar Connect Deployment and Administration Guide.
To access Email Tracking, navigate to the Sugar Connect Portal and click on the Email Tracking tab in the navigation bar.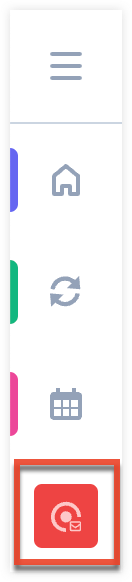
You will see your list of emails you have opted to track as well as additional tabs related to email tracking. Refer to the following sections for additional information on utilizing these features.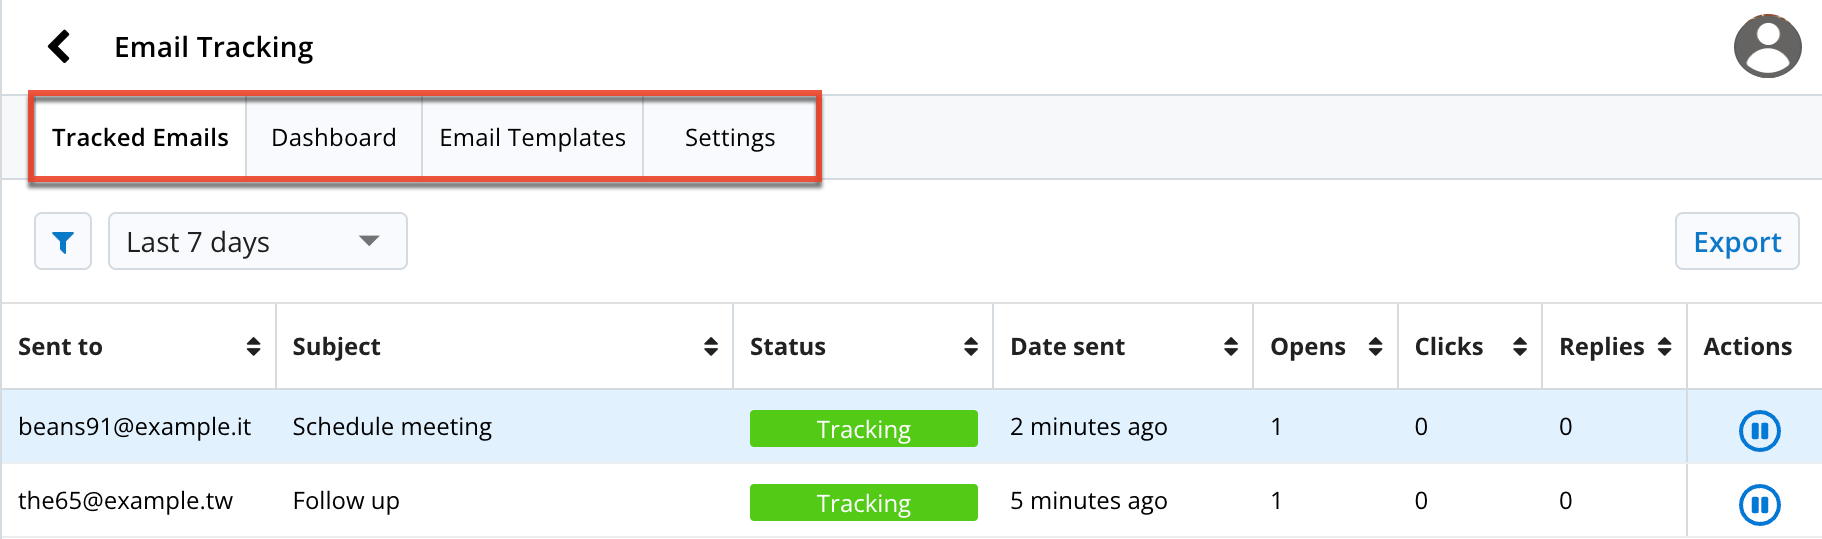
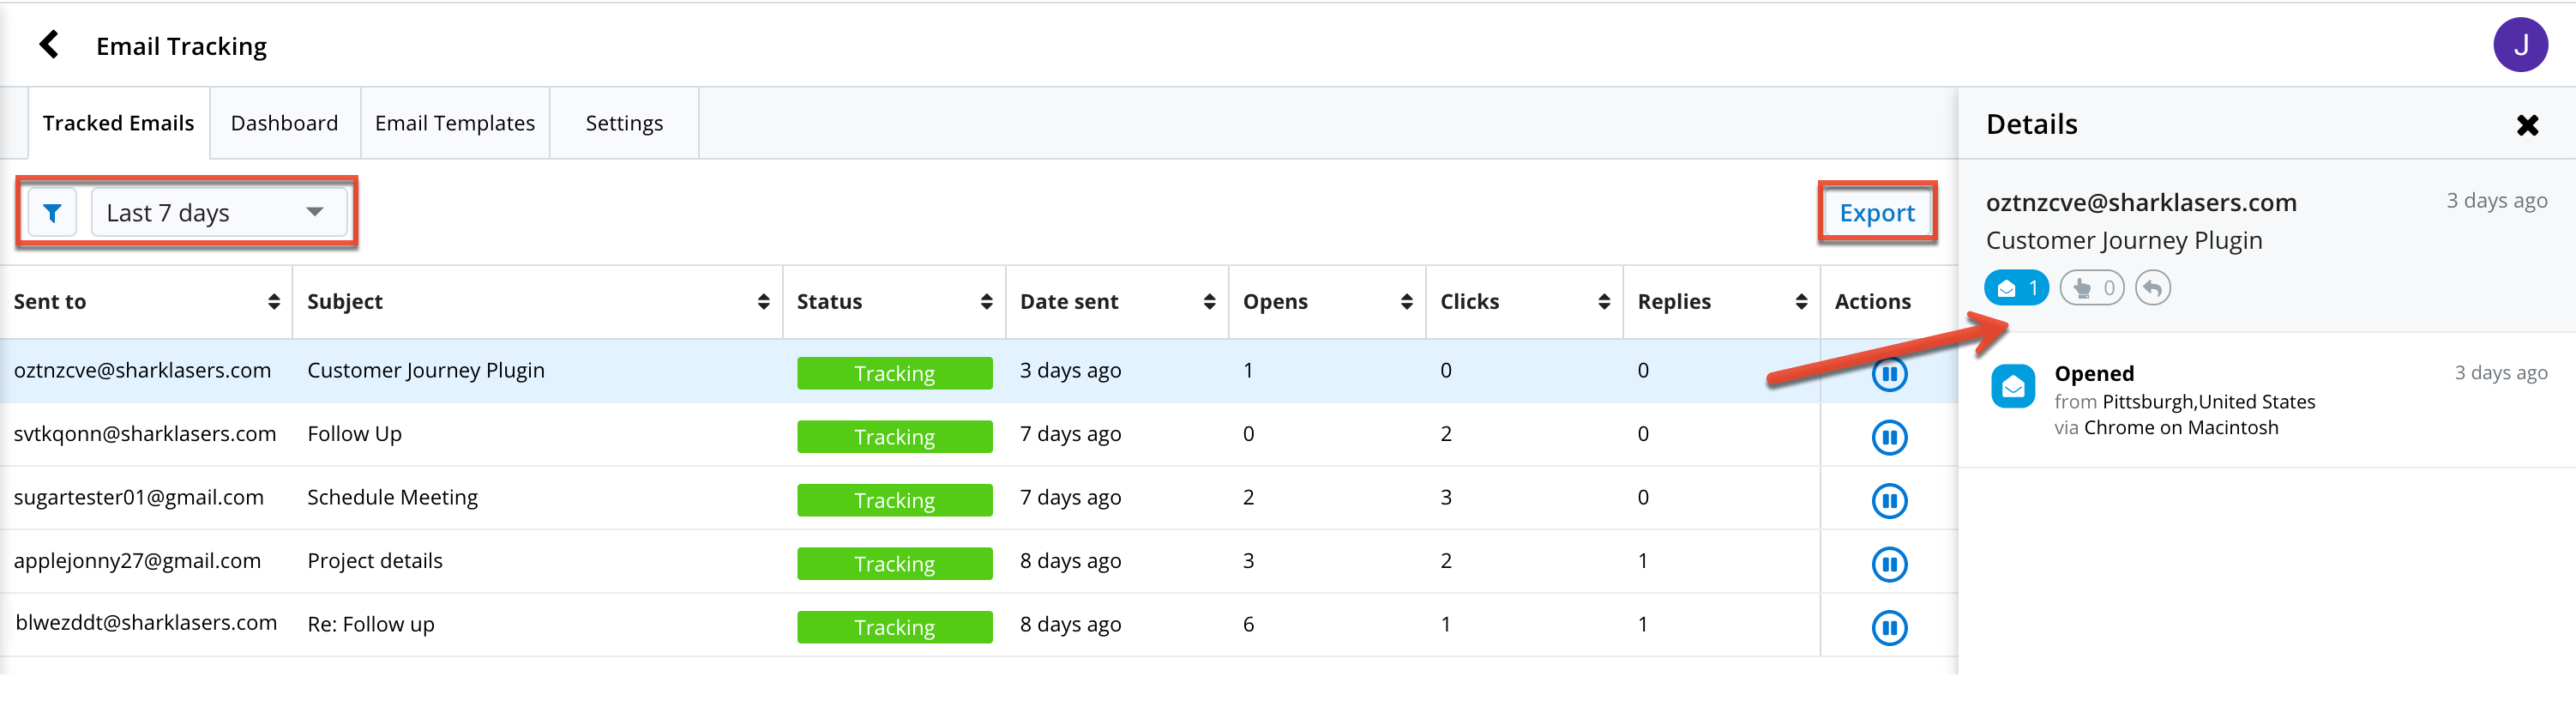
Tracked Emails Tab
Clicking on "Email Tracking" takes you to the Tracked Emails page where you can view the following:
A list of the recipients of tracked emails, subject, status, date sent, and the number of opens, clicks, and replies. The last column allows you to pause and resume tracking the email.
A set of filters for the list view: Opened, Clicked, Replied, Template, Subject, and Recipients. You can also filter the list to show emails sent within the last 7, 15, 30, or 90 days.
The Export button which allows the user to download a csv file of the information contained in the list view.
A Details panel which displays the email you are viewing at the top followed by a timeline of each instance when the email was opened, a link was clicked, and any replies sent. Clicking anywhere on the email line in the list view, with the exception of the pause or resume button, will open the Details.
Dashboard Tab
The Dashboard tab within the Email Tracking section contains a number of reports, which are able to be filtered by the Reporting Period dropdown, that will show you the following information:
A total number of emails tracked, opened, clicked, and replied.
A graph showing the total number of emails tracked, viewed, clicked, and replied.
A total number of contacts reached.
A list of the top contacts.
The top email templates.
The top links.

Email Templates Tab
The Email Templates tab within the Email Tracking section shows a list of templates and the number of opens, clicks, and replies for each. You can filter the list by category and search by template name or owner.
Settings Tab
The Settings tab within the Email Tracking section allows the user to:
Track clicks on links in tracked emails
Auto enable email tracking
Show real-time click notifications
Enable real-time email view notifications
Note: Auto enable email tracking is not currently available for Outlook.