Listeners
Overview
Listeners, also referred to as Event Listeners and Lead/Contact Listeners, is a powerful tool that you can use to automate your sales and marketing process. Listeners act like a bridge between your external CRM and Sugar Market as they check contact records for new and updated values you define and initiate actions such as adding a contact to a nurture or removing a contact from a list.
This page describes how to use, create, and manage listeners throughout Sugar Market.
Using Listeners
Active listeners run in the background approximately every five minutes, so it is important to carefully consider all of the different conditions and how they can be met. Consider whether the behavior you are defining may occur through some other action in Sugar Market, in which case, using a listener may not be necessary.
There are two types of listeners: On Insert and On Update. When using the On Update type, you will need to enable field tracking to activate the listener. This is to eliminate the excessive resource load that would be required to continuously check every record field.
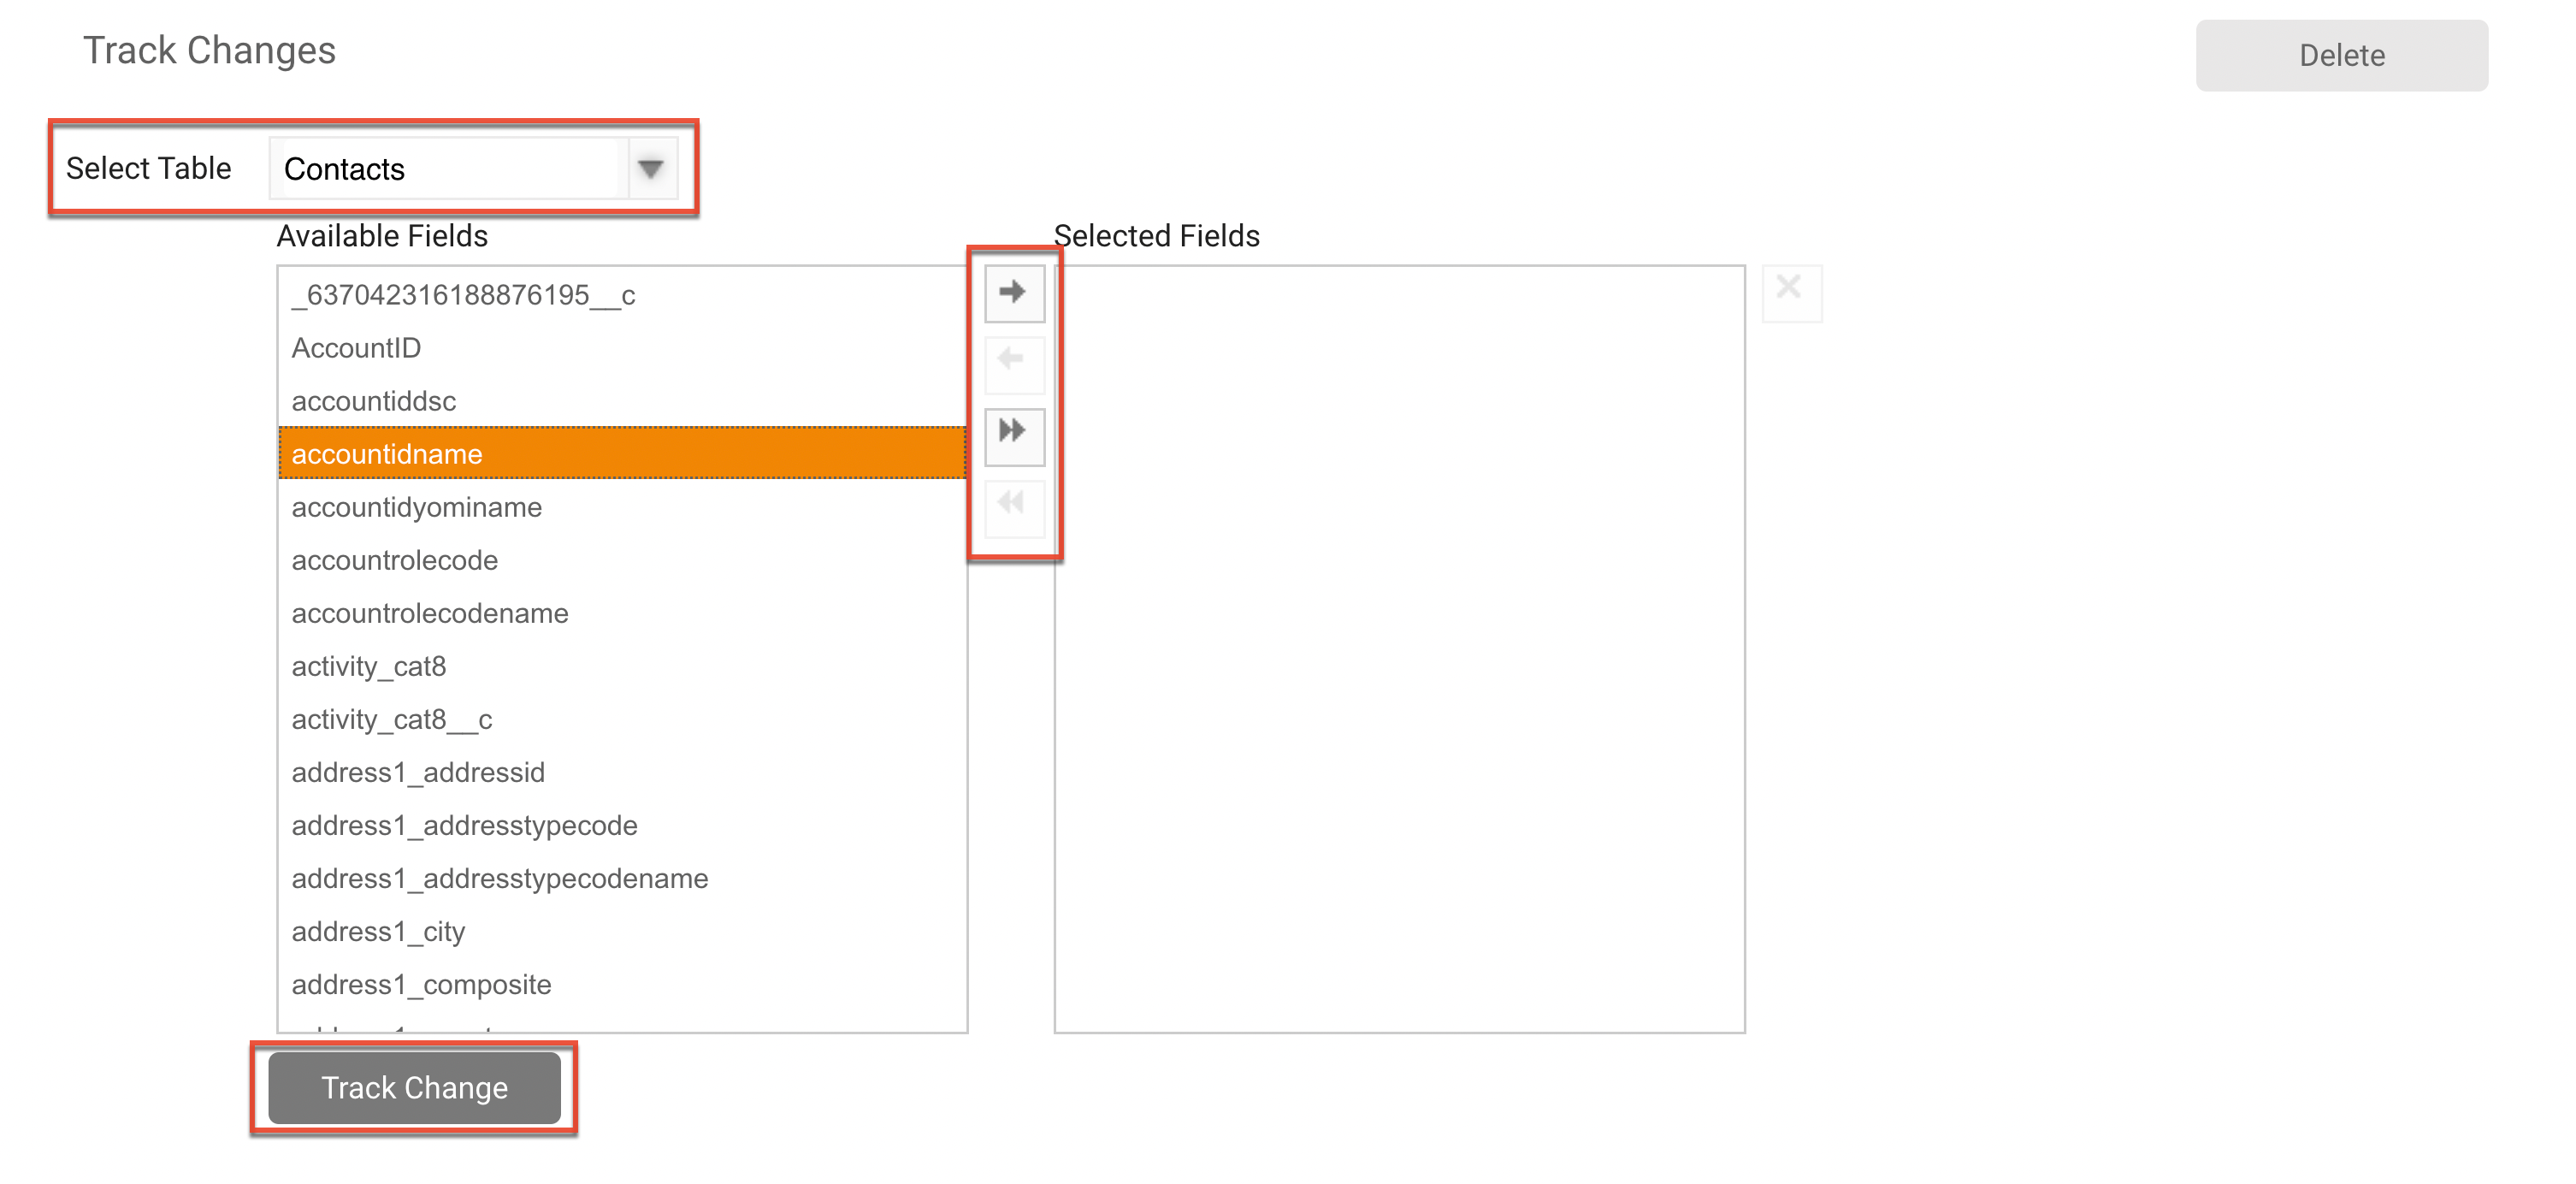
To enable change tracking for On Update listeners:
- From the user menu, click "Admin".
- In the Administrator section, within the Marketing Administration tab, click "Change Tracking".
- Select the table in the dropdown list, and then select a field in the Available Fields list.
- Click the right-facing arrow to add the field to the Selected Fields list.
- Click the Track Change button.
Creating Listeners
There are three parts to creating a listener: defining listener basics, listener conditional values, and listener actions. The conditional values and actions function as IF/THEN statements: if the defined condition is found, then the defined action will occur.
Defining Listener Basics
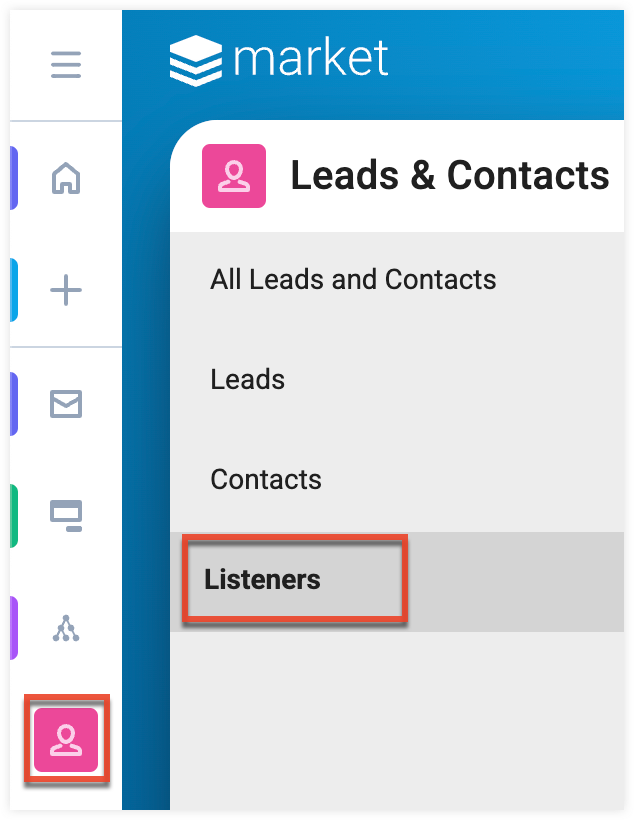
- In the navigation bar, click the Leads and Contacts module.
- Click the Listeners submodule.
- Click the Create button.
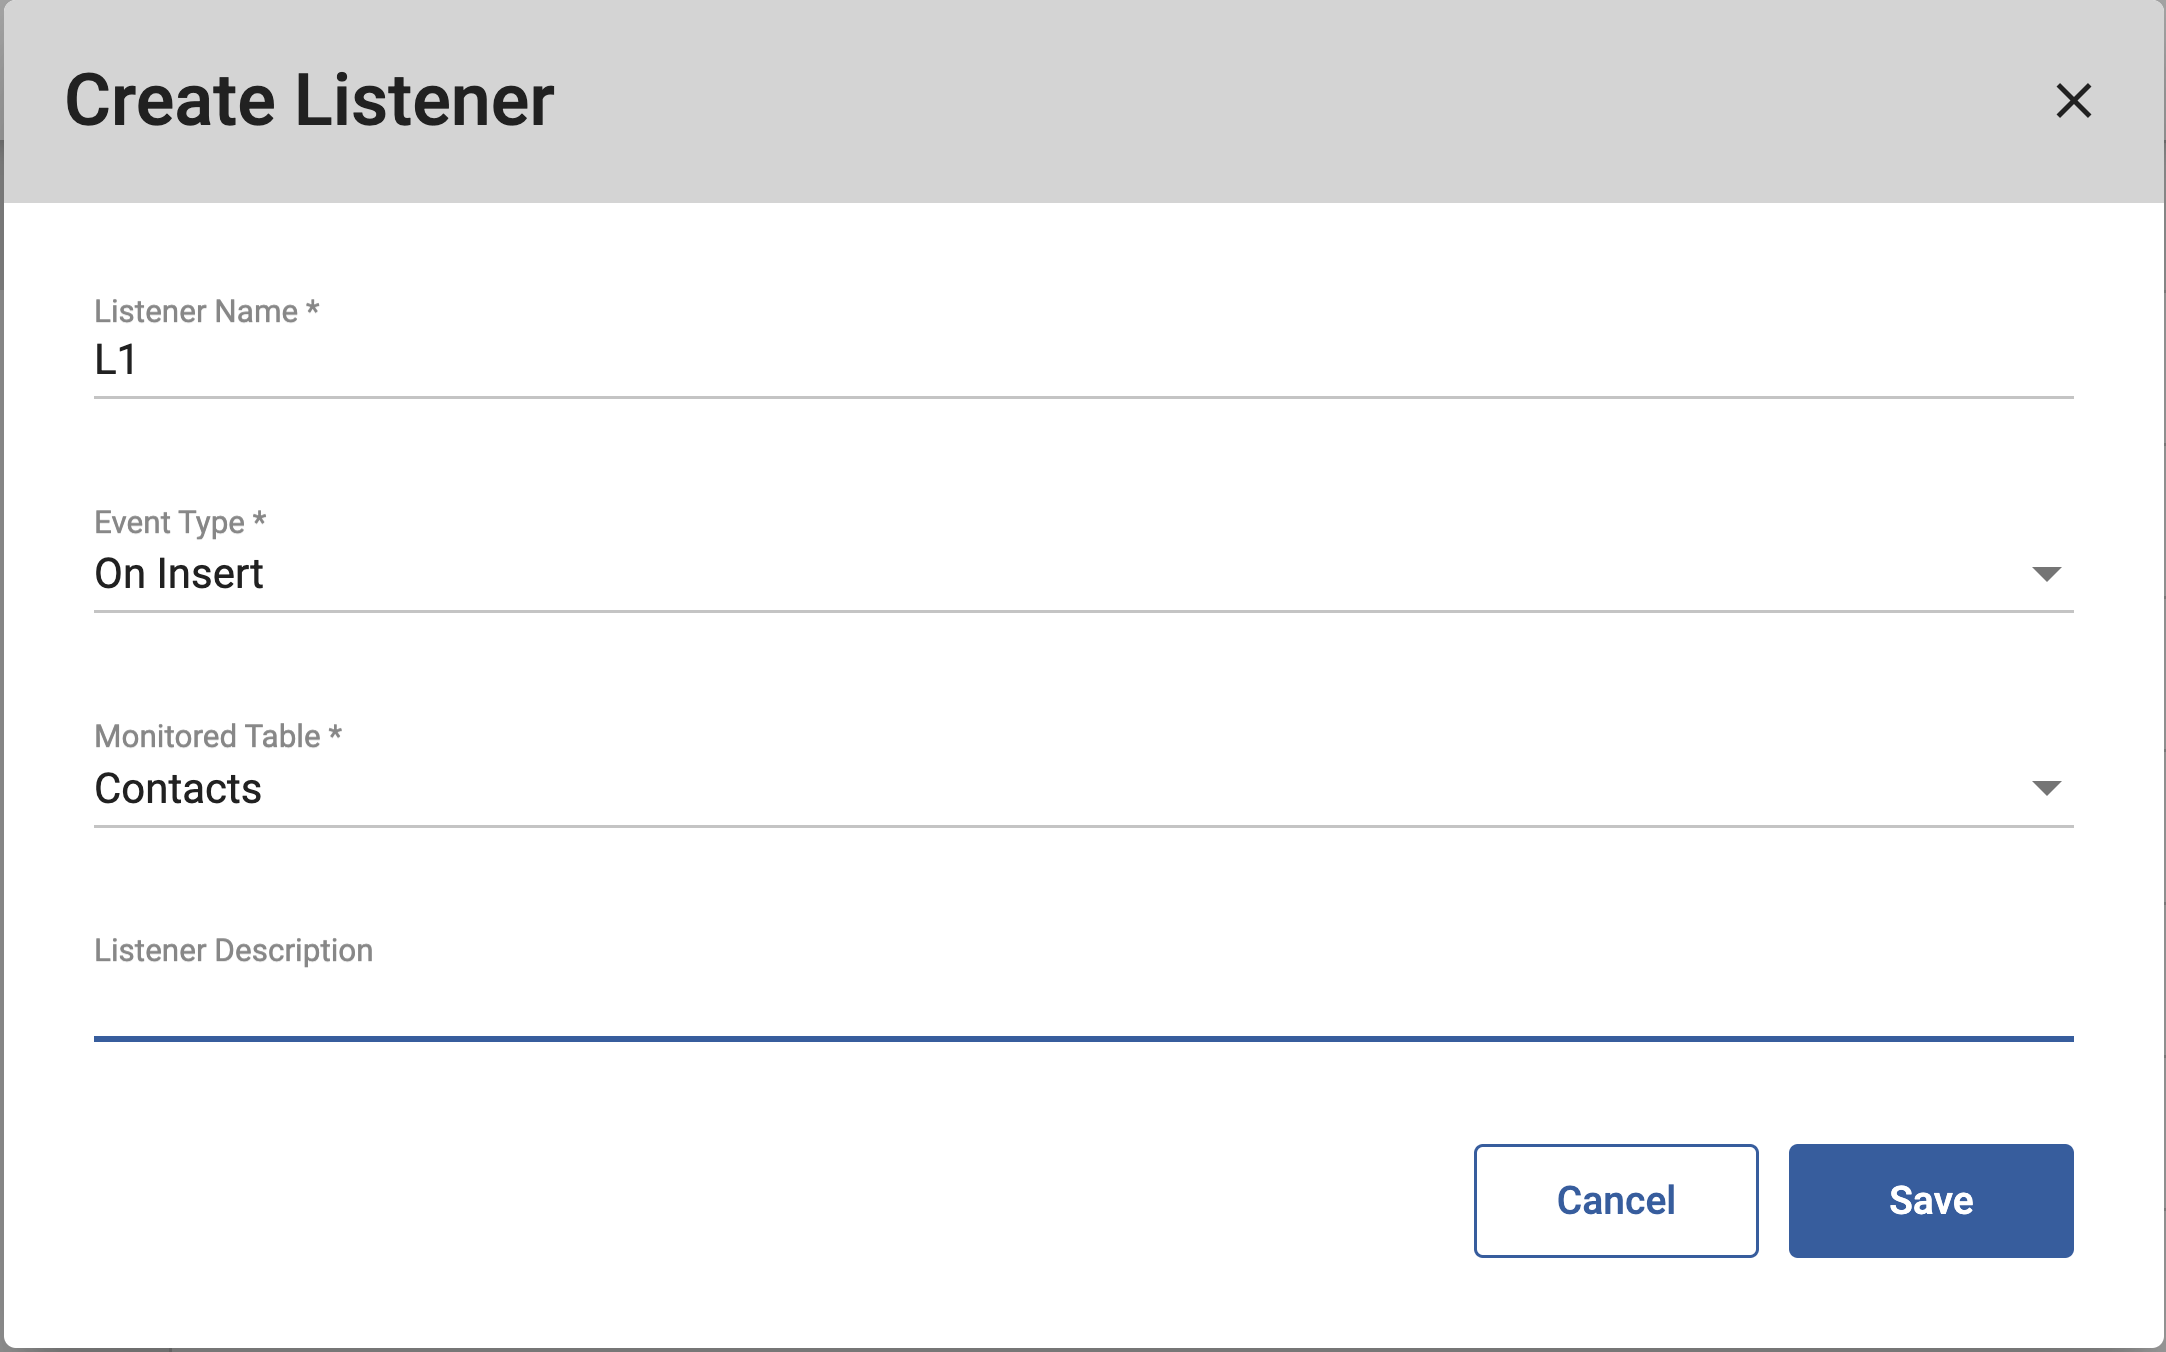
- Complete the following fields, and then click the Save button.
- Listener Name: Name to identify the listener in Sugar Market.
- Event Type: Select "On Update" or "On Insert" to define whether the conditions will be evaluated when a record is updated in Sugar Market, or when a new record is added.
- Monitored Table: Select either the Contacts or Opportunities table as the location of the field to be monitored.
- Listener Description: Type descriptive text to make it easy to identify and modify this listener in the future.
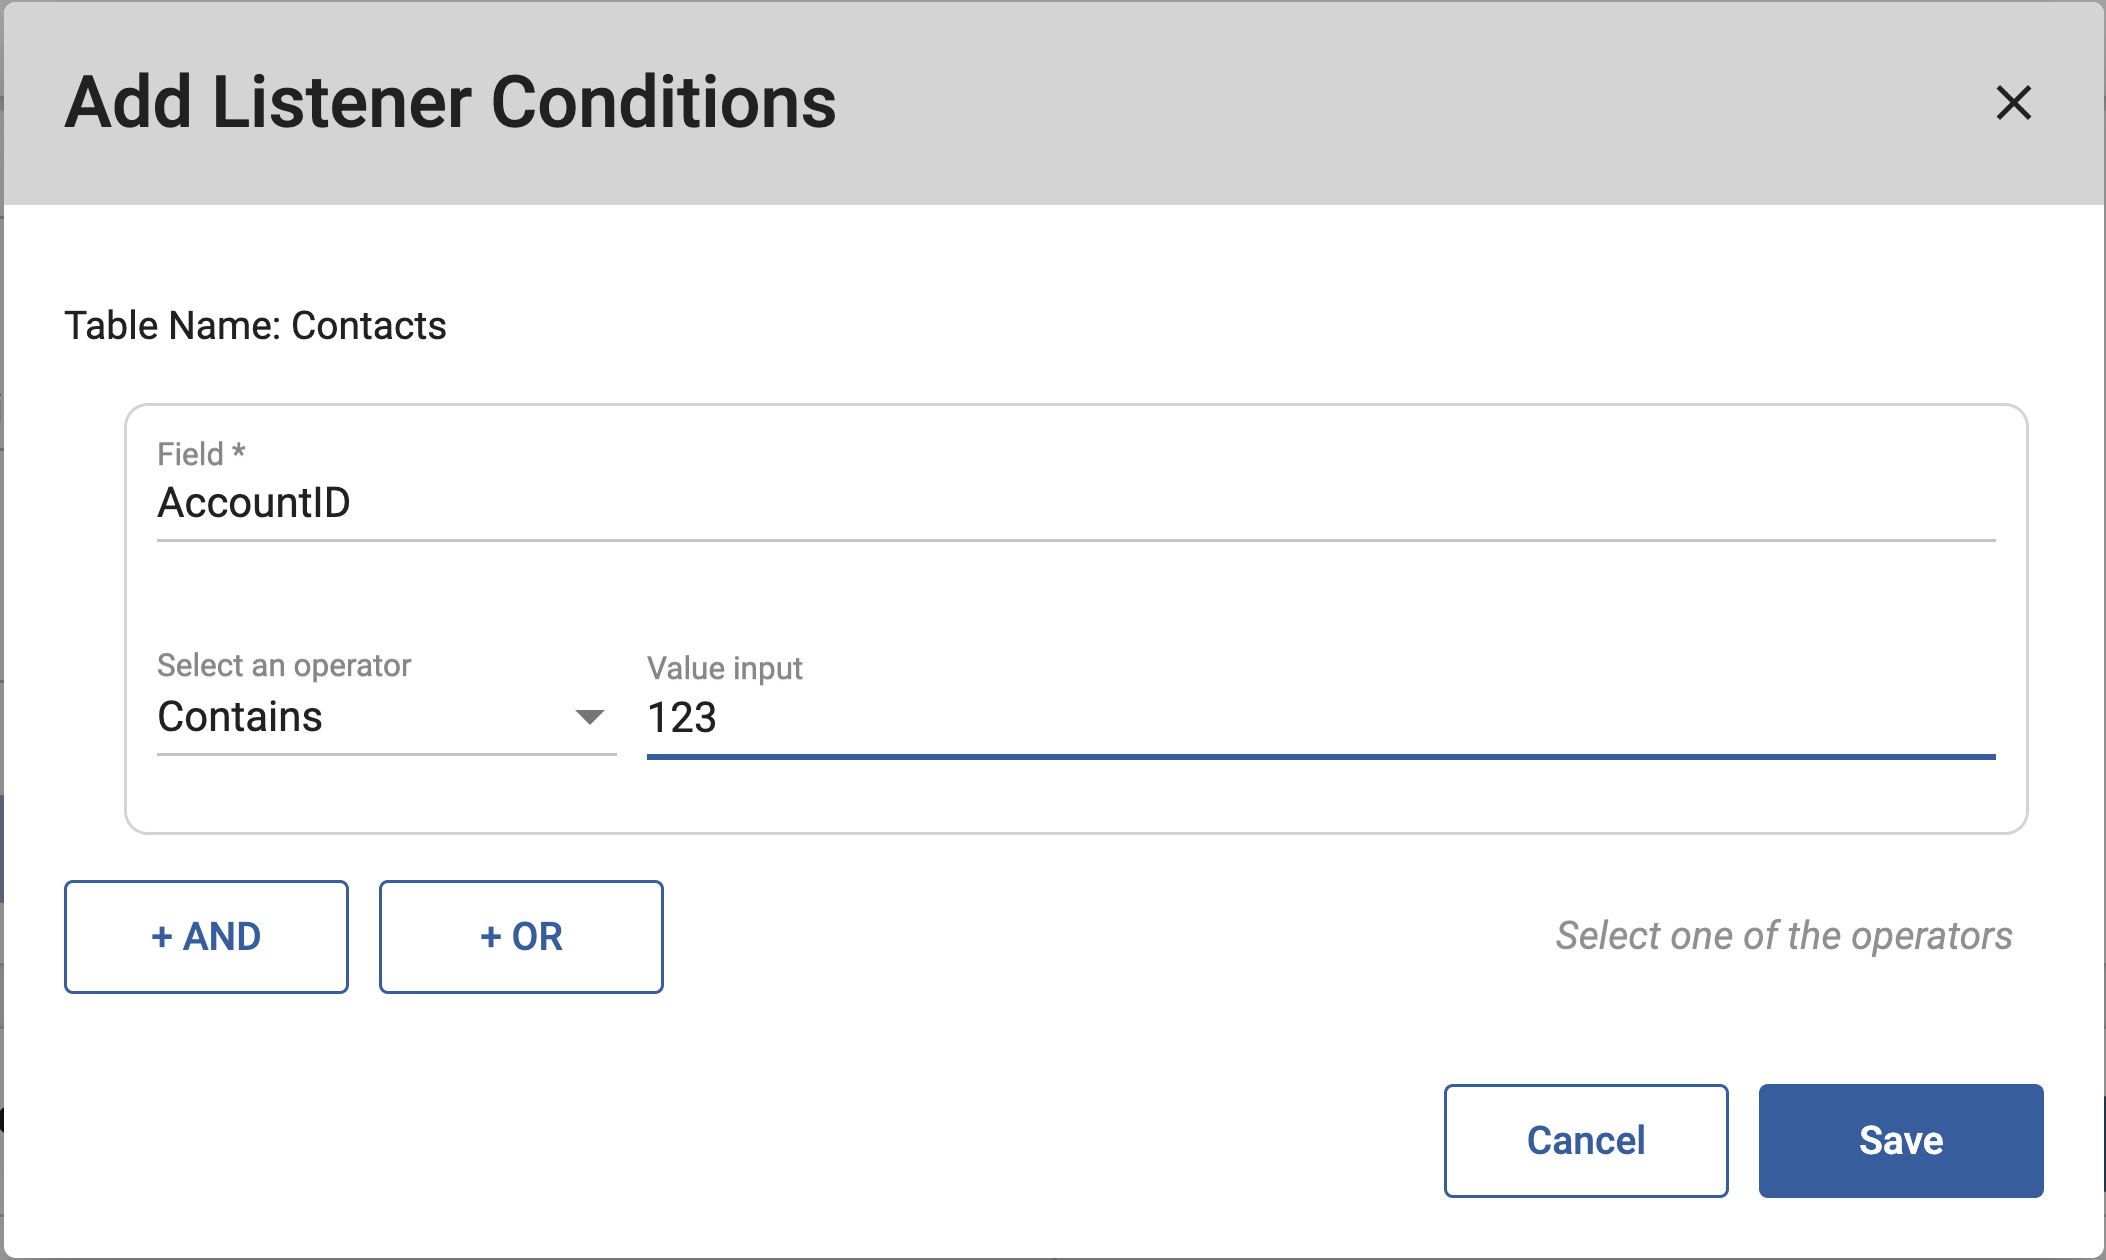
Defining Listener Conditional Values
The listener conditional values describe the field conditions to be evaluated.
- In the Listener Conditional Values section, click the Add button.
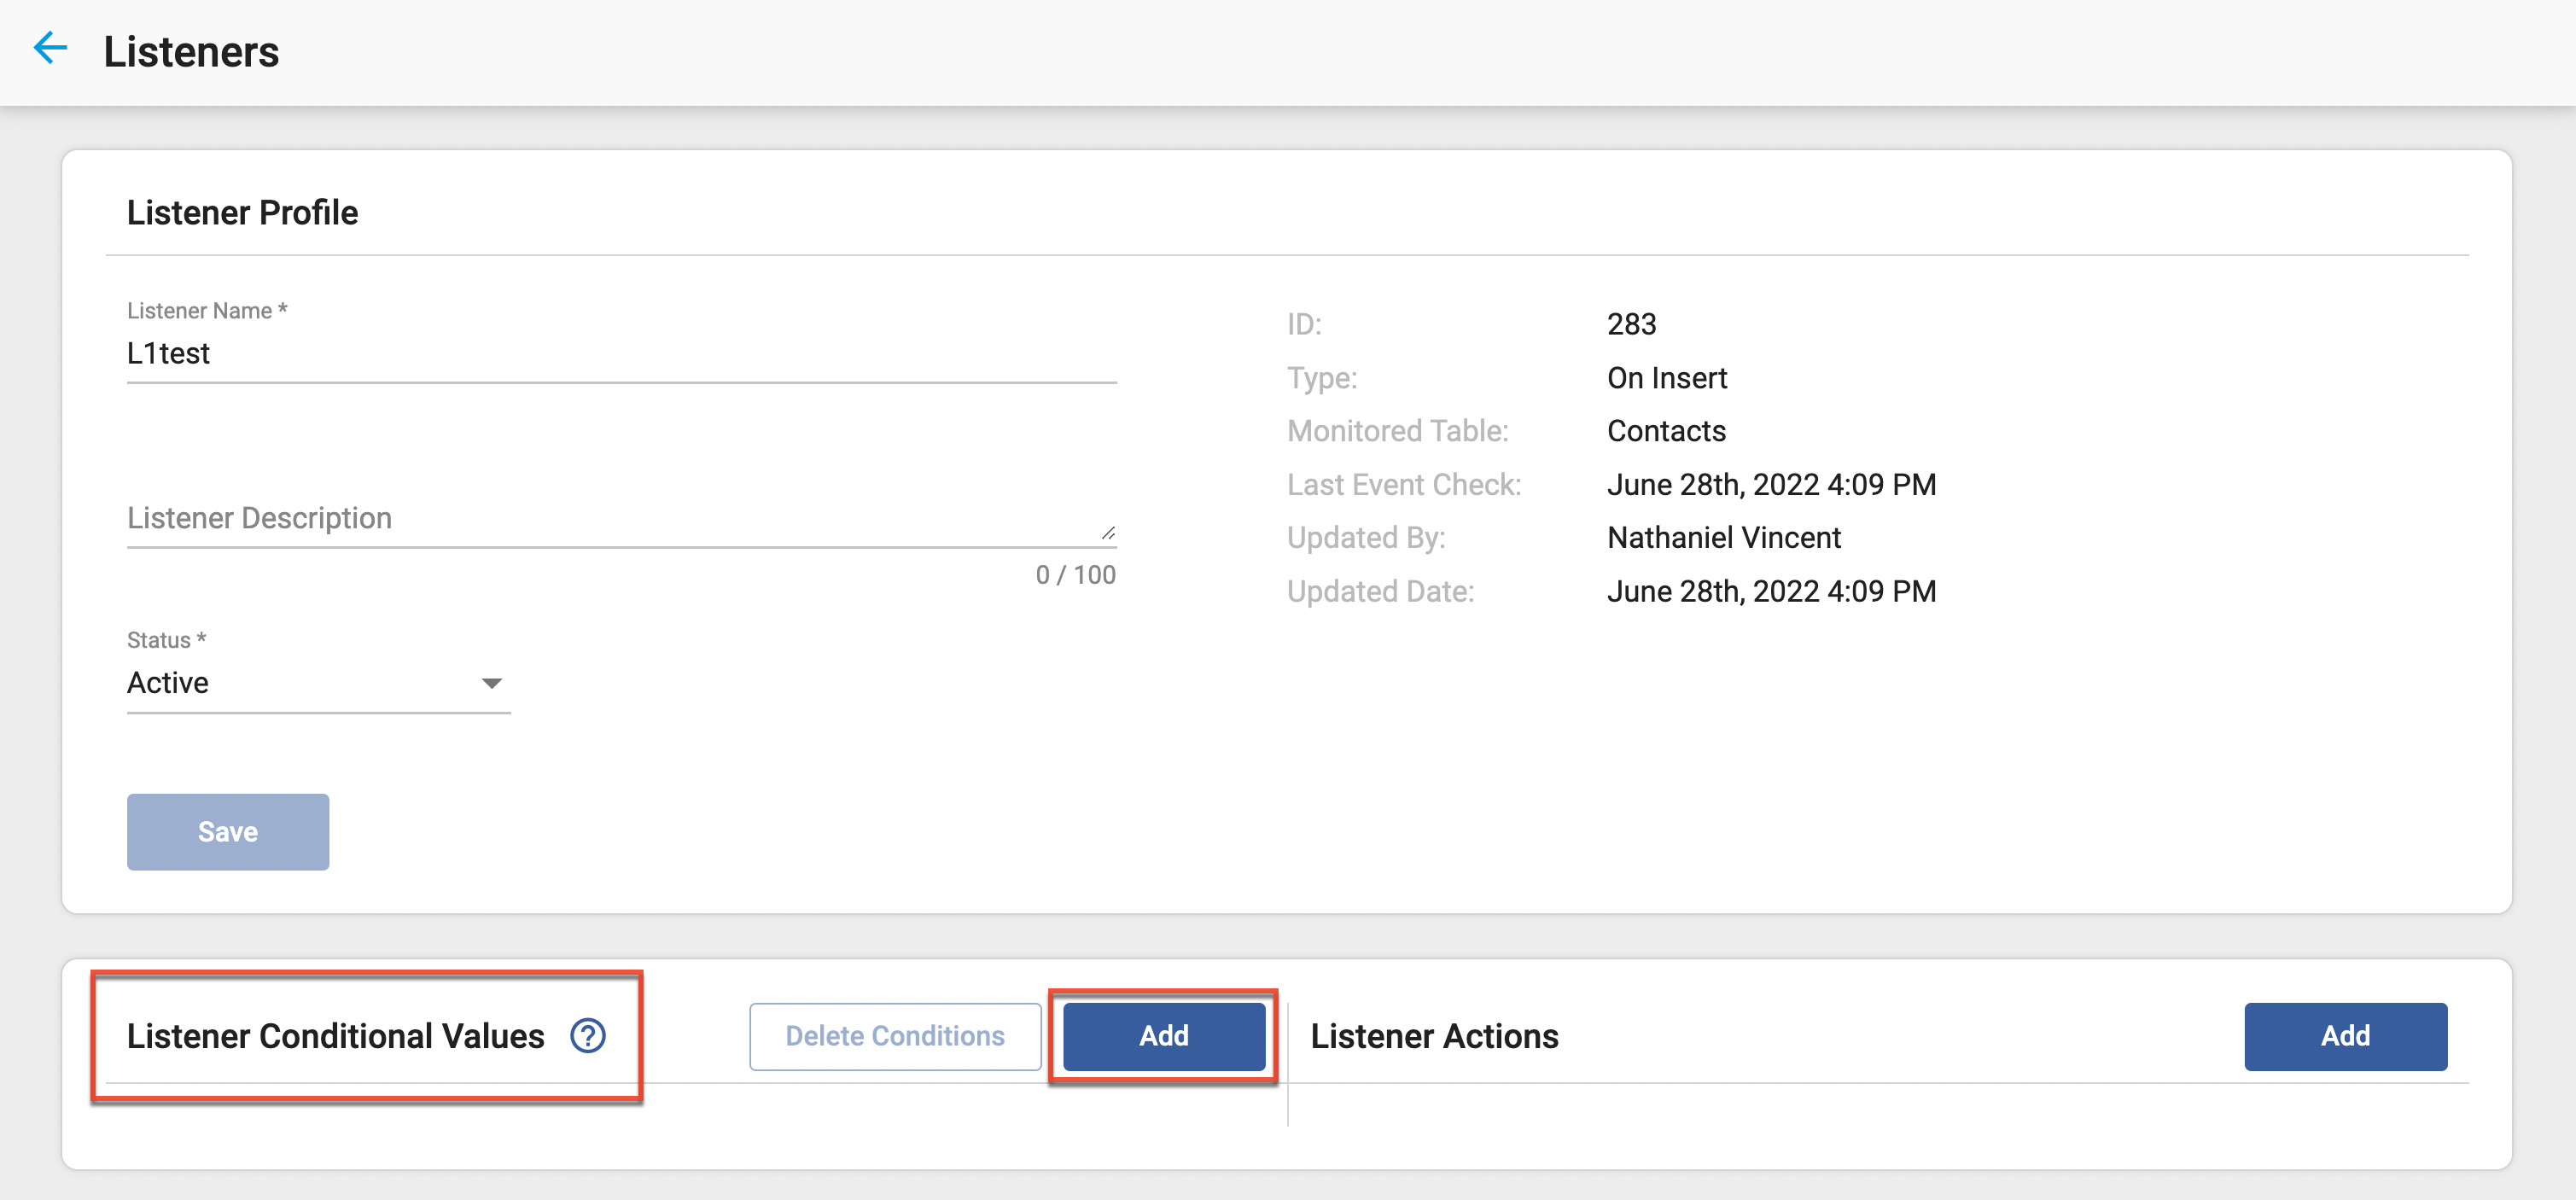
- Complete the following fields, and then click the Save button:
- Field: Field name you are monitoring. If you do not see your field name here, enable change tracking for this field.
- Select an operator: Whether the field should equal or contain the defined Ending Value.
- Value input: The specific field value to launch the action you will define in the Event Activities section.
- AND+/OR+: To add additional filtering conditions within the grouping click either the "+ AND" or "+ OR" buttons. Mixed logic conditions are not allowed.
Defining Listener Actions
Listener actions describe the actions to occur when the defined conditions are met.
- In the Listener Actions section, click the Add button.
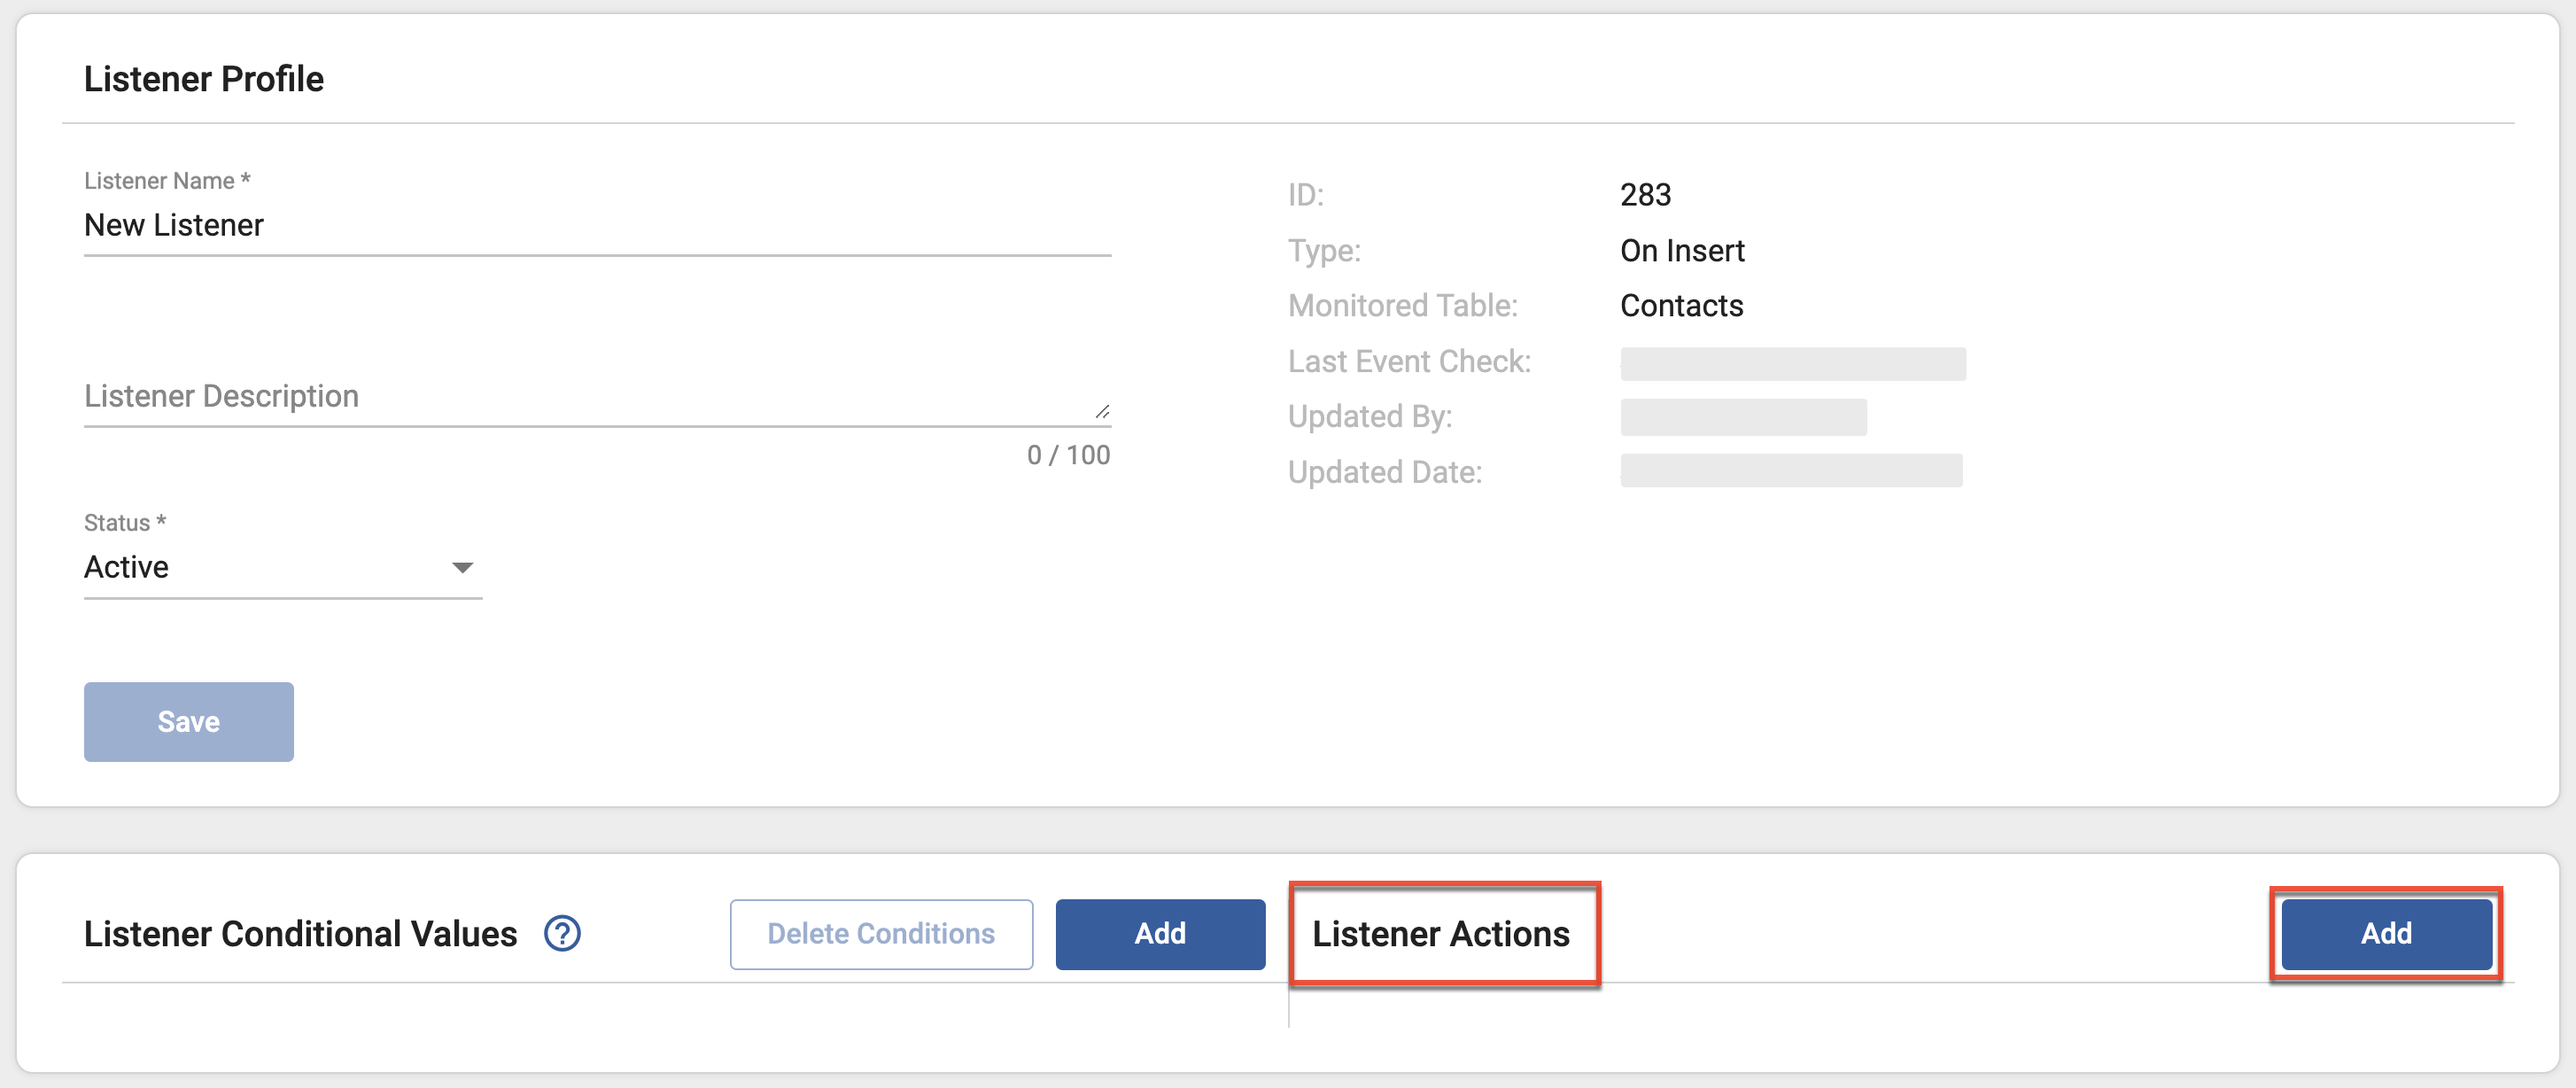
- Select an action from the dropdown list.
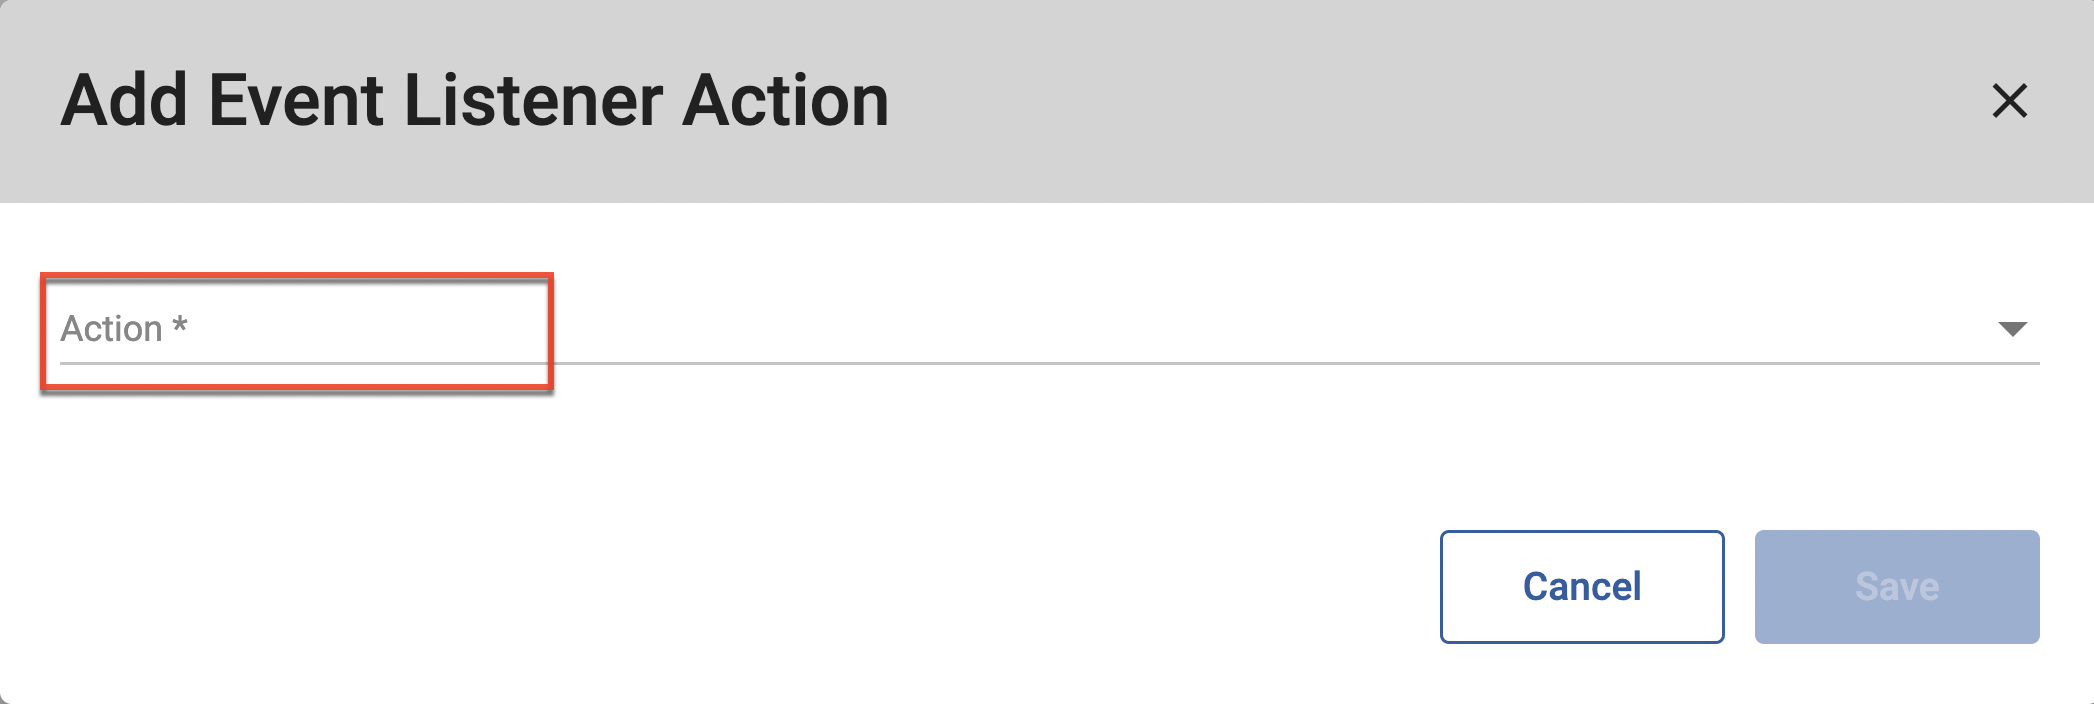
- If the action needs to be further defined (e.g. Add to Nurture*, Add to Distribution List, Alert Role), then select the name from the dropdown list provided, and then click the Save button.
- Click the Save button within the Listener Profile section to save your changes to the listener. The listener immediately becomes active.
* When using the "Add to Nurture" action, select "Add to Nurture 2" when using Nurture Builder and "Add to Nurture" when using the legacy builder.
Managing Listeners
To make changes to existing listeners:
- Navigate to Manage > CRM > Lead/Contact Listener.
- Click the listener you want to edit, then click the edit icon from the toolbar.

- Click the Save button within the Listener Profile section to save your changes to the listener.
Activating/Deactivating Listeners
When listeners are not needed, you can deactivate the listener to keep it available for future use.
To deactivate a listener:
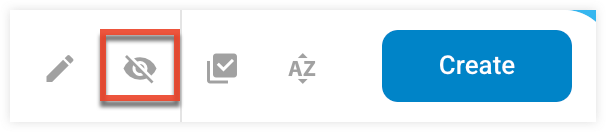
- Navigate to Manage > CRM > Lead/Contact Listener.
- Click the listener you want to deactivate, then click the crossed-out eye icon from the toolbar.
To activate a listener:
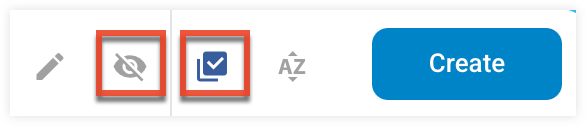
- Navigate to Manage > CRM > Lead/Contact Listener.
- Click the check icon from the toolbar to show inactive listeners.
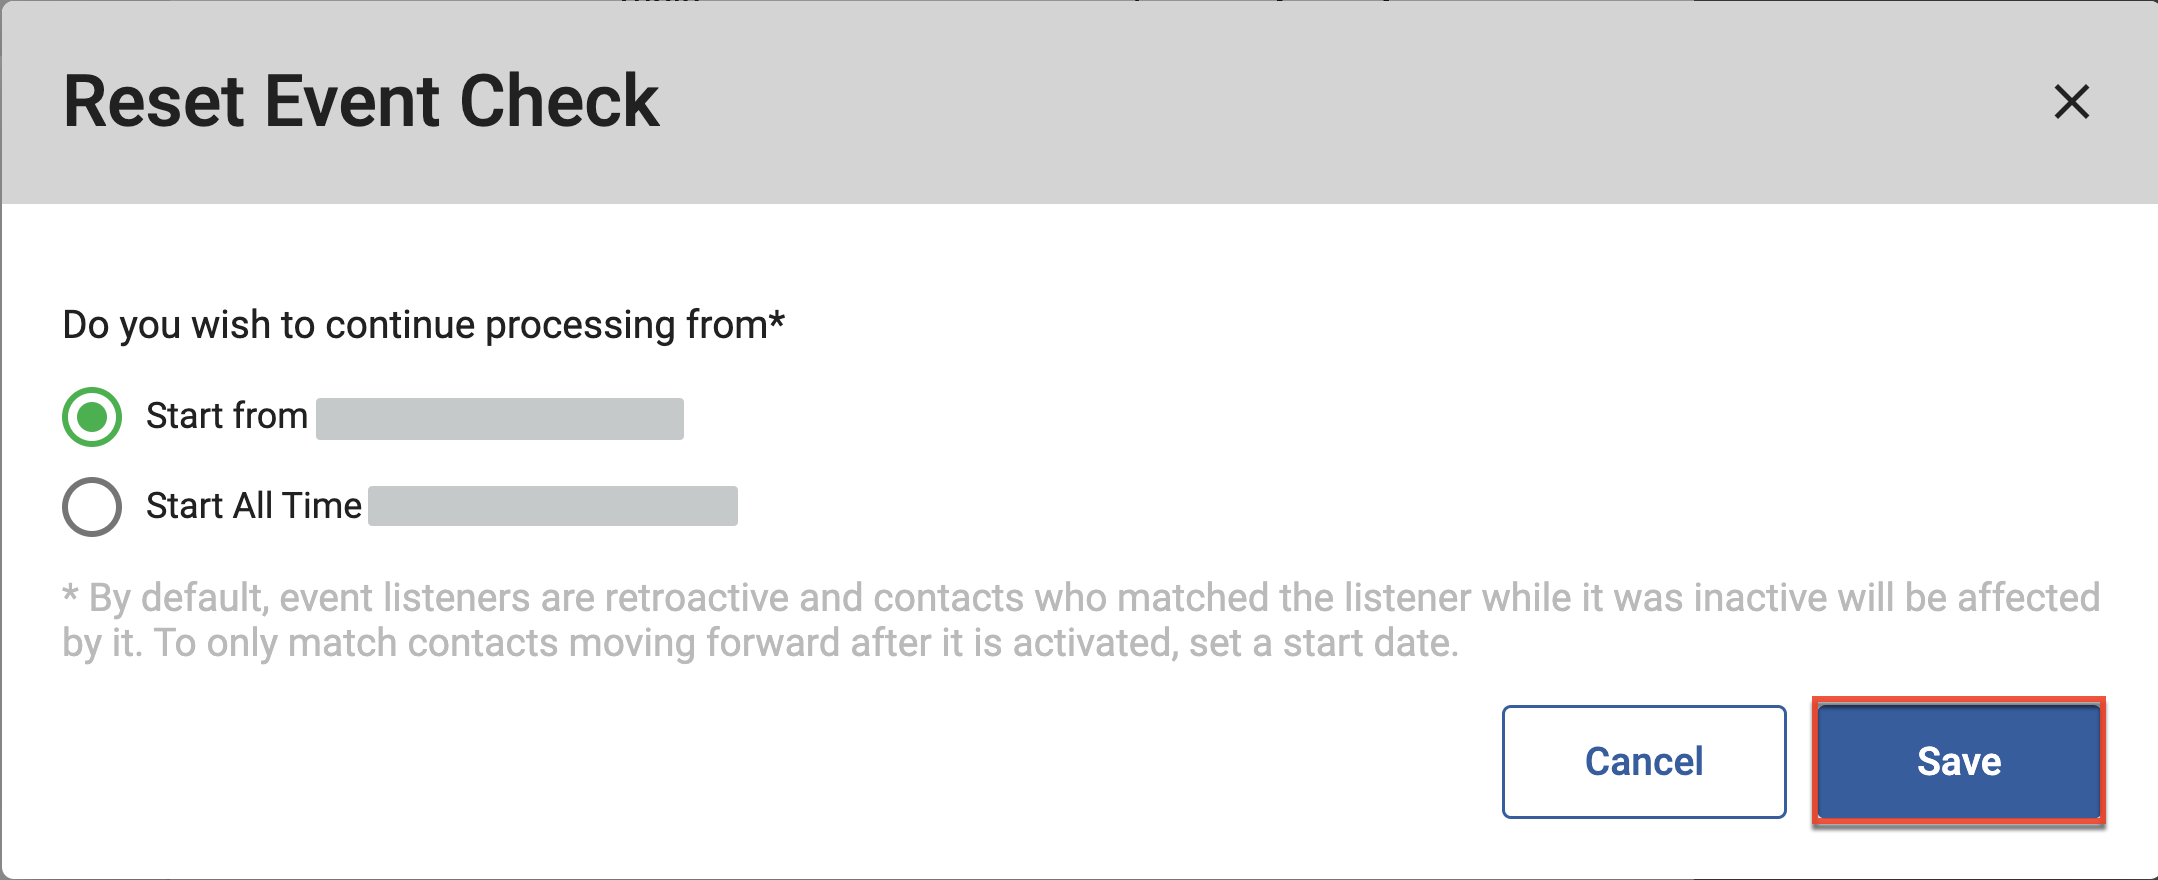
- Click the listener you want to activate, then click the eye icon from the toolbar.
- Select the "Start from" option to make the listener retroactive and therefore update contacts that met the conditions while the listener was inactive, or select the "Start All Time" option to make the listener effective from the time you save the updated listener.
- Click the Save button.
Searching for Listeners
To search for listeners:
- Navigate to Manage > CRM > Lead/Contact Listener.
- Use the search field to search for a specific listener, or click the filter icon to create an advanced search.

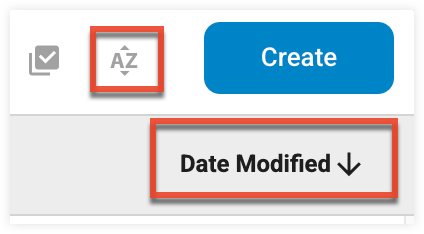
- To sort your listeners by column click the column title, or click the sort icon.
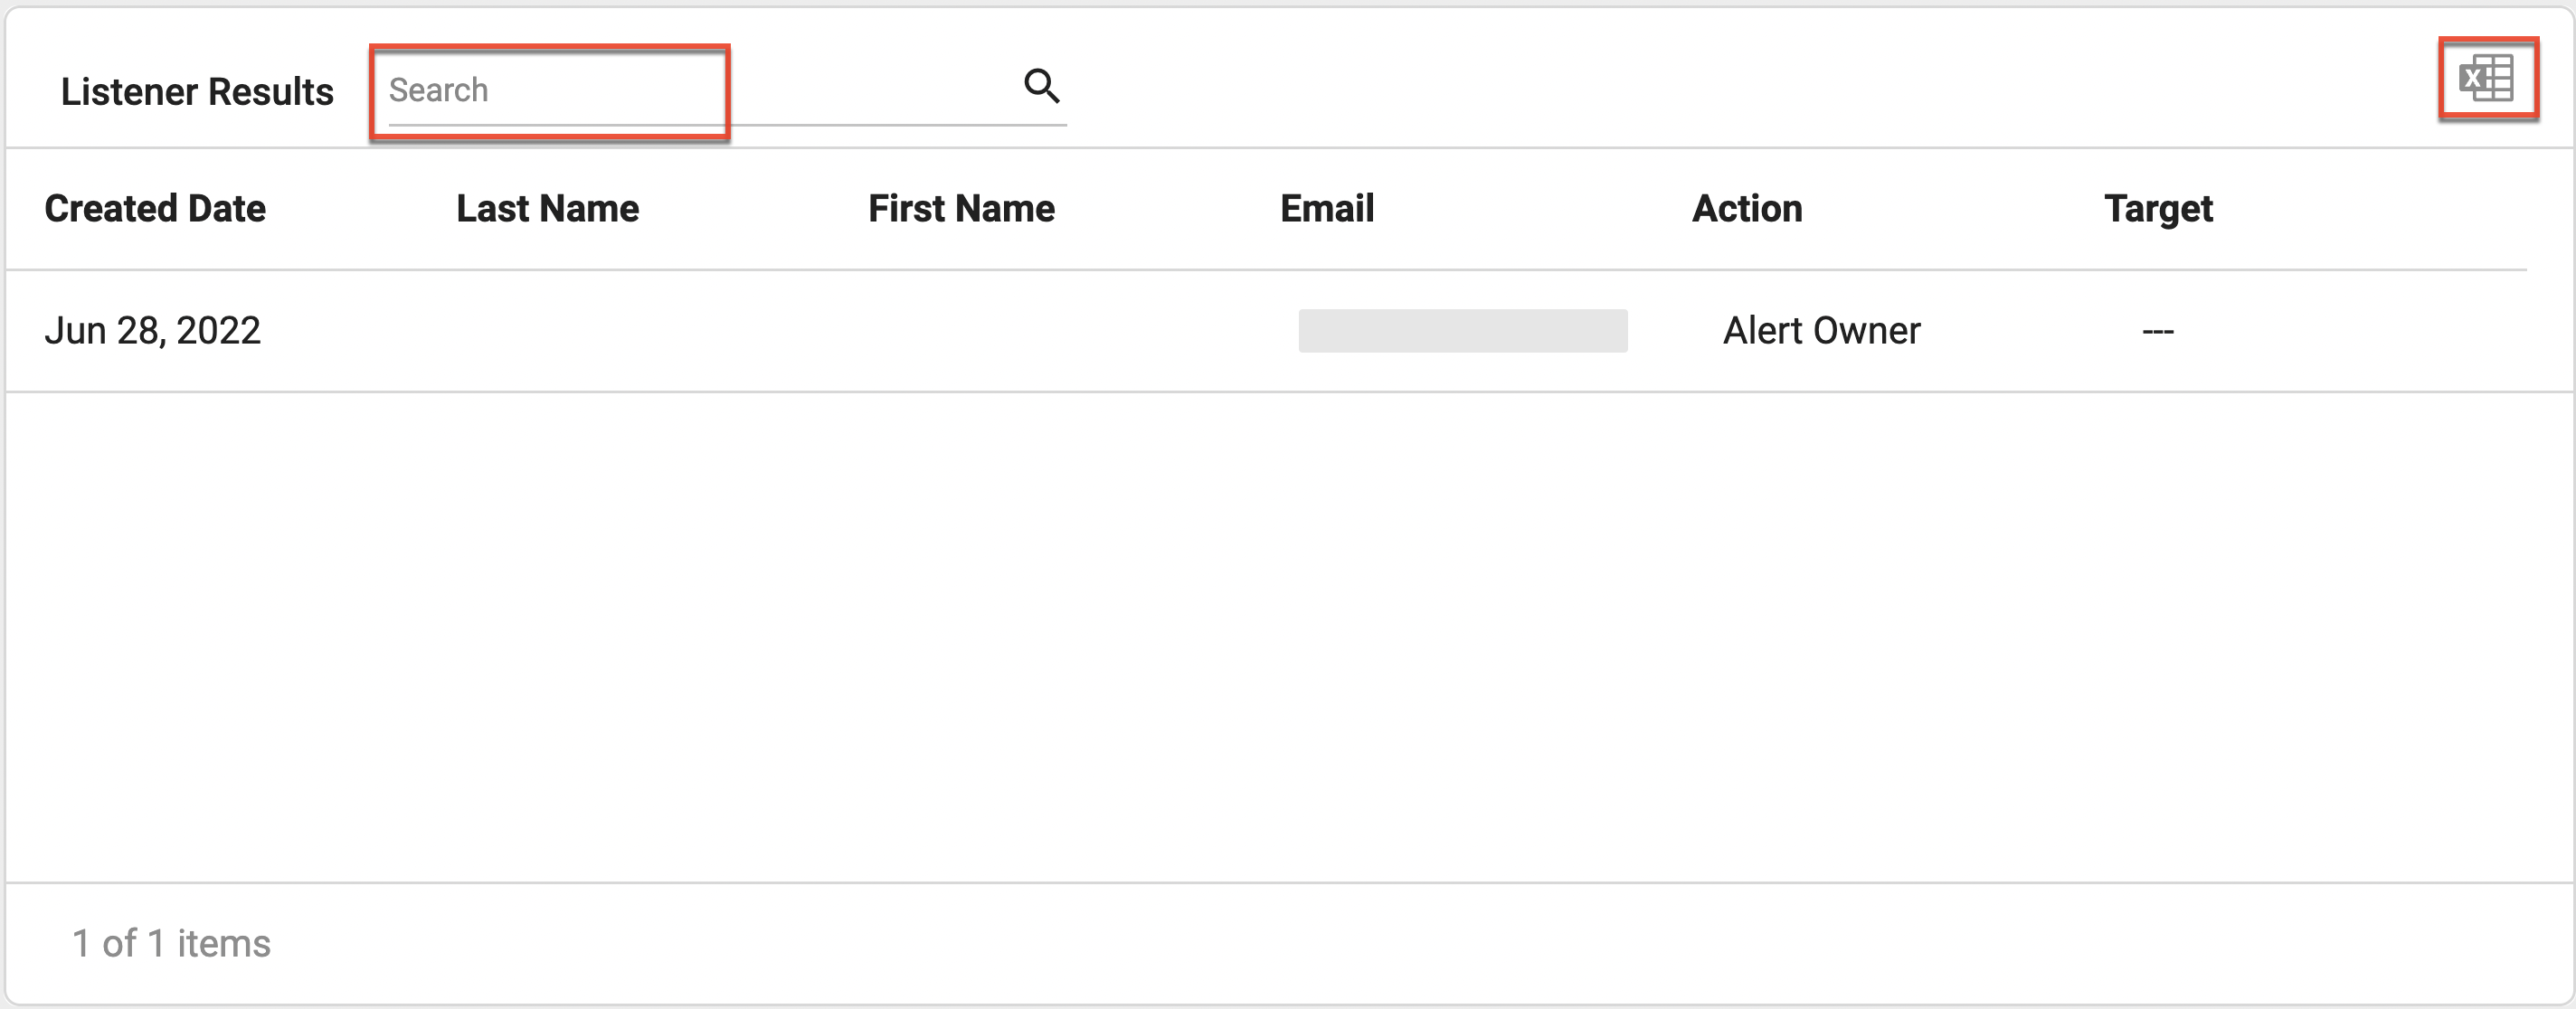
Viewing Listener Results
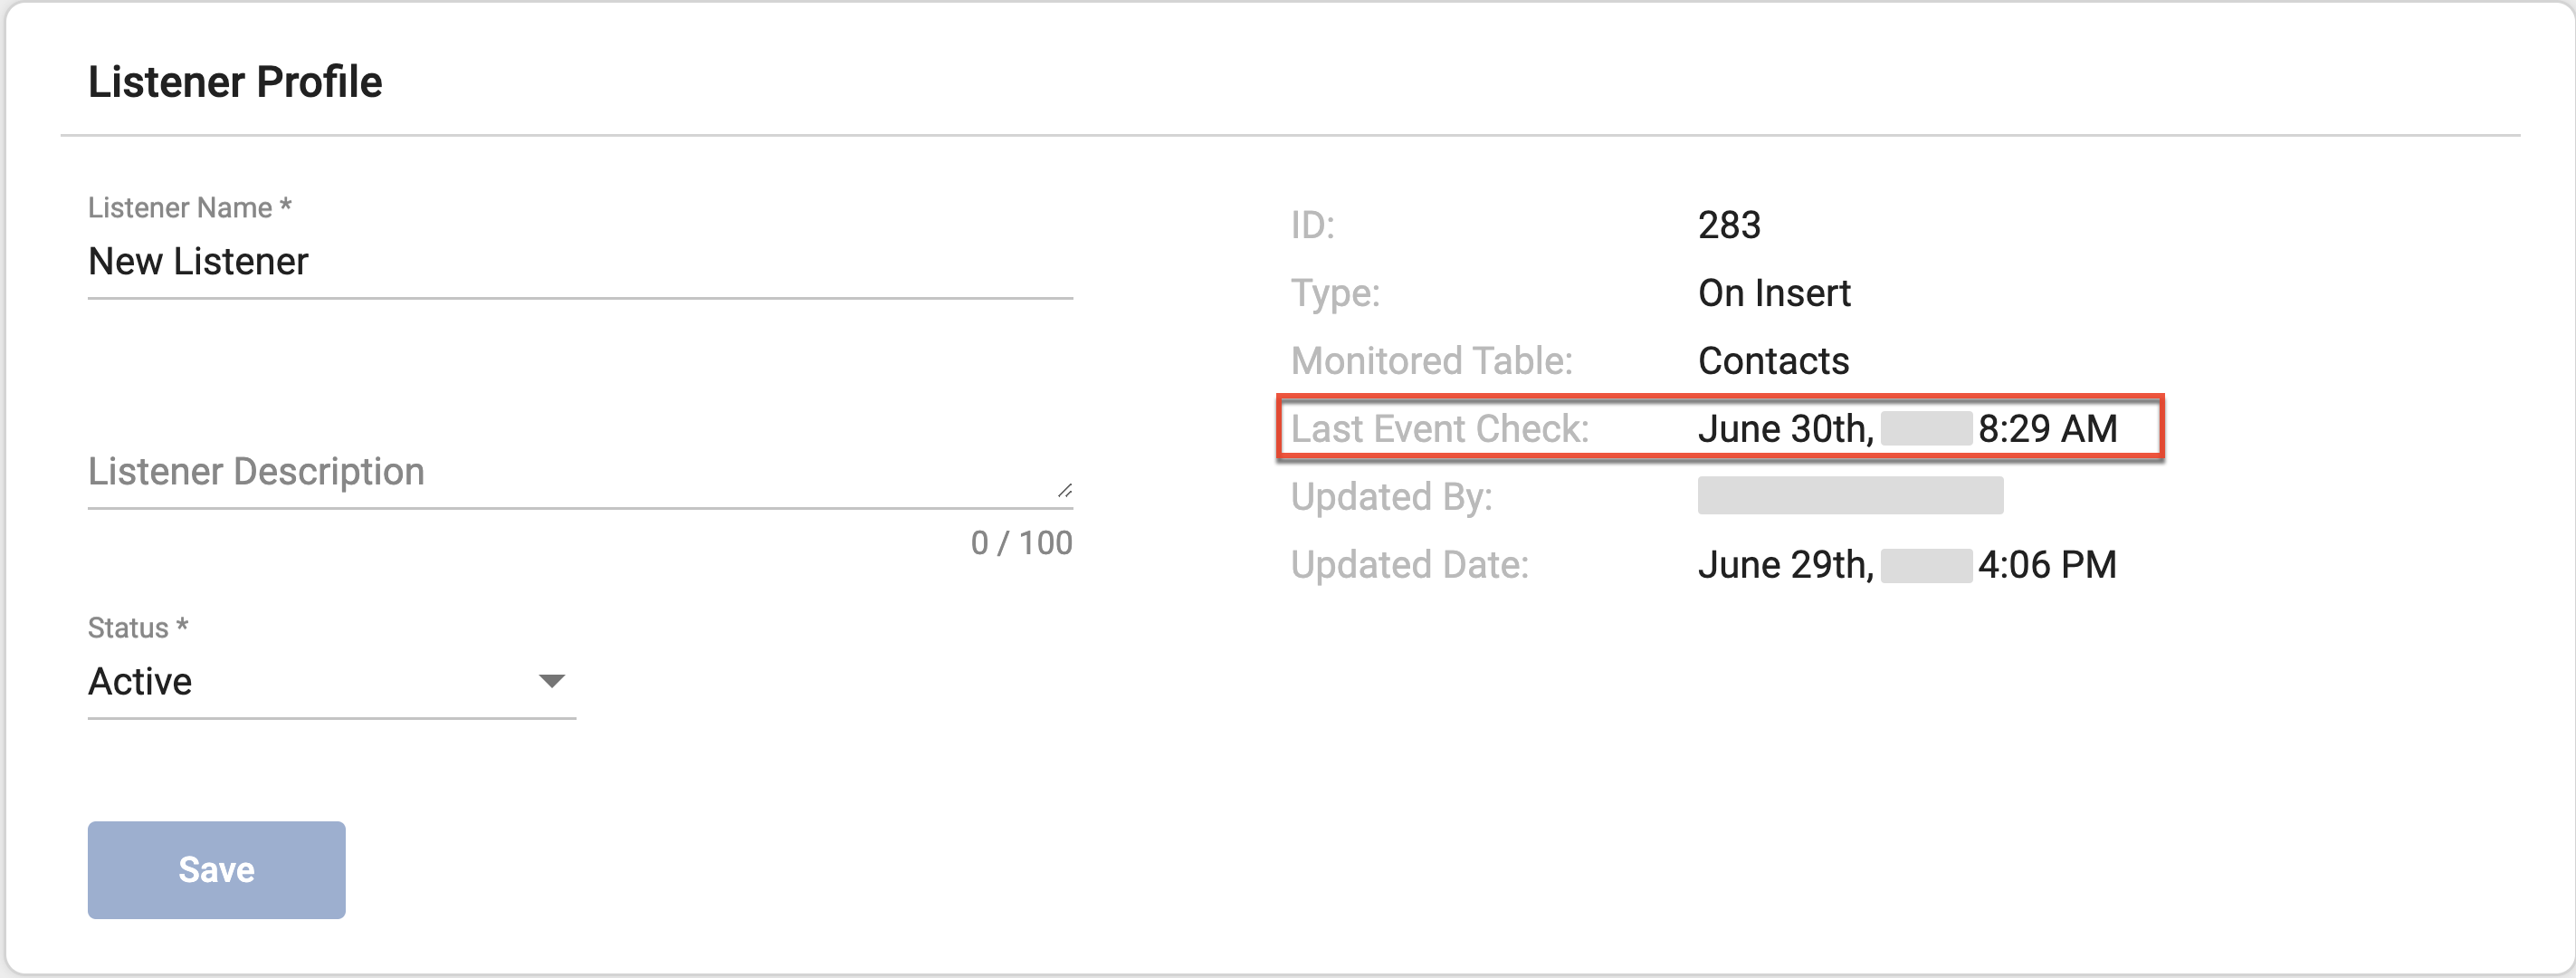
You can view the last event check date of a listener when in edit mode.
The Listener Results section at the bottom of the page displays every time the listener was run. You can search this section with the search field and click the Export icon to produce a Microsoft Excel file containing the results.