User and Role Management
Overview
Sugar Market users with the Admin Navigation role can create and manage roles and user accounts, including security permissions.
About Permissions
Permissions in Sugar Market can be granted directly to individual users and to roles. Roles define what users can access and the actions they can perform in Sugar Market. Using roles simplifies the process of managing permissions since you can define a group of security permissions in a role and then assign users to the role to share the same permissions. Roles are defined by one or both of the following attributes:
- Navigation Access: Controls the areas of the system a user can visit. Navigation access, which is also referred to as security attributes, is defined at detailed levels to control access to specific Sugar Market features, as shown in Sugar Market Permissions.
- Data Access: Determines which Sugar Market internal CRM data a user can access. In data access roles, everything created by the users (e.g. a template) or owned by the users (e.g. a specific contact record) assigned to the role is accessible to all other users that are assigned to the same role. When data access is not enabled for a role, users can only see the records they own and what they have created themselves in Sugar Market. Roles that have only data access can be viewed as read-only roles, which are useful when you have users who need to see data in your external CRM without needing access to all areas of Sugar Market. These roles allow each user's direct permissions to determine the specific locations within Sugar Market they are able to access. This allows all users to view summary data such as journies and scoring. Access to the other Buyer's Journey tabs will be dictated by the other roles to which each user is assigned.
Permissions Example
Consider a user assigned to a role that has permissions to access all dashboards. To also grant this user access to CRM tasks, assign the permission directly to the user account. This gives the user access to all dashboards and CRM tasks, while others assigned to the same role will only have access to the dashboards.
Key Attributes of Permissions
The following summarizes how permissions function in Sugar Market:
- Permissions can be granted at both the user level and the role level.
- Permissions are not restrictive (e.g. delete accounts). Permissions granted both directly to a user or through a role give full access to the corresponding functionality, so a user either has full access to a feature or none at all.
- Permissions granted to an individual user supersede any permissions that are defined in a role to which the user is assigned.
- Permissions are cumulative when a user is assigned to both a role and granted permissions directly in the user's account.
- Role permissions are defined in the role's Navigation Access tab.
- User permissions are defined in the user account's Navigation Access tab.
- You can assign an unlimited number of permissions to both users and roles.
Predefined Roles
The following four roles are included with Sugar Market to help get you started with managing permissions. You can use these roles as defined and assign them to users, make changes to their permissions1, or copy them as the basis for a new role. You cannot delete these predefined roles.
Important: While you can add or remove specific permissions that are defined in Sugar Market's predefined roles, you cannot change the Data Access or Navigation Access designation in these roles. All references in this guide to any of these predefined roles are to the roles as they are defined when you became a Sugar Market customer; therefore, any changes made to these roles may negate those references.
| Role Name | Data Access | Navigation Access | Description |
| Admin Navigation | ✔ | ✔ | Access to all permissions and data. If your Sugar Market instance is enabled for SugarIdentity, users assigned the Admin Navigation role must also either be a CRM System Administrator or assigned to the User Management role in SugarIdentity to manage user data in Sugar. |
| GPDR | ✔ | Can help ensure you are complying with GDPR regulations through the following permissions:
|
|
| Marketing Navigation | ✔ | Access to most permissions with the exception of those in the CRM Admin and Marketing Admin permission categories, as well as some Event permissions | |
| Sales Navigation | ✔ | Access to permissions in the CRM, Dashboard, Tools, and Web Forensics permission categories, and a few permissions in the Forms, Events, and Marketing categories; This is the most restrictive predefined role. |
Creating Roles
In addition to the predefined roles, you can create your own roles. To assign permissions directly to user accounts instead of using a role, refer to the Managing User Permissions section.
To create a new role:
- From the user menu, click "Admin".
- In the Administrator section, within the User Administration tab, click "Roles".

- Click the Create button at the top of the page.
- Identify a name for the role and a description to make it easily identifiable, and then click the Save button. A confirmation message is displayed and the new role is added to the list of roles.
Note: When the role is created, there are no permissions attached to the role; you must edit the role to assign permissions.
Editing Roles
You can make changes to existing roles, including the name, description, type, and the specific permissions assigned to the role1.
To edit a role:
- From the user menu, click "Admin".
- In the Administrator section, within the User Administration tab, click "Roles".
- Locate the desired role either by scrolling through the list or searching by role name or description.
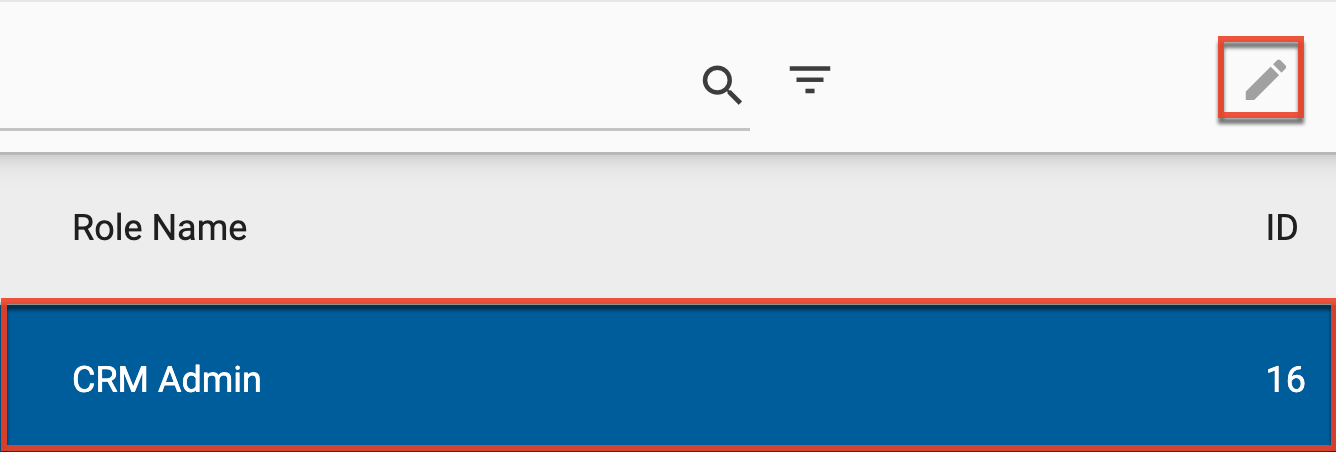
- Double-click the role name, or with the role highlighted, click the Edit icon in the toolbar. The Role page displays.
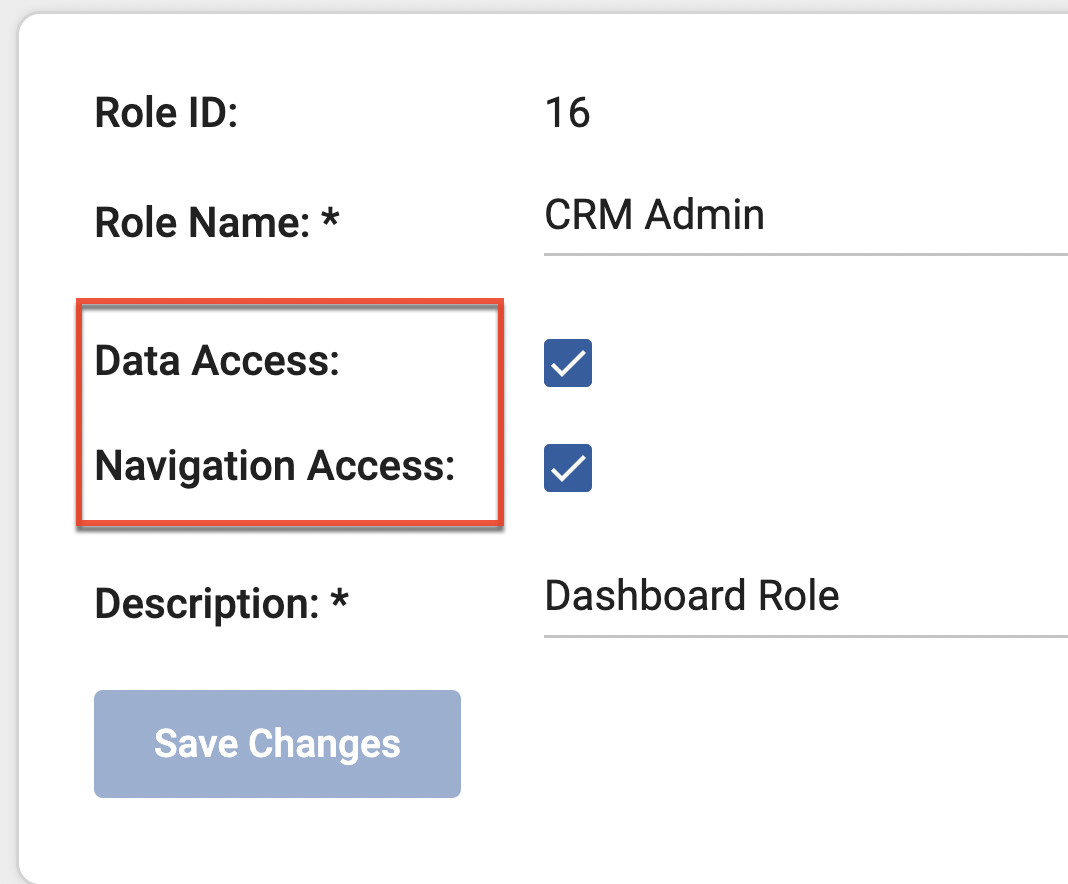
- Select one or both checkboxes for the type of permission:
- Data Access: Allows everyone in the role to see what others in the role have created.
- Navigation Access: Allows everyone in the role to have access to the same features. When this option is selected, the Navigation Access tab displays to allow you to set the specific locations in Sugar Market where this role will have access. Refer to the Sugar Market Permissions page for descriptions of each category.
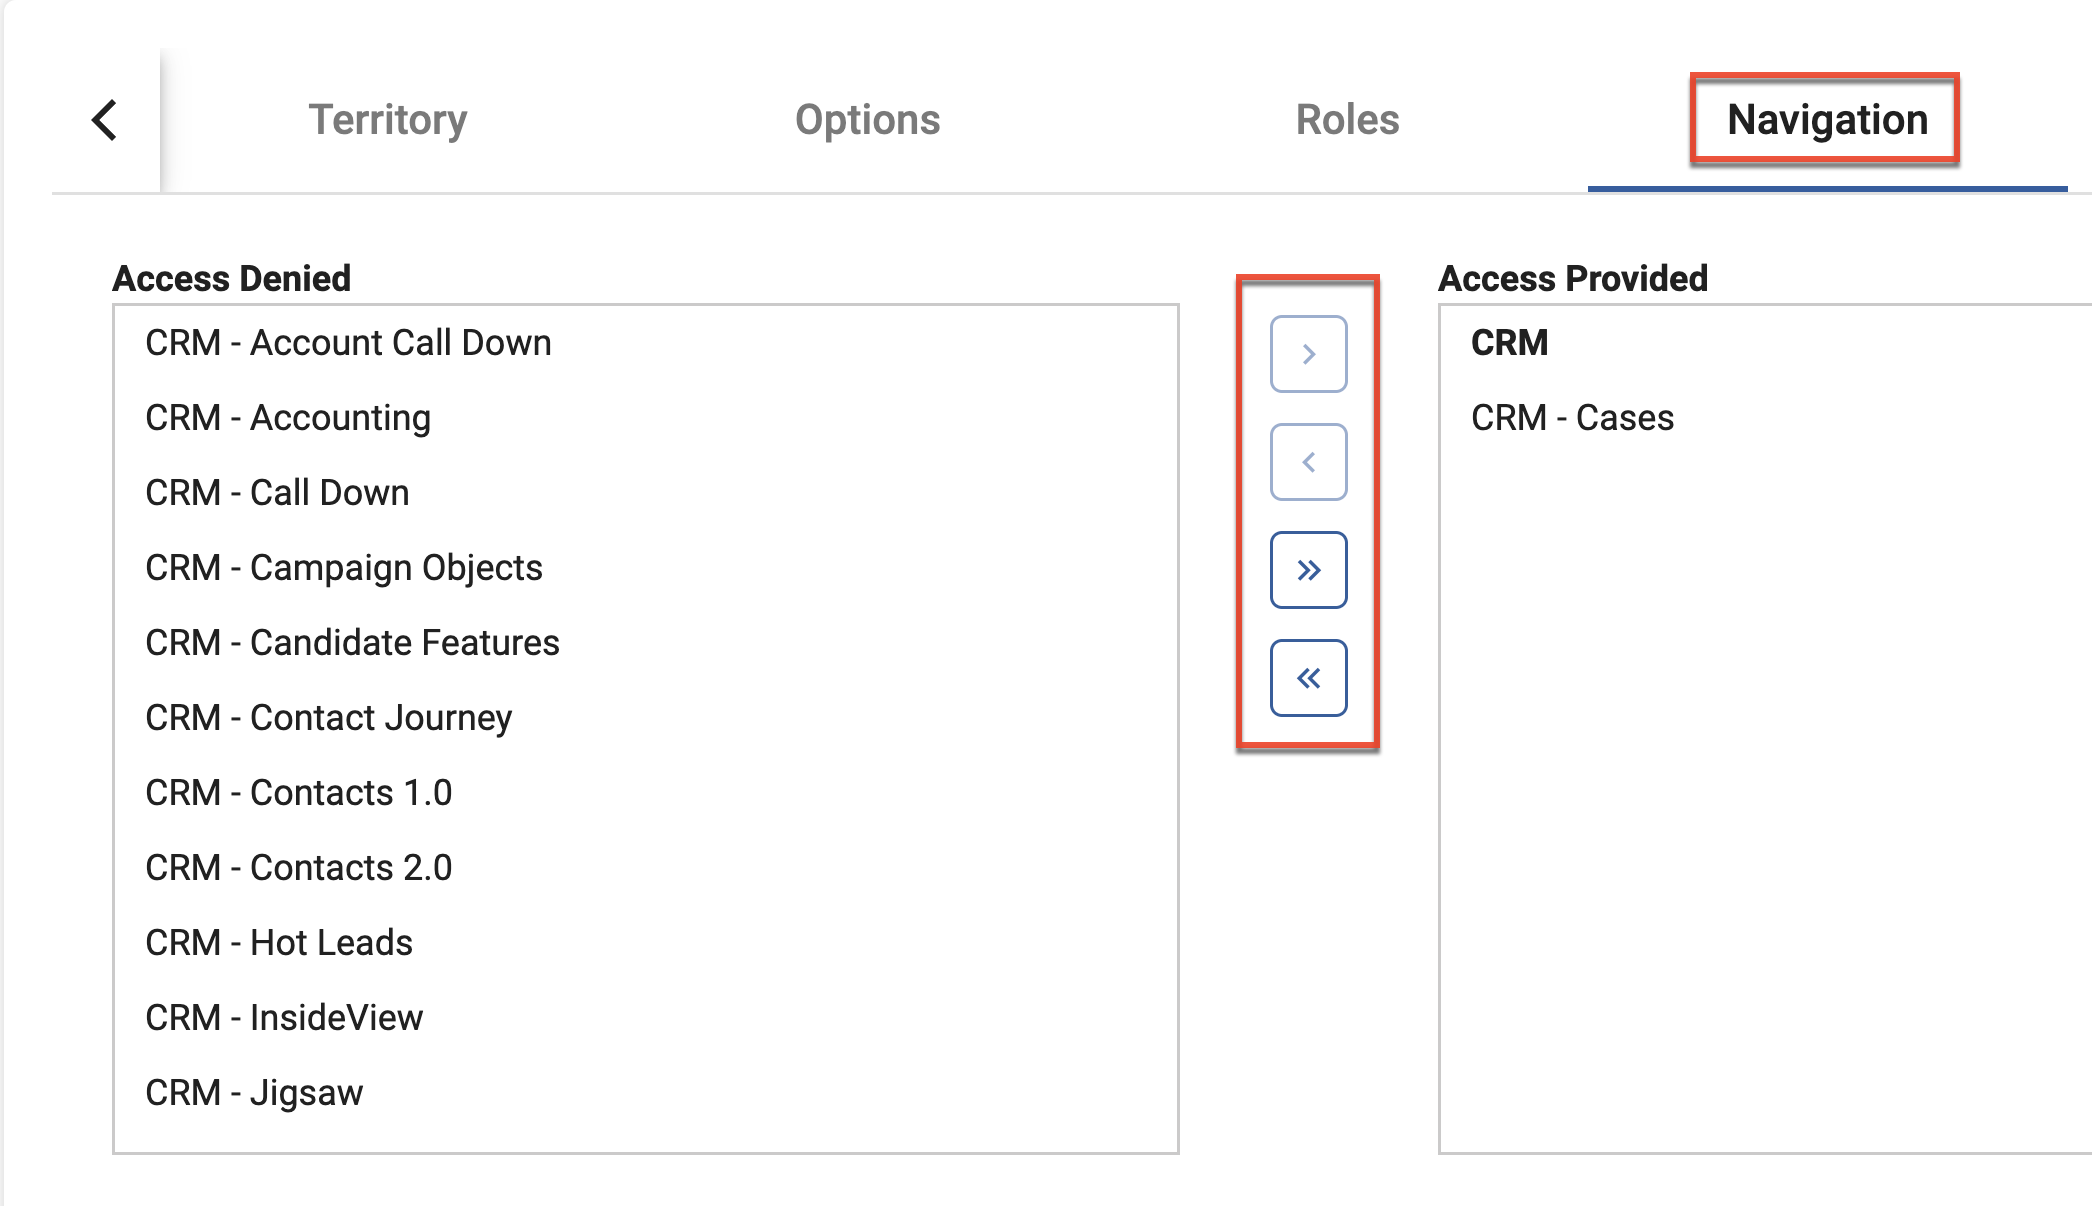
- On the Navigation Access tab, select the permissions that correspond to the Sugar Market features that users assigned to this role can access.
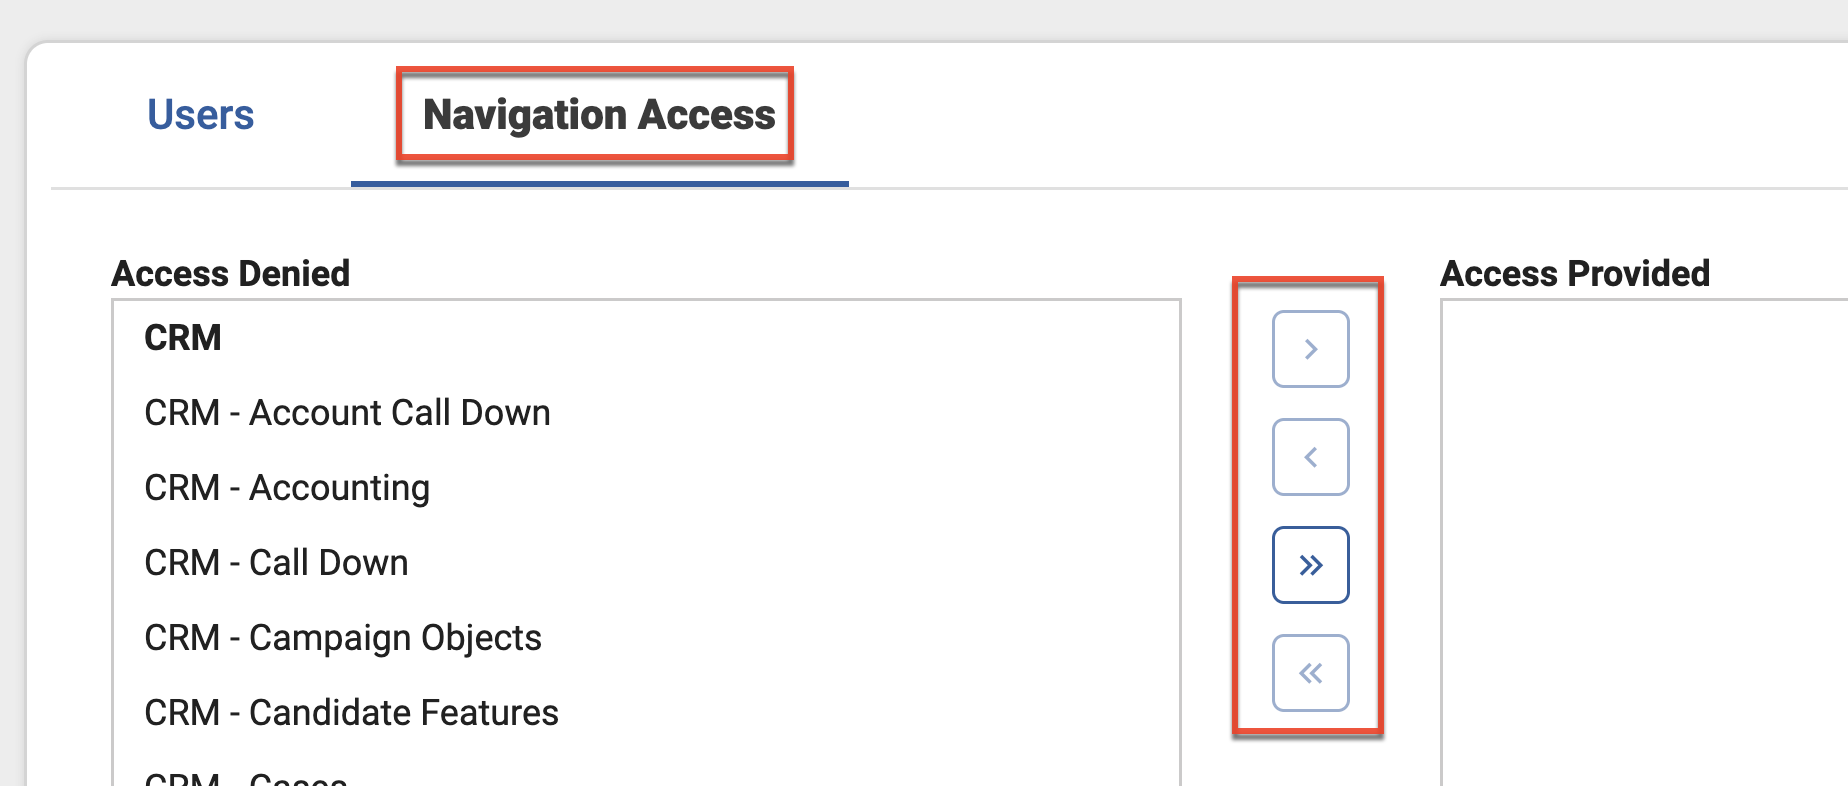
Use the following guidelines when selecting permissions:
- Select individual permissions by clicking the right-facing arrow with the location selected.
- Select multiple permissions by holding the keyboard CTRL key while making selections.
- Add all Sugar Market permissions by clicking the double right-facing arrow.
- To remove permissions from the Access Provided list, highlight the permission and then click the left-facing arrow, or click the double left-facing arrow to remove all selections.
- Click the Save Changes button at the bottom of the page to save the selected permissions.
- Click the Save Changes button at the top of the page to save the new role.
Refer to the Managing User Permissions section for information on assigning users to roles.
1 You cannot change the Data Access or Navigation Access designation in predefined roles.
Copying Roles
It is often faster to create a new role by copying an existing role, especially if there are many permissions attached to the role. To create a role by copying an existing role:
- From the user menu, click "Admin".
- In the Administrator section, within the User Administration tab, click "Roles".
- Locate the desired role either by scrolling through the list or searching by role name or description.
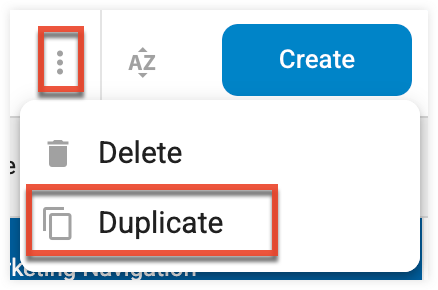
- With the role highlighted, expand the three-dots menu and and select "Duplicate".
- Identify a name for the new role and then click the Copy button.
Deleting Roles
- From the user menu, click "Admin".
- In the Administrator section, within the User Administration tab, click "Roles".
- Locate the desired role either by scrolling through the list or searching by role name or description.
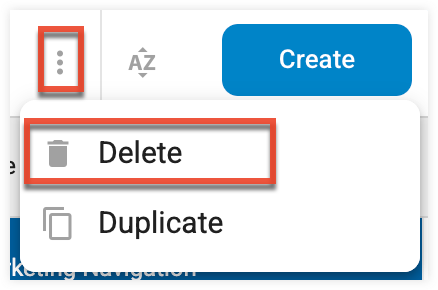
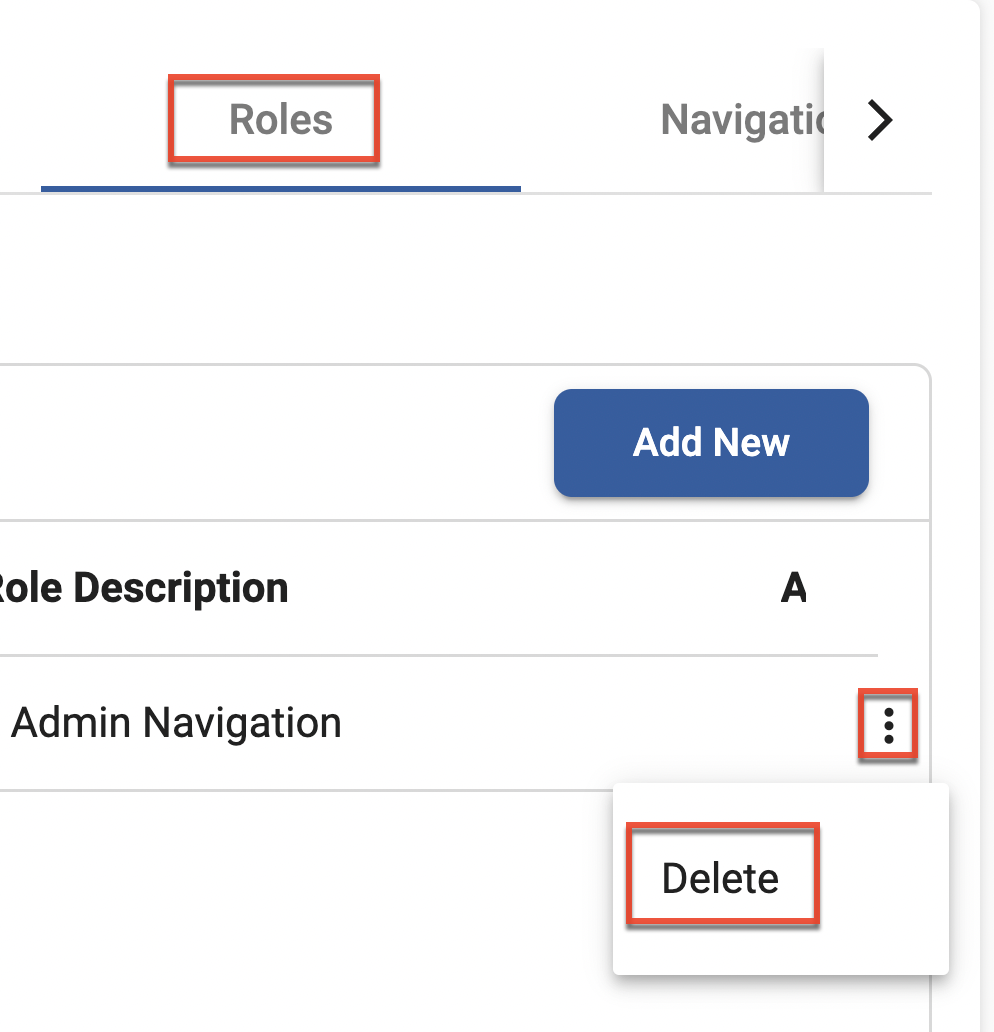
- With the role highlighted, expand the three-dots menu and then select "Delete".
About Users
When your Sugar Market instance is integrated with an external CRM, your entire Users table is pulled into Sugar Market during the initial sync, and user accounts continue to sync in accordance with the sync schedule. This process does not grant these users access to Sugar Market, but the user accounts can be assigned as contact owners, alert recipients, and used in lead routing. To give user accounts access to Sugar Market, a user with the Admin Navigation role must initiate a password reset.
Creating Users
To create users in Sugar Market after the initial sync with your CRM, we strongly suggest you create the user account in your CRM and let the account sync over to Sugar Market. This will ensure the user names are identical and will mitigate login issues caused by duplicate user accounts in Sugar Market. If you want users to only have access to Sugar Market and not your CRM, or if you are using Sugar Market without an integrated CRM, then you can manually create users directly in Sugar Market.
Manually Creating Users
When creating new Sugar Market user accounts, you initially assign a default role. After creating the basic user account, you will then initiate a password reset and can further define user preferences and permissions through additional role assignments and direct permissions in the user account. The email address must be unique for each user account.
- From the user menu, click "Admin".
- In the Administrator section, within the User Administration tab, click "Users".
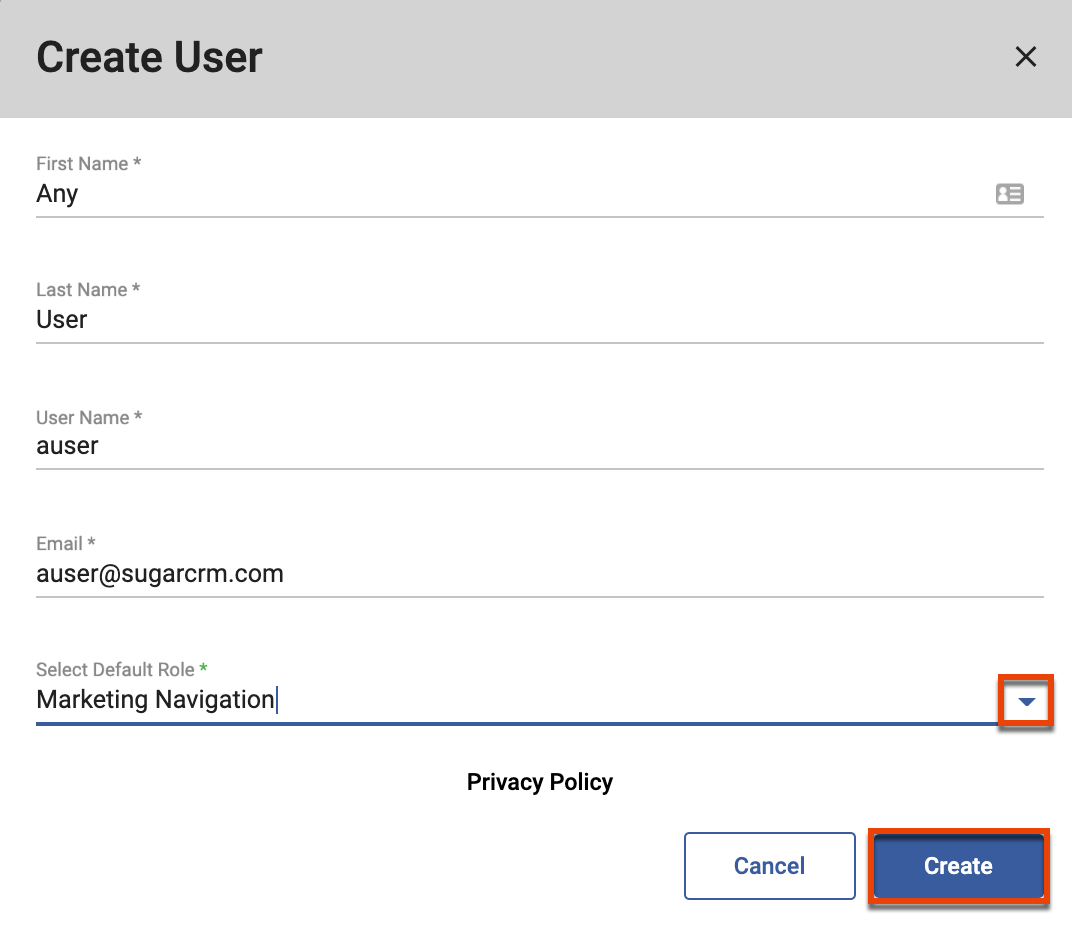
- Click the Create button at the top of the page.
- Complete all fields, and then click the Create button. A confirmation message displays indicating the basic user account was created.
- Locate the newly created user by browsing through the user list or using the Search field at the top of the page.
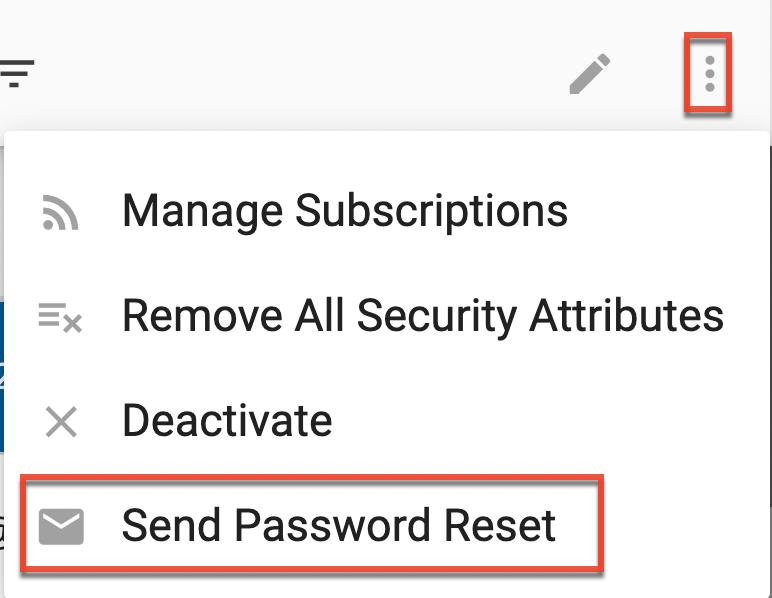
- With the user selected, click the three-dots menu in the toolbar and then select "Send Password Reset". A confirmation message displays indicating the password reset email has been sent to the user. The email will contain instructions and a link for the user to submit the password reset.
Creating Users in SugarIdentity
If your Sugar Market instance is enabled for SugarIdentity, creating users is done in SugarIdentity. You can follow these steps to create a Sugar Market user via SugarIdentity:
- From the user menu, click "Admin".
- In the Administrator section, within the User Administration tab, click "Users".
- Click the Create button at the top of the page to be directed to a new tab in SugarIdentity.
- From the Create User page, complete the required fields.
- The value selected for the License Type, CRM User Type, Enable User Management Role fields in SugarIdenitity are used to control the level of access the user has across the Sugar Market and SugarCRM instances:
Note: The SugarIdentity User Management role grants regular users access to SugarIdentity allowing them to modify certain user data (e.g., email address) without giving them full system administrator access. The setting must first be enabled on the Tenant Settings page in SugarIdentity before assigning users to the role.License Type User Type Enable User Management Role Access Sugar Market license N/A N User has access to only the Sugar Market instance SugarCRM license (e.g., Sell Premier) + Sugar Market license Regular User N User has access to the SugarCRM and Sugar Market instances SugarCRM license + Sugar Market license System Administrator User N User has full admin access in the SugarCRM instance and has access to the Sugar Market instance SugarCRM license + Sugar Market license Regular User Y User has user data management access in the SugarCRM instance and has access to the Sugar Market instance
- Once you have finished configuring the new user click the Save button.
- Return to the Sugar Market tab.
- Users created via SugarIdentity will not be automatically assigned any default roles in Sugar Market. Locate the newly created user by browsing through the user list or using the Search field at the top of the page and assign the user to the appropriate roles.
- Once the Market user account is fully set up and ready to access, navigate back to SugarIdentity and send a Welcome Email.
Managing User Accounts
Users with the Admin Navigation role can make changes to user accounts. To access your user accounts:
- From the user menu, click "Admin".
- In the Administrator section, within the User Administration tab, click "Users".
From this view you can do any of the following:
- Define User Preferences
- Manage User Permissions
- Reset User Passwords
- Manage User Subscriptions
- Deactivate User Accounts
Defining User Preferences
While users can define some basic preferences when they first log in to Sugar Market or by editing their own profile, those with the Admin Navigation role can manage additional details for all user accounts.
Note: If your Sugar Market instance is enabled for SugarIdentity certain fields in the user's profile are read-only and can only be edited by administrators in SugarIdentity.
To manage user preferences:
- In the Users list view, locate the desired account by browsing through the user list or using the Search field at the top of the page.
- With the user account name selected, click the pencil icon in the toolbar.

- On the Preferences page, make the needed changes to the options within each tab and then click the Save button. The following is an outline of each Preference tab:
- General: Basic user contact information, including user name, local time zone, and physical address.
- Social Profile: Links to the user's social media profiles, which can be used in merge tags2.
- Territory: Specific locations and Geos to which the user belongs. Use the right-facing arrows to add locations and the left-facing arrows to remove locations.
- Options: Preferences related to Sugar Market Alerts. In the Alert CC Email field, identify the email addresses of recipients who should be copied on alerts sent to this user. In the Account Score field, identify the threshold number to define when an alert will be sent to the user. When Accounts that are assigned to the user fall below this threshold, an alert will be sent to the user.
- Roles: outlined here.
- Navigation: outlined here.
- CRM Layout: When there are multiple layouts available for Opportunities, you can select a specific layout to customize the display of Opportunity records for the user.
2 The information on these tabs can also be edited by users when they edit their own profile.
Managing User Permissions
You can manage user permissions either through direct permissions or roles.
Managing Direct Permissions
To assign permissions directly to or remove permissions from a user account:
- In the Users list view, locate the desired account by browsing through the user list or using the Search field at the top of the page.
- With the user account name selected, click the pencil icon in the toolbar.
- On the Navigation tab, select the permissions that correspond to the Sugar Market features the users can access. Use the following guidelines when selecting permissions:
- Select individual permissions by clicking the right-facing arrow with the specific permission selected.
- Select multiple permissions by holding the keyboard Shift key while making selections.
- Add all Sugar Market permissions by clicking the double right-facing arrow.
- To remove permissions from the Access Provided list, highlight the permission and then click the left-facing arrow, or click the double left-facing arrow to remove all selections.
- Click the Save button at the top of the page.
Note: Any permissions the user may inherit from assigned roles are not reflected on this tab. Roles to which the user has been assigned are shown on the Roles tab.
Rapid Permission Removal
You can quickly remove a user's direct permissions from the Users list view. This will remove all permissions that are directly granted to the user, not any roles to which the user may be assigned. Use this feature with caution as it does not provide a warning before execution.
To quickly remove direct permissions, select the user account name, click the three-dots menu in the toolbar and then select "Remove All Security Attributes". A confirmation message displays.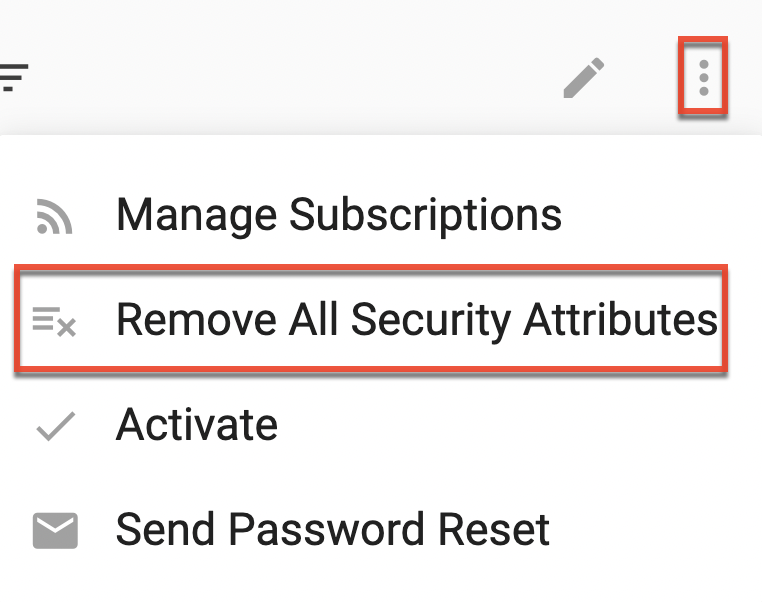
Managing User Roles
You can assign users to or remove users from a role either in the role definition or the user preferences.
Note: If your Sugar Market instance is enabled for SugarIdentity it is important to review a users SugarIdentity settings whenever making changes to their roles in Sugar Market to ensure the expected access is achieved.
Managing User Roles within the Role Definition
To manage user roles within the role definition:
- Follow the instructions for Editing Roles.
- Navigate to the Users tab.
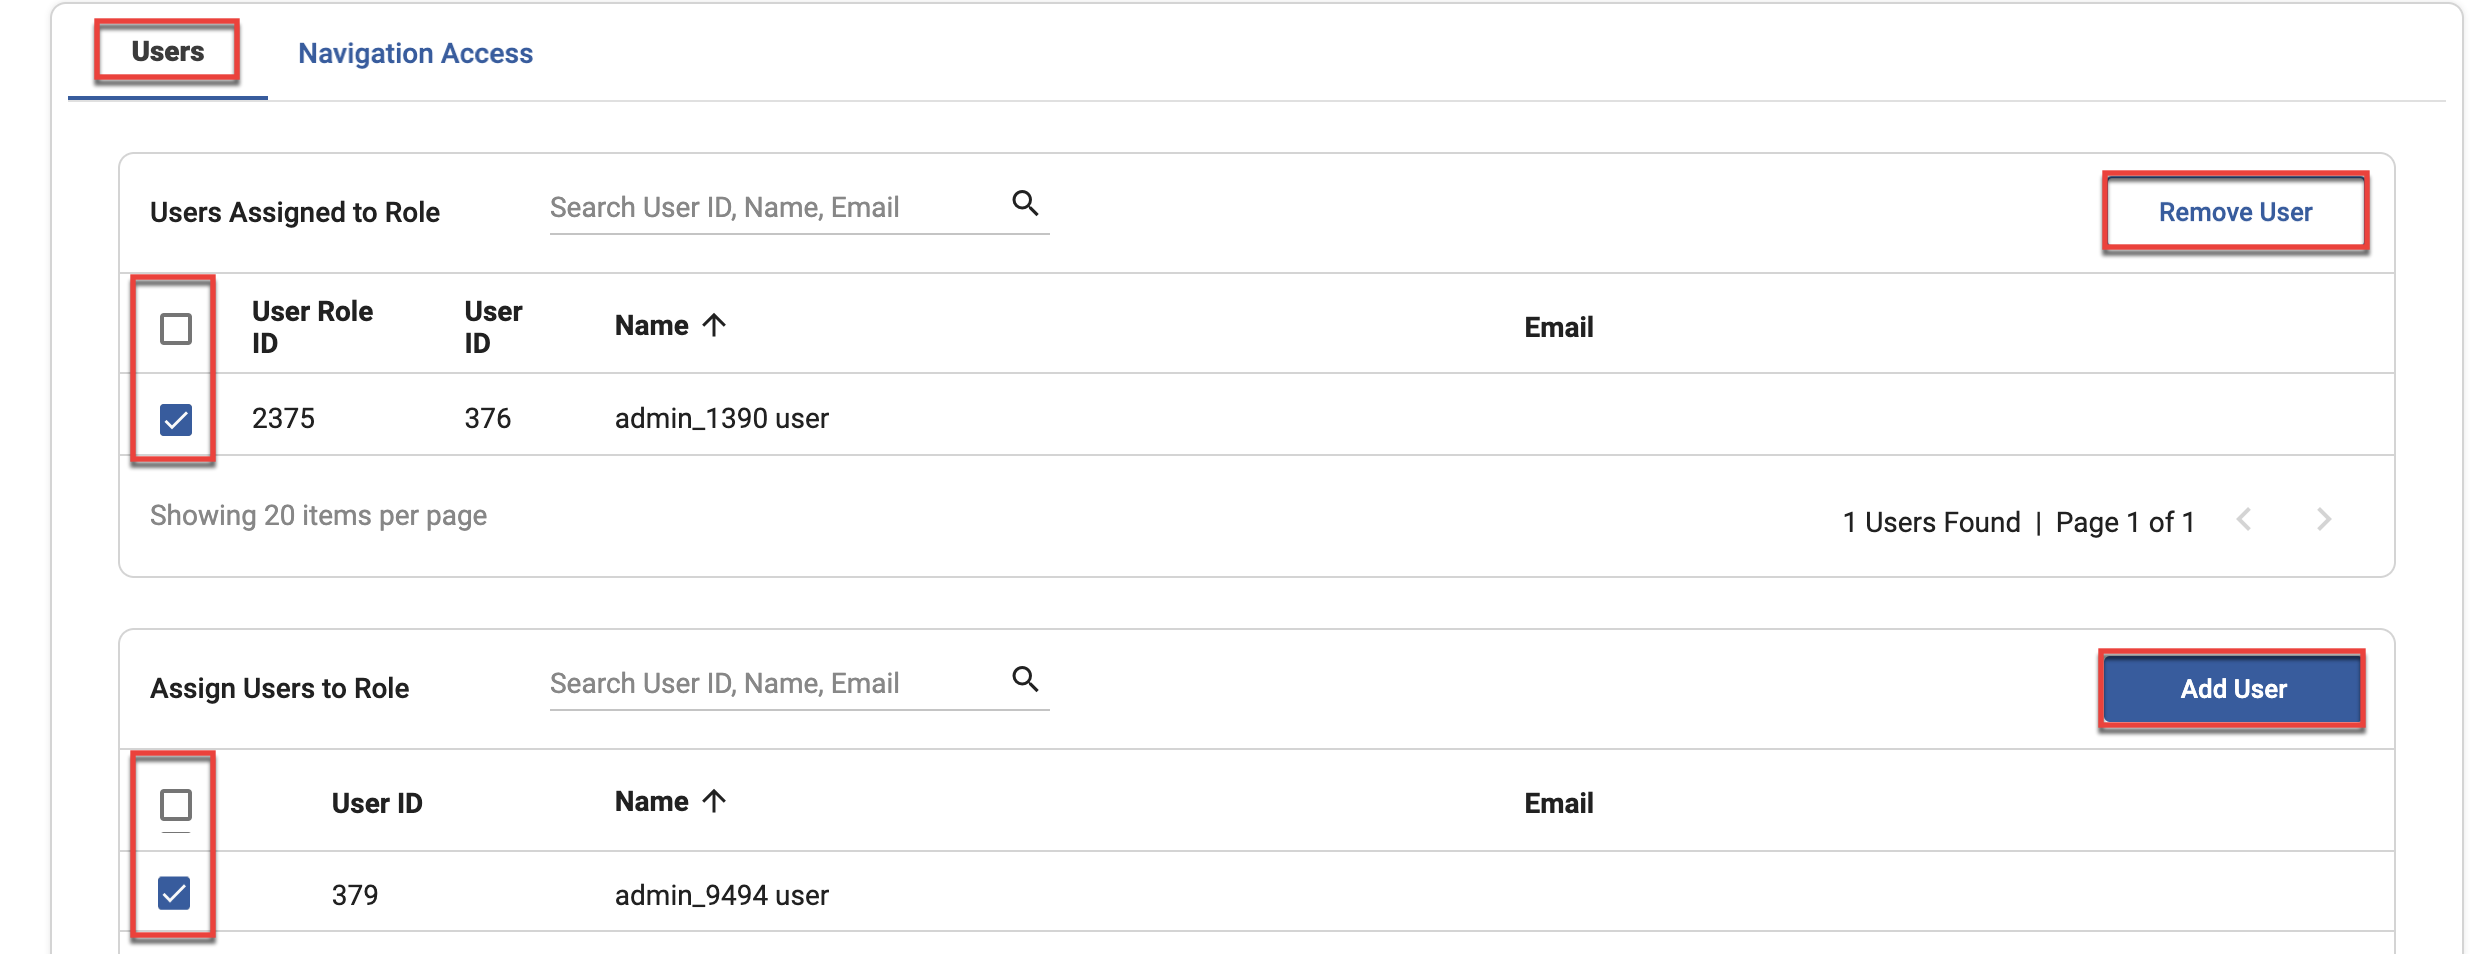
- To assign users to the role, in the "Assign Users to Role" section, use the search field to locate the desired user. Select the checkbox next to the user names, or select the checkbox at the top of the list to select all users in the view1, and then click the Add User button. The user names are added to the "Users Assigned to Role" section. The role name will also appear on the user accounts' Role tab.
- To remove users from the role, in the Users Assigned to Role section, select the checkbox next to the user names, or select the checkbox at the top of the list to select all users in the view1, and then click the Remove User button. This only removes the user from the role; it does not delete the user account.
1 If the number of users exceeds the space available on the page, then clicking into the Select All checkbox will select all users shown in the current view, and the total number of users is displayed with a link that allows you to select all users. 
You can also assign all users to a specific role in the Manage Roles list view by clicking the Add All Users button with the role name selected: 
Managing User Roles in User Preferences
To assign users to or remove users from a role within the user preferences:
- Follow the instructions for editing user accounts.
- To add the user to a role, on the Roles tab click the Add New Role button. Select a role to assign to the user, and then click the Save button.
- To remove the user from a role, on the Roles tab click the three-dots menu in the Actions column next to the desired role and then select "Delete". This action does not delete the role, it only removes the user from the role.
- Click the Save button at the top of the User page.
Resetting User Passwords
In addition to initiating a password reset when you create a new user account, you can activate a password reset on behalf of a user at any time. To change your own password, refer to the Sugar Market Settings and Preferences page.
To activate a password reset if your Sugar Market instance is not enabled for SugarIdentity:
- In the Users list view, locate the desired user by browsing through the user list or using the Search field at the top of the page.
- With the user account name selected, expand the three-dots menu and then select "Send Password Reset". A confirmation message displays indicating the password reset email has been sent to the user. The email will contain instructions and a link for the user to complete the password reset.
To activate a password reset if your Sugar Market instance is not enabled for SugarIdentity:
- In the Users list view, locate the desired user by browsing through the user list or using the Search field at the top of the page.
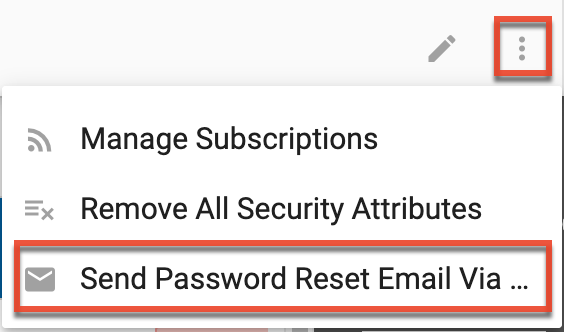
- With the user account name selected, expand the three-dots menu and then select "Send Password Reset Email Via SugarIdentity".
- From the Users list view, locate the user you wish to send the password reset email to, then click the lock icon to the far right of the record's row. A pop-up message will display asking for confirmation. Click "Confirm" to proceed.

- An email with the reset password link will be sent to the user's email address. Please note that the password reset email will use the primary language of the admin user triggering the request.
Managing Report Subscriptions
While users can manage their own subscriptions to reports, you can also manage them for users.
To manage users' subscriptions:
- In the Users list view, locate the desired account by browsing through the user list or using the Search field at the top of the page.
- With the user account name selected, expand the three-dots menu and then select "Manage Subscriptions". The User Email Subscriptions page displays.

- To select or deselect a standard report, click the checkbox next to the report name, or click the Check All or Uncheck All button at the top of the page.

- To make changes to existing custom or landing page report subscriptions, expand the Actions menu next to the report name, and then select "Edit". Make the desired changes to the subscription settings, and then click the Save button.
- To delete existing custom or landing page report subscriptions, expand the Actions menu next to the report name, and then select "Delete". Click the OK button in the confirmation dialog.
- Click the Save Changes button at the top of the page after making all subscription changes.
Reassigning User Records
To reassign records owned by a user to another user:
- In the Users list view, locate the desired account by browsing through the user list or using the Search field at the top of the page.
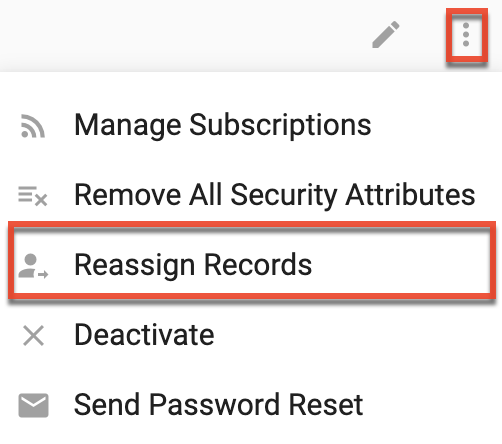
- With the user account name selected, expand the three-dots menu and then select "Reassign Records".
- From the Reassign Records modal, use the Select User field to select the user that will be assigned all of the records owned by selected user.

- Click "Confirm".
Deactivating User Accounts
You can deactivate users to remove their access to your Sugar Market instance.
Note: If you are synced to SugarCRM with SugarIdentity enabled, any users deleted in SugarCRM with be deactivated in Sugar Market. If you are synced to SugarCRM without SugarIdentity enabled or synced to any other supported external CRMs, any users deleted in the CRM will not be deactivated in Sugar Market.
To deactivate a user account if your Sugar Market instance is not enabled for SugarIdentity:
- In the Users list view, locate the desired account by browsing through the user list or using the Search field at the top of the page.
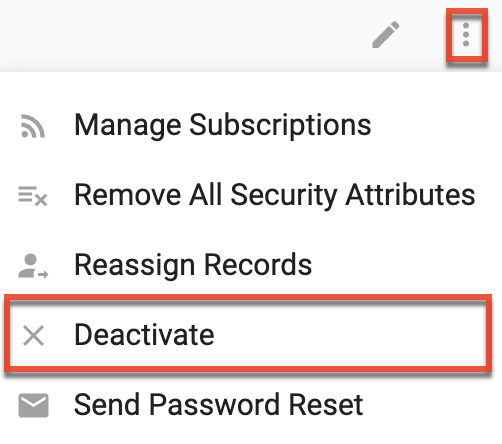
- With the user account name selected, expand the three-dots menu and then select "Deactivate". The Deactivate User dialog displays, where you will select another Sugar Market to become the owner of any records assigned to the user you are deactivating. This step is required even when the selected user is not currently an owner of any records.
- From the Deactivate User and Reassign Records modal, use the Select User field to select the user that will be assigned all of the records owned by the user you are deactivating.
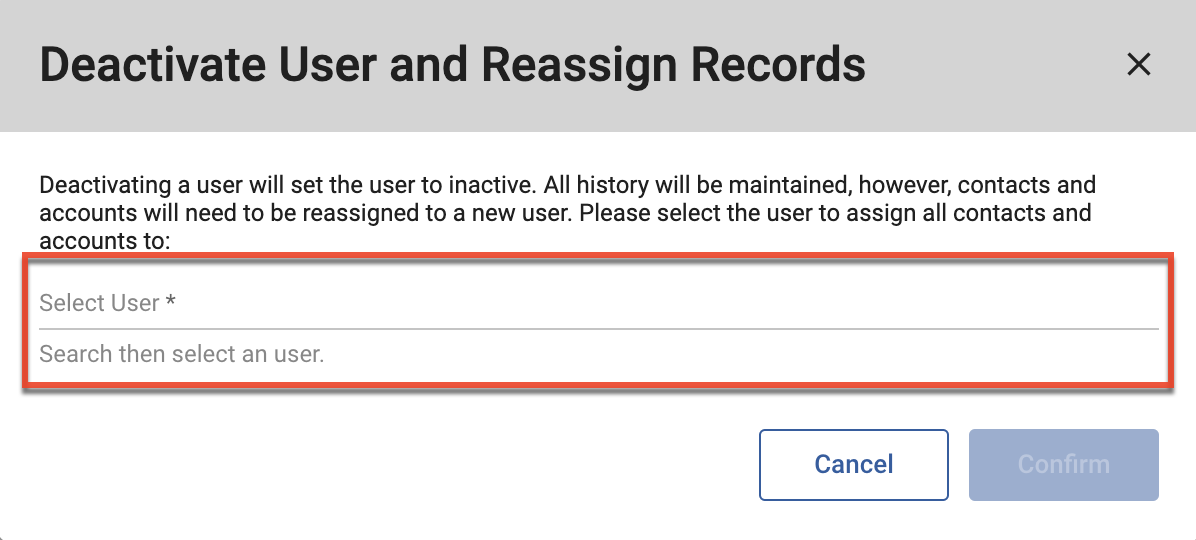
- Click the Confirm button. The user account status is updated to Inactive in the Users list view.
To deactivate a user account if your Sugar Market instance is enabled for SugarIdentity:
- In the Users list view, locate the desired account by browsing through the user list or using the Search field at the top of the page.
- Reassign the user's records to another user.
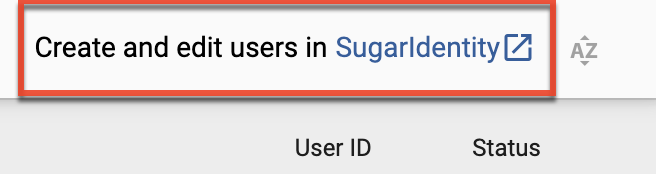
- From the Users list view, navigate to SugarIdentity by clicking the SugarIdentity link in the toolbar.
- In the Users list view, click the user's name you wish to deactivate.
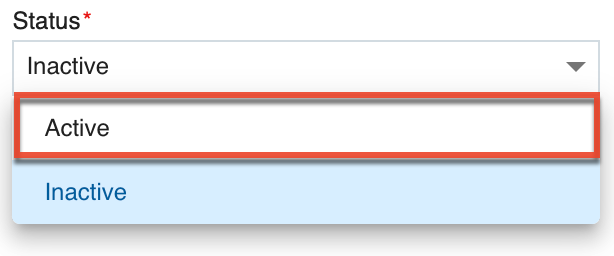
- In the user's record view, change the Status field to "Inactive", then click "Save". The user account status is updated to Inactive in the Sugar Market Users list view.
Activating User Accounts
To activate a user account if your Sugar Market instance is not enabled for SugarIdentity:
- Select the user in the Users list view.
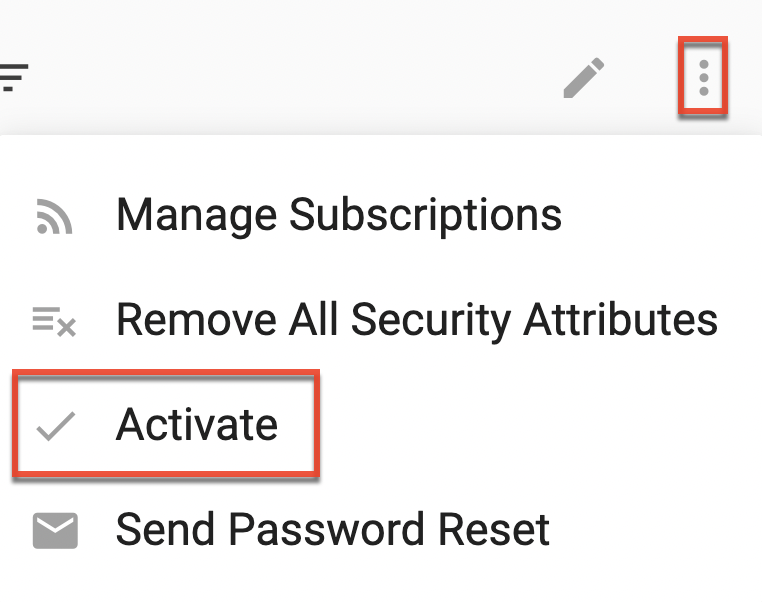
- Click the three-dots menu and then select "Activate". The user account status is updated to Active in the Users list view and the user can log in to Sugar Market using the previously existing credentials.
To activate a user account if your Sugar Market instance is enabled for SugarIdentity:
- Select the user in the Users list view.
- Click the three-dots menu and then select "Activate User via SugarIdentity".
- Click the pencil icon in the toolbar.
- Click the Activate via SugarIdentity button.

- From the Users list view, click the user's name you wish to activate.
- In the user's record view, change the Status field to "Active", then click "Save" at the bottom of the user record.