Sugar Market Internal CRM
Overview
Sugar Market has built-in CRM capabilities that can be used independently of an external CRM system. While we do not recommend using Sugar Market's internal CRM in place of an external CRM, there are some advantages to utilizing the Sugar Market internal CRM, including creating custom fields. This page describes the CRM management options available in Sugar Market's internal CRM.
Understanding the Sugar Market Sync
When Sugar Market is integrated with your external CRM, it is important to understand the data sync between the two platforms. Please review the Sugar Market Sync Overview in the Integration Guide for more information. For information you are maintaining in your external CRM, we recommend you make any necessary changes to the records in your CRM and let them sync down into Sugar Market.
CRM Management Options
CRM management options include:
To access the CRM management options:
- Click the open button at the top of the navigation bar to view all available modules.
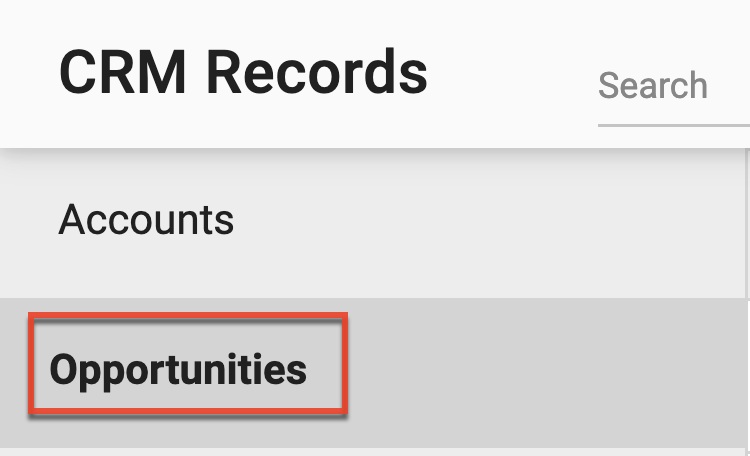
- Click the CRM Records module.

Accounts
Learn more about managing accounts in Sugar Market's internal CRM via the Accounts guide page.
Opportunities
While most users will create Opportunities and track them in their external CRM, you can also use Sugar Market to create and manage Opportunities to track potential sales. Opportunities can be created at both the Account level and the Contact level.
To access Opportunities:
- Click the open button at the top of the navigation bar to view all available modules.
- Click the CRM Records module.
- Click the Opportunities submodule.
A list of existing opportunities is displayed. Here you can create a new opportunity and sort the list using the buttons at the top of the list view.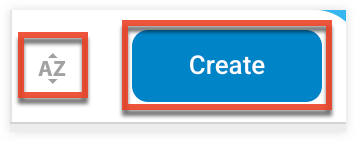
Creating or Editing an Opportunity
- Click the Create button at the top right to create a new opportunity.
- To edit an opportunity, highlight the opportunity and click the Edit icon.
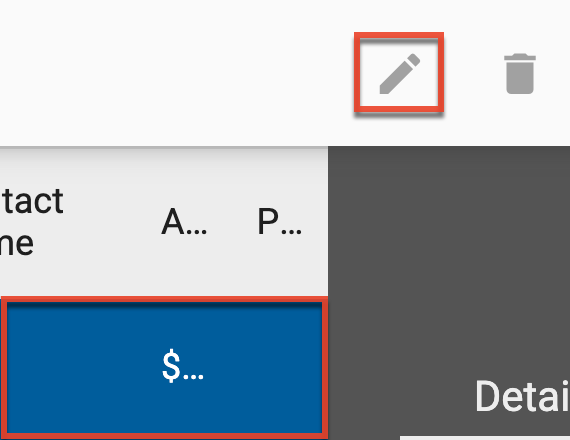
- Make the desired changes, and then click the Save and Return button.
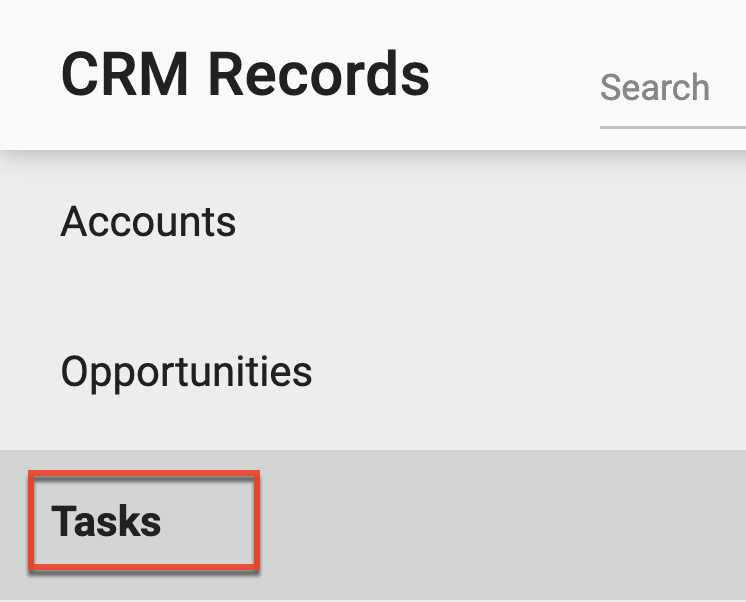
Tasks
Tasks help to monitor the activities that have occurred with the prospect during the marketing and sales process, focusing efforts on the prospects that have the best chance of converting.
To access tasks:
- Click the open button at the top of the navigation bar to view all available modules.
- Click the CRM Records module.
- Click the Tasks submodule.
A list of existing tasks is displayed. Here you can create a new task and sort the list using the buttons at the top of the list view.
Creating or Editing a Task
- To create a new task, click the Create button, complete the form, and then click the Create button.
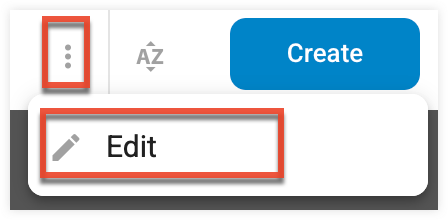
- To edit a task, highlight the task, click the three-dots menu, and then select "Edit". The Edit Task dialog opens.
- Make the desired changes, and then click the Save button.
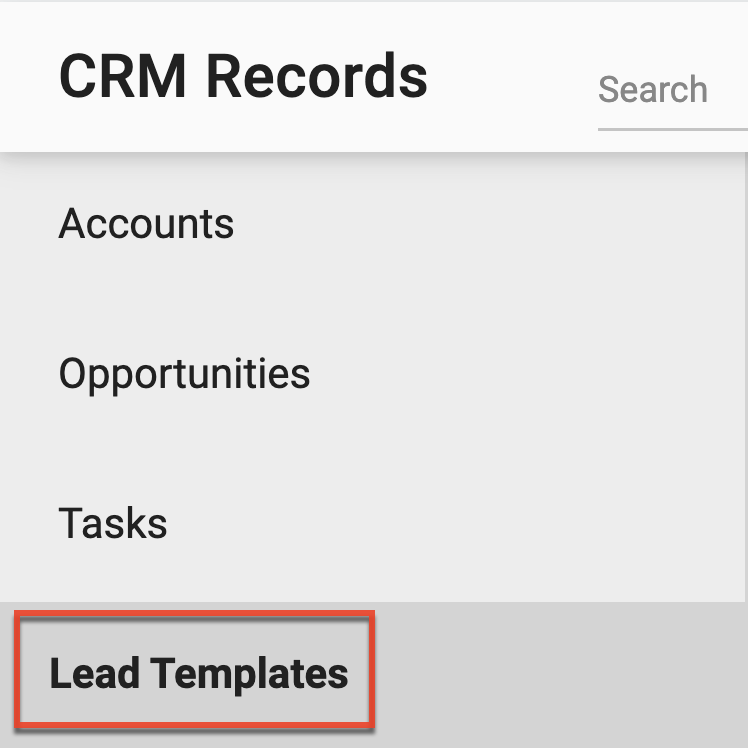
Lead Templates
The Lead Templates tab of the CRM module contains Lead Scoring Templates. Contact Scoring is managed through the Scoring module.
To access Lead Templates:
- Click the open button at the top of the navigation bar to view all available modules.
- Click the CRM Records module.
- Click the Lead Templates submodule.
A list of existing lead templates is displayed. Here you can create a new lead template and sort the list using the buttons at the top of the list view.
Creating a Lead Template
- Click the Create button at the top of the page.
- Select a template type, identify a name for the template, and then click the Create button. The Scoring Template Attributes page opens.
- Click the Add New button to identify template attributes, select a column name and identify the value, and then click the Save button.
- Click the Save and Return button to save the new Lead Template.
Editing a Lead Template
- With the template highlighted, click the Edit icon. The Scoring Template Attributes page opens.

- Make desired changes and then click the Save button.
Lead/Contact Listeners
Please refer to the Listeners page for information on managing lead/contact listeners.
Importing Account and Opportunity Records
In addition to importing Contacts, you can also import accounts and opportunities into Sugar Market and easily map information to various fields.
File Requirements
- The file must be a .csv, .xls, or .xlsx.
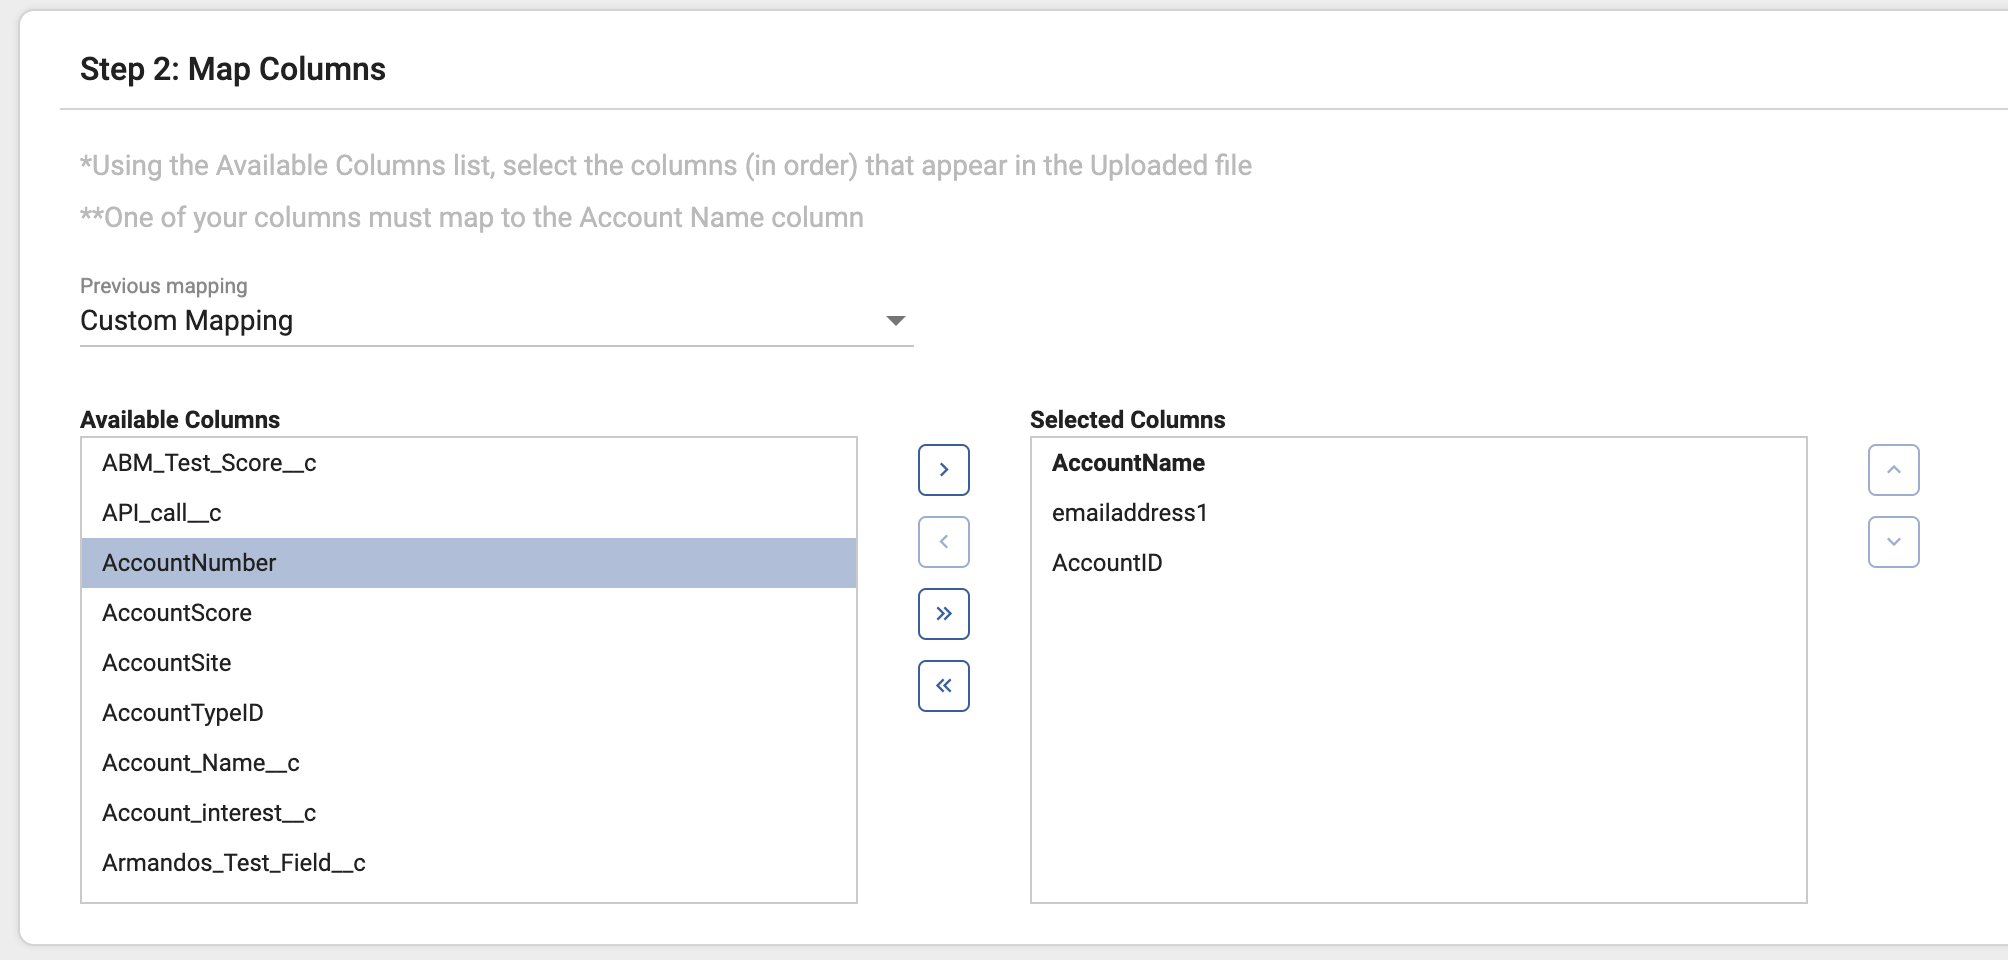
- For account imports, a column for the AccountName field is required and must be mapped. This field is used as the unique identifier when choosing to overwrite existing account records with your import.
Follow these steps to import accounts or opportunities:
- From the user menu, click "Admin".
- In the CRM Administrator section, within the Data tab, click "Import Accounts" or "Import Opportunities".
- In Step 1, click the Select File field to locate your file and then click the Upload button.
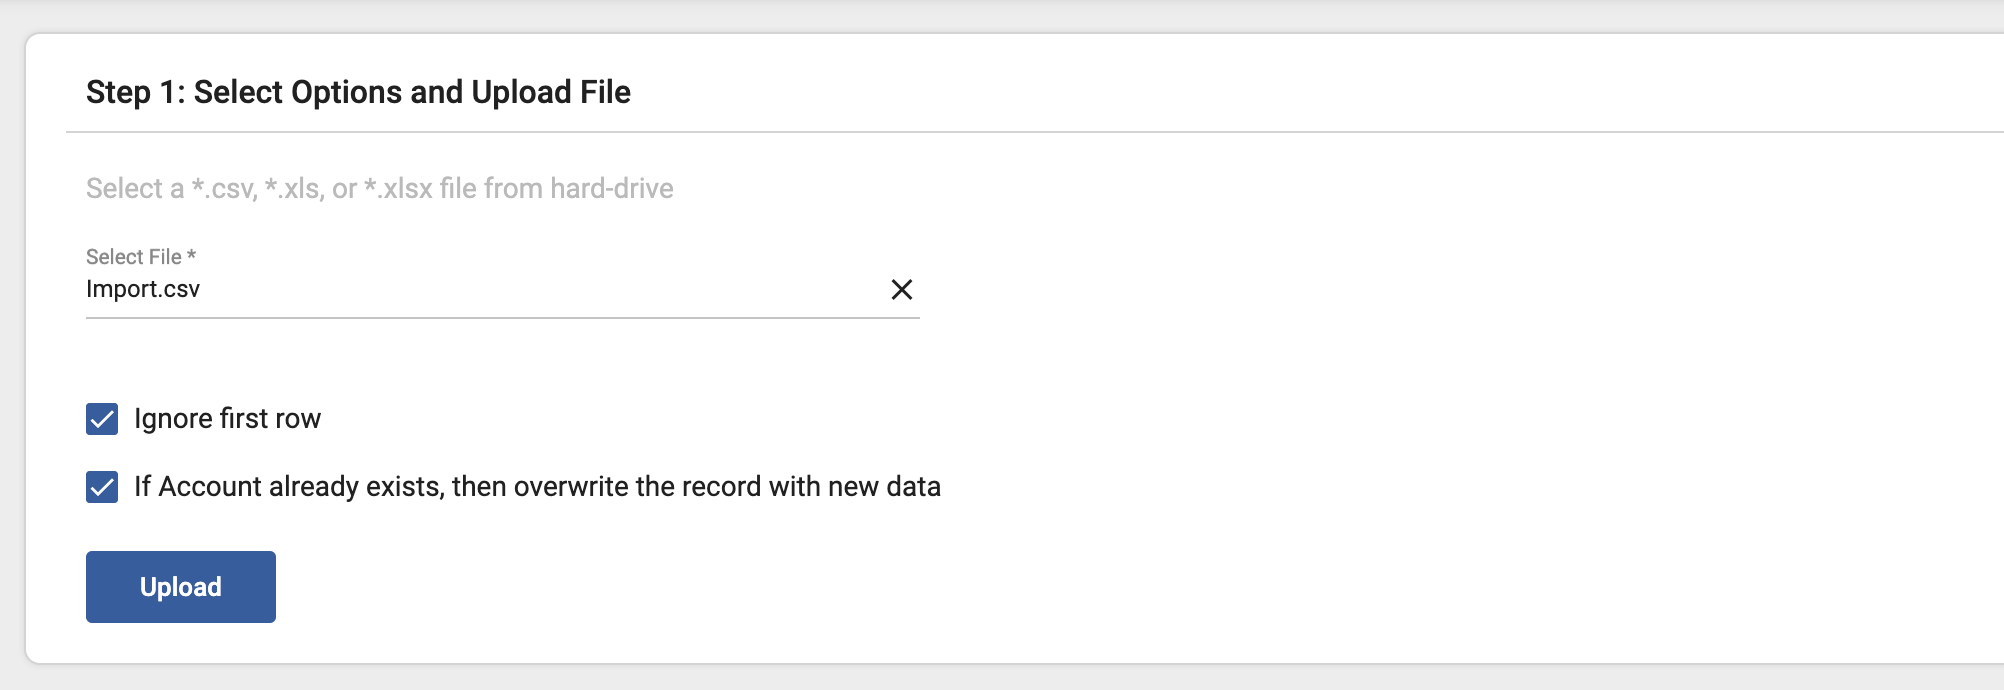
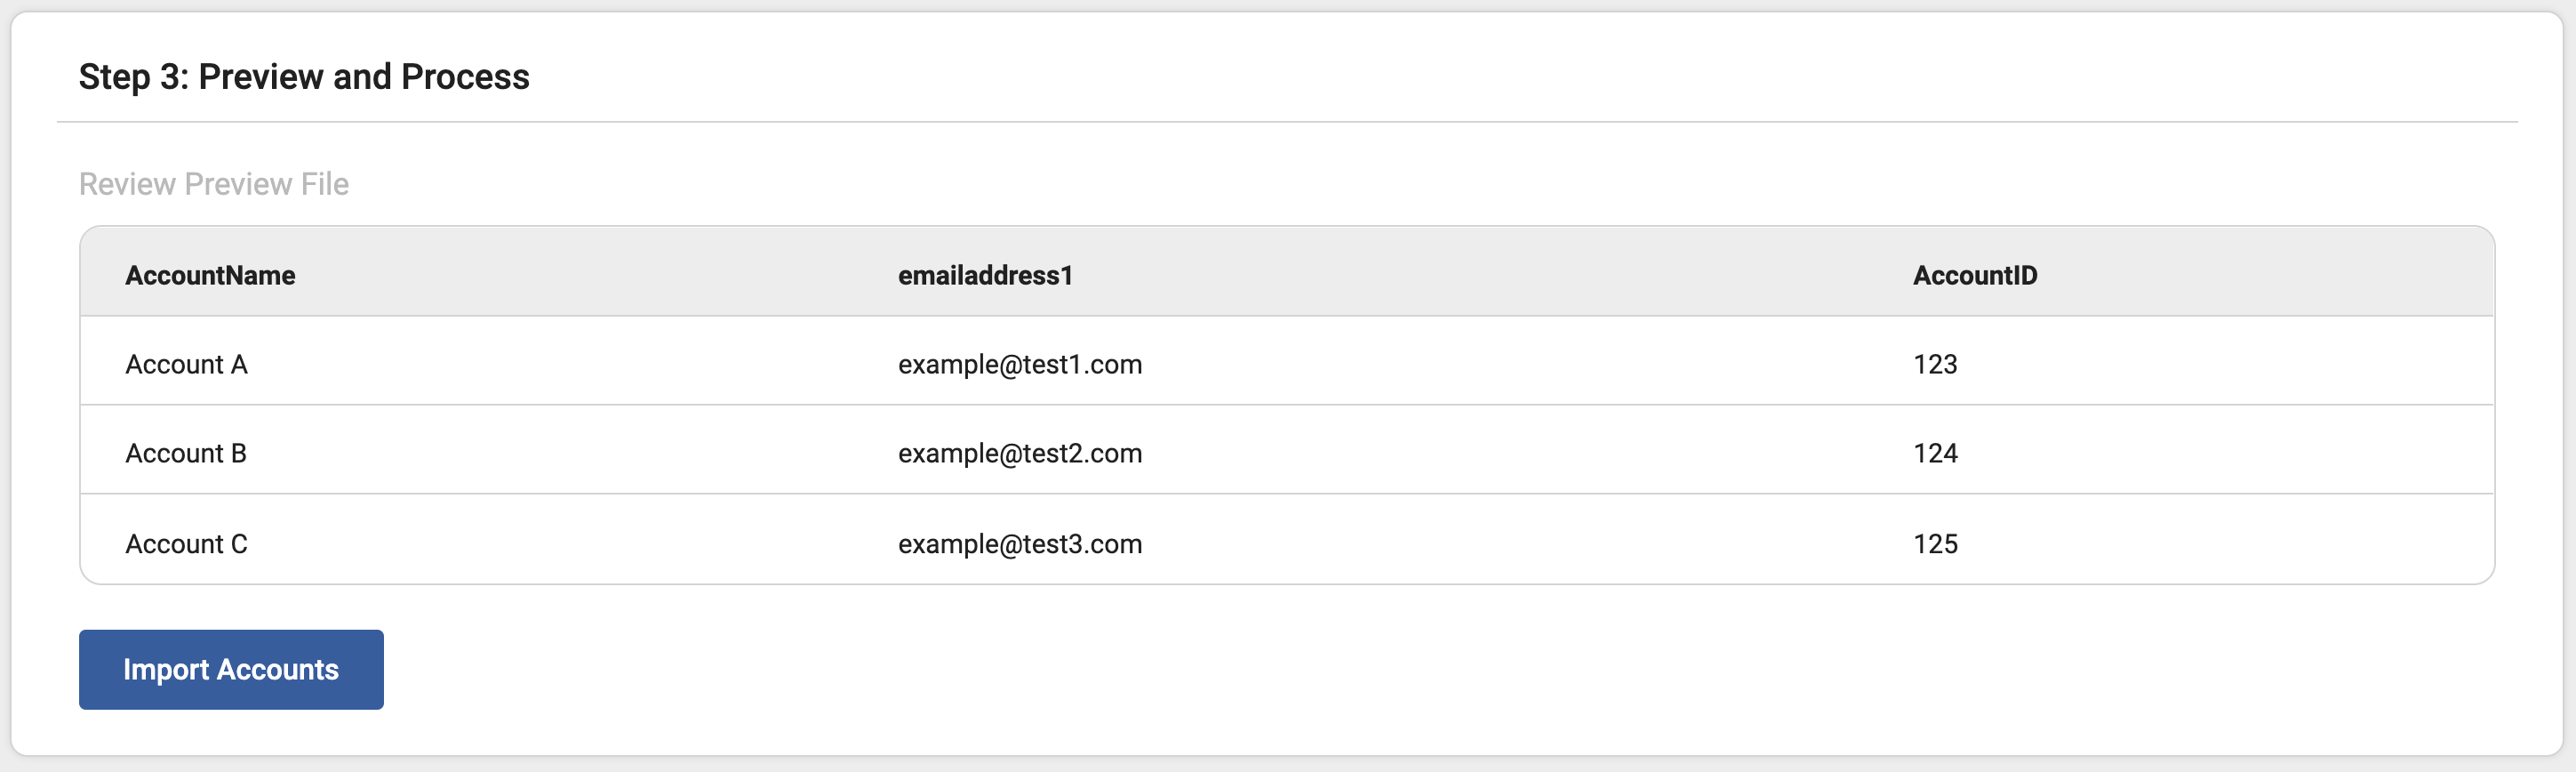
Note: If the first row of your file contains column headers, select the Ignore first row checkbox. When importing accounts, if you want to overwrite existing account record information with the data in your file, select the If Account already exists, then overwrite the record with new data checkbox. - In Step 2, select and order the columns to match the columns in your file. You can also use the Previous mapping field to preselect a set of mappings used in a previous import.
- In Step 3, review the mappings you have created for your file and then click the Import Accounts or Import Opportunities button. The import may take some time depending on the size of the file, you will receive an email confirmation when the import is complete.
Creating Custom Fields
Marketers sometimes need to quickly create new fields for tracking or want to keep information separate from their external CRM. Sugar Market allows you to create new fields stored in Sugar Market's internal CRM, to assist with tracking contacts, leads, or accounts, their specific marketing efforts, and their preferences. These can vary from free-text fields to dropdowns and checkboxes. The steps to create a field are the same for each of the entities in Sugar Market's internal CRM: Accounts, Leads/Contacts, Opportunities, Tasks, and Activities.
To create a custom field:
- From the user menu, click "Admin".
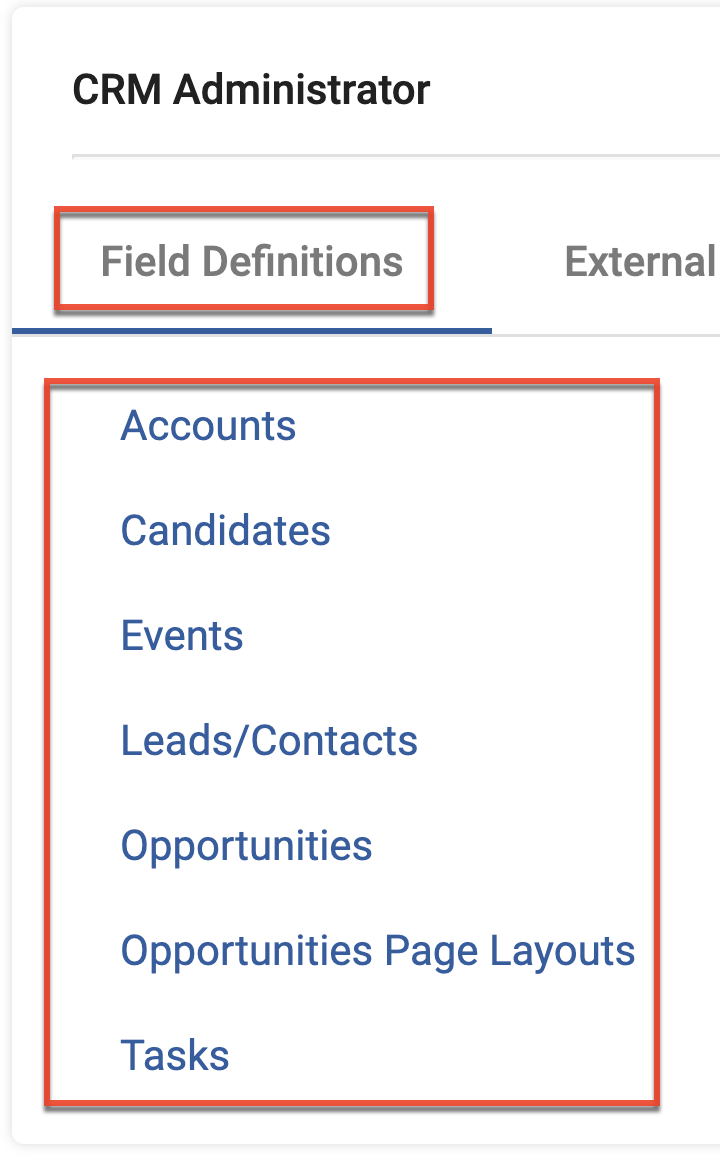
- In the CRM Administrator section, within the Field Definitions tab, click a record type.
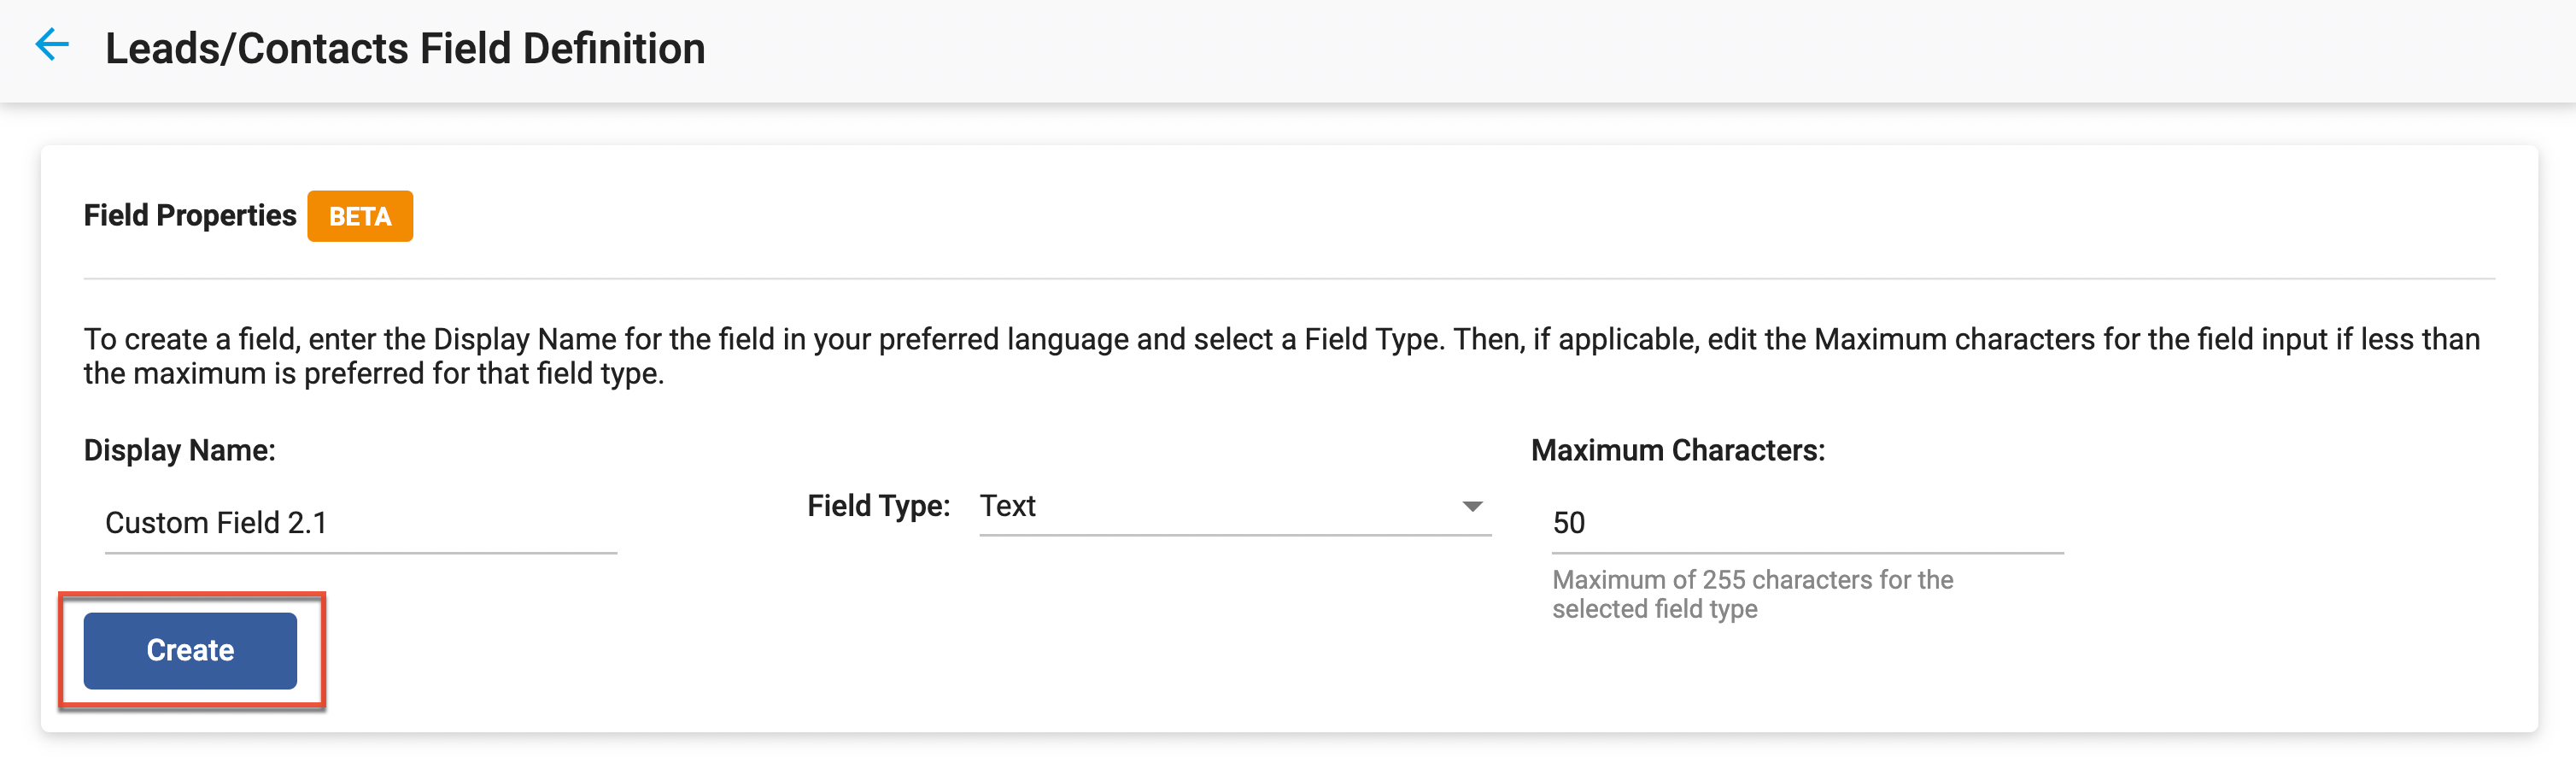
- Click the Create button at the top of the page to create a custom field for the selected record type.
- Complete the following fields:
- Display Name: Input an easily identifiable name that will be used as the field label in Sugar Market.
- Field Type: Select the type of field based on your data type and preference.
- Maximum Characters: Identify the maximum number of characters allowed for the field's values. Some field types do not have a maximum character condition.
- Click the Create button.
- Click the Create button in the Create Field window to create the custom field.
Note: Once created, settings for Field Type and Maximum Characters (if applicable) will no longer be available to edit. This is to ensure proper mapping of the field and to safeguard your collected data. - To add language variants to the display name click the Add button in the Field Language Attribute section.
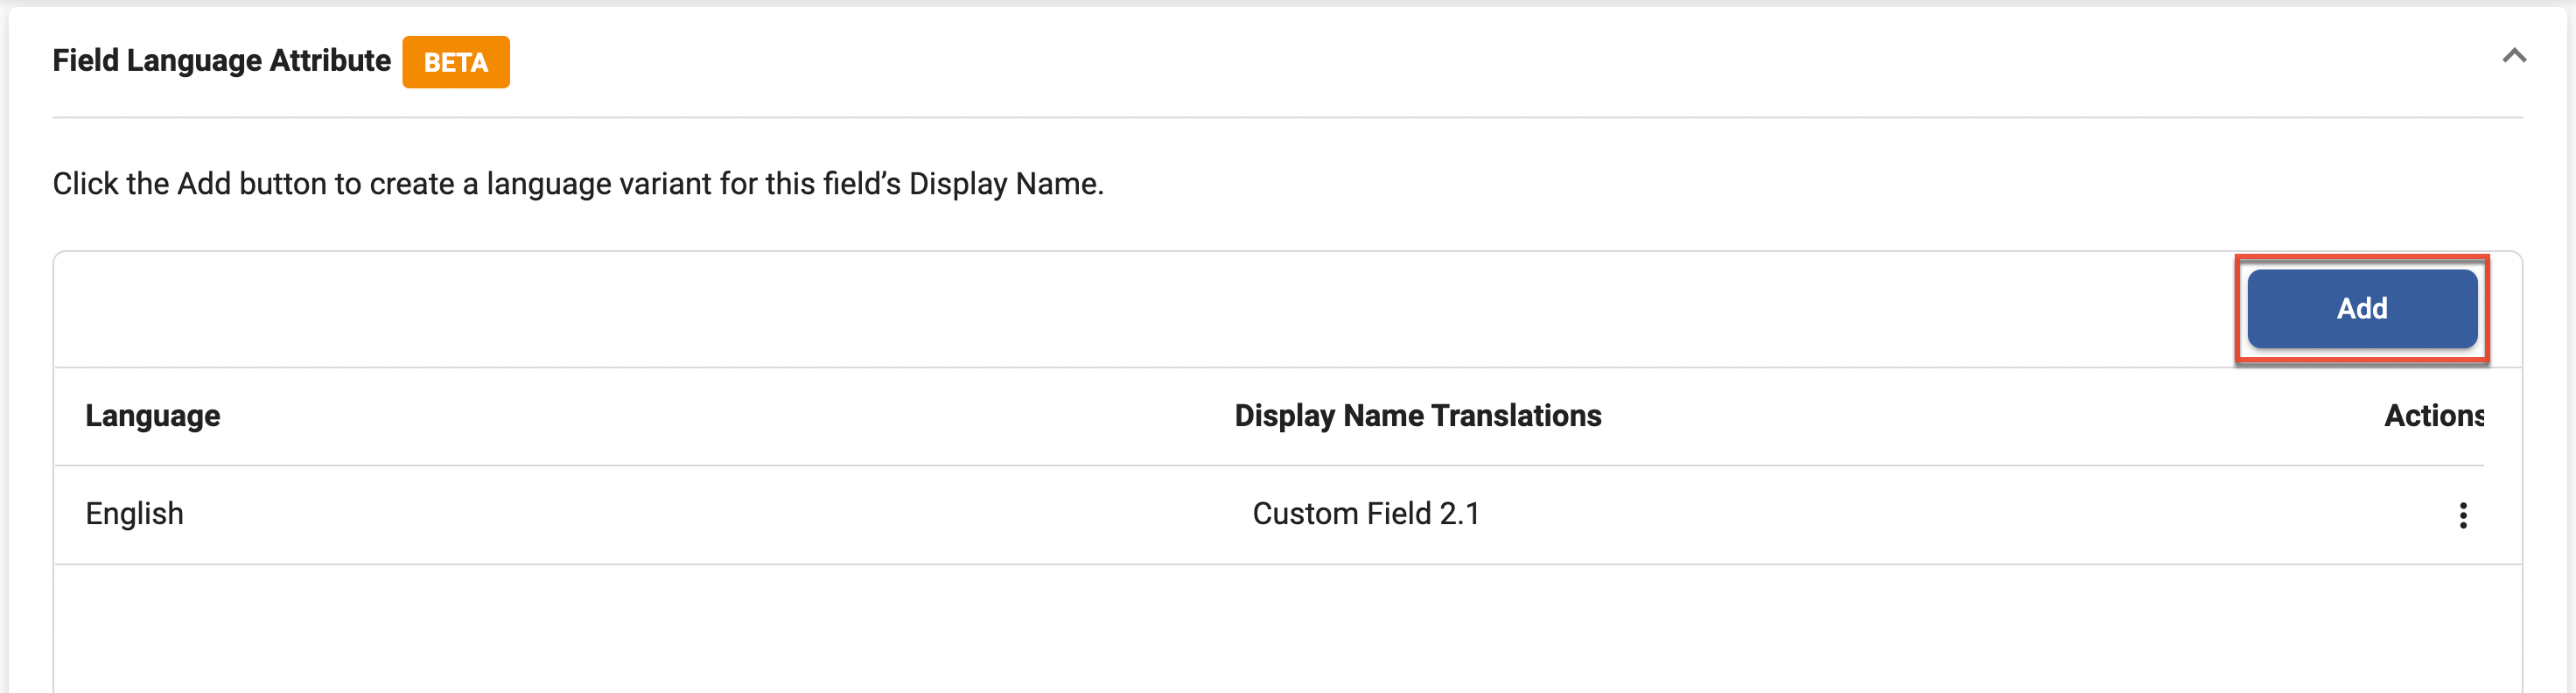
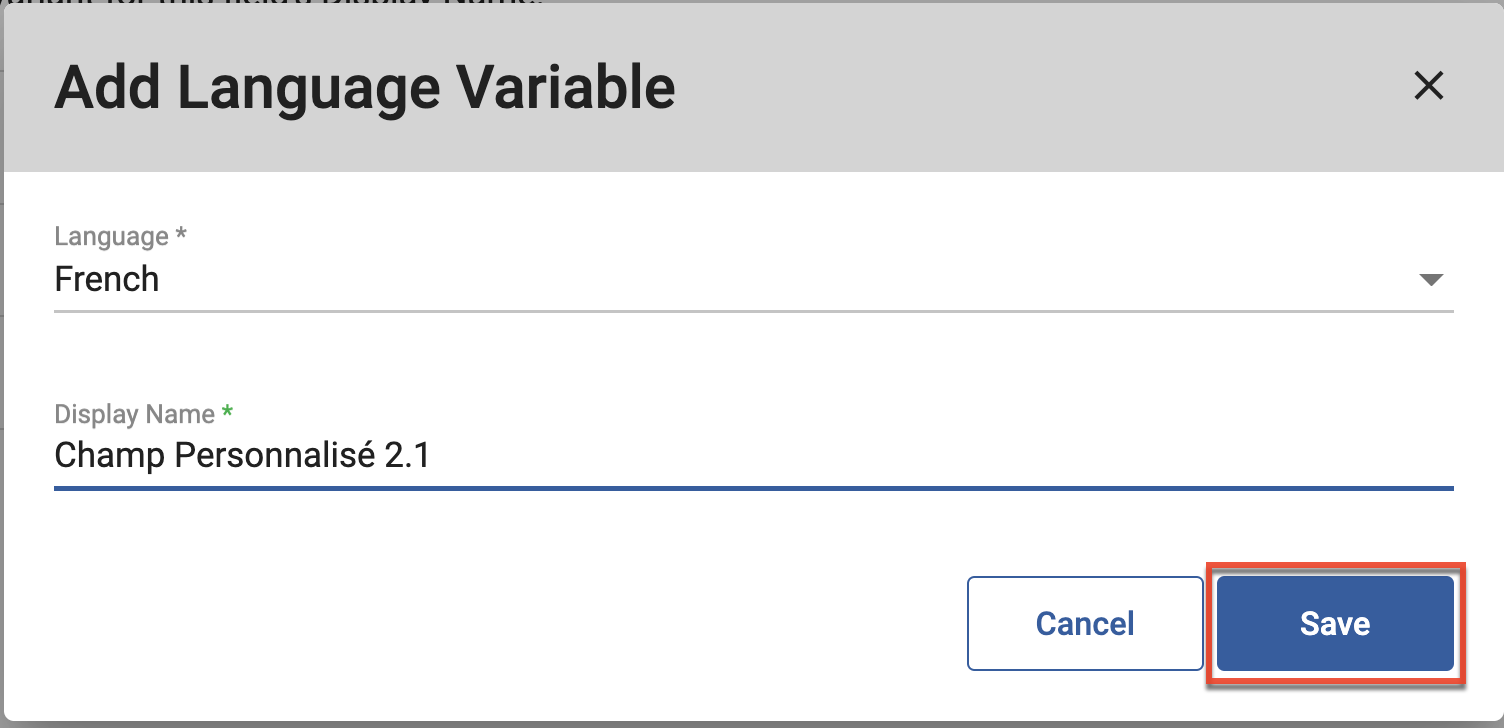
- Select a language and fill out the translated display name.
- Click the Save button to save your language variant.
- To edit or delete display name language variants click the three-dots menu under the Actions column of the variant you want to edit or delete.

- When creating checkbox, picklist, and radio button field types you can create list items for the field by clicking the Add button in the List Properties section.
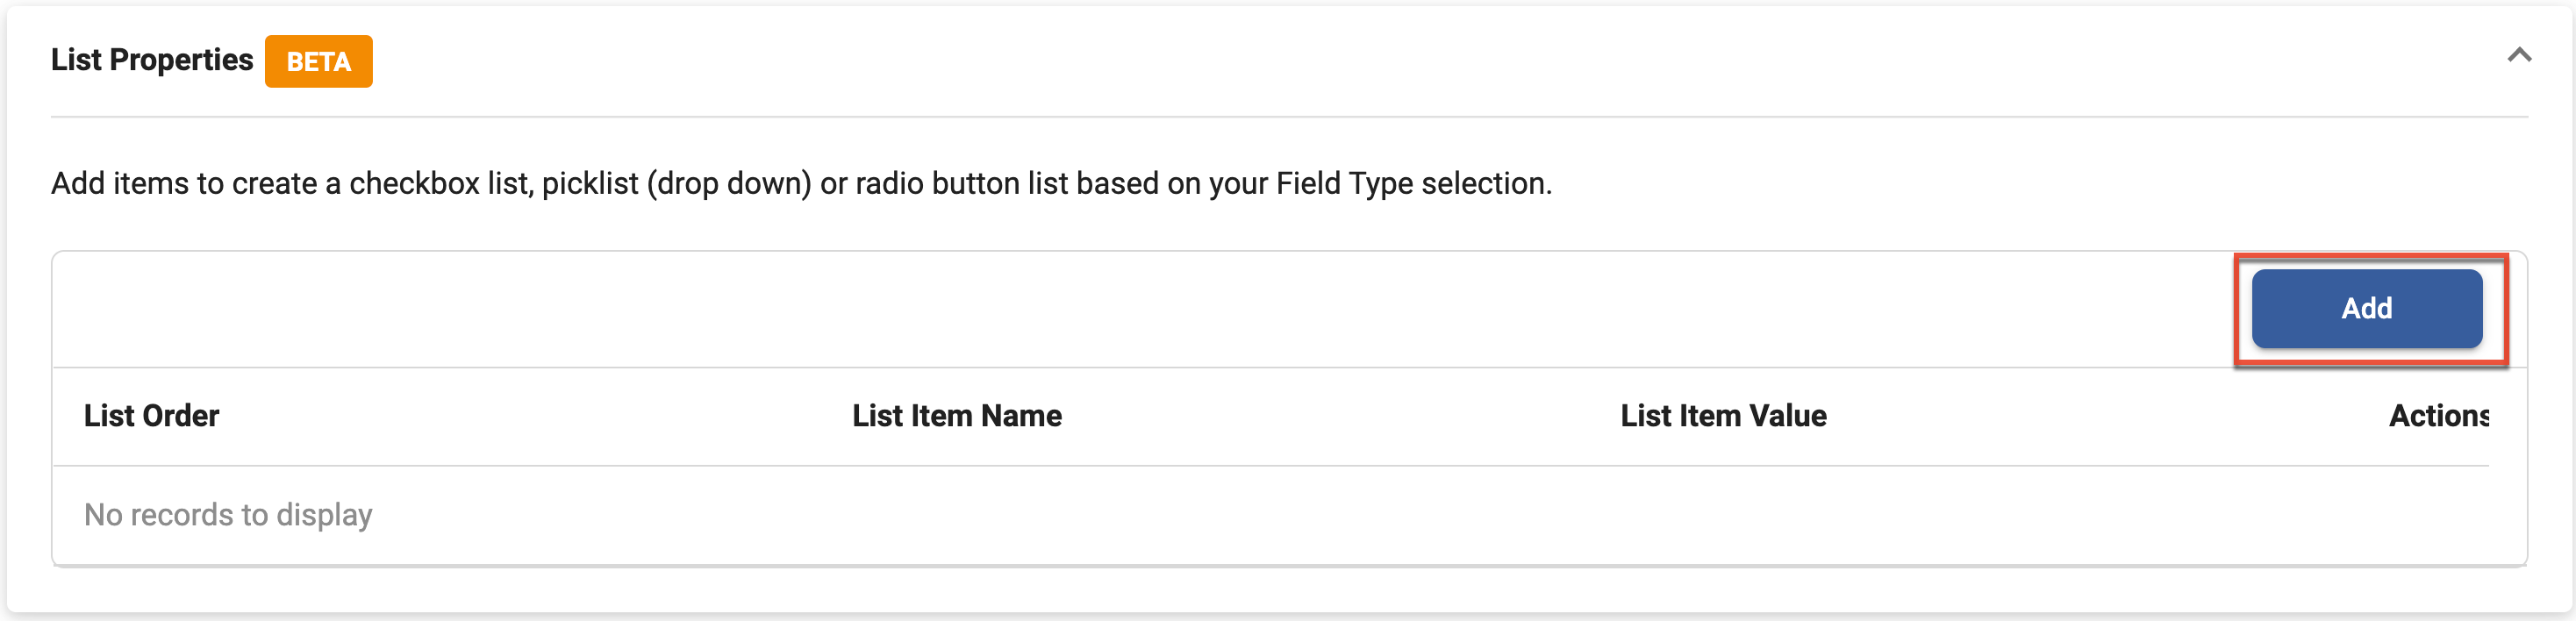
- Set a name for your list item using the List Item Name field and set a unique identifier for your list item using the List Item Value field.
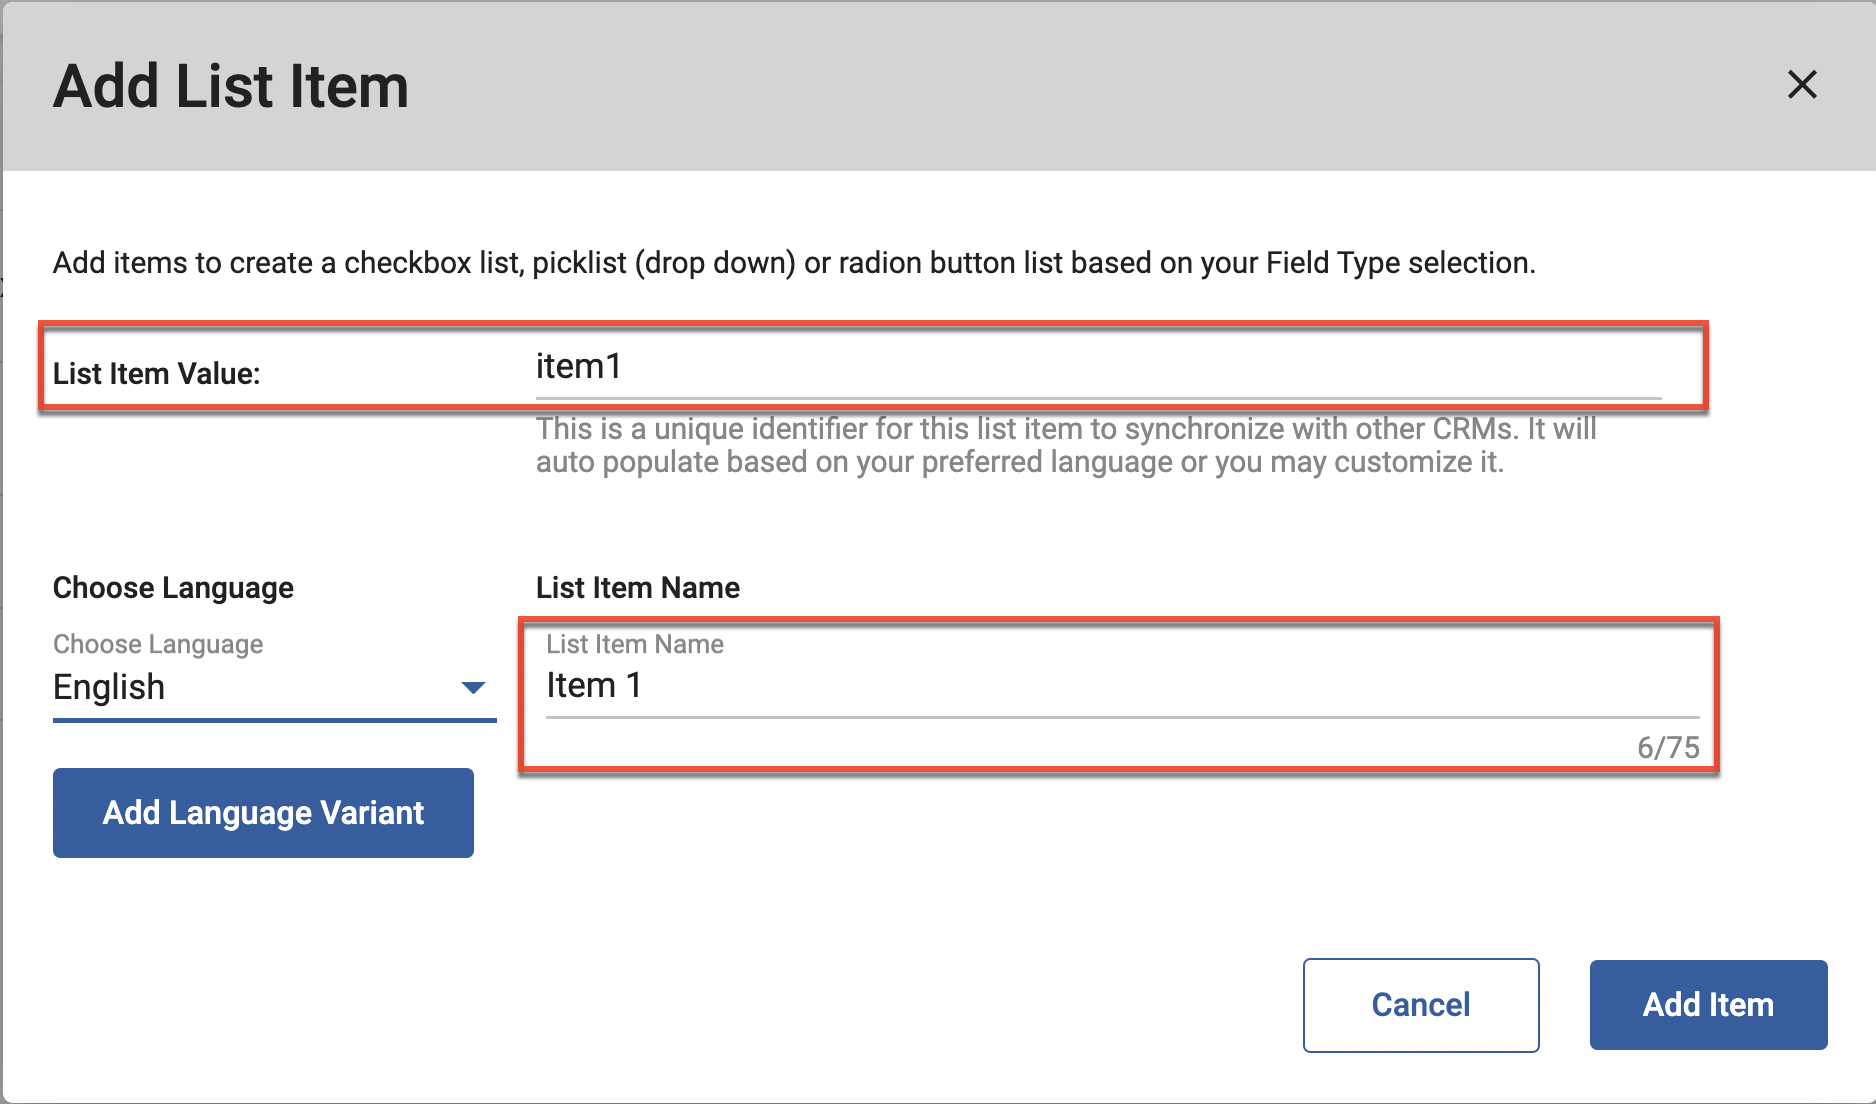
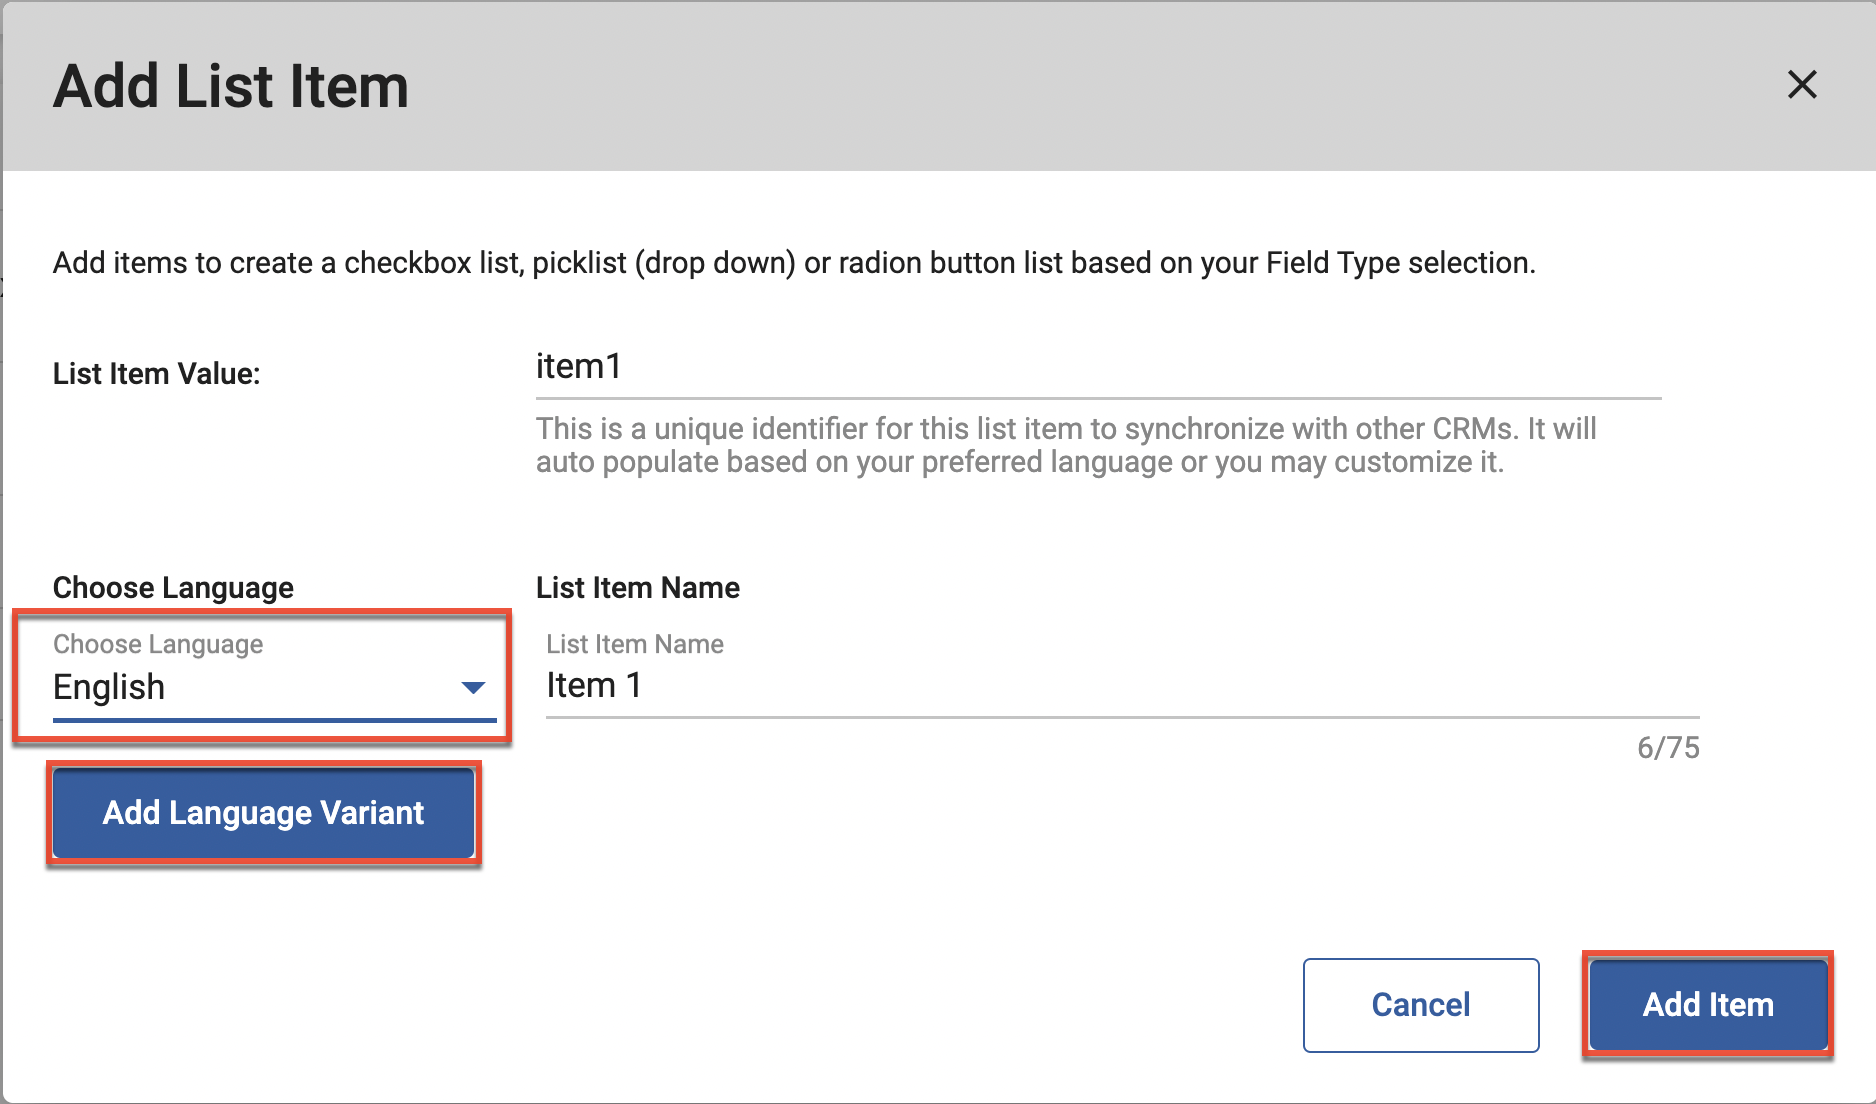
- Choose a language for your list item using the Choose Language dropdown field. Click the Add Language Variant if you need to add language variants for your list item.
- Click Add Item to save your list item.
- To edit or delete list items click the three-dots menu under the Actions column of the list item you want to edit or delete.