Creating an Application ID for Sugar Market with Dynamics Integrations
Overview
Microsoft has announced that their deprecation of the current SDK class is planned for April 2021. To allow the Sugar Market sync to continue, you will be required to register your application with Microsoft and to update configuration settings in Sugar Market. With no specific date yet announced, we recommend you complete this process by April 1, 2021.
This page describes the necessary steps to reconfigure your connector, which include:
- Creating a Microsoft Application ID
- Adding a Redirect URL
- Updating the Connector Settings in Sugar Market
Please read this Microsoft article for additional information on this recent change, and this tutorial on registering an app with Azure Active Directory. If you need assistance with changing your settings in Sugar Market, please contact Support.
Creating a Microsoft Application ID
The first step is to create an application ID in Microsoft Azure Active Directory.
- Log in to your Microsoft Dynamics CRM.
- In a new tab, navigate to https://portal.azure.com/. The following page displays:
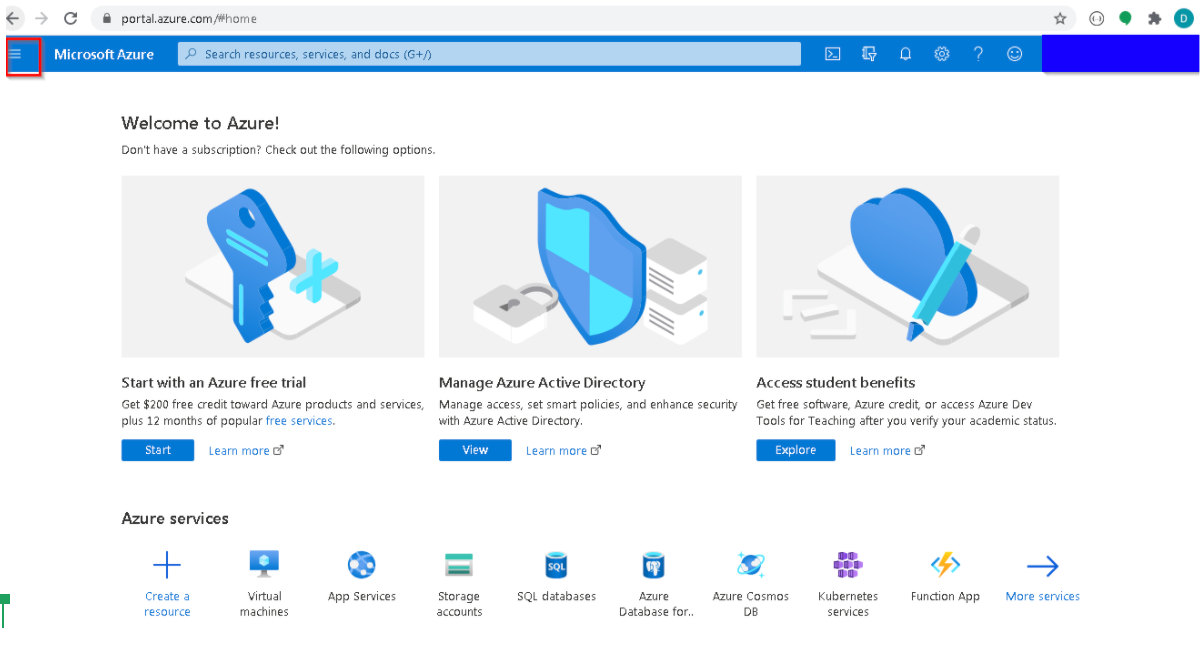
- Expand the menu at the top left of the page, and then select "Azure Active Directory".
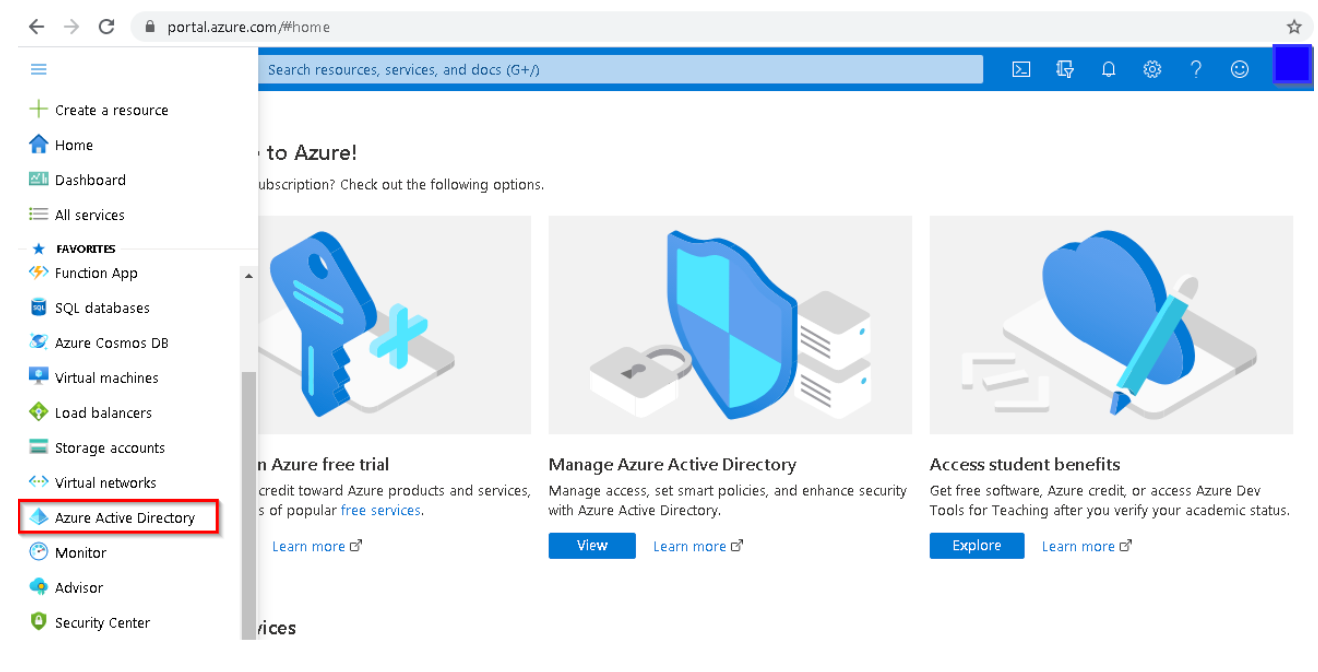
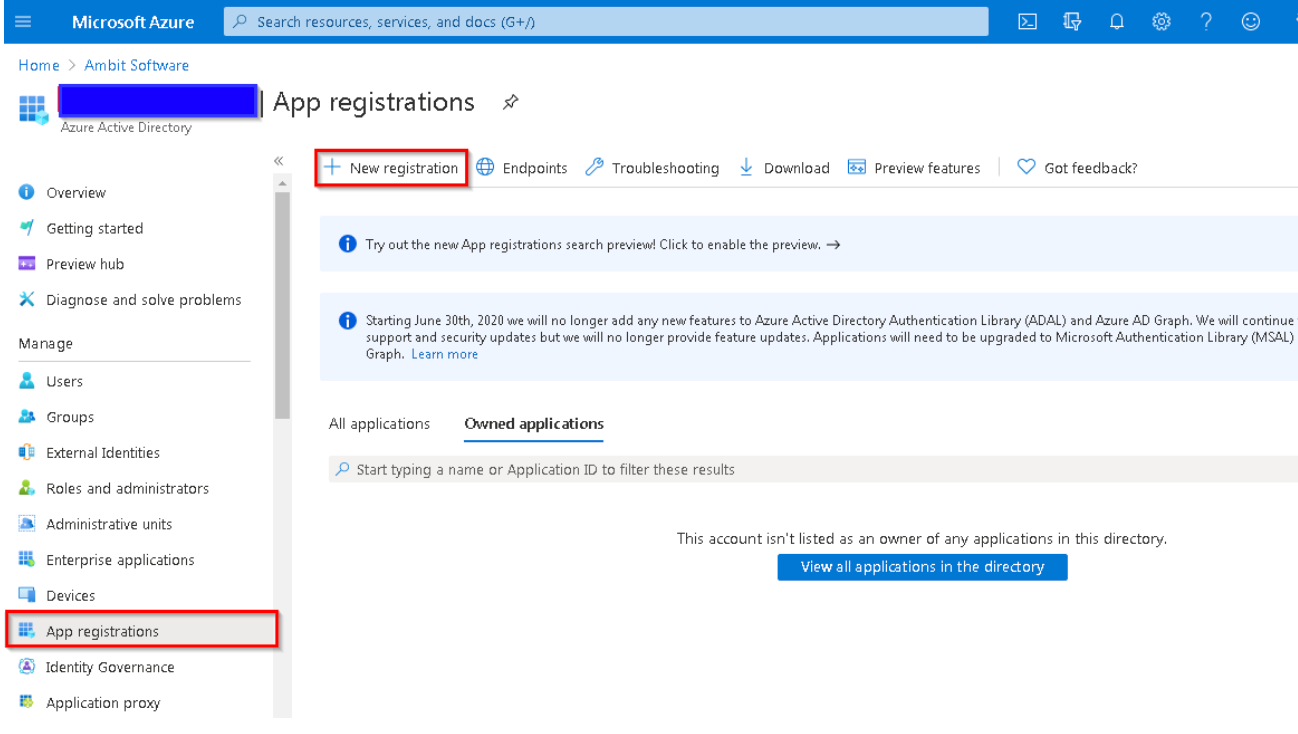
- In the left-hand panel, select "App Registrations".
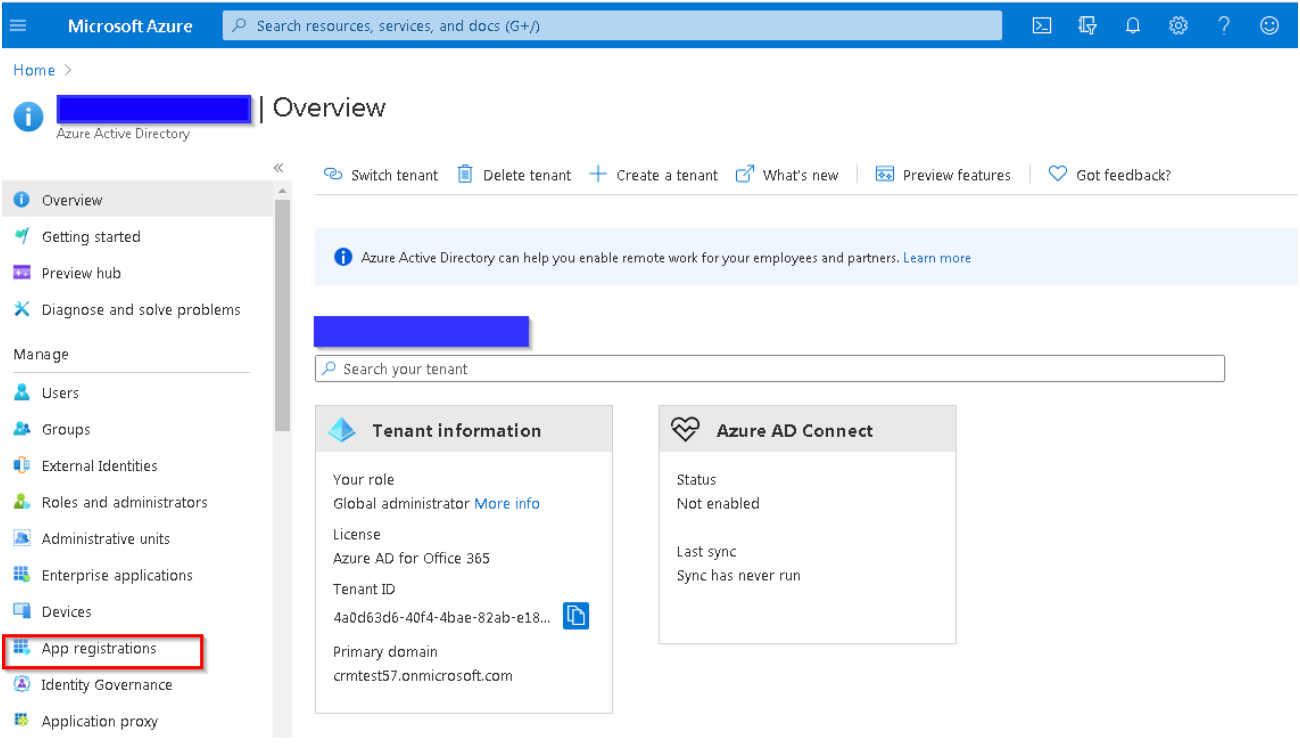
- On the App registrations page, click the New registration button.
- Enter a name to identify the application (e.g. "SugarMarketApp"), and then click the Register button.
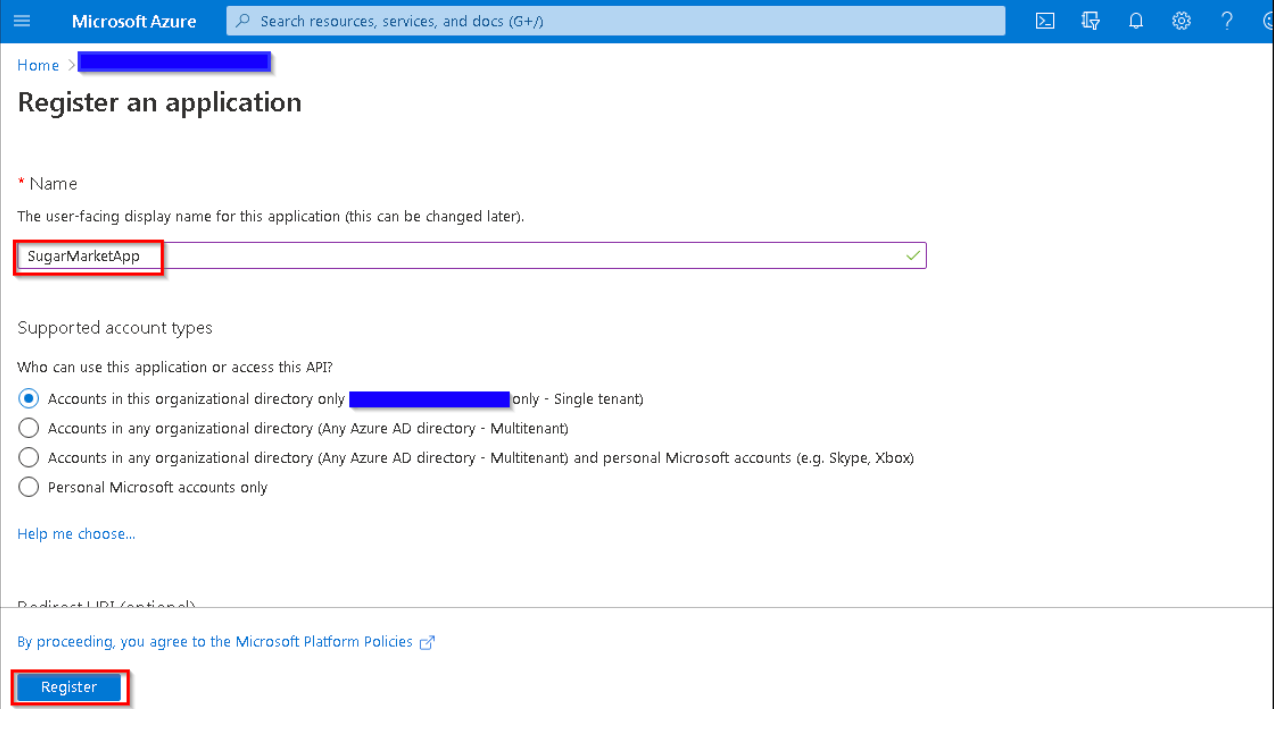
-
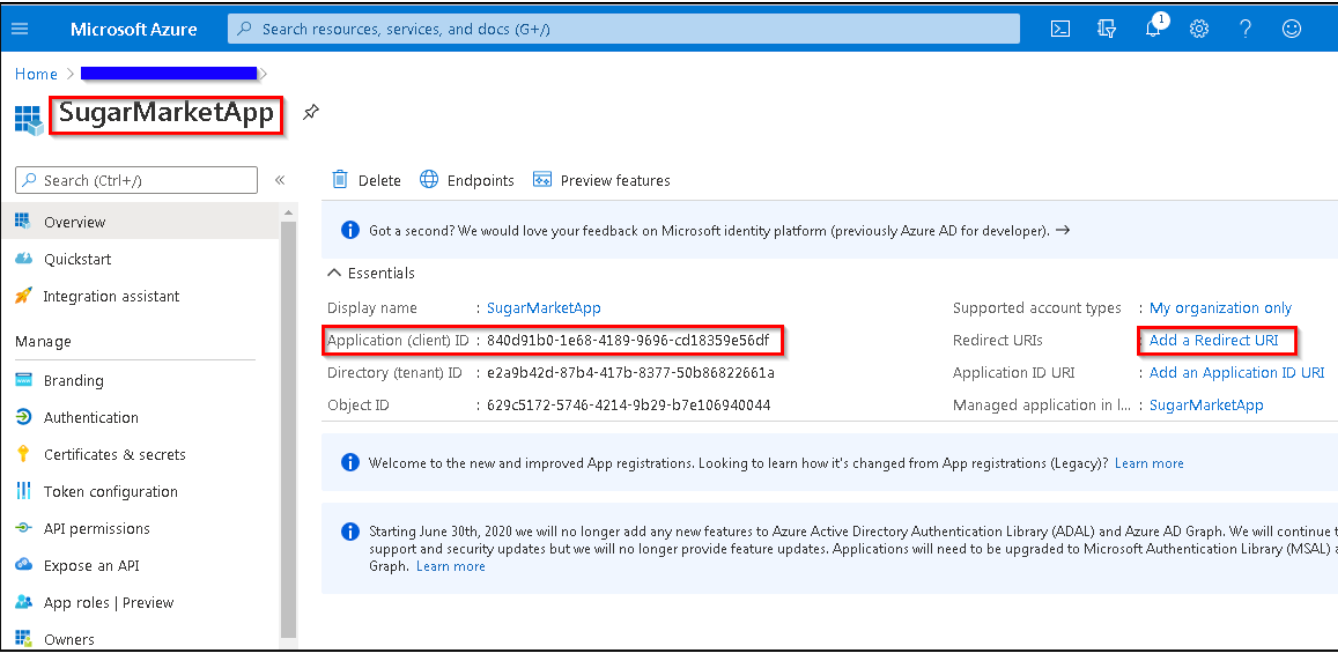
A generated Application ID displays. Copy this to your system clipboard to add to your connector settings in Sugar Market, and then proceed to the Adding a Redirect URL section.
Adding a Redirect URL
- Still in Microsoft Azure, click the Add a Redirect URL link as shown in the screenshot above.
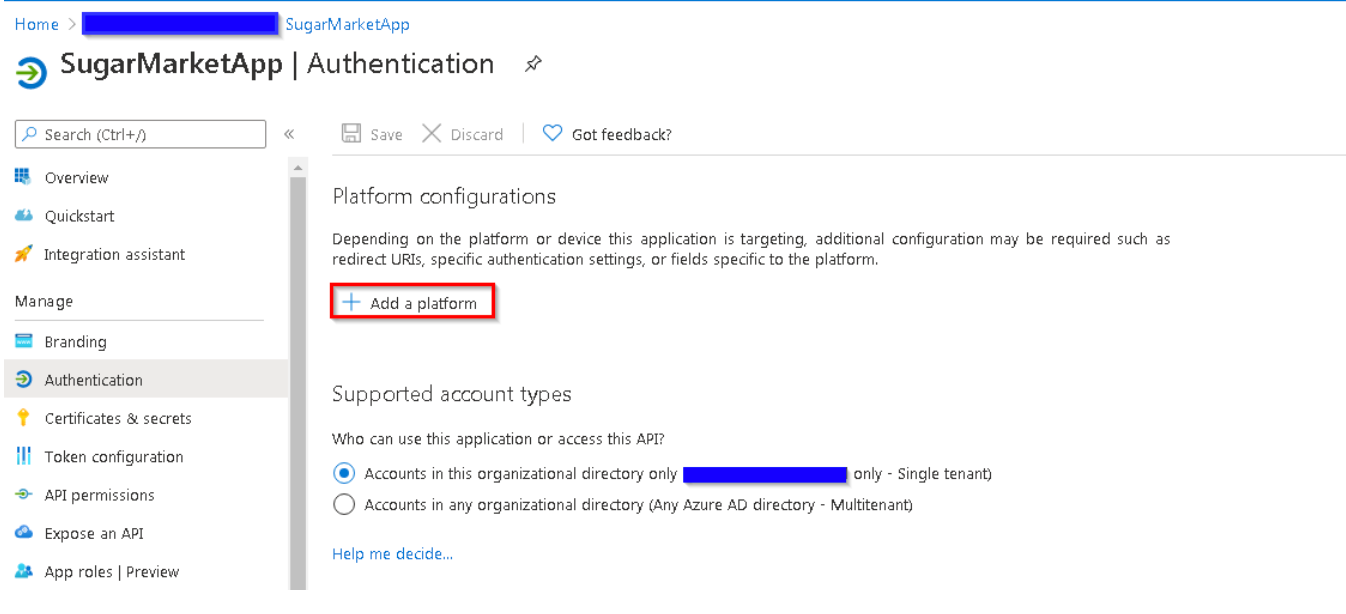
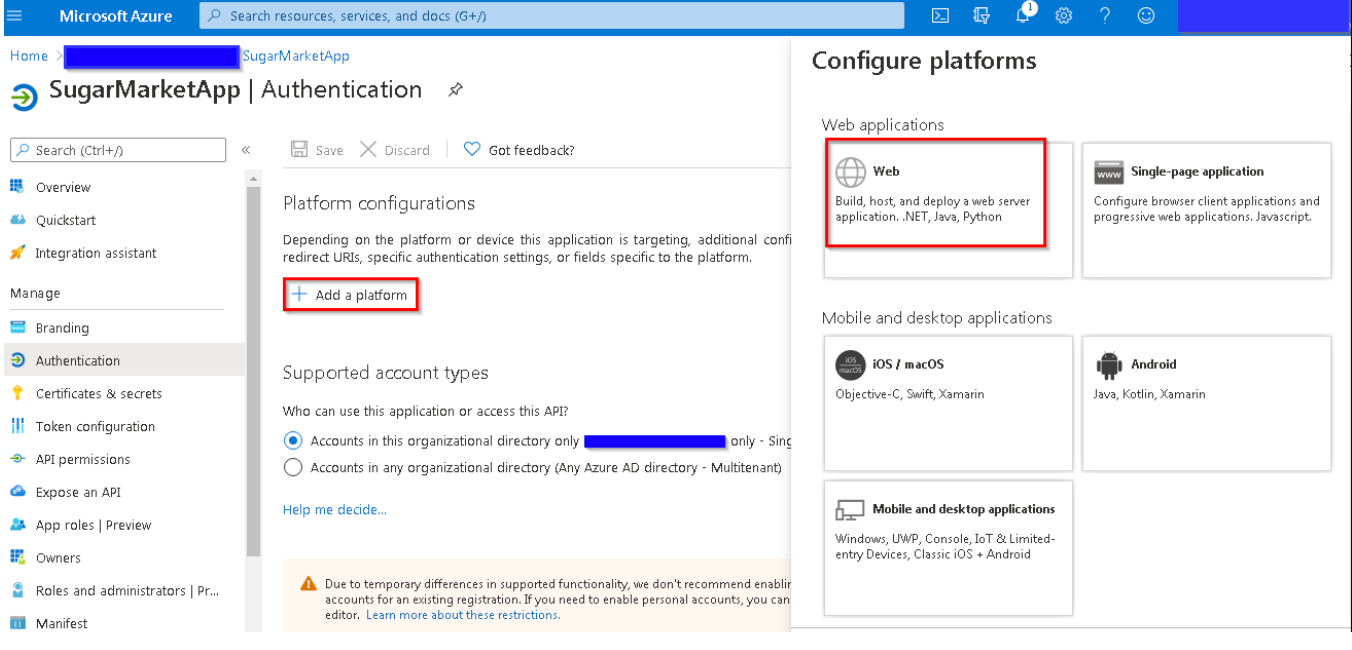
- Click the Add a platform button.
- In the Configure Platforms panel that displays, click the Web tile.
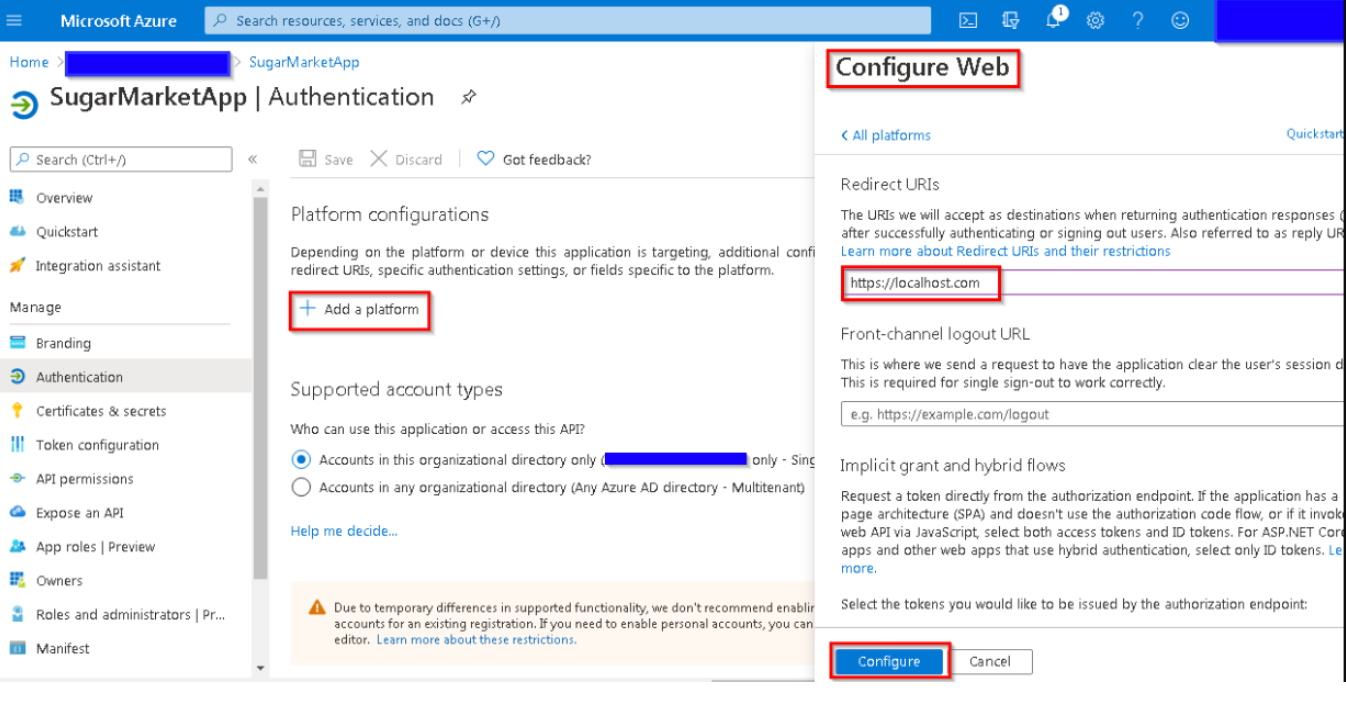
- In the Redirect URLs section, enter "https://localhost.com" in the textbox, and then click the Configure button.
-
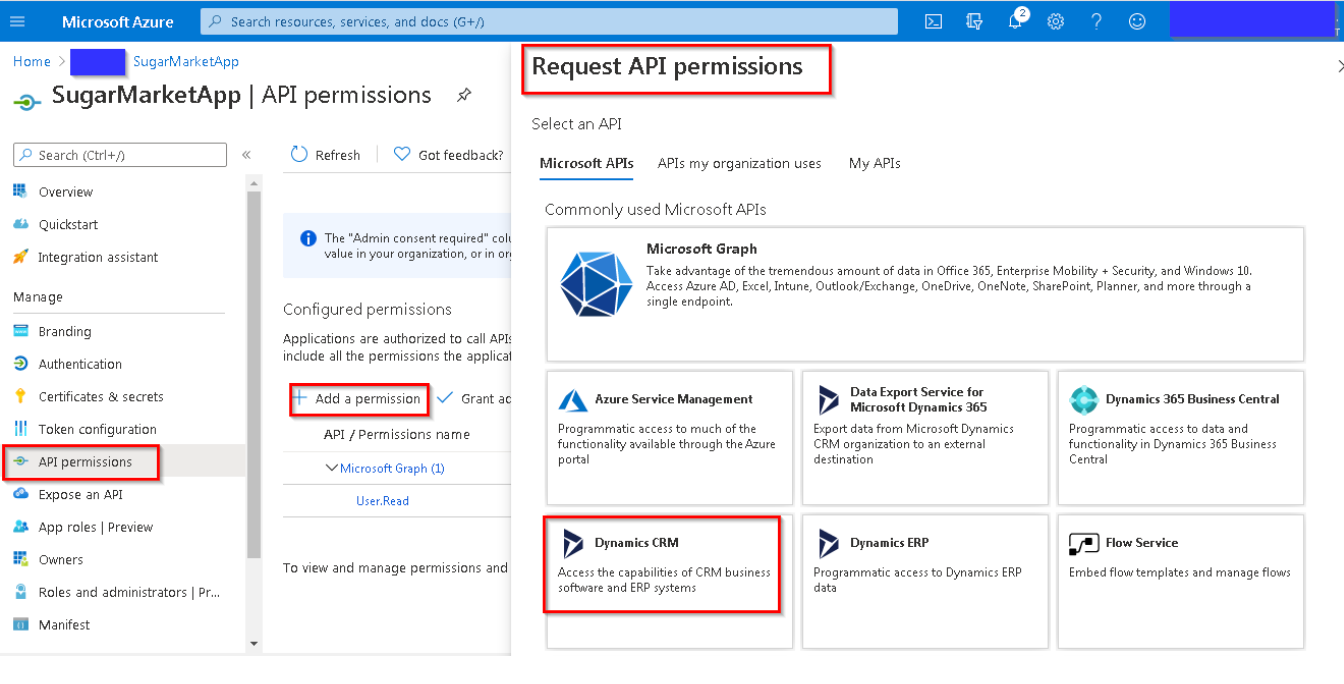
In the left-hand panel, select "API permissions", and then click the Add a permission button.

-
The Request API permissions panel displays on the right. Click the Dynamics CRM tile.
-
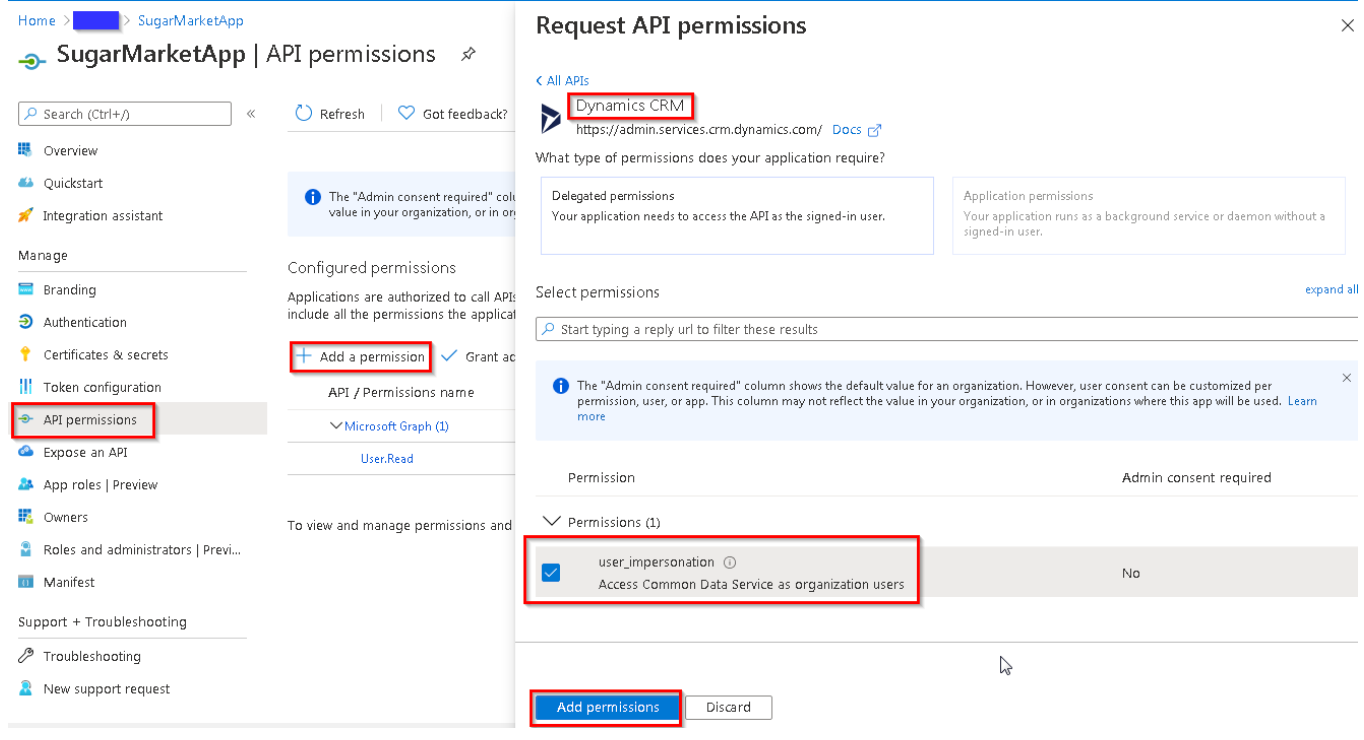
Select the checkbox next to "user_impersonation", and then click the Add permissions button.
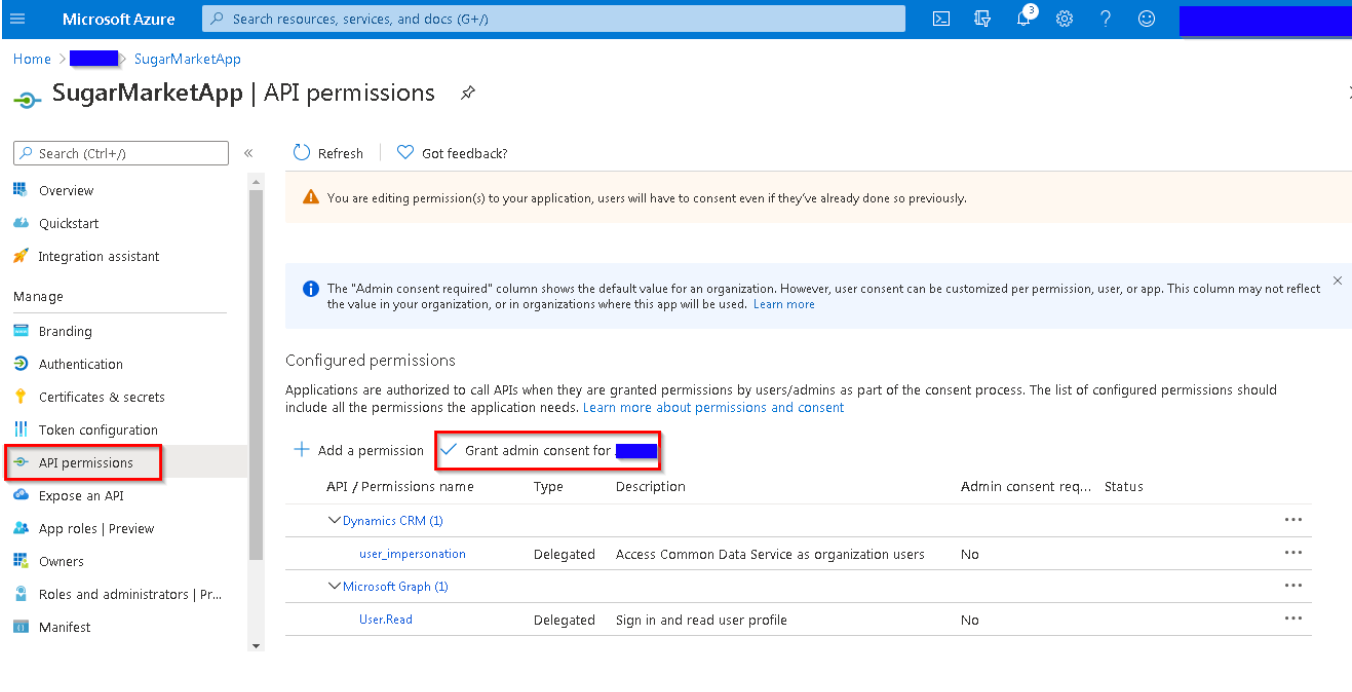
- Click the "Grant admin consent for < >" button.
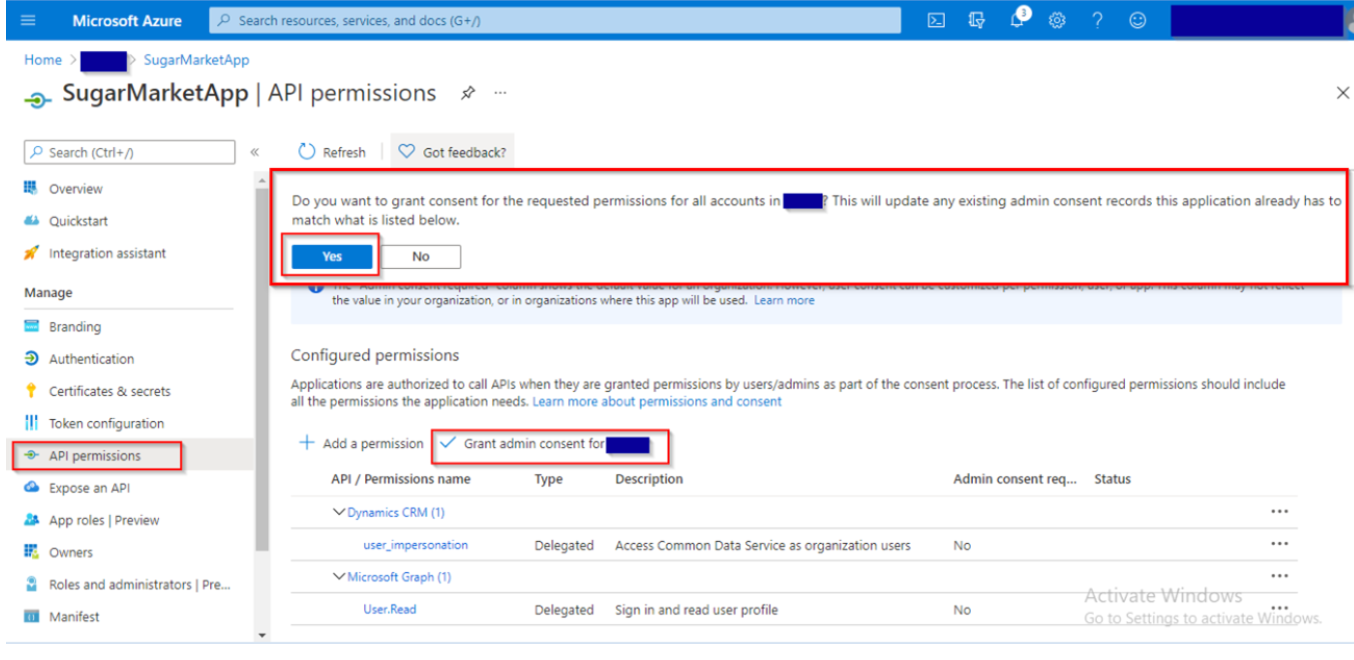
- The following confirmation message displays. Click the Yes button in the popup message.
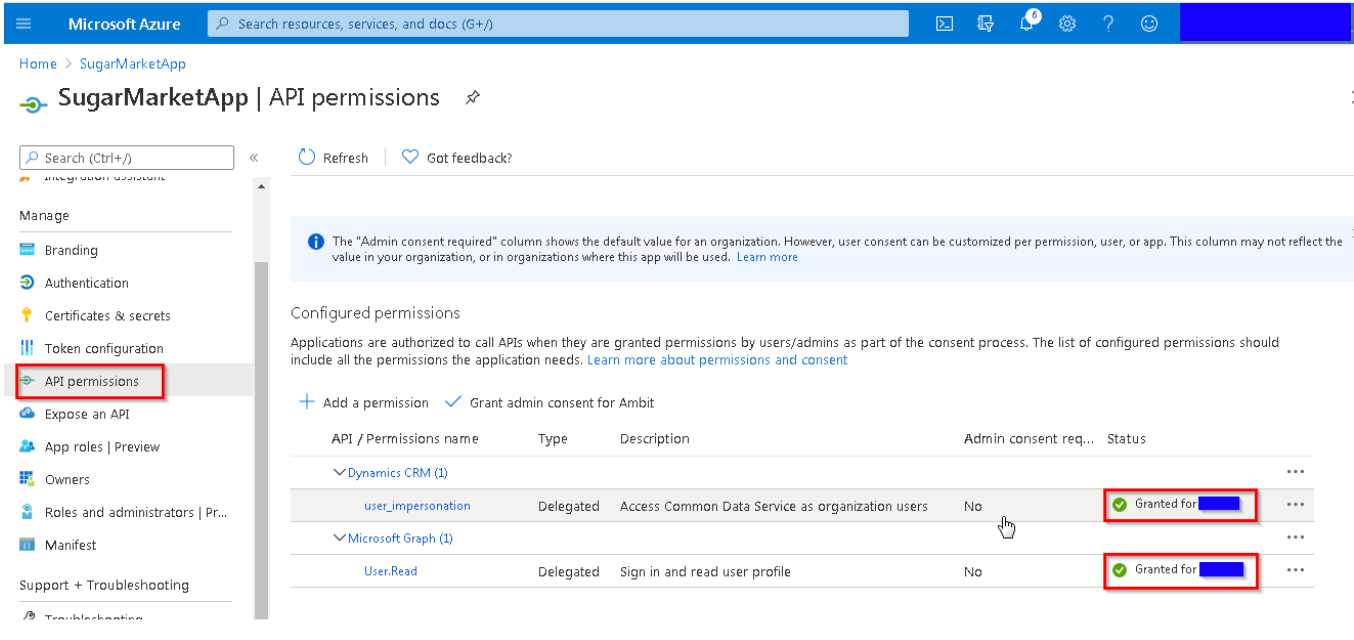
- The API permissions status is updated.
-
In the left-hand panel, select "Manifest", and then update the 'allowPublicClient' and 'Oauth2AllowImplicitFlow' settings to true.
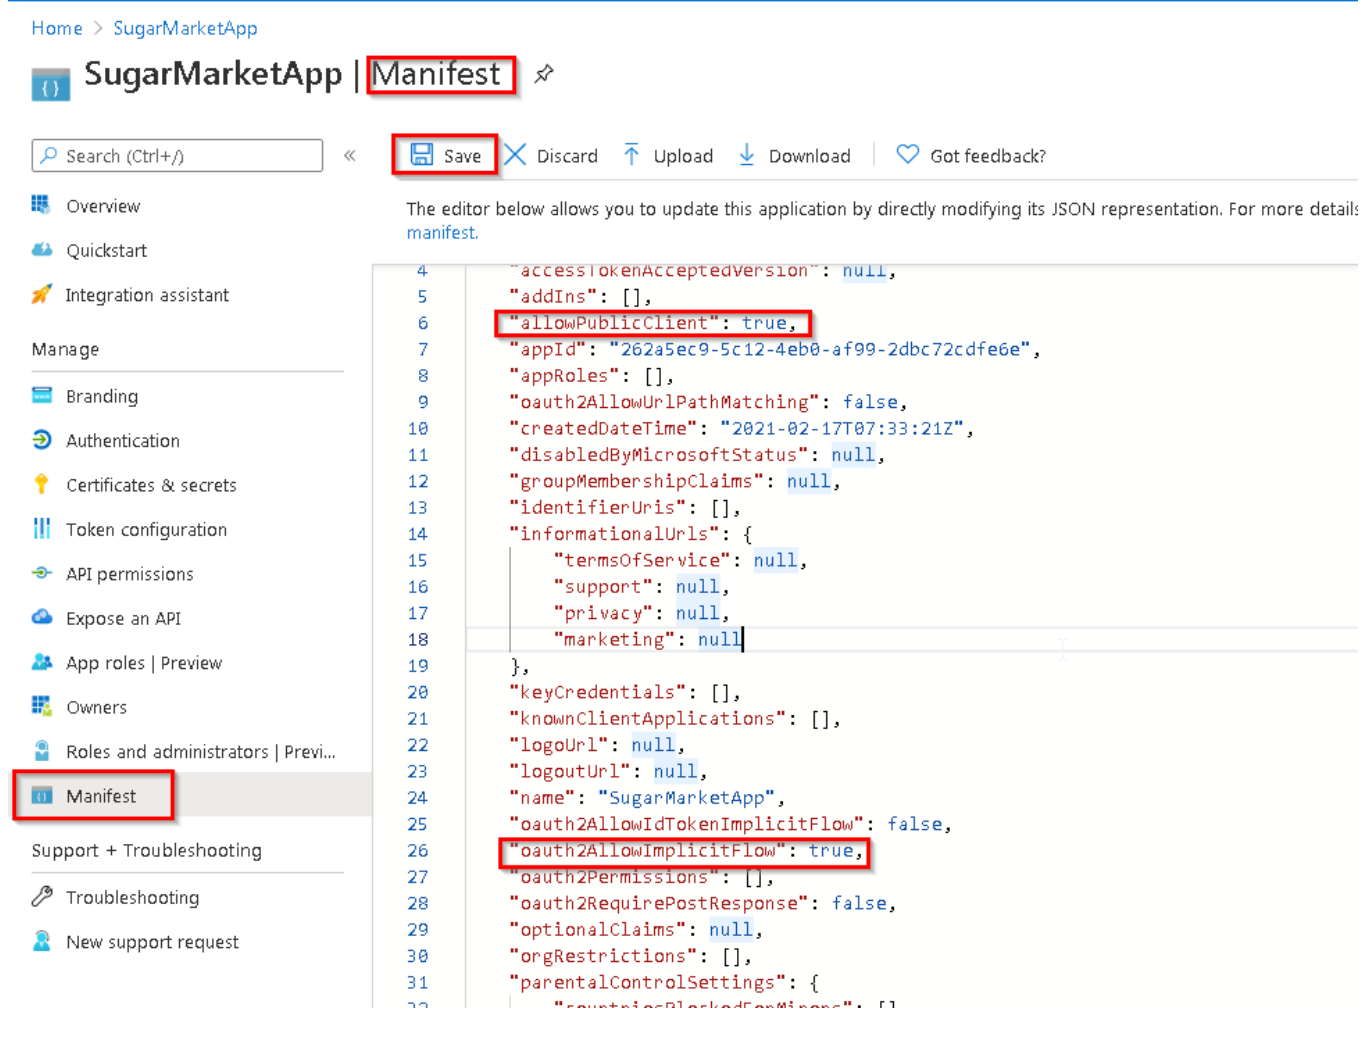
- Click the Save button at the top of the page.
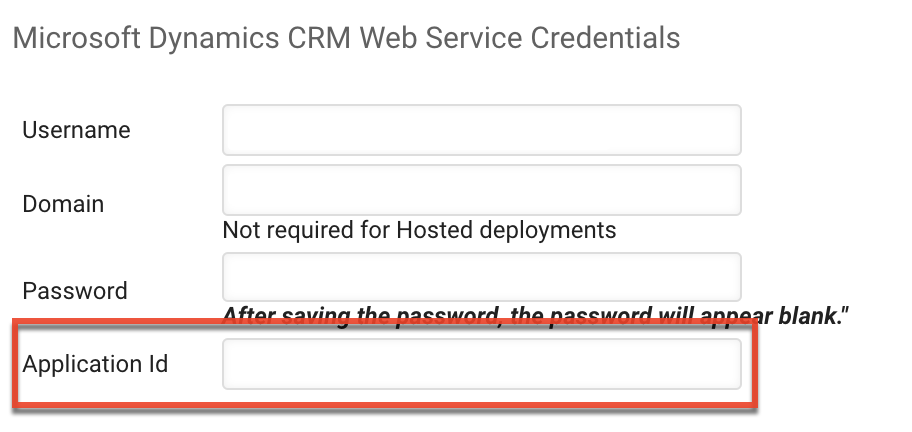
Updating the Connector Settings in Sugar Market
In the final step, you will update your MS Dynamics Connector settings in Sugar Market with the Application ID you generated in Step 7 of Creating a Microsoft Application ID.
- From the user menu, click "Admin".
- In the CRM Administrator section, within the External Connectors tab, click "Microsoft CRM".
- In the Microsoft Dynamics CRM Web Service Credentials section, enter the application ID you copied from Microsoft Azure into the Application ID field.
- Click the Save Connection button.