Migrating Customizations Between Instances
Overview
Administrators in Sugar can make customizations to modules via Studio as well as create custom modules via Module Builder. Occasionally, Studio and Module Builder customizations developed in one instance may need to be migrated to another instance. This article will go over how to migrate both Studio and Module Builder customizations between different instances.
Use Case
In this example, we will migrate the Studio and Module Builder customizations created in a development environment to a production environment.
Prerequisites
You will need to have existing customizations made to modules via Studio. You will also need to have an existing custom module or create a new one via Module Builder. For more information on creating customizations or custom modules, please refer to Studio and Module Builder documentation.
Note: Sugar Sell Essentials customers do not have the ability to upload custom file packages to Sugar using Module Loader.
Steps to Complete
Migrating Module Builder Customizations
The Export and Publish options in Module Builder both create a zip file containing the custom module package which can be migrated to another instance. The Publish option will have the custom module show up in Studio once it is installed. The Export option will have the custom module appear in Module Builder, which will need to be deployed in the instance once it is ready for use.
We will go over how to publish or export a custom module created in the development environment and install the package into the production environment as an example.
Export Custom Module Package
- Navigate to Admin > Module Builder in the development environment.
- Click on the package name and click either the Publish or Export button.
- Publish: Click "Publish" to create a zip file containing the custom module package to be saved on your local machine. The custom module will appear in Studio once the package is installed via Module Loader. Additional configurations can be made to the custom module via Studio as necessary.
- Export: Click "Export" to create a zip file containing the custom module package to be saved on your local machine. The custom module package will be visible in Module Builder once it is installed via Module Loader. Further customizations can be made to the custom module via Module Builder before deploying it in the instance.

- The system will create a zip file to be saved on your local machine.
Install Custom Module Package
- Navigate to Admin > Module Loader in the production environment.
- Click the Choose File button to select the package containing the custom module from your local machine.
- Select your file and click "Open".
- Click the Upload button to upload your package.
- Click the Install button to the right of the package name.
- Accept the License Agreement and click "Commit".
- Click the Back to Module Loader button once you see the Module Installed Successfully message.
- Once the package is successfully installed in the production environment, the custom module will appear in either Studio or Module Builder.
Migrating Studio Customizations
Module customizations made in Studio such as custom fields, layouts, and field labels can be exported from one instance and migrated to another instance. Changes to dropdown lists are not exported unless the dropdown is used in a custom field. We will go over how to export the Studio customizations from the development environment and install the package into the production environment as an example.
Export Studio Customizations
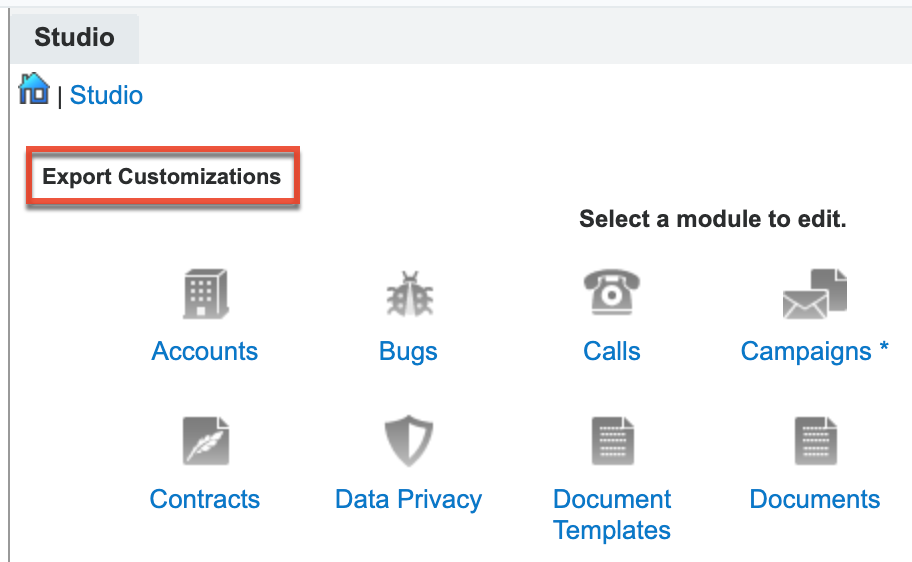
- Navigate to Admin > Studio in the development environment.
- Click the Export Customizations button.
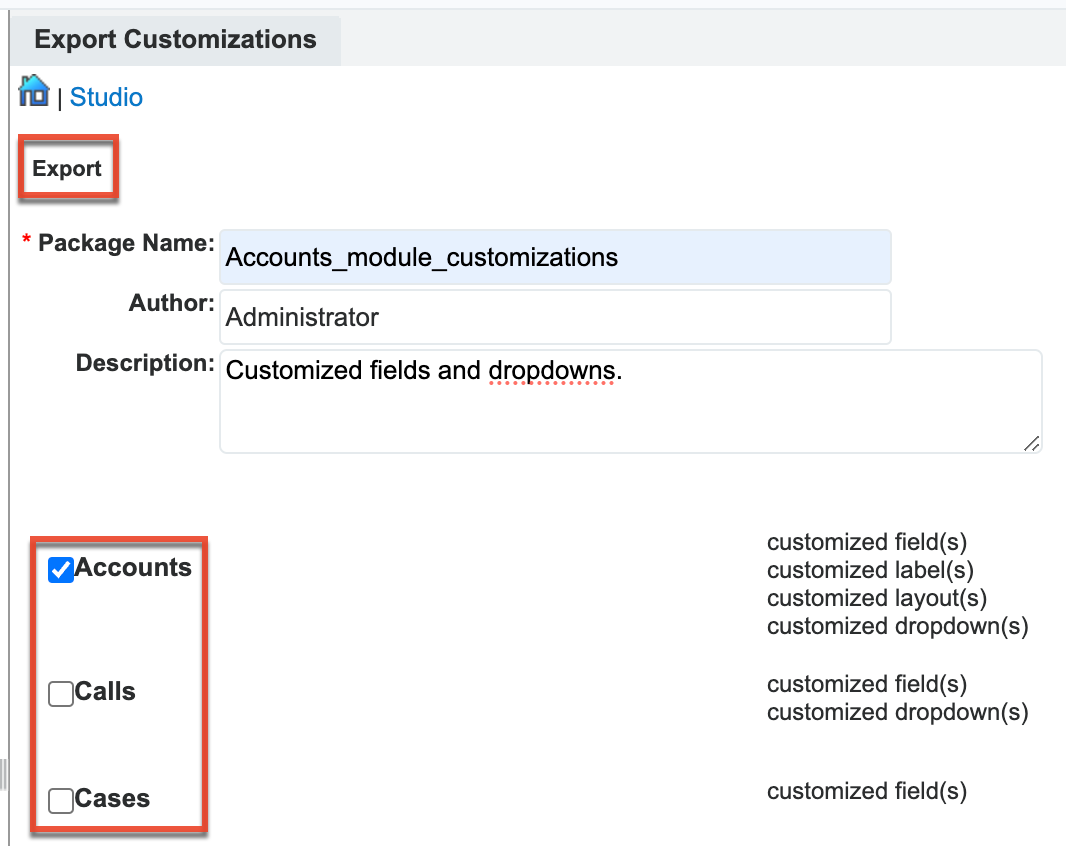
- Enter the package name, author, and description.
- Package Name: Enter a name for the custom package you will be exporting.
- Author: Enter your name as the author.
- Description: Enter a description for the package.
- Select the modules you wish to export the customizations for.
- Click the Export button.
- The system will create a zip file to be saved on your local machine.
Install Studio Customizations
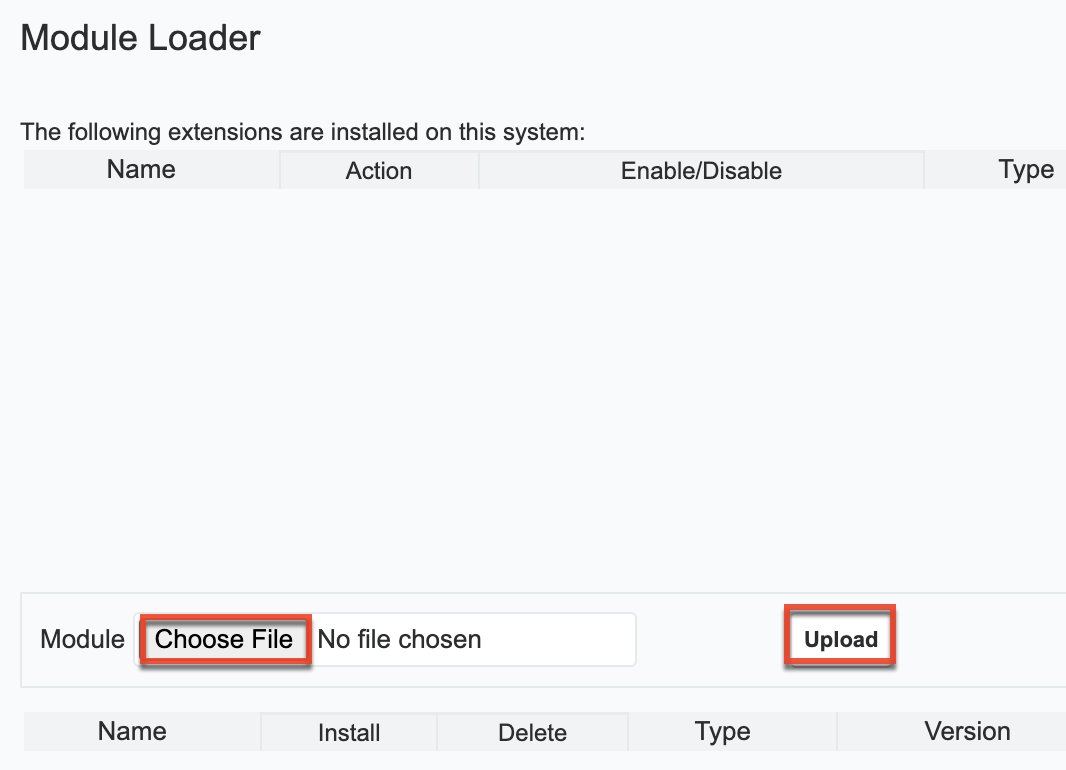
- Navigate to Admin > Module Loader in the production environment.
- Click the Choose File button to select the package containing the Studio customizations from your local machine.
- Select your file and click "Open".
- Click the Upload button to upload your package.
- Click the Install button to the right of the package name.

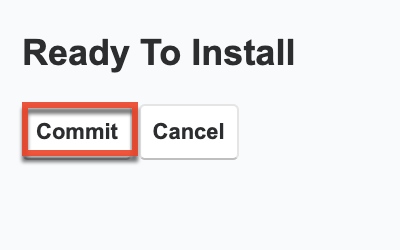
- Click "Commit" on the Ready To Install page.
- Once the package is installed successfully, you will be redirected to the Module Loader page.
- Once the package is successfully installed, the system will apply the Studio customizations to the specific modules in the production environment.